Creative Labs AVPSB1530 Sound Blaster User Manual My
Creative Labs Inc Sound Blaster My
UserManual.wiki
>
Creative Labs
>
AVPSB1530 User Manual
>
User Manual 1530
Contents
1.
User Manual 1530
2.
User Manual 1532
User Manual 1530
Navigation menu
Upload a User Manual
Namespaces
Wiki Guide
HTML
PDF
Info
Views
User Manual
Discussion / Help
Navigation

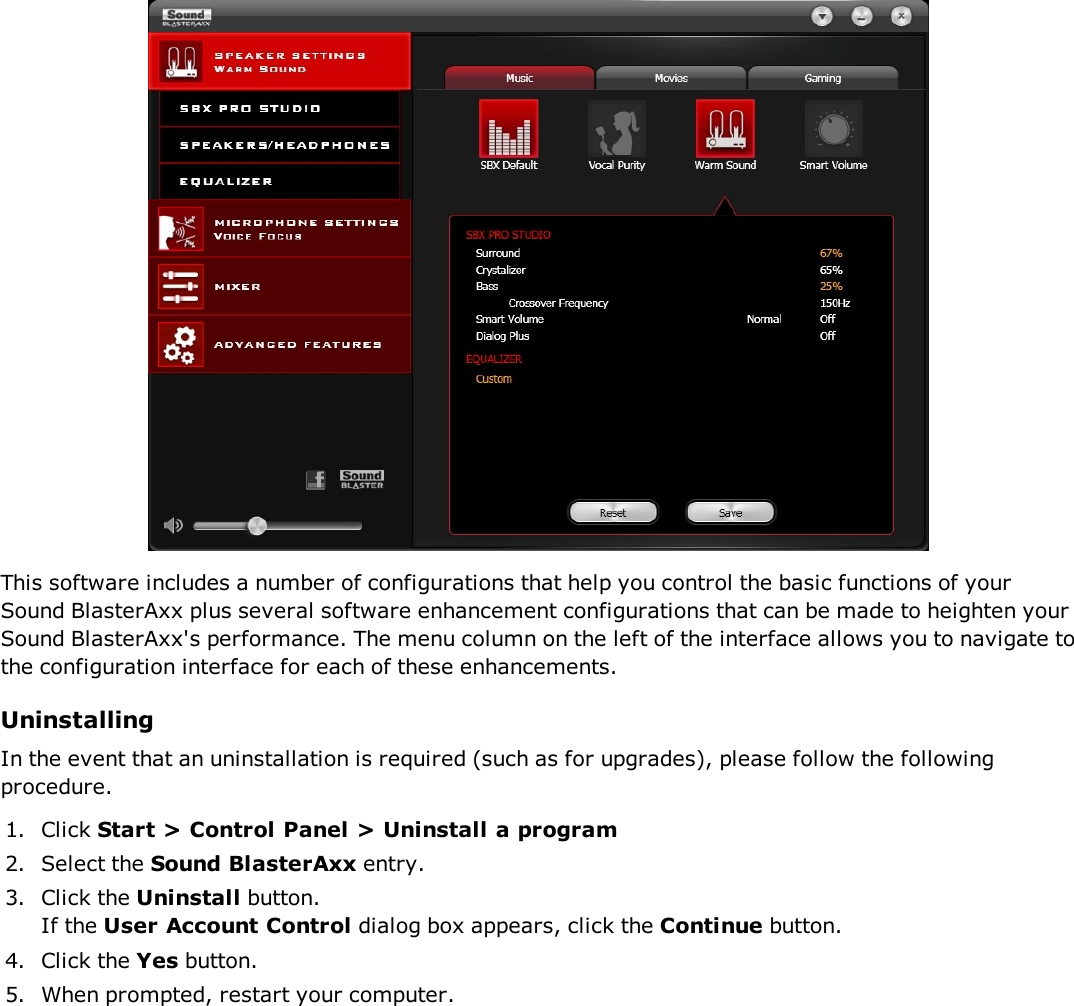
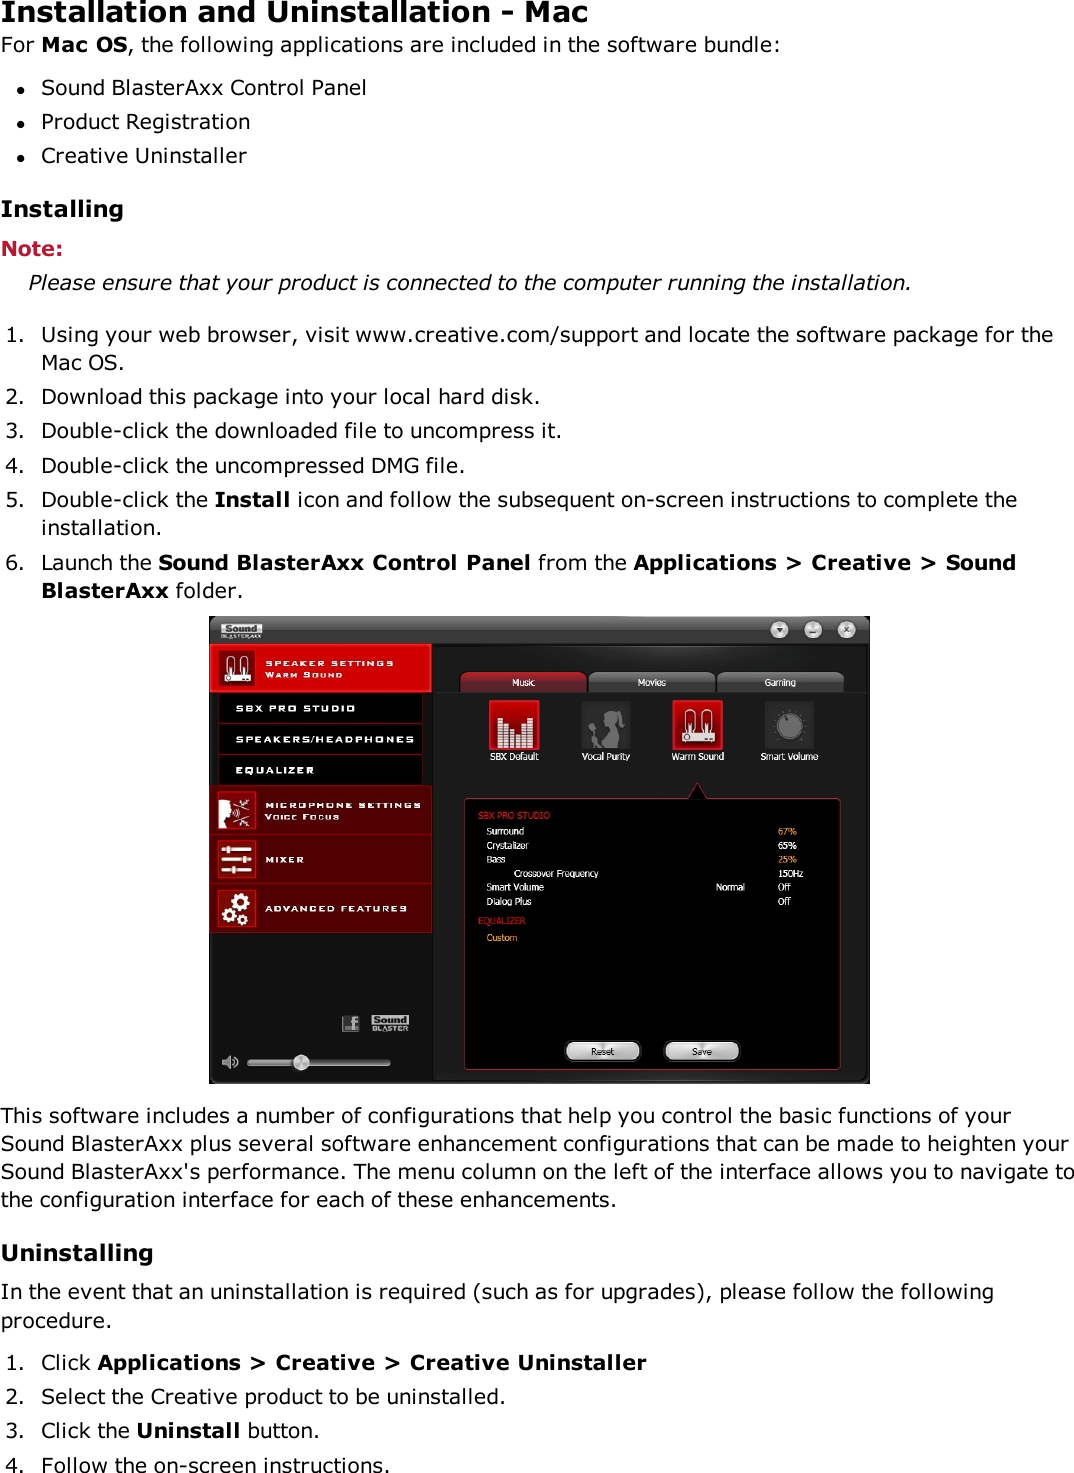
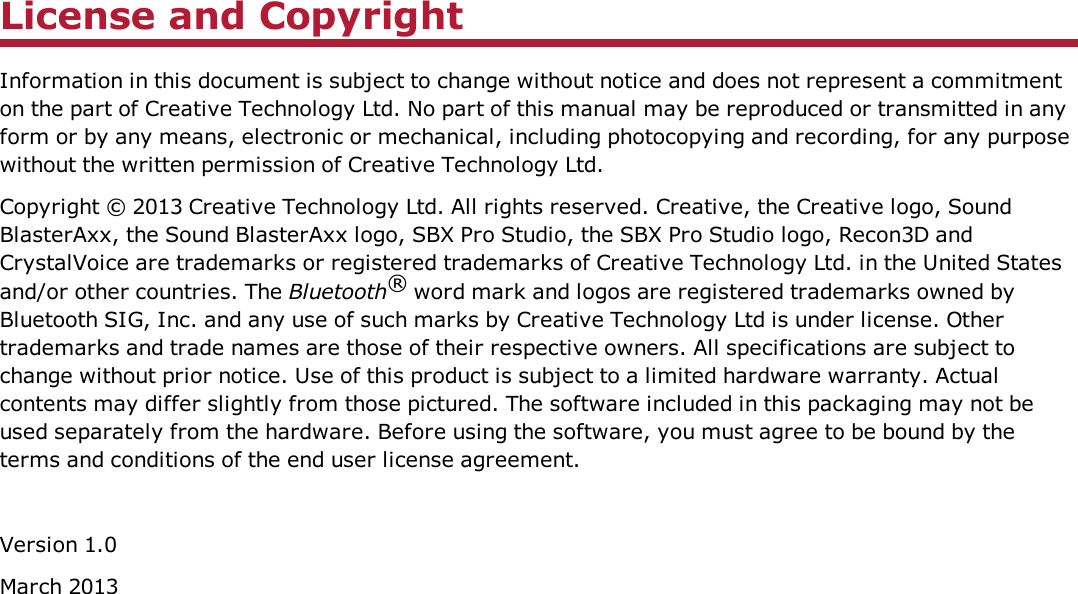
![Using the Sound BlasterAxx Control PanelThe rest of this chapter explains how to use the Sound BlasterAxx Control Panel to view and adjust thevarious features of your Sound BlasterAxx product. The examples and screenshots below uses Windowsas an example. The UI for other operating systems may differ slightly.Managing Your ProfilesThe Sound BlasterAxx Control Panel comes equipped with a set of pre-configured profiles to suit yourdifferent needs including gaming, movies/videos, music, etc. To activate a profile,1. From the left menu, select "Speaker Settings" for pre-set audio profiles or "MicrophoneSettings" for voice profiles.2. Select the profile you wish to use.Modifying Profile SettingsYou can also modify the pre-configured settings of each profile.1. Select a profile to apply it to your SBX 200.2. Select "Speaker Settings > SBX Pro Studio" and / or "Speaker Settings >Equalizer" to editthe configuration of the currently selected speaker profile.3. Select "Microphone Settings >CrystalVoice" to edit the currently selected microphone profile.4. Return to the profile interface. All changes made in steps 2 and 3 will be reflected here.5. Click [Save] to save your changes or click [Reset] to return the profile to its pre-configuredsettings.](https://usermanual.wiki/Creative-Labs/AVPSB1530.User-Manual-1530/User-Guide-1999525-Page-18.png)
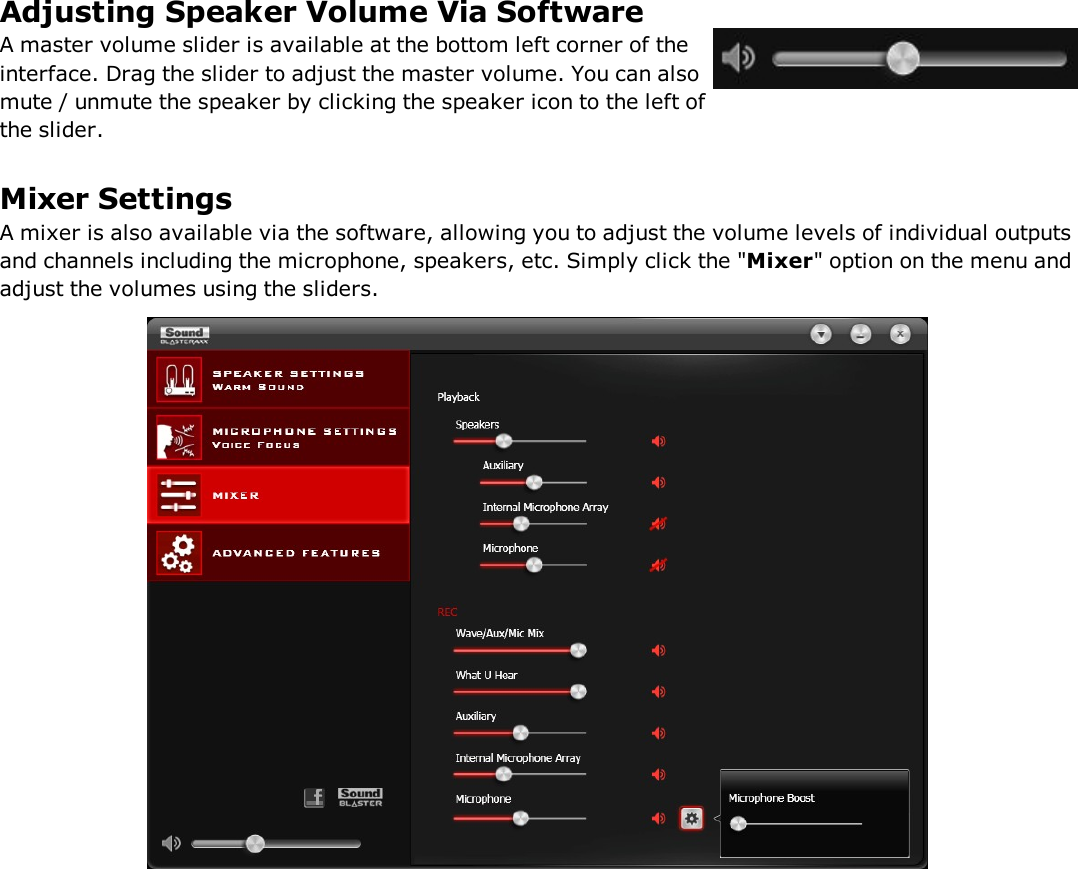
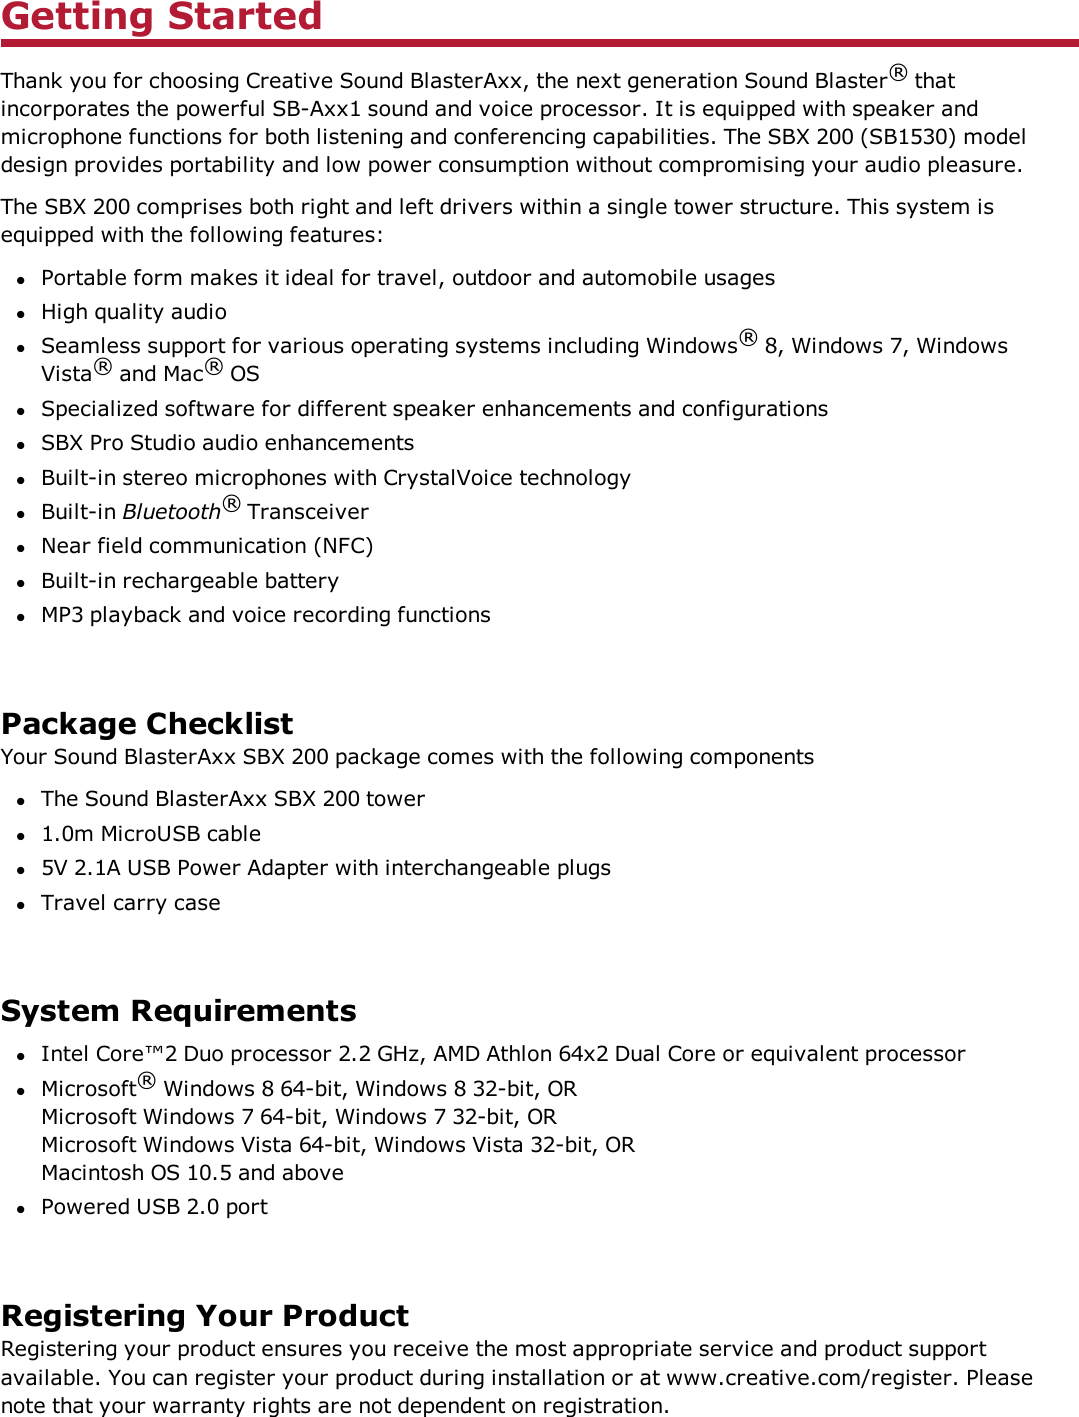
![Enhancing the Microphone - CrystalVoiceThe SBX 200 is equipped with built-in stereo microphones, allowing you to easily carry out video/audioconferencing using popular VoIP applications such as Ventrilo®etc. CrystalVoice enhancements help tofurther this experience by enhancing the clarity of such communications.To configure CrystalVoice settings, Click the "CrystalVoice" menu option on the left.1. Click the power button to turn on CrystalVoice.2. Select the SBX 200 as your recording device, adjusting the microphone volume using the slider.3. Select the desired enhancements to turn on and adjust the settings according to your needs.4. Click [Test] and speak into your Sound BlasterAxx to hear your voice recorded based on theconfigured settings. Readjust if necessary.CrystalVoice enhancements helps you hear and be heard clearly by all participants of the conference,doing away with noisy background distortions and unclear communication that disrupts your onlinegaming and chatting experience. The various enhancements available include:CrystalVoice Acoustic Echo Cancellation - eliminates echoes and enables the speaker to listen tothe other parties clearly. Echoes are a common problem present in voice communication systems thatdisrupts conversations by making it difficult to hear the other party.CrystalVoice Noise Reduction - enables the speaker to be heard clearly over background noise byconstantly monitoring the environment and eliminating unwanted noise that interferes with theconversation.CrystalVoice Smart Volume - automatically adjusts the loudness of a voice to maintain a consistentvolume level. This makes it convenient for the speaker to converse normally, regardless of his distancefrom the microphone.CrystalVoice FX™ - enables the alteration of voice with a variety of effects which can be used toenhance the tone of a voice, create interesting accents or even allow someone to sound like acompletely different person.CrystalVoice Focus - creates a zone and suppresses noise outside it to enable the speaker within tobe heard with amazing clarity. Multiple microphones are used to focus, enhance the speaker’s voice,and eliminate sounds outside the zone.](https://usermanual.wiki/Creative-Labs/AVPSB1530.User-Manual-1530/User-Guide-1999525-Page-21.png)
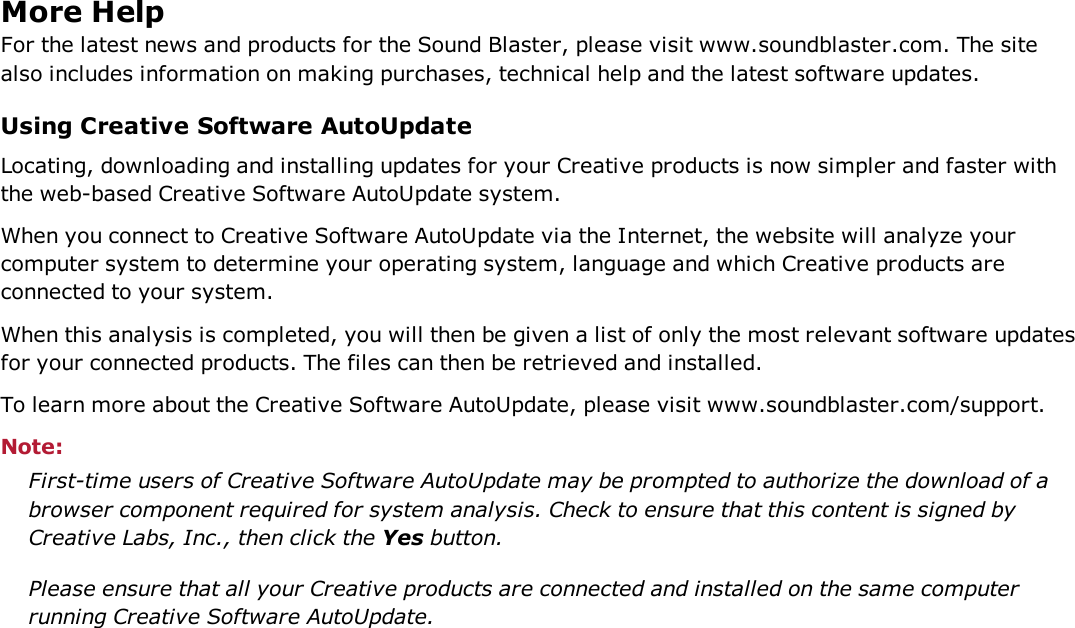
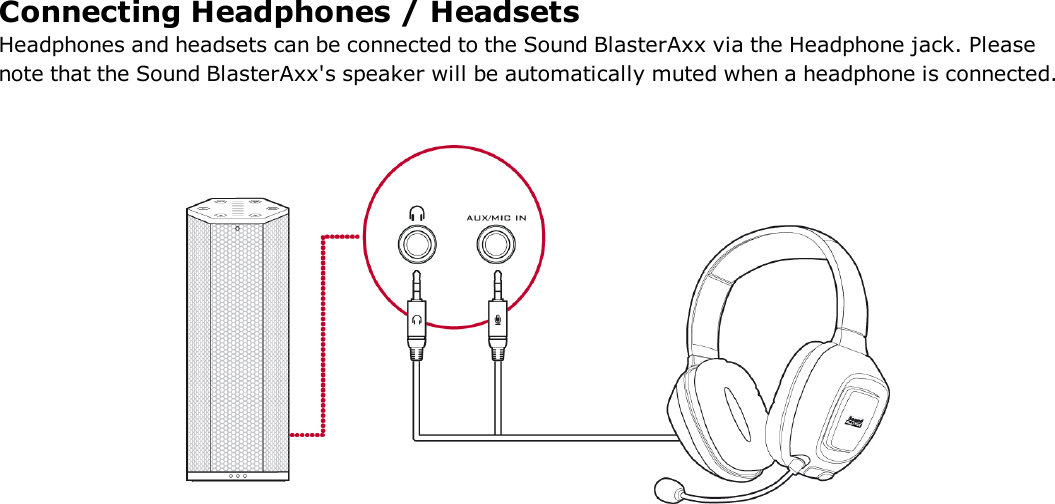
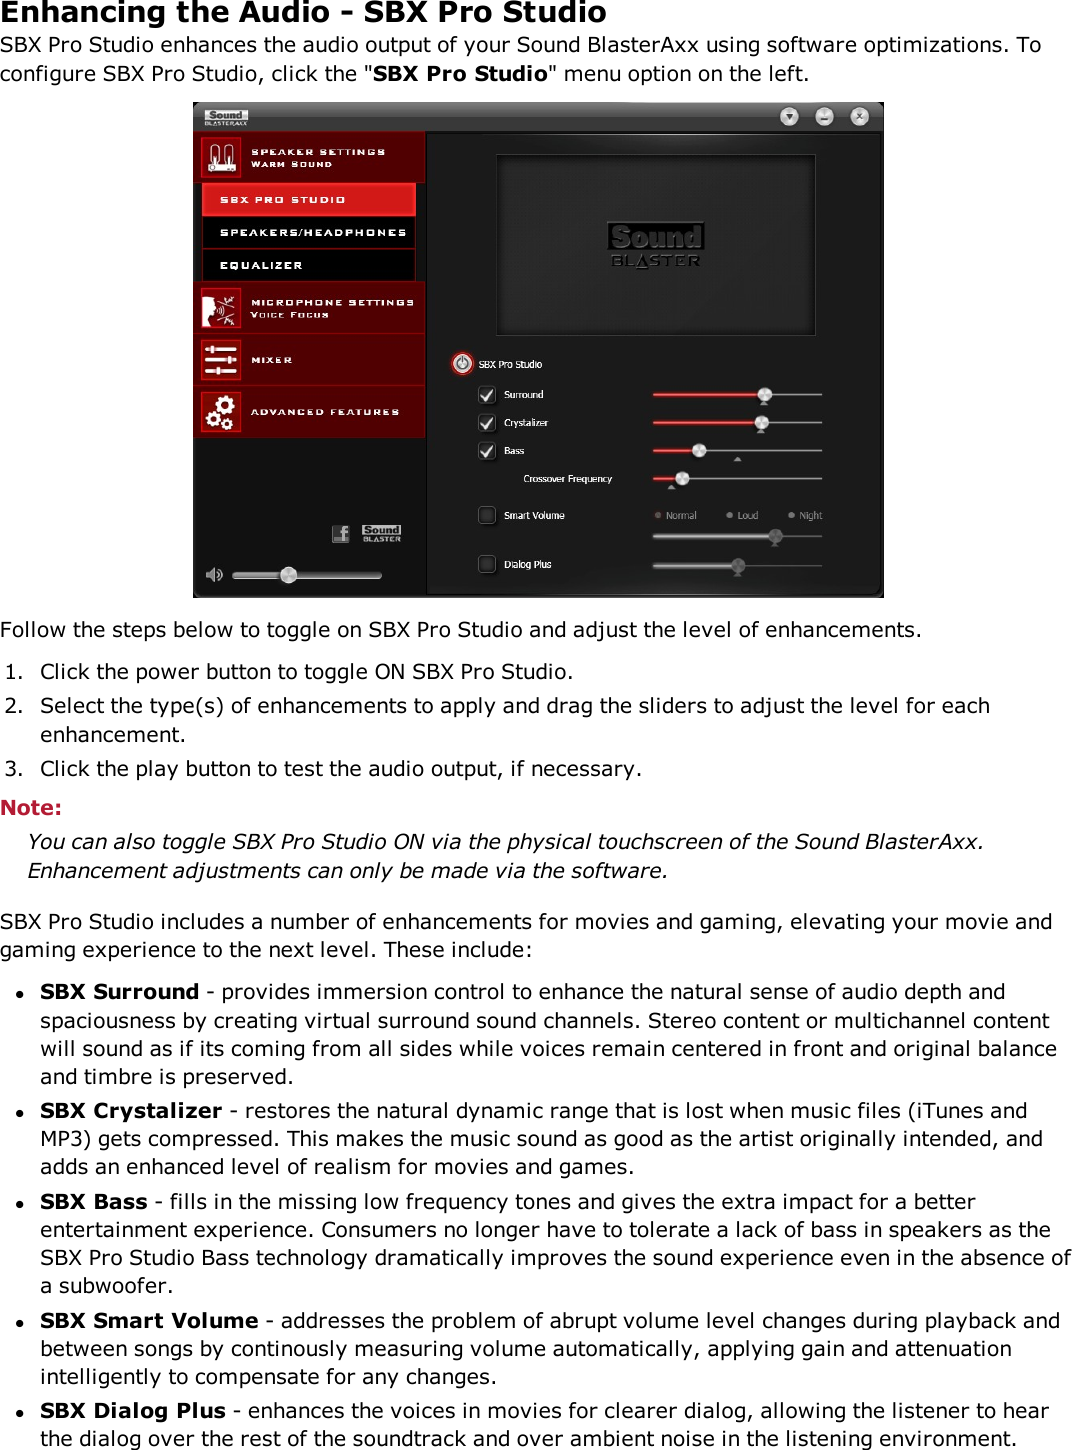
![View Speakers / Headphones SettingsEach SBX 200 is equipped with a headphone jack, allowing you to connect your favorite headphones tothe Sound BlasterAxx for audio output. Connecting headphones to the Sound BlasterAxx automaticallymutes the speaker. From the software, you can check whether audio is played via speakers orheadphones.1. View the current settings for the speakers / headphones.2. Click [Test] to hear a sample audio clip played back based on the settings.](https://usermanual.wiki/Creative-Labs/AVPSB1530.User-Manual-1530/User-Guide-1999525-Page-22.png)
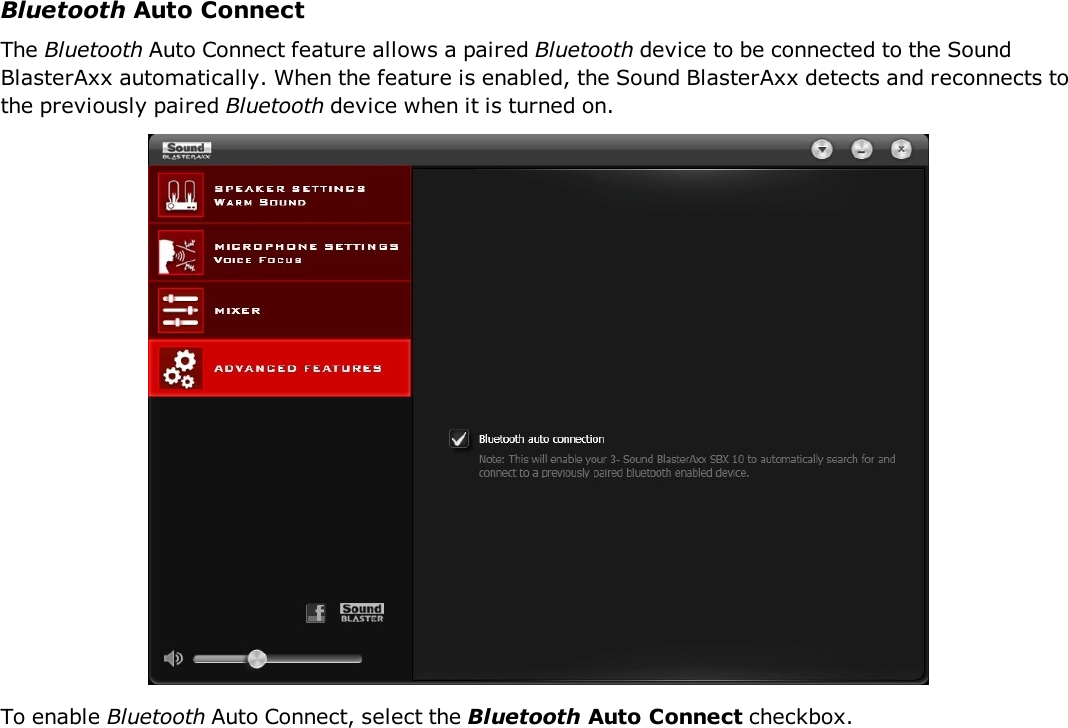
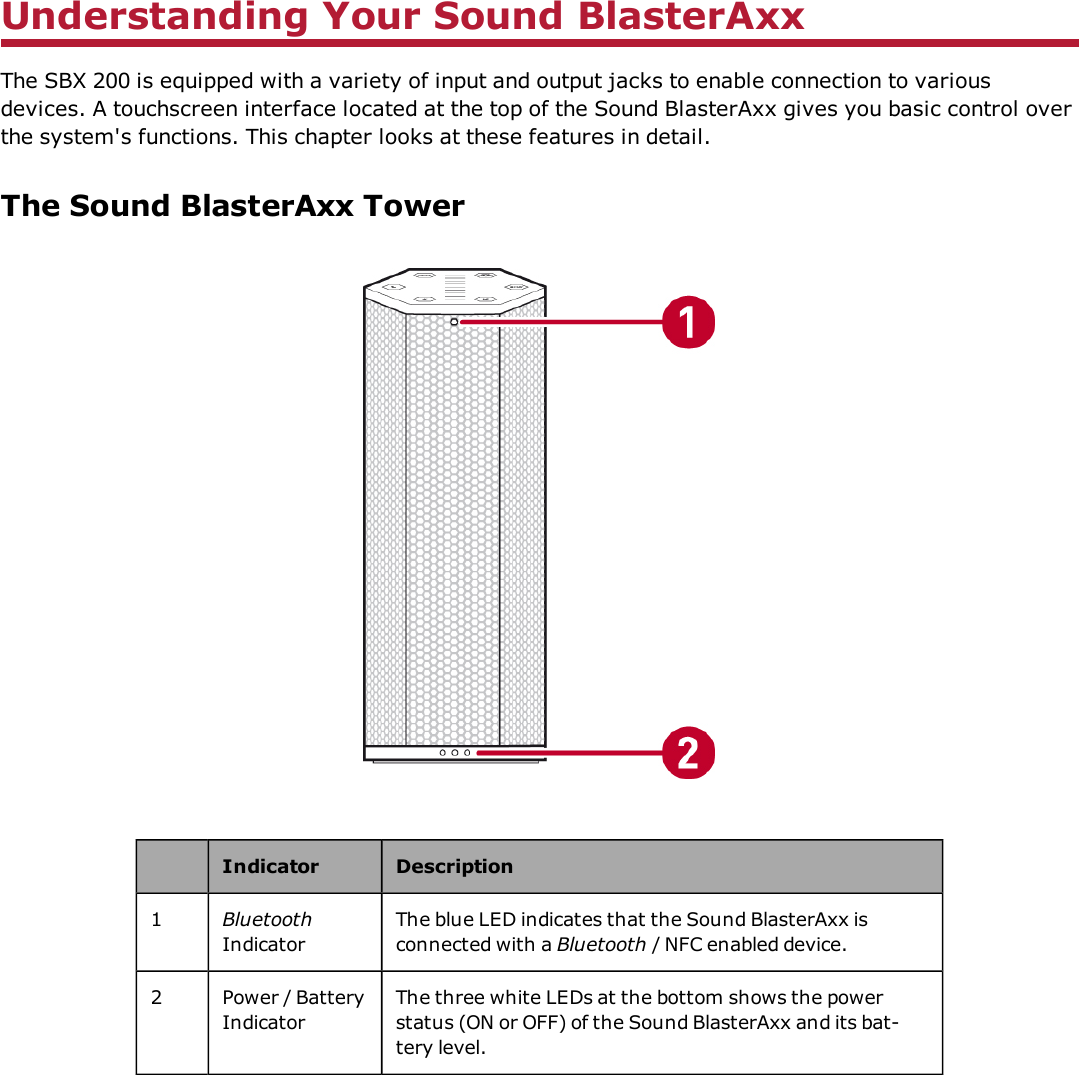
![Understanding Other Advanced FeaturesThe software also provides other advanced features including:lEqualizer SettingslBluetooth Auto ConnectEqualizer SettingsEqualizers allows you to filter various audio frequency, thus controlling the tone of your audio output.The Sound BlasterAxx Control Panel comes equipped with a range of preset equalizer settings, helpingyou to select different audio tones easily. You can also manually modify or add equalizer presets.To view the Equalizer Settings interface, select "Equalizer" from the menu. To apply and adjust anequalizer preset,1. Check the EQ checkbox to enable the use of the equalizer.2. From the drop down menu, select the preset to use.3. Adjust the vertical slider bars to achieve your desired level.4. Click [Save] to save the changes to the preset if necessary.You can also delete any user created equalizer presets by selecting the preset from the drop down menuand clicking [Delete].Note:All default equalizer presets cannot be deleted.](https://usermanual.wiki/Creative-Labs/AVPSB1530.User-Manual-1530/User-Guide-1999525-Page-23.png)