Crestron Electronics 2023288 Handheld WiFi Touch Panel User Manual Operations Guide TPMC 3X
Crestron Electronics Inc Handheld WiFi Touch Panel Operations Guide TPMC 3X
UserManual.wiki
>
Crestron Electronics
>
2023288 User Manual
manual
Navigation menu
Upload a User Manual
Namespaces
Wiki Guide
HTML
PDF
Info
Views
User Manual
Discussion / Help
Navigation

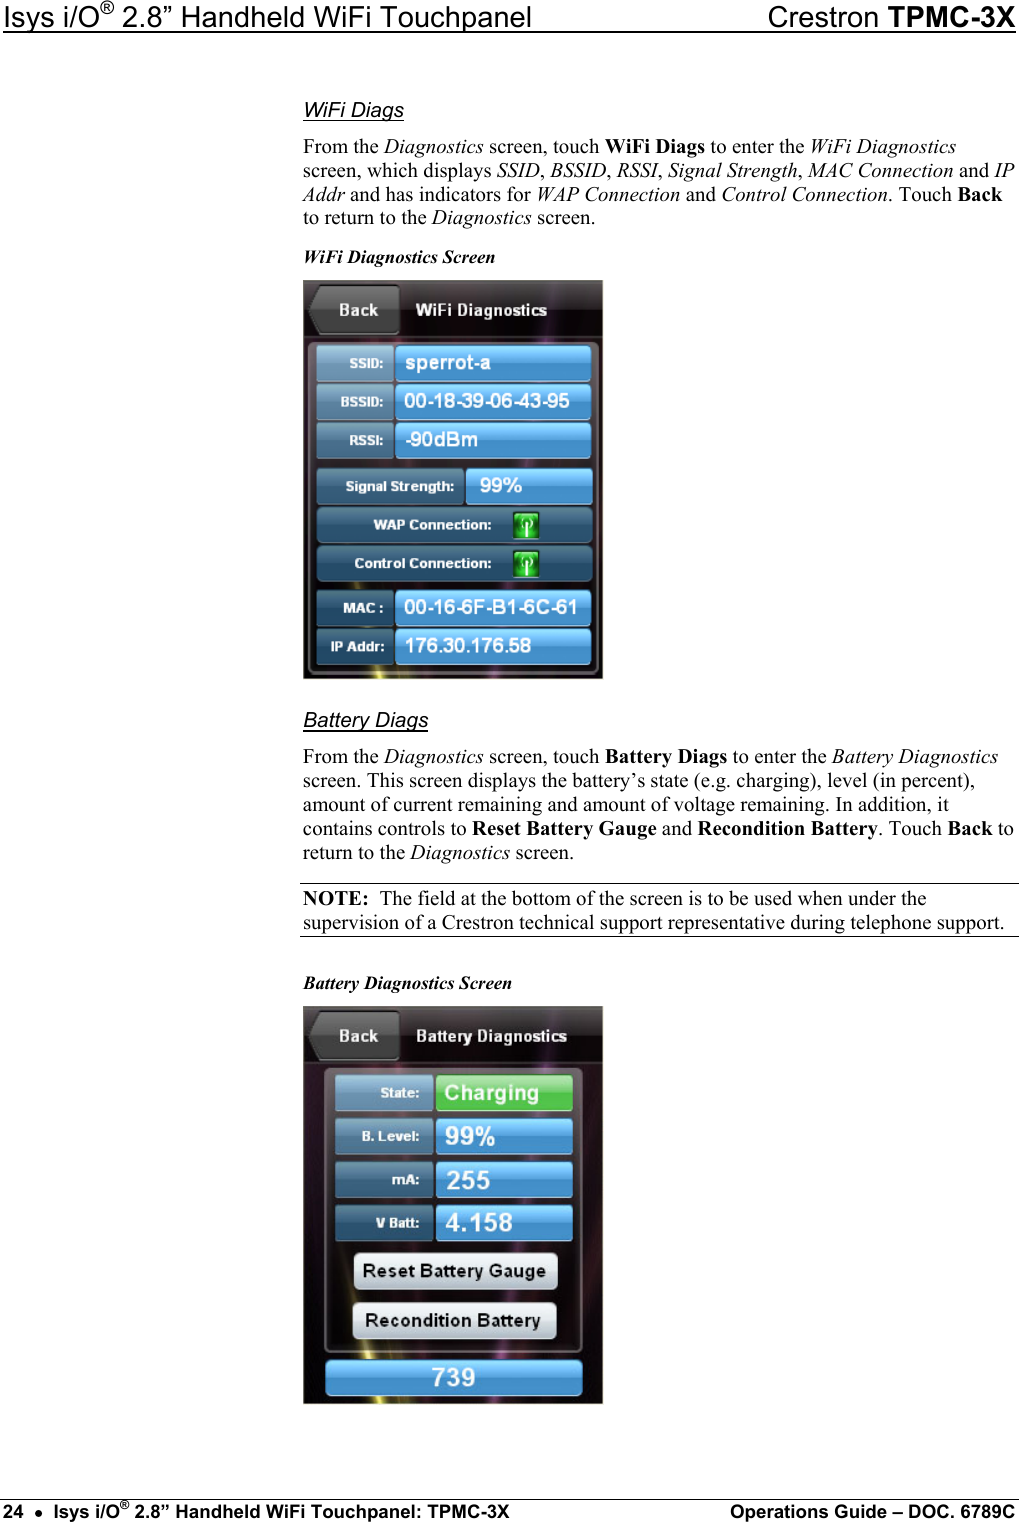
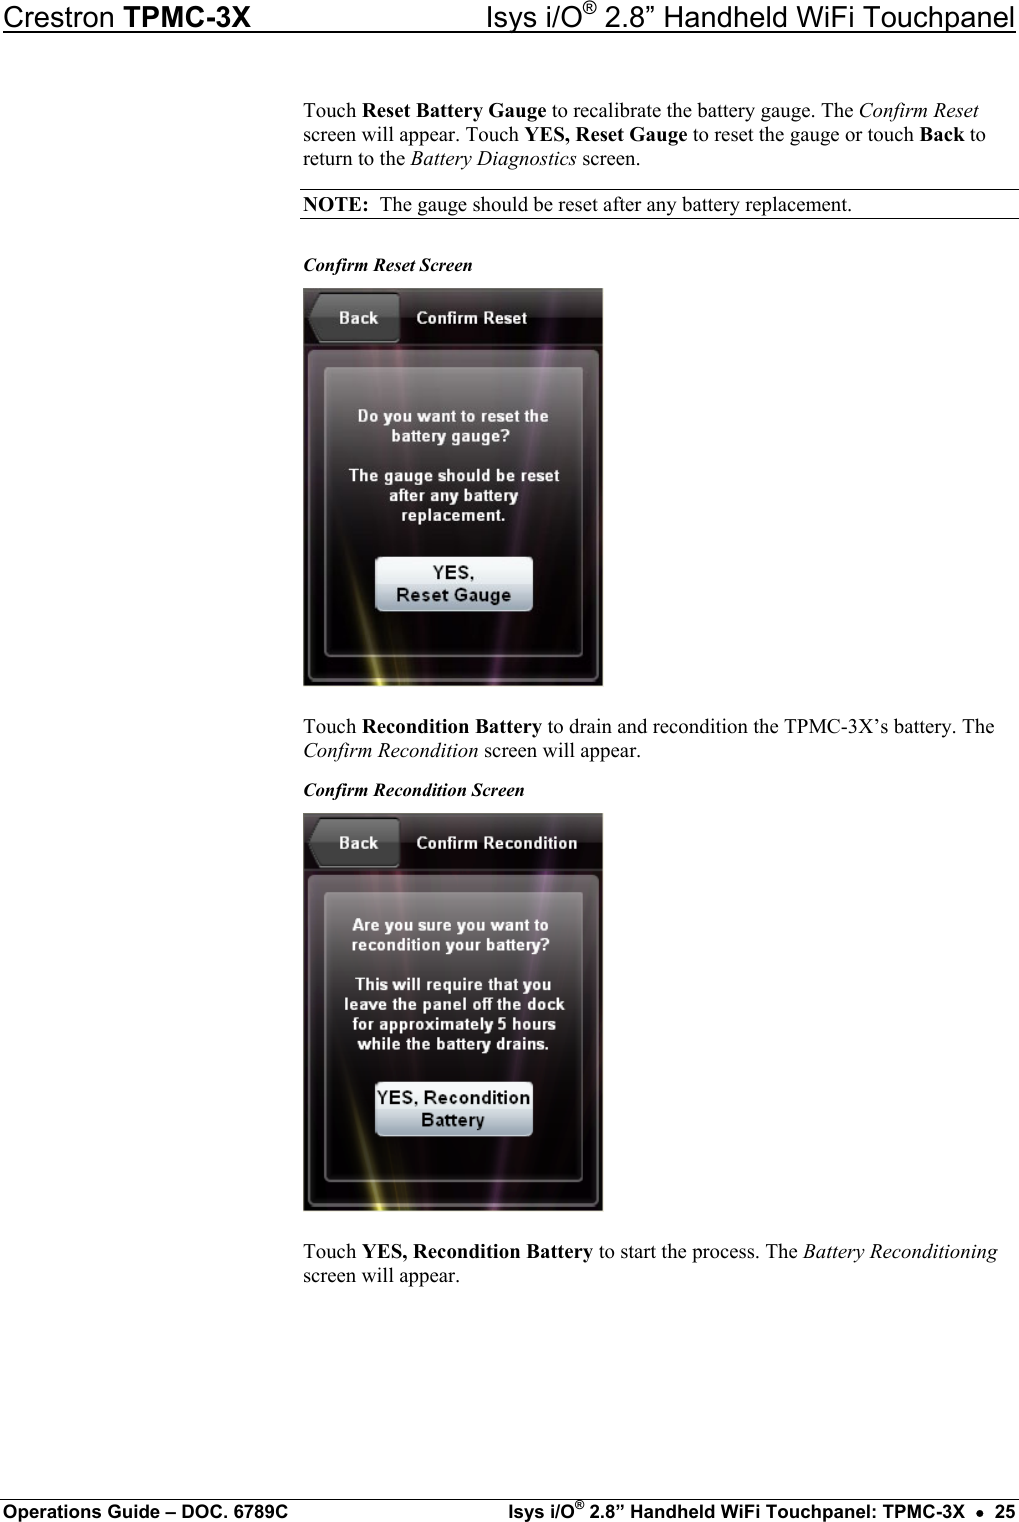
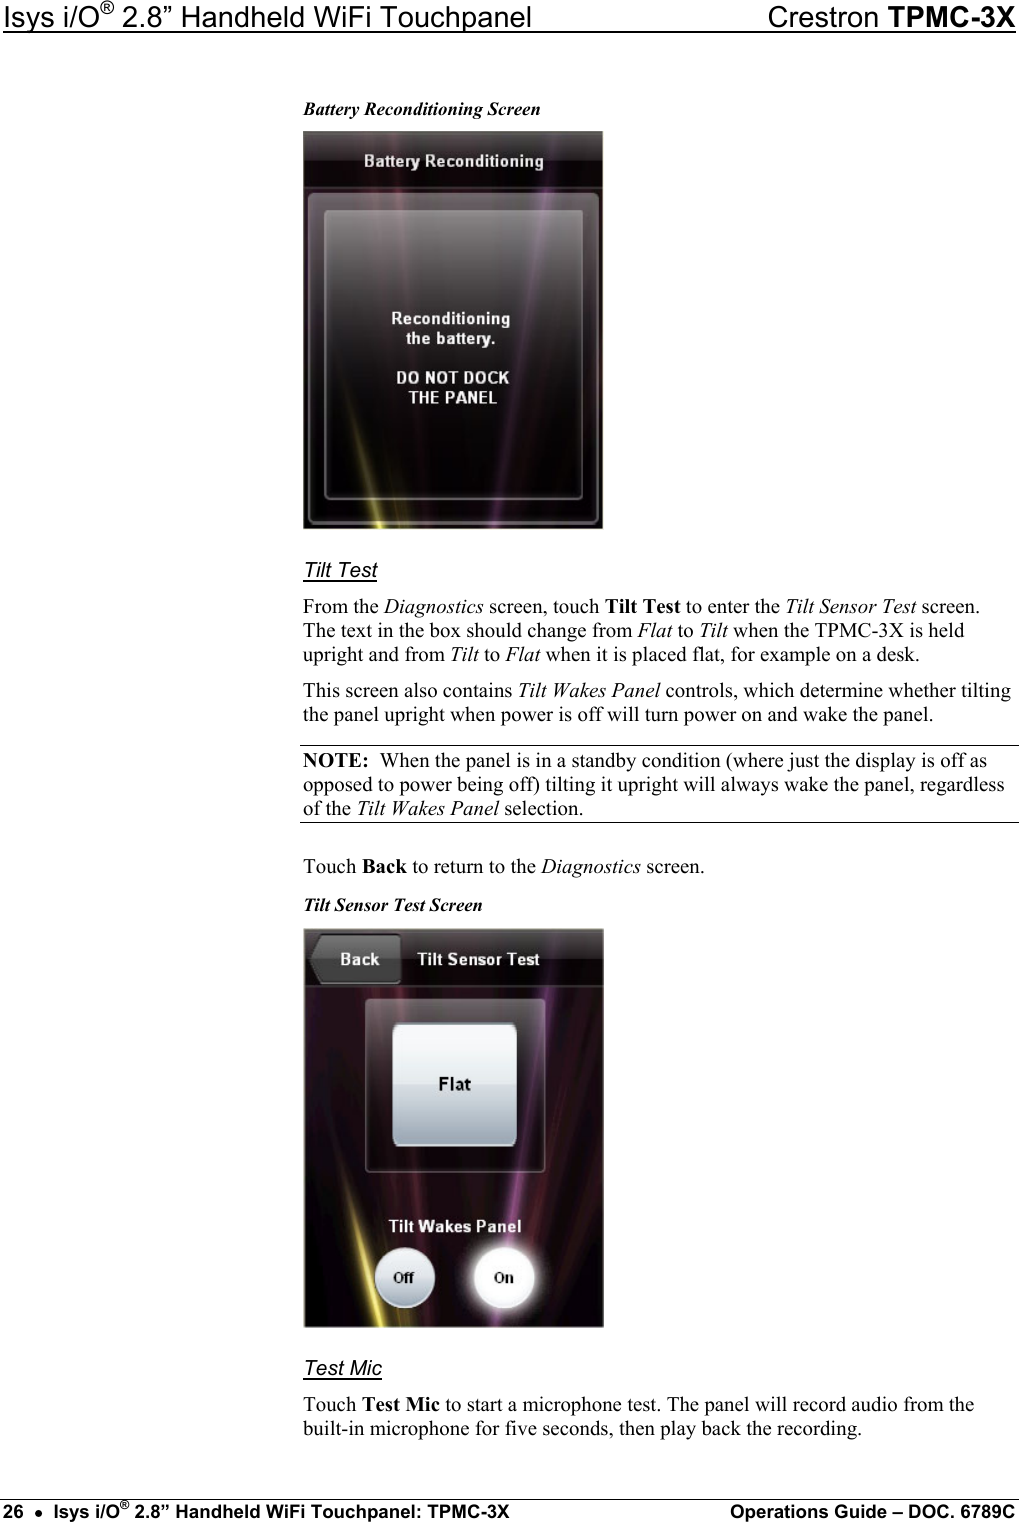
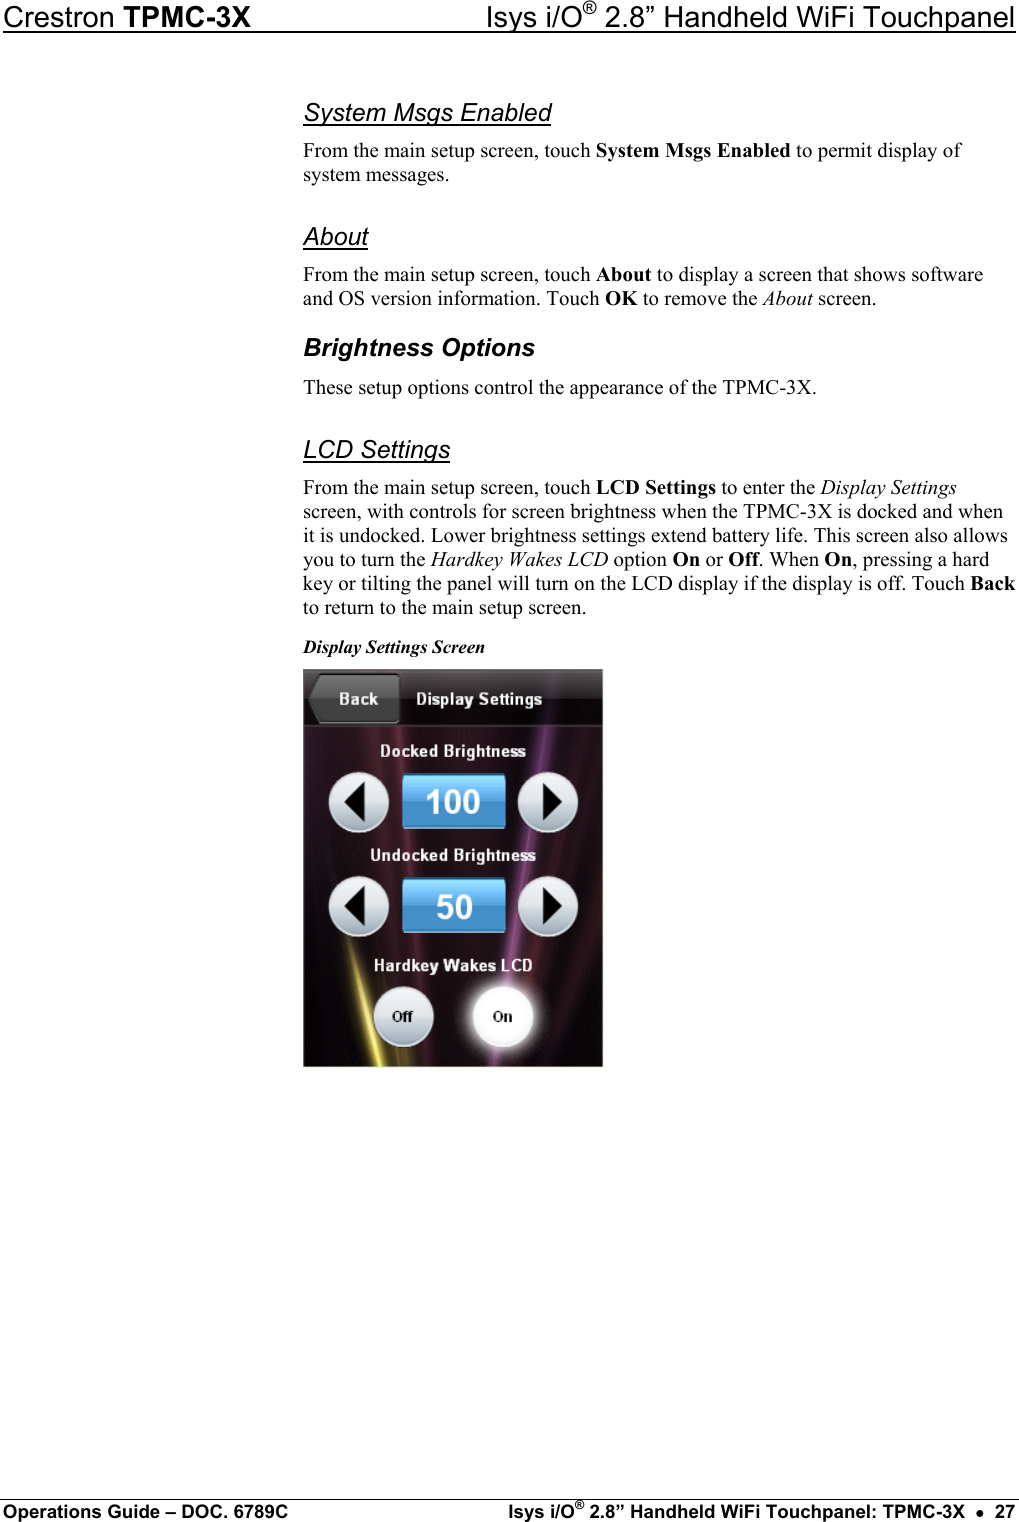
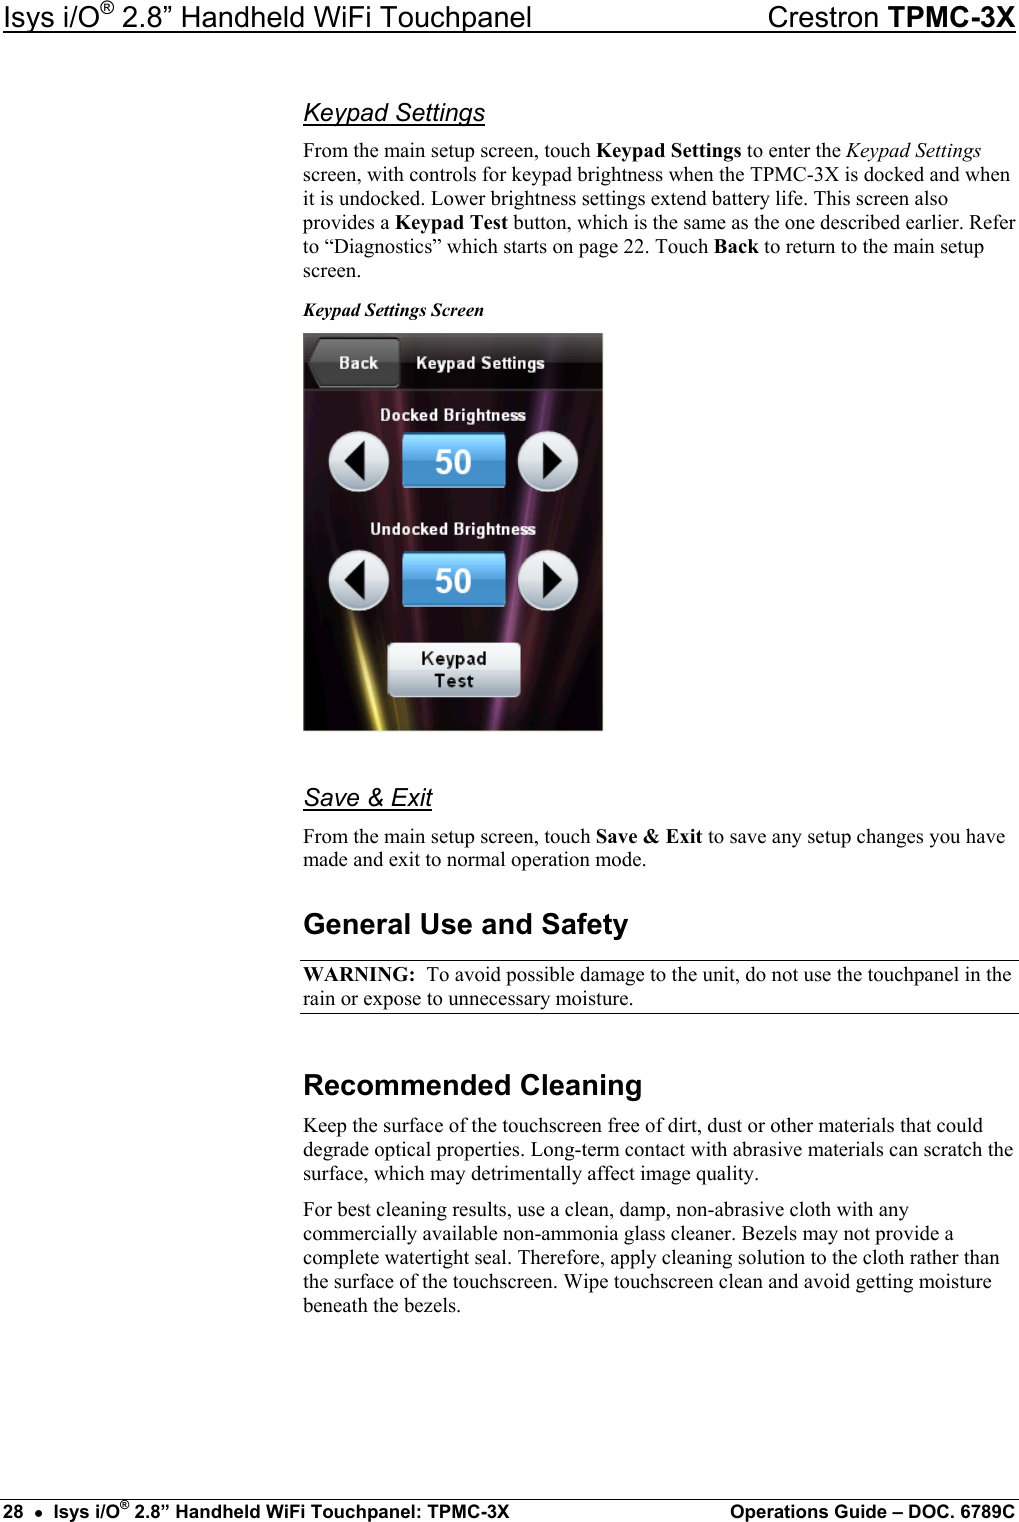
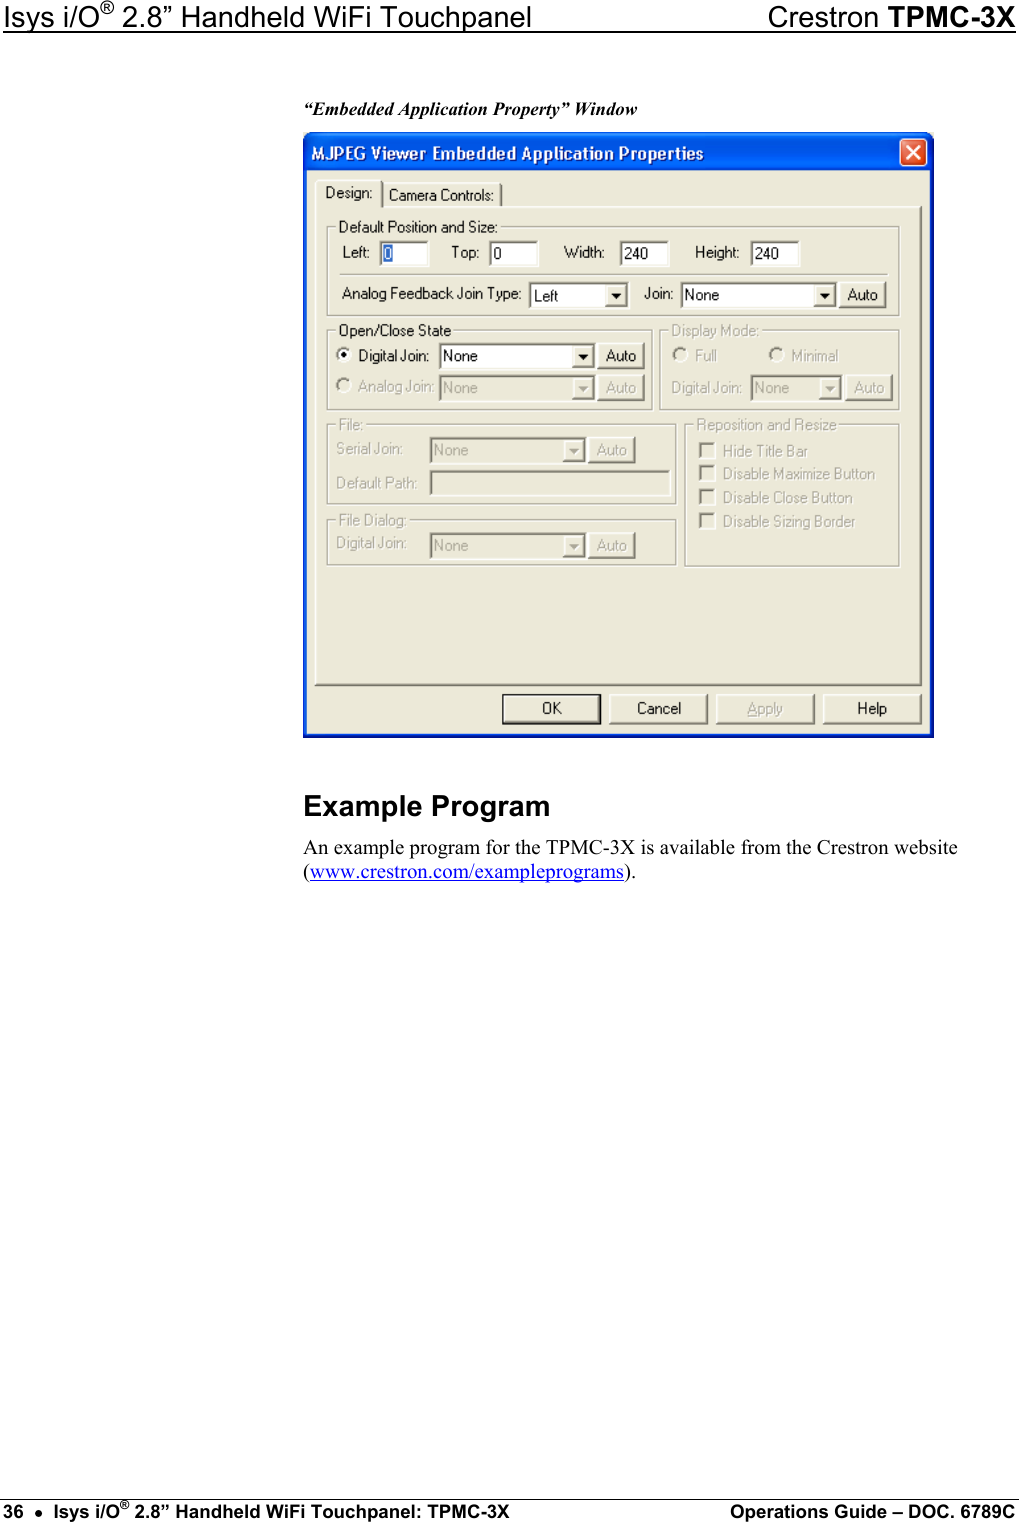
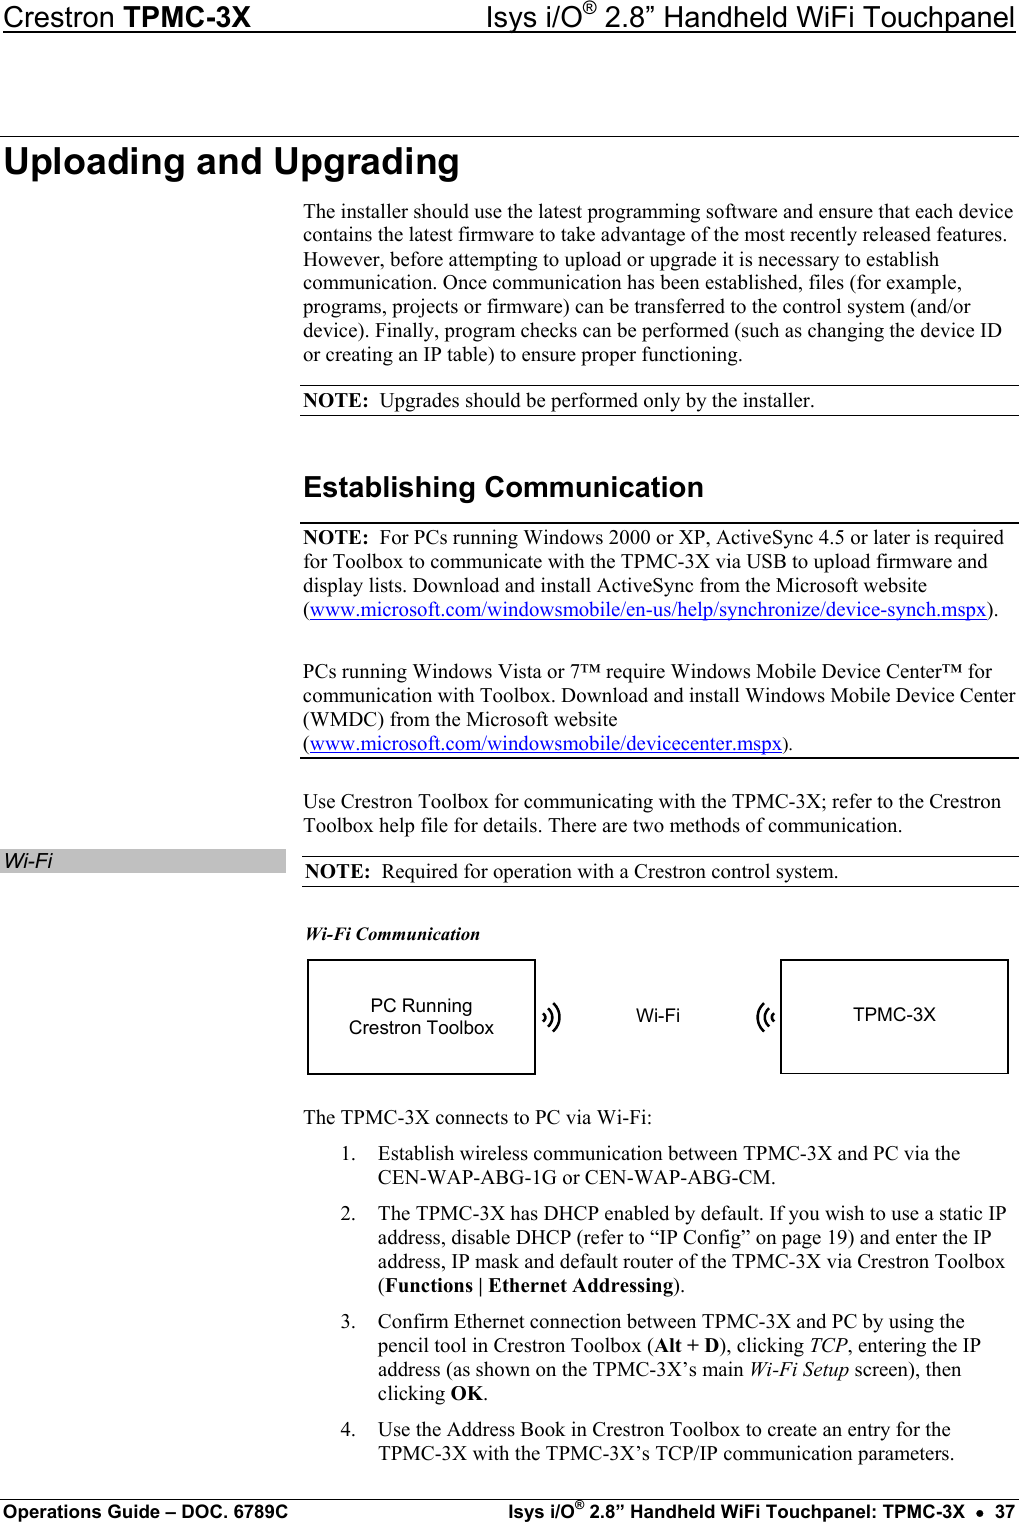
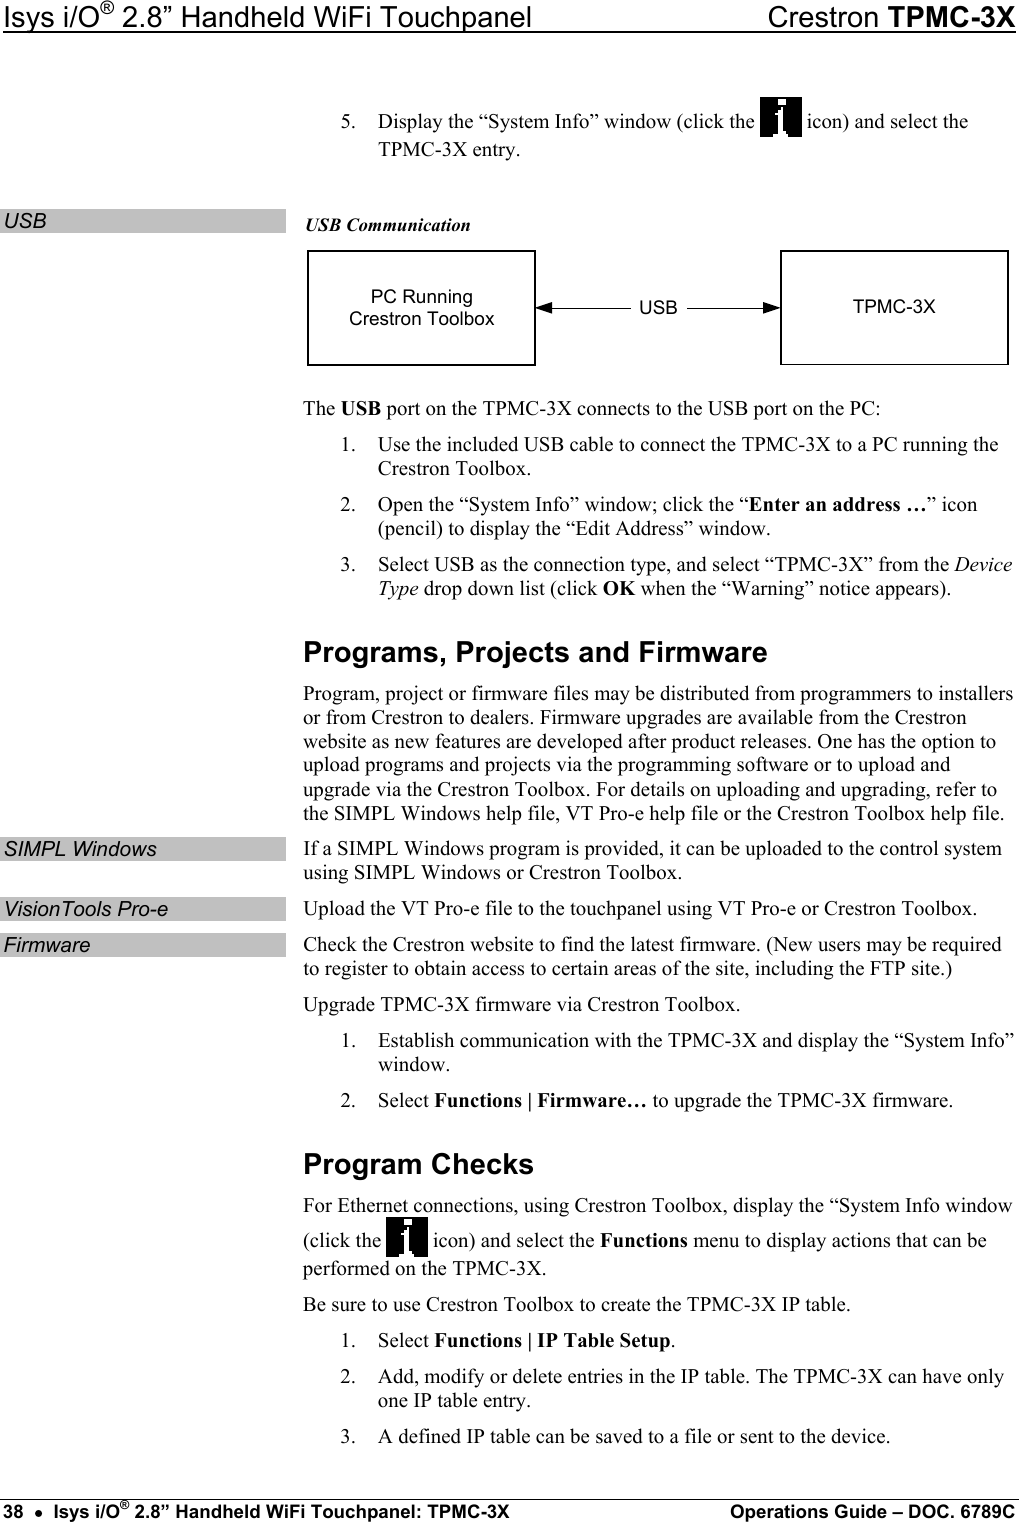
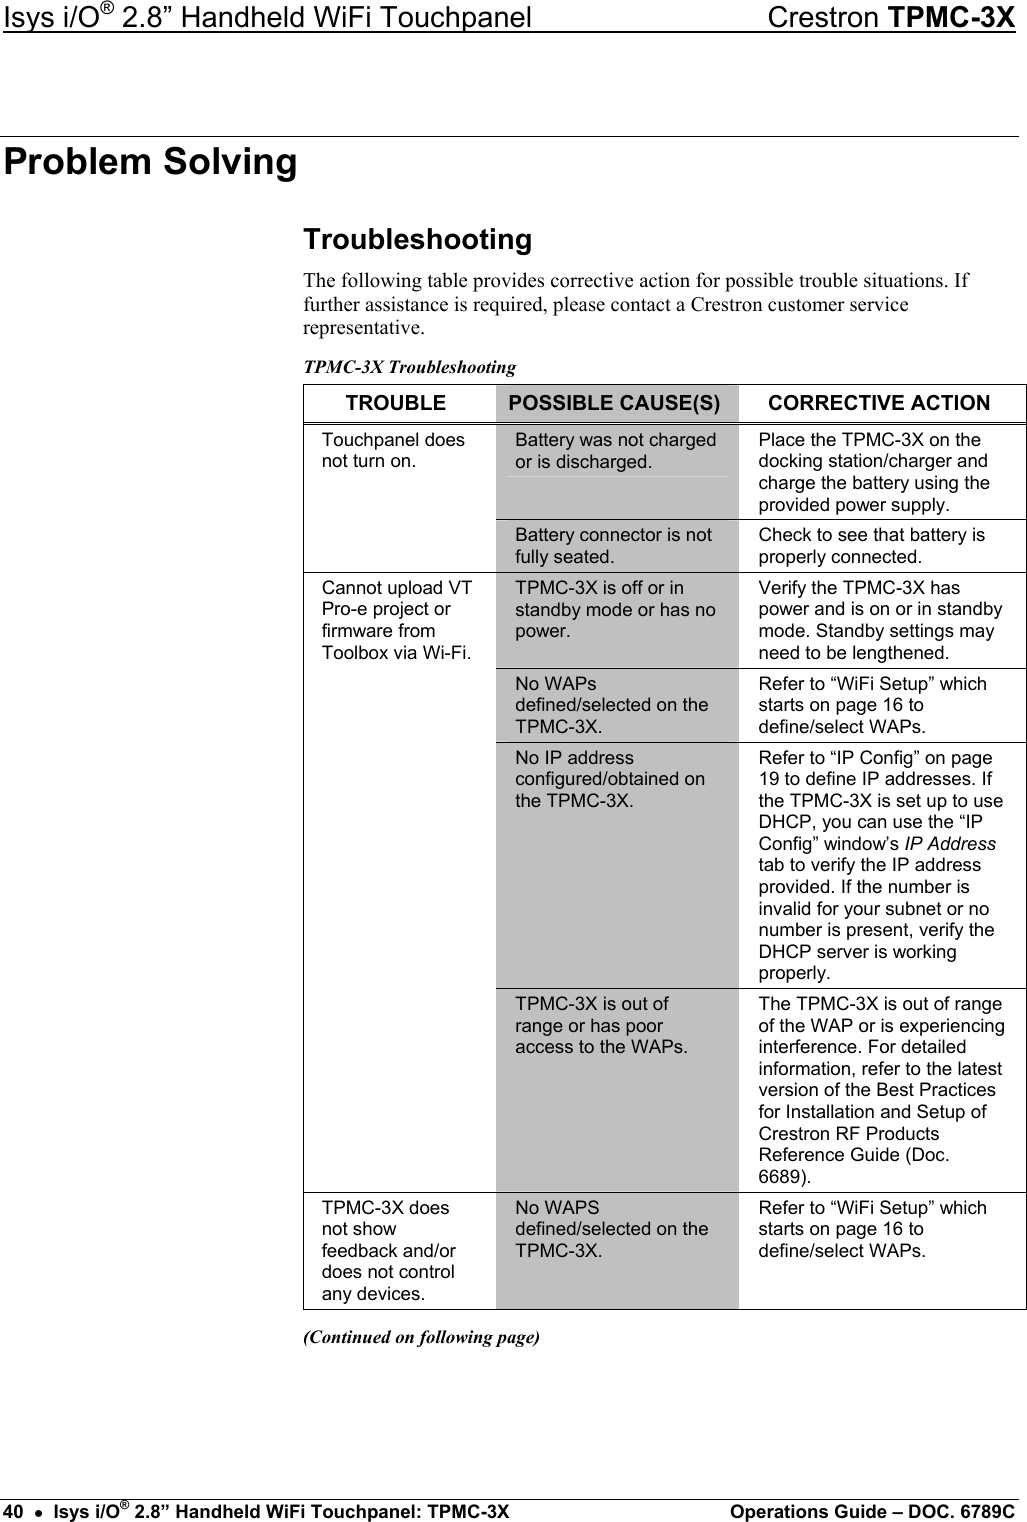
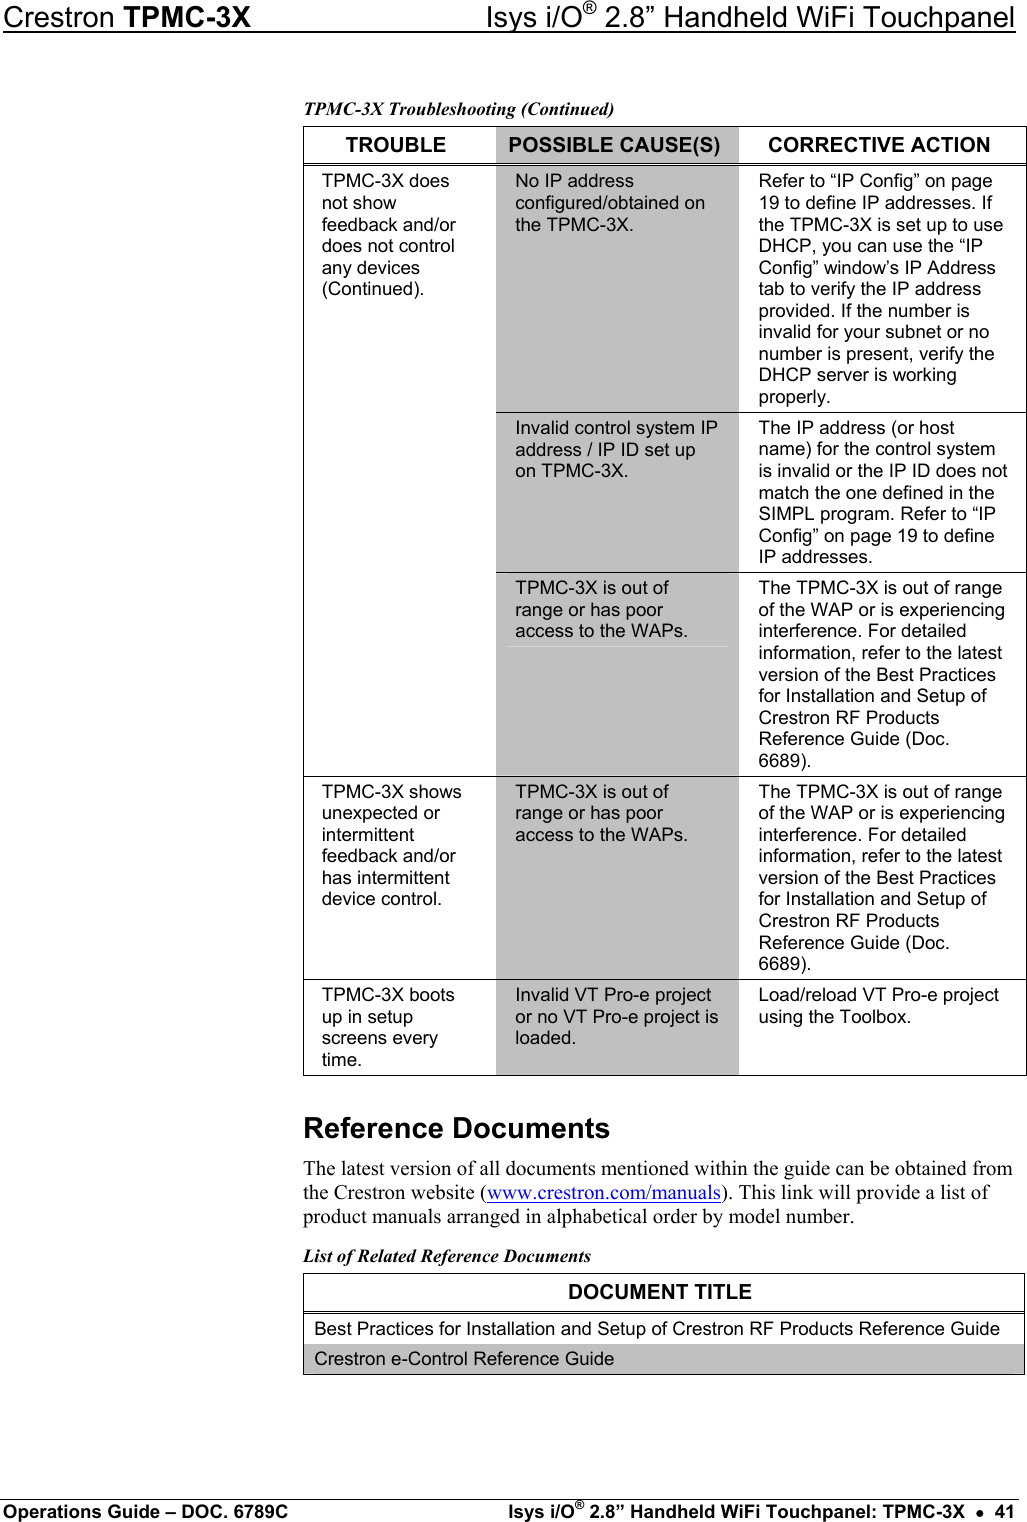
![Isys i/O® 2.8” Handheld WiFi Touchpanel Crestron TPMC-3X Further Inquiries If you cannot locate specific information or have questions after reviewing this guide, please take advantage of Crestron's award winning customer service team by calling Crestron at 1-888-CRESTRON [1-888-273-7876]. You can also log onto the online help section of the Crestron website (www.crestron.com/onlinehelp) to ask questions about Crestron products. First-time users will need to establish a user account to fully benefit from all available features. Future Updates As Crestron improves functions, adds new features and extends the capabilities of the TPMC-3X, additional information may be made available as manual updates. These updates are solely electronic and serve as intermediary supplements prior to the release of a complete technical documentation revision. Check the Crestron website periodically for manual update availability and its relevance. Updates are identified as an “Addendum” in the Download column. 42 • Isys i/O® 2.8” Handheld WiFi Touchpanel: TPMC-3X Operations Guide – DOC. 6789C](https://usermanual.wiki/Crestron-Electronics/2023288/User-Guide-1199419-Page-46.png)