Crestron Electronics LX3 Handheld Remote User Manual Operations Guide MLX 3
Crestron Electronics Inc Handheld Remote Operations Guide MLX 3
UserManual.wiki
>
Crestron Electronics
>
LX3 User Manual
>
User manual 1
Contents
1.
User manual 1
2.
User manual 2
3.
User manual 3
User manual 1
Navigation menu
Upload a User Manual
Namespaces
Wiki Guide
HTML
PDF
Info
Views
User Manual
Discussion / Help
Navigation
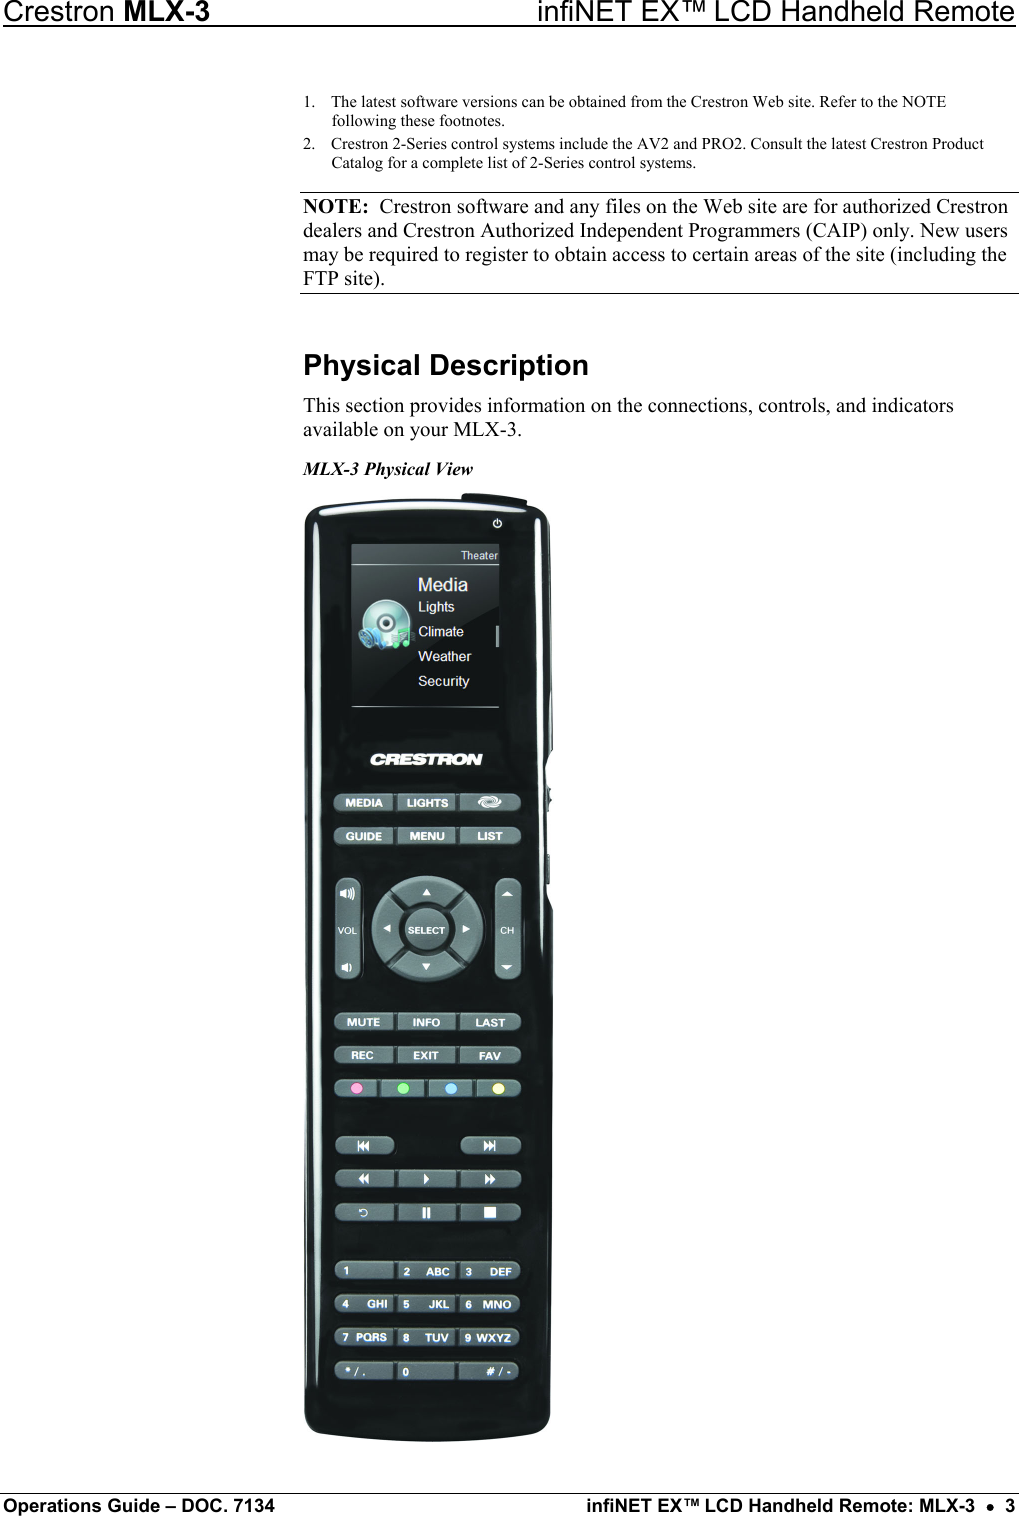
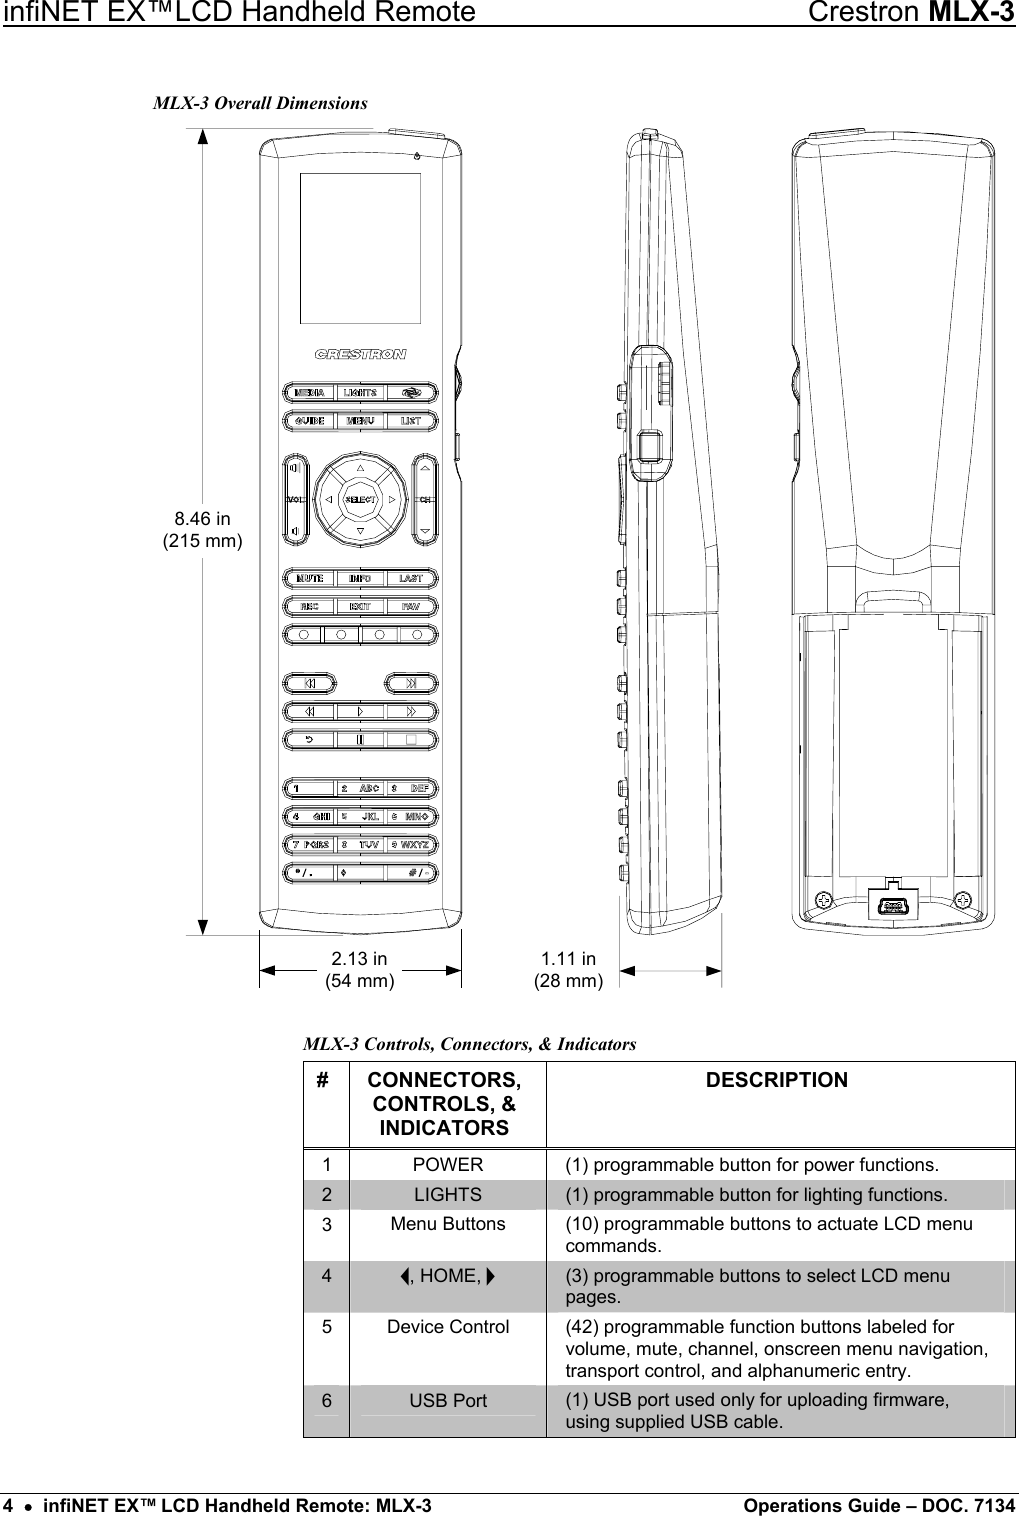
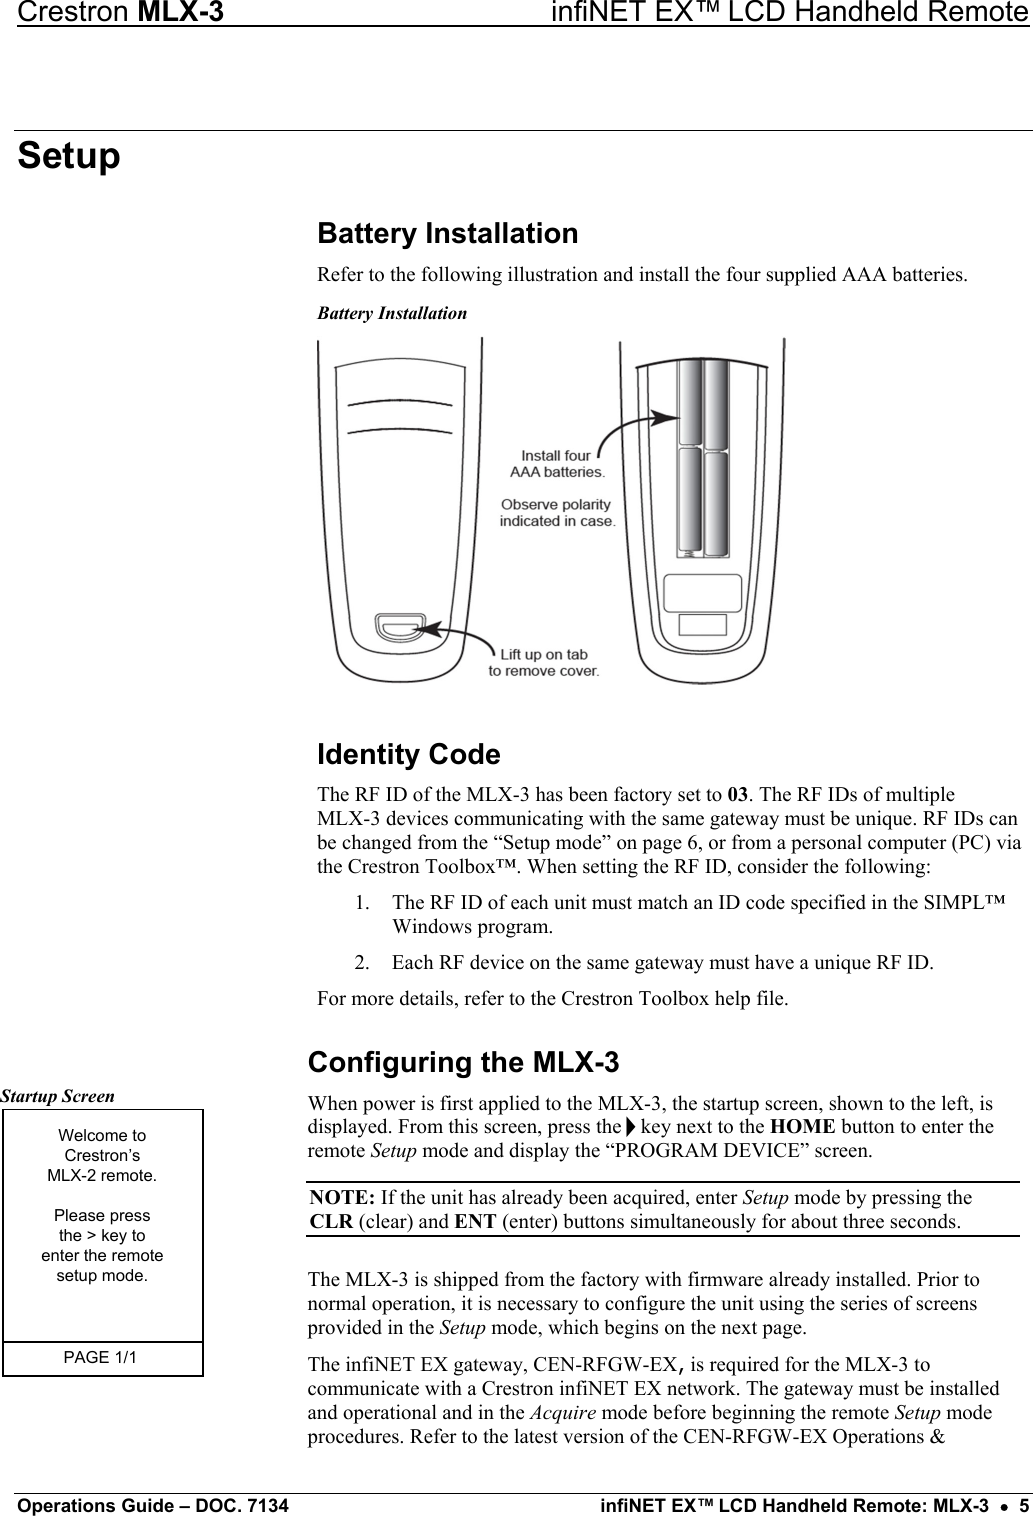
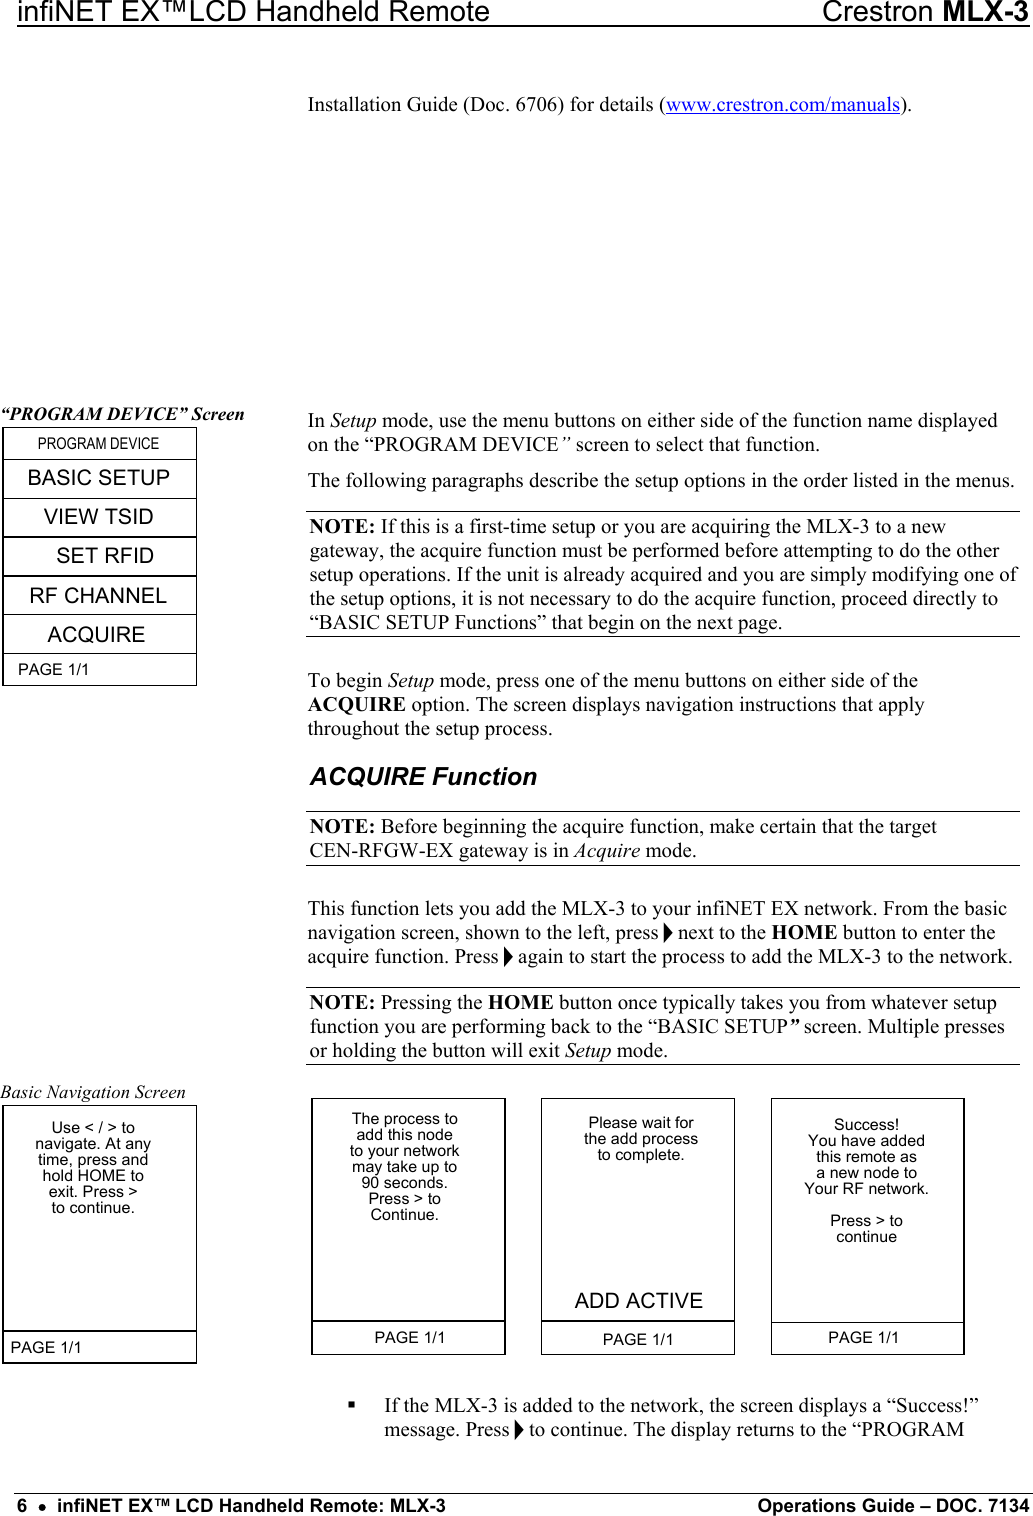
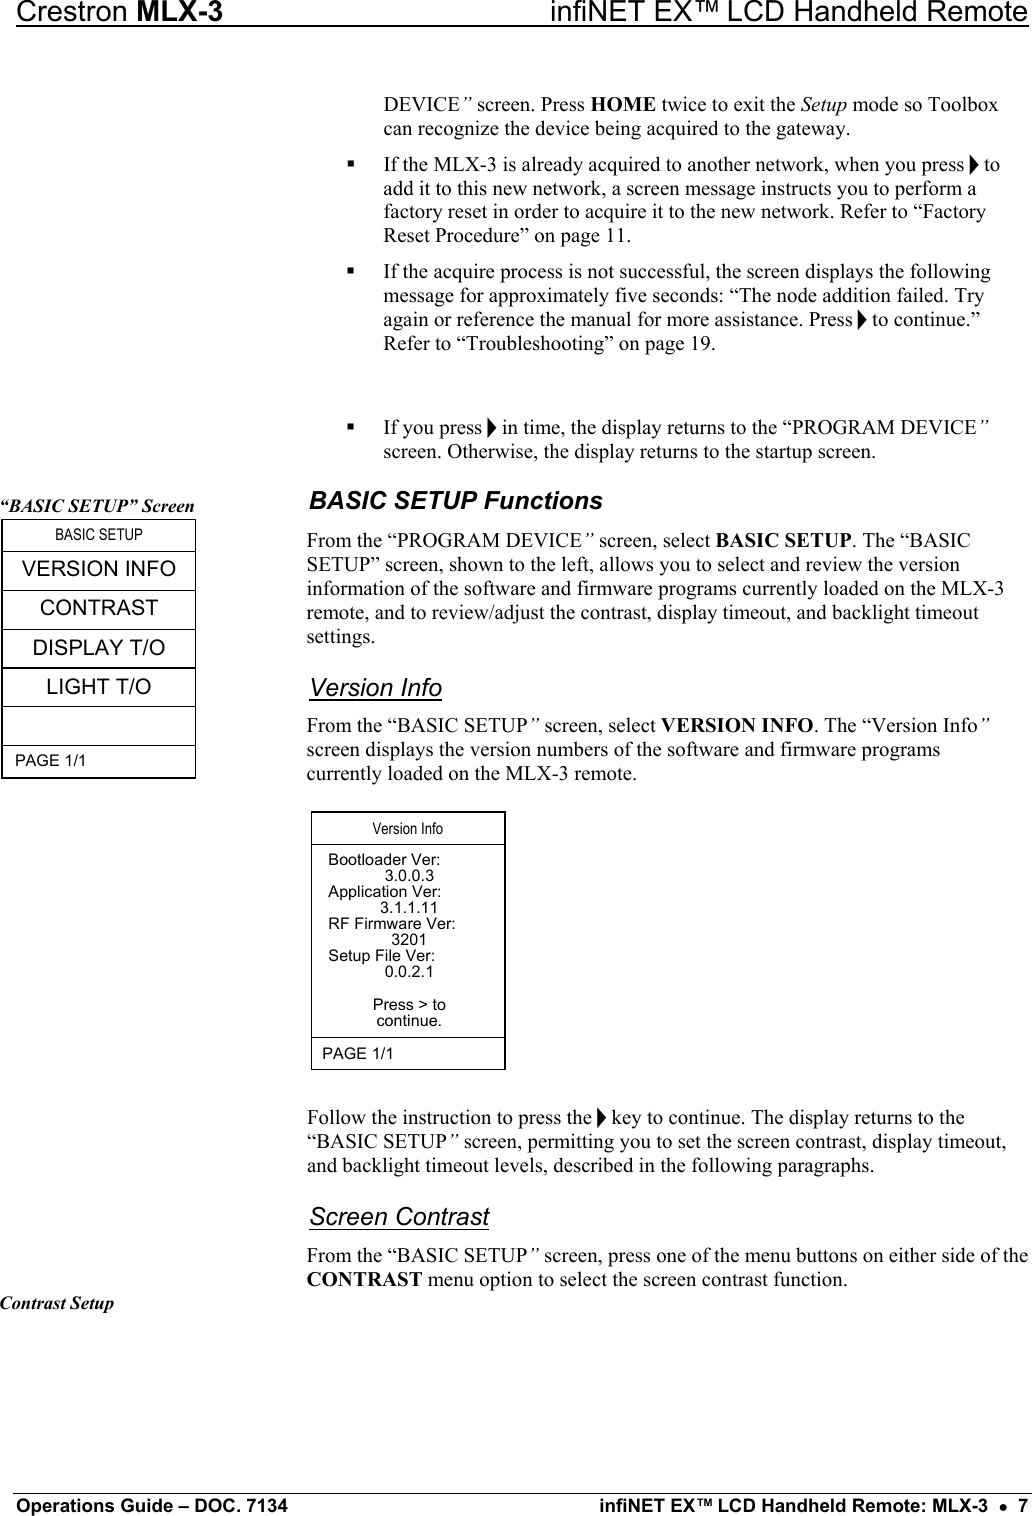
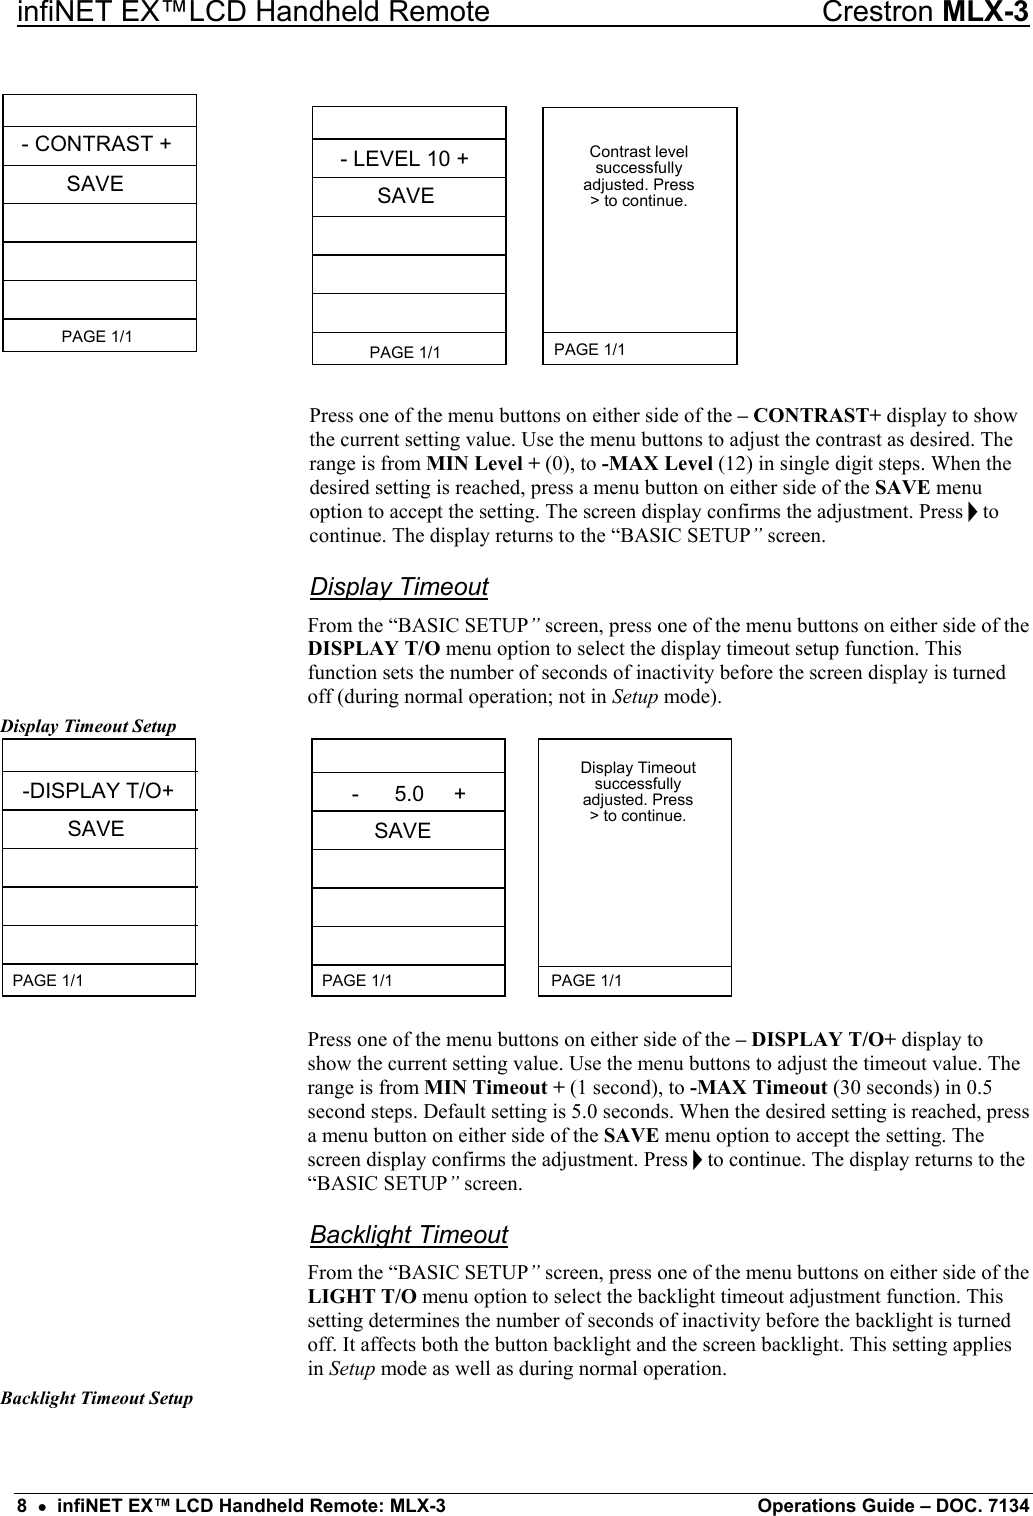
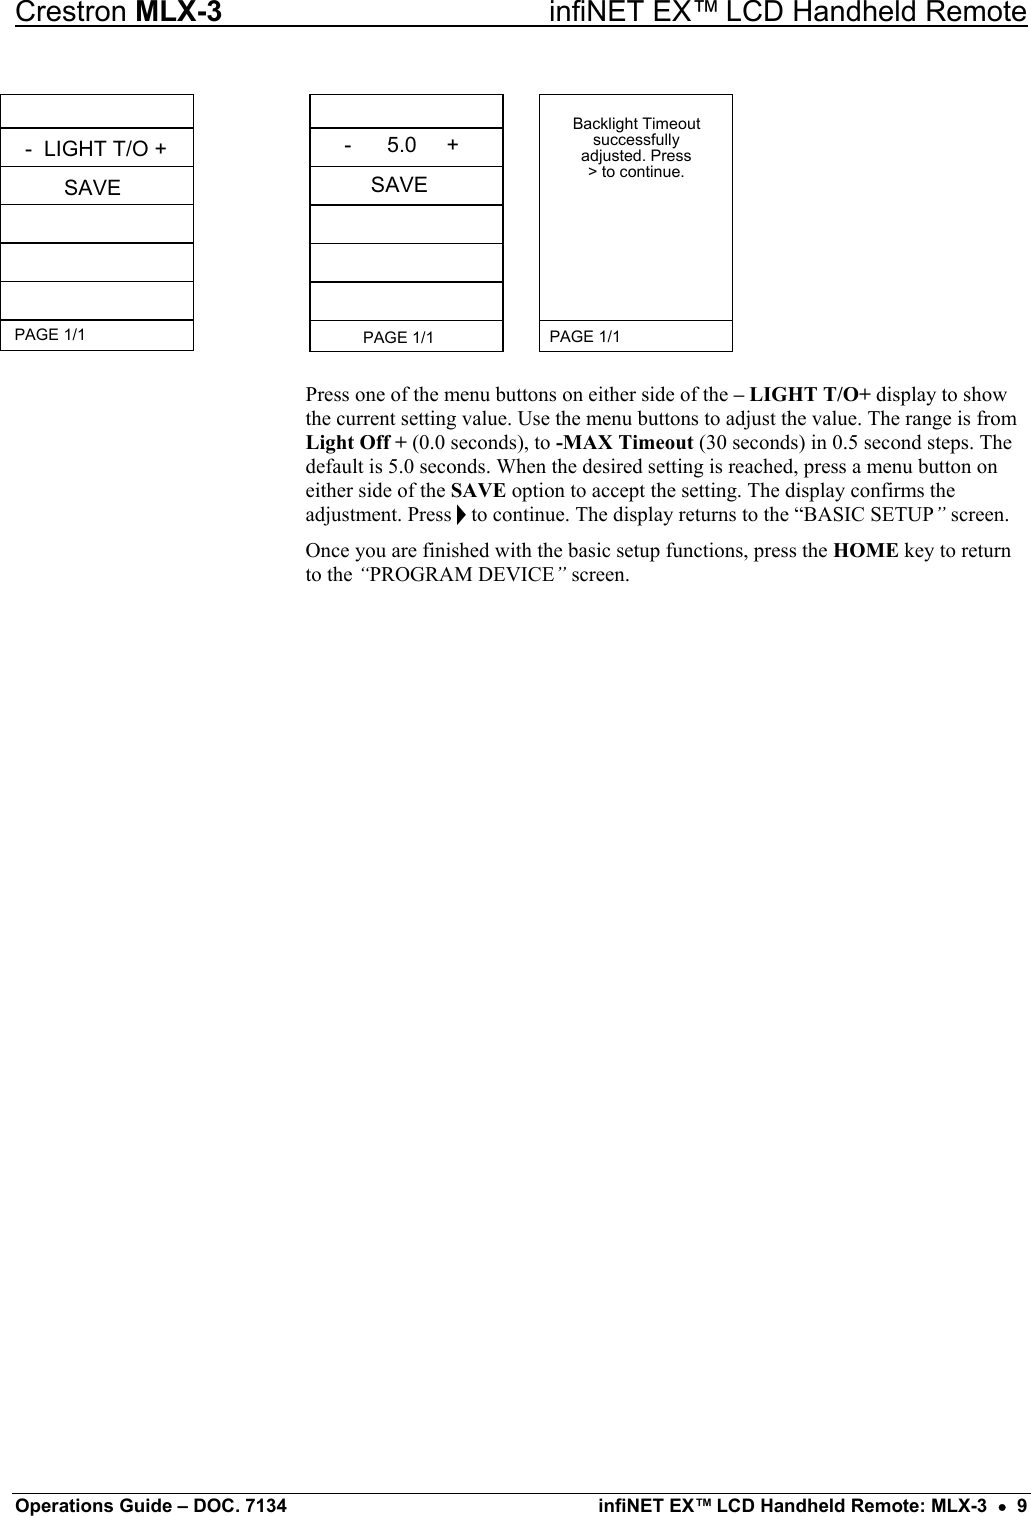
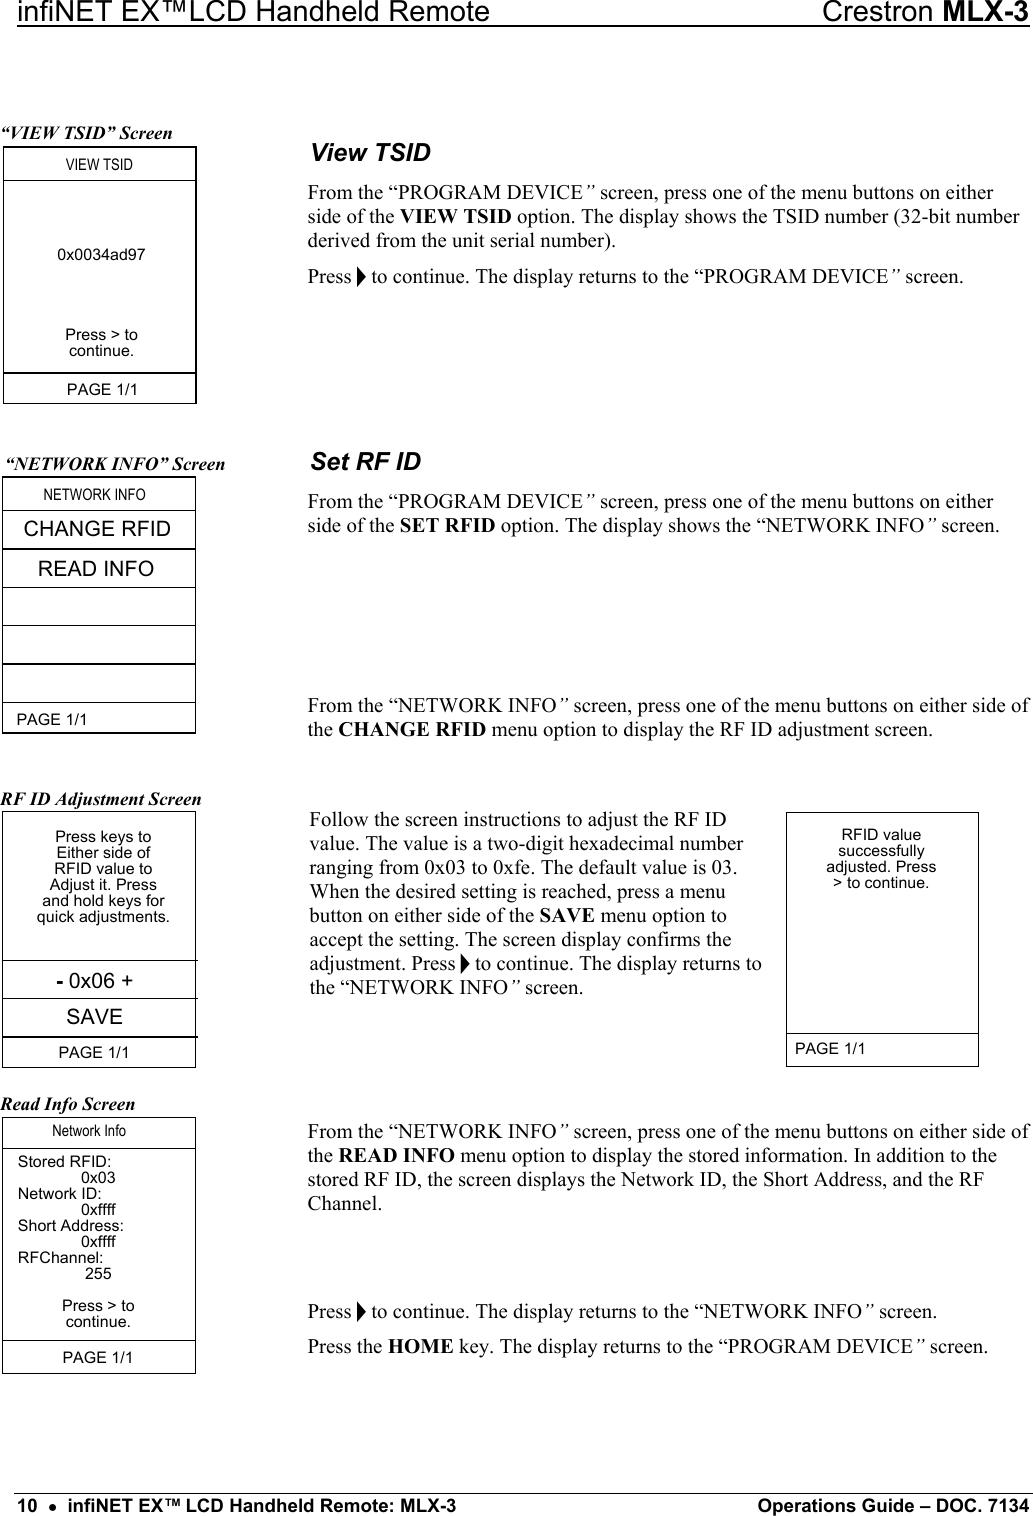

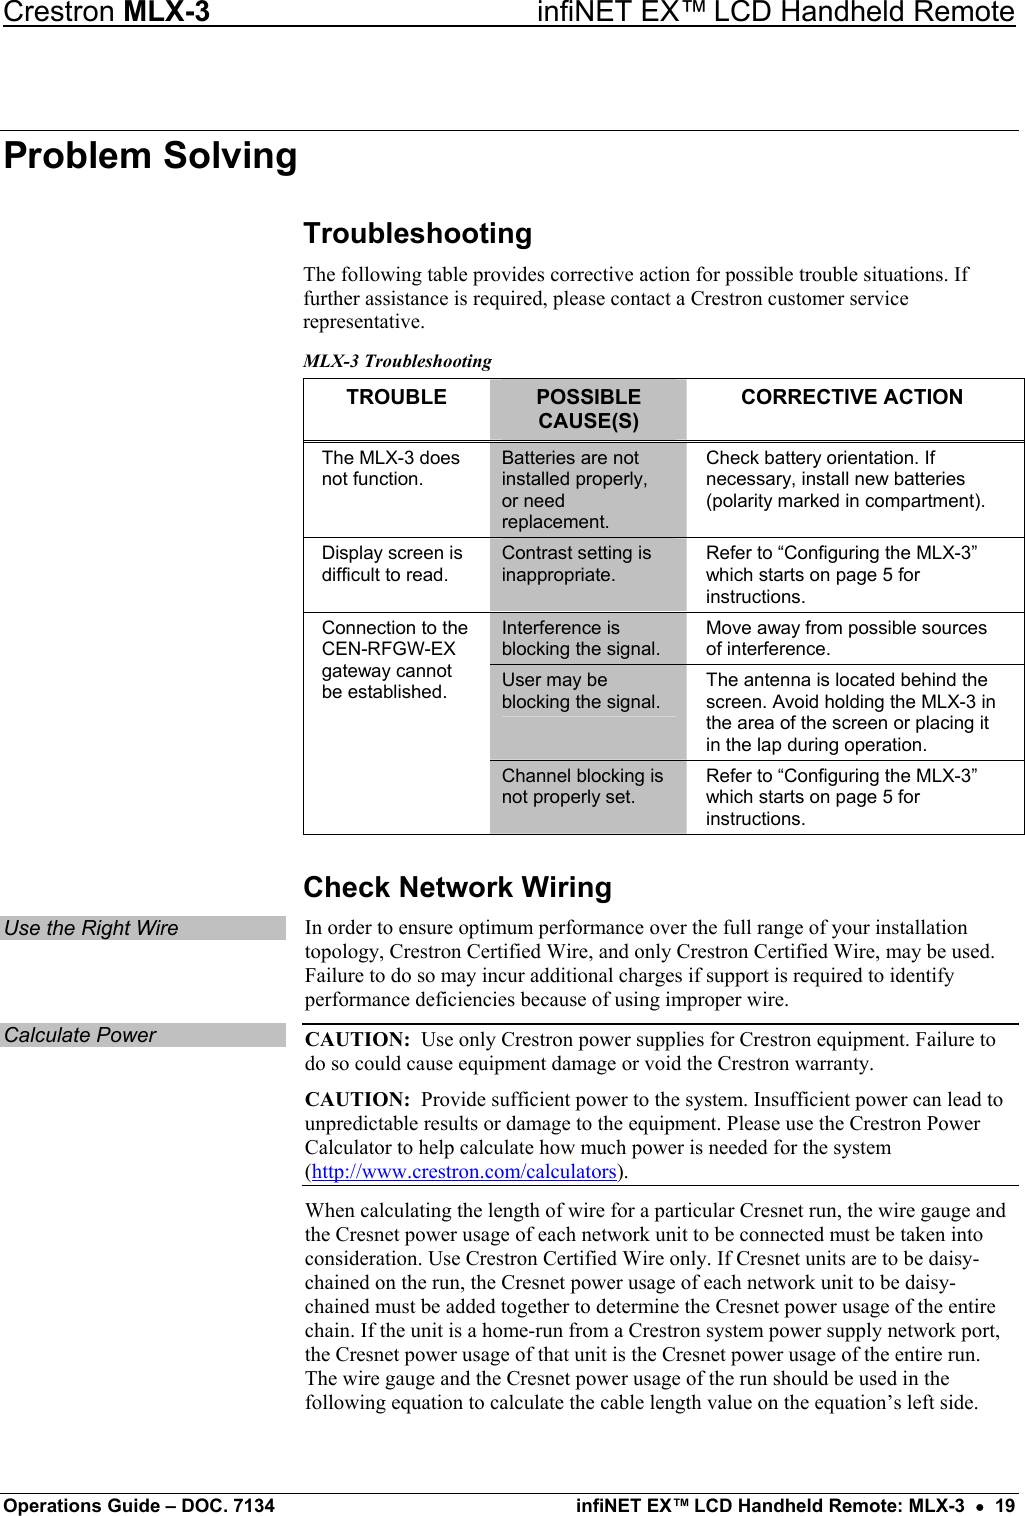
![infiNET EX™LCD Handheld Remote Crestron MLX-3 Cable Length Equation L = Length of run (or chain) in feetR = 6 Ohms (Crestron Certified Wire: 18 AWG (0.75 mm ))or 1.6 Ohms (Cresnet HP: 12 AWG (4 mm ))P = Cresnet power usage of entire run (or chain)22L < 40,000R x PWhere: Make sure the cable length value is less than the value calculated on the right side of the equation. For example, a Cresnet run using 18 AWG Crestron Certified Wire and drawing 20 watts should not have a length of run more than 333 feet (101 meters). If Cresnet HP is used for the same run, its length could extend to 1250 feet (381 meters). NOTE: All Crestron certified Cresnet wiring must consist of two twisted pairs. One twisted pair is the +24V conductor and the GND conductor, and the other twisted pair is the Y conductor and the Z conductor. Strip and Tin Wire When daisy-chaining Cresnet units, strip the ends of the wires carefully to avoid nicking the conductors. Twist together the ends of the wires that share a pin on the network connector, and tin the twisted connection. Apply solder only to the ends of the twisted wires. Avoid tinning too far up the wires or the end becomes brittle. Insert the tinned connection into the Cresnet connector and tighten the retaining screw. Repeat the procedure for the other three conductors. Add Hubs Use of a Cresnet Hub/Repeater (CNXHUB) is advised whenever the number of Cresnet devices on a network exceeds 20 or when the combined total length of Cresnet cable exceeds 3000 feet (914 meters). Reference Documents The latest version of all documents mentioned within the guide can be obtained from the Crestron Web site (www.crestron.com/manuals). This link will provide a list of product manuals arranged in alphabetical order by model number. List of Related Reference Documents DOCUMENT TITLE Best Practices for Installation and Setup of Crestron RF Products CEN-RFGW-EX infiNET EX™ Wireless Gateway Further Inquiries If you cannot locate specific information or have questions after reviewing this guide, please take advantage of Crestron's award winning customer service team by calling Crestron at 1-888-CRESTRON [1-888-273-7876]. You can also log onto the online help section of the Crestron Web site (www.crestron.com/onlinehelp) to ask questions about Crestron products. First-time users will need to establish a user account to fully benefit from all available features. Future Updates As Crestron improves functions, adds new features, and extends the capabilities of the MLX-3, additional information may be made available as manual updates. These updates are solely electronic and serve as intermediary supplements prior to the release of a complete technical documentation revision. 20 • infiNET EX™ LCD Handheld Remote: MLX-3 Operations Guide – DOC. 7134](https://usermanual.wiki/Crestron-Electronics/LX3.User-manual-1/User-Guide-1375361-Page-24.png)