Current CP16A Remote User Manual Manual
Current Products Corp. Remote Manual
UserManual.wiki
>
Current
>
CP16A User Manual
Manual
Navigation menu
Upload a User Manual
Namespaces
Wiki Guide
HTML
PDF
Info
Views
User Manual
Discussion / Help
Navigation
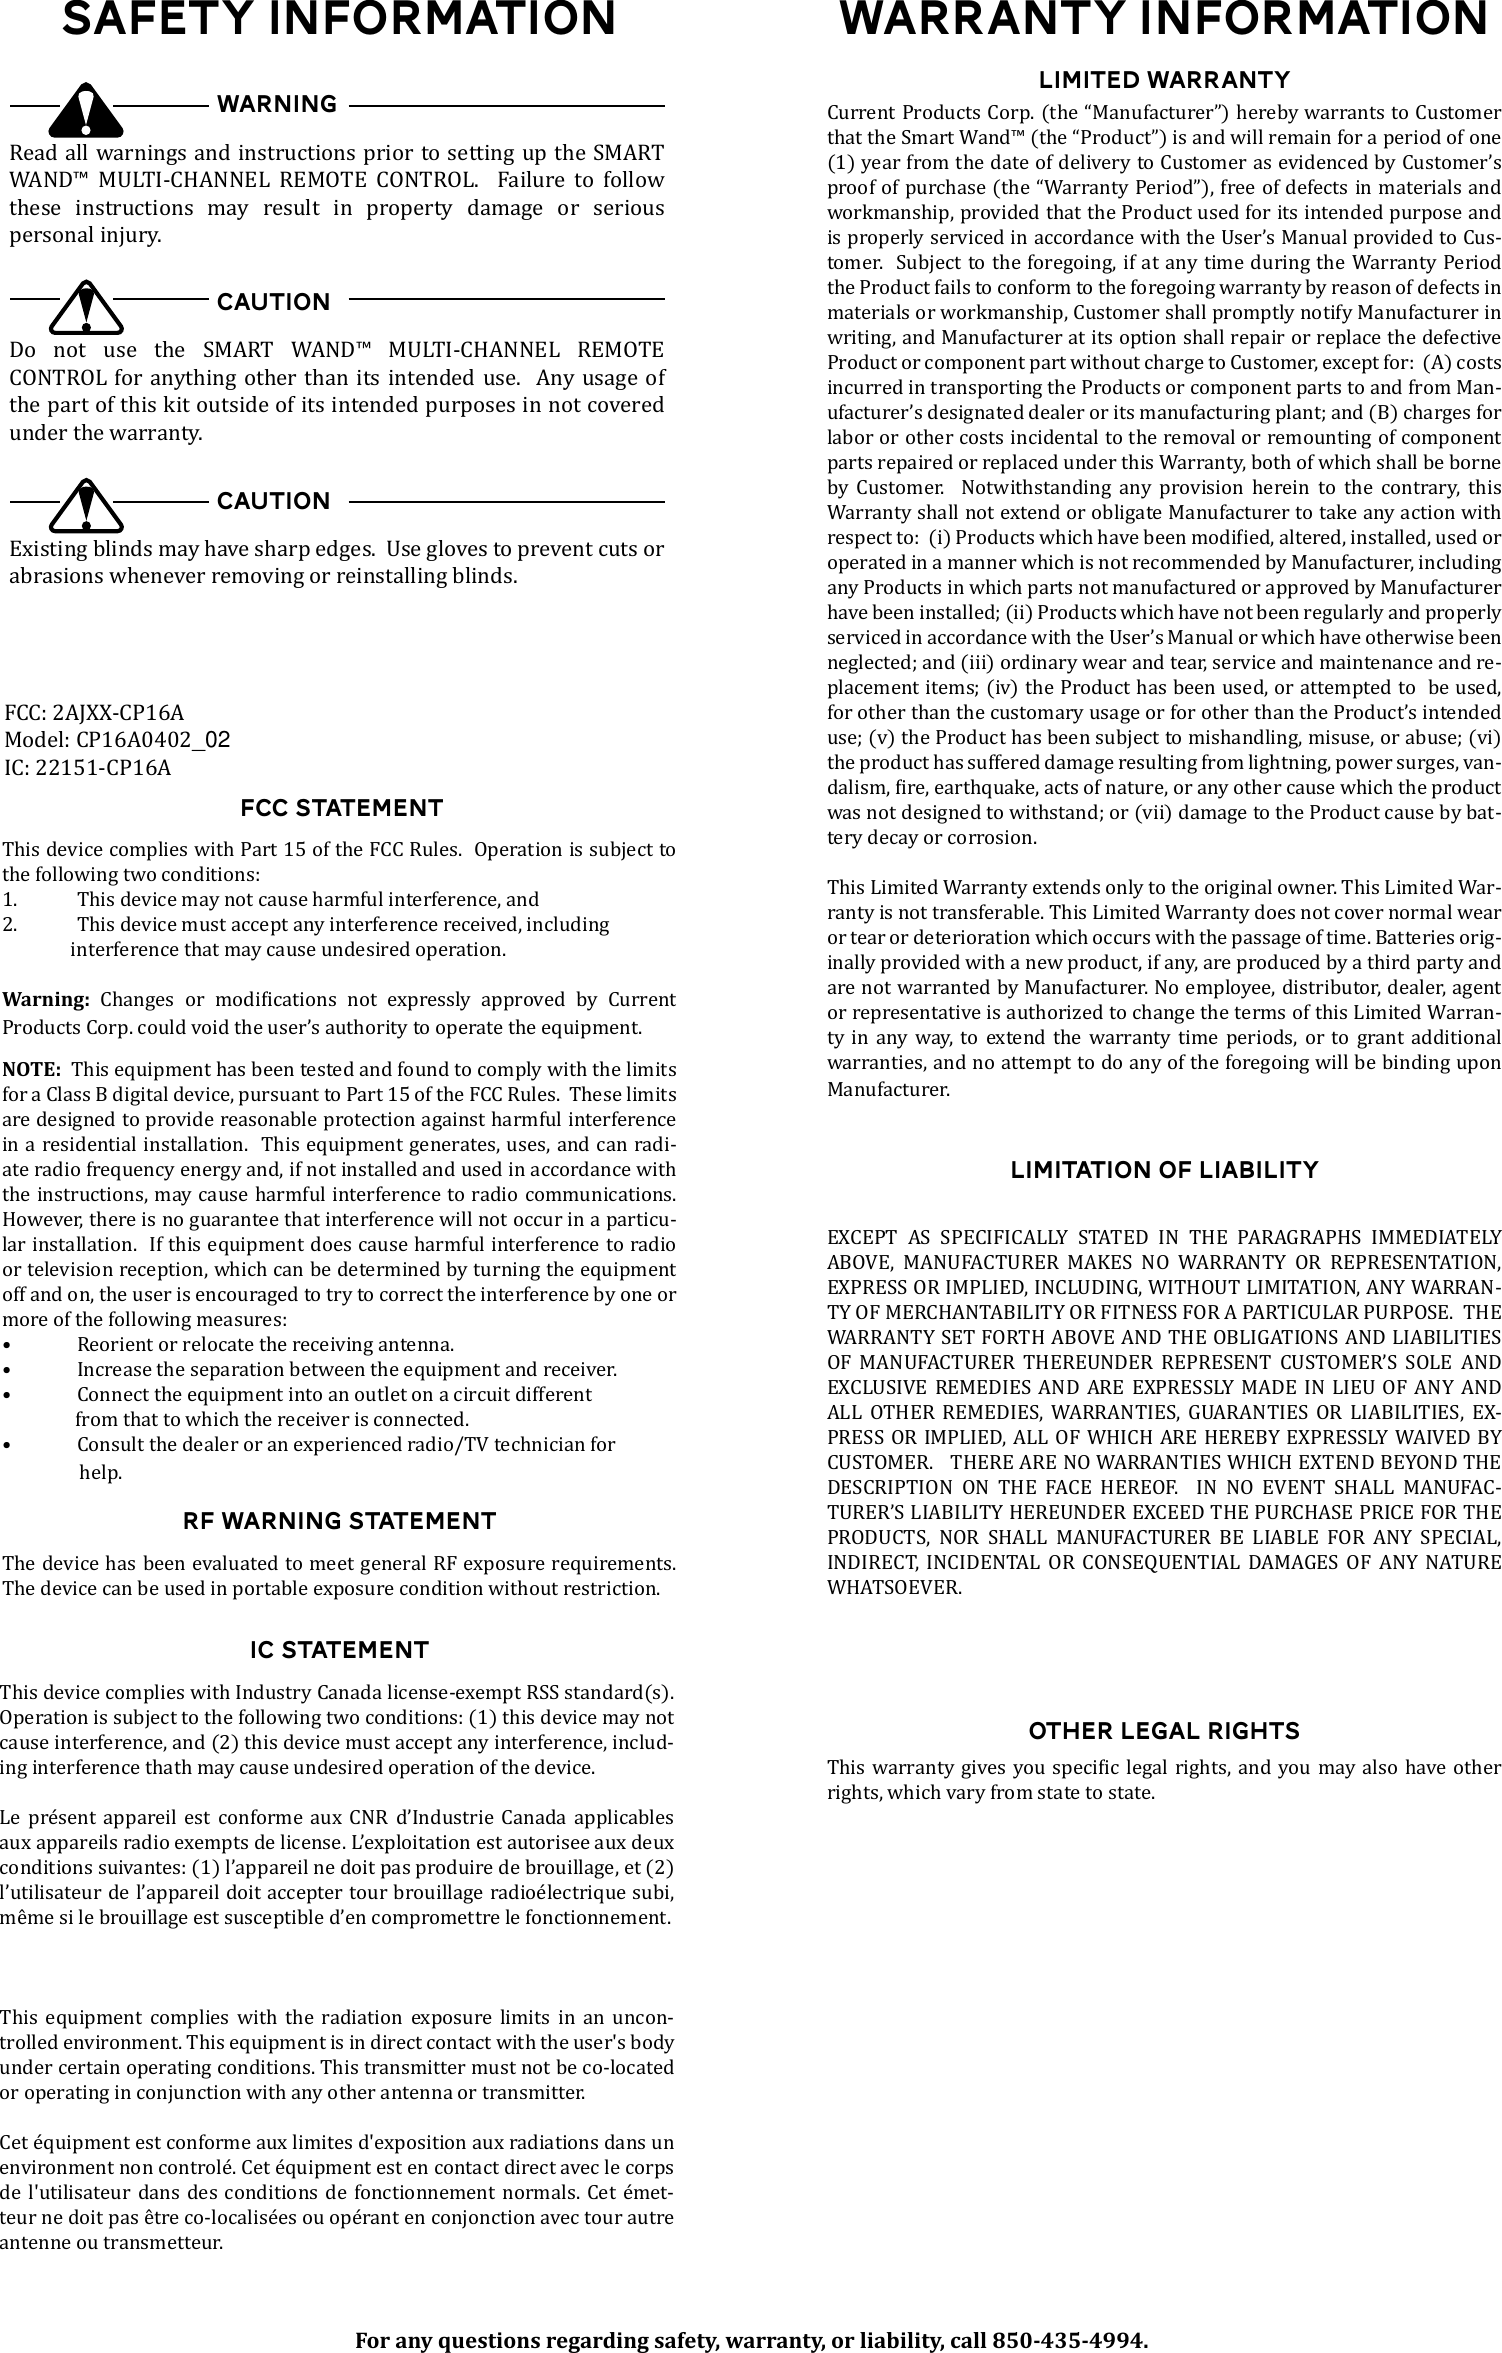
![REMOTE CONTROL Quick USER GUIDEThe optional remote control provides the user with added functionality for controlling their blinds. The remote control contains single push ability to move the slats open, closed, or to your favorite position. The remote also customized control.Tilt Up/ LeftTilt Down/ RightChannel Selector FavoriteFull Up/ LeftFull OpenFull Down/ RightChannel LEDs14325CH14325CH1432514325REMOTE BUTTON DESCRIPTIONSTILT TOGGLE and stop at the next position setting. There are seven (7) position settings from the full up to the full down position. The user may also press and hold the toggle button until the slats get to the desired position, then release the toggle.FULL UP/ LEFTMoves the slats to the full up position for horizontal blinds or full right position for vertical blinds. FULL OPENMoves all slats to the full open position.FULL DOWN/ RIGHTMoves all slats to the full down position for horizontal blinds, or full left position for vertical blinds. FAVORITEThe user can program this button to any position they choose to be their most preferred position; however, if left unchanged it will move the slats to approximately half way between the full open and the full down/ left position. CHANNEL SELECTORUsed to customize control of multiple blinds on a single remote. The currently selected channel is indicated by the Channel LEDs. Pressing the CHANNEL Button once will display the current channel. Pressing it again will switch to the next channel. When all LEDs are lit, the remote is selected to broadcast on all channels. SETTING UP THE REMOTE Determine which blind(s) you wish to pair to the handheld remote.Press the PROGRAMMING BUTTON on each SMART WAND™ you wish to pair to the remote until you hear a SINGLE BEEP (1) [Fig. 1], then release.Figure 1; Push and Hold14325CH14325CH1432514325Figure 2; Push Channel Buttonthe desired channel you wish to set [Fig. 2]. Figure 3; Press in TackUse a tack or pen to press and release the PAIRING button on the back of the remote [Fig. 3] When this button has been pressed, the LED’s on the To PAIR, press the top left button on the tilt toggle [Fig. 4]. The blind(s) will jog down and up showing that it has received the command and completed the process. If you ever need to unpair, you can repeat the same steps and press the bottom button on the tilt toggle to unpair [Fig. 5].14325CH14325CH1432514325Figure 4; Push To Pair14325CH14325CH1432514325Figure 5; Push to UnpairPAIRING THE REMOTEPairing to the remote can be performed before or after installation and programming of the SMART WAND™.SETTING THE FAVORITE BUTTONThe FAVORITE Button allows the user to program a slat position unique to the user which moves all slats included on that channel to the user’s favorite position.To program the FAVORITE Button, twist the SMART WAND™ until the desired position is reached. Figure 6; Push and Hold Programming ButtonNext, press and hold the PROGRAMMING BUTTON on the SMART WAND™ until you hear a TRIPLE BEEP (3), then release. [Fig. 6].Your FAVORITE Button is now programmed to move that blind to your favorite position. Each SMART WAND™ can be set to have different favorite positions. After the SMART WAND™ is set, test by moving your blinds, then pressing the FAVORITE Button. All blinds on that channel should move to their programmed favorite position. For additional help during Remote Control programming and set up, visit www.currentproductscorp.com/support, where you can read our other support materials or view our instructional videos. Or, you can reach our customer service department at 850-435-4994. 1995 Hollywood Ave.Pensacola, FL 32505850-435-4994Changing the BatteriesThe SMART WAND Remote is powered using (1) 3V 2032 coin cell lithium battery. back off of the remote body. Once removed, the coin cell battery should be visable. Slide the coin cell battery down until it comes out of the battery holster. Inset the new battery by sliding it up into the battery holster. Replace the remote backing.](https://usermanual.wiki/Current/CP16A/User-Guide-3822012-Page-1.png)