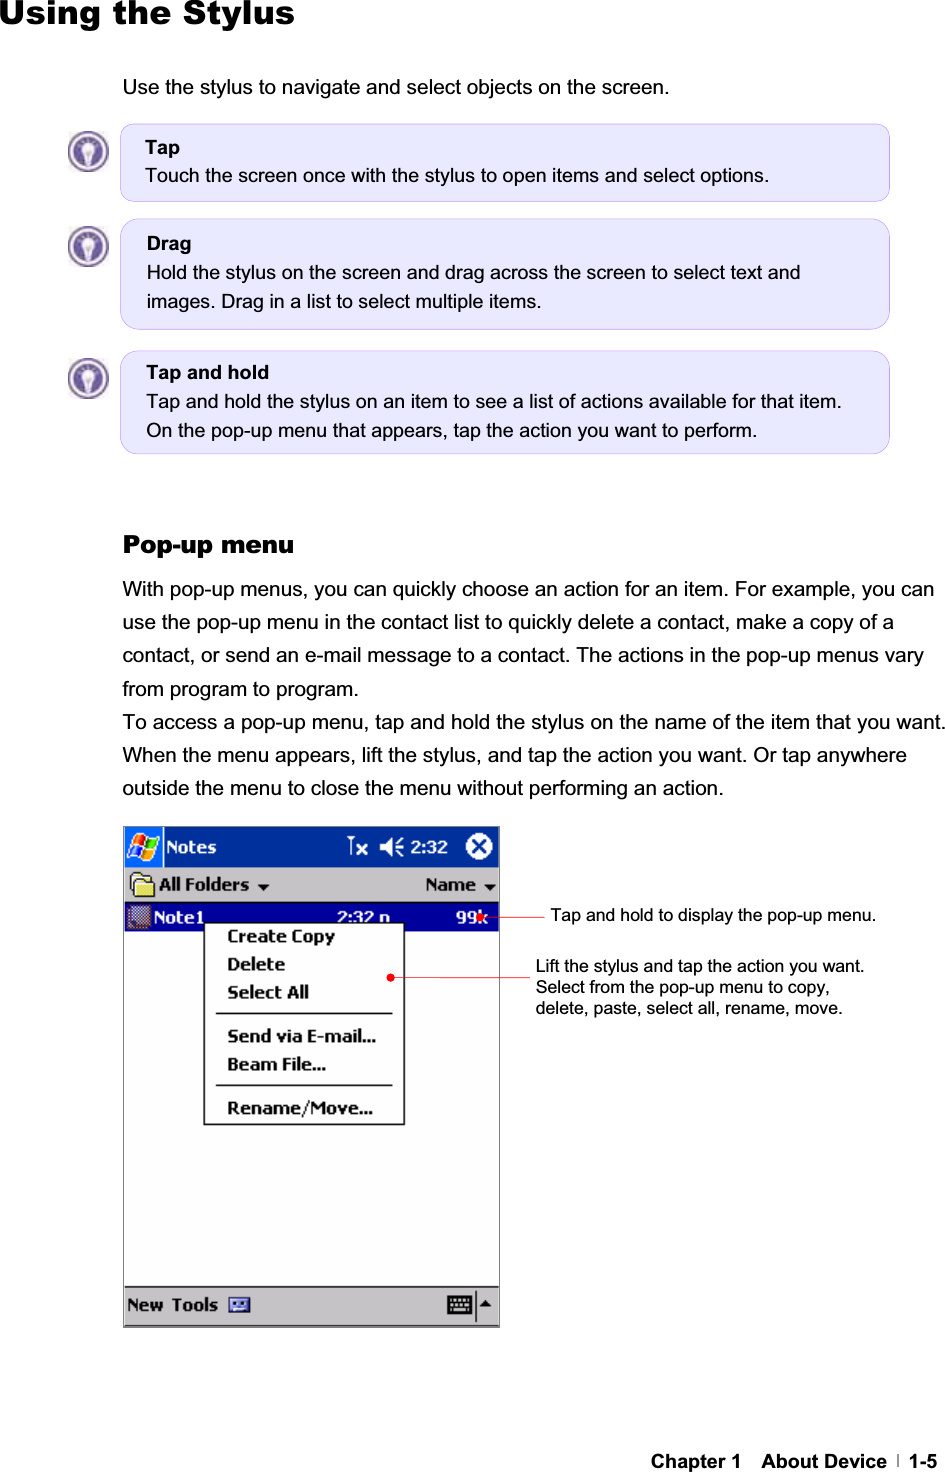
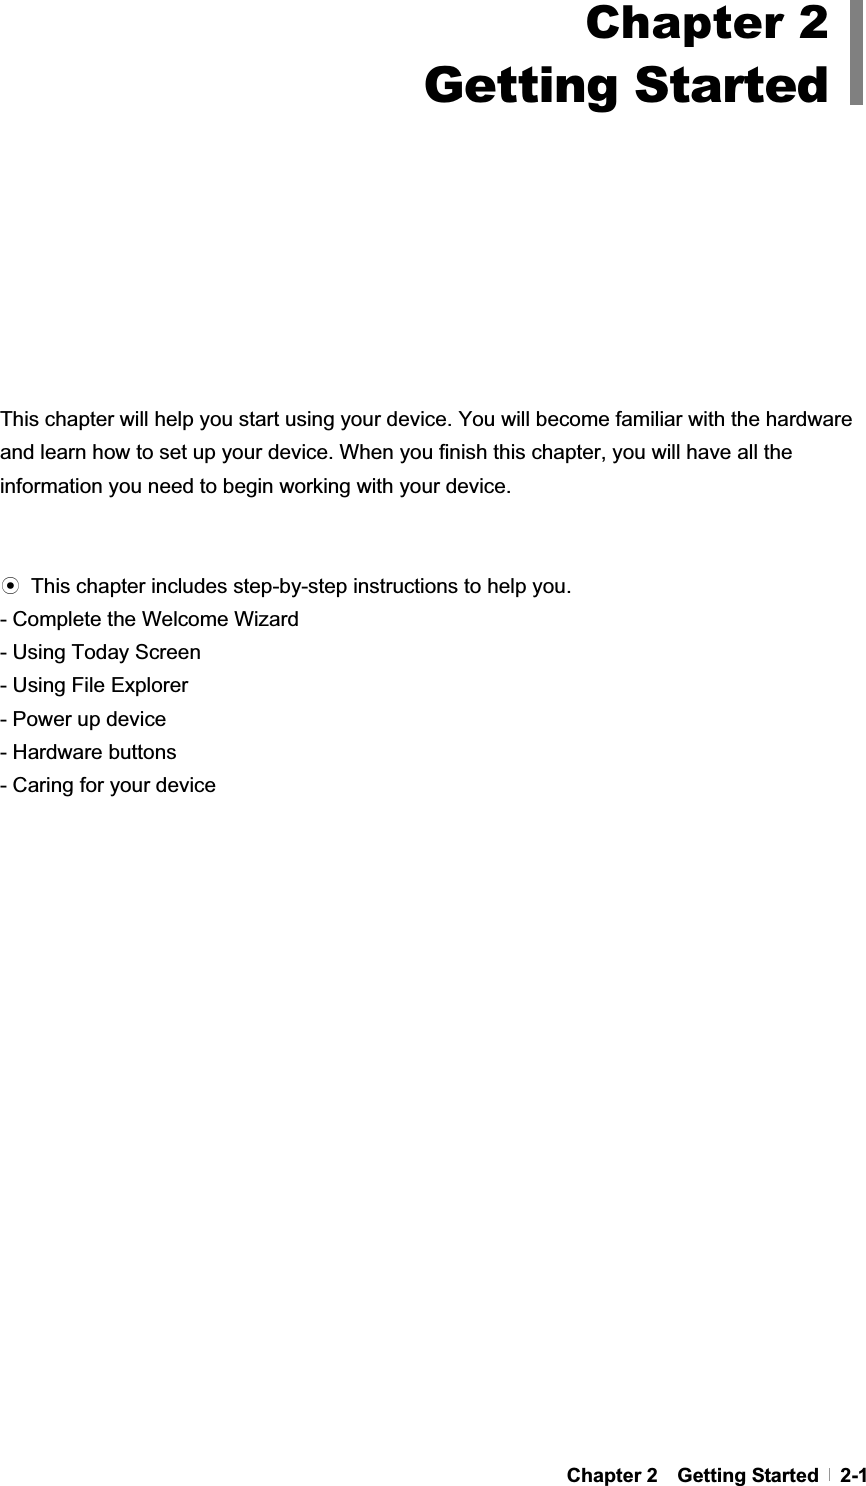
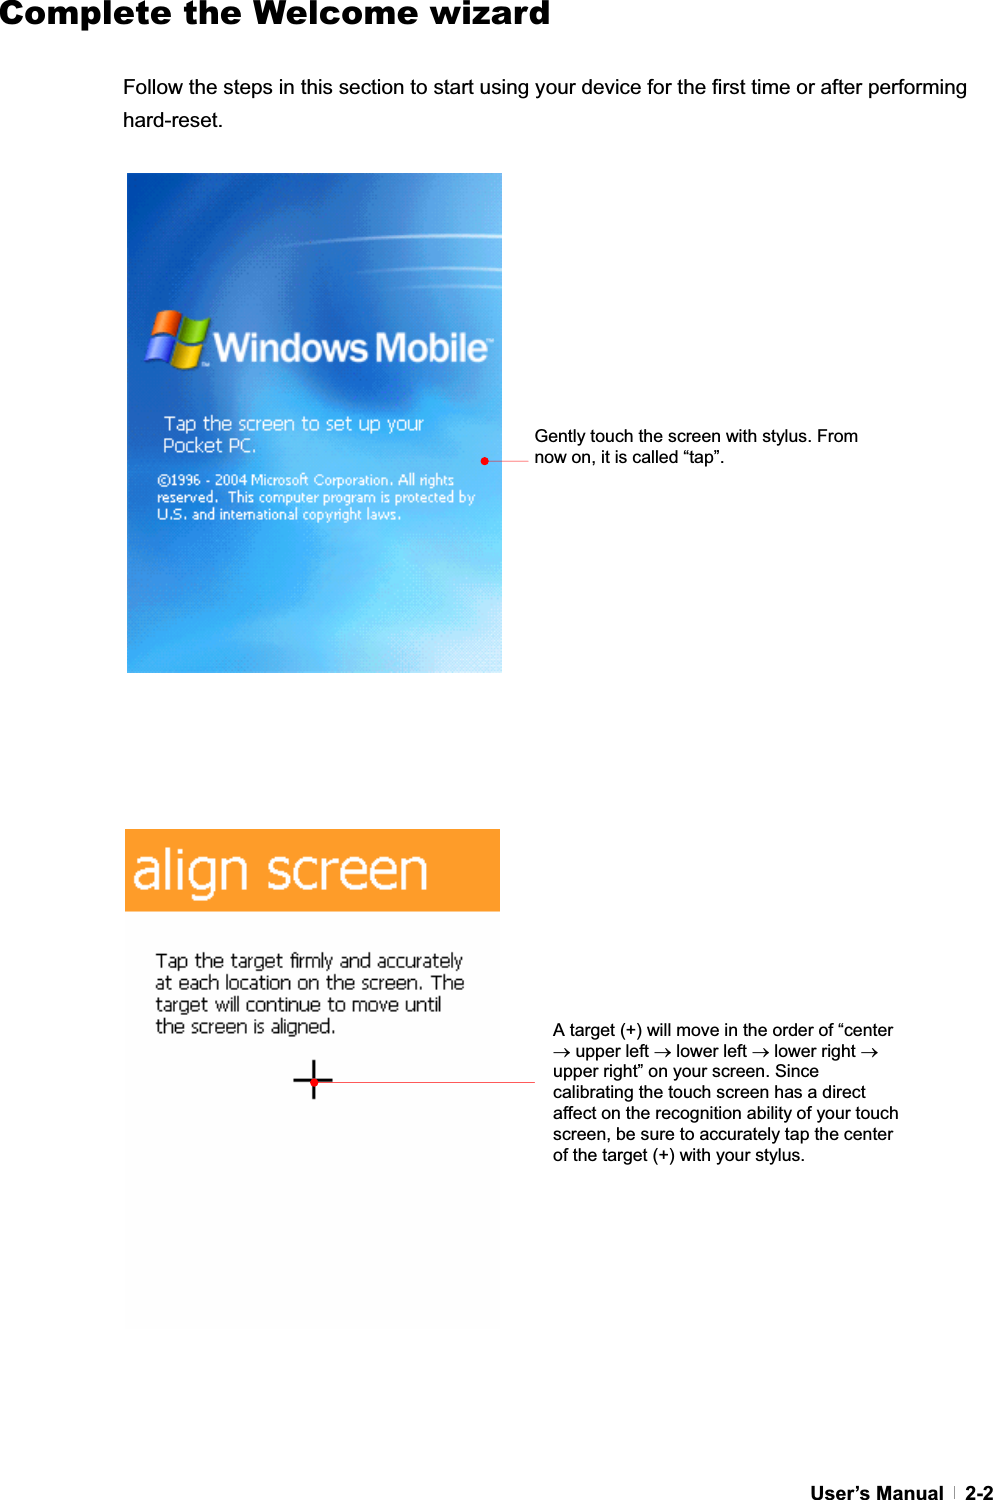
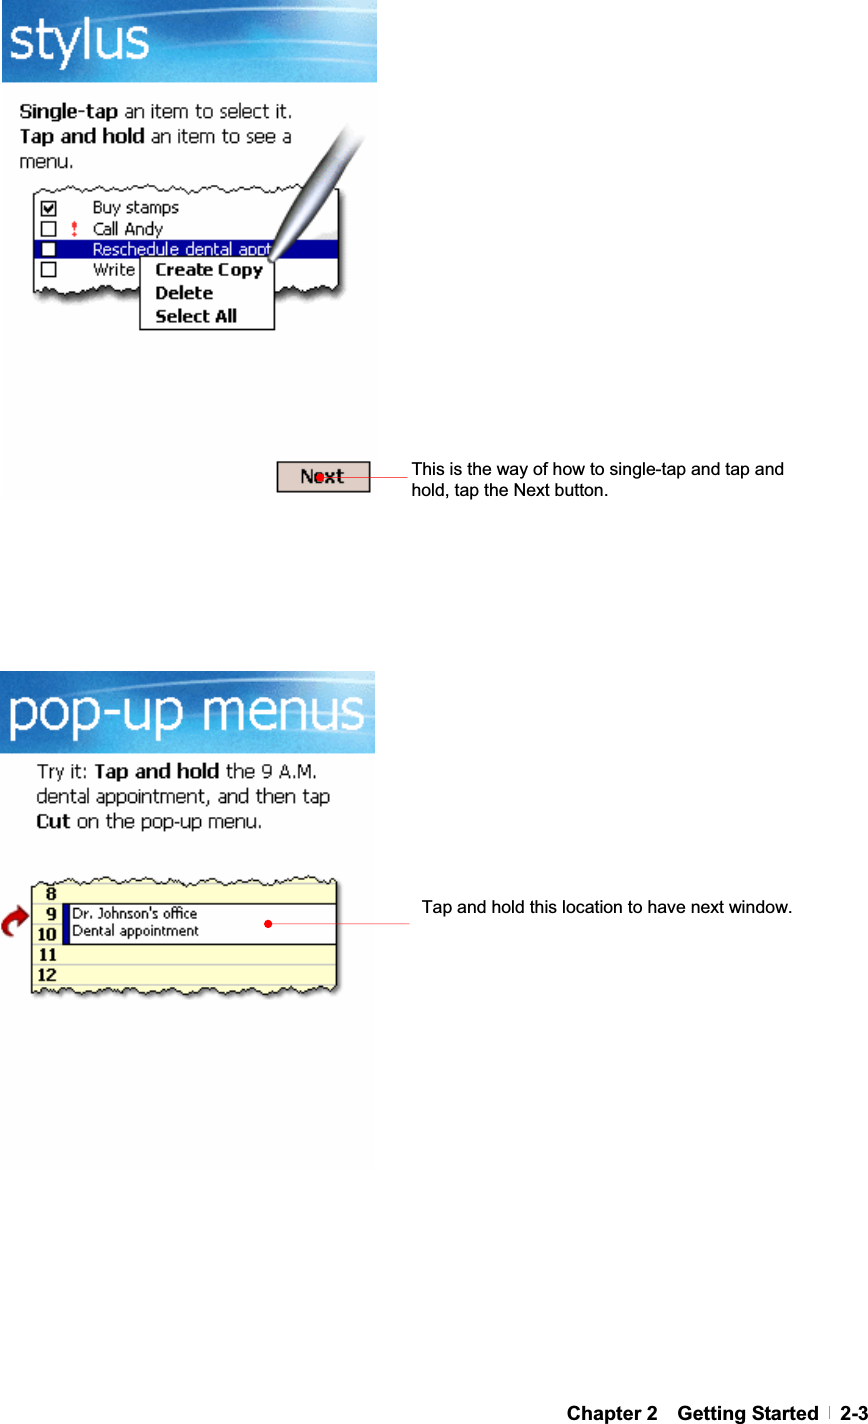
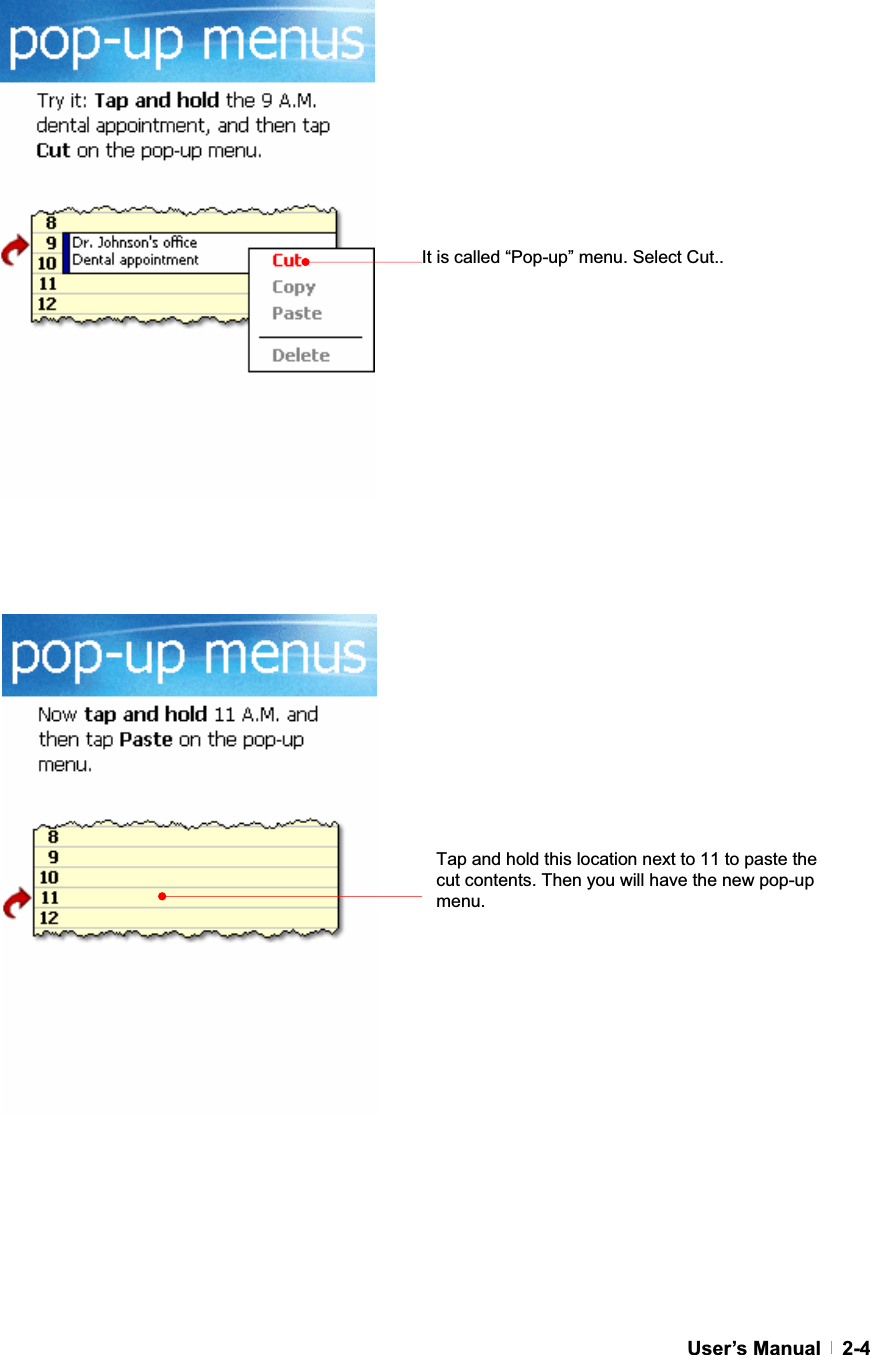
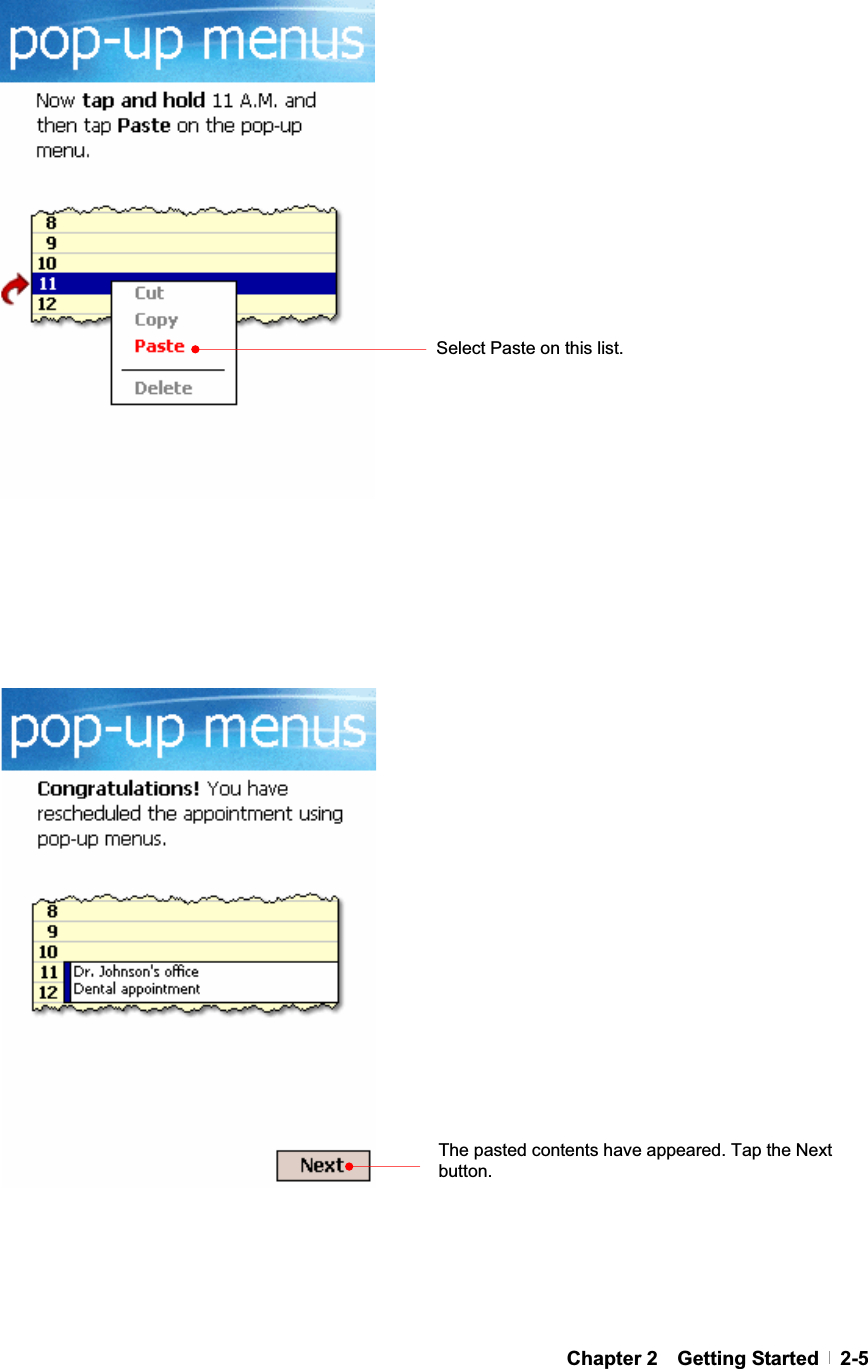
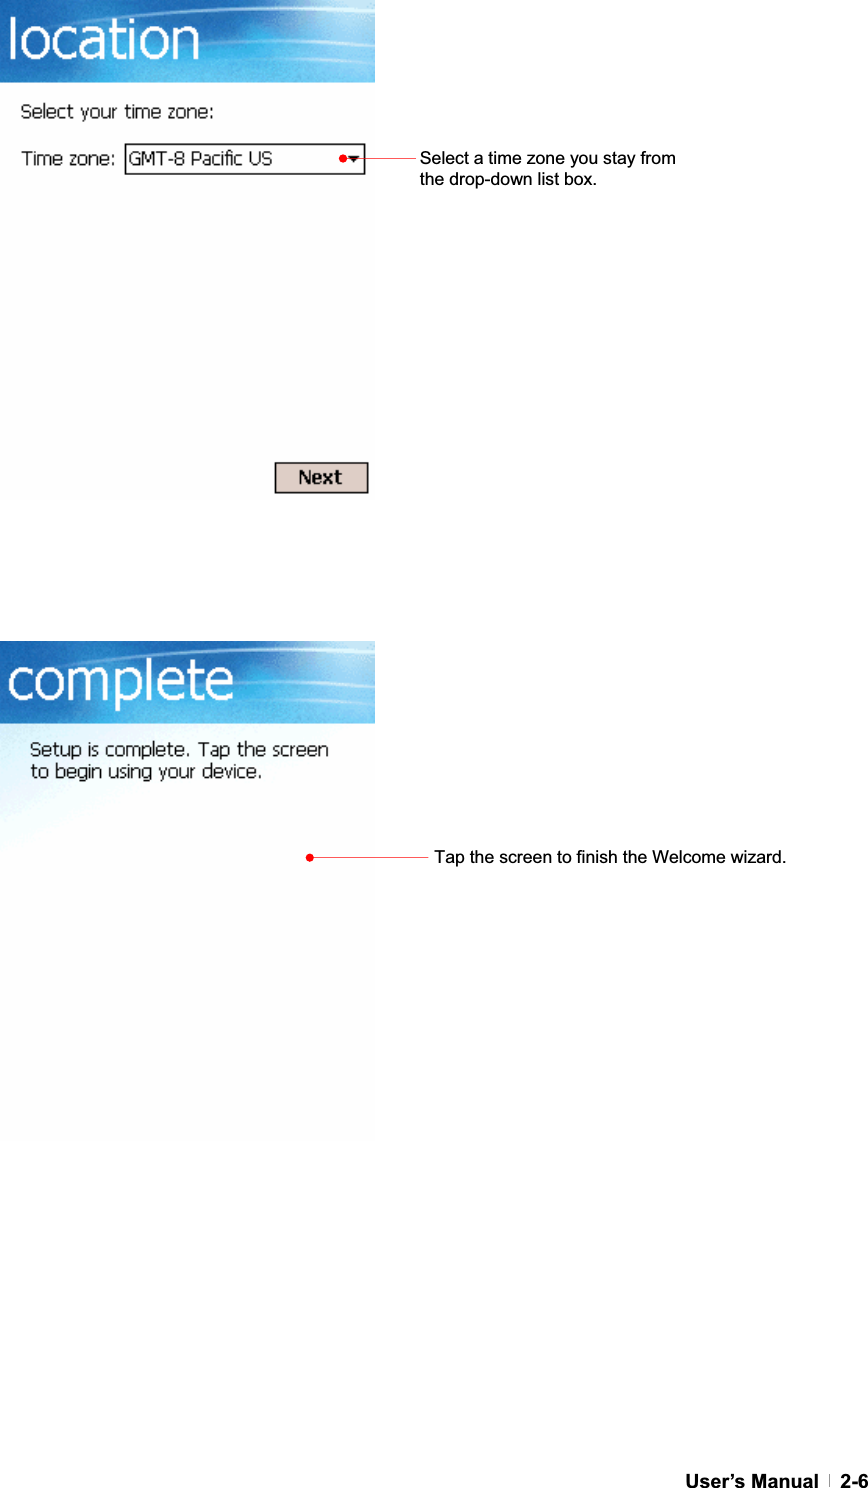
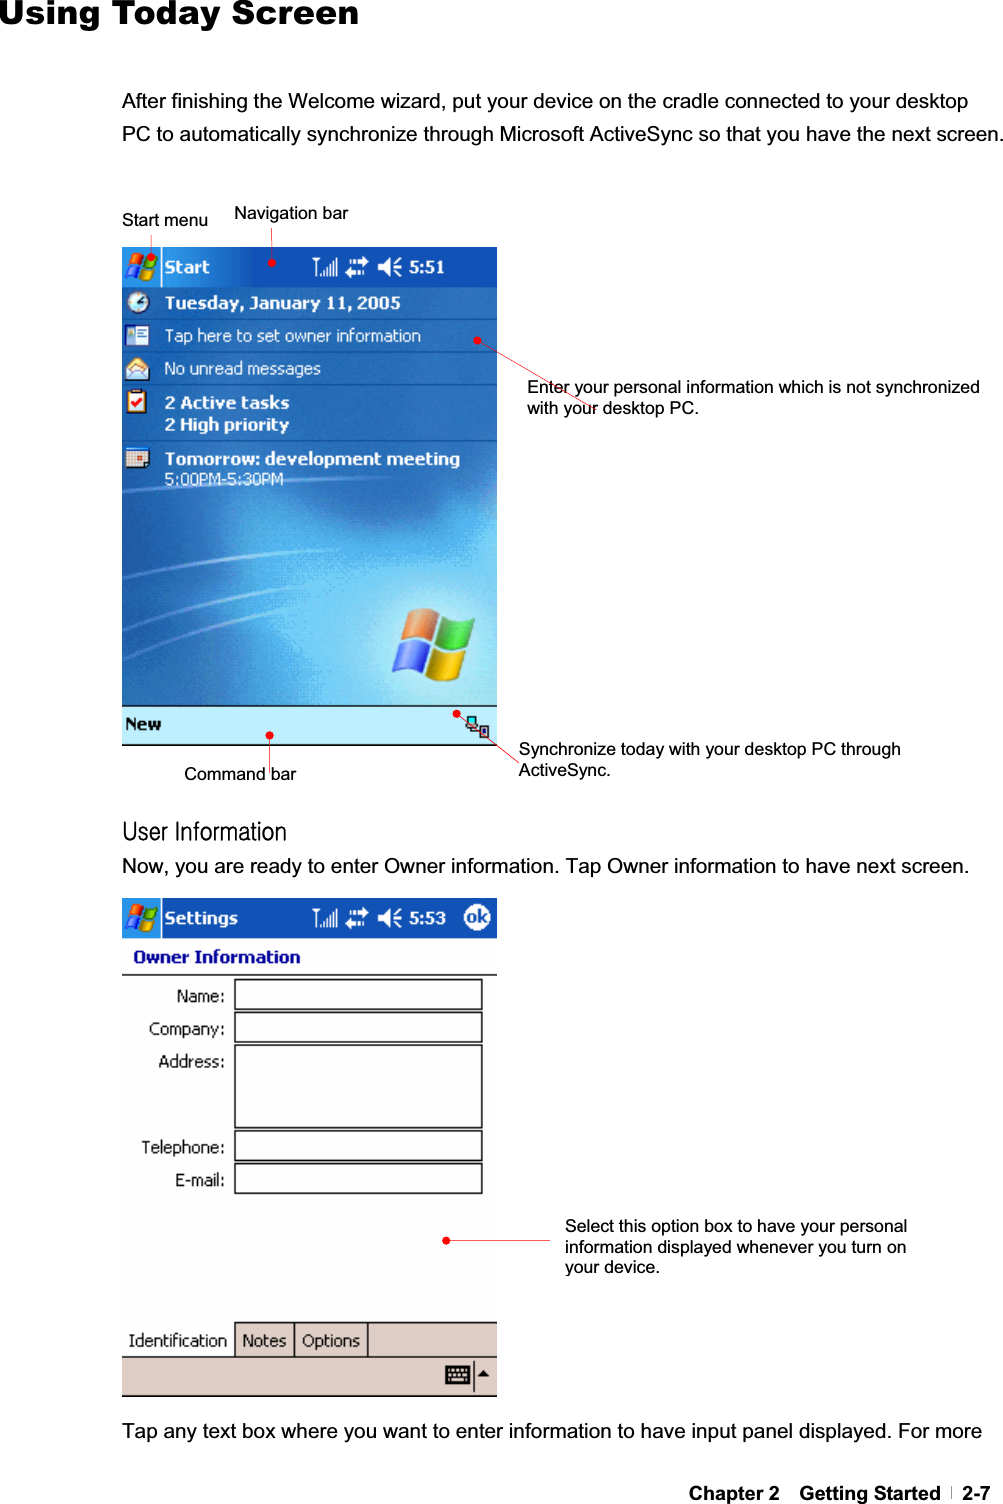
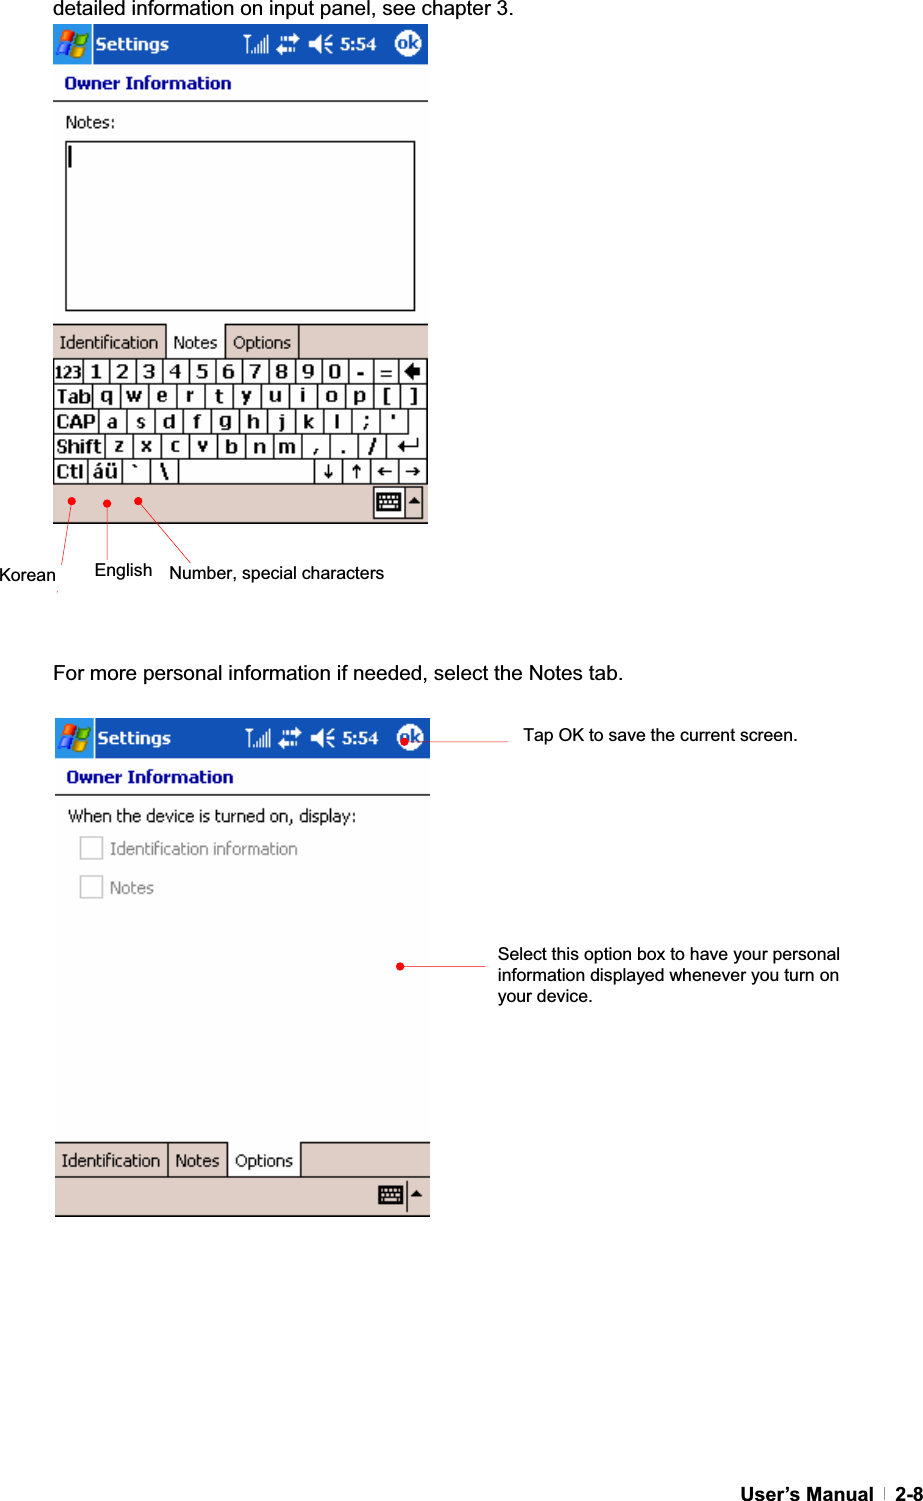
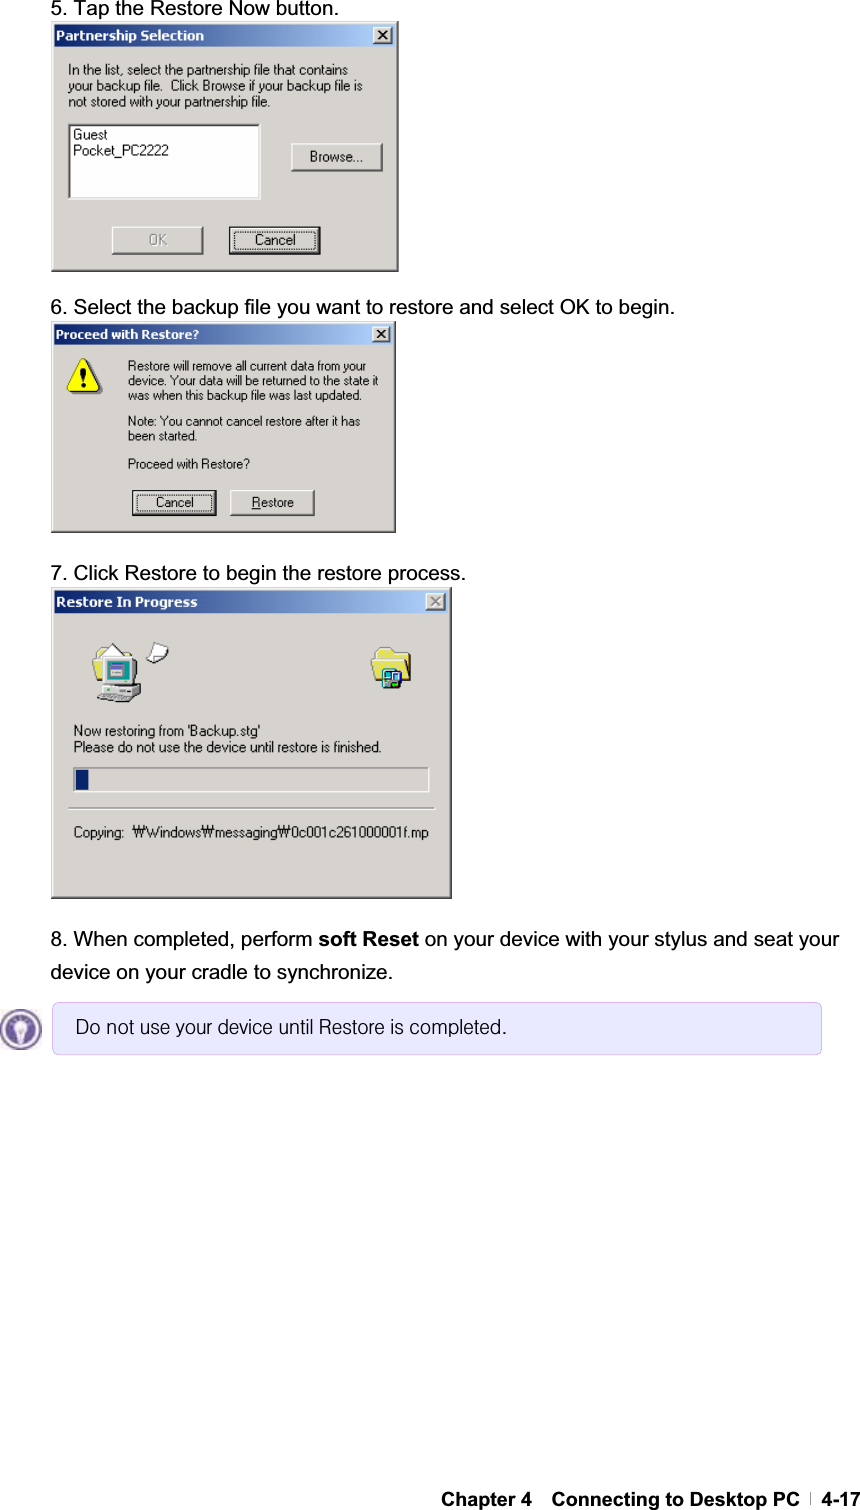
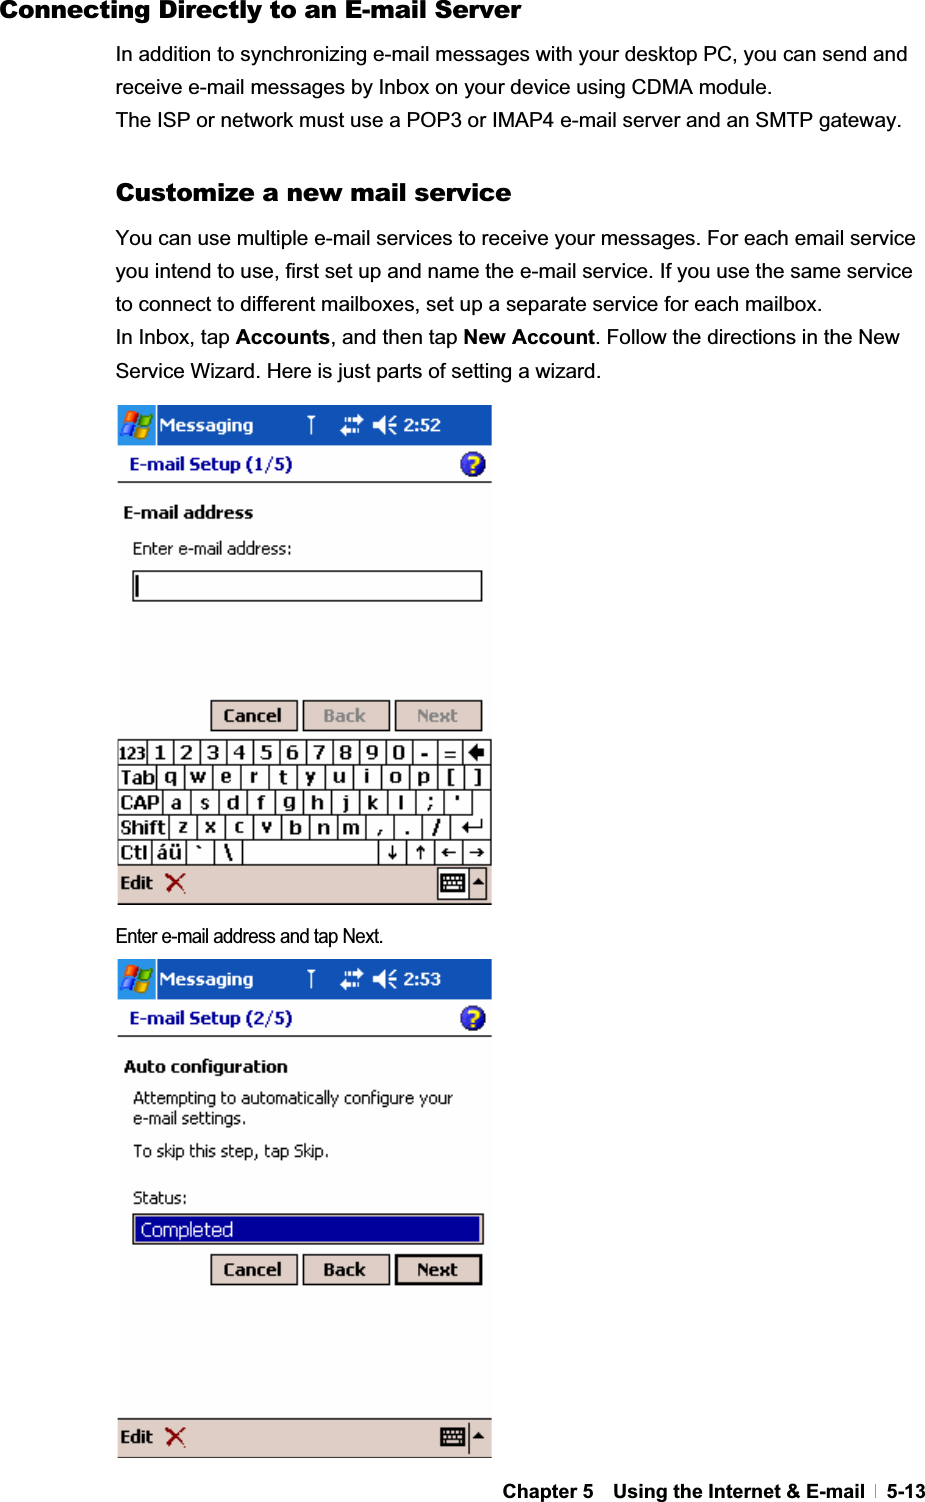
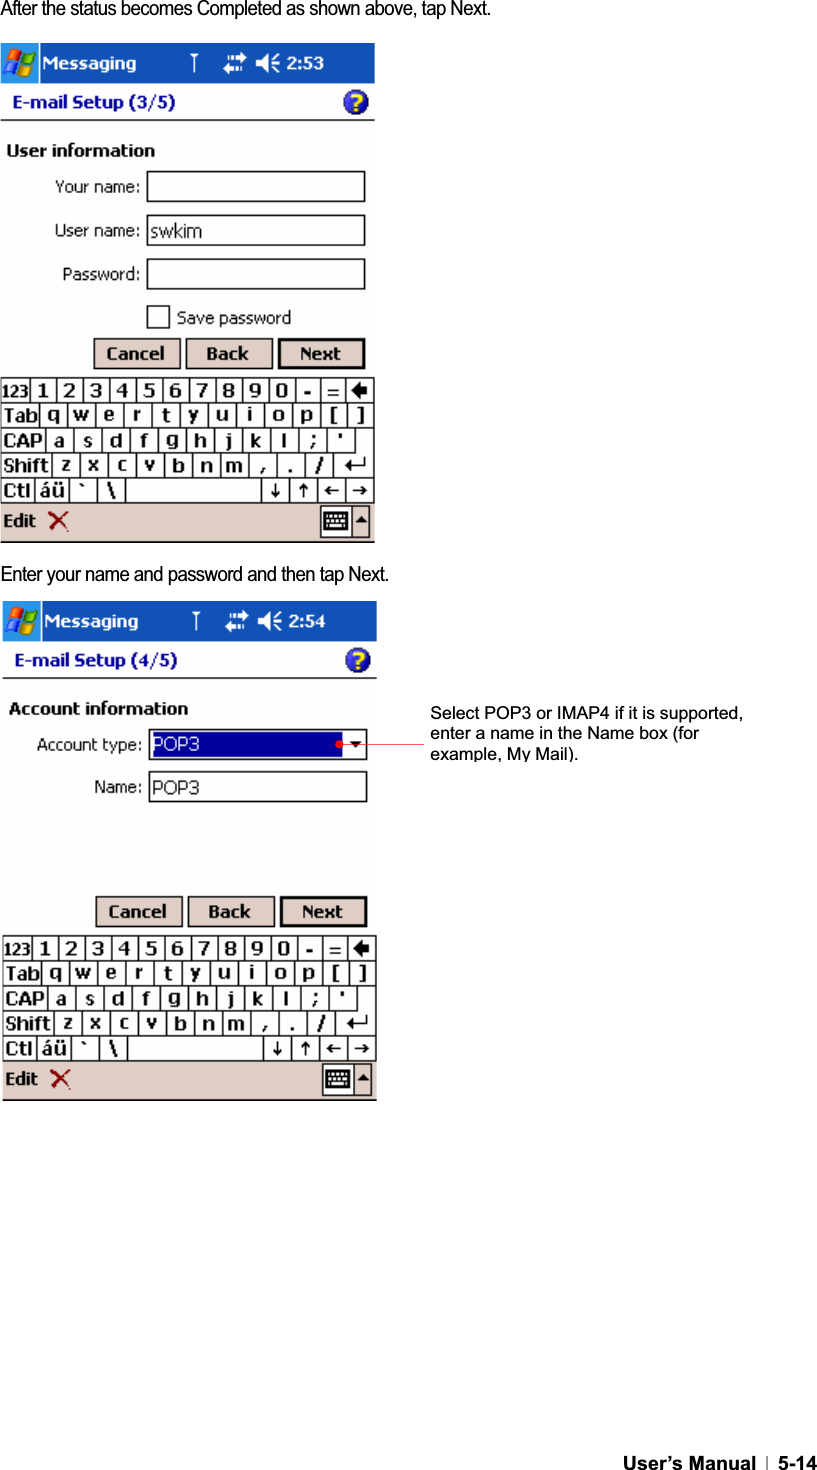
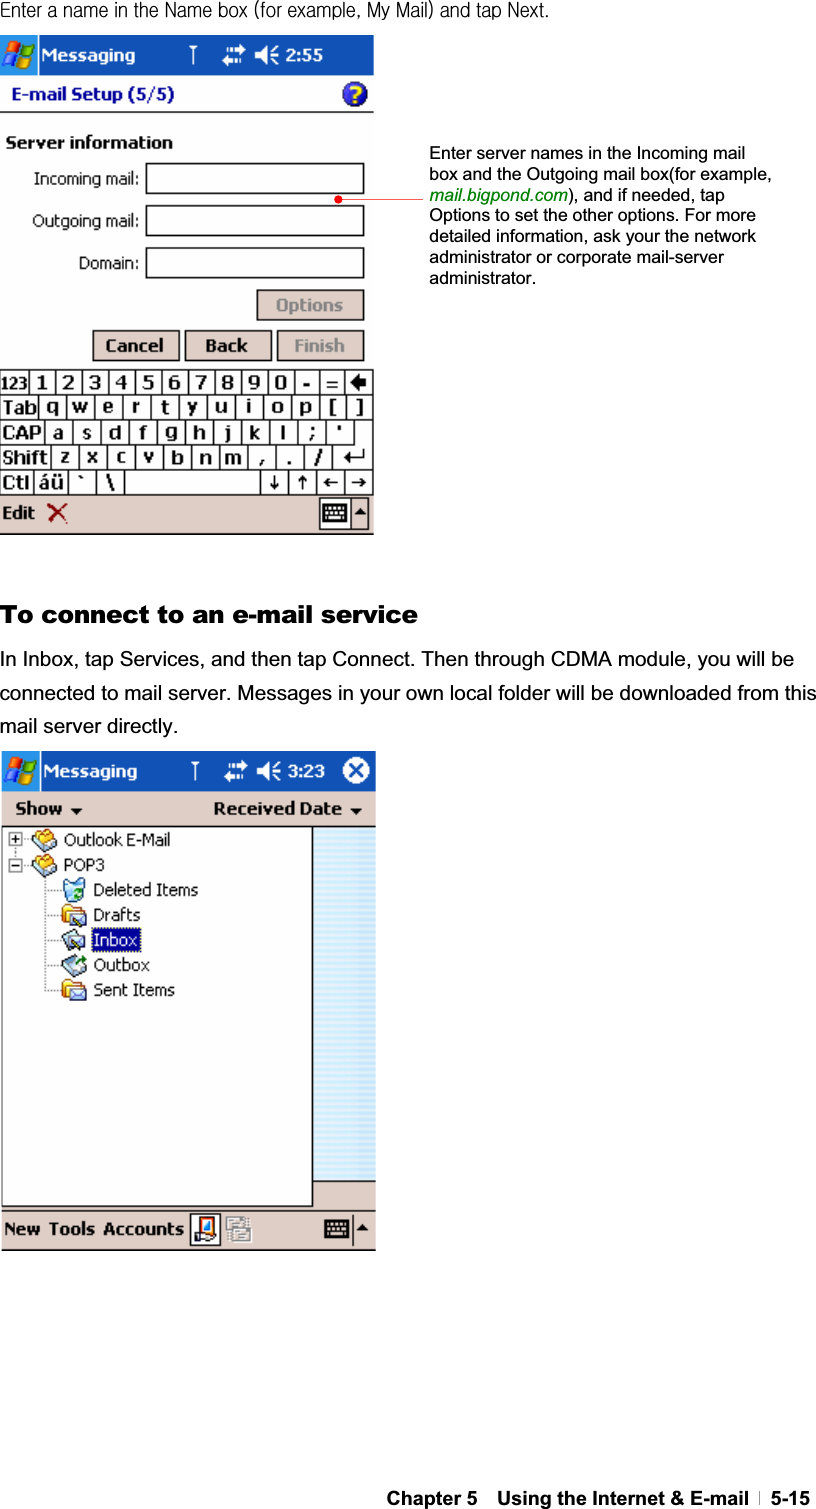
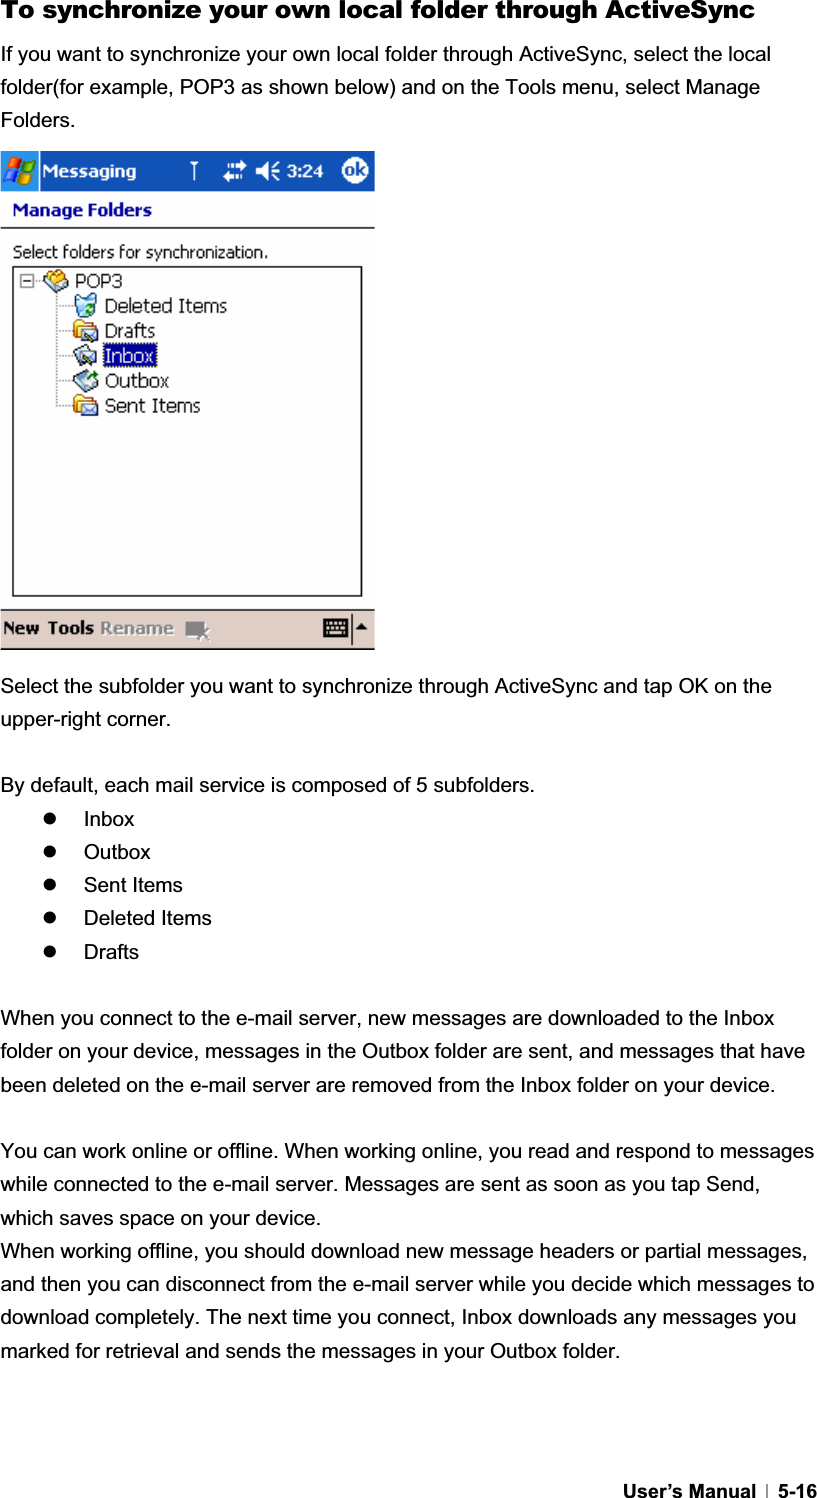
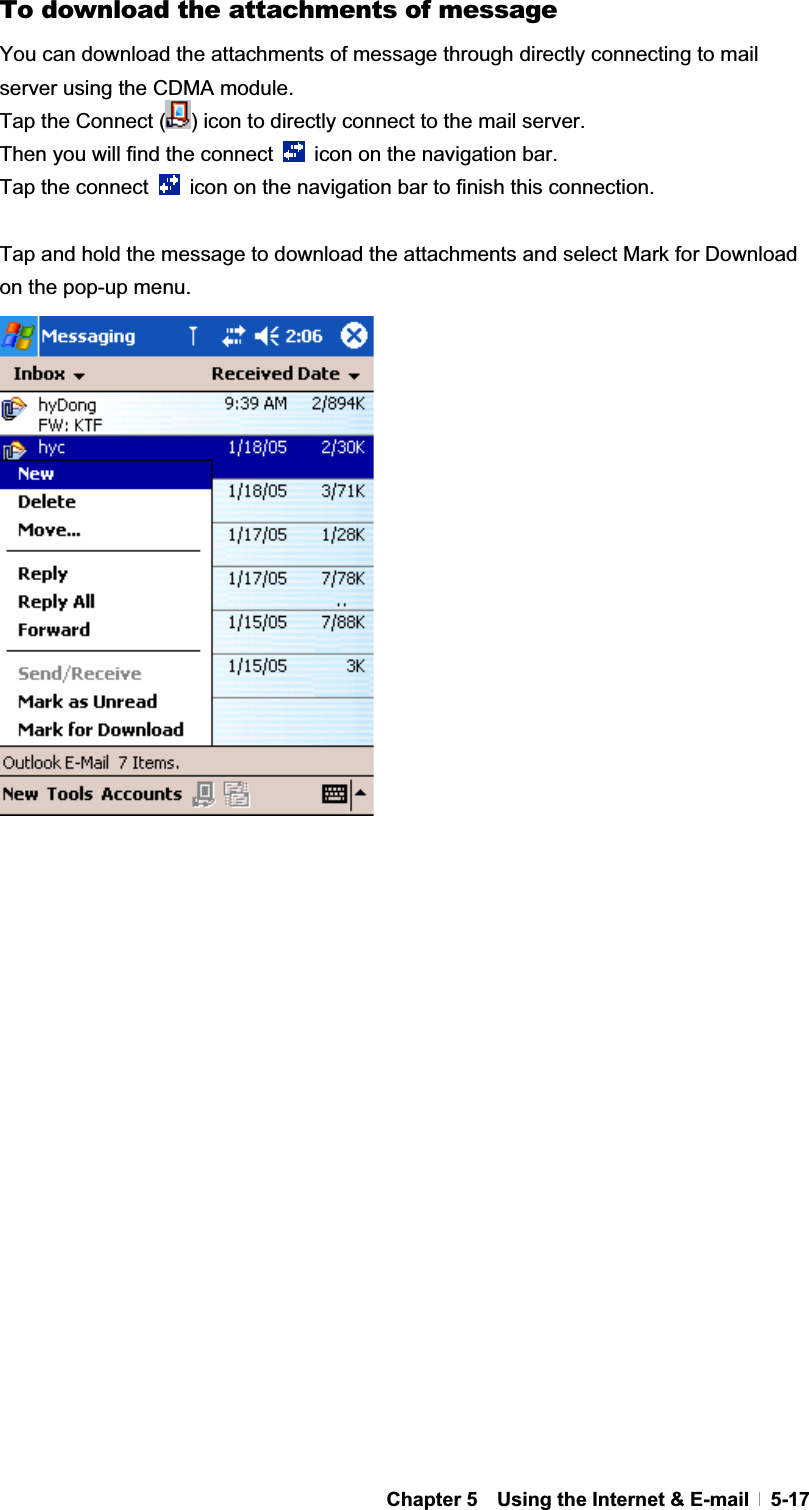
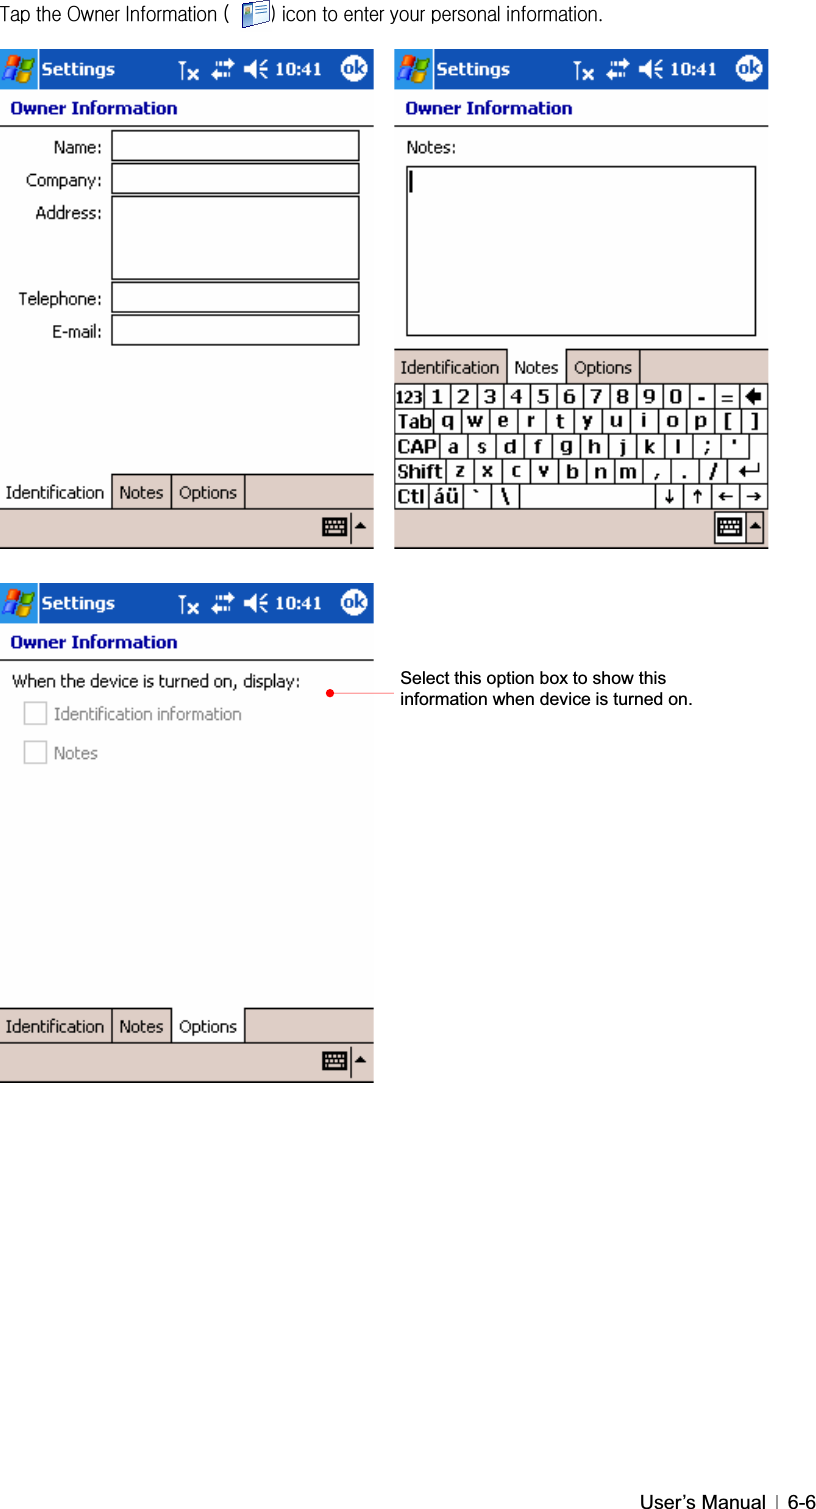
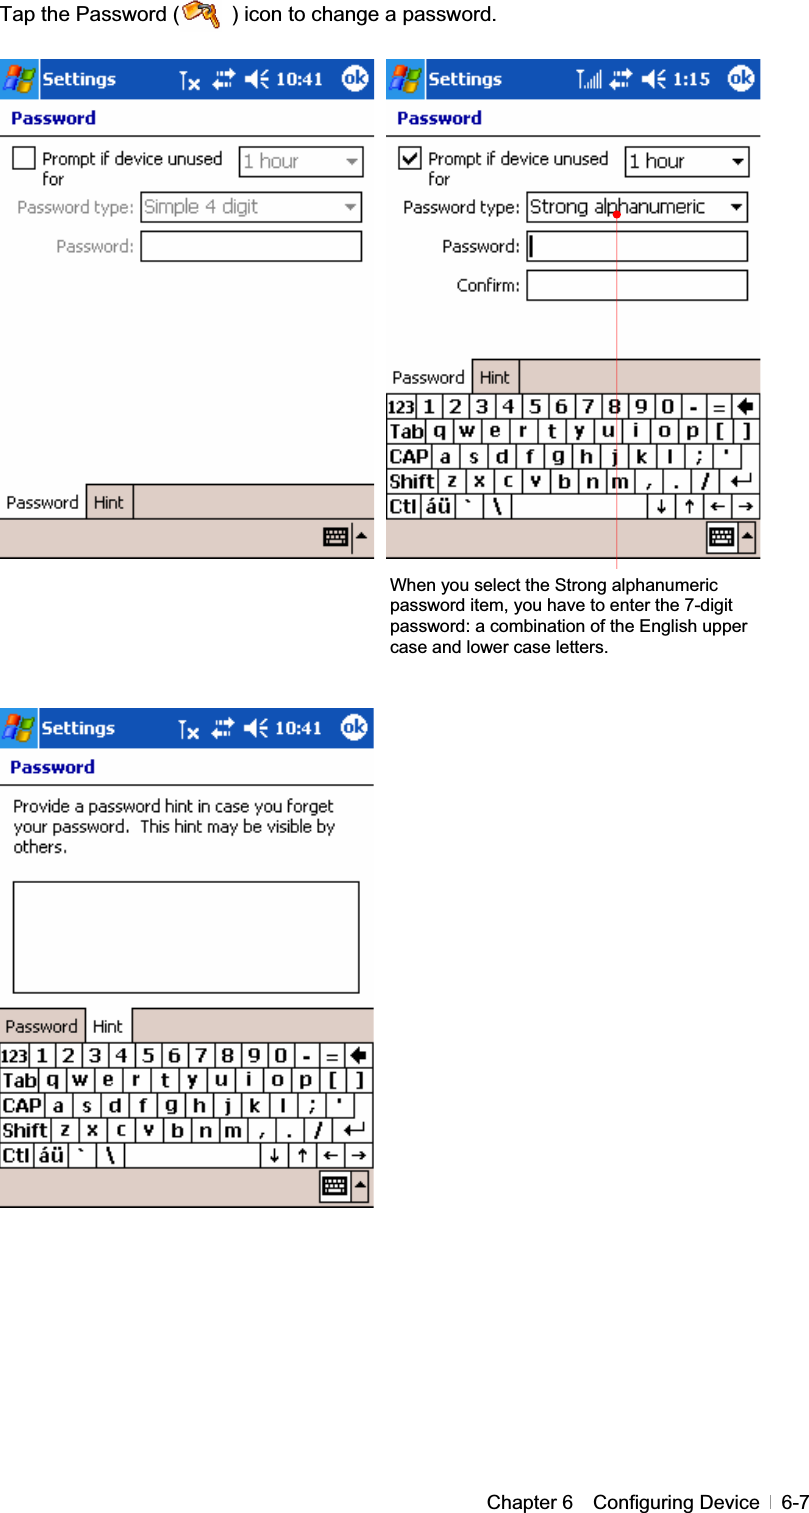
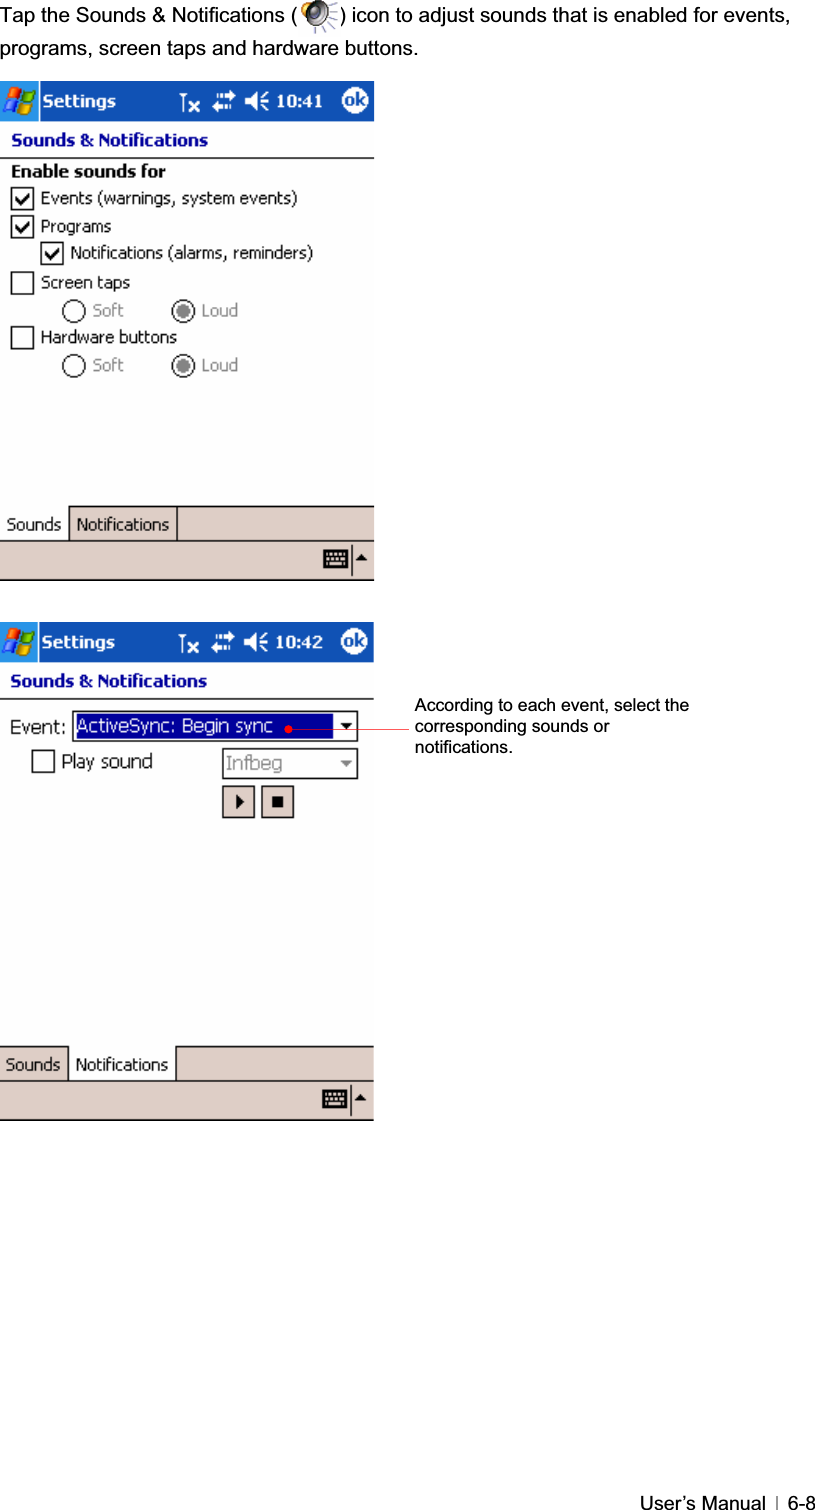
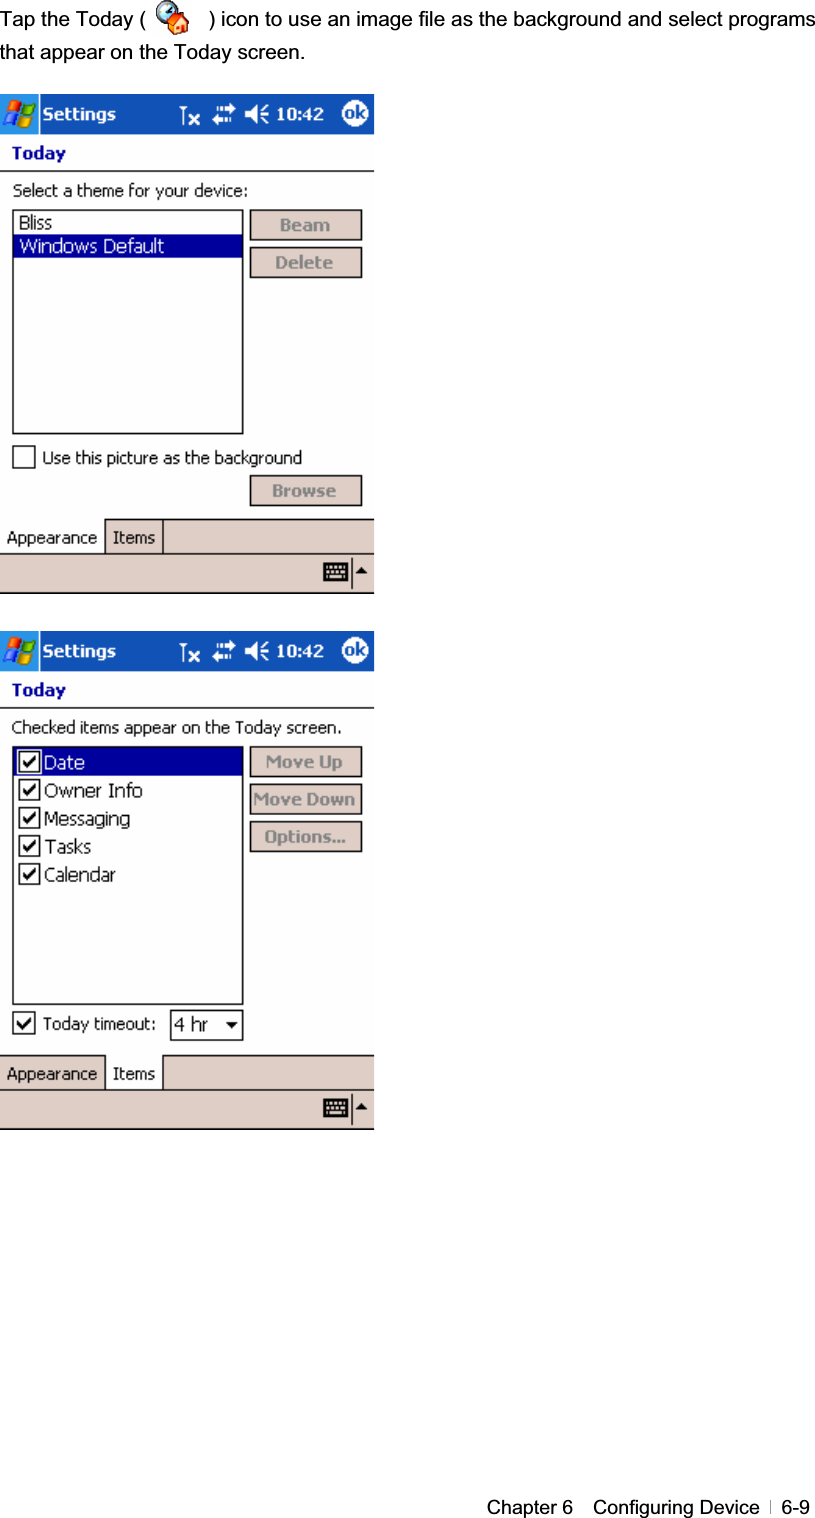
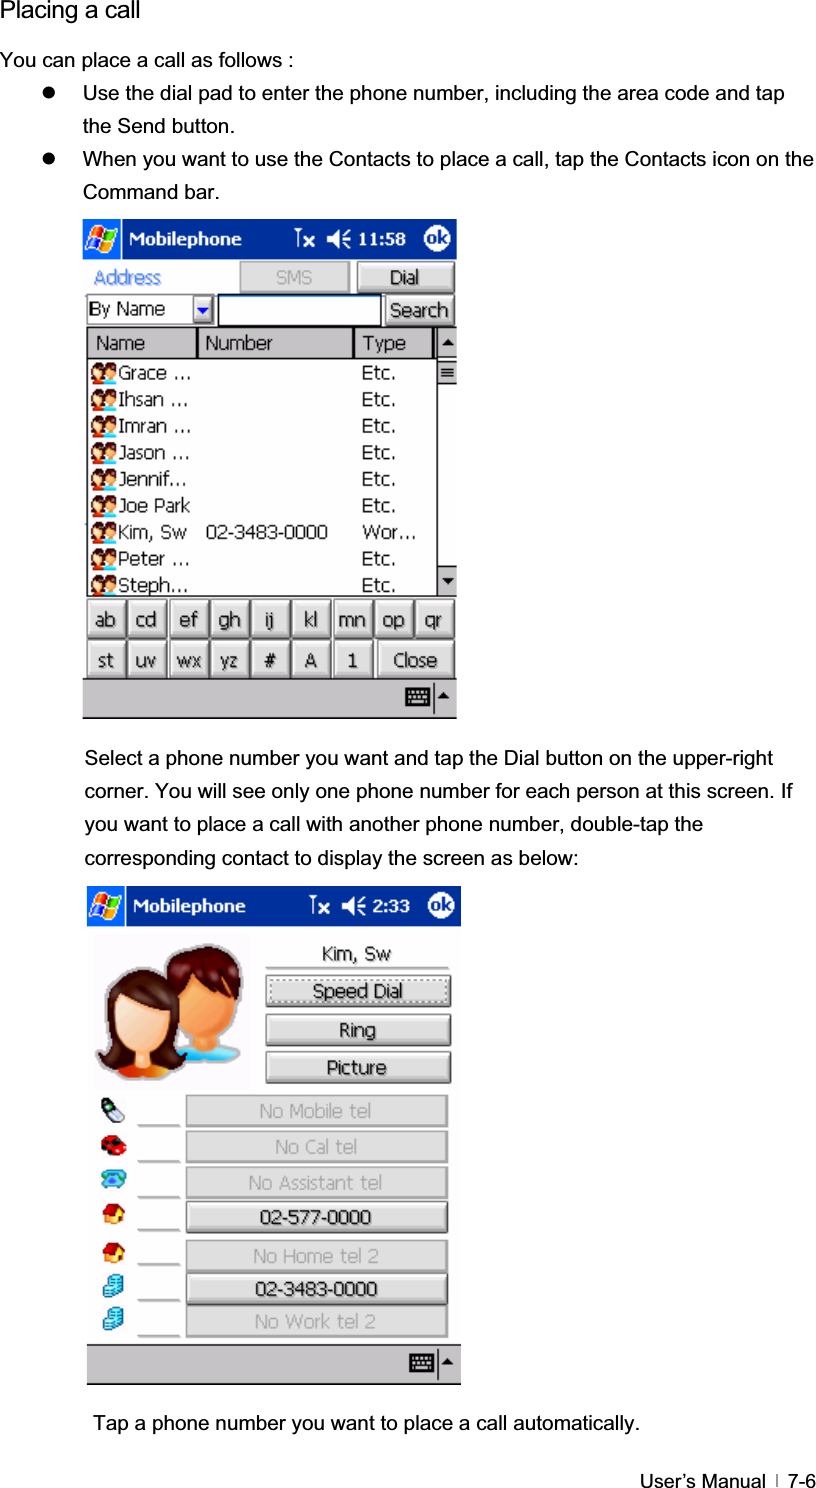
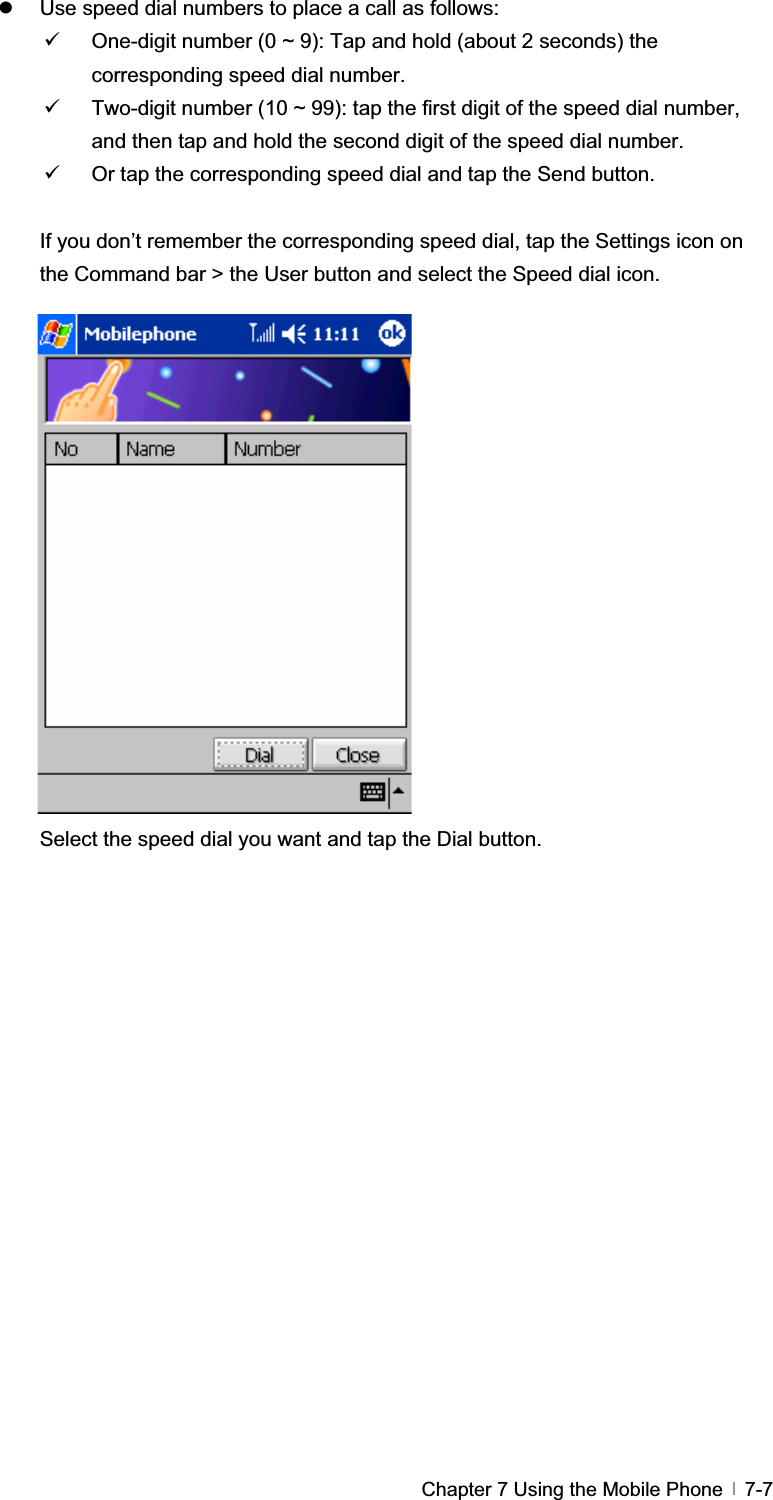
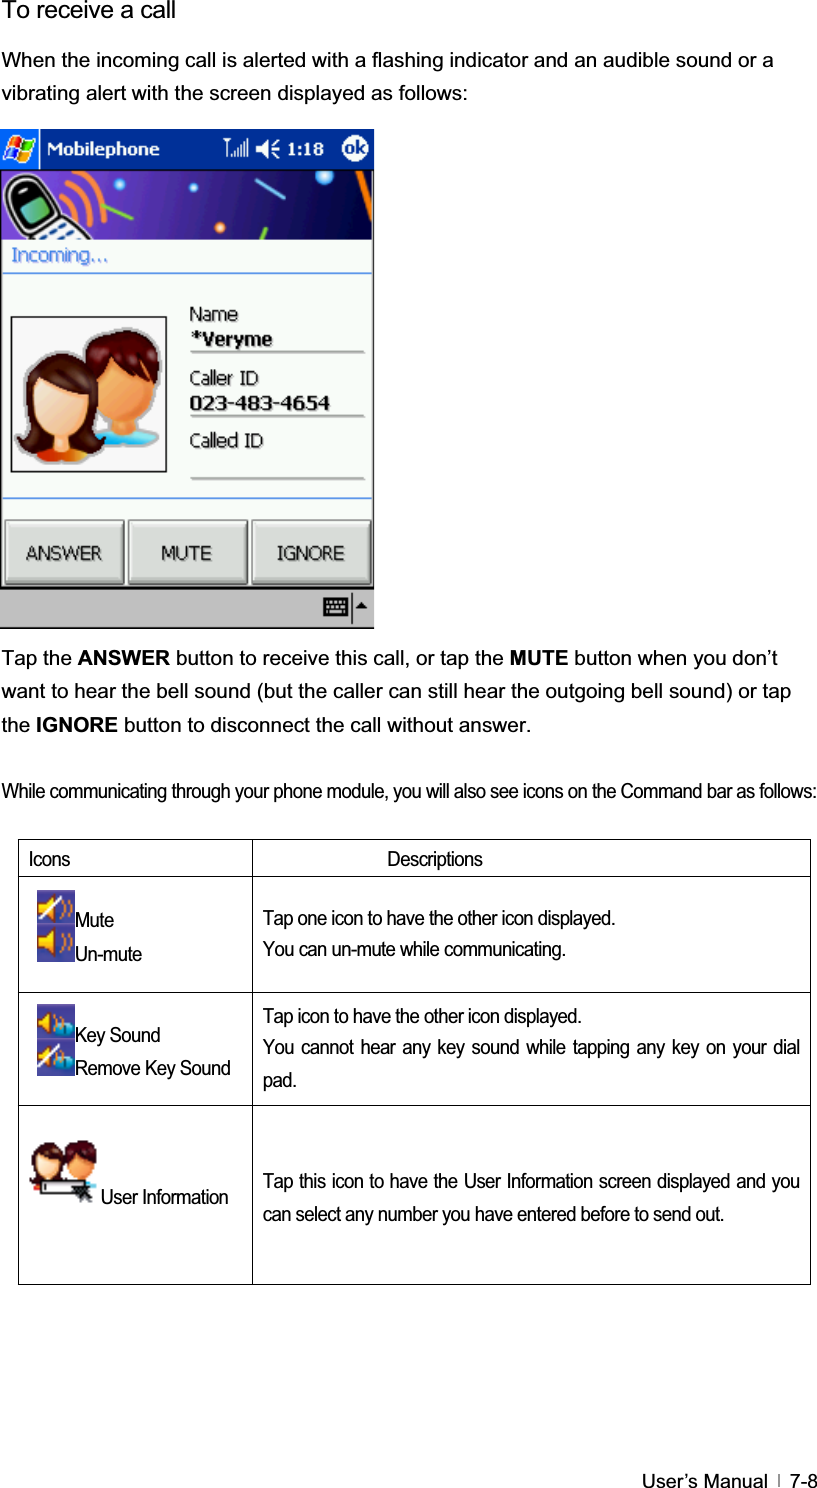
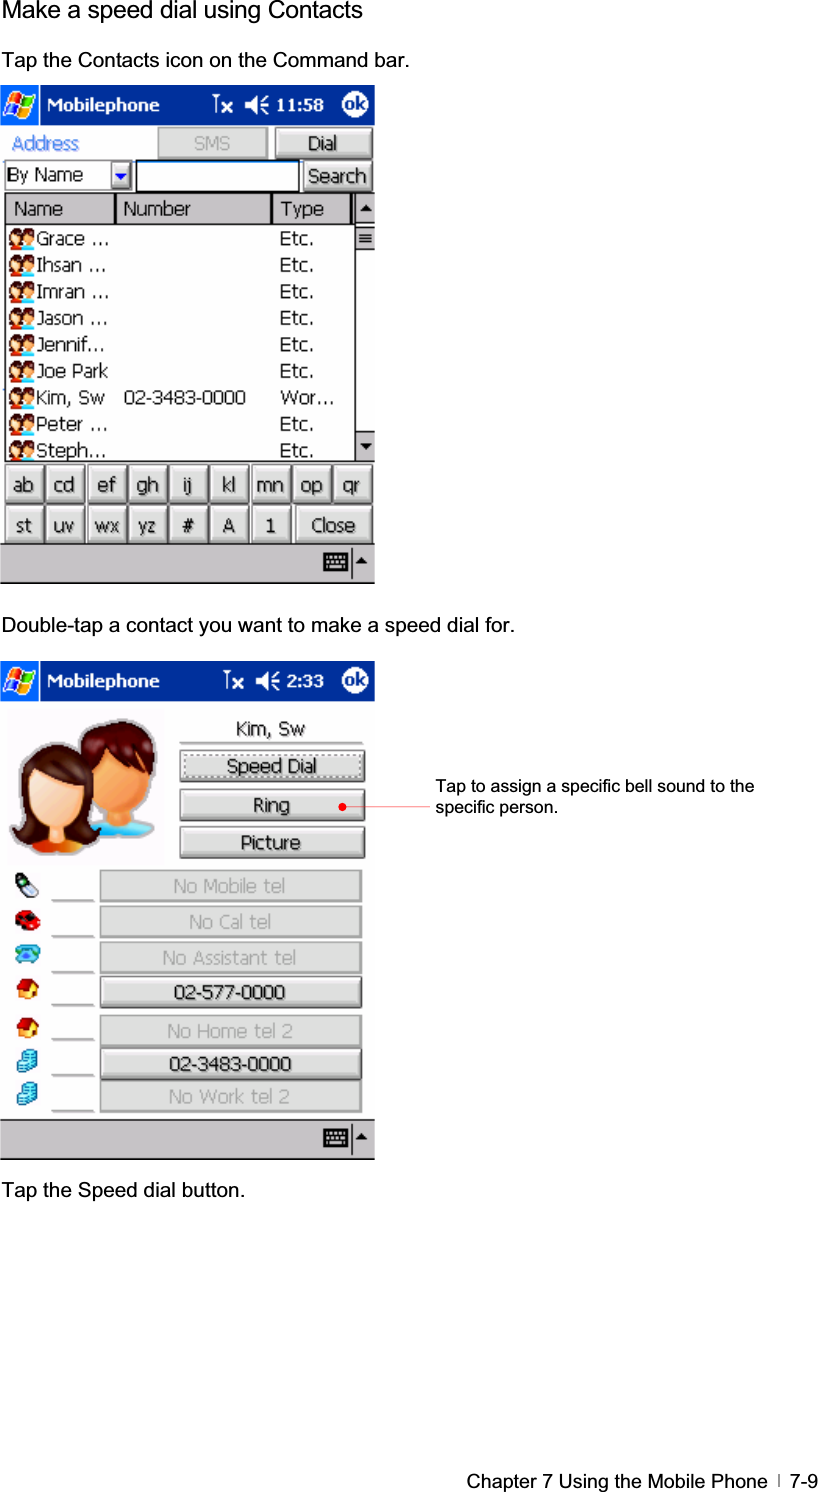
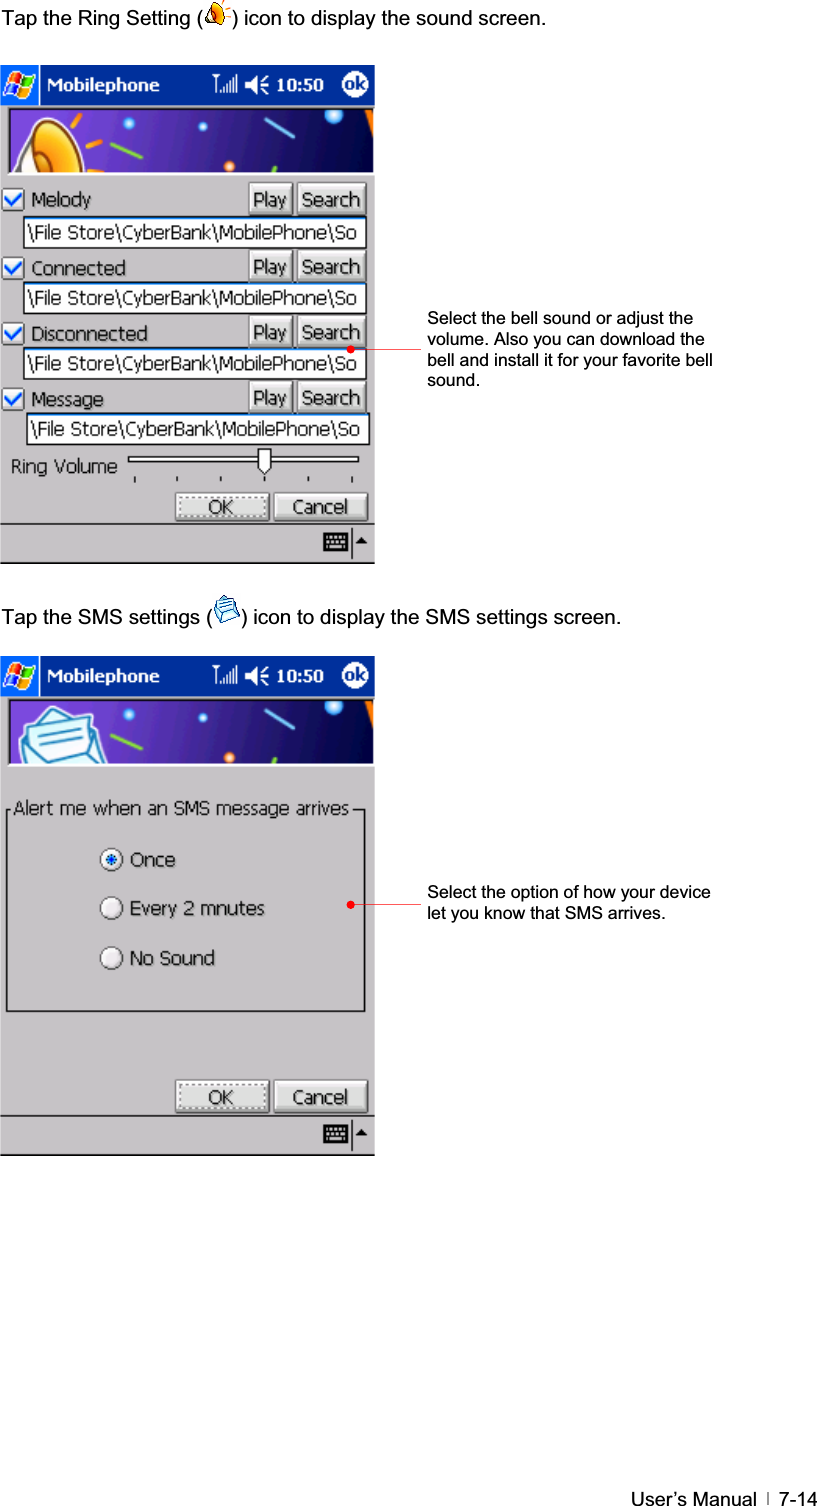
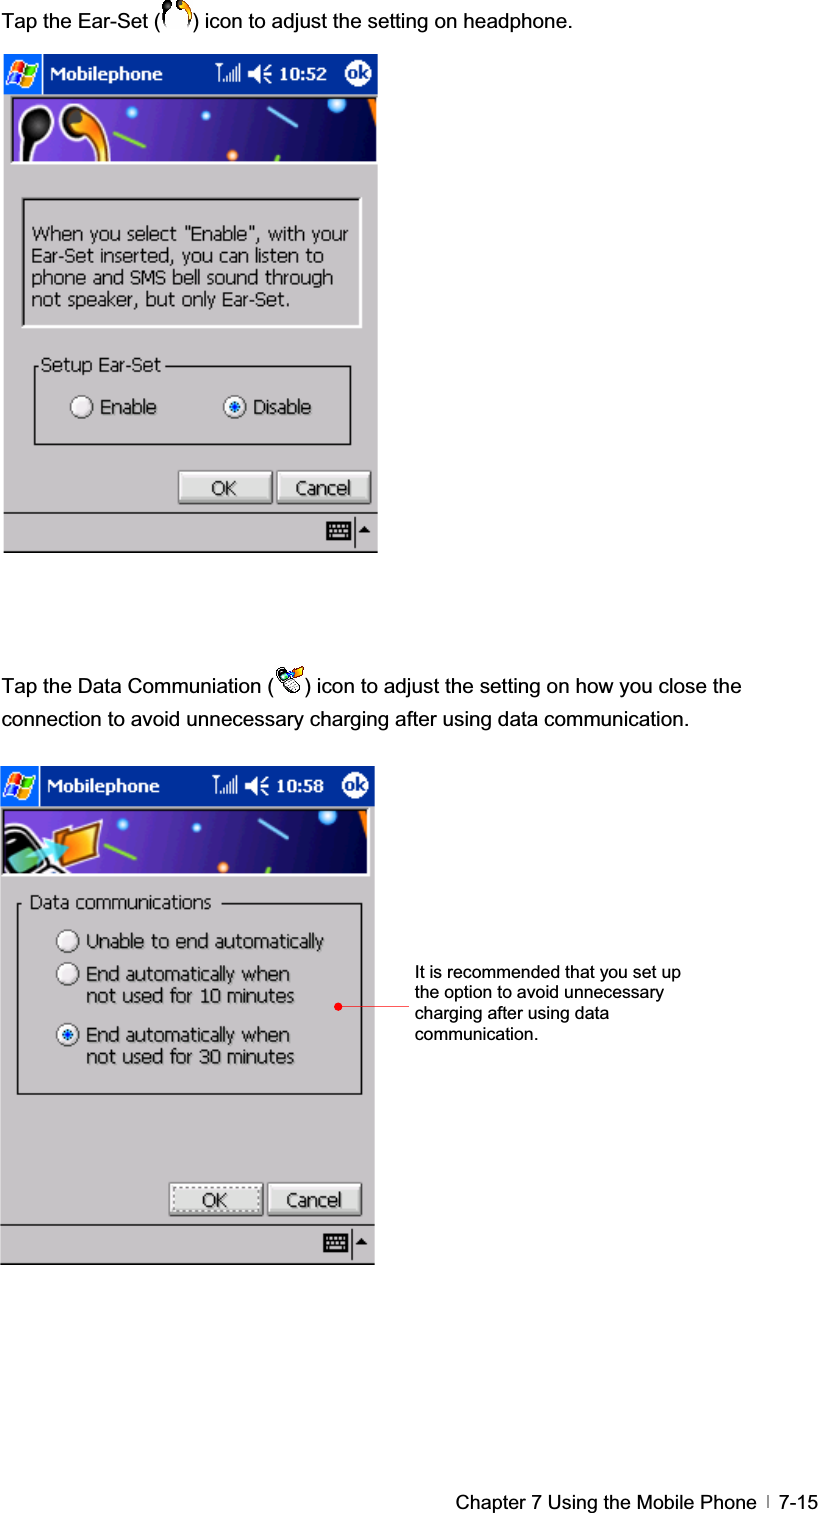
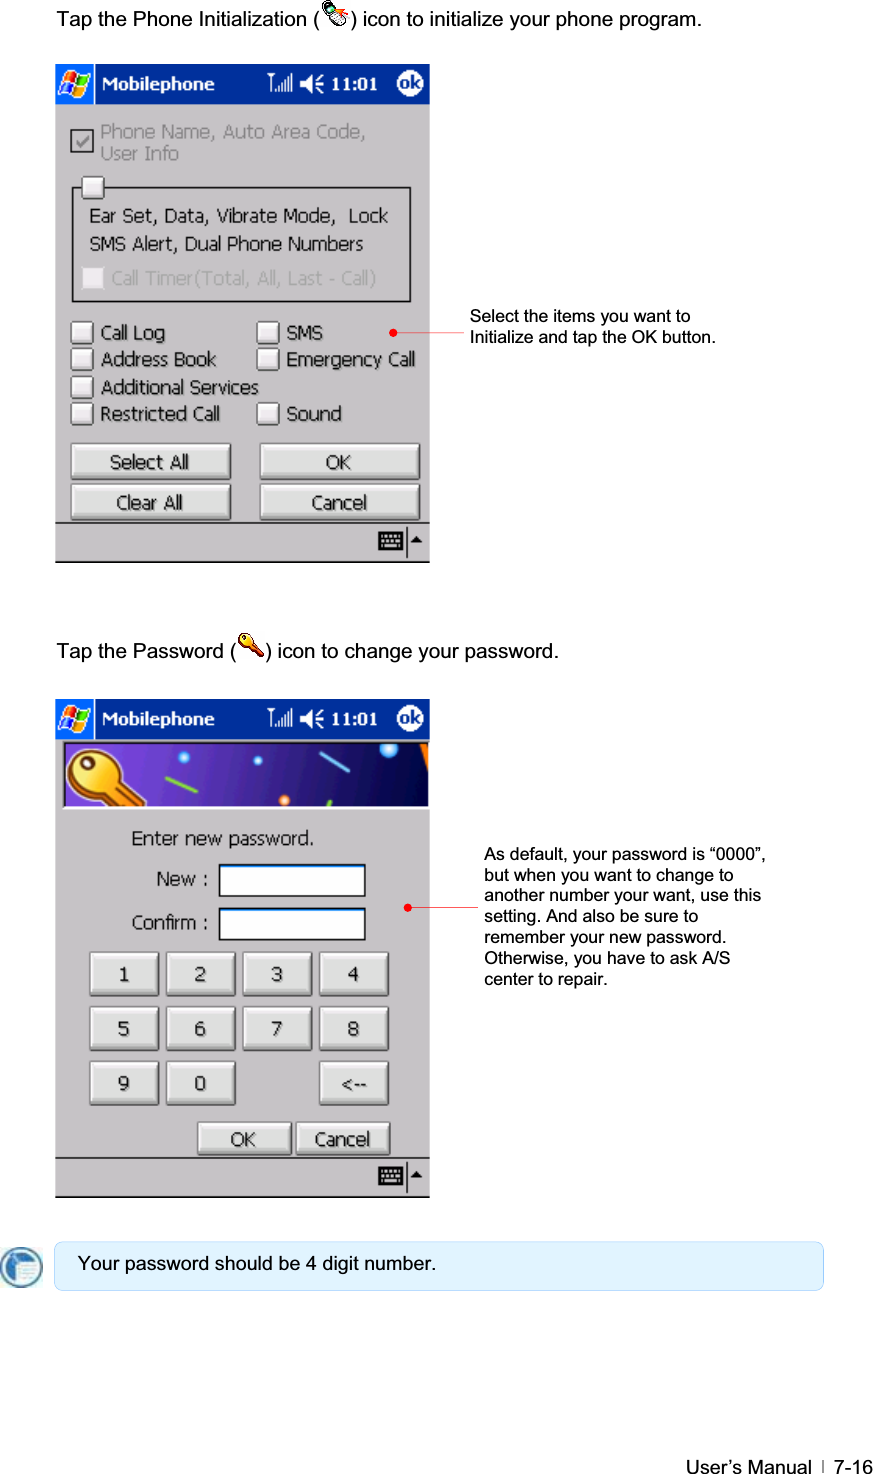
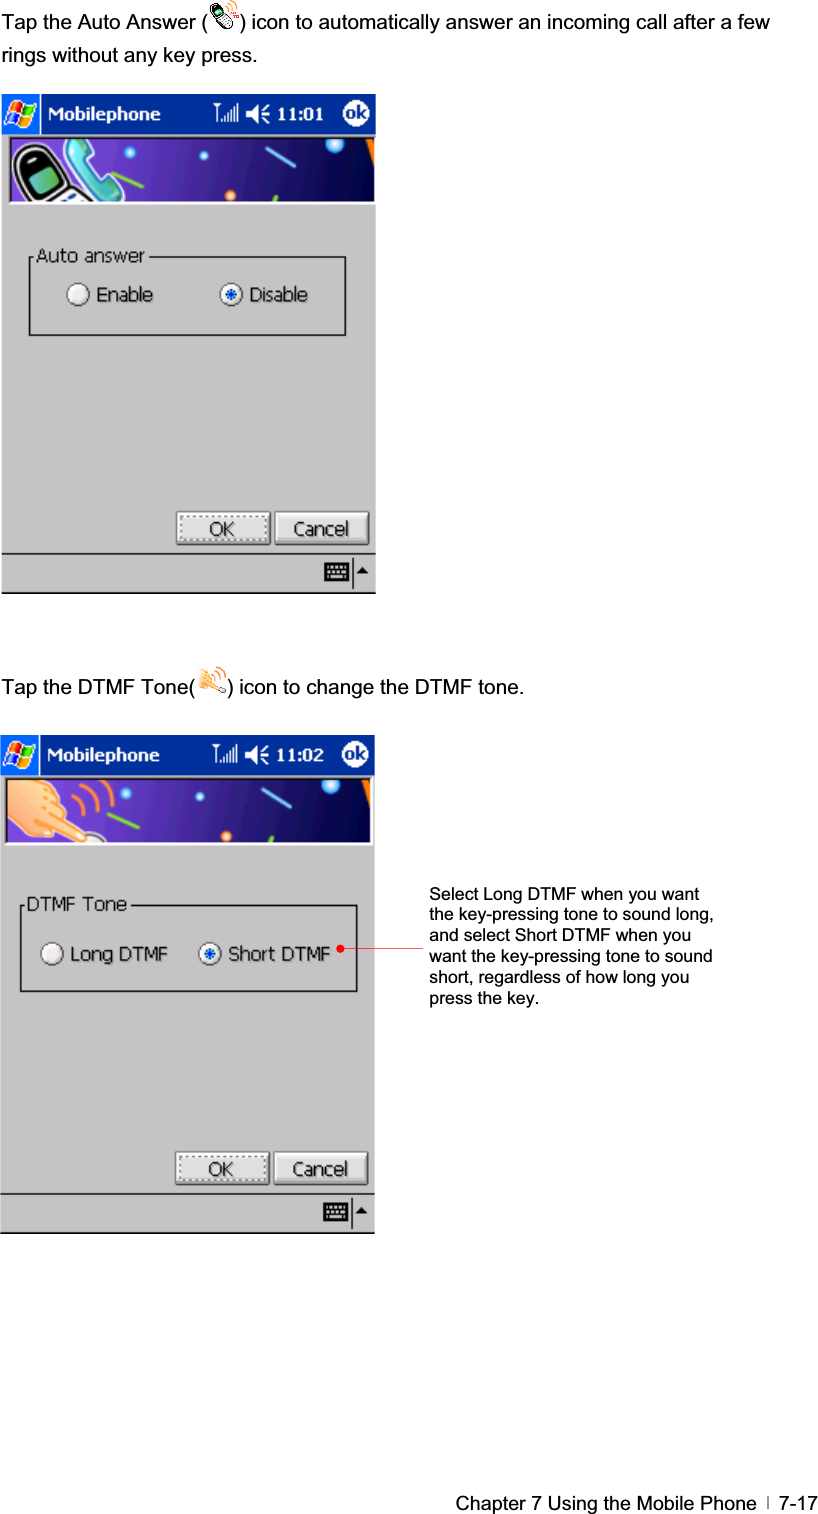
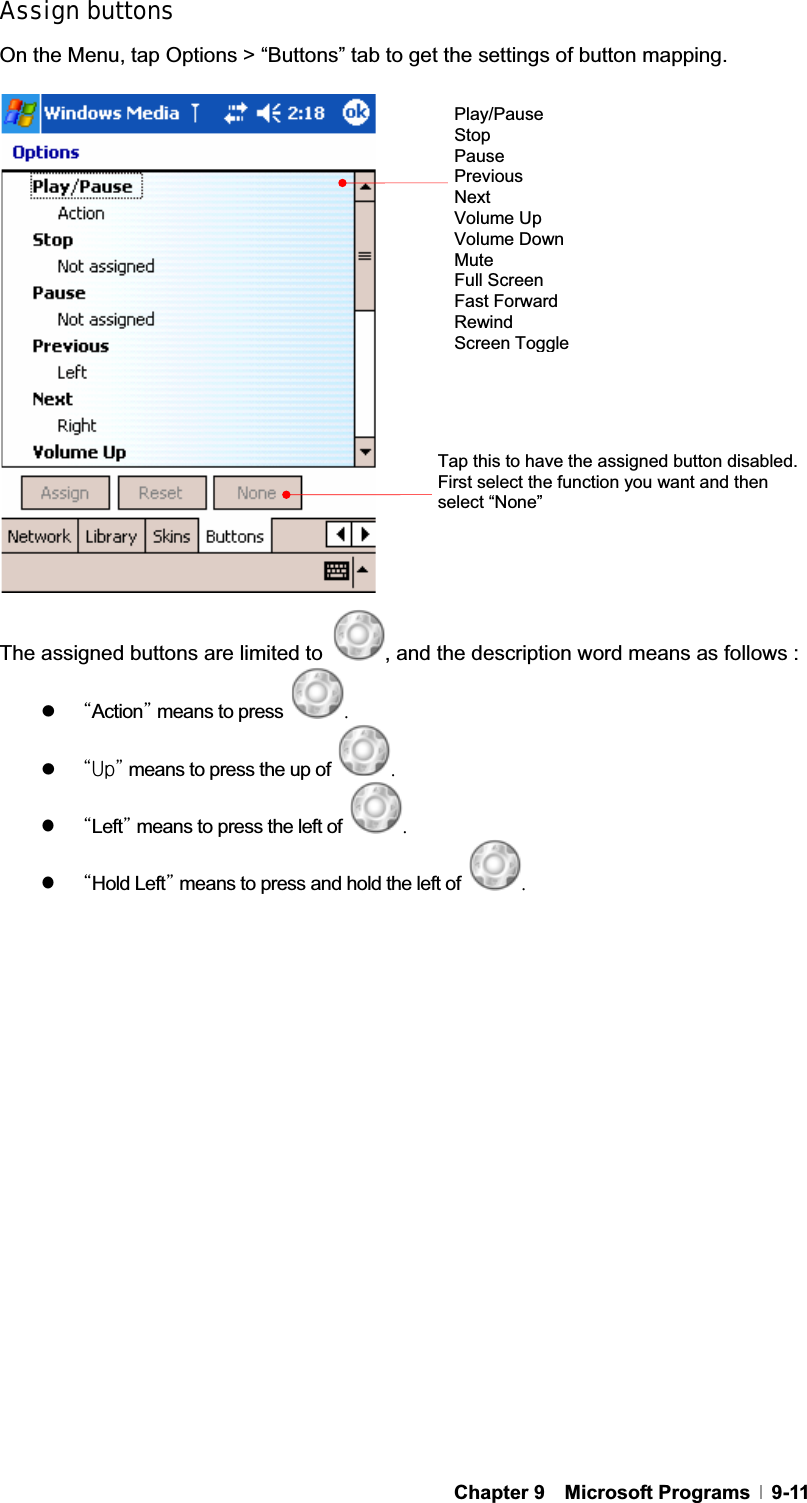
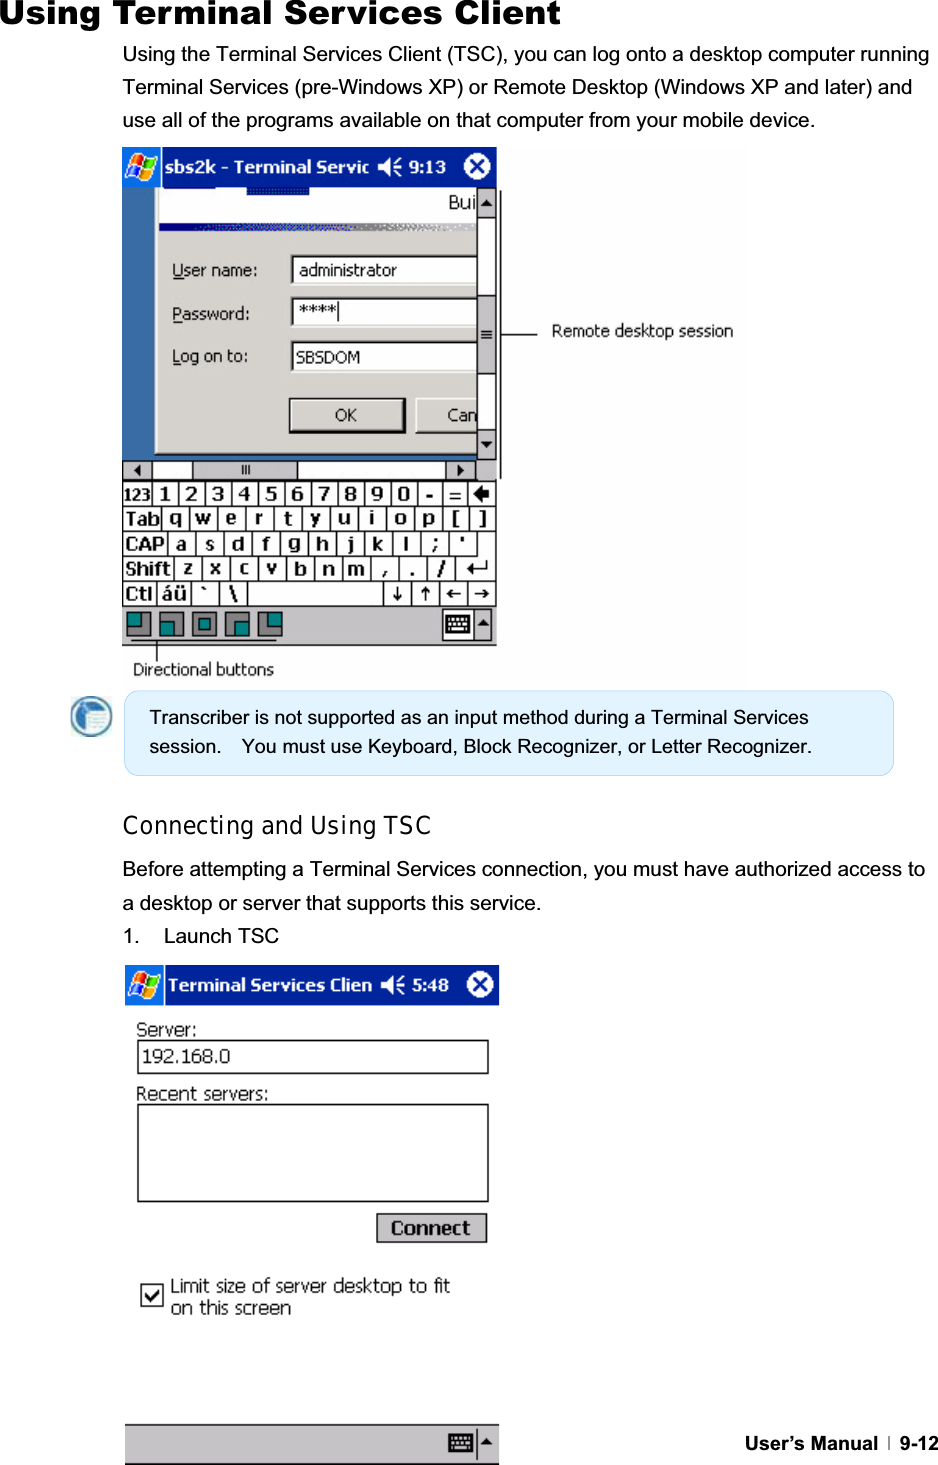
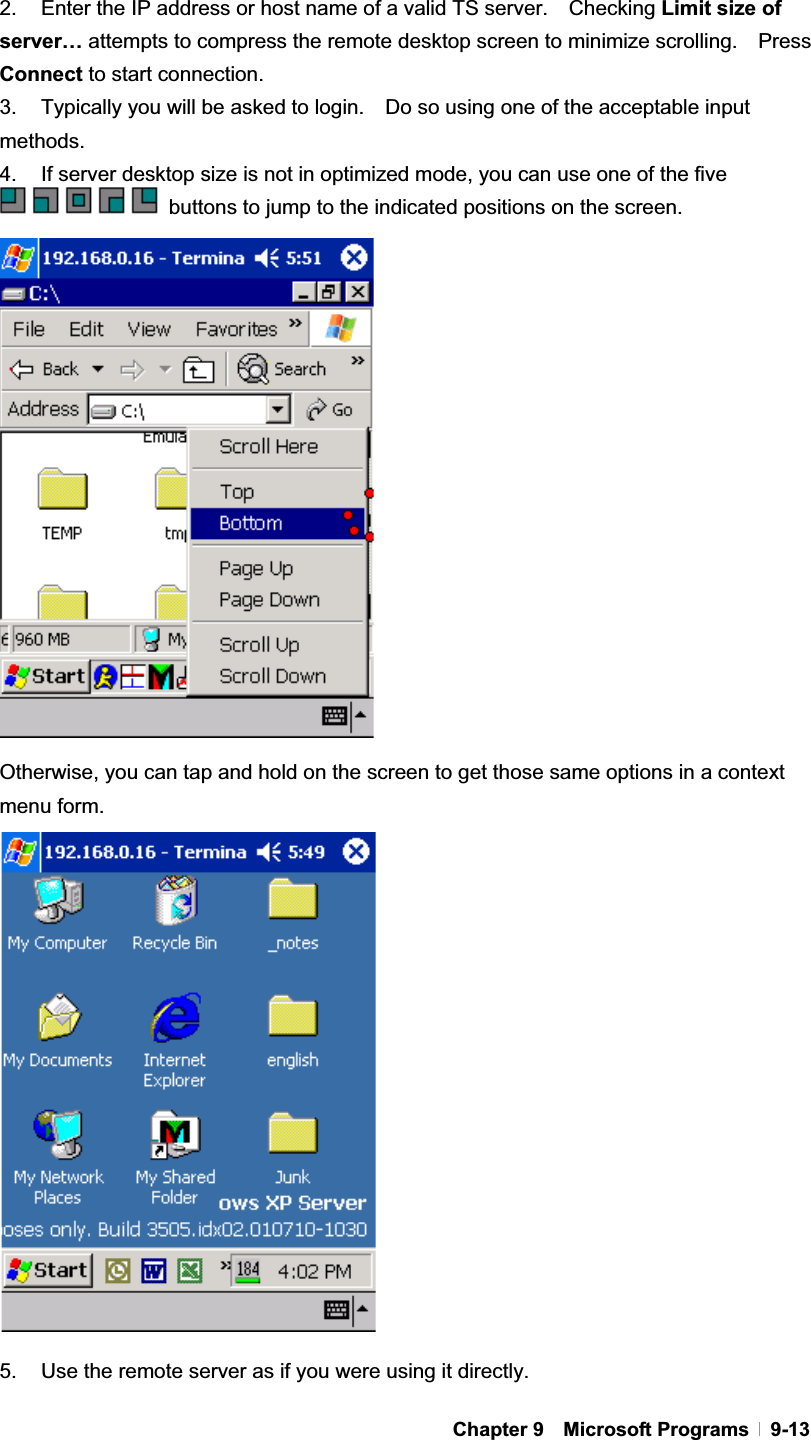
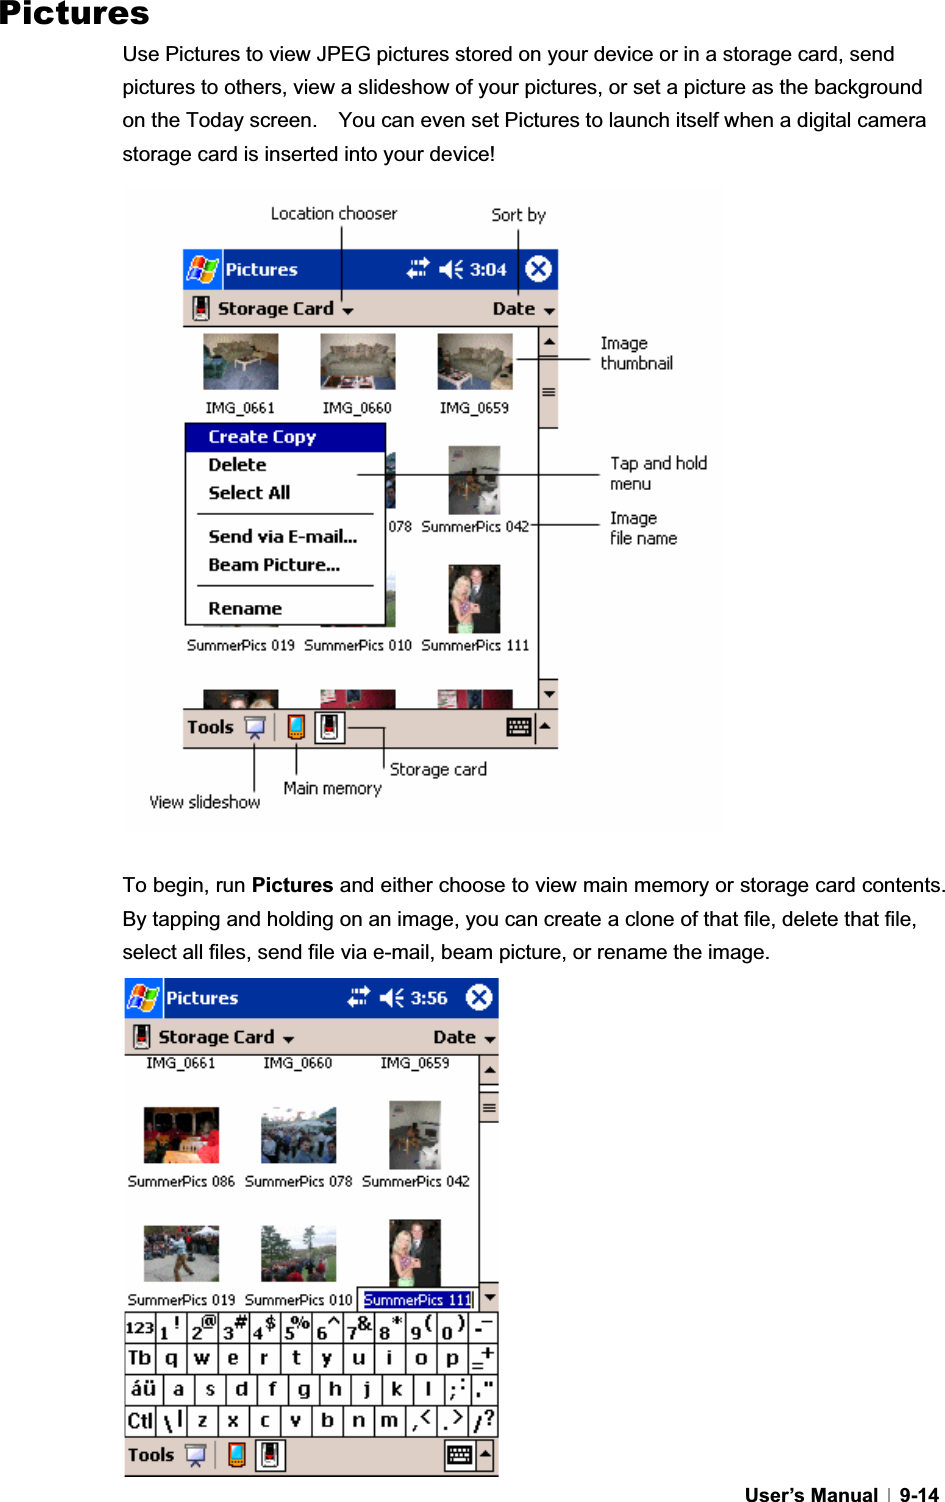
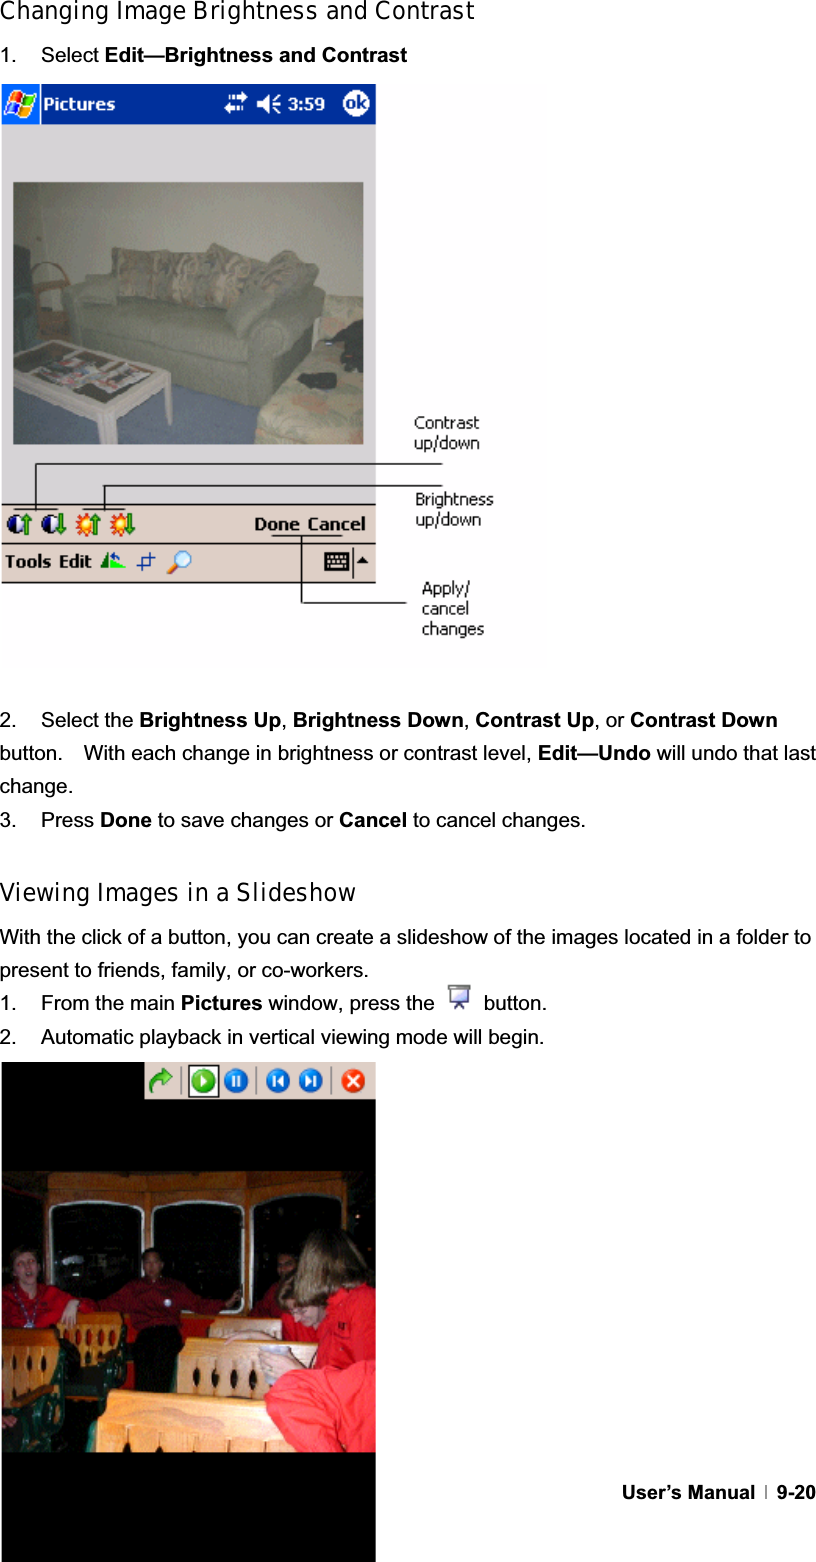
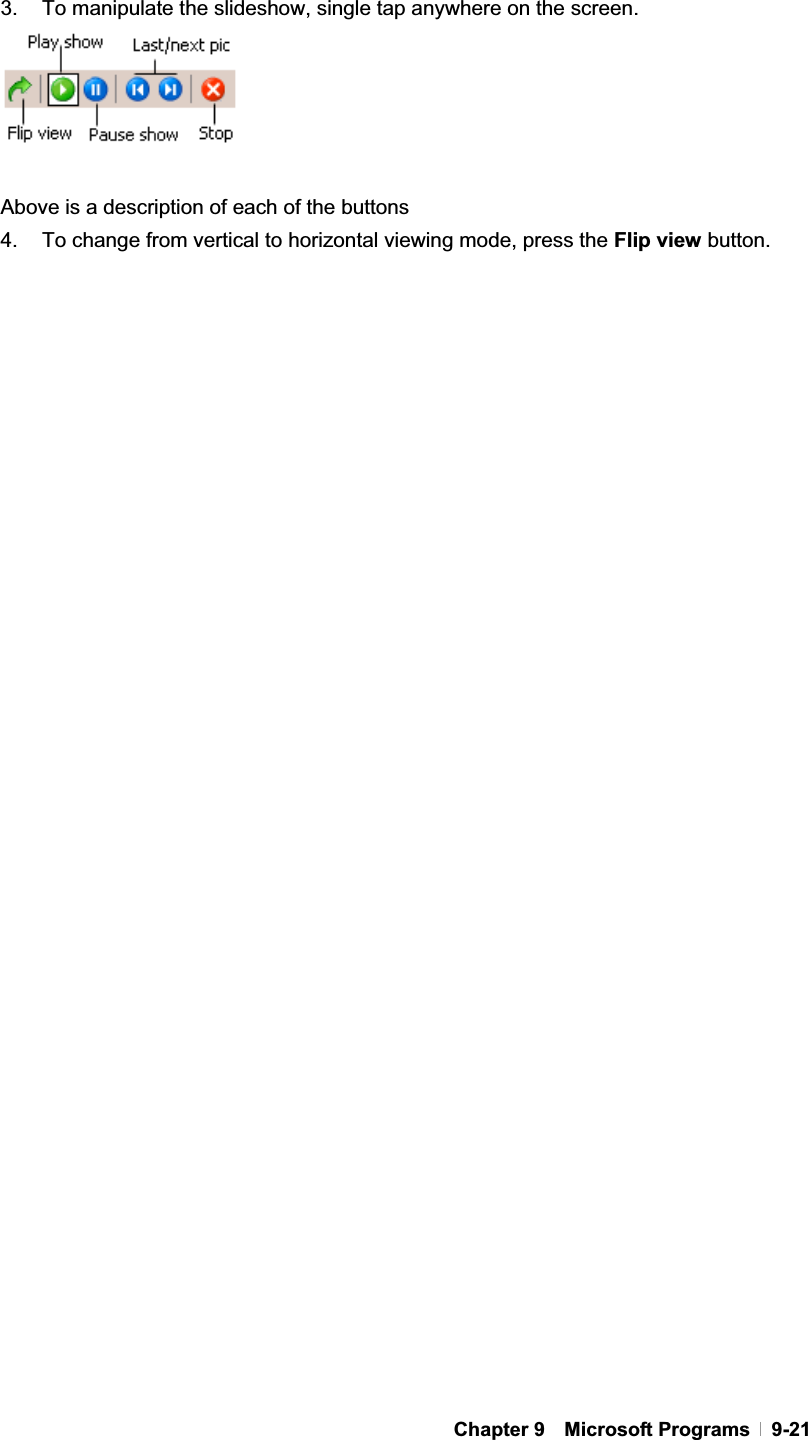
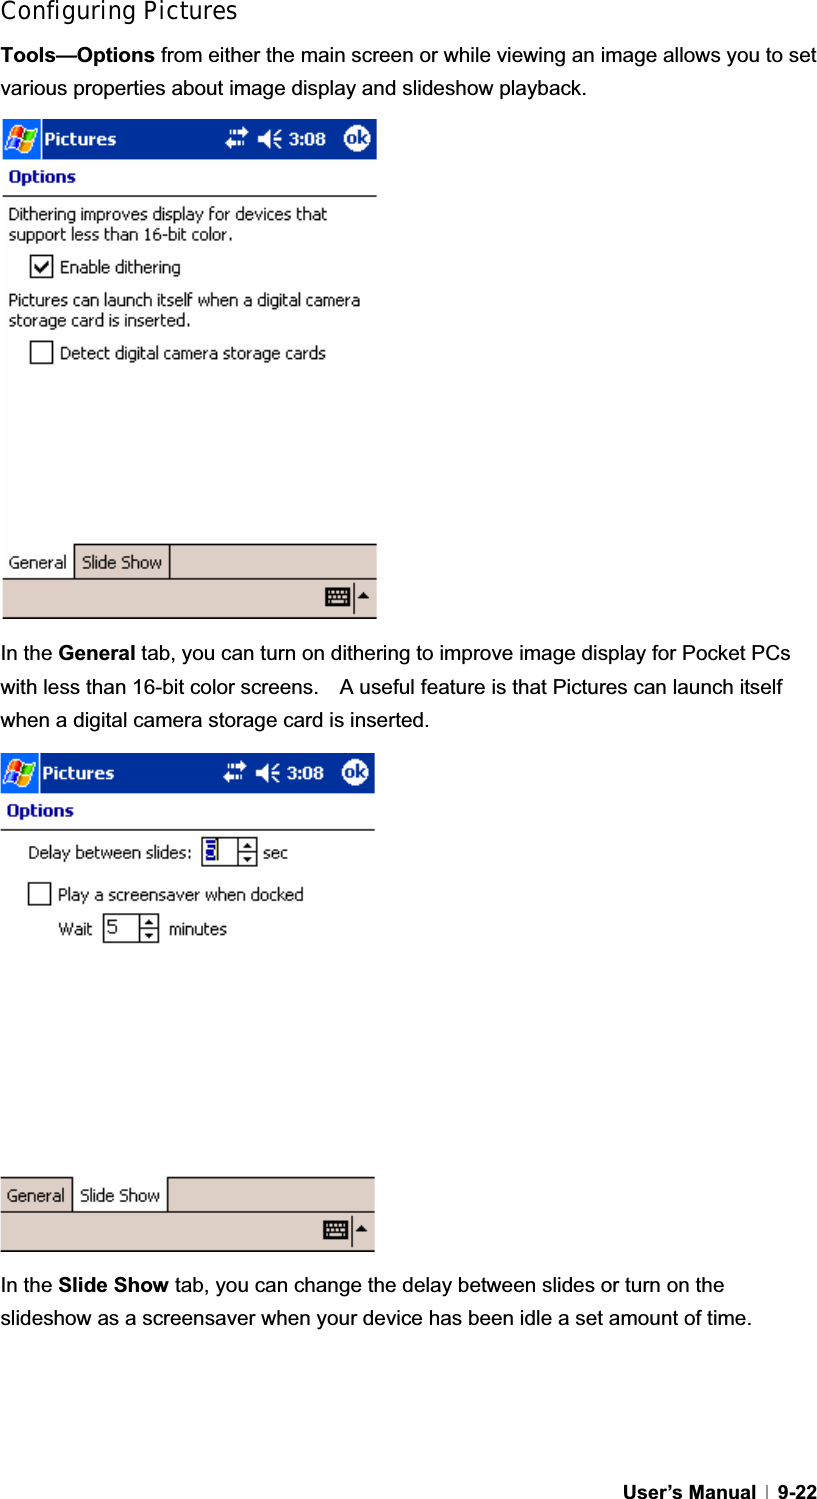
CyberBank CB-0880NP Triton / Pocket PC CDMA Phone User Manual
CyberBank Corp Triton / Pocket PC CDMA Phone
UserManual.wiki
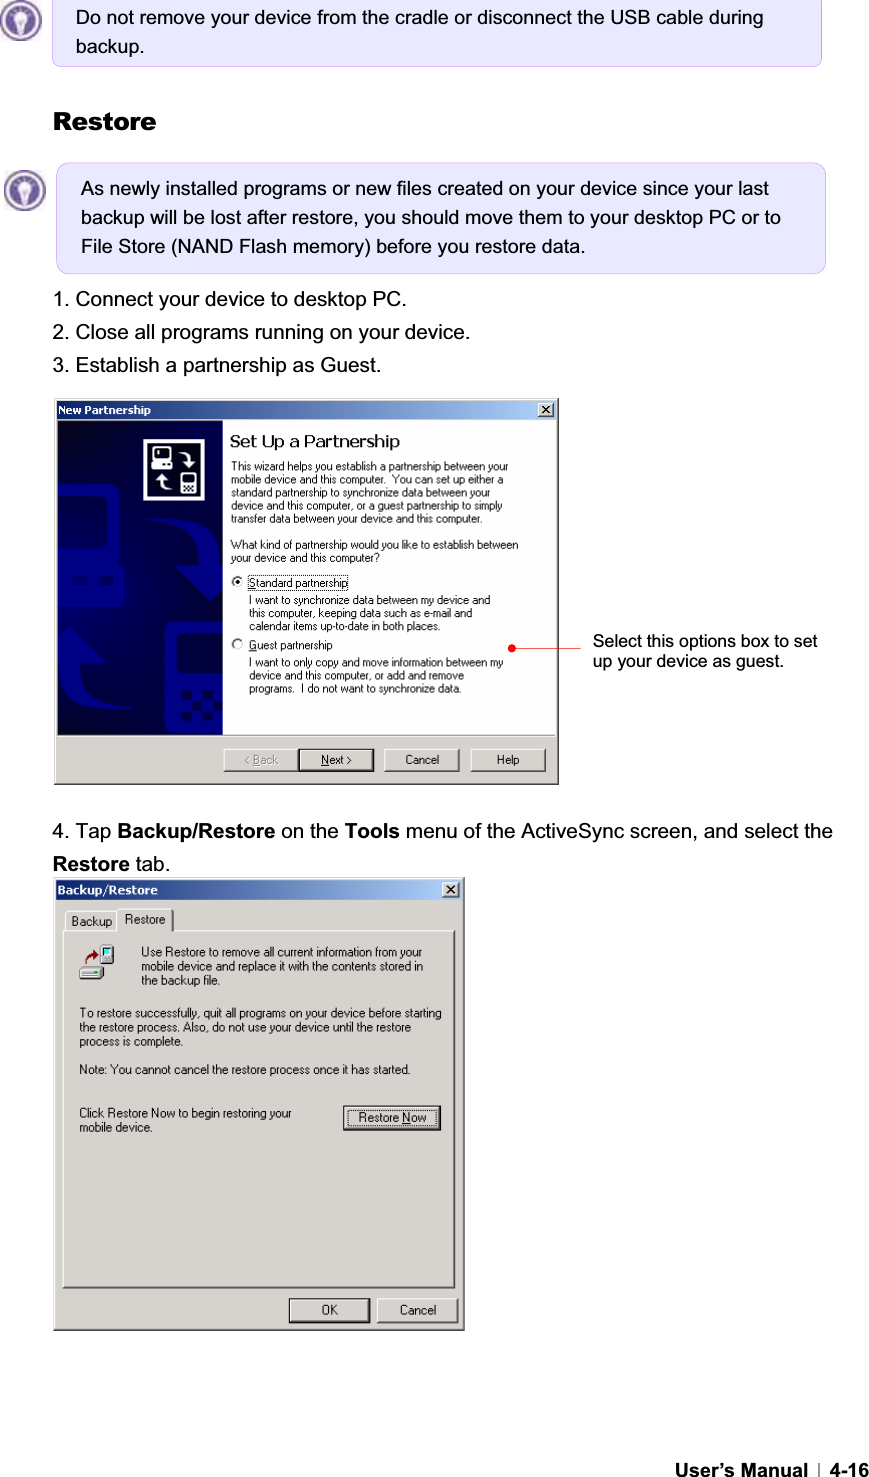
>
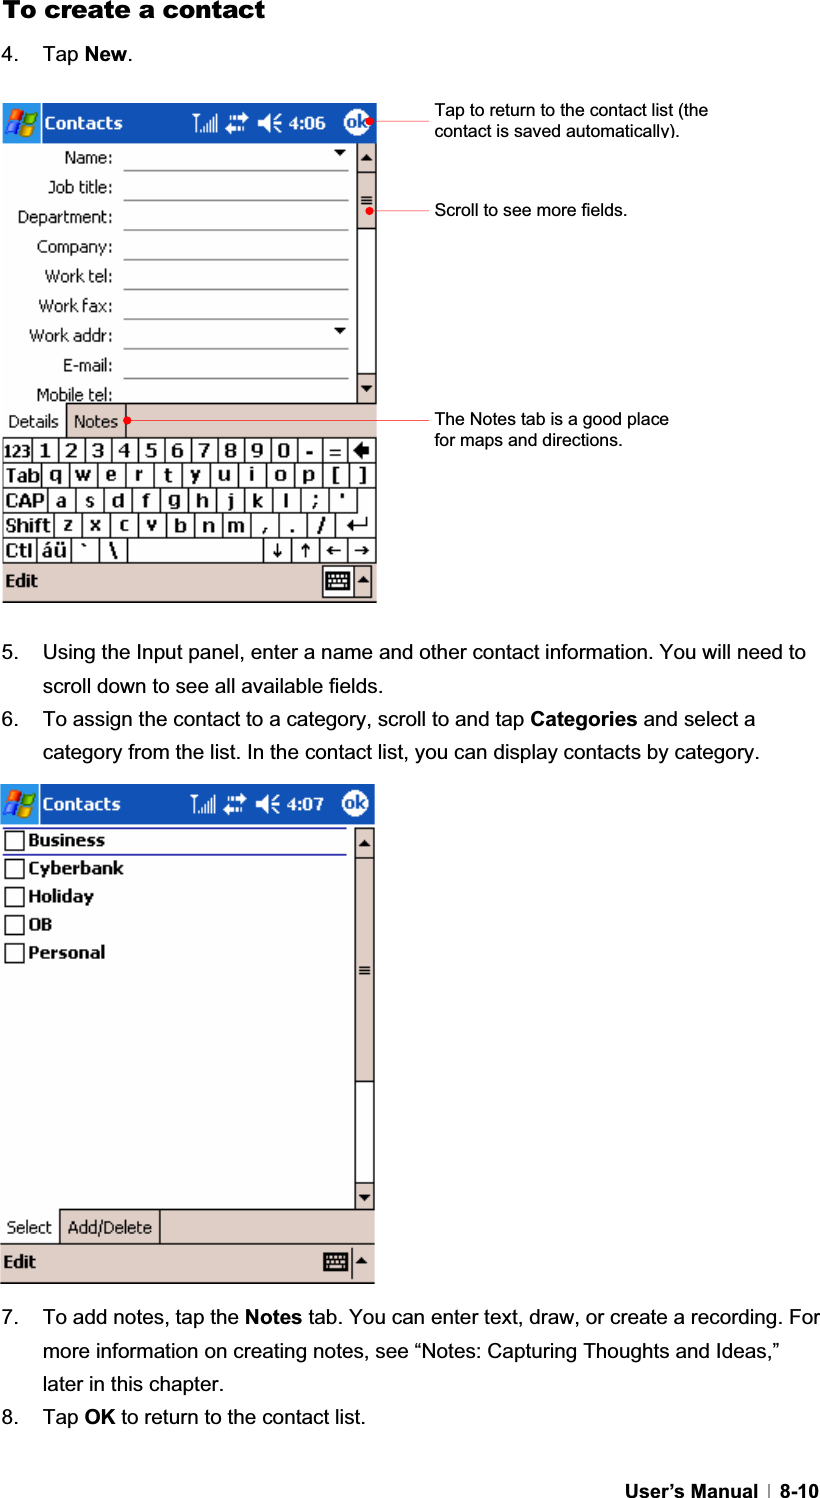
CyberBank
>
CB 0880NP User Manual
Manual
Navigation menu
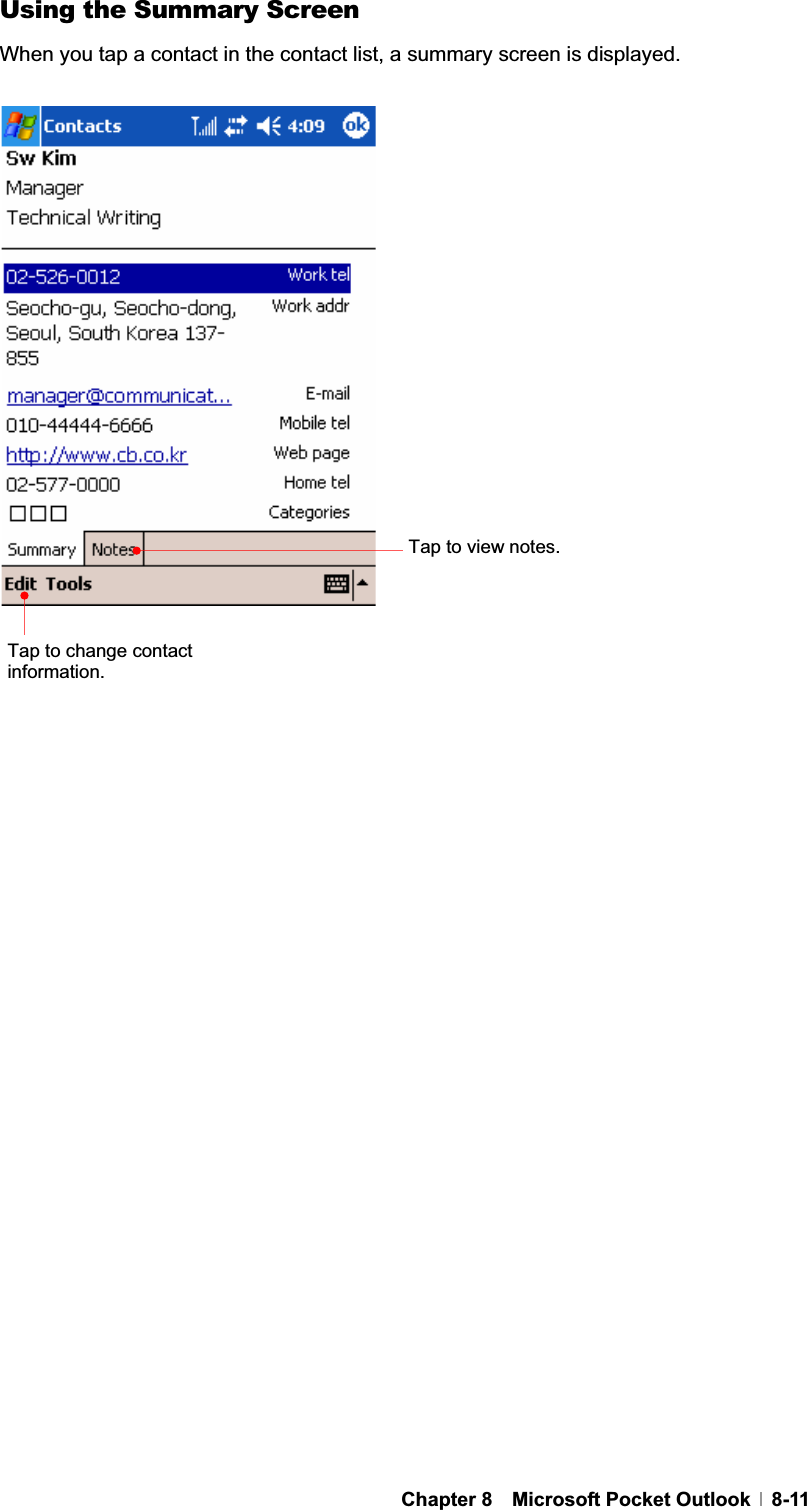
Upload a User Manual
Namespaces
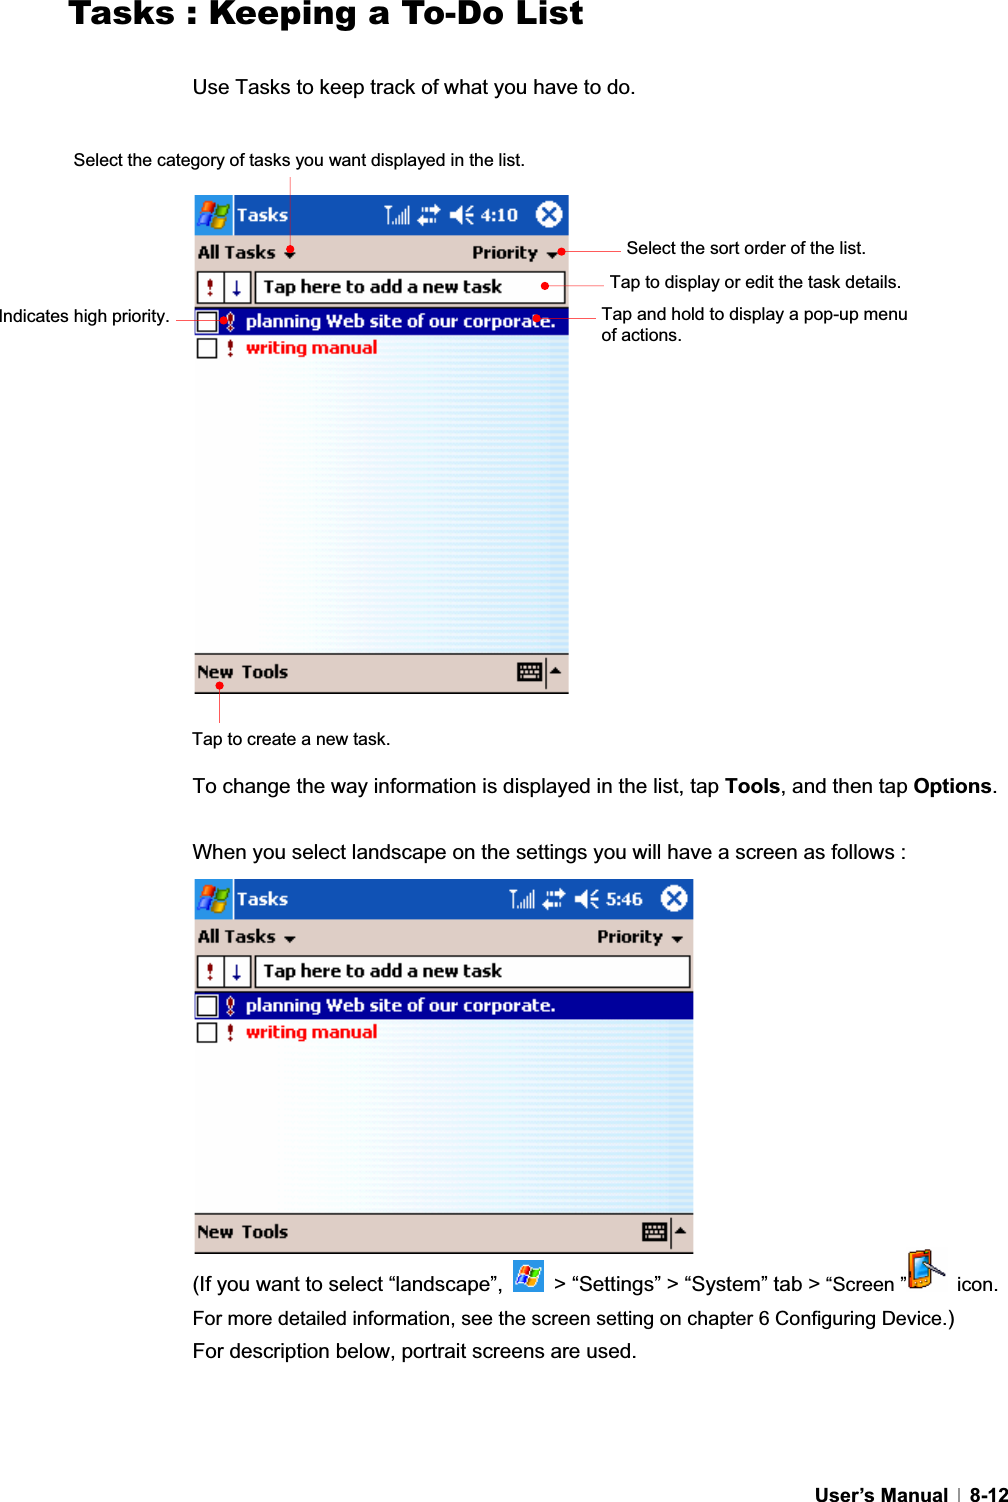
Wiki Guide
HTML
PDF
Info
Views
User Manual
Discussion / Help
Navigation


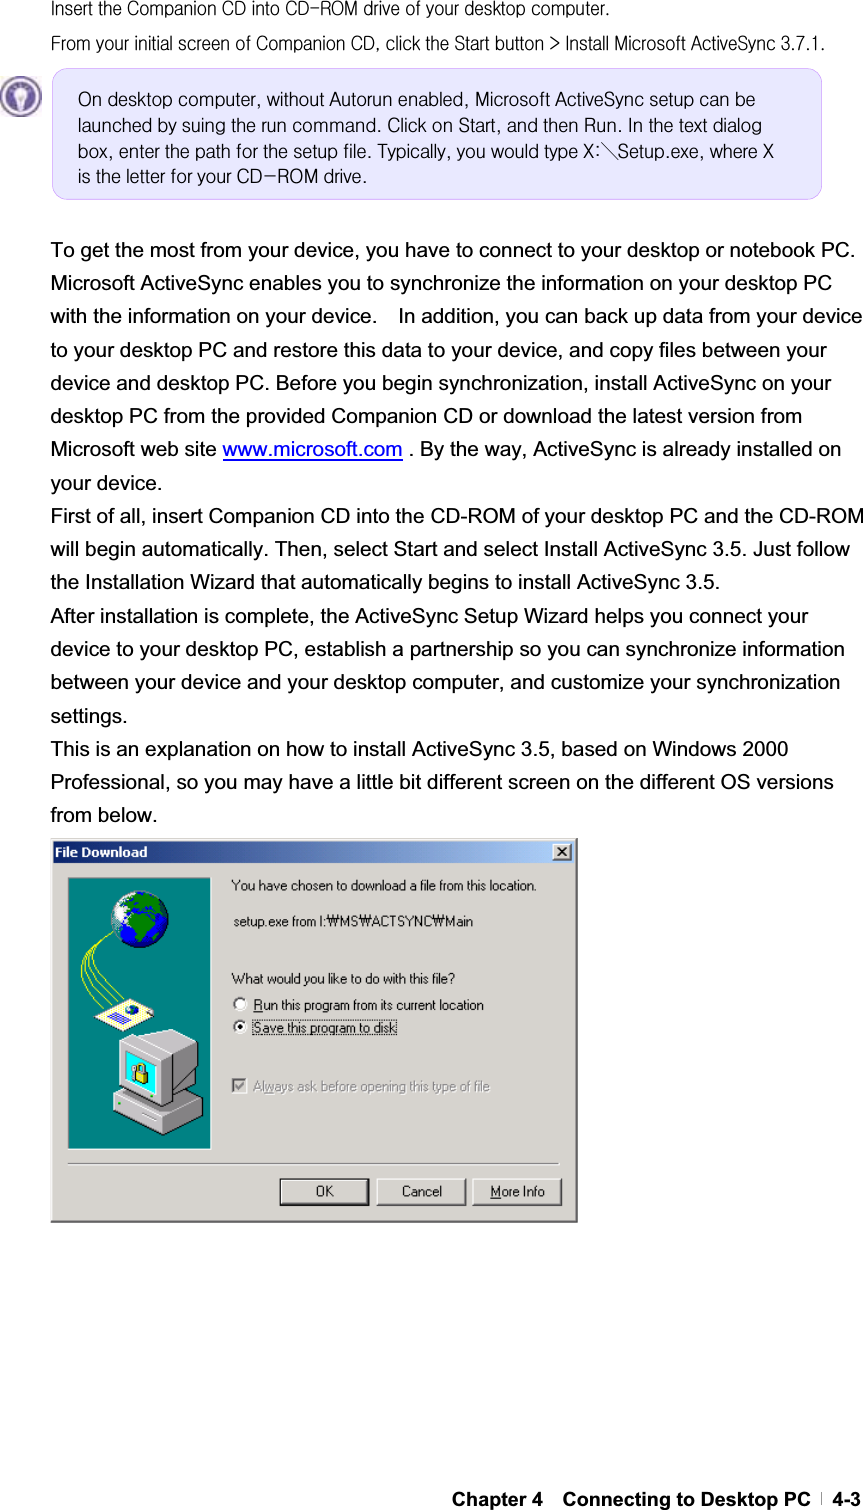
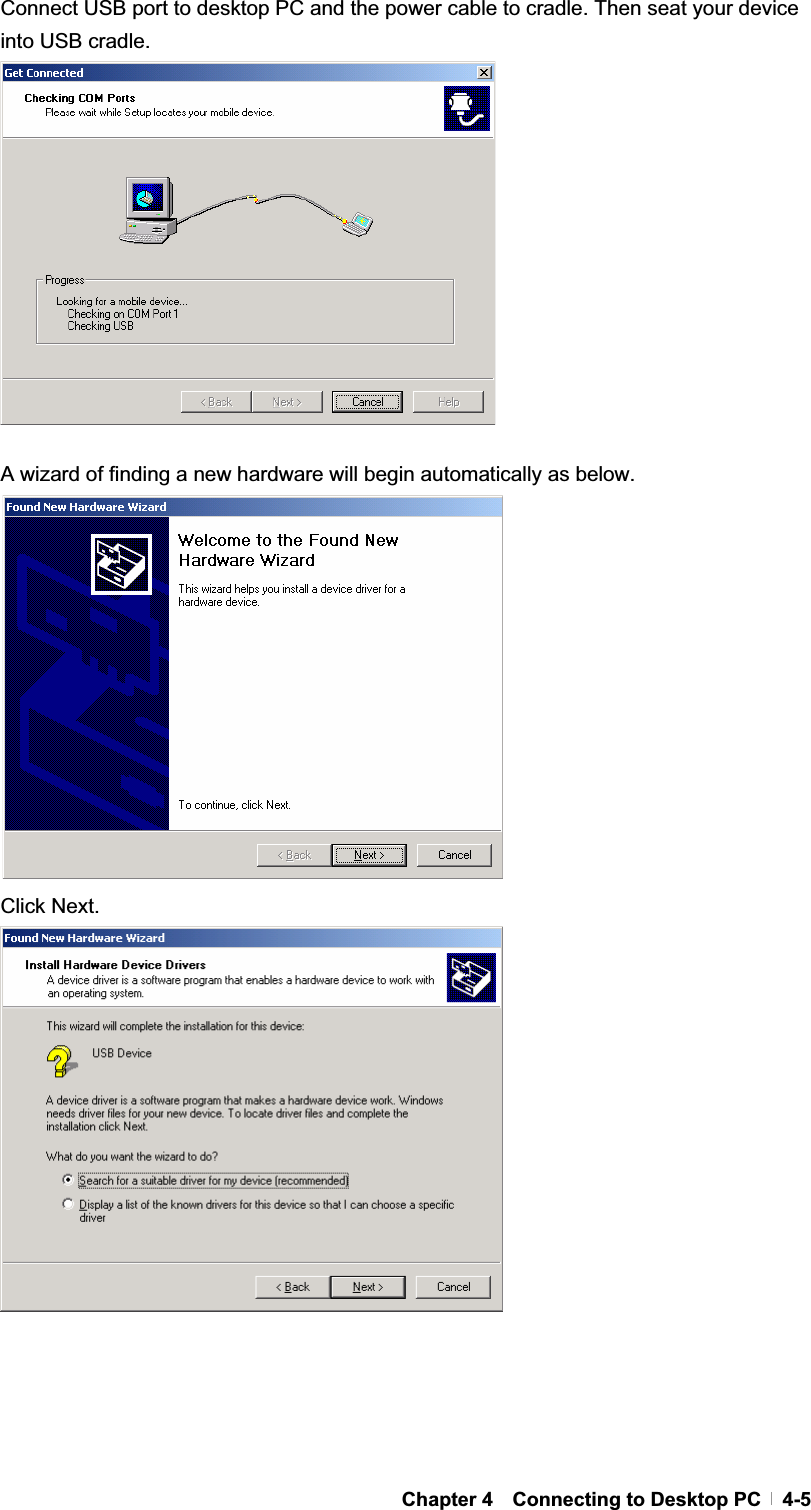
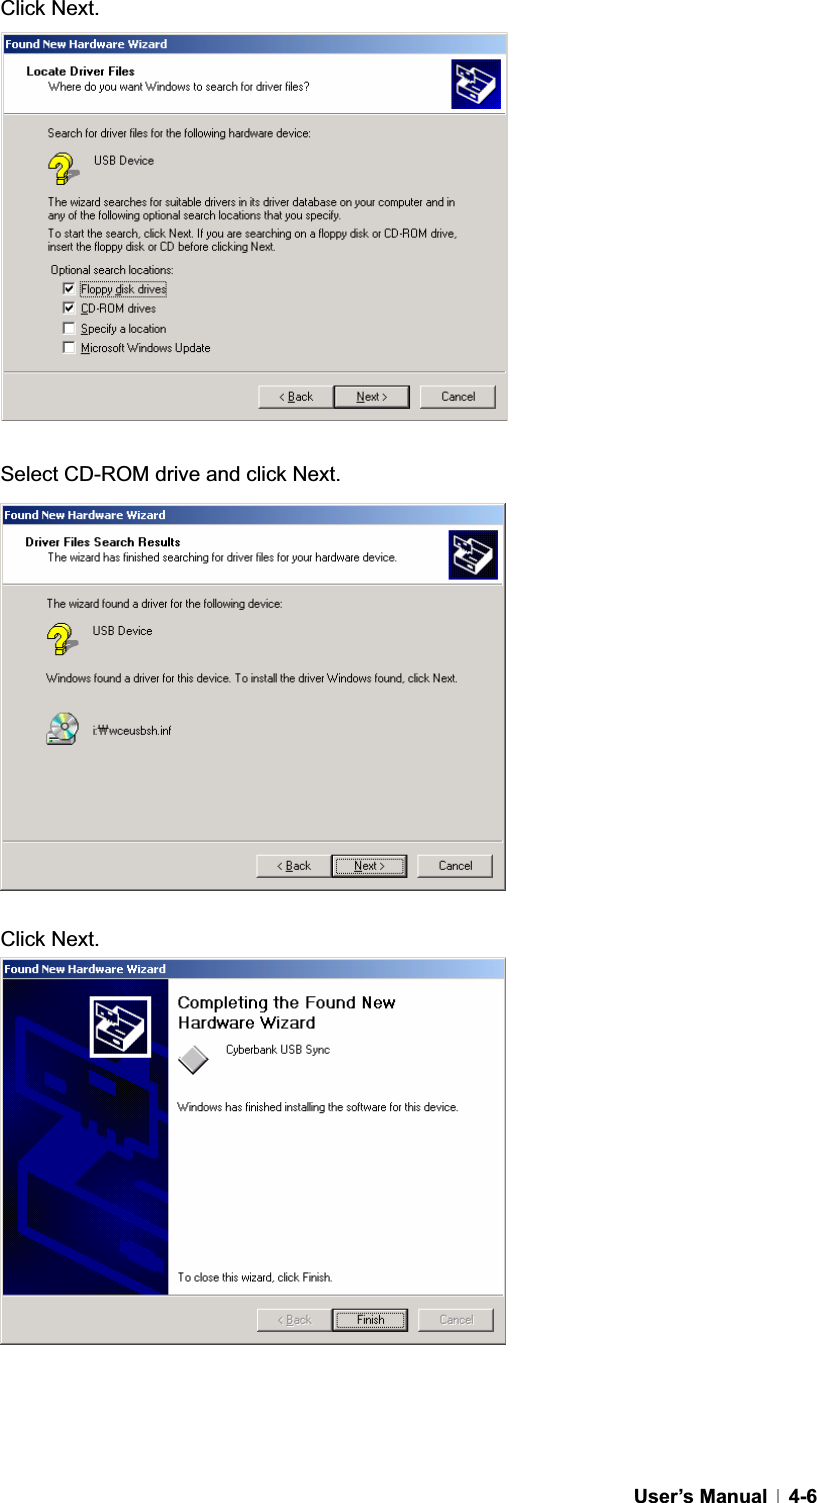
![GChapter 4 Connecting to Desktop PC 4-1To get the most from your device, you will want to connect to your desktop or notebook PC. This chapter describes how to establish the connection between your device and your desktop PC, and how to synchronize and transfer files between your device and your desktop (or any PC that has Microsoft ActiveSync installed). G wGwjGYWWYG G wGwjGYWWZG GhzGZU^UXG ̺G ̺GhzGZU]G̺GGhzGZU\G̺GGiGwGwjGYWWZGGGGGGSGGGGGhzGZU^UXGGGGGGhzGZU]GGhzGZU\UGඝ In this chapter, you will learn the followings : - Install Microsoft ActiveSync and establish a partnership - Full Backup & Restore using Backup/Restore of ActiveSync - How to install programs using ActiveSync - Connecting to Device Chapter 4Connecting to Desktop](https://usermanual.wiki/CyberBank/CB-0880NP/User-Guide-530332-Page-43.png)
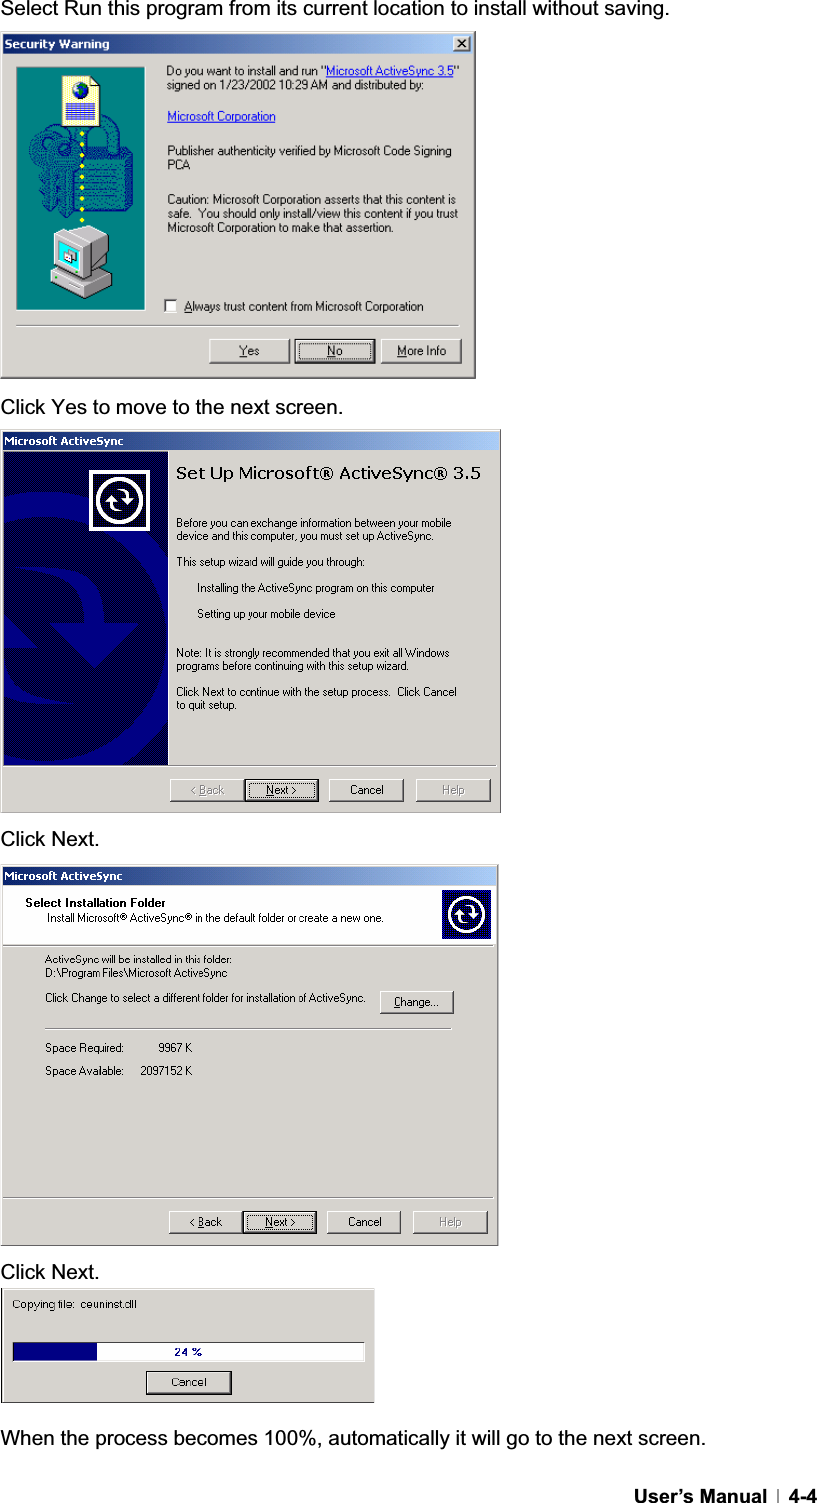
![GUser’s Manual 4-2Install Microsoft ActiveSync and establish a partnership Install Microsoft ActiveSync GGGGGGGGGGGGGGGhzGZU^UXGGGGGaGzjGjkGzjGGGUUUGztGGGUUVVGhzGZU^UXGGGGGzUGGGjkSGGhzGZU^UXGGGGGtzhzujUllGGGGGGGUGGGG{GGGSGGGGGG|ziGGGGGGGGGGUGGGGGGGGGGGGGGGGGGzGyGz~GYWWWGUGztGvGYWWYGUGzvGYWWWGUGztGpG[UWXGzwXGGGUGzXYG¥G]\GtiGGGGG Gz`GGY\TGGSGpkhGGG|ziO|GzGiPGG GzjkTyvtGGz}nhGGGGY\]GGGGGzrGMGtGThis is an explanation on how to install ActiveSync 3.7.1, based on Windows 2000 Professional, so you may have a little bit different screen on the different OS versions from below.](https://usermanual.wiki/CyberBank/CB-0880NP/User-Guide-530332-Page-44.png)


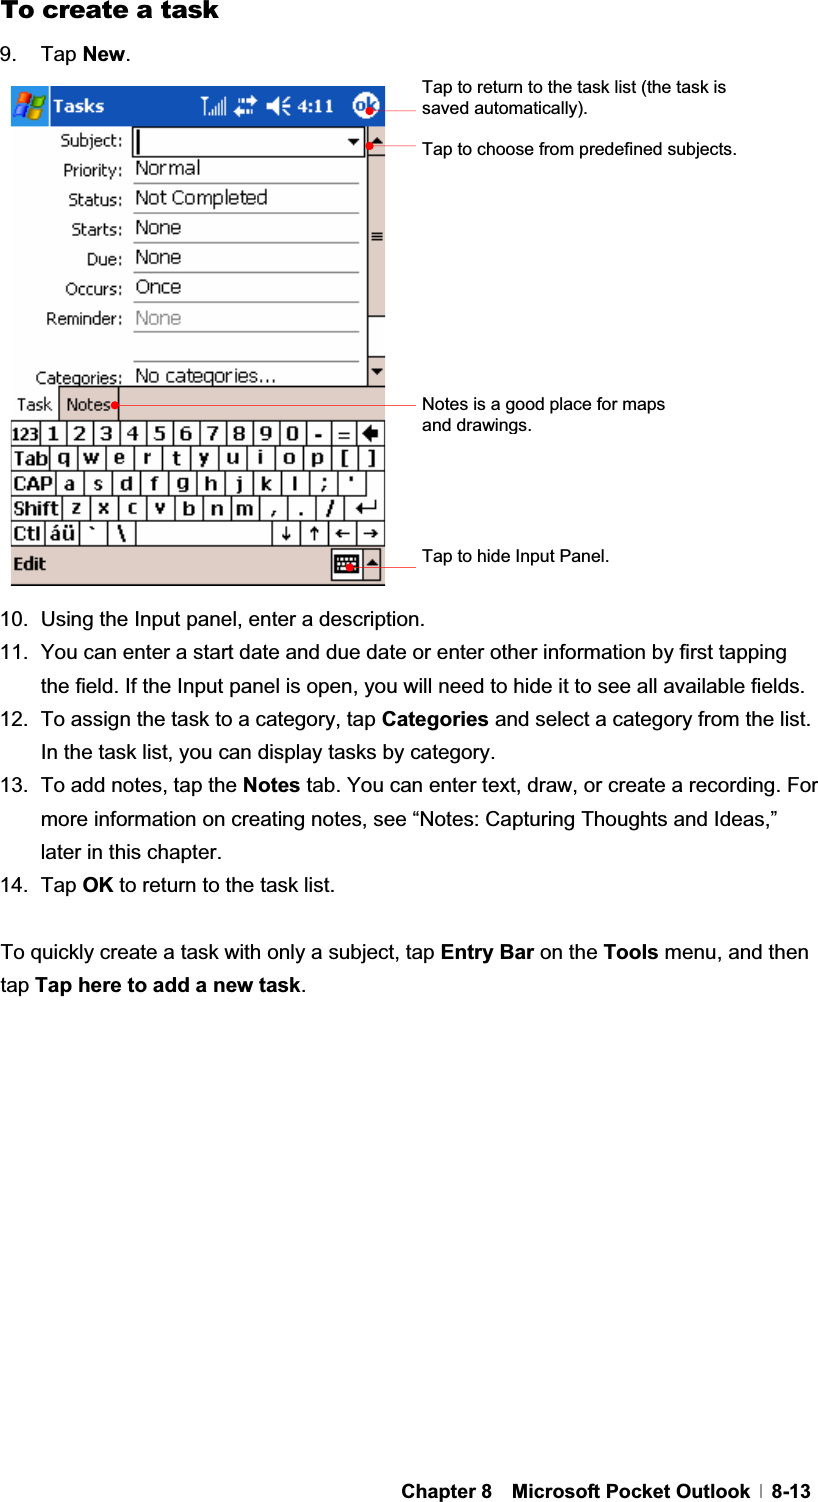


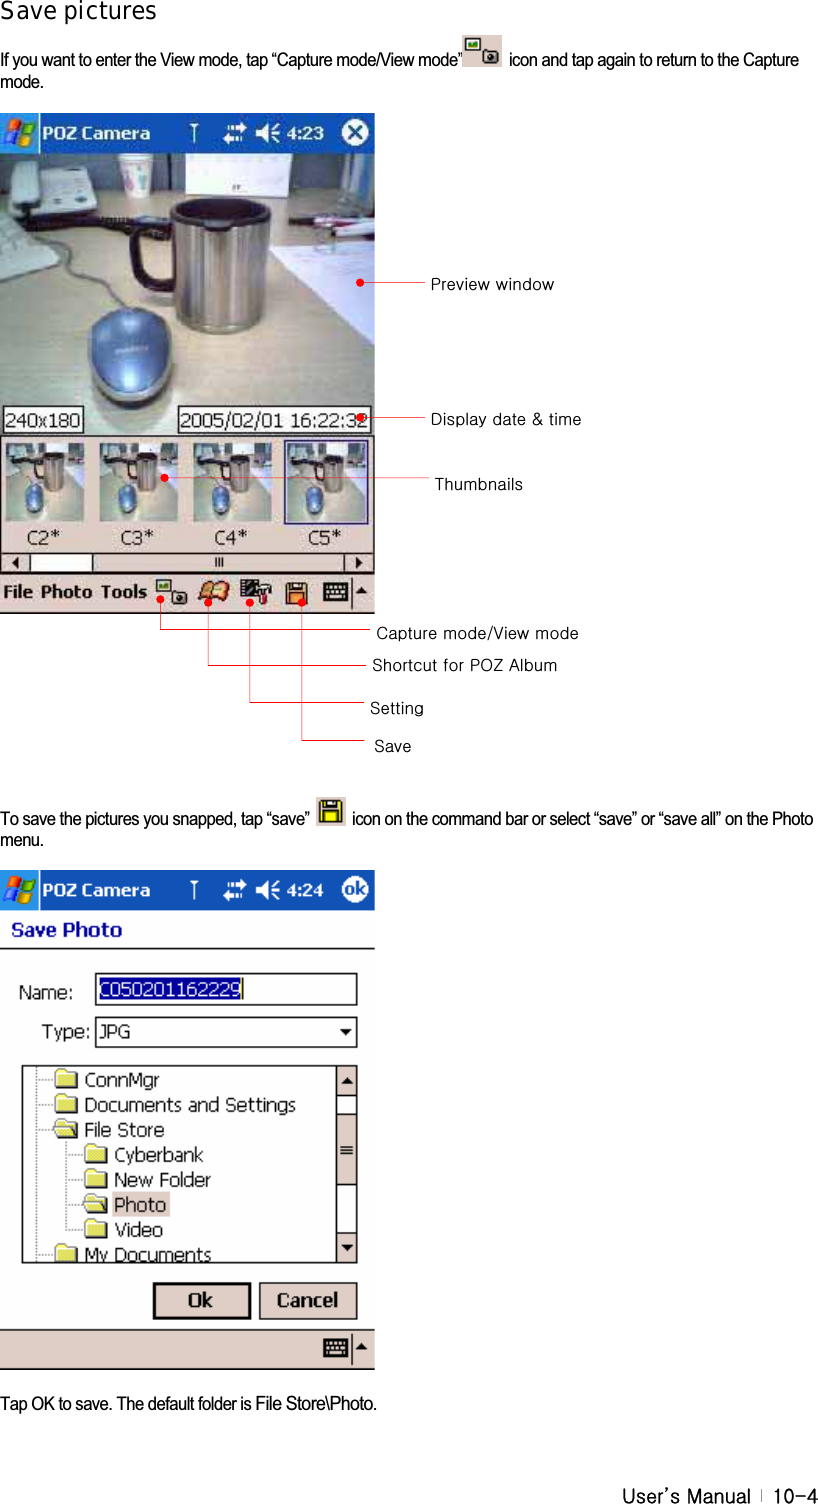
![G|˅GtG G XWT]Shortcut for POZ Album Tap “Shortcut for POZ Album” icon on the command bar to open the POZ Album program which helps you to view the stored pictures. Settings Tap “Setting” on the Tools menu to set POZ Camera program. Tap OK to save on Screen size, the maximum number of images, Timer, Brightness, button and shutter sound.](https://usermanual.wiki/CyberBank/CB-0880NP/User-Guide-530332-Page-177.png)

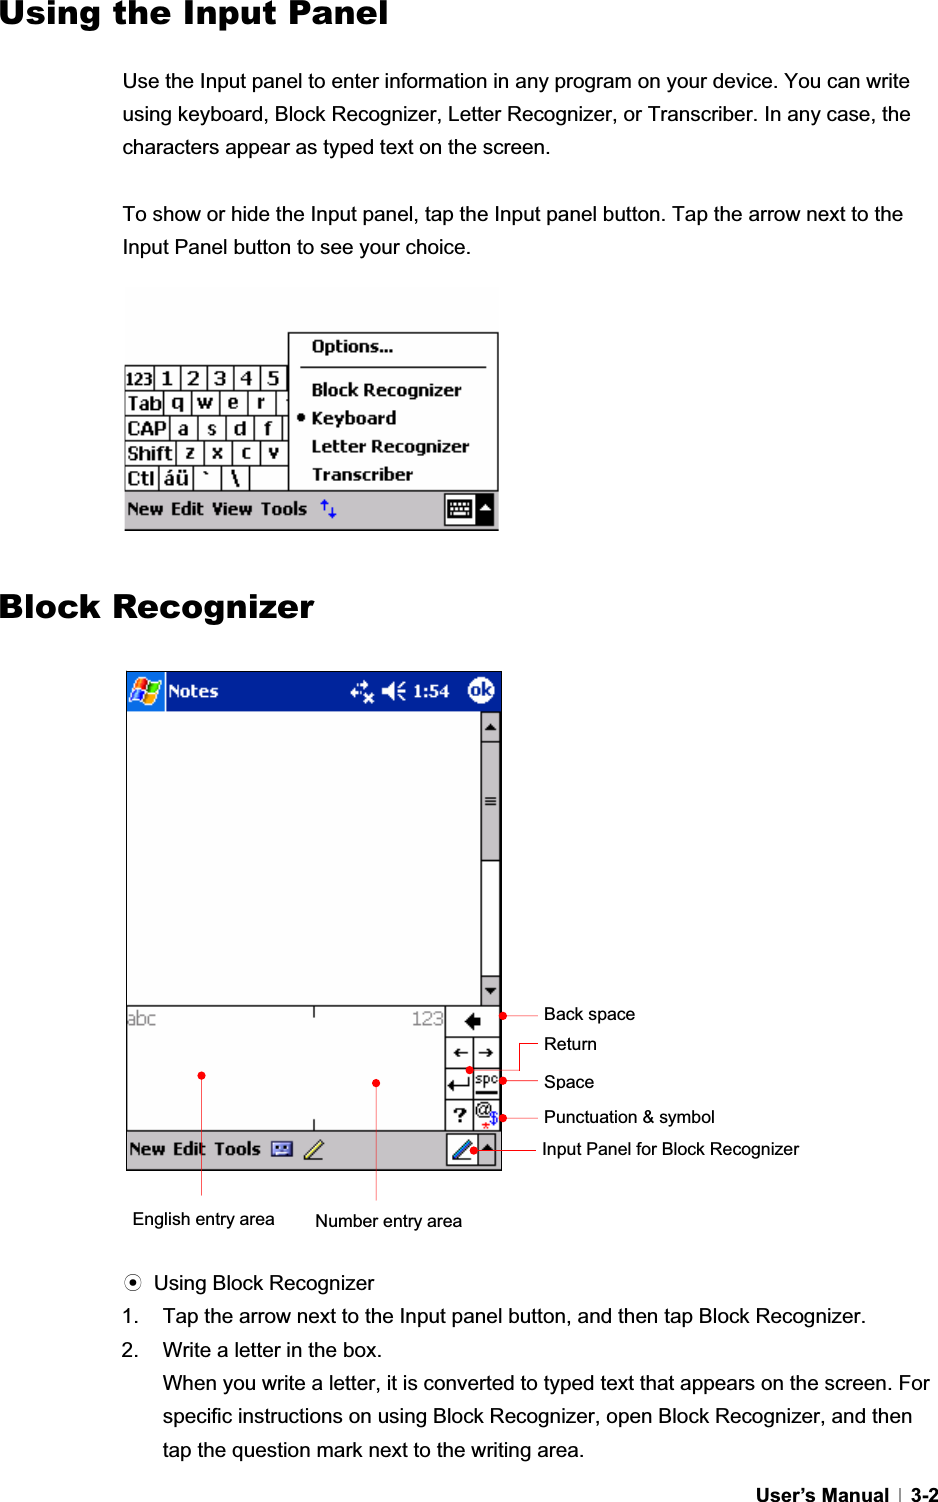
![G|˅GtG G XWTX]GhGGGGGGGGGGvrUGGOpen the existing album Tap “Open Album” to open the existing album. GGGGGGGGGGGGGGGGzGGGGGGGvrUGGGGGGGGGGGGGGGGGGGGGGG{GGGGGGGGGUG](https://usermanual.wiki/CyberBank/CB-0880NP/User-Guide-530332-Page-187.png)