CyberOptics 003 WML-C40 User Manual WaferSense TM AGS User s Guide
CyberOptics Semiconductor WML-C40 WaferSense TM AGS User s Guide
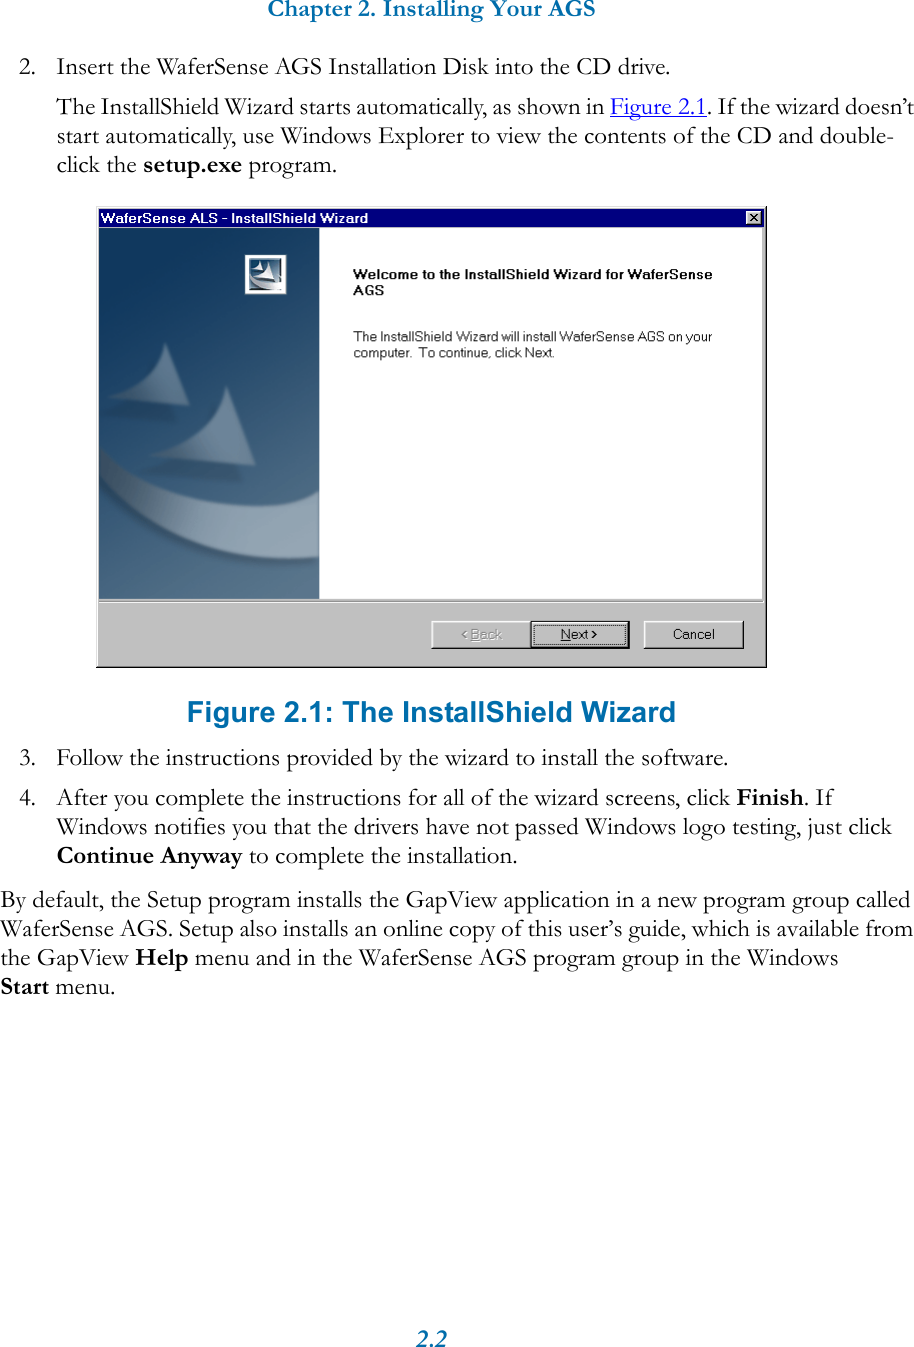
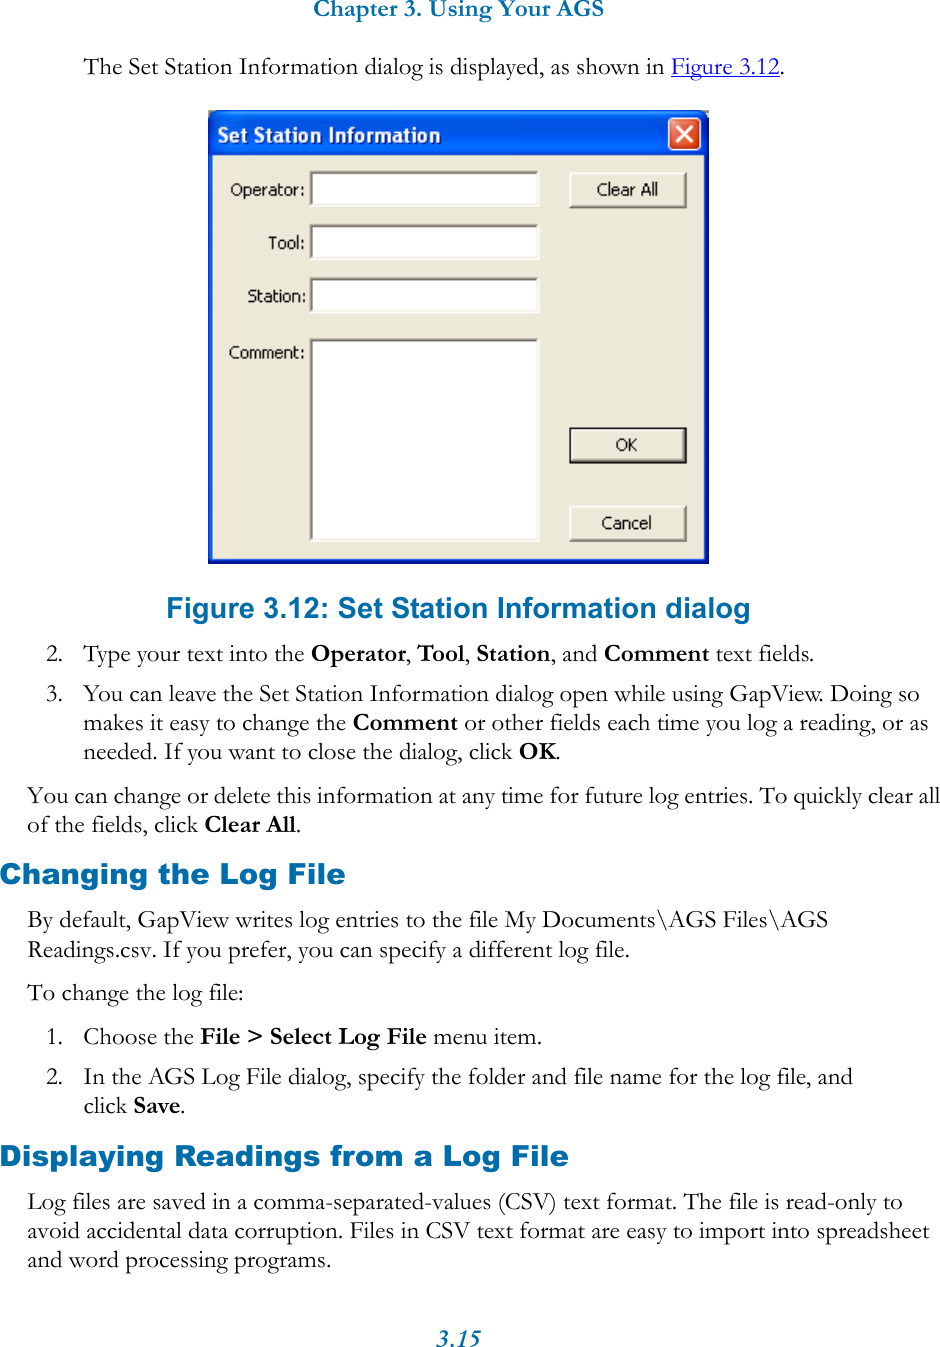
UserManual.wiki
>
CyberOptics
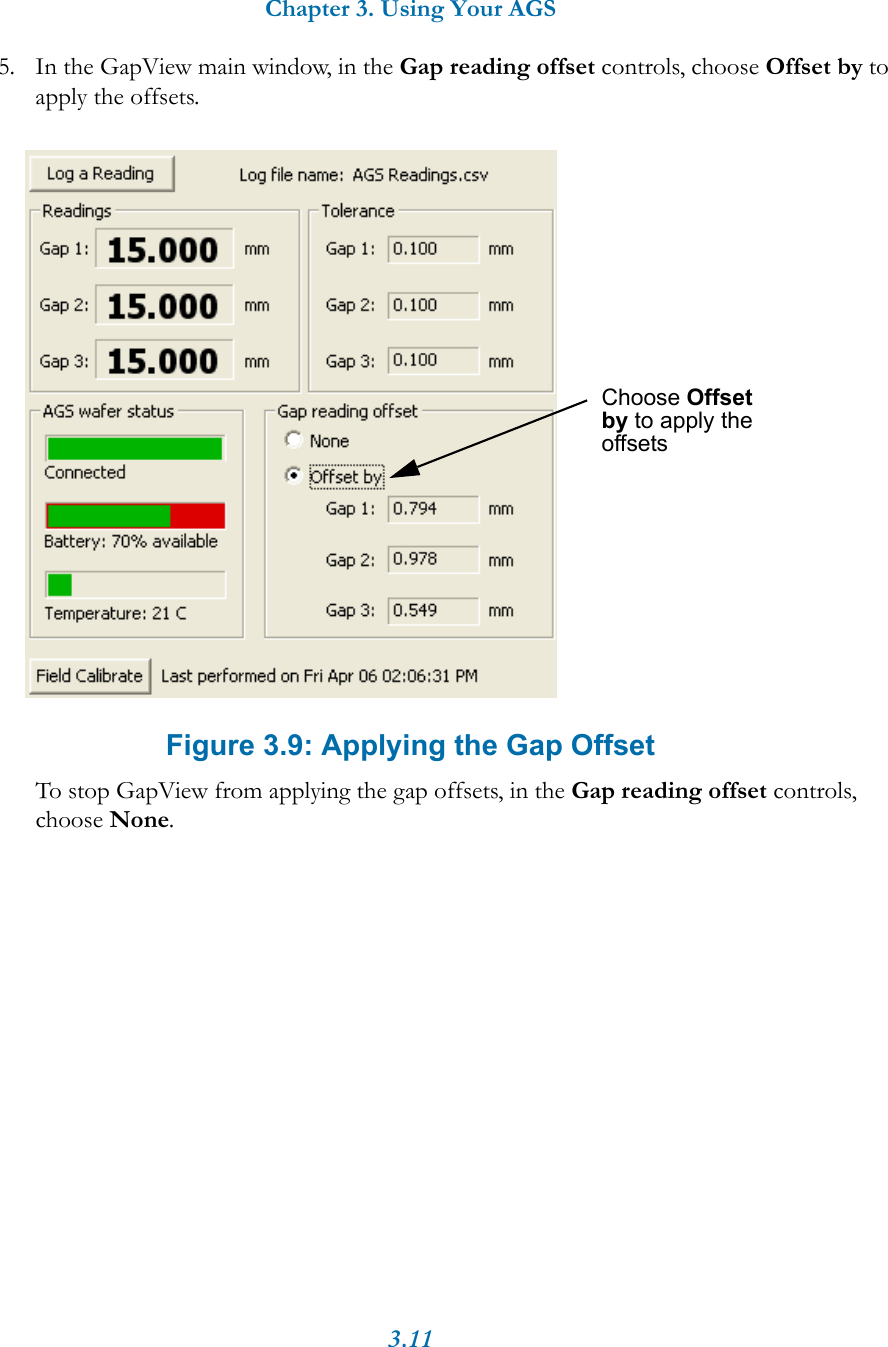
>
003 User Manual
>
User Manual
Contents
1.
User Manual
2.
Users Manual
3.
User Manual_20171102_v1 - 11_11616692 AMS-8023533-REV_E (2)
4.
User Manual_20200121_v1 - 11_APS3-8025869-User-Guide-REV_A resize
User Manual
Navigation menu
Upload a User Manual
Namespaces
Wiki Guide
HTML
PDF
Info
Views
User Manual
Discussion / Help
Navigation