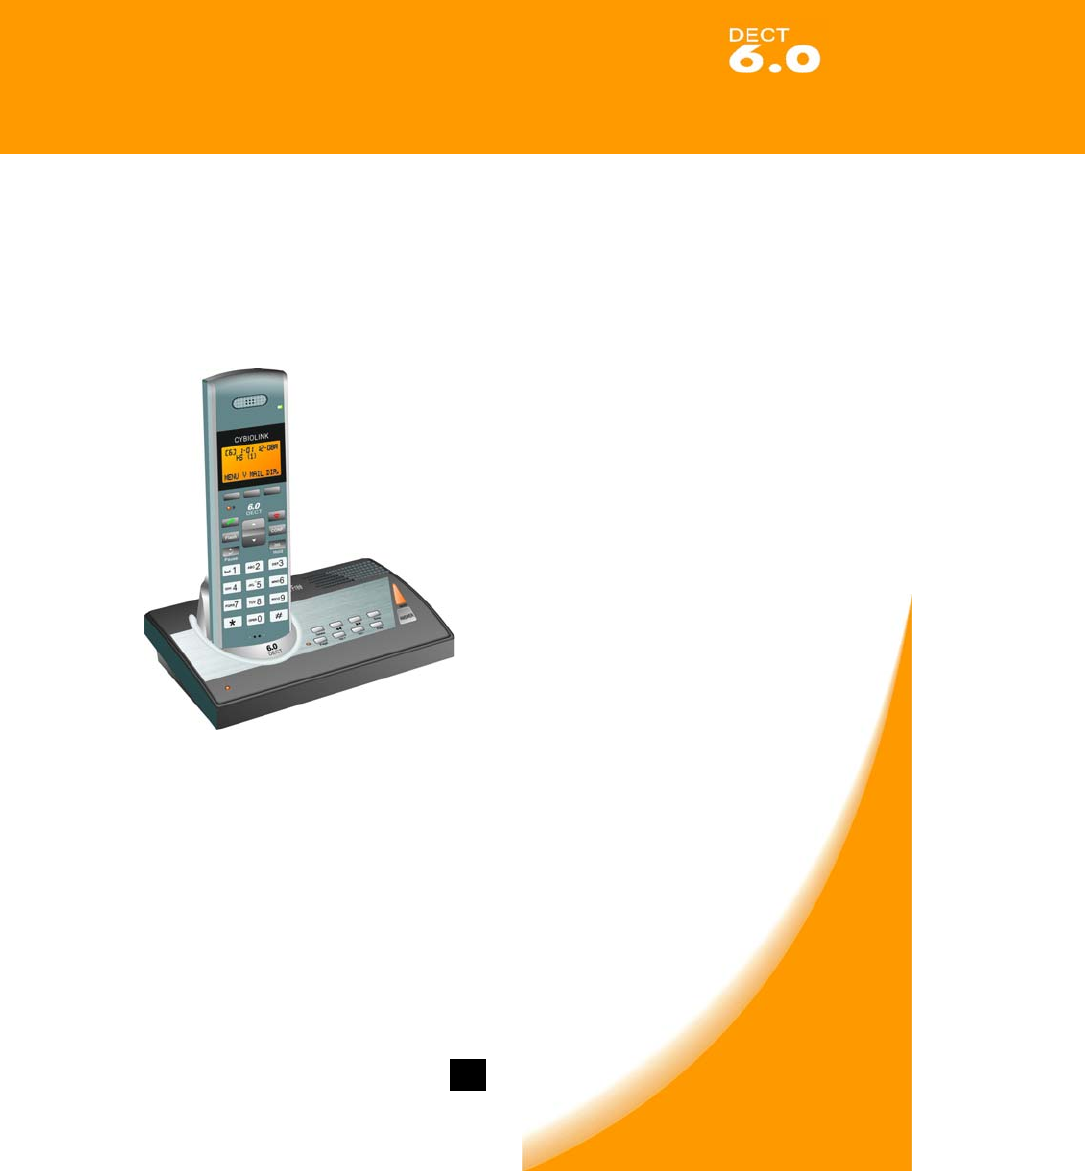
Cybiotronics 936001 1.9GHz CORDLESS PHONE User Manual
Cybiotronics Limited 1.9GHz CORDLESS PHONE Users Manual
Users Manual
0
OWNER’S MANUAL
Installation and operating instructions
60CN57-2
DIGITAL CORDLESS PHONE SYSTEM
Please read this manual carefully
before use. Retain it for future
reference.
KEY FEATURES
z Answering System
z Interference free Digital **
z Maximum range
z Excellent handset speakerphone
z Provides the best sound quality,
security and range
z Amber backlit keypad and display
z Slim cutting-edge design
CALLER ID / CALL WAITING COMPATIBLE
Caller ID, Caller ID Call Waiting are available from your local
telephone operator. After subscribing to Caller ID, Caller ID
Call Waiting, this phone will display Caller/Caller Waiting
party’s name and phone number (where available).
**DECT 6.0 technology will not conflict with other wireless
devices such as wireless computer routers and keyboards,
Bluetooth accessories, microwave oven and other popular
household devices.

1
IMPORTANT INFORMATION---------------------------------------------------------------------
Important Safety Instructions-----------------------------------------------------------------------
INTRODUCTION--------------------------------------------------------------------------------------
Special Features---------------------------------------------------------------------------------------
INSTALLATION---------------------------------------------------------------------------------------
Package Contents-------------------------------------------------------------------------------------
Choosing the Best Location-------------------------------------------------------------------------
Connecting the Base Unit---------------------------------------------------------------------------
Charging the Batteries-------------------------------------------------------------------------------
DC Power------------------------------------------------------------------------------------------------
Low Battery---------------------------------------------------------------------------------------------
Cleaning the Battery Contacts---------------------------------------------------------------------
USING YOUR PHONE-------------------------------------------------------------------------------
Handset--------------------------------------------------------------------------------------------------
Base Unit------------------------------------------------------------------------------------------------
Powering ON the Handset--------------------------------------------------------------------------
Standby Mode------------------------------------------------------------------------------------------
Powering OFF the Handset-------------------------------------------------------------------------
Range Condition---------------------------------------------------------------------------------------
Registration---------------------------------------------------------------------------------------------
BASE SETTINGS VIA HANDSET----------------------------------------------------------------
Deregister a Handset---------------------------------------------------------------------------------
Dial Mode------------------------------------------------------------------------------------------------
Flash Time-----------------------------------------------------------------------------------------------
Modify PIN-----------------------------------------------------------------------------------------------
Set Base to Default -----------------------------------------------------------------------------------
HANDSET SETTINGS-------------------------------------------------------------------------------
Alarm -----------------------------------------------------------------------------------------------------
Ring Setup ----------------------------------------------------------------------------------------------
Configure Ringtone for Incoming Calls via External line (outside land line)---------
Configure Ring Volume for Incoming Calls External line (outside land line)---------
Configure Ringtone for Intercom Calls--------------------------------------------------------
Configure Ring Volume for Intercom Calls---------------------------------------------------
Do Not Disturb------------------------------------------------------------------------------------------
Tone Setup----------------------------------------------------------------------------------------------
Set Key Tone On/Off-------------------------------------------------------------------------------
Set Battery Low Alert Tone On/Off-------------------------------------------------------------
Set Out of Range Alert Tone On/Off-----------------------------------------------------------
4
4
6
6
7
7
7
8
8
9
9
9
10
10
10
11
11
11
11
12
14
14
14
15
15
16
17
17
17
18
18
19
19
19
20
20
20
20
CONTENTS

2
Language Setting--------------------------------------------------------------------------------------
Change Handset Name------------------------------------------------------------------------------
Auto Answer --------------------------------------------------------------------------------------------
Set Auto Answer Mode On/Off---------------------------------------------------------------------
Call Barring----------------------------------------------------------------------------------------------
Date & Time Settings---------------------------------------------------------------------------------
Set Time Format------------------------------------------------------------------------------------
Set Date & Time ------------------------------------------------------------------------------------
Set Weekday ----------------------------------------------------------------------------------------
Set Handset to Default-------------------------------------------------------------------------------
Display the Phonebook Entries--------------------------------------------------------------------
Add Entries to Phonebook --------------------------------------------------------------------------
Symbols--------------------------------------------------------------------------------------------------
Edit an Entry in the Phonebook--------------------------------------------------------------------
Delete an Entry from the Phonebook-------------------------------------------------------------
Delete all Entries in the Phonebook --------------------------------------------------------------
Review Caller ID List ---------------------------------------------------------------------------------
Save Caller ID Information to Phonebook-------------------------------------------------------
Delete a Record from the Caller ID List----------------------------------------------------------
Delete all Records in Caller ID List----------------------------------------------------------------
Review Dialed Numbers List------------------------------------------------------------------------
Add a Dialed Number to the Phonebook--------------------------------------------------------
Delete a Dialed Number-----------------------------------------------------------------------------
Delete All Dialed Numbers--------------------------------------------------------------------------
MAKING A CALL-------------------------------------------------------------------------------------
Dial a Number------------------------------------------------------------------------------------------
Call from Phonebook---------------------------------------------------------------------------------
Call from Caller ID List-------------------------------------------------------------------------------
Call from Dialed Numbers List---------------------------------------------------------------------
Call the Last Dialed Number------------------------------------------------------------------------
Enter a Pause in Dialing Sequence---------------------------------------------------------------
PAGING AND INTERCOM-------------------------------------------------------------------------
Locate Misplaced Handset(s) with the Base Unit---------------------------------------------
Intercom between Handsets------------------------------------------------------------------------
Transfer a Call to another Handset---------------------------------------------------------------
CALL CONFERENCING----------------------------------------------------------------------------
Call Conferencing-------------------------------------------------------------------------------------
RECEIVING A CALL---------------------------------------------------------------------------------
Via External line (outside land line)---------------------------------------------------------------
During Intercom----------------------------------------------------------------------------------------
Switch to a Waiting Call------------------------------------------------------------------------------
Mute a Call----------------------------------------------------------------------------------------------
CONTENTS
21
21
22
22
22
23
23
23
24
24
25
25
26
26
27
27
28
28
28
29
29
29
30
30
32
32
32
32
33
33
33
34
34
34
35
36
36
38
38
39
39
40

3
Answering System----------------------------------------------------------------------------------
Message capacity-------------------------------------------------------------------------------------
Activate the answering machine-------------------------------------------------------------------
Activate via the base-------------------------------------------------------------------------------
Activate via the handset--------------------------------------------------------------------------
Telephone answering machine setting-----------------------------------------------------------
Set date/time/weekday----------------------------------------------------------------------------
Set message alert tone---------------------------------------------------------------------------
Set number of rings-------------------------------------------------------------------------------
Set number of rings--------------------------------------------------------------------------------
Set TAM mode--------------------------------------------------------------------------------------
Answer with recording-----------------------------------------------------------------------------
Answer without recording-------------------------------------------------------------------------
Set QGM----------------------------------------------------------------------------------------------
Set remote access PIN---------------------------------------------------------------------------
Restore ATM default setting------------------------------------------------------------------------
New message indication----------------------------------------------------------------------------
Message play back-----------------------------------------------------------------------------------
Options during playback on the telephone base -------------------------------------------
Options during playback on the handset ----------------------------------------------------
Delete all messages ---------------------------------------------------------------------------------
Record and play memos-----------------------------------------------------------------------------
Record a memo-------------------------------------------------------------------------------------
Call screening------------------------------------------------------------------------------------------
Call intercept-------------------------------------------------------------------------------------------
Remote access----------------------------------------------------------------------------------------
TROUBLESHOOTING-------------------------------------------------------------------------------
CARE AND MAINTENANCE----------------------------------------------------------------------
FCC REQUIREMENTS------------------------------------------------------------------------------
INDUSTRY CANADA REQUIREMENTS-----------------------------------------------------
CUSTOMERS SERVICE----------------------------------------------------------------------------
41
41
42
42
42
43
43
43
43
44
45
45
45
46
48
49
50
50
51
51
52
53
53
54
54
54
56
57
58
61
62
CONTENTS

4
Important Safety Instructions
To reduce the risk of fire, electric shock and / or injury to persons, always follow
the following safety precautions when using this telephone equipment.
1. Read, understand, and follow all
instructions.
2. Unplug this telephone from the wall
outlet before cleaning. Do not use
liquid or aerosol cleaners. If necessary,
use a soft cloth lightly moistened with
a mild detergent solution.
3. Do not use this telephone near a
bathtub, kitchen sink, wash bowl,
laundry tub, swimming pool, a wet
basement or anywhere else there is
water or liquid.
4. Do not place this telephone on an
unstable cart, stand or table. A fall
could cause serious damage to the
phone.
5. Slots and openings in the cabinet at
the back or bottom are provided for
ventilation to protect the unit from
overheating. These openings must not
be blocked or covered. Do not place
this telephone on a bed, sofa, rug or
other similar surface. This telephone
should never be placed near or over a
radiator or heat register. This
telephone should not be placed in a
built-in installation unless proper
ventilation is provided.
6. Never push objects of any kind
through slots in the phone. They could
touch dangerous voltage points or
short out parts that could result in a
risk of fire or electric shock. Never spill
liquid of any kind on the telephone.
7. Unplug this telephone from the wall
outlet and refer to a qualified service
representative in any of the following
situations:
a) If liquid has been spilled into the
telephone.
b) If the telephone has been
exposed to rain or water.
c) If the telephone does not operate
normally by following the
operating instructions. Adjust
only those controls that are
covered by the operating
instructions. Improper adjustment
of other controls may result in
damage and will often require
extensive work by a qualified
technician to restore the
telephone to normal operation.
d) If the telephone has been
dropped or the case has been
damaged.
e) If the telephone exhibits a distinct
change in performance.
8. Do not use the telephone to report a
gas leak in the vicinity of the leak.
9. Avoid using this telephone during an
electrical storm. There may be a
remote risk of electric shock from
lightning.
10. Never install jacks in a wet location
unless the jack is specifically designed
for wet locations.
11. Never touch uninsulated telephone
wires or terminals unless the
telephone line has been disconnected
at the network interface.
IMPORTANT INFORMATION

5
12. Use with caution when installing or
modifying telephone lines.
13. To reduce the risk of electric shock, do
not disassemble this product, but take
it to a qualified service centre when
some service or repair work is required.
Opening or removing covers may
expose you to dangerous voltages or
other risks. Incorrect reassembly can
cause electric shock when the
appliance is subsequently used.
14. Use only the power cord and batteries
indicated in this manual. Do not
dispose of batteries in fire. They may
explode. Check with local codes for
possible special disposal instructions.
15. Plug the power adapter to the
socket-outlet that is nearest to the
telephone and is easily accessible.
16. For service or replacement, you can
purchase a suitable headset through
our service center or retailer shop.
17. We advise that this telephone should
not be used near intensive care
medical equipment or by persons with
pacemakers.
18. CAUTION
RISK OF EXPLOSION IF REPLACED
BY AN INCORRECT TYPE.
DISPOSE OF USED BATTERIES
ACCORDING TO THE
INSTRUCTIONS. USE ONLY WITH
(DESAY MODEL NO:
DESAY600AAAH ; (1.2 V 600mAh )
Ni-MH RECHARGEABLE BATTERY)
Use only with a Class 2 Power Source, 7.5V DC, 300mA for
the Base Unit
SAVE THESE INSTRUCTIONS
IMPORTANT INFORMATION

6
INTRODUCTION
Special Features
DECT 6.0 (1.9GHz) digital cordless telephone system
Multiple handsets capability, supports up to 5 handsets (Model
CY-932 expandable handsets may be purchased separately by
calling – see page 61 for details)
Answering system which can record and store up to 59
messages. A single message can be up 2 minutes in length.
3-way conference call - two handsets & an incoming call
(an expandable handset is required)
Call transfer to other handsets
Hands-free speakerphone function
Phonebook with 40 entries; Phonebook dialing
Outgoing call list up to last 9 dialed numbers
Support fixed line Type I and Type II CID (FSK and DTMF)
Caller list with last 40 Caller ID records
Hold function (for two or multiple handsets)
Mute function
Intercom between two handsets
(an expandable handset is required)
Alarm clock including snooze option
Page to all handsets
Tone / Pulse dialing
Digital volume control
Audio setup that includes 10 melodies for external-line and
intercom rings
Range Alert tone option
Battery low tone option
Barring handset from dialing
Display the talk / intercom time
Auto answer function
English / German / French / Italian / Spanish / Dutch intelligent
LCD display

7
Package Contents
Check to be sure that the following items are included. If there is any missing or
visible damage, contact the original place of purchase and do not attempt to
operate if it is damaged.
One Base Unit with Handset
1 Belt Clip
Two Rechargeable Batteries ( AAA 1.2V / 600mAh)
One 7 foot Telephone Line cord
One DC adapter (DC 7.5V / 300mA)
Owner’s Manual
Choosing the Best Location
Calls are transmitted between the base unit and handset, or between handsets (an
expandable handset is required), by way of wireless radio waves. For maximum
distance and noise-free operation, here are some important guidelines:
1. The location of base unit should be close to both a phone jack and a
continuous power outlet that is not switch-controlled.
2. Place the base unit at a high, central location with no obstructions such as
walls.
3. Keep the base unit and the handset away from sources of electrical noise
such as a TV, personal computer, or another cordless phone.
4. The base unit can be placed on the tabletop or mounted on a wall.
Note: While using the handset:
If you are near a working microwave oven, noise may occur from the receiver or
speaker. Move away from the microwave oven and closer to your phone’s base
unit.
If more than one cordless telephone set is being used and your handset is near
another cordless phone’s base unit, noise may occur. Move away from the other
phone’s base unit and closer to your base unit.
INSTALLATION
8
Your new telephone includes the highest quality NiMH (Nickel Metal Hydride)
rechargeable batteries. Following the simple instructions below can significantly
improve your batteries operational results.
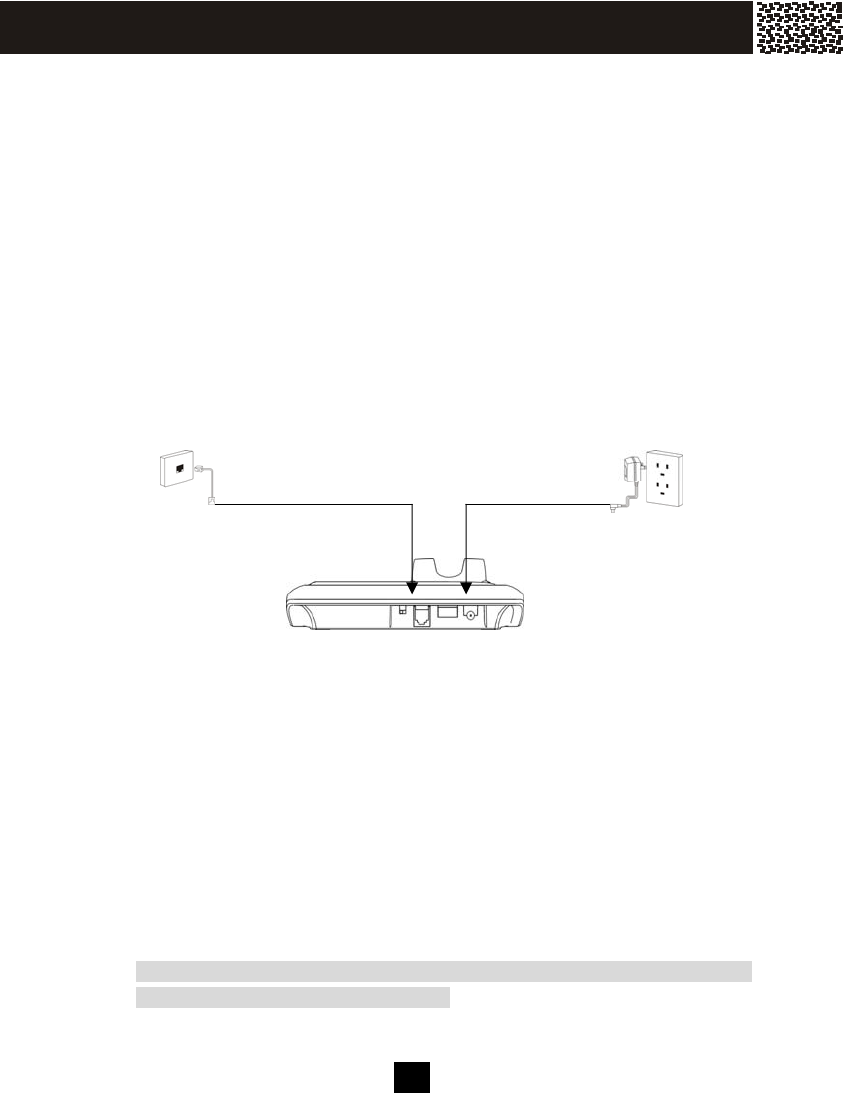
Connecting the Base Unit
1. Plug one end of the telephone line cord into the ‘TEL. LINE’ jack at the
bottom of the base unit and plug the other end of the cord into a modular
telephone wall jack. (If your wall jack is not modular, contact your local
telephone company for assistance).
2. Plug the supplied DC adapter’s barrel plug into the ‘DC 7.5V’ jack at the
bottom of base unit and the other end into a standard 120V AC wall outlet.
Charging the Batteries
1. Press the release point on the back cover of the handset and slide
downwards to open the battery compartment.
2. Insert the supplied two batteries into the compartment according to polarity
marks (+).
3. Slide the back cover upwards until it snaps into place.
4. Place the handset on the base unit and make sure the Charge Indicator on
the base unit illuminates, which indicates that it has begun charging. The
battery icon on the handset LCD will change from the mode of ‘very low’, to
‘low’, to ‘medium’, to ‘full’ and repeat as a cycle.
5. Leave the handset on the base unit and make sure the batteries are charged
for at least 15 hours prior to initial use!
INSTALLATION
TELEPHONE WALL JACK AC WALL OUTLET

9
DC Power
Caution:
1. Use only with the supplied DC Adapter (AC 120V, DC 7.5V, 300mA).
2. Plug the adapter into a continuous power outlet, which is near the base unit
and is not switch-controlled.
3. The DC adapter must be kept connected at all times. (It is normal for the
adapter to be warm during use).
4. Do not remove the battery from the handset to charge it. Do not remove or
damage the battery casing.
5. For the longest battery life and the maximum talk & standby time, try to
completely charge and discharge the batteries every time.
6. If you do not expect to use your phone for a month or longer, remove the
batteries from the handset. The batteries may leak chemicals that can
destroy electronic components.
7. To avoid the risk of explosion, do not dispose of the batteries in a fire. Check
with your local waste facility for disposal instructions.
Low Battery
The battery icon on the handset LCD shows the current level of battery strength.
If the battery is not properly charged, there will be a warning tone when the handset
is in use. While this occurs, the handset may not function normally, and the
handset must be immediately placed back onto the base unit for battery charging.
Clean Battery Contacts
To maintain a good charge, it is necessary to clean all battery contacts on the
handset and the base unit with a soft, dry cloth about once a month. You may also
use a pencil eraser or other contact cleaner, but never use any liquids or solvents.
INSTALLATION

10
Wall Mounting Base Unit
The base unit can be mounted on a standard wall phone plate.
1. Plug the DC adapter’s barrel plug into the jack marked “7.5V 300mA” at the
bottom of the base unit.
2. Plug the telephone line cord into the jack marked “TEL. LINE”.
3. Hold the base unit up next to the wall jack and plug the line cord into the wall
jack.
4. Place the base unit on the posts of the wall plate and push down until the
base unit is secured firmly.
5. Plug the DC adapter into a standard wall outlet.
Note: If you are not using a standard wall plate to mount the phone on a wall, you
may also mount it with ordinary screws. Affix two screws on the wall, remember to
leave 1/8 inch of the screw extending from the wall.
Short tab

11
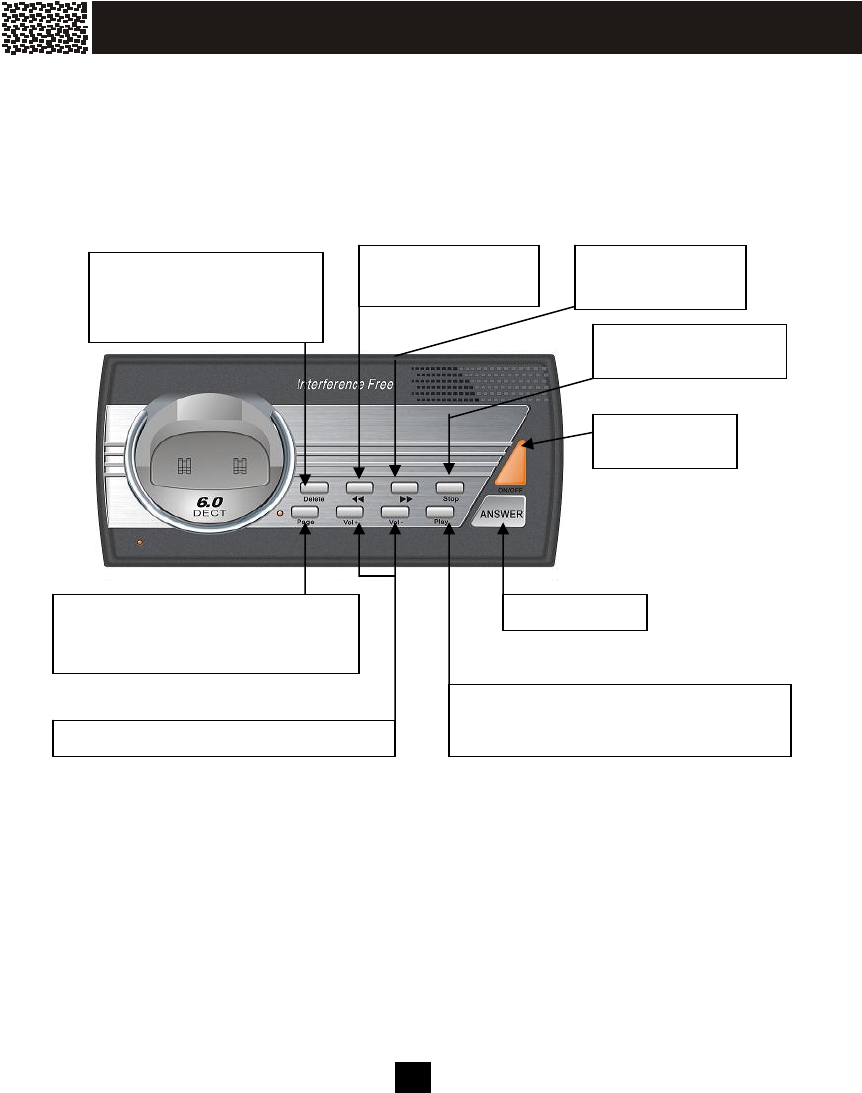
1 Receiver
2
Light Indication for
• New Call
• Incoming Call
• Line-in-use
• Voice Mail
3 Date & Time
4 Handset Name
5 Battery Strength
6 Menu
7
Softkeys, each key is
programmed to perform
various functions.
8 Speakerphone Indicator
9 Talk, to make or receive
calls.
10
Menu scroll and volume key,
to navigate menu items and
adjust volume during talk.
11 End / Off, to terminate calls.
12
Flash, to access some
services provided by the
telephone company.
13 Conference
14 Redial / Pause
15 Intercom
16 Keypad
17 Microphone
18 Delete massage
19 Headset Jack (use 2.5mm
jack headset)
20 Play the previous message.
21 Skip to the next message
22 Stop to play massage
23 TAM indicator
24 Page
25 Adjust volume
26 Play message
27 TAM On/Off
Handset
se Unit
USING YOUR PHONE
Base Unit
18 20
2
1
22
23
24
25
26
27
12
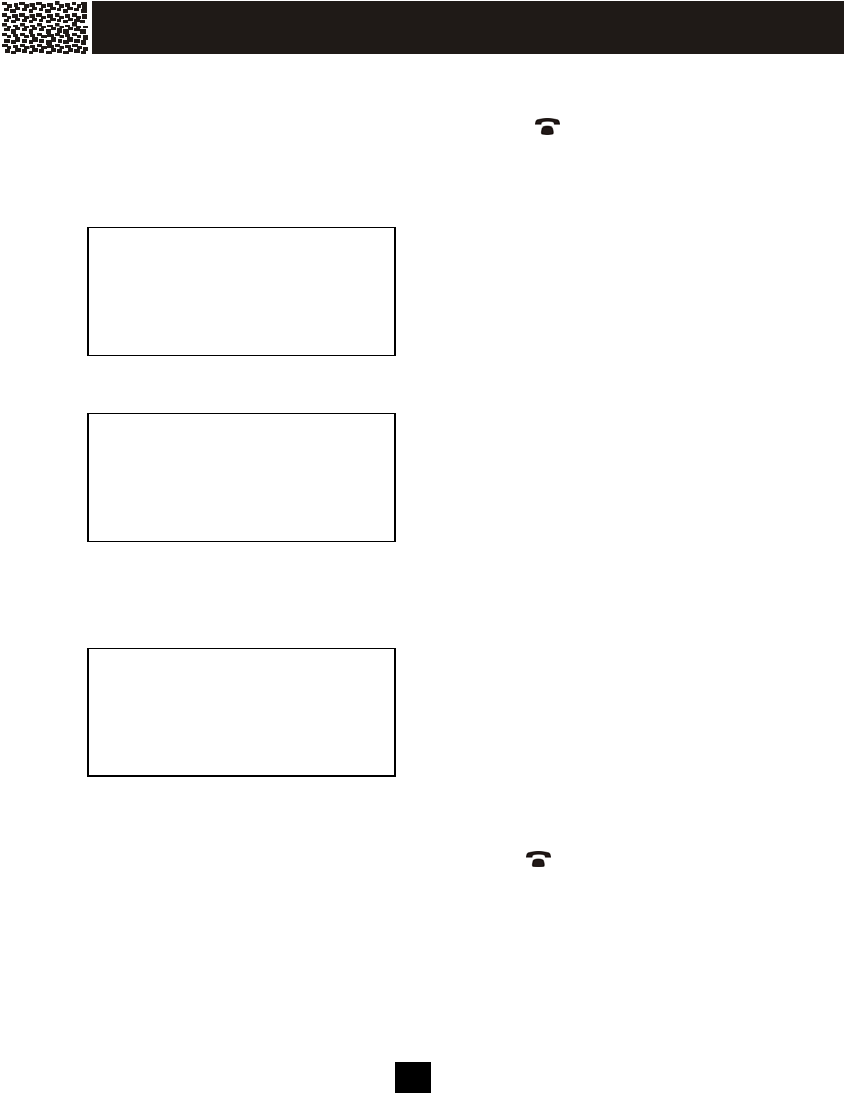
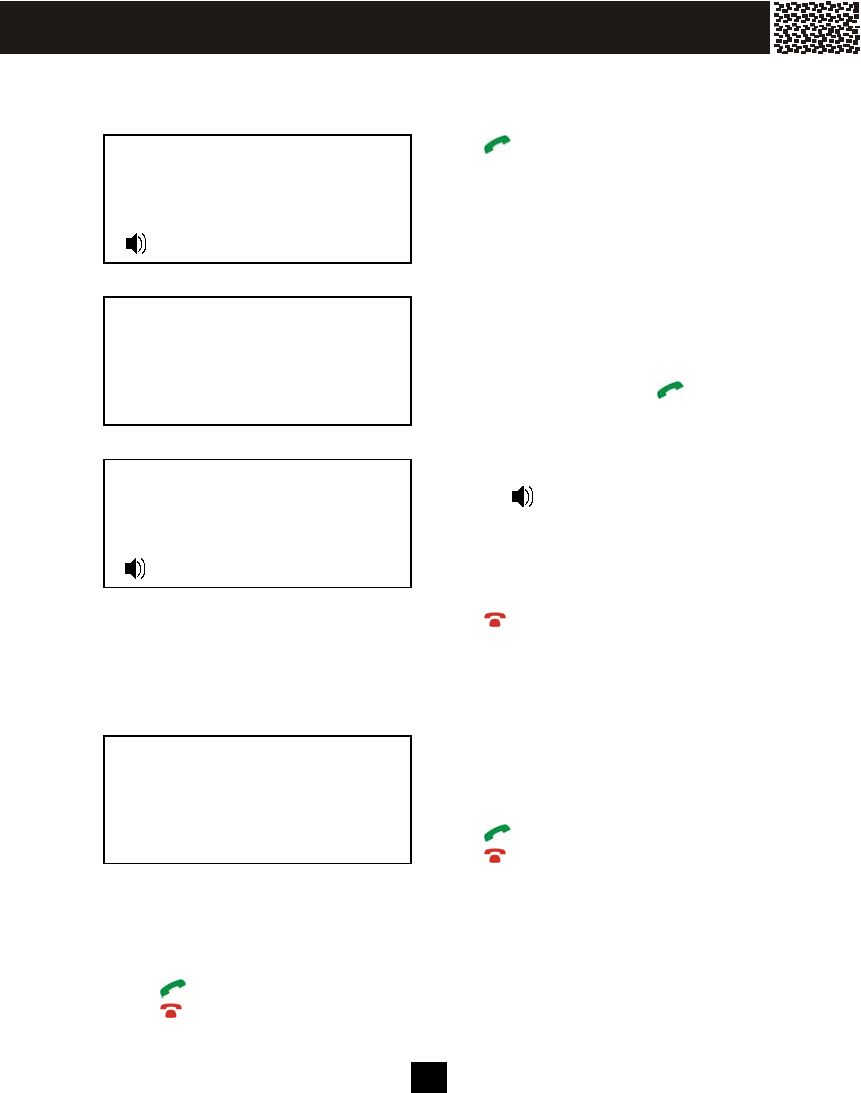
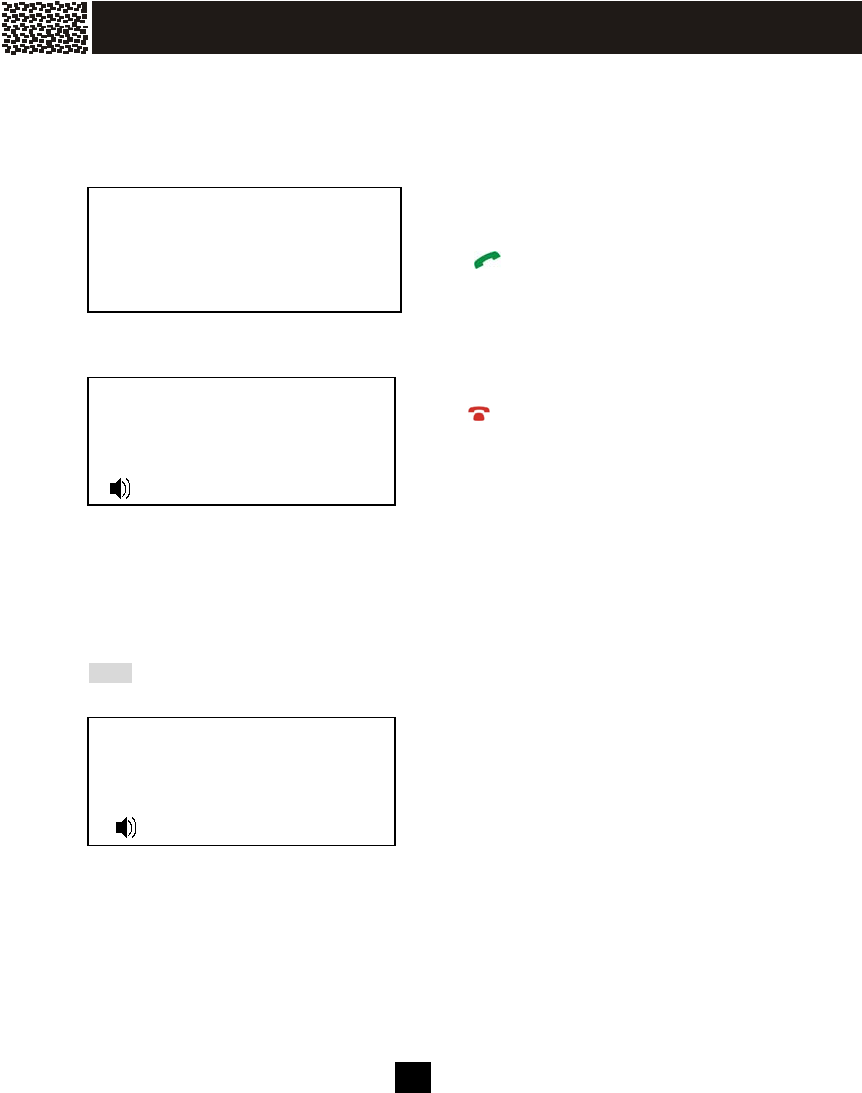
Powering ON the Handset
When the handset is powered OFF, press and hold the key for 2 seconds or
simply place it on the base unit to power it ON.
If battery life is sufficient, the handset will power ON. If not, it will remain powered
OFF.
After powering ON, the handset will enter
subscription mode and search for a
registered base. A message as shown, will
display on the screen.
If the handset is unsuccessful in finding a
base, the screen will show ‘OUT OF
RANGE’. Please move the handset closer
to the base unit or check whether the
power adapter is properly connected at
both the base unit and wall outlet.
Standby Mode If the handset is successful in finding a
base, the handset will enter the standby
mode.
In standby mode, a registered handset
displays as shown.
Powering OFF the Handset
When the handset is powered ON, press and hold the key for 2 seconds to
power it OFF.
Note: To answer a call when the handset is powered OFF, you need to power it
back ON. It may take a few moments for the handset to re-establish a radio link
with the base unit.
Range Condition
A warning indication will be provided to the user when the handset is out of range.
SEARCHING
MENU
DIR
OUTOFRANGE
MENU
DIR
12–25 2:58 P
HS (1)
ANSWERON
MENU
DIR
USING YOUR PHONE
13
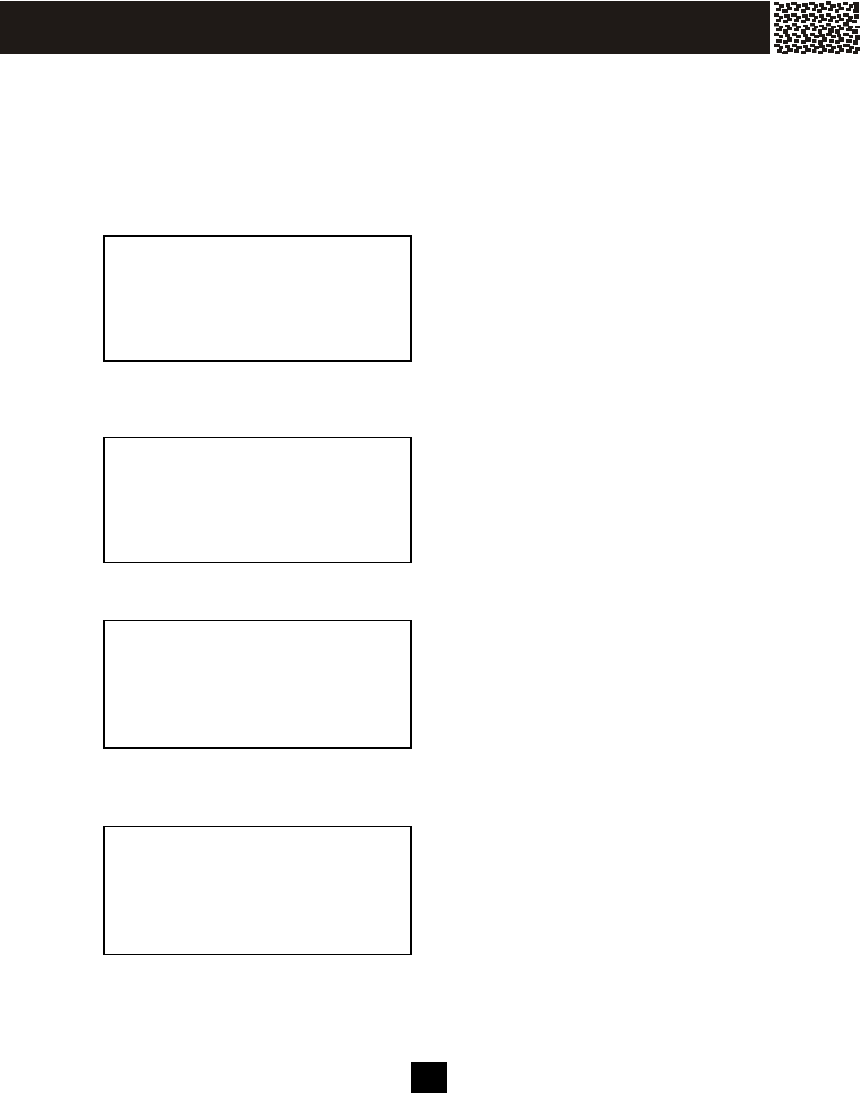
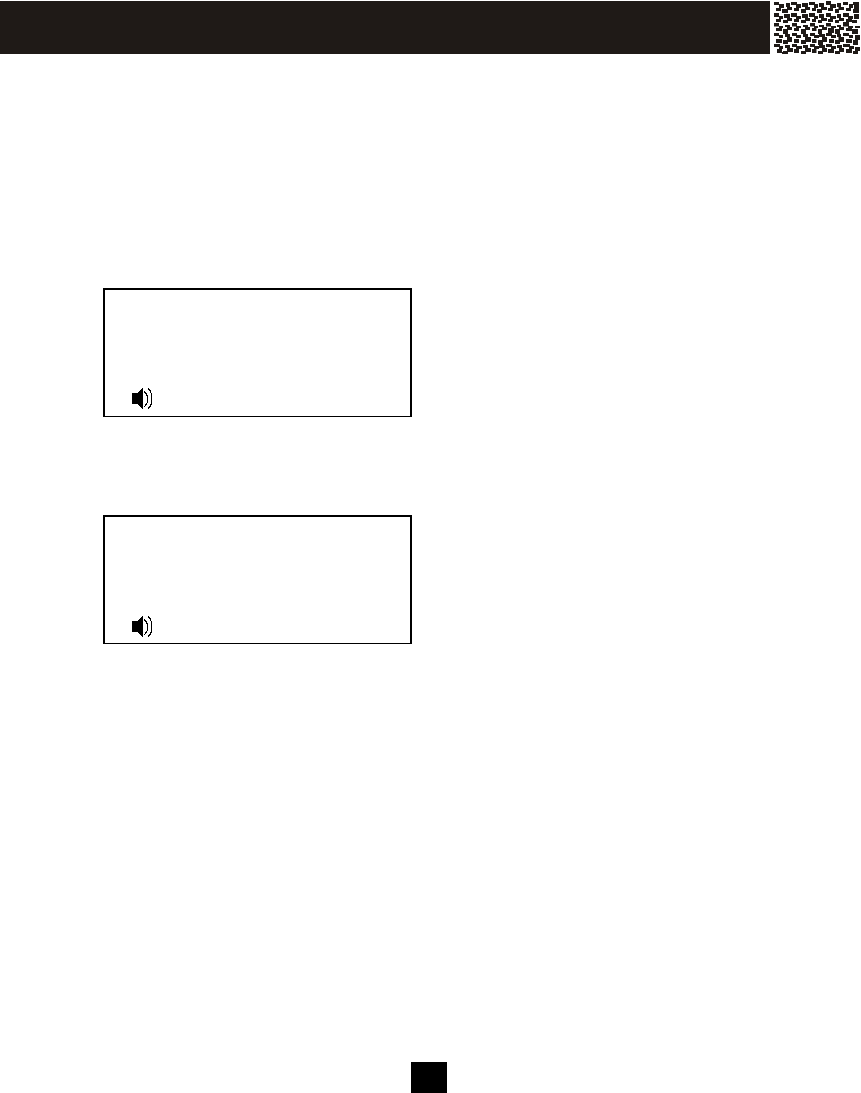
Registration
Before registering a handset to the base unit, the base unit should first enter the
registration mode.
Press the [Page] key on the base for more than 3 seconds until the ‘Line-in-use’
indicator begins to flash quickly.
An unregistered handset displays as
shown.
Press the [MENU] softkey, and then the
[OK] softkey to enter ‘REGISTRATION’.
After pressing the [OK] softkey, a list of
bases will be displayed.
There are 4 base positions available for
registration.
Select the BASE among BASE1 - BASE4,
(For the first time of use, select ‘BASE1’),
then press the [SEL] softkey.
Now the handset begins searching for the
base.
UNREGISTERED
MENUDIR.
REGISTRATION
OKEXIT
BASE1↓
BASE2
SELEXIT
SEARCHING1
EXIT
USING YOUR PHONE
14
When the base has been found, you have
to input the PIN code (4 digits) for the
base. The default PIN code is 0000.
(The code can be changed later).
Then registration is completed.
PIN?****
OKEXIT
12–25 3:29 P
HS (1)
MENU
DIR
USING YOUR PHONE
15
The base options can be set using a handset registered to this base.
Press the [MENU] softkey, select ‘BS SETTINGS’ and press [OK].
Deregister a Handset
Select ‘TERMINATE HS’, and press [OK].
Input the 4-digit PIN code.
The default PIN is 0000.
Use ▲ / ▼ to scroll the list of handsets
(HS).
Press the [DEL] softkey to select a
handset (except for the current handset
which cannot be deregistered).
Dial Mode Press the [MENU] softkey, select ‘BS
SETTINGS’ and press [OK].
Use ▲ / ▼ to select ‘DIAL MODE’, and
press [OK].
Press ▲ / ▼ to scroll the two options.
Press [SAVE] to save your setting.
TERMINATEHS
DIALMODE
OKEXIT
PIN?****
OKDELEXIT
HS1↓
HS2
DELEXIT
TONE ↓
PULSE
SAVEEXIT
BASE SETTINGS VIA HANDSET
16
Flash Time
This function allows the user to set the flash time parameter according to your local
telephone network settings when using the [Flash] key in some services, such as
call waiting service and conference calling service, etc.
Press the [MENU] softkey, select ‘BS
SETTINGS’ and press [OK].
Use ▲ / ▼ to select ‘FLASH TIME’ and
press [OK].
Use ▲ / ▼ to choose between the two
options and then press [SAVE] to save
your setting.
(‘SHORT’ = 300ms, ‘LONG’ = 650ms)
Modify PIN
Press the [MENU] softkey, select ‘BS SETTINGS’, and press [OK].
Use ▲ / ▼ to select ‘MODIFY PIN’ and press [OK].
Input the current 4-digit PIN.
Press [OK] to complete.
The default PIN is 0000.
DIALMODE
FLASHTIME
OKEXIT
SHORT↑
LONG
SAVEEXIT
PIN ? ****
OKDELEXIT
BASE SETTINGS VIA HANDSET
17
Input the new 4-digit PIN.
Press [OK] to complete.
Input the new PIN again to confirm.
Press [OK] to complete.
Please do not forget this new PIN code.
Now the new PIN will be stored in the
base unit.
Set Base to Default
This function allows the user to restore the base settings to the factory default
settings.
Press the [MENU] softkey
Use ▲ / ▼ to select ‘BS SETTINGS’ and
press the [OK] softkey.
Select ‘BASE DEFAULT’ and press the
[OK] softkey.
Input the 4-digit PIN.
The default PIN is 0000.
Press the [OK] softkey to complete.
Then settings of the base will revert to the
factory default values.
NEWPIN****
OKDELEXIT
CONFIRM****
OKDELEXIT
MODIFYPIN↑
BASEDEFAULT
OKEXIT
PIN?****
OKDELEXIT
BASE SETTINGS VIA HANDSET
18
Alarm
Press the [MENU] softkey, select ‘HS
SETTINGS’ and press the [OK] softkey.
Select the ‘ALARM CLOCK’ and press the
[OK] softkey.
Use ▲ / ▼ to select ‘ON’ or ‘OFF’
Press the [SAVE] softkey, to save your
setting.
Select “ON’ and Press the [SAVE]
Use the keypad to input the time
consecutively. (If the ‘TIME FORMAT’ is
‘12-HOUR’ format, you need to choose
‘a.m.’ or ‘p.m.’ by using the [AM/PM]
softkey).
Press [SAVE], to save your setting.
Use ▲ / ▼ to select ‘ON’ or ‘OFF’
Press the [SAVE] softkey, to save your
setting.
Ring Setup
Press the [MENU] softkey, use ▲ / ▼ to
select ‘HS SETTINGS’ and press [OK].
Select ‘RING SETUP’ and press [OK].
ALARMCLOCK ↓
RINGSETUP
OKEXIT
OFF ↓
ON
SAVEEXIT
12:32PM
SAVEAM/PMEXIT
SNOOZEON ↓
SNOOZEOFF
SAVEEXIT
ALARMCLOCK
RINGSETUP
OKEXIT
HANDSET SETTINGS
19
Use ▲ / ▼ to select the type of ring that
you want use.
You can assign different ringtones and
volumes for incoming intercom calls, and
outside land line call (‘INTC’ is for intercom
calls and ‘LINE’ is for outside landline call).
Press the [OK] softkey.
Use ▲ / ▼ to select ‘MELODY’ or
‘VOLUME’ setting.
If you enter the ‘MELODY’ setting
Use ▲ / ▼ to select a melody.
Press the [SAVE] softkey, to save your
setting.
If you enter the ‘VOLUME’ setting.
Use ▲ / ▼ to select a volume level.
Press the [SAVE] softkey, to save your
setting.
Configure Ringtone for Incoming Calls via External line
Press the [MENU] softkey, select ‘HS SETTINGS’ and press [OK]. Select ‘RING
SETUP’ by using ▲ / ▼ and then pressing [OK].
Select ‘LINE RING’, and then press [OK].
Select ‘MELODY’, and then press [OK].
Press ▲ / ▼ to select the desired ringtone, then press the [SAVE] softkey to save
your setting.
Configure Ring Volume for Incoming Calls via External line
Press the [MENU] softkey, select ‘HS SETTINGS’ and press [OK]. Select ‘RING
SETUP’ by using ▲ / ▼ and then pressing [OK].
Select ‘LINE RING’, and then press [OK].
Select ‘VOLUME’, and then press [OK].
Press ▲ / ▼ to select the desired volume, then press the [SAVE] softkey to save
your setting.
INTCRING ↓
LINERING
OKEXIT
MELODY ↓
VOLUME
OKEXIT
MELODY1↓
MELODY2
SAVEEXIT
VOLUME2↑
VOLUME1
SAVEEXIT
HANDSET SETTINGS

20
Configure Ringtone for Intercom Calls
Press the [MENU] softkey, select ‘HS SETTINGS’ and press [OK]. Select ‘RING
SETUP’ by using ▲ / ▼ and then pressing [OK].
Select ‘INTC RING’, and then press [OK].
Select ‘MELODY’, and then press [OK].
Press ▲ / ▼ to select the desired ringtone, then press the [SAVE] softkey to save
your setting.
Configure Ring Volume for Intercom Calls
Press the [MENU] softkey, select ‘HS SETTINGS’ and press [OK].
Select ‘RING SETUP’ by using ▲ / ▼ and then pressing [OK].
Select ‘INTC RING’, and then press [OK].
Select ‘VOLUME’, and then press [OK].
Press ▲ / ▼ to select the desired volume, then press the [SAVE] softkey to save
your setting.
Do Not Disturb
Press the [MENU] softkey, select ‘HS
SETTINGS’ and press [OK].
Select ‘RING SETUP’ by using ▲ / ▼ and
then pressing [OK].
Select ‘DO NOT DISTURB’, and then
press [OK].
Press ▲ / ▼ to choose ‘OFF’ or ‘ON’,
then press [OK] to save your setting.
If this option is set to ‘ON’, the screen will display “DO NOT DISTURB” in standby
mode. Then no ring will be heard from any external line (outside land line) call;
however the call information will still be displayed on the screen, and the call can
still be answered.
LINERING↑
DONOTDISTURB
OKEXIT
OFF ↓
ON
OKEXIT
HANDSET SETTINGS
21
Tone Setup
Press the [MENU] softkey, select ‘HS
SETTINGS’ and press [OK].
Select ‘TONE SETUP’ by using ▲ / ▼
and pressing [OK].
Then you can configure the displayed 3
types of tones.
Set Key Tone On/Off
Press the [MENU] softkey, select ‘HS SETTINGS’ and press [OK].
Select ‘TONE SETUP’ by using ▲ / ▼ and press [OK].
Select ‘KEY TONE’ and press [OK].
Use ▲ / ▼ to select ‘OFF’ or ’ON’, then press [SAVE], to save your setting.
Set Battery Low Alert Tone On/Off
Press the [MENU] softkey, select ‘HS SETTINGS’ and press [OK].
Select ‘TONE SETUP’ by using ▲ / ▼ and press [OK].
Select ‘BATTERY LOW’ and press [OK].
Use ▲ / ▼ to select ‘OFF’ or ‘ON’, then press [SAVE] to save your setting.
Set Out of Range Alert Tone On/Off
Press the [MENU] softkey, select ‘HS SETTINGS’ and press [OK].
Select ‘TONE SETUP’ by using ▲ / ▼ and pressing [OK].
Select ‘RANGE ALARM’ and press [OK].
Use ▲ / ▼ to select ‘OFF’ or ‘ON’, then press [SAVE], to save your setting.
RINGSETUP
TONESETUP
OKEXIT
KEYTONE↓
BATTERYLOW
OKEXIT
HANDSET SETTINGS

22
Language Setting
Press the [MENU] softkey, select ‘HS
SETTINGS’ and press [OK].
Select ‘LANGUAGE’ by using ▲ / ▼ and
then pressing [OK].
Use ▲ / ▼ to scroll through the 6
available language options (English,
German, French, Italian, Spanish, and
Dutch).
Select the desired language and then
press [SAVE], to save your setting.
Change Handset Name
‘HS (N)’ is the default name of a handset after registering it to a base unit. The
handset extension number ‘N’ (1—5) shows the handset as the ‘N’th handset that
registered to the base. The name will be shown on the screen when the handset is
in standby mode.
A handset must be registered to the base before it can be assigned to a name.
To change the handset name to text
format.
Press the [MENU] softkey.
Use ▲ / ▼ to select ‘HS SETTINGS’ and
press [OK].
Select ‘HS LABEL’ and press [OK].
Press [DEL] to delete the current name,
and use the keypad to input the new
name.
Then press [SAVE], to save your change.
TONESETUP↓
LANGUAGE
OKEXIT
ENGLISH↓
DEUTSCH
SAVEEXIT
LANGUAGE
HSLABEL
OKEXIT
NAME?JOHN
SAVEDELABC
HANDSET SETTINGS
23
Auto Answer
The handset can be set to answer incoming calls automatically. When the handset
is not on the base unit or the charger cradle, must be pressed to answer
incoming calls. Auto answer mode can only be activated when the handset is on
the base unit or charger cradle, in which case, the line will be automatically
connected when the handset is picked up from the base unit or charger cradle.
Set Auto Answer Mode On/Off
Press the [MENU] softkey.
Use ▲ / ▼ to select ‘HS SETTINGS’ and
press [OK].
Select ‘AUTO ANSWER’ and press [OK].
Use ▲ / ▼ to select ‘OFF’ or ‘ON’.
Press [OK] to save your setting.
Call Barring
Handset can be set to disable outgoing
outside land line calls.
To set the call barring mode ‘ON’ or ‘OFF’
Press the [MENU] softkey.
Use ▲ / ▼ to select ‘HS SETTINGS’ and
press [OK].
Select ‘CALL BARRING’ and press [OK].
Input the 4-digit PIN.
The default PIN is 0000.
Press [OK] to confirm.
HSLABEL
AUTOANSWER
OKEXIT
OFF↓
ON
OKEXIT
AUTOANSWER
CALLBARRING
OKEXIT
PIN?****
OKEXIT
HANDSET SETTINGS
24
Use ▲ / ▼ to select ‘OFF’ or ‘ON’.
Press [SAVE], to save your setting.
If you set to ‘ON’, the screen will display
“CALLS BARRED” in standby mode.
Date & Time Settings
Set Time Format
Press the [MENU] softkey.
Use ▲ / ▼ to select ‘HS SETTINGS’ and
press the [OK] softkey.
Select ‘DATE & TIME’ and then press the
[OK] softkey.
Select ‘TIME FORMAT’ and then press
the [OK] softkey.
Use ▲ / ▼ to select your desired format.
Press [SAVE] to save your setting.
Then the time will be displayed in the
format you have set when return to
standby mode.
Set Date & Time
Press the [MENU] softkey.
Use ▲ / ▼ to select ‘HS SETTINGS’ and
press the [OK] softkey.
Select ‘SET DATE&TIME’ and press the
[OK] softkey.
OFF
ON
SAVEEXIT
TIMEFORMAT↓
SETDATE&TIME
OKEXIT
12‐HOUR↓
24‐HOUR
SAVEEXIT
TIMEFORMAT↑
SETDATE&TIME
OKEXIT
HANDSET SETTINGS
25
Use the keypad to input the date and time
consecutively. (If you have already set the
‘TIME FORMAT’ to ‘12-HOUR’ format,
then you also need to choose ‘a.m.’ or
‘p.m.’ by using the [AM/PM] softkey).
Press [SAVE], to save your setting.
Set Handset to Default
Press the [MENU] softkey.
Use ▲ / ▼ to select ‘HS SETTINGS’ and
press the [OK] softkey.
Select ‘SET WEEKDAY’ and press the
[OK] softkey.
Press the [CHANGE] softkey to choose
the day and then press the [OK] softkey
Set Handset to Default
This function allows the user to restore the handset settings to the factory default
settings.
Press the [MENU] softkey.
Use ▲ / ▼ to select ‘HS SETTINGS’ and
press the [OK] softkey.
Select ‘HS DEFAULT’ and press the [OK]
softkey.
Input the 4-digit PIN.
The default PIN is 0000.
Press the [OK] softkey to complete.
Then all settings on the handset will revert
to the factory default values.
MM/DDHH:MM
00/0000:00AM
SAVEAM/PMEXIT
SETDATE&TIME↑
SETWEEKDAY
OKEXIT
WEEKDAY:MON↑
OKCHANGEEXIT
SELECTBASE↑
HSDEFAULT
OKEXIT
PIN?****
OKDELEXIT
HANDSET SETTINGS
26
Display the Phonebook Entries
In standby mode, press the [DIR.] softkey
to enter the telephone directory.
Then the phonebook screen will be
displayed.
Use ▲ / ▼ to access and scroll the
phonebook entries.
Add Entries to the Phonebook
In standby mode, press the [DIR.] softkey
to enter the telephone directory.
Then the phonebook screen will be
displayed.
Press the [ADD] softkey to add a new
entry.
Use the keypad to input the name.
Press the [ABC] ([123]) softkey, to switch
the input mode between numerical mode
and alphabetical mode.
If you input the wrong words or numbers,
use ▲ / ▼ and the [DEL] softkey to erase
the errors.
Press [OK] to complete the input.
In alphabetical mode, each numeric key is assigned a set of letters and symbols as
shown below. Press the corresponding key until your desired letter is displayed. If
two consecutive letters from the same key are required, just wait until the cursor
moves to the next blank space before inputting.
Numeric: 1 2 3 4 5 6 7 8 9 0
Alpha:
space,-,@ ,_
A,B,C D,E,F G,H,I J,K,L M,N,O P,Q,R,S T,U,V W,X,Y,Z
?,&,/ ,,
PHONEBOOK
38ENTRIES
ADDDELEXIT
#1812345678
JOHNSMITH
PHONEBOOK
EDITDELEXIT
PHONEBOOK38
ENTRIES
ADDDELEXIT
NAME?
JOHN
OKDELABC
HANDSET SETTINGS
27
Symbols
You can also use [½] or [#] to insert the following special symbols in the name field.
½ + , - . / @ : ; < = > ? { ¦ } ~ [ \ ] ^ _ ` ! ″ # $ % & ´ …
Note: Name must start with an alphabetic character.
Use the keypad to input the number.
Press the [OK] softkey when finished.
Press the [DEL] softkey to erase the
digit(s) you inputted in error, and then
input the correct ones.
Use ▲ / ▼ to select a distinct ringtone for
this entry.
Press [SAVE] to complete.
Edit an Entry in the Phonebook
In standby mode, press the [DIR.] softkey
to enter the telephone directory.
Use ▲ / ▼ to access and scroll the
phonebook entries.
When the entry that you want to edit
appears, press the [EDIT] softkey.
Then follow the steps as adding an entry
to the phonebook.
NUMBER?
12345678
OKDELEXIT
MELODY1↓
MELODY2
SAVEEXIT
#1812345678
JOHNSMITH
PHONEBOOK
EDITDELEXIT
HANDSET SETTINGS

28
Delete an Entry from the Phonebook
In standby mode, press [DIR.] softkey to
enter telephone directory.
Use ▲ / ▼ to access and scroll the
phonebook entries.
When the entry that you want to delete
appears, press [DEL] softkey.
Press [YES] to confirm your deletion.
Then this entry is deleted.
Delete All Entries in the Phonebook
In standby mode, press the [DIR.] softkey
to enter the telephone directory.
Press the [DEL] softkey to delete all
entries.
Press [YES] to confirm the deletion.
Then all entries are deleted.
#1812345678
JOHNSMITH
PHONEBOOK
EDITDELEXIT
SURETODELETE?
YESNO
PHONEBOOK
38ENTRIES
ADDDELEXIT
DELETEALL?
YESNO
HANDSET SETTINGS

29
Review the Caller ID List
In standby mode, press ▲ / ▼ to enter the
Caller ID List.
Then the Caller ID book screen will be
displayed.
Press ▲ to review the latest calls, press
▼ to review the earlier calls.
The date and time is also displayed in the
format you have set.
Save Caller ID Information to the Phonebook
In standby mode, press ▲ / ▼ to enter the
Caller ID List.
Use ▲ / ▼ to access and scroll the Caller
ID List.
When the record that you want to save
appears, press the [SAVE] softkey.
Then follow the same steps as adding an
entry to the phonebook.
Delete a Record from the Caller ID List
In standby mode, press ▲ / ▼ to enter the
Caller ID List.
Use ▲ / ▼ to access and scroll the Caller
ID List.
When the record that you want to delete
appears, press the [DEL] softkey.
CIDBOOK
20ENTRIES
DELEXIT
#125/123:58P
JOHNSMITH
12345678X2
SAVEDELEXIT
#125/123:58P
JOHNSMITH
12345678X2
SAVEDELEXIT
#112/253:58P
JOHNSMITH
12345678X2
SAVEDELEXIT
HANDSET SETTINGS
30
Press [YES] to confirm the deletion.
Then this record is deleted.
Delete All Records in the Caller ID List
In standby mode, press ▲ / ▼ to enter the
Caller ID List.
Then the Caller ID book screen will be
displayed.
Press the [DEL] softkey to delete all
records.
Press [YES] to confirm the deletion.
Then all records are deleted.
Review the Dialed Numbers List
Every handset can store its own last 9 dialed numbers independently, each number
of up to 24 digits.
Press the [Redial] key, use ▲ / ▼ to review the dialed number(s).
If the displayed number matches with an entry in the phonebook, the corresponding
name will also be shown.
Add a Dialed Number to the Phonebook
When the number you want appears,
press the [SAVE] softkey.
Then follow the steps as adding an entry
to the phonebook.
SURETODELETE?
YESNO
CIDBOOK
20ENTRIES
DELEXIT
DELETEALL?
YESNO
#112345678
JOHNSMITH
REDIALBOOK
SAVEDELEXIT
HANDSET SETTINGS
31
HANDSET SETTINGS
Delete a Dialed Number
When the number that you want to delete
appears, press the [DEL] softkey.
Press the [OK] softkey.
Press [YES] to confirm the deletion.
Then this number is deleted.
Delete All Dialed Numbers
Press the [Redial] key.
Press the [DEL] softkey.
Press ▼ to select ‘DELETE ALL’.
Then press the [OK] softkey.
#112345678
JOHNSMITH
REDIALBOOK
SAVEDELEXIT
DELETE↓
DELETEALL
OKEXIT
SURETODELETE?
YESNO
#112345678
JOHNSMITH
REDIALBOOK
SAVEDELEXIT
DELETE↓
DELETEALL
OKEXIT

32
Press [YES] to confirm the deletion.
Then all numbers are deleted.
DELETEALL?
YESNO
HANDSET SETTINGS
33
Method 1: Dial a Number
Press .
Input the number.
Or:
Input the number.
(You may use the [DEL] softkey to delete
the digits).
Press the [CALL] softkey or .
During the call:
Press the softkey to toggle hands-free
mode. Press it again to quit this mode.
Press the [MUTE] softkey to disable the
microphone. For private discussions,
press ▲ / ▼ to adjust the volume.
Press to terminate the call.
Method 2: Call from the Phonebook
Press the [DIR.] softkey to review the
phonebook.
Use ▲ / ▼ to scroll to the number you
need.
Press .
Press to terminate the call.
Method 3: Call from the Caller ID List
Press ▲ / ▼ to review the Caller ID list.
Use ▲ / ▼ to scroll to the number you need.
Press .
Press to terminate the call.
1234567
MUTEDIR.
1234567
CALLDELEXIT
LINE00:00:01
MUTEDIR.
#1812345678
JOHNSMITH
PHONEBOOK
EDITDELEXIT
MAKING A CALL

34
Method 4: Call from Dialed Numbers List
Press [Redial] key to review the dialed numbers.
Use ▲ / ▼ to scroll to the number you need.
Press .
Press to terminate the call.
Method 5: Call the Last Dialed Number
Press .
Press the [Redial] key to dial out the last dialed number.
Press to terminate the call.
Note: Putting the handset on the base unit can also terminate the call.
Enter a Pause in the Dialing Sequence
The [Redial/Pause] key allows you to add a 3-second pause during pre-dialing or
when storing a number in the phonebook.
To add a pause, press the [Redial/Pause] key at your desired position when
inputting or editing a phone number, and a “P” appears on the screen.
For a longer delay, press the [Redial/Pause] key additional times.
Note: The number you want to store cannot have more
than 24 digits, including the pause. One “P” counts as
one digit.
MAKING A CALL
35
Locate Misplaced Handset(s) with Base Unit
To locate the handset(s) while not on the base unit, press the [Page] key on the
base unit. Then the handset(s) in range will display ‘PAGING FROM BASE’ and
emit an alert signal that is different from the external line (outside land line) calls.
No response from the handset(s) if it is battery power failure or turned to Power
OFF.
To stop the paging, press [Page] on the base again or press any key on the
handset. If no handset answers, the paging will stop automatically after 1 minute.
Note: 1.The handset being paged will ring even if the ringer has been set to ‘OFF’.
Intercom between Handsets (in this case an expandable handset is
required) Press the [Int.] key on a handset in
standby mode.
Then the screen will show all the other
available handsets in range of the base
unit. (‘HS’ is for ‘handset’).
Use ▲ / ▼ to scroll to the handset you
want to intercom with and press [CALL].
For instance, if HS (2) is being paged by
HS (1), HS (1) will display ‘PAGING HS
(2)’.
HS (2) will ring and display ‘PAGING
FROM HS (1)’.
Press the [Int.] key, or the [OK]
softkey on HS (2) to answer the intercom
call.
If HS (2) does not want to answer, press
HS2↓
HS3
CALLEXIT
PAGINGHS(2)
EXIT
PAGINGFROM
HS(1)
OKEXIT
INTC 00 : 00 : 0
MUTE
EXIT
PAGING AND INTERCOM
36
the [EXIT] softkey, then the ring will stop.
Note: If two handsets are engaging in an intercom talk when an external line
incoming both handsets can hear one beep tone.
Transfer a Call to another Handset
During a call, the current call can be transferred to another handset as described
below. (in this case an expandable handset is required)
When a handset is engaging in an
external line (outside land line) call.
Press the [Int.] key and use ▲ / ▼ to
scroll to the handset you want to transfer
this call to, then press the [CALL] softkey.
If you do this from HS (1) to HS (2), then
HS (2) rings and displays ‘PAGING
FROM HS (1)’.
On Handset (2), press , [Int.] or [OK]
to answer the paging and then talk with
Handset (1). (Internal talk).
Now the initiator of the transfer can talk
with the party to be transferred to, and
then the initiator can press to
complete the transfer.
If the party being transferred to does not
want to answer the paging, press or
the [EXIT] softkey to reject it.
Then the handset being paged stops
ringing and returns to standby mode, and
the initiating handset resumes the
external line talk.
HS2
HS3
CALLEXIT
PAGINGFROM
HS(1)
OKEXIT
INTC00:00:01
MUTE
EXIT
12–25 13:59 P
HS (1)
MENUDIR.
PAGING AND INTERCOM
37
Call Conferencing
This cordless system supports ‘conference calls’ up to 3 parties (2 handsets and 1
external line call and in this case an expandable handset is required).
When one handset is engaging in an
external line (outside land line) call, press
the [Int.] key on that handset to put the
current call on hold and call another
handset by way of intercom.
Use ▲ / ▼ to scroll to the handset you
want.
Then press the [CALL] softkey to page.
If you do this from HS (1) to HS (2), then
HS (2) rings and displays ‘PAGING FROM
HS (1)’.
On Handset (2), press , [Int.] or [OK]
to answer the paging and talk with
Handset (1). (Intercom talk).
LINE00:00:01
MUTEDIR.
HS2
HS3
CALLEXIT
PAGINGFROM
HS(1)
OKEXIT
INTC00:00:01
MUTE
EXIT
CALL CONFERENCING
38
When the intercom call is established, on
the initiating handset {in this case is
Handset (1)}, pressing the [Int.] key can
switch between the intercom talk and
external line talk.
After the initiating handset being switched
to ‘INTC’ (intercom) call, press the [CONF]
key on the initiating handset can talk with
the two parties (external line party, and
intercom party) simultaneously, which is
the conference mode.
On any handset, pressing or [EXIT]
can retreat from the current conversation
and return to standby mode. The other
handset will continue the external line call.
To end the call, make sure that both
handsets have quit.
Note: If your handset has already retreated from the conversation; you can still join
into the conversation again by following the procedures stated on Page 36.
LINE00:00:09
INTCONHOLD
MUTE
CONF00:00:23
MUTEEXIT
LINE00:02:48
MUTEDIR.
CALL CONFERENCING
39
Via External line (outside land line)
Caller ID service is not available With Caller ID
When the phone rings, if you want to mute
the ringer, press the [MUTE] softkey or
.
Press the [UNMUTE] softkey to resume
the ringer.
Press to answer the call.
Press ▲ / ▼ to adjust the volume.
Press to end the call.
Note: If ‘auto answer mode’ is set to ‘ON’, when the ring sounds, there is no need
to press , just picking the handset up off the base (or charging cradle) can
answer the call automatically.
CALLVIALINE
MUTE
12–25 13:59 P
JOHNSMITH
12345678×2
MUTE
CALLVIALINE
LINERING
M
UTE
D
UN
MUTE
LINE00:00:01
MUTE
DIR
RECEIVING A CALL
40
During Intercom (in this case an expandable handset is
required)
During intercom talk, if an external line
call comes, the handset(s) will hear
intermittent beeps.
Press key to end the current
intercom and answer the incoming call.
Press ▲ / ▼ to adjust the volume.
Press to end the call.
Switch to a Waiting Call
Note: This service may require subscription from your local telephone company.
During an external line call, press the
[Flash] key to put the current external line
call on hold and answer the incoming
waiting external line call.
Pressing the [Flash] key again can resume
the first external line call.
INTC00:00:49
MUTE
EXIT
LINE00:00:01
.MUTE
LINE00:02:17
MUTEDIR.
RECEIVING A CALL
41
Mute a Call
You can mute a call while discussing matters with a nearby person in privacy
without transmitting your voice over.
During an External line call
Press the [MUTE] softkey.
Then ‘MUTE’ is shown on the screen to
indicate it is muting the microphone.
Press the [MUTE] softkey again to
un-mute the microphone.
During Intercom
Press the [MUTE] softkey.
Then ‘MUTE’ is shown on the screen to
indicate it is muting the microphone.
Press the [MUTE] softkey again to
un-mute the microphone.
MUTE00:00:58
MUTEDIR.
MUTE00:00:31
MUTEEXIT
RECEIVING A CALL
42
Message capacity
The answering system can record and store up to 59 messages. A single
message can be up 2 minutes in length. The total storage capacity for the
announcement, messages and memos is approximately 12 minutes. Message will
remain available for replay until they are deleted.
TAM= Telephone Answering Machine
Press to delete message
currently playing, or press to
delete all when a message
is paused messages
Press to skip to the
previous message
Press to skip to the
next message.
Press to stop message
playing
Press page key to locate all handsets,
or Press and hold page key for 3
seconds to register a handset.
TAM on/off
Press to play back new messages.
Press and hold to play all messages.
Press to pause while playing.
Press to adjust volume for message playing
TAM on/off
Indicator
IMPORTANT INFORMATION
43
Activate the answering machine
Activate via the base:
The answering system must be turned on to answer and record messages. Press
[ANSWER] in the base unit to turn the answering system on or off. If the answering
system is turned on, it will announce “answering machine on”, and then play the
greeting words which the answering system will tell the phone caller to leave a
message. The light above the [ANSWER] button will be On. If the answering
system is turned off, it will announce “answering machine off”, and the light above
the [ANSWER] button will be off.
Activate via the handset:
The answering system can be turned on/off through a registered handset.
1. Press [MENU] key to display the
menu when the handset is not in use.
2. Press ▲ or ▼ to select TAM then
press [OK].
3. Press ▲ or ▼ to select TAM
SETTING then press [OK].
4. Press ▲ or ▼ to select TAM
ON/OFF then press [OK].
5. Press ▲ or ▼ to select ON or OFF
then press [SAVE]. You will hear a
confirmation tone
Answering System
REGISTRATION
↑
TAM
Note:
You can record memo, greeting words to the caller, who will leave message (out
going message), through handset only, but you can play any message through
either handset or base unit.
TAMON/OFF
↓
AMALERT
OFF
↑
ON
MEMO↑
TAMSETTING
OKEXIT
44
Telephone Answering Machine setting
You can change the TAM setting via a registered handset.
Set date/time/weekday
Prior to playing a message, the answering machine announces when the message
was received. Before using the answering machine, set the date, time and weekday,
so that messages are dated correctly. To change these settings, refer to handset
setting for detailed operation (see page 24).
Set message alert tone
Your telephone base can be set to beep every 1 minute to alert you of the new
messages ready for your review. To enable this feature:
1. On your handset, press [MENU] key
to display the menu when the handset
is not in use.
2. Press ▲ or ▼ to select TAM then
press [OK].
3. Press ▲ or ▼ to select TAM
SETTING then press [OK].
4. Press ▲ or ▼ to select TAM ALERT
then press [OK].
5. Press ▲ or ▼ to select ON or OFF
then press [SAVE].
You will hear a confirmation tone
MEMO↑
TAMSETTING
OKEXIT
REGISTRATION
↑
TAM
TAMON/OFF↓
TAMALERT
OKEXIT
OFF
↑
ON
Answering System
45
Set number of rings
This feature allows you to select the number of rings before the answering machine
answers a call. You can choose from 2 to 9 rings or time saver. When time saver is
selected, the answering machine answers after three rings if you have new
messages and after seven rings if there are no new messages.
To set the number of rings: 1. On your handset, press [MENU] key
to display the menu when the handset
is not in use.
2. Press ▲ or ▼ to select TAM then
press [OK].
3. Press ▲ or ▼ to select TAM
SETTING then press [OK].
4. Press ▲ or ▼ to select SET RINGS
then press [OK].
5. Press ▲ or ▼ to select desired
number of rings then press [SAVE].
You will hear a confirmation tone.
Answering System
TAMALERT
SETRINGS
SETRINGS
6RINGS
SAVE
RIGISTRATION
↓
AMALERT
MEMO↑
TAMSETTING
OKEXIT
46
Set TAM mode
You can decide whether the answering machine will prompt the caller to leave
message or not when answering a call. Two modes can be selected for the
answering machine:
Answer with recording:
Play the greeting with OGM1 to prompt the caller to leave a message, and save the
message in the telephone base for you to review later.
Answer without recording:
Play the greeting with OGM2 to prompt the caller to hang up.
To set the TAM mode: 1. On your handset, press [MENU] key
to display the menu when the handset
is not in use.
2. Press ▲ or ▼ to select TAM then
press [OK].
3. Press ▲ or ▼ to select TAM
SETTING then press [OK].
4. Press ▲ or ▼ to select TAM MODE
then press [OK].
5. Press ▲ or ▼ to select “ANS WITH
REC” to set TAM mode as answering
with recording, or “ANS NO REC” to
set TAM mode as answering without
recording.
ANSWITHREC↑
ANSNOREC
SAVE
EXIT
REGISTRATION↑
TAM
OK
MEMO
TAMSETTING
OKEXIT
SETRINGS
TAMMODE
Answering System
47
Set OGM (Out Going Message)
The answering machine has 2 different OGM, used in different TAM mode. The
OGM is the greeting announcement played to the phone caller when the answering
machine answers the call. OGM 1 is used for “Answer with recording” mode; OGM2
is for “Answer without recording” mode. The system has a default OGM for both
TAM modes. And you can record your own greeting as OGM for either TAM mode.
To change the OGM:
1. On your handset, press [MENU] key to
display the menu when the handset is not
in use.
2. Press ▲ or ▼ to select TAM then
press [OK].
3. Press ▲ or ▼ to select TAM
SETTING then press [OK].
4. Press ▲ or ▼ to select SET OGM
then press [OK].
5. Press ▲ or ▼ to select “ANS WITH
REC” to set OGM for answering with
recording mode, or “ANS NO REC” to
set OGM for answering without
recording mode, then press [OK].
Note:
OGM1 is greeting one
OGM2 is greeting two
Default OGM1 is “no one is available to take your call, please leave a
message after the tone”. Default OGM2 is “no one is available to take your
call, please hang up”
ANSWITHREC↓
ANSNOREC
OKEXIT
Answering System
REGISTRATION
↑
TAM
MEMO↑
TAMSETTING
OKEXIT
TAMMODE
SETOGM
OKEXIT
48
6. Now press ▲ or ▼ to select
between
PLAYBACK: to play the current OGM for
the selected mode
RECORD: to record a new OGM for the
selected mode.
DEFAULT: to set the OGM as default for
the selected mode.
If you selected RECORD, a voice will
announce “record the greeting one (or two)
after the tone”, then a beep sounds, then
you can say your greeting for the selected
TAM mode, i.e. greeting one for answer
with recording, greeting two for answer
without recording.
You have 30 seconds to record your
greeting. The screen will show the rest
time you can record. Press [SAVE] when
finish
The answering machine will playback the
recorded OGM for you to confirm.
If you selected DEFAULT, the screen
prompts you to confirm, press YES to
confirm, then the OGM will be set to
default, and the default greeting will be
played for your sure
Note:
You can record your own greetings, or set it to the default greetings.
PLAYBACK↑
RECORD
SPEAKAFTERTONE
RECORDINGOGM1
EXIT
RECORDINGOGM1
TIME:30
SAVE
EXIT
Note:
The DEFAULT option will not appear in the menu if you have not recorded your own
OGM
CONFIRM?
YESNO
Answering System
49
Set remote access PIN
A 4-digit security code is required to access the answering machine remotely from
any touch tone telephone. The preset PIN is 0000.
To set the remote access PIN: 1. On your handset, press [MENU] key
to display the menu when the
handset is not in use.
2. Press ▲ or ▼ to select TAM then
press [OK].
3. Press ▲ or ▼ to select TAM
SETTING then press [OK].
4. Press ▲ or ▼ to select TAM PIN
then press [OK].
5. Use the dialing keys to enter 4
digits PIN code, then press [SAVE].
You will hear a confirmation tone.
Answering System
SETOGM
TAMPIN
OK
EXIT
TAMPIN:
0000
SAVE
REGISTRATION
↑
TAM
MEMO↑
TAMSETTING
OKEXIT
50
Restore TAM default setting
You can set all settings of answering machine to a default value.
TAM default setting value
ITEM STATUS
Answer machine ON
TAM alert ON
Answer Rings 5 Rings
TAM mode answer with recording
TAM PIN 0000
To set TAM to default setting: 1. On your handset, press [MENU] key
to display the menu when the
handset is not in use.
2. Press ▲ or ▼ to select TAM then
press [OK].
3. Press ▲ or ▼ to select TAM
SETTING then press [OK].
4. Press ▲ or ▼ to select TAM
DEFAULT then press [OK].
5. Use the dialing keys to enter 4-digit
registration PIN code, then press
[OK]. You will hear a confirmation
tone. Refer to page16 for the
registration PIN.
TAMPIN↑
TAMDEFAULT
OKEXIT
PIN?****
OKDEL
REGISTRATION
↑
TAM
MEMO↑
TAMSETTING
OKEXIT
Answering System
51
New message indication
If the new message alert tone is turned on, the telephone base will beep every 1
minute when there are un-reviewed messages.
When there are new messages, the handset’s screen will show the number of
new messages when the handset is not in use.
Message playback
Press Play on the telephone base to listen to new messages, press Play and hold
down for 3 seconds to listen to all messages(include listened messages).
To play new messages on the handset:
1. On your handset, press [MENU] key
to display the menu when the
handset is not in use.
2. Press ▲ or ▼ to select TAM then
press [OK].
3. Press ▲ or ▼ to select NEW MSG
then press [OK] to listen to new
messages; or select SAVED MSG
then press [OK] to listen to all
messages.
4. The handset will play “you have XX
new messages”, then play the
messages one by one. Before
playing each message, the weekday
and time ,when the message is
received, are announced. As
displayed on the screen. The earliest
of new or all messages will be played first according to your selection...
03:0103:50P
HS(1)
ANSON03NEW
MENU
DIR
NEWMSG↓
SAVEDMSG
OKEXIT
YOUHAVES
3NEWMSGS
Answering System
REGISTRATION
↑
TAM
52
Options during playback on the telephone base
Press Vol+ / Vol- to adjust the speaker volume.
Press to skip to the next message.
Press to listen to the previous message.
Press [Play] to pause when playing a message,
press [Play] again to continue.
Press [Delete] to delete the current message when playing, press [Delete] to delete
all messages when a message is paused.
Press and hold Delete longer than 2 seconds when the telephone is not in use to
delete all messages.
Options during playback on the handset
When playing messages, there are 2 stages for each message playing.
The first stage is playing the basic information about the message, including
sequence number of the message, the weekday and time when the message is
received. On this stage, the key is displayed. You can press to switch
between speaker and earpiece to listen to the message.
The second stage is playing the message itself. On this stage, the key DEL is
displayed. You can press DEL to delete the message.
You can also press pause key to pause message playing, On the pause
state, a countdown timer appears showing the time left for the message staying
in pause state, 60 seconds given. When the timer reaches 0, playing is stopped
and the screen exited to the previous menu.
MESSAGE#01
THU10:12P
MESSAGE#01
THU10:12P
Answering System
Note:
Press to switch between speaker and earpiece to listen the message.
You can press [EXIT] to end playing at any time.
53
On the pause state, you can press [DELALL] to
delete all the messages, press [YES] to confirm.
Then all messages are deleted.
On all playing stages, You can:
press << to listen to the previous message.
Press >> to skip to the next message.
Press ▲ or ▼ to adjust volume.
Delete all messages
On the base:
Press and hold Delete longer than 2 seconds when the telephone is not in use to
delete all messages.
On the handset: 1. On your handset, press [MENU] key
to display the menu when the
handset is not in use.
2. Press ▲ or ▼ to select TAM then
press [OK].
3. Press ▲ or ▼ to select DELETE
ALL then press [OK].
4. Press YES to confirm. You will hear
“All messages deleted”.
DELETEALL
CONFIRM?
YESNO
Note: You have 2 ways to delete all messages
Answering System
SAVEDMSG
DELETEALL
CONFIRM?
YES
NO
Note: If there is no message, the DELETE ALL will not appear in the menu
MESSAGE#01
PAUSE59
REGISTRATION↑
TAM
OK
54
Record and play memos
Memos are your own recorded messages used as reminders for yourself or others
using the same answering machine. They are saved, played back and deleted in
the same way as incoming messages.
Record a memo 1. On your handset, press [MENU] key
to display the menu when the
handset is not in use.
2. Press ▲ or ▼ to select TAM then
press [OK].
3. Press ▲ or ▼ to select MEMO
then press [OK].
The handset will announce “record memo
after the tone”, after a beep, you can start
to say the memo. The screen shows the
remaining time for your memo, 120
seconds in maximum.
4. Press [SAVE] when finish. When the
memory is full, the screen will show
“MEM IS FULL” temporarily. TAM will
play “memory full”.
RECORDINGMEMO
TIME:120
SAVE
EXIT
Note:
Press SAVE immediately when you finish speaking your memo to save recording
memory.
REGISTRATION
↑
TAM
DELETEALL
MEMO
Answering System
55
Call screening
You can listen at the telephone base to a
caller leaving a message.
You can also listen at any registered
handset to a caller leaving a message.
When the answering machine answers a
call, your handset will show a screen
softkey.
Press SCREEN, you will hear the caller leaving a message.
Call intercept
If you want to answer a call while a message is being recorded, press TALK or
on the handset. The message will not be saved.
Remote access
A four-digit security code is required to access the answering machine remotely
from any touch tone telephone. The preset code is 0000. See page 48 to change it.
To access the answering system remotely:
Dial your telephone number from any touch tone telephone. When the system
answers and plays your announcement, enter ** from the dialing key pad, you will
hear “enter password”, then enter the four-digit security code (PIN). For example
**0000, you will hear the answering machine reading a menu of remote commands,
enter the commands in the following table. Hang up to end the call.
Answering System
SCREEN?
TALK
Note:
If the answering machine is set to off, the answering machine will answer your call
after 10 rings
56
Command Function
2 To hear new messages
3 To hear all messages
7 To pass (skip) a message when playing message
8 To review a message (back to the previous message) when
playing message
9 To delete the message when playing message
0 To pause the message when playing message
4 To delete all messages
5 To turn answering machine on / off
To change(re-record) a greeting (pressed when playing the
menu)
Note: you can only change the greeting for currently selected
OGM1 or OGM2, the selection can only be changed via a
handset. See “TAM mode” on Page 45
6
To repeat the current message (pressed when playing
message)
1 To repeat these options
Answering System
57
Please refer to the following tips before calling for technical assistance:
Problem(s) Possible Cause(s) Solution(s)
No dial tone is heard when
pressing .
1. The base unit is not properly
connected to the outside land
line.
2. Too far from the base unit.
3. Batteries are low (low battery
icon is displayed).
▪ Check the cables.
▪ Move closer to the base unit.
▪ Charge the batteries.
When putting the handset
on the base unit, no beep
is heard.
1. The handset is not placed
properly on the base unit.
2. Charging contacts are dirty.
▪ Take the handset off the base unit and
put it back again.
▪ Clean charging contacts with a clean
and dry cloth.
Battery icon remains
empty although the
handset has charged for
24 hours.
1. Handset batteries are
defective.
2. Handset is not placed
properly on the base unit.
3. The power adapter is not
properly connected.
▪ Purchase new Ni-MH rechargeable
batteries (AAA 1.2V 600mAh).
▪ Check whether the power adapter is
properly connected to the main point.
No display on the screen. 1. Batteries are uncharged.
2. The phone is not properly
connected.
▪ Charge the batteries.
▪ Make sure your phone is properly
plugged in.
Bad audio quality
(crackles, echo, etc.)
1. Interference from nearby
electrical appliance.
2. Base unit is installed in a
room with thick walls.
3. The handset is too far from
the base unit.
▪ Move the nearby electrical appliance to
a different location.
▪ Install the base unit in a different room.
▪ Move closer to the base unit.
Cannot hear the other
party clearly / speaker too
quiet.
1. The volume is set to
minimum.
▪ Press ▲ / ▼ to adjust the phone
volume.
The phone does not ring
when a call comes in.
1. The ringer is off. ▪ Turn on the ringer.
Cannot call a phone
number.
1. The handset has lost link
with the base unit.
▪ Page the handset from the base unit to
ensure connectivity exists.
TROUBLESHOOTING
58
The following suggestions will help you care for the telephone so you can enjoy it
for years.
Keep the telephone dry. If it gets wet, wipe it dry immediately.
Liquids might contain minerals that can corrode the electronic
circuits.
Use and store the telephone only in normal temperature envi-
ronments. Temperature extremes can shorten the life of
electronic devices, and distort or melt plastic parts.
Handle the telephone gently and carefully. Dropping it can
damage circuit boards and cases, and can cause the
telephone to work improperly.
Keep the telephone away from excessive dust and dirt, which
can cause premature part wear.
Wipe the telephone with a damp cloth occasionally to keep it
looking new. Do not use harsh chemicals, cleaning solvents, or
strong detergents to clean the telephone.
CARE AND MAINTENANCE

59
This equipment complies with Part 68 of FCC rules and the requirements adopted
by the ACTA. On the bottom of this equipment is a label that contains, among other
information, a product identifier in the format US:CACW400B******. If requested,
this number must be provided to the telephone company.
The REN is used to determine the number of devices that may be connected to a
telephone line. Excessive RENs on a telephone line may result in the devices not
ringing in response to an incoming call. In most but not all areas, the sum of the
RENs should not exceed five (5.0). To be certain of the number of devices that may
be connected to a line, as determined by the total RENs, contact the local
telephone company. [For products approved after July 23, 2001, the REN for this
product is part of the product identifier that has the format US:CACW400B******.
The digits represented by 00B are the REN without a decimal point (e.g., 03B is a
REN of 0.3B). For earlier products, the REN is separately shown on the label.]
Should you experience trouble with this equipment, please contact Customer
Service at
1-800-988-7728
for repair or warranty information. If the equipment is causing harm to the telephone
network, the telephone company may request that you disconnect the equipment
until the problem is resolved.
NOTICE: If your home has specially wired alarm equipment connected to the
telephone line, ensure the installation of this equipment ID does not disable your
alarm equipment. If you have questions about what will disable alarm equipment,
consult your telephone company or a qualified installer.
If your equipment should cause harm to the telephone network, the telephone
company may temporarily disconnect your service. If possible, they will notify you in
advance that temporary discontinuance of service may be required.
However, when advance written notice is not possible, the telephone company may
temporarily discontinue service without notice if such action is necessary under the
circumstances.
FCC REQUIREMENTS

60
The telephone company may make changes in its communication facilities,
equipment, operations, or procedures where such action is reasonably required in
the operation of its business and is not inconsistent with the rules and regulations
of the Federal Communications Commission.
NOTICE TO HEARING AID WEARERS: This telephone has been registered
with the FCC as hearing aid compatible.
Warning: Changes or modifications to this unit not expressly approved by
the party responsible for compliance could void the user’s authority to
operate the equipment.
Caution: To maintain compliance with the FCC’s RF exposure guidelines
place the base unit at least 20 cm from nearby persons.
For body worn operation, this handset has been tested and meets the FCC RF
exposure guidelines. Use of accessories other than provided may not ensure
compliance with FCC RF exposure guidelines.
Do not attempt to repair or modify this equipment. Changes or modifications
not expressly approved by the party responsible for its compliance could void the
user’s authority to operate the equipment.
This equipment should not be used on coin telephone lines. Connection to party
line services are subject to state tariffs. If trouble is experienced, disconnect this
equipment from the telephone line to determine if it is causing the malfunction. If
the equipment is determined to be malfunctioning, its use should be discontinued
until the problem has been corrected.
Current FCC regulations specify that any direct connections to a telephone
company line be done using only standard phone jacks USOC RJ11C and plugs
that is TIA-1096-A compliant. A plug and jack used to connect this equipment to the
premises wiring and telephone network must comply with the applicable FCC Part
68 rules and requirements adopted by the ACTA. A compliant telephone cord and
modular plug is provided with this product. It is designed to be connected to a
compatible modular jack that is also compliant. See installation instructions for
details.
FCC REQUIREMENTS

61
This device complies with part 15 of the FCC Rules. Operation is subject to the
following two conditions: (1) This device may not cause harmful interference, and (2)
this device must accept any interference received, including interference that may
cause undesired operation.
Privacy of communications may not be ensured when using this phone.
Note:
This equipment has been tested and found to comply with the limits for a Class B
digital device, pursuant to Part 15 of the FCC Rules. These limits are designed to
provide reasonable protection against harmful interference in a residential
installation. This equipment generates, uses, and can radiate radio frequency
energy and, if not installed and used in accordance with the instructions, may
cause harmful interference to radio communications. However, there is no
guarantee that interference will not occur in a particular installation. If this
equipment does cause harmful interference to radio or television reception, which
can be determined by turning the equipment off and on, the user is encouraged to
try to correct the interference by one or more of the following measures:
1. Reorient or relocate the receiving antenna.
2. Increase the separation between the equipment and receiver.
3. Connect the equipment into an outlet on a circuit different from that to which
the receiver is connected.
4. Consult the dealer or an experienced radio / TV technician for help.
FCC REQUIREMENTS

62
Industry Canada Requirements
This Class B digital apparatus complies with Canadian ICES-003.
Cet appareil numérique de la classe B est conforme à la norme NMB-003
du Canada.
'This product meets the applicable Industry Canada technical
specifications.
Le présent materiel est conforme aux specifications techniques
applicables d'Industrie Canada
'The Ringer Equivalence Number is an indication of the
maximum number of terminals allowed to be connected to a
telephone interface. The termination on an interface may consist
of any combination of devices subject only to the requirement
that the sum of the Ringer Equivalence Numbers of all the
devices does not exceed five.
L'indice d'équivalence de la sonnerie (IES) sert à indiquer le
nombre maximal de terminaux qui peuvent être raccordés à une
interface téléphonique. La terminaison d'une interface peut
consister en une combinaison quelconque de dispositifs, à la
seule condition que la somme d'indices d'équivalence de la
sonnerie de tous les dispositifs n'excède pas 5.''
SAVE THIS INSTRUCTION

63
For Customer Service questions or to order Additional
Cordless Handsets (CY-932), please call
CY-932 Picture
NOTE:
z The CY-932 is designed to work with the CY-936AM System. It will not work
alone or with other Telephone Systems.
z The CY-932 can pairs with up to 4 Base (CY-936AM) simultaneously
z The CY-936 System can support up to 4 additional handsets (CY-932), for a
total of 5 handsets.
CUSTOMER SERVICEMENTS
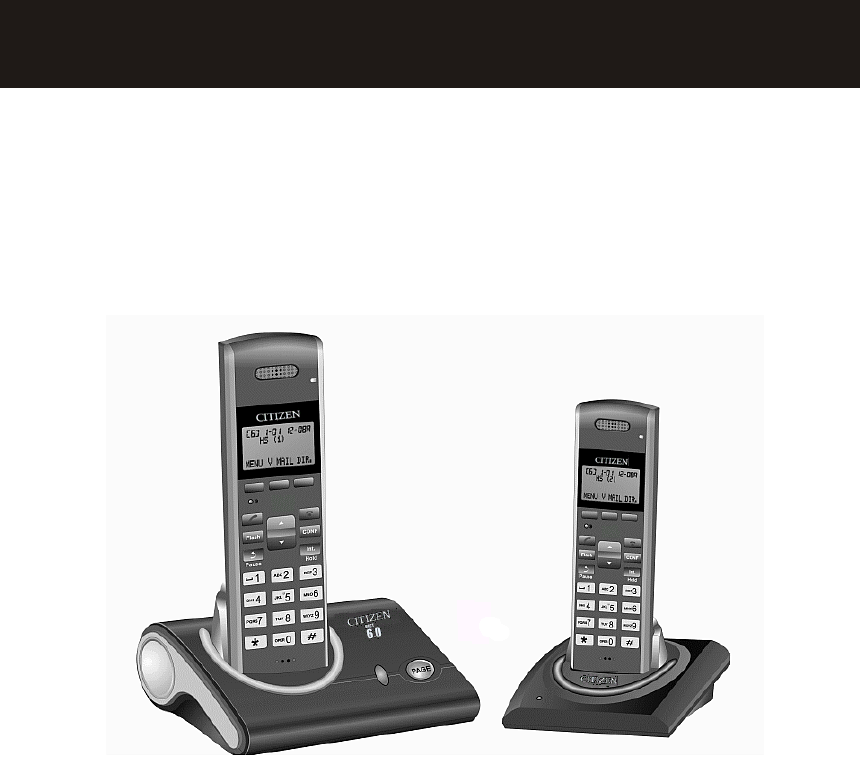
DECT 6.0 Digital
Owner’s Manual
Installation and Operating Instructions
Please read this manual completely before use.
60CN55-2 (Bundle Handset)
MULTI-HANDSET CORDLESS SYSTEM

1
IMPORTANT INFORMATION---------------------------------------------------------------------
Important safety instructions------------------------------------------------------------------------
INTRODUCTION--------------------------------------------------------------------------------------
Special features---------------------------------------------------------------------------------------
INSTALLATION --------------------------------------------------------------------------------------
Package contents-------------------------------------------------------------------------------------
Choose the best location----------------------------------------------------------------------------
Connect the base unit--------------------------------------------------------------------------------
Charge the battery------------------------------------------------------------------------------------
DC power------------------------------------------------------------------------------------------------
Low battery----------------------------------------------------------------------------------------------
Clean battery contacts-------------------------------------------------------------------------------
Wall mounting base unit-----------------------------------------------------------------------------
USE YOUR PHONE----------------------------------------------------------------------------------
Handset--------------------------------------------------------------------------------------------------
Base unit------------------------------------------------------------------------------------------------
Power on the handset--------------------------------------------------------------------------------
Standby mode------------------------------------------------------------------------------------------
Power off the handset--------------------------------------------------------------------------------
Range condition----------------------------------------------------------------------------------------
Registration---------------------------------------------------------------------------------------------
BASE SETTINGS VIA HANDSET----------------------------------------------------------------
Deregister a handset---------------------------------------------------------------------------------
Dial mode------------------------------------------------------------------------------------------------
Modify PIN-----------------------------------------------------------------------------------------------
Flash time-----------------------------------------------------------------------------------------------
Set base to default------------------------------------------------------------------------------------
HANDSET SETTINGS-------------------------------------------------------------------------------
Alarm-----------------------------------------------------------------------------------------------------
Ring setup-----------------------------------------------------------------------------------------------
Configure ringtone for incoming calls via exterior-line (fixed line)----------------------
Configure ring volume for incoming calls exterior-line (fixed line)----------------------
Configure ringtone for intercom calls----------------------------------------------------------
Configure ring volume for intercom calls -----------------------------------------------------
Do not disturb-------------------------------------------------------------------------------------------
Tone setup-----------------------------------------------------------------------------------------------
Set key tone on/off---------------------------------------------------------------------------------
Set battery low alert tone on/off-----------------------------------------------------------------
Set out of range alert tone on/off---------------------------------------------------------------
Language setting--------------------------------------------------------------------------------------
Change handset name-------------------------------------------------------------------------------
Auto answer---------------------------------------------------------------------------------------------
Set auto answer mode on/off---------------------------------------------------------------------
3
3
5
5
6
6
6
7
7
8
8
8
9
10
10
10
11
11
11
11
12
14
14
14
15
15
16
17
17
17
18
18
18
18
19
20
20
20
20
21
21
22
22
CONTENTS

2
Call barring----------------------------------------------------------------------------------------------
Date & time settings----------------------------------------------------------------------------------
Set date format--------------------------------------------------------------------------------------
Set date--------------------------------------------------------------------------------------------
Set time format--------------------------------------------------------------------------------------
Set time-----------------------------------------------------------------------------------------------
Set handset to default--------------------------------------------------------------------------------
Display the phonebook entries---------------------------------------------------------------------
Add entries to phonebook---------------------------------------------------------------------------
Symbols-----------------------------------------------------------------------------------------------
Edit an entry in phonebook--------------------------------------------------------------------------
Delete an entry from phonebook------------------------------------------------------------------
Delete all entries in phonebook--------------------------------------------------------------------
Review caller ID list-----------------------------------------------------------------------------------
Save caller ID information to phonebook-------------------------------------------------------
Delete a record from caller ID list-----------------------------------------------------------------
Delete all records in caller ID list------------------------------------------------------------------
Review dialed numbers list-------------------------------------------------------------------------
Add a dialed number to phonebook--------------------------------------------------------------
Delete a dialed number------------------------------------------------------------------------------
Delete all dialed numbers---------------------------------------------------------------------------
MAKING A CALL-------------------------------------------------------------------------------------
Dial a number-----------------------------------------------------------------------------------------
Call from phonebook--------------------------------------------------------------------------------
Call from caller ID list --------------------------------------------------------------------------------
Call from dialed numbers list-----------------------------------------------------------------------
Call the last dialed number--------------------------------------------------------------------------
Enter a pause in dialing sequence--------------------------------------------------------------
PAGING AND INTERCOM-------------------------------------------------------------------------
Locate misplaced handset(s) with base unit----------------------------------------------------
Intercom between handsets------------------------------------------------------------------------
Transfer a call to another handset----------------------------------------------------------------
CALL CONFERENCING----------------------------------------------------------------------------
Call conferencing--------------------------------------------------------------------------------------
RECEIVING A CALL---------------------------------------------------------------------------------
Via exterior-line (fixed line)-------------------------------------------------------------------------
During intercom----------------------------------------------------------------------------------------
Switch to a waiting call-----------------------------------------------------------------------------
Mute a call-----------------------------------------------------------------------------------------------
TROUBLESHOOTING-------------------------------------------------------------------------------
CARE AND MAINTENANCE----------------------------------------------------------------------
22
23
23
24
24
25
25
26
27
27
28
28
29
29
30
30
30
31
31
31
32
32
34
34
34
34
35
35
35
36
36
36
37
38
38
40
40
41
41
42
43
45
CONTENTS

3
Important Safety Instructions
To reduce the risk of fire, electric shock and / or injury to persons, always follow
the following safety precautions when using this telephone equipment.
1. Read, understand, and follow all
instructions.
2. Unplug this telephone from the wall
outlet before cleaning. Do not use
liquid or aerosol cleaners. If necessary,
use a soft cloth lightly moistened with
a mild detergent solution.
3. Do not use this telephone near a
bathtub, kitchen sink, wash bowl,
laundry tub, swimming pool, a wet
basement or anywhere else there is
water or liquid.
4. Do not place this telephone on an
unstable cart, stand or table. A fall
could cause serious damage to the
phone.
5. Slots and openings in the cabinet at
the back or bottom are provided for
ventilation to protect the unit from
overheating. These openings must not
be blocked or covered. Do not place
this telephone on a bed, sofa, rug or
other similar surface. This telephone
should never be placed near or over a
radiator or heat register. This
telephone should not be placed in a
built-in installation unless proper
ventilation is provided.
6. Never push objects of any kind
through slots in the phone. They could
touch dangerous voltage points or
short out parts that could result in a
risk of fire or electric shock. Never spill
liquid of any kind on the telephone.
7. Unplug this telephone from the wall
outlet and refer to a qualified service
representative in any of the following
situations:-
a) If liquid has been spilled into the
telephone.
b) If the telephone has been
exposed to rain or water.
c) If the telephone does not operate
normally by following the
operating instructions. Adjust
only those controls that are
covered by the operating
instructions. Improper adjustment
of other controls may result in
damage and will often require
extensive work by a qualified
technician to restore the
telephone to normal operation.
d) If the telephone has been
dropped or the case has been
damaged.
e) If the telephone exhibits a distinct
change in performance.
8. Do not use the telephone to report a
gas leak in the vicinity of the leak.
9. Avoid using this telephone during an
electrical storm. There may be a
remote risk of electric shock from
lightning.
10. Never install jacks in a wet location
unless the jack is specifically designed
for wet locations.
11. Never touch uninsulated telephone
wires or terminals unless the
telephone line has been disconnected
at the network interface.
12. Use with caution when installing or
modifying telephone lines.
13. To reduce the risk of electric shock, do
not disassemble this product, but take
it to a qualified serviceman when some
service or repair work is required.
Opening or removing covers may
IMPORTANT INFORMATION

4
expose you to dangerous voltages or
other risks. Incorrect reassembly can
cause electric shock when the
appliance is subsequently used.
14. Use only the power cord and batteries
indicated in this manual. Do not
dispose of batteries in fire. They may
explode. Check with local codes for
possible special disposal instructions.
15. Plug the adapter to the socket-outlet
that near the equipment and shall be
easily accessible.
16. For service or replacement, you can
purchase a suitable headset through
service center or retailer shop.
17. We advise that this telephone should
not be used near intensive care
medical equipment or by persons with
pacemakers.
18. CAUTION
RISK OF EXPLOSION IF BATTERY IS
REPLACED BY AN INCORRECT
TYPE.
USE RECHARGEABLE BATTERY
TYPE ONLY’, Desay, Ni-MH, size
AAA , 1.2V, 600mAH
DISPOSE OF USED BATTERIES
ACCORDING TO YOUR LOCAL
CODE.
Use only with Class 2 Power Source, 7.5V DC, 500mA for the Base
and Charger Unit
SAVE THESE INSTRUCTIONS
IMPORTANT INFORMATION

5
Special Features
1.9GHz digital DECT 6.0 cordless
phone system
Multiple handsets capability, support
up to 5 handsets
3-way conference call (two handsets
& an incoming call)
Call transfer to other handsets
Hands-free function
Phonebook with 40 entries;
Phonebook dialing
Redial; Redial list of last 9 dialed
numbers
Support fixed line Type I and Type II
CID (FSK and DTMF)
Caller list with last 40 Caller ID
records
Hold function
Mute function
Intercom between two handsets
Alarm clock including snooze option
Page to all handsets
Tone / Pulse dialing
Digital volume control
Audio setup that includes 10 melodies
for exterior-line and intercom rings
Range tone option
Battery low tone option
Barring handset from dialing
Display the talk / intercom time
Auto answer function
English / German / French / Italian /
Spanish / Dutch intelligent LCD
display
INTRODUCTION

Package Contents
Check to be sure that the following items are included. If there is any missing or
visible damage, contact the original place of purchase and do not attempt to
operate if it is damaged.
• One base unit
• One handset with belt clip
• Two batteries (1.2V / 600mAh)
• One 7 feet telephone line cord
• One DC adapter (DC 7.5V / 500mA)
• One Wall Mount
• Owner’s Manual
Choose the Best Location
Calls are transmitted between the base unit and handset, or between handsets, by
way of wireless radio waves. For maximum distance and noise-free operation,
here are some important guidelines:
1. The location of base unit should be close to both a phone jack and a
continuous power outlet that is not switch-controlled.
2. Place the base unit at a high, central location with no obstructions such as
walls.
3. Keep the base unit and the handset away from sources of electrical noise
such as TV, personal computer, or another cordless phone.
4. The base unit can be placed on the tabletop or mounted on a wall.
Note: While using the handset:
If you are near a working microwave oven, noise may occur from the receiver or
speaker. Move away from the microwave oven and closer to your phone’s base
unit.
If more than one cordless telephone set is being used and your handset is near
another cordless phone’s base unit, noise may occur. Move away from other
phone’s base unit and closer to your CY-936 base unit.
INSTALLATION

7
Your new telephone includes the highest quality NiMH (Nickel Metal Hydride)
rechargeable batteries. Follow the simple instructions below can significantly
improve your operational results.
Connect the Base Unit
1. Plug one end of the telephone line cord into the ‘TEL. LINE’ jack at the
bottom of the base unit and plug the other end of the cord into a modular
telephone wall jack. (If your wall jack is not modular, contact your local
telephone company for assistance.)
2. Plug the supplied DC adapter’s barrel plug into the ‘DC 7.5V’ jack at the
bottom of base unit and the other end into a standard 120V AC wall outlet.
Charge the Battery
1. Press the release point on the back cover of the handset and slide
downwards to open the battery compartment.
2. Insert the supplied two batteries into the compartment according to polarity
marks.
3. Slide the back cover upwards until it snaps into place.
4. Place the handset on the base unit and make sure the Charge indicator on
the base unit illuminates, which indicates the charging begins. The battery
icon on the handset LCD will change from the mode of ‘very low’, to ‘low’, to
‘medium’, to ‘full’ and repeat as a cycle.
5. Charge all batteries for at least 15 hours prior to initial use.
INSTALLATION

8
DC Power
Caution:
1. Use only with the supplied DC Adapter (AC 120V, DC 7.5V, 500mA).
2. Plug the adapter to a continuous power outlet, which is near the base unit
and is not switch-controlled.
3. The DC adapter must keep connected at all times. (It is normal for the
adapter to be warm during use)
4. Do not remove the battery from the handset to charge it. Do not remove or
damage the battery casing.
5. For the longest battery life and the maximum talk & standby time, completely
charge and discharge the batteries every time.
6. If you do not expect to use your phone for a month or longer, remove the
batteries from the handset. The batteries may leak chemicals that can
destroy electronic parts.
7. To avoid the risk of explosion, do not dispose of the batteries in a fire. Check
with local codes for possible disposal instructions.
Low Battery
The battery icon on the handset LCD shows the current level of battery strength.
If the battery is not properly charged, there will be a warning tone when the
handset is in use and “BATTERY LOW” displayed. While this occurs, the handset
may not function normally.
Clean Battery Contacts
To maintain a good charge, it is necessary to clean all battery contacts on the
handset and the base unit with a soft, dry cloth about once a month. You may also
use a pencil eraser or other contact cleaner, but never use any liquids or solvents.
INSTALLATION

9
Wall Mounting Base Unit
The base unit can be mounted on a standard wall phone plate.
1. Plug the DC adapter’s barrel plug into the jack marked “7.5V 500mA” at the
bottom of the base unit.
2. Plug the telephone line cord into the jack marked “TEL. LINE”.
3. Hold the base unit up next to the wall jack and plug the line cord into the wall
jack.
4. Place the base unit on the posts of the wall plate and push down until the
base unit is secured firmly.
5. Plug the DC adapter into a standard wall outlet.
Note: If you are not using a standard wall plate to mount the phone on a wall, you
may also mount it with ordinary screws. Affix two screws on the wall, remember to
leave 1/8 inch of the screw extending from the wall.
Short tab
INSTALLATION
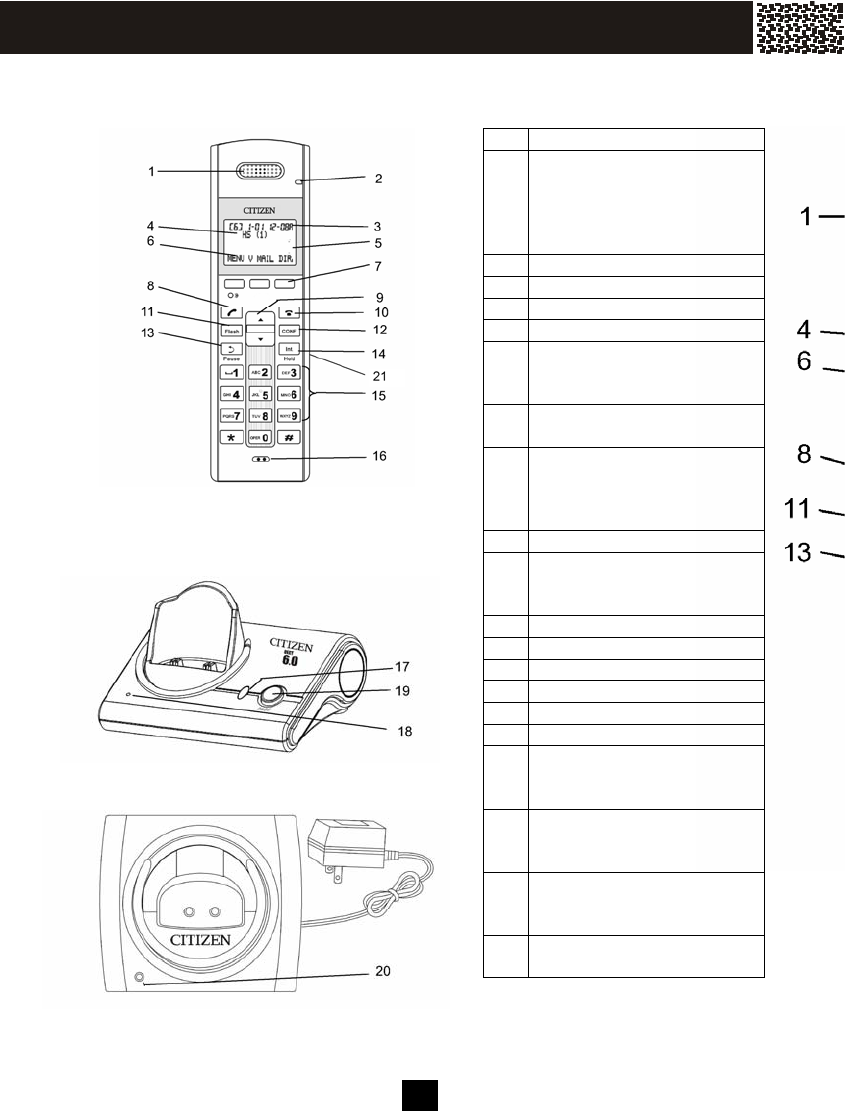
10
1 Receiver
2 Light Indication for
-New Call
-Incoming Call
-Line-in-use
-Voice Mail (VMWI)*
3 Day & Time
4 Handset name
5 Battery strength
6 Menu
7 Softkeys, each key is
Programmed to perform
Various functions.
8 Talk, to make or receive
Calls.
9 Menu scroll and volume
key, to navigate menu
items and adjust volume
during talk.
10 End/Off, to terminate calls.
11 Flash, to access some
Services provided by the
Telephone company.
12 Conference
13 Redial/Pause
14 Intercom/Hold
15 Keypad
16 Microphone
17 Line-in-use indication
18 ‘Charge’ indicator,
illuminates when handset
is being charged.
19 Page key, to page all
handsets in range of the
base unit
20 ‘Charge’ indicator,
illuminates when handset
is being charged.
21 Headset Jack (use 2.5mm
jack headset)
USE YOUR PHONE
Handset
eUnit
r
ger Unit
11
Power on the Handset
When the handset is powered off, press and hold key can power it on.
If battery life is sufficient, the handset will power on. If not, it will remain powered
off.
After powering on, the handset will enter
subscription mode and search for a
registered base. A message as shown on
the screen will appear.
If the handset is successful in finding a
base, the handset will enter the standby
mode.
If the handset is unsuccessful in finding a
base, the screen will show ‘OUT OF
RANGE’.
Standby Mode
In standby mode, a registered handset
displays as this.
Power off the Handset
When the handset is powered on, press and hold key can power it off.
Range Condition
A warning indication will be provided to the user when the handset is out of range.
SEARCHING
MENUDIR.
OUTOFRANGE
MENUDIR.
12–25 2:58 P
HS (1)
MENUDIR.
USE YOUR PHONE
12
Registration
Before registering a handset to the base unit, the base unit should first enter the
registration mode.
Press the [Page] key on the base for more than 3 seconds till the ‘In Use’ indicator
begins to flash quickly.
An unregistered handset displays as this.
Press [MENU] softkey, select
‘REGISTRATION’, then press [OK]
After pressing [OK] softkey, a list of
bases will be displayed.
There are 4 base positions available for
registration.
Select the BASE among BASE1 - BASE4,
(For the first time of use, select ‘BASE1’),
and then press [SEL] softkey.
Now the handset begins searching for the
base.
UNREGISTERED
MENUV.MAILDIR.
REGISTRATION
OKEXIT
BASE1↓
BASE2
SELEXIT
SEARCHING1
EXIT
USE YOUR PHONE

13
When the base has been found, you
have to input the PIN code (4 digits) for
the base. The default PIN code is printed
on the backside label of the base (The
code can be changed later).
Then registration is completed.
PIN?****
OKEXIT
12–25 3:29 P
HS (1)
MENUDIR.
USE YOUR PHONE
14
The base options can be set through the operation on a handset registered to this
base.
Press the [MENU] softkey, select ‘BS SETTINGS’ and press [OK].
Deregister a Handset
Press the [MENU] softkey, select ‘BS SETTINGS’ and press [OK].
.
Select ‘TERMINATE HS’, and press [OK].
Input the 4-digit PIN code.
The default PIN is printed on the
backside label of the base.
Use ▲ / ▼ to scroll the list of handsets
(HS).
Press the [DEL] softkey to select a
handset (except for the current handset).
Dial Mode
Press the [MENU] softkey, select ‘BS
SETTINGS’ and press [OK].
Use ▲ / ▼ to select ‘DIAL MODE’, and
press [OK].
Press ▲ / ▼ to scroll the two options.
Press [SAVE] to save your setting.
TERMINATEHS↓
DIALMODE
OKEXIT
PIN?****
OKDELEXIT
HS1↓
HS2
DELEXIT
TONE↓
PULSE
SAVEEXIT
BASE SETTINGS VIA HANDSET
15
Modify PIN
Press the [MENU] softkey, select ‘BS SETTINGS’ and press [OK].
Use ▲ / ▼ to select ‘MODIFY PIN’ and press [OK].
Input the current 4-digit PIN.
Press [OK] to complete.
The default PIN is on the backside label
of the base.
Input the new 4-digit PIN.
Press [OK] to complete.
Input the new PIN again to confirm.
Press [OK] to complete.
Please do not forget this new PIN code.
Now the new PIN will be stored in the
base unit.
Flash Time
This function allows the user to set the flash time parameter according to your
local telephone network settings when using the [Flash] key in some services,
such as call waiting service and conference calling service, etc.
Press the [MENU] softkey, select ‘BS
SETTINGS’ and press [OK].
Use ▲ / ▼ to select ‘FLASH TIME’ and
press [OK].
PIN?****
OKDELEXIT
NEWPIN****
OKDELEXIT
CONFIRM****
OKDELEXIT
DIALMODE
FLASHTIME
OKEXIT
BASE SETTINGS VIA HANDSET
16
Use ▲ / ▼ to choose between the two
options and then press [SAVE] to save
your setting.
(‘SHORT’ = 300, ‘LONG’ = 650)
Set Base to Default
This function allows the user to restore the base settings to factory default.
Press the [MENU] softkey
Use ▲ / ▼ to select ‘BS SETTINGS’ and
press [OK] softkey.
Select ‘BASE DEFAULT’ and press [OK]
softkey.
Input the 4-digit PIN.
The default PIN is on the backside label
of the base.
Press [OK] softkey to complete.
Then all settings of the base will revert to
factory default values.
SHORT↑
LONG
SAVEEXIT
MODIFYPIN↑
BASEDEFAULT
OKEXIT
PIN?****
OKDELEXIT
BASE SETTINGS VIA HANDSET

17
Alarm
Press the [MENU] softkey, select ‘HS
SETTINGS’ and press [OK] softkey.
Select ‘ALARM CLOCK’ and press [OK]
softkey.
Use ▲ / ▼ to select ‘ON’ or ‘OFF’
Press [SAVE] softykey to save your
setting.
Ring Setup
Press the [MENU] softkey, use ▲ / ▼ to
select ‘HS SETTINGS’ and press [OK].
Select ‘RING SETUP’ and press [OK].
Use ▲ / ▼ to select a type of ring that
you want to set.
(You can assign different ringtones and
volume for incoming intercom call, fixed
line call respectively, ‘INTC’ is for
intercom.)
Press [OK] softkey.
Use ▲ / ▼ to select ‘MELODY’ or
‘VOLUME’ setting.
ALARMCLOCK↓
RINGSETUP
OKEXIT
OFF↓
ON
SAVEEXIT
ALARMCLOCK
RINGSETUP
OKEXIT
INTCRING↓
LINERING
OKEXIT
MELODY↓
VOLUME
OKEXIT
HANDSET SETTINGS
18
If you enter the ‘MELODY’ setting
Use ▲ / ▼ to select a melody.
Press [SAVE] softkey to save your
setting.
If you enter the ‘VOLUME’ setting
Use ▲ / ▼ to select a volume level.
Press [SAVE] softkey to save your
setting.
Configure Ringtone for Incoming Calls via Exterior-line
Press the [MENU] softkey, select ‘HS SETTINGS’ and press [OK]. Select ‘RING
SETUP’ by using ▲ / ▼ and then press [OK].
Select ‘LINE RING’, then press [OK].
Select ‘MELODY’, then press [OK].
Press ▲ / ▼ to select the desired ringtone, then press the [SAVE] softkey to save
your setting.
Configure Ring Volume for Incoming Calls via Exterior-line
Press the [MENU] softkey, select ‘HS SETTINGS’ and press [OK]. Select ‘RING
SETUP’ by using ▲ / ▼ and then press [OK].
Select ‘LINE RING’, then press [OK].
Select ‘VOLUME’, then press [OK].
Press ▲ / ▼ to select the desired volume, then press the [SAVE] softkey to save
your setting.
Configure Ringtone for Intercom Calls
Press the [MENU] softkey, select ‘HS SETTINGS’ and press [OK]. Select ‘RING
SETUP’ by using ▲ / ▼ and then press [OK].
Select ‘INTC RING’, then press [OK].
Select ‘MELODY’, then press [OK].
Press ▲ / ▼ to select the desired ringtone, then press the [SAVE] softkey to save
your setting.
Configure Ring Volume for Intercom Calls
Press the [MENU] softkey, select ‘HS SETTINGS’ and press [OK].
Select ‘RING SETUP’ by using ▲ / ▼ and then press [OK].
Select ‘INTC RING’, then press [OK].
Select ‘VOLUME’, then press [OK].
Press ▲ / ▼ to select the desired volume, then press the [SAVE] softkey to save
your setting.
MELODY1↓
MELODY2
SAVEEXIT
VOLUME2↑
VOLUME1
SAVEEXIT
HANDSET SETTINGS

19
Do Not Disturb
Press the [MENU] softkey, select ‘HS
SETTINGS’ and press [OK].
Select ‘RING SETUP’ by using ▲ / ▼
and then press [OK].
Select ‘DO NOT DISTURB’, then press
[OK].
Press ▲ / ▼ to choose ‘OFF’ or ‘ON’,
then press [OK] to save your setting.
If this option is set to ‘ON’, the screen will display “DO NOT DISTURB” in standby
mode. Then no ring will be heard from any exterior-line (fixed line) call; but the call
information will still be displayed on the screen, and you can also answer the call if
you want.
LINERING↑
DONOTDISTURB
OKEXIT
OFF↓
ON
OKEXIT
HANDSET SETTINGS
20
Tone Setup
Press the [MENU] softkey, select ‘HS
SETTINGS’ and press [OK].
Select ‘TONE SETUP’ by using ▲ / ▼
and press [OK].
Then you can configure the displayed 3
types of tones.
Set Key Tone On/Off
Press the [MENU] softkey, select ‘HS SETTINGS’ and press [OK].
Select ‘TONE SETUP’ by using ▲ / ▼ and press [OK].
Select ‘KEY TONE’ and press [OK].
Use ▲ / ▼ to select ‘OFF’ or ’ON’, then press [SAVE] to save your setting.
Set Battery Low Alert Tone On/Off
Press the [MENU] softkey, select ‘HS SETTINGS’ and press [OK].
Select ‘TONE SETUP’ by using ▲ / ▼ and press [OK].
Select ‘BATTERY LOW’ and press [OK].
Use ▲ / ▼ to select ‘OFF’ or ‘ON’, then press [SAVE] to save your setting.
Set Out of Range Alert Tone On/Off
Press the [MENU] softkey, select ‘HS SETTINGS’ and press [OK].
Select ‘TONE SETUP’ by using ▲ / ▼ and press [OK].
Select ‘RANGE ALARM’ and press [OK].
Use ▲ / ▼ to select ‘OFF’ or ‘ON’, then press [SAVE] to save your setting.
RINGSETUP
TONESETUP
OKEXIT
KEYTONE↓
BATTERYLOW
OKEXIT
HANDSET SETTINGS
21
Language Setting
Press the [MENU] softkey, select ‘HS
SETTINGS’ and press [OK].
Select ‘LANGUAGE’ by using ▲ / ▼ and
then press [OK].
Use ▲ / ▼ to scroll through the 6
available language options (English,
German, French, Italian, Spanish, Dutch).
Select the desired language and then
press [SAVE] to save your setting.
Change Handset Name
‘HS (N)’ is the default name of a handset after registering it to a base unit. The
handset extension number ‘N’ (1—5) shows the handset is the ‘N’th handset that
registered to the base. The name will be shown on the screen when the handset is
in standby mode
A handset must be registered to the base before it can be assigned to a name.
To change the handset name in text
format
Press the [MENU] softkey.
Use ▲ / ▼ to select ‘HS SETTINGS’ and
press [OK].
Select ‘HS LABEL’ and press [OK].
Press [DEL] to delete the current name,
and use keypad to input the new name.
Then press [SAVE] to save your change.
TONESETUP↓
LANGUAGE
OKEXIT
ENGLISH↓
DEUTSCH
SAVEEXIT
LANGUAGE↓
HSLABEL
OKEXIT
NAME?
SAVEDELABC
HANDSET SETTINGS
22
Auto Answer
Handset can be set to answer incoming calls automatically. When the handset is
not on the base unit or the charger cradle, must be pressed to answer
incoming calls. Auto answer mode can only be activated when the handset is on
the base unit or charger cradle, in which case, the line will be automatically
connected when the handset is picked up from the base unit or charger cradle.
Set Auto Answer Mode On/Off
Press the [MENU] softkey.
Use ▲ / ▼ to select ‘HS SETTINGS’ and
press [OK].
Select ‘AUTO ANSWER’ and press [OK].
Use ▲ / ▼ to select ‘OFF’ or ‘ON’.
Press [OK] to save your setting.
Call Barring
Handset can be set to disable outgoing
fixed line calls.
To set the call barring mode ‘ON’ or ‘OFF’
Press the [MENU] softkey.
Use ▲ / ▼ to select ‘HS SETTINGS’ and
press [OK].
Select ‘CALL BARRING’ and press [OK].
Input the 4-digit PIN.
The default PIN is on the backside label
of the base.
Press [OK] to confirm.
HSLABEL↓
AUTOANSWER
OKEXIT
OFF↓
ON
OKEXIT
AUTOANSWER↓
CALLBARRING
OKEXIT
PIN?****
OKEXIT
HANDSET SETTINGS

23
Use ▲ / ▼ to select ‘OFF’ or ‘ON’.
Press [SAVE] to save your setting.
If you set to ‘ON’, the screen will display
“CALLS BARRED” in standby mode.
Date & Time Settings
Press the [MENU] softkey.
Use ▲ / ▼ to select ‘HS SETTINGS’ and
press [OK] softkey.
Select ‘DATE & TIME’ and press [OK]
softkey.
OFF
ON
SAVEEXIT
CALLBARRING
DATE&TIME
OKEXIT
HANDSET SETTINGS
24
Set Date
Press the [MENU] softkey.
Use ▲ / ▼ to select ‘HS SETTINGS’ and
press [OK] softkey.
Select ‘DATE & TIME’ and press [OK]
softkey.
Select ‘SET DATE&TIME’ and press [OK]
softkey.
Use the keypad to input the date
consecutively.
Press [SAVE] to save your setting.
Set Time Format
Press the [MENU] softkey.
Use ▲ / ▼ to select ‘HS SETTINGS’ and
press [OK] softkey.
Select ‘DATE & TIME’ and press [OK]
softkey.
Select ‘TIME FORMAT’ and press [OK]
softkey.
Use ▲ / ▼ to select your desired format.
Press [SAVE] to save your setting.
Then the time will be displayed in the
format you have set when return to
standby mode.
TIMEFORMAT↑
SETDATE&TIME
OKEXIT
DD/MMHH:MM
00/0000:00
SAVEEXIT
DATEFORMAT
TIMEFORMAT
OKEXIT
12‐HOUR↓
24‐HOUR
SAVEEXIT
HANDSET SETTINGS
25
Set Time
Press the [MENU] softkey.
Use ▲ / ▼ to select ‘HS SETTINGS’ and
press [OK] softkey.
Select ‘DATE & TIME’ and press [OK]
softkey.
Select ‘SET DATE&TIME’ and press [OK]
softkey.
Use ▲ / ▼ to shift the position of cursor.
Use the keypad to input the time
consecutively in the format you have set.
(If you have already set the ‘TIME
FORMAT’ to ‘12-HOUR’ format, then you
also need to choose ‘a.m.’ or ‘p.m.’ by
using the [AM/PM] softkey.)
Press the [SAVE] softkey to save your
setting.
TIMEFORMAT↑
SETDATE&TIME
OKEXIT
DD/MMHH:MM
00/0000:00AM
SAVEAM/PMEXIT
HANDSET SETTINGS
26
Set Handset to Default
This function allows the user to restore the handset settings to factory default.
Press the [MENU] softkey
Use ▲ / ▼ to select ‘HS SETTINGS’ and
press [OK] softkey.
Select ‘HS DEFAULT’ and press [OK]
softkey.
Input the 4-digit PIN.
The default PIN is on the backside label
of the base.
Press [OK] softkey to complete.
Then all settings of the handset will revert
to factory default values.
SELECTBASE↑
HSDEFAULT
OKEXIT
PIN?****
OKDELEXIT
HANDSET SETTINGS
27
Display the Phonebook Entries
In standby mode, press [DIR.] softkey to
enter the telephone directory.
Then the phonebook screen will be
displayed.
Use ▲ / ▼ to access and scroll the
phonebook entries.
Add Entries to Phonebook
In standby mode, press [DIR.] softkey to
enter telephone directory.
Then the phonebook screen will be
displayed.
Press [ADD] softkey to add a new entry.
Use keypad to input the name.
Press [ABC] ([123]) softkey to switch the
input mode between numerical mode and
alphabetical mode.
If you input wrong words or numbers, use
▲ / ▼ and [DEL] softkey to erase the
errors.
Press [OK] to complete the input.
In alphabetical mode, each numeric key is assigned a set of letters and symbols
as printed below. Press the corresponding key until your desired letter is displayed.
If two consecutive letters from the same key is required, just wait until the cursor
moves to the next blank space.
Numeric: 1 2 3 4 5 6 7 8 9 0
Alpha:
Space A,B,C D,E,F G,H,I J,K,L M,N,O P,Q,R,S T,U,V W,X,Y,Z
PHONEBOOK
38ENTRIES
ADDDELEXIT
#1812345678
JOHNSMITH
PHONEBOOK
EDITDELEXIT
PHONEBOOK
38ENTRIES
ADDDELEXIT
NAME?
JOHN
OKDELABC
HANDSET SETTINGS
28
Symbols
You can also use [½] or [#] to insert the following special symbols in the name
field.
½ + , - . / @ : ; < = > ? { ¦ } ~ [ \ ] ^ _ ` ! ″ # $ % & ´ ( )
Note: Name must be started with an alphabetic character.
Use keypad to input number
Press [OK] softkey when finished.
Press [DEL] softkey to erase the digit(s)
you input in error, and then input the
correct one.
Use ▲ / ▼ to select a distinct ringtone for
this entry.
Press [SAVE] to complete.
Edit an Entry in Phonebook
In standby mode, press [DIR.] softkey to
enter telephone directory.
Use ▲ / ▼ to access and scroll the
phonebook entries.
When the entry that you want to edit
appears, press [EDIT] softkey.
Then follow the steps as adding an entry
to phonebook.
NUMBER?
12345678
OKDELEXIT
MELODY1↓
MELODY2
SAVEEXIT
#1812345678
JOHNSMITH
PHONEBOOK
EDITDELEXIT
HANDSET SETTINGS
29
Delete an Entry from Phonebook
In standby mode, press [DIR.] softkey to
enter telephone directory.
Use ▲ / ▼ to access and scroll the
phonebook entries.
When the entry that you want to delete
appears, press [DEL] softkey.
Press [YES] to confirm your deletion.
Then this entry is deleted.
Delete All Entries in Phonebook
In standby mode, press [DIR.] softkey to
enter telephone directory.
Press [DEL] softkey to delete all entries.
Press [YES] to confirm the deletion.
Then all entries are deleted.
#1812345678
JOHNSMITH
PHONEBOOK
EDITDELEXIT
SURETODELETE?
YESNO
PHONEBOOK
38ENTRIES
ADDDELEXIT
DELETEALL?
YESNO
HANDSET SETTINGS

30
Review Caller ID List
In standby mode, press ▲ / ▼ to enter
the Caller ID List.
Then the Caller ID book screen will be
displayed.
Press ▲ to review the latest call, press ▼
to review the earliest call.
The date and time is also displayed in the
format you have set.
Save Caller ID Information to Phonebook
In standby mode, press ▲ / ▼ to enter
the Caller ID List.
Use ▲ / ▼ to access and scroll the Caller
ID List.
When the record that you want to save
appears, press [SAVE] softkey.
Then follow the steps as adding an entry
to phonebook.
Delete a record from Caller ID List
In standby mode, press ▲ / ▼ to enter
the Caller ID List.
Use ▲ / ▼ to access and scroll the Caller
ID List.
When the record that you want to delete
appears, press [DEL] softkey.
CIDBOOK
20ENTRIES
DELEXIT
#125/123:58P
JOHNSMITH
12345678X2
SAVEDELEXIT
#125/123:58P
JOHNSMITH
12345678X2
SAVEDELEXIT
#112/253:58P
JOHNSMITH
12345678X2
SAVEDELEXIT
HANDSET SETTINGS
31
Press [YES] to confirm the deletion.
Then this record is deleted.
Delete All Records in Caller ID List
In standby mode, press ▲ / ▼ to enter
the Caller ID List.
Then the Caller ID book screen will be
displayed.
Press [DEL] softkey to delete all records.
Press [YES] to confirm the deletion.
Then all records are deleted.
Review Dialed Numbers List
Every handset can store its own last 10 dialed numbers independently, each
number of up to 32 digits.
Press [Redial] key, use ▲ / ▼ to review the dialed number(s).
If the displayed number matches with an entry in the phonebook, the
corresponding name will also be shown.
Add a Dialed Number to Phonebook
When the number you want appears,
press [SAVE] softkey.
Then follow the steps as adding an entry
to phonebook.
SURETODELETE?
YESNO
CIDBOOK
20ENTRIES
DELEXIT
DELETEALL?
YESNO
#112345678
JOHNSMITH
REDIALBOOK
SAVEDELEXIT
HANDSET SETTINGS
32
Delete a Dialed Number
When the number that you want to delete
appears, press [DEL] softkey.
Press [OK] softkey.
Press [YES] to confirm the deletion.
Then this number is deleted.
Delete All Dialed Numbers
Press [Redial] key.
Press [DEL] softkey.
Press ▼ to select ‘DELETE ALL’.
Then press [OK] softkey.
#112345678
JOHNSMITH
REDIALBOOK
SAVEDELEXIT
DELETE↓
DELETEALL
OKEXIT
SURETODELETE?
YESNO
#112345678
JOHNSMITH
REDIALBOOK
SAVEDELEXIT
DELETE↓
DELETEALL
OKEXIT
HANDSET SETTINGS

33
Press [YES] to confirm the deletion.
Then all numbers are deleted.
DELETEALL?
YESNO
HANDSET SETTINGS
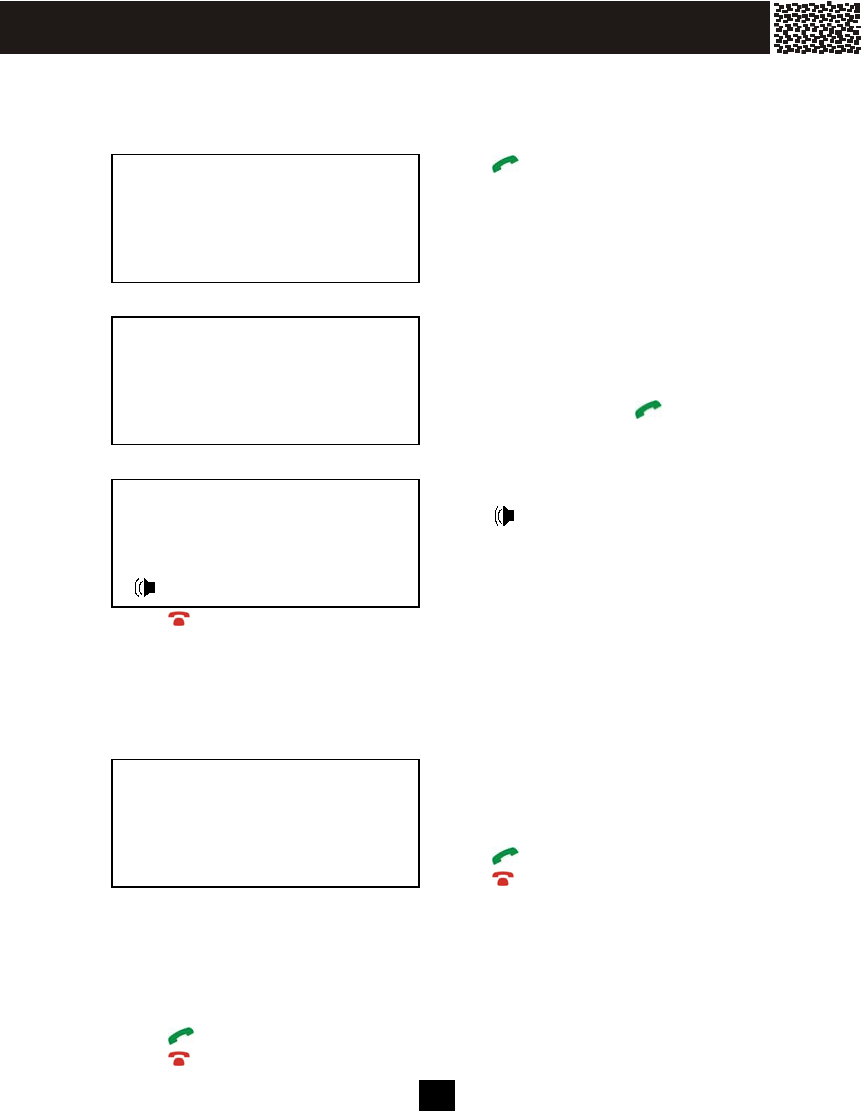
34
Method 1: Dial a Number
Press .
Input the number.
Or:
Input the number.
(You may use [DEL] softkey to delete the
digits)
Press [CALL] softkey or .
During the call:
Press softkey to toggle hands-free
mode. Press it again to quit this mode.
Press [MUTE] softkey to disable the
microphone. (For private discussion)
Press ▲ / ▼ to adjust the volume.
Press to terminate the call.
Method 2: Call from Phonebook
Press [DIR.] softkey to review the
phonebook.
Use ▲ / ▼ to scroll to the number you
need.
Press .
Press to terminate the call.
Method 3: Call from Caller ID List
Press ▲ / ▼ to review the Caller ID list.
Use ▲ / ▼ to scroll to the number you need.
Press .
Press to terminate the call.
1234567
CALLMUTEDIR.
1234567
CALLDELEXIT
LINE00:00:01
MUTEDIR.
#1812345678
JOHNSMITH
PHONEBOOK
EDITDELEXIT
MAKING A CALL

35
Method 4: Call from Dialed Numbers List
Press [Redial] key to review the dialed numbers.
Use ▲ / ▼ to scroll to the number you need.
Press .
Press to terminate the call.
Method 5: Call the Last Dialed Number
Press .
Press [Redial] key to dial out the last dialed number.
Press to terminate the call.
Note: Put the handset on the base unit can also terminate the call.
Enter a Pause in Dialing Sequence
The [Redial/Pause] key allows you to add a 3-second pause during pre-dialing or
when storing a number in phonebook.
To add a pause, press [Redial/Pause] key at your desired position when inputting
or editing a phone number, and a “P” appears on the screen.
For longer delay, press [Redial/Pause] key additional times.
Note: The number you want to store cannot have more than 24 digits, including
the pause. One “P” counts as one digit.
MAKING A CALL
36
Locate Misplaced Handset(s) with Base Unit
To locate the handset(s) while not on the base unit, press [Page] key on the base
unit. Then the handset(s) in range will display ‘PAGING FROM BASE’ and emit an
alert signal that is different from exterior-line (fixed line) calls.
To stop the paging, press [Page] on the base unit again or press any key on the
handset. If no handset answers, the paging will stop automatically after 1 minute.
Note: 1.The handset being paged will ring even if the ringer has been set to ‘OFF’.
2. If two handsets are engaging in an intercom talk, then both handsets can
only hear one beep instead of alert.
Intercom between Handsets
Press [Int.] key on a handset in standby
mode.
Then the screen will show all the other
available handsets in range of the base
unit. (‘HS’ is for ‘handset’)
Use ▲ / ▼ to scroll to the handset you
want to intercom with and press [CALL].
For instance, if HS (2) is being paged by
HS (1), HS (1) will display ‘PAGING HS
(2)’.
HS (2) will ring and display ‘PAGING
FROM HS (1)’.
Press [Int.] key, or [OK] softkey on
HS (2) to answer the intercom call.
If HS (2) does not want to answer, press
[EXIT] softkey, then the ring will stop.
HS2↓
HS3
CALLEXIT
PAGINGHS(2)
EXIT
PAGINGFROM
HS(1)
OKEXIT
INTC00:00:01
MUTE
EXIT
PAGING AND INTERCOM
37
Transfer a Call to Another Handset
.
During a call, the current call can be transferred to another handset as described
below.
When a handset is engaging in an
exterior-line (fixed line) call.
Press [Int.] key and use ▲ / ▼ to scroll
to the handset you want to transfer this
call to, then press [OK] softkey.
If you do this from HS (1) to HS (2), then
HS (2) rings and displays ‘PAGING
FROM HS (1)’.
On Handset (2), press , [Int.] or [OK]
to answer the paging and then talk with
Handset (1). (Internal talk)
Now the initiator of the transfer can talk
with the party to be transferred to, and
then the initiator can press to
complete the transfer.
If the party being transferred to does not
want to answer the paging, can press
or [EXIT] softkey to reject it .
Then the handset being paged stops
ringing and returns to standby mode,
and the initiating handset resumes the
exterior-line talk.
HS2
HS3
OKEXIT
PAGINGFROM
HS(1)
OKEXIT
INTC00:00:01
MUTE
EXIT
12–25 13:59 P
HS (1)
MENUDIR.
PAGING AND INTERCOM
38
Call Conferencing
CY-936 cordless system supports ‘conference call’ that up to 3 parties (2 handsets
and 1 exterior-line call).
When one handset is engaging in an
exterior-line (fixed line) call, press [Int.]
key on that handset to put the current call
on hold and call another handset by way
of intercom.
Use ▲ / ▼ to scroll to the handset you
want.
Then press [CALL] softkey to page.
If you do this from HS (1) to HS (2), then
HS (2) rings and displays ‘PAGING
FROM HS (1)’.
On Handset (2), press , [Int.] or [OK]
to answer the paging and talk with
Handset (1). (Intercom talk)
LINE00:00:01
MUTEDIR.
HS2
HS3
CALLEXIT
PAGINGFROM
HS(1)
OKEXIT
INTC00:00:01
MUTE
EXIT
CALL CONFERENCING
39
When the intercom call is established,
on the initiating handset { in this case is
Handset (1) }, press [Int.] key can switch
between the intercom talk and
exterior-line talk.
After the initiating handset being switched
to ‘INTC’ (intercom) call, press [CONF]
key on the initiating handset can talk with
the two parties (exterior-line party,
intercom party) simultaneously, which is
the conference mode.
On any handset, press or [EXIT] can
retreat from the current talk and return to
standby mode, the other handset will
continue the exterior-line call.
To end the call, make sure that both
handsets have quit.
Note: Even a handset has already retreated from the talk; you can still join it in
the talk again through the procedures stated on Page 38.
LINE00:00:09
INTCONHOLD
MUTE
CONF00:00:23
LINE
MUTEEXIT
LINE00:02:48
MUTEDIR.
CALL CONFERENCING
40
Via Exterior-line (Fixed line)
Without Caller ID With Caller ID
When the phone rings, if you want to
mute the ringer, press [MUTE] softkey or
.
Press [UNMUTE] softkey to resume the
ringer.
Press to answer the call.
Press ▲ / ▼ to adjust the volume.
Press to end the call.
Note: If ‘auto answer mode’ is set to ‘ON’, when the ring sounds, no need to press
, just pick up the handset off the base (or charger cradle) can answer the call
automatically.
CALLVIALINE
MUTE
12–25 13:59 P
JOHNSMITH
12345678X2
HIDEEXIT
CALLVIALINE
LINERINGMUTED
UNMUTE
LINE00:00:01
MUTEDIR.
RECEIVING A CALL
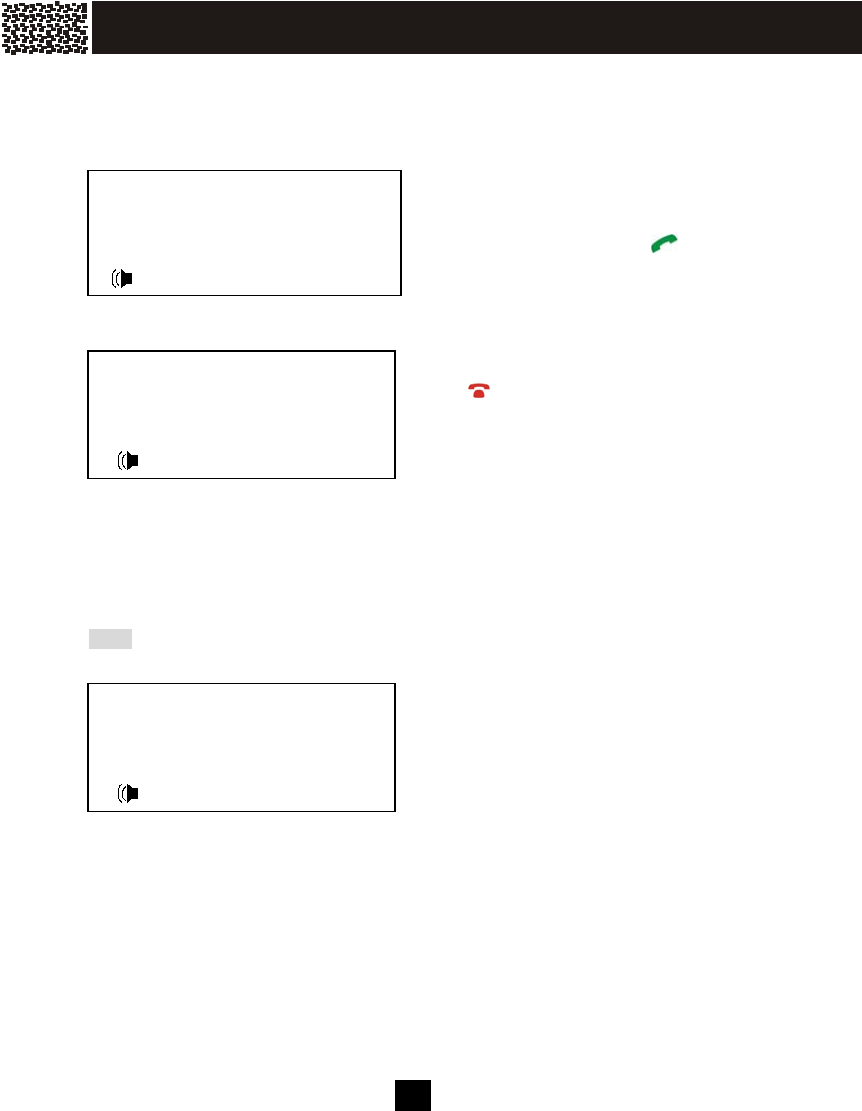
41
During Intercom
During intercom talk, if an exterior-line
call comes, both handsets will hear
intermittent beeps.
Then on any handset, press can
terminate the current intercom and
answer the incoming call.
Press ▲ / ▼ to adjust the volume.
Press to end the call.
Switch to a Waiting Call
Note: This service may require subscription from your local telephone company.
During an exterior-line call, press [Flash]
key to put the current exterior-line call on
hold and answer the incoming waiting
exterior-line call.
Press [Flash] key again can resume the
first exterior-line call.
INTC00:00:49
MUTE
EXIT
LINE00:00:01
MUTEDIR.
LINE00:02:17
MUTEDIR.
RECEIVING A CALL
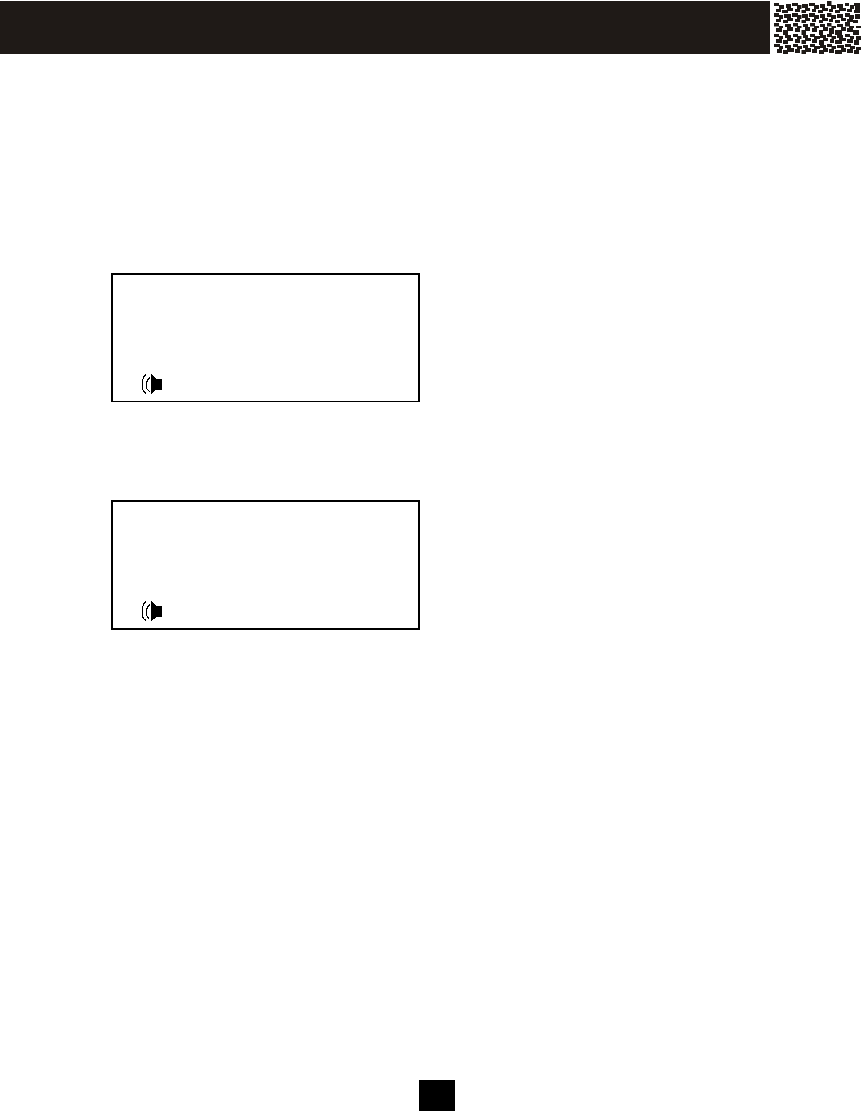
42
Mute a Call
You can mute a call while discussing matters with nearby person in privacy
without transmitting your voice over.
During an exterior-line call
Press [MUTE] softkey.
Then ‘MUTE’ is shown on the screen to
indicate it is muting the microphone.
Press [MUTE] softkey again to un-mute
the microphone.
During intercom
Press [MUTE] softkey.
Then ‘MUTE’ is shown on the screen to
indicate it is muting the microphone.
Press [MUTE] softkey again to un-mute
the microphone.
MUTE00:00:58
MUTEDIR.
MUTE00:00:31
MUTEEXIT
RECEIVING A CALL
43
Please refer to the following tips before you call for support service:
Problem(s) Possible Cause(s) Solution(s)
No dial tone is heard
when pressing .
1.The base unit is not
properly connected to
the fixed line.
2.Too far from the base
unit.
3.Battery is low (low
battery icon is
displayed).
▪ Check the cables.
▪ Move closer to the base unit.
▪ Charge the battery.
When putting the
handset on the base
unit, no beep is
heard.
1.The handset is not
placed properly on the
base unit.
2.Charging contacts are
dirty.
▪ Take the handset off the base
unit and put it back again.
▪ Clean charging contacts with a
clean and dry cloth.
Battery icon remains
empty although the
handset has charged
for 24 hours.
1.Handset battery is
defective.
2.Handset is not placed
properly on the base
unit.
3.The power adapter is
not properly connected.
▪ Please contact your dealer to
purchase new rechargeable
battery.
▪ Check whether the power
adapter is properly connected
to the main point.
No display on the
screen.
1.Battery is uncharged.
2.The phone is not
properly connected.
▪ Charge the battery.
▪ Make sure your phone is
properly plugged in.
Bad audio quality
(crackles, echo, etc.)
1.Interference from nearby
electrical appliance.
2.Base unit is installed in
a room with thick walls.
3.The handset is too far
from the base unit.
▪ Move the nearby electrical
appliance to a different
location.
▪ Install the base unit in a
different room.
▪ Move closer to the base unit.
Cannot hear the other
party clearly / speaker
too quiet.
1.The volume is set to
minimum.
▪ Press ▲ / ▼ to adjust phone
volume.
TROUBLESHOOTING
44
The phone does not
ring when a call
comes in.
1.The ringer is off. ▪ Turn on the ringer.
Cannot call phone
number.
1.The handset has lost
link with the base unit.
▪ Page the handset from the
base unit to ensure
connectivity exists.
TROUBLESHOOTING
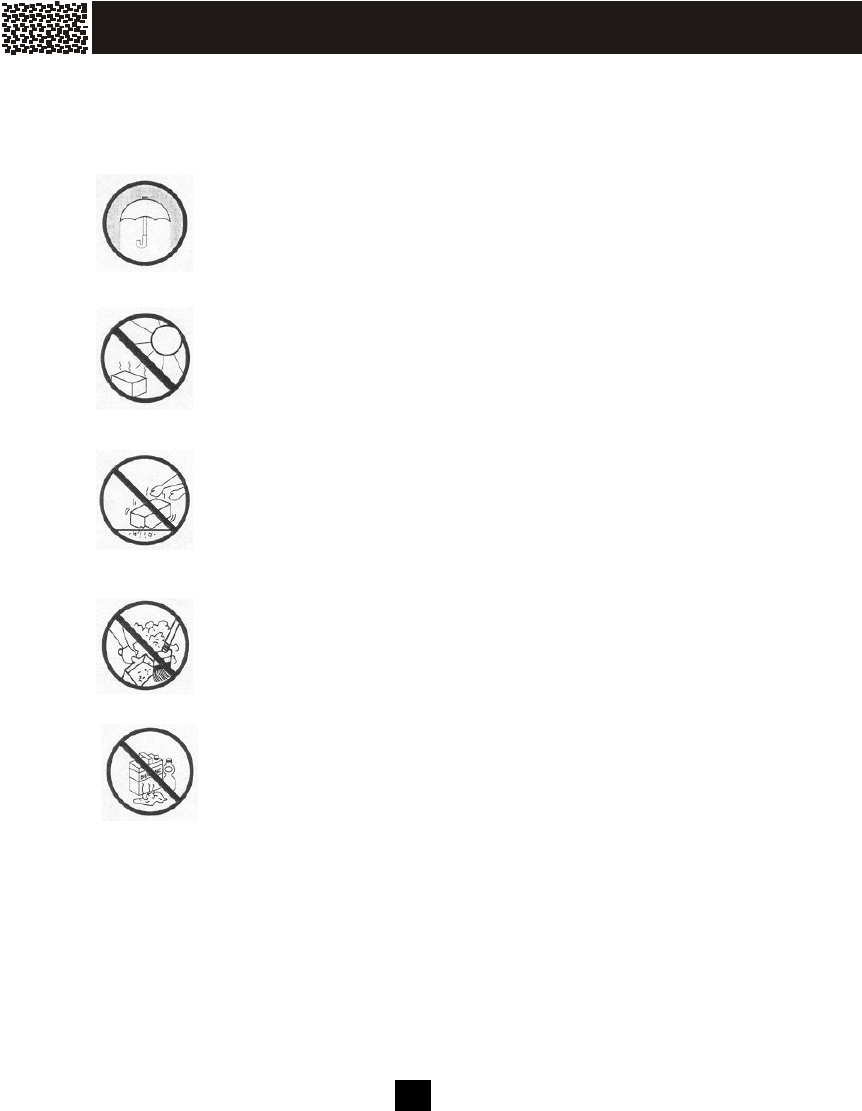
45
The following suggestions will help you care for the telephone so you can enjoy it
for years.
Keep the telephone dry. If it gets wet, wipe it dry immediately.
Liquids might contain minerals that can corrode the electronic
circuits.
Use and store the telephone only in normal temperature envi-
ronments. Temperature extremes can shorten the life of
electronic devices, and distort or melt plastic parts.
Handle the telephone gently and carefully. Dropping it can
damage circuit boards and cases and can cause the
telephone to work improperly.
Keep the telephone away from excessive dust and dirt, which
can cause premature part wear.
Wipe the telephone with a damp cloth occasionally to keep it
looking new. Do not use harsh chemicals, cleaning solvents,
or strong detergents to clean the telephone.
CARE AND MAINTENANCE

46
This equipment complies with Part 68 of FCC rules and the requirements adopted
by the ACTA. On the bottom of this equipment is a label that contains, among
other information, a product identifier in the format US:CACW400B******. If
requested, this number must be provided to the telephone company.
The REN is used to determine the number of devices that may be connected to a
telephone line. Excessive RENs on a telephone line may result in the devices not
ringing in response to an incoming call. In most but not all areas, the sum of the
RENs should not exceed five (5.0). To be certain of the number of devices that
may be connected to a line, as determined by the total RENs, contact the local
telephone company. [For products approved after July 23, 2001, the REN for this
product is part of the product identifier that has the format US:CACW400B******.
The digits represented by 00B are the REN without a decimal point (e.g., 03B is a
REN of 0.3B). For earlier products, the REN is separately shown on the label.]
Should you experience trouble with this equipment, please contact Customer
Service at
1-800-988-7728
for repair or warranty information. If the equipment is causing harm to the
telephone network, the telephone company may request that you disconnect the
equipment until the problem is resolved.
NOTICE: If your home has specially wired alarm equipment connected to the
telephone line, ensure the installation of this equipment ID does not disable your
alarm equipment. If you have questions about what will disable alarm equipment,
consult your telephone company or a qualified installer.
If your equipment should cause harm to the telephone network, the telephone
company may temporarily disconnect your service. If possible, they will notify you
in advance that temporary discontinuance of service may be required.
However, when advance written notice is not possible, the telephone company
may temporarily discontinue service without notice if such action is necessary
under the circumstances.
FCC REQUIREMENTS

47
The telephone company may make changes in its communication facilities,
equipment, operations, or procedures where such action is reasonably
required in the operation of its business and is not inconsistent with the
rules and regulations of the Federal Communications Commission.
NOTICE TO HEARING AID WEARERS: This telephone has been
registered with the FCC as hearing aid compatible.
Warning: Changes or modifications to this unit not expressly
approved by the party responsible for compliance could void the
user’s authority to operate the equipment.
Caution: To maintain compliance with the FCC’s RF exposure
guidelines place the base unit at least 20 cm from nearby persons.
For body worn operation, this handset has been tested and meets the
FCC RF exposure guidelines. Use of accessories other than provided
may not ensure compliance with FCC RF exposure guidelines.
Do not attempt to repair or modify this equipment. Changes or modifications
not expressly approved by the party responsible for its compliance could void the
user’s authority to operate the equipment.
This equipment should not be used on coin telephone lines. Connection to party
line services are subject to state tariffs. If trouble is experienced, disconnect this
equipment from the telephone line to determine if it is causing the malfunction. If
the equipment is determined to be malfunctioning, its use should be discontinued
until the problem has been corrected.
Current FCC regulations specify that any direct connections to a telephone
company line be done using only standard phone jacks USOC RJ11C and plugs
that is TIA-1096-A compliant. A plug and jack used to connect this equipment to
the premises wiring and telephone network must comply with the applicable FCC
FCC REQUIREMENTS

48
Part 68 rules and requirements adopted by the ACTA. A compliant telephone cord
and modular plug is provided with this product. It is designed to be connected to a
compatible modular jack that is also compliant. See installation instructions for
details.

49
This device complies with part 15 of the FCC Rules. Operation is subject to the
following two conditions: (1) This device may not cause harmful interference, and
(2) this device must accept any interference received, including interference that
may cause undesired operation.
Privacy of communications may not be ensured when using this phone.
Note:
This equipment has been tested and found to comply with the limits for a Class B
digital device, pursuant to Part 15 of the FCC Rules. These limits are designed to
provide reasonable protection against harmful interference in a residential
installation. This equipment generates, uses, and can radiate radio frequency
energy and, if not installed and used in accordance with the instructions, may
cause harmful interference to radio communications. However, there is no
guarantee that interference will not occur in a particular installation. If this
equipment does cause harmful interference to radio or television reception, which
can be determined by turning the equipment off and on, the user is encouraged to
try to correct the interference by one or more of the following measures:
1. Reorient or relocate the receiving antenna.
2. Increase the separation between the equipment and receiver.
3. Connect the equipment into an outlet on a circuit different from that to which
the receiver is connected.
4. Consult the dealer or an experienced radio / TV technician for help.
FCC REQUIREMENTS

50
Industry Canada Requirements
This Class B digital apparatus complies with Canadian ICES-003.
Cet appareil numérique de la classe B est conforme à la norme NMB-003
du Canada.
'This product meets the applicable Industry Canada technical
specifications.
Le présent materiel est conforme aux specifications techniques
applicables d'Industrie Canada
'The Ringer Equivalence Number is an indication of the
maximum number of terminals allowed to be connected to a
telephone interface. The termination on an interface may consist
of any combination of devices subject only to the requirement
that the sum of the Ringer Equivalence Numbers of all the
devices does not exceed five.
L'indice d'équivalence de la sonnerie (IES) sert à indiquer le
nombre maximal de terminaux qui peuvent être raccordés à une
interface téléphonique. La terminaison d'une interface peut
consister en une combinaison quelconque de dispositifs, à la
seule condition que la somme d'indices d'équivalence de la
sonnerie de tous les dispositifs n'excède pas 5.''
SAVE THIS INSTRUCTION

51
For cETL Safety
UL60950-1 -Cordless Phone (with Rechargeable battery)
IMPORTANT SAFETY INSTRUCTIONS - French Version
Refer to UL60950-1 1st Edition Clause 1.7, the text of instructions shall be
verbatim as shown below or in equally definitive terminology. This
instructions may be in the form of a separate booklet, or sheet, or shall be
part of the instruction manual separated in format from the other
instructions, and appearing before any operating instructions.
==================================================
IMPORTANTES MESURES DE SÉCURITÉ
Certaines mesures de sécurité doivent être prises pendant l’utilisation de
matérial téléphonique afin de réduire les risques d’incendie, de choc
électrique et de blessures. En voici quelquesunes:
1. Ne pas utiliser l’appareil près de l’eau, p.ex., près d’une baignoire,
d’un lavabo, d’un évier de cuisine, d’un bac à laver, dans un
sous-sol humide ou près d’une piscine.
2. Éviter d’utiliser le téléphone (sauf s’il s’agit d’un appareil sans fil)
pendant un orage électrique. Ceci peut présenter un risque de
choc électrique causé par la foudre.
3. Ne pas utiliser l’appareil téléphonique pour signaler une fuite de
gaz s’il est situé près de la fuite.
4. Utiliser seulement le cordon d’alimentation et le type de piles
indiqués dans ce manuel. Ne pas jeter les piles dans le feu:
elles peuvent exploser. Se conformer aux règlements pertinents
quant à l’élimination des piles.
5. la socklet-sortie sera installée près de l'équipement et
serafacilement accessible
6. ATTENTION- Il y a danger d’explosion s’il y a remplacement
incorrect de la batterie. Remplacer uniquement avec une batterie
du même type ou d’un type équivalent recommandé par le
constructeur. Mettre au rebut les batteries usagées conformément
aux instructions du fabricant.
7. Pour l'entretien ou le remplacement, vous pouvez acheter un
écouteur approprié par le centre commercial ou le magasin de
détaillant.

52
8. L'équipement doit être fourni à partir d'un acquiescement gauche
identifié d'USB aux conditions de la source d'énergie limitée.
CONSERVER CES INSTRUCTIONS
========================================================
EQUIPMENT ATTACHMENT LIMITATIONS
Before installing this equipment, users should ensure that it is permissible
to be connected to the facilities of the local telecommunications
company. The equipment must also be installed using an acceptable
method of connection. In some cases, the company’s inside wiring
associated with a single line individual service may be extended by
means of a certified connector assembly (telephone extension cord).
The customer should be aware that compliance with the above conditions
may not prevent degradation of service in some situations.
Repairs to certified equipment should be made by an authorized
Canadian maintenance facility designated by the supplier. Any repairs or
alterations made by the user to this equipment, or equipment
malfunctions, may give the telecommunications company cause to
request the user to disconnect the equipment.
Users should ensure for their own protection that the electrical ground
connections of the power utility, telephone lines and internal metallic
water pipe system, if present, are connected together. This precaution
may be particularly important in rural areas.
Caution: Users should not attempt to make such connections themselves,
but should contact the appropriate electric inspection authority, or
electrician, as appropriate.