user manual
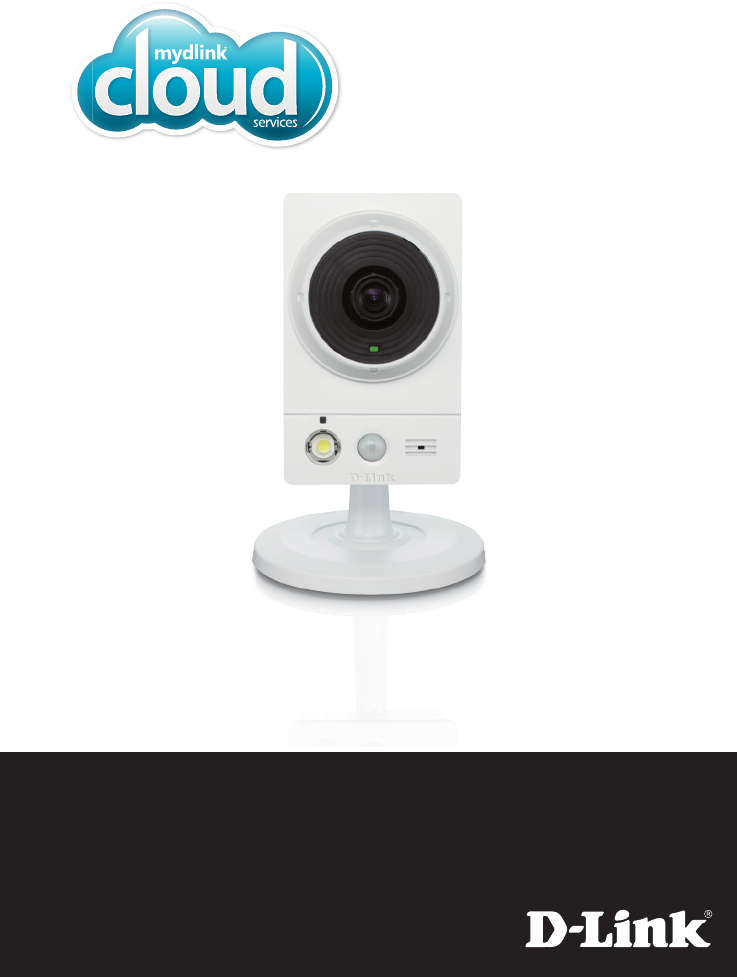
DCS-2136L
Quick Install Guide
Wireless N Day/Night Camera
with Color Night Vision
2
ENGLISH
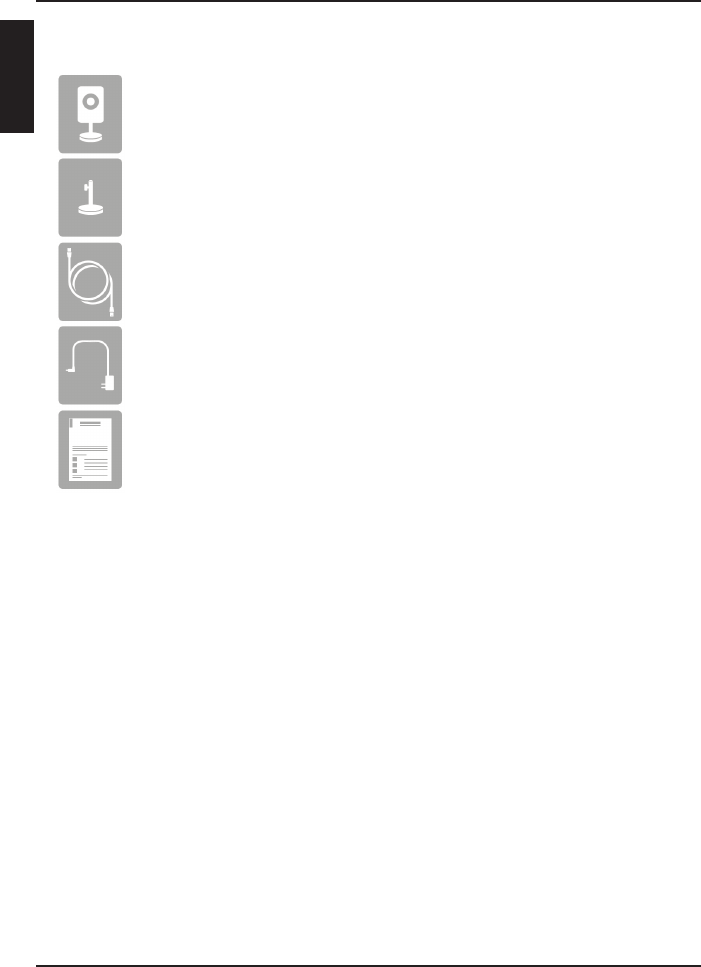
Package Contents
Minimum Requirements
Computer with:
• PC with 1.3 GHz or above and at least 128 MB RAM
• Windows® 8, Windows® 7, Vista® or XP (32-bit or 64-bit)
• Mac OS® X 10.6 or higher
Web Browser:
• Internet Explorer® 7, Firefox 12, Safari 4, or Chrome 20 and above
• Installed and enabled Java and ActiveX® controls
Network Device and Service:
• A router (D-Link Cloud Router is recommended)
• An Internet connection
• An e-mail account (Required to register mydlink service)
CAT5 Ethernet Cable
DCS-2136L Wireless N Day/Night Camera with Color Night Vision
If any of the above items are missing, please contact your reseller.
Power Adapter
Stand/Mounting Bracket
Quick Install Guide
3
ENGLISH
If you wish to connect your camera to your router with a wireless connection,
you can simply disconnect the Ethernet cable and move the camera to its
intended location.
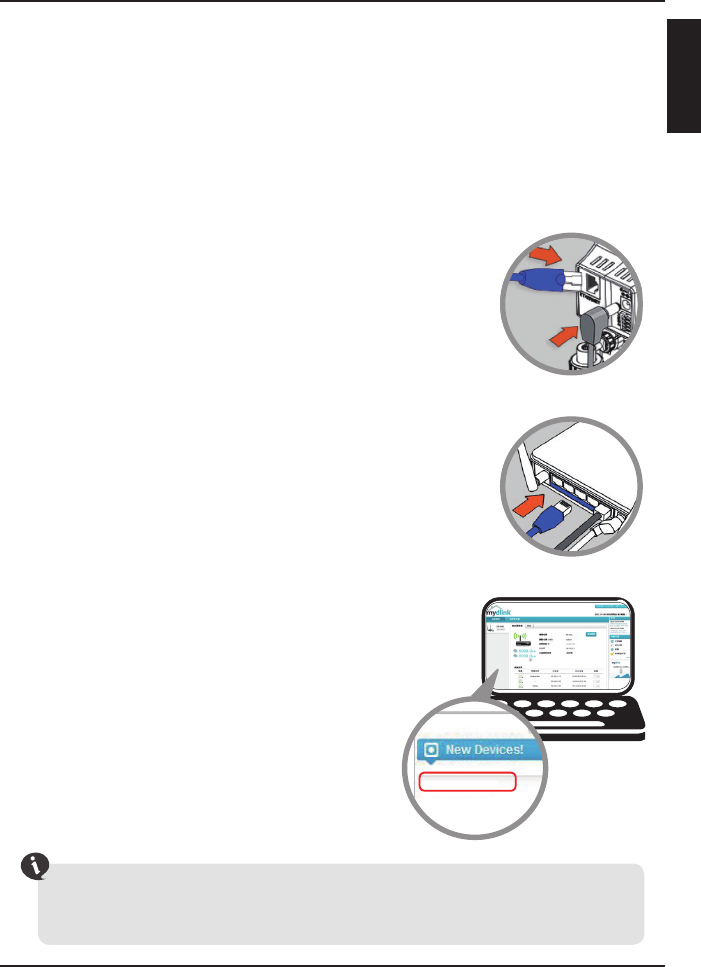
Step 3
From any computer, open a web browser, go to
http://www.mydlink.com and log in to your
account.
Click on the device name when the new device
notication appears to add the camera to your
account.
Step 1
Connect the power cable and Ethernet cable to your
cloud camera.
Step 2
Connect the other end of the Ethernet cable to your
D-Link Cloud Router and connect the camera’s power
adapter to a power outlet.
Setting up your Camera
Using a D-Link Cloud Router (Zero Conguration)
If you have a D-Link Cloud Router, you can take advantage of Zero Conguration
Setup. This feature automatically congures your camera’s settings for you and
adds it to your mydlink account automatically. If you do not have a D-Link Cloud
router, refer to the next page to install and congure your camera.
DCS-2136L
4
ENGLISH
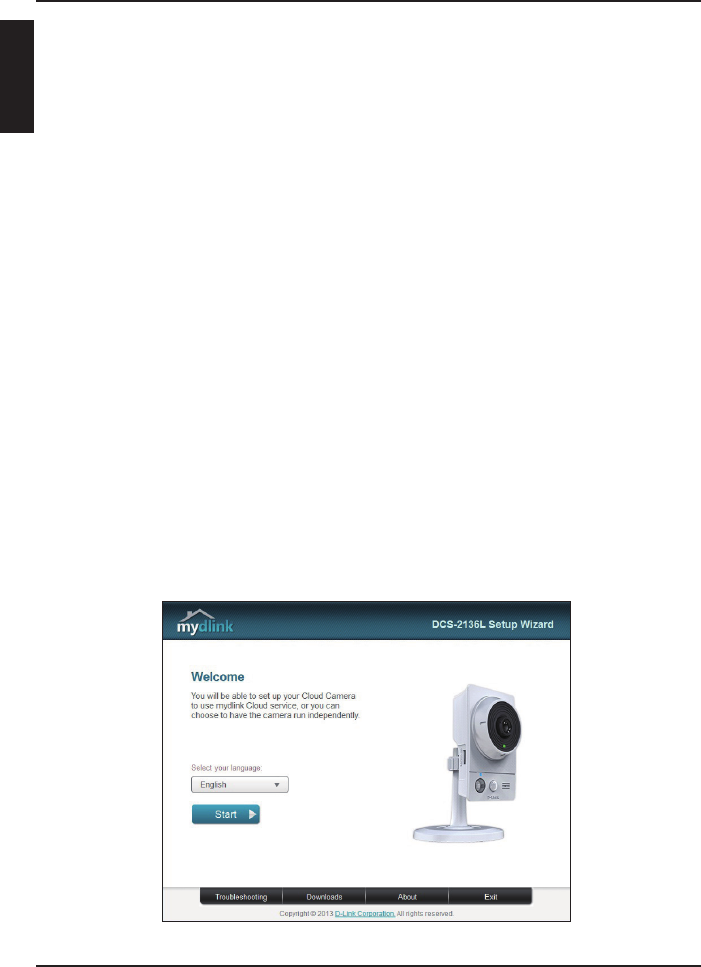
Using the Setup Wizard
If you do not have a D-Link Cloud Router, you can simply use any Windows or
Mac computer to go through the Setup Wizard, which will guide you through
the installation process from connecting your hardware to conguring your
camera and registering it with your mydlink account.
Download the Setup Wizard from http://www.mydlink.com/download.
Click your camera model and then under Wizard, click the link of the version
(Windows or Mac) you want to download. Depending on your web browser,
you may need to right-click the link and select Save link as.
Windows Users - Extract (“unzip”) the les to a folder on your computer and
then double-click the autorun.exe le.
Mac Users - Download the Mac OS Setup Wizard. Open the SetupWizard le
and launch the application.
After about 20-30 seconds, the Setup Wizard will open. Follow the on-screen
instructions.
5
ENGLISH
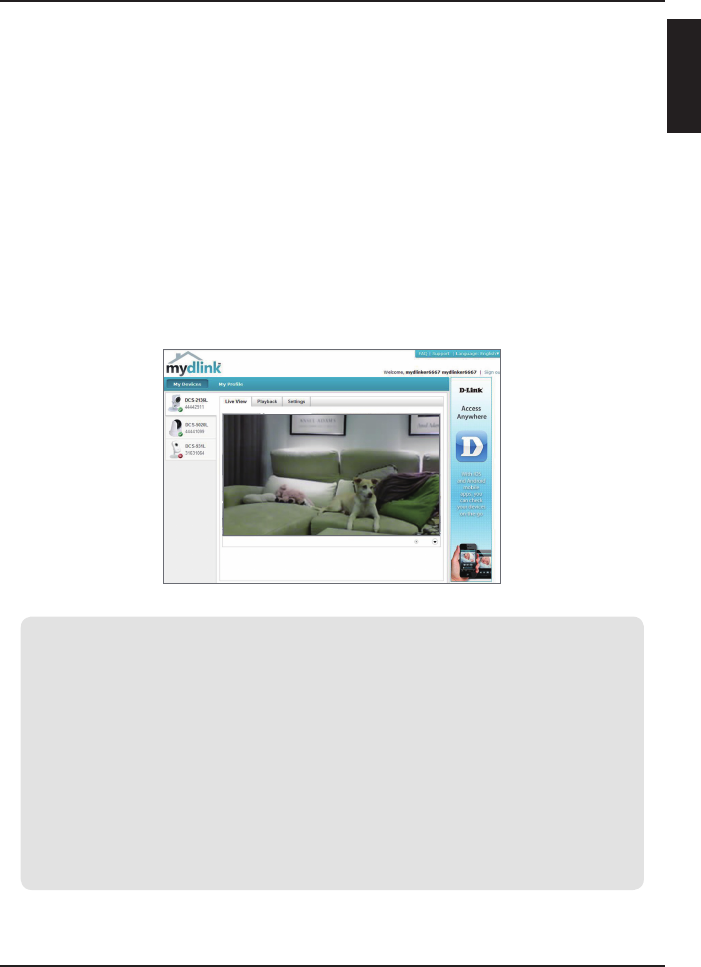
Getting Started with mydlink
mydlink is a web-based service which allows you to view and control your
mydlink-enabled devices through any computer connected to the Internet. If
you have cameras linked to your mydlink account, you will be able to see their
live views using the mydlink website. Follow the instructions below to access
your mydlink account.
• Open a web browser on any computer connected to the Internet.
• Type http://www.mydlink.com in the address bar and press Enter.
• Sign in using your mydlink account.
• From the home screen, you will be able to view all devices which have
been linked to your mydlink account.
• Ensure that your browser supports both Java and ActiveX, and that these
features have been installed and enabled.
• Windows does not have Java installed by default. You can download the latest
version from http://www.java.com.
• In Mac OS X 10.7.x, Java applets are disabled by default. To enable Java applets,
click the Finder > Applications > Utilities > Java Preferences and check the
Enable applet plug-in and Web Start applications option.
• The ActiveX® controls in IE will install automatically if needed. We suggest that
you make sure that you have enabled the related options in Tools > Internet
Options > Security > Custom Level.
6
ENGLISH
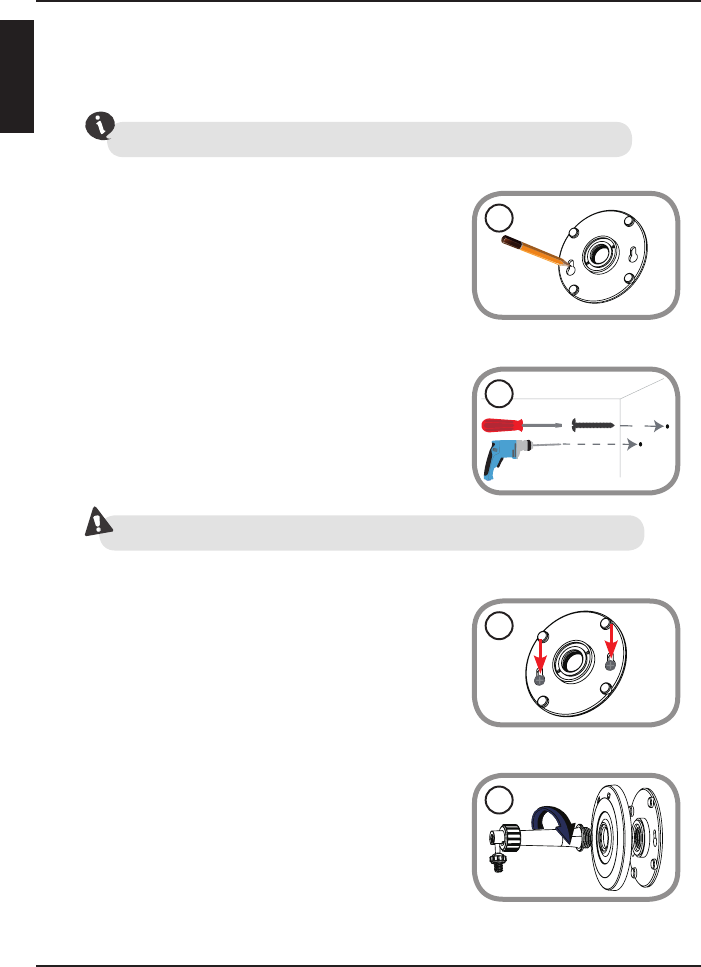
Mount the Camera
1. Place the mounting base where you want
to position the camera and use a pencil to
mark the holes.
4. Place the base cover on the base and
screw the camera stem clockwise into the
mounting base.
2. Depending on the material of the wall or
ceiling, use proper tools to drill two holes or
screws where you marked. If the wall is made
out of concrete, drill the holes rst, insert the
plastic anchors and then the screws.
3. Place the mounting base over the screw that
is mounted on the wall. Make sure to t the
screw-heads over the big holes and slide
it downward to lock rmly. Lightly pull the
base forward to make sure that it is locked.
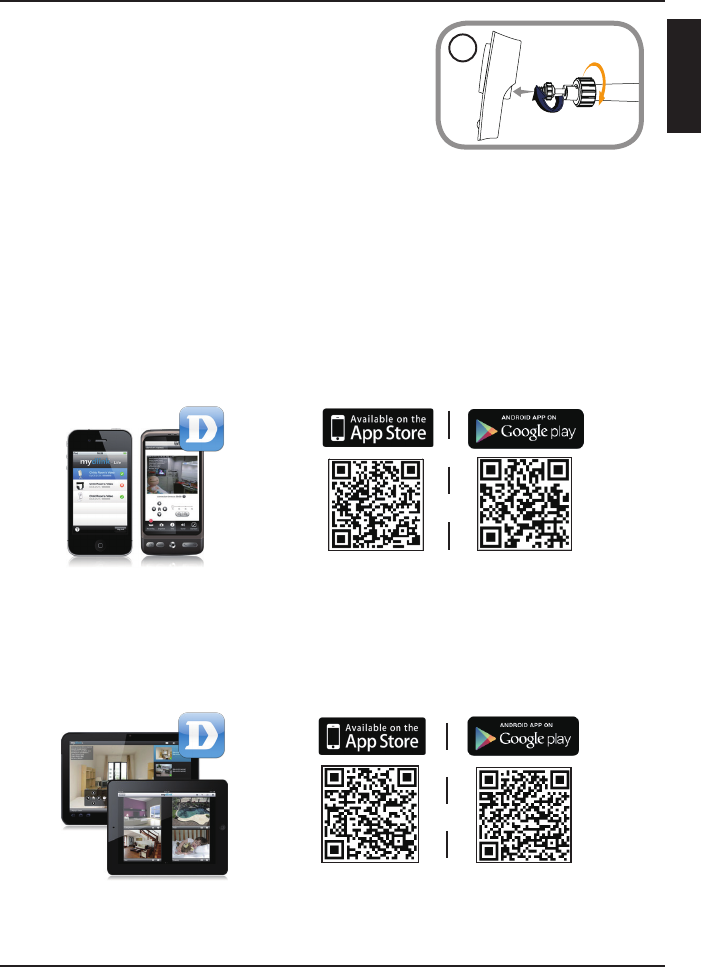
Please refer to the steps below to assist you with mounting the camera.
The space between the camera and the screwheads should be 3mm.
We suggest that you congure the camera before mounting.
1
2
3
4
7
ENGLISH
Download mydlink Lite/mydlink + Apps
5. Adjust the angle of the camera as desired,
then tighten the collar on the camera stem
to lock it in place.
5
mydlink Lite App (Free)
Search for “mydlink lite” to download and install the app on your smartphone
or tablet when connected to the Internet. You can also nd the app by
scanning the QR code below with a QR code scan app.
mydlink+ App (Paid - Tablet Only)
Search for the word “mydlink+” to download and install the app on your
tablet when connected to the Internet. You can also nd the app by scanning
the QR code below with a QR code scan app.
System Requirements: iOS version 4.3 or above. Android version 2.1 or above.
System Requirements: iOS version 4.3 or above. Android version 2.1 or above.
8
ENGLISH
Technical Support
This guide is only for the rst time conguration. Please refer to the user manual
to learn more or visit http://www.mydlink.com for more information. Also feel
free to contact us. U.S. and Canadian customers can contact D-Link Technical
Support through our website.
http://support.dlink.com
USA
http://support.dlink.ca
Canada
Version 1.0
April 9, 2013
RMN0101032
Copyright ©2013 All rights reserved. D-Link and the D-Link logo are registered trademarks of D-Link Corporation or
its subsidiaries. Other trademarks are the property of their respective owners. Maximum wireless signal rate derived
from IEEE Standard 802.11g and 802.11n specications. Actual data throughput will vary. Network conditions and
environmental factors, including volume of network trac, building materials and construction, and network
overhead, lower actual data throughput rate. Environmental factors will adversely aect wireless signal range.
Product specications, size and shape are subject to change without notice, and actual product appearance may
dier from that depicted on the packaging. Visit dlink.com (US) or dlink.ca (Canada) for more details.
FCC Notices
This device complies with Part 15 of the FCC Rules. Operation is subject to the following
two conditions: (1) this device may not cause harmful interference, and (2) this
device must accept any interference received, including interference that may cause
undesired operation.
CAUTION: Change or modification not expressly approved by the party
responsible for compliance could void the user’s authority to operate this
equipment.
This equipment has been tested and found to comply with the limits for a Class B
digital device, pursuant to Part 15 of the FCC Rules. These limits are designed to provide
reasonable protection against harmful interference in a residential installation. This
equipment generates, uses and can radiate radio frequency energy and, if not
installed and used in accordance with the instructions, may cause harmful interference to
radio communications. However, there is no guarantee that interference will not occur in
a particular installation. If this equipment does cause harmful interference to radio or
television reception, which can be determined by turning the equipment off and on,
the user is encouraged to try to correct the interference by one or more of the following
measures:
--Reorient or relocate the receiving antenna.
--Increase the separation between the equipment and receiver.
--Connect the equipment into an outlet on a circuit different from that to which the
receiver is connected.
--Consult the dealer or an experienced radio/TV technician for help.
CAUTION:
Any changes or modifications not expressly approved by the grantee of this device
could void the user's authority to operate the equipment.
RF exposure warning
This equipment must be installed and operated in accordance with provided
instructions and the antenna(s) used for this transmitter must be installed to provide a
separation distance of at least 20 cm from all persons and must not be co-located or
operating in conjunction with any other antenna or transmitter. End-users and
installers must be provide with antenna installation instructions and transmitter
operating conditions for satisfying RF exposure compliance."
For operation within 5.15 ~ 5.25GHz frequency range, it is restricted to indoor
environment. This device meets all the other requirements specified in Part 15E,
Section 15.407of the FCC Rules.
Canada Notices
Industry Canada regulatory information
This device complies with Industry Canada licence-exempt RSS standard(s). Operation is
subject to the following two conditions: (1) this device may not cause interference, and (2)
this device must accept any interference, including interference that may cause
undesired operation of the device.
The user is cautioned that this device should be used only as specified within this
manual to meet RF exposure requirements. Use of this device in a manner
inconsistent with this manual could lead to excessive RF exposure conditions.
Le présent appareil est conforme aux CNR d'Industrie Canada applicables
aux appareils radio exempts de licence. L'exploitation est autorisée aux
deux conditions suivantes : (1) l'appareil ne doit pas produire de brouillage,
et (2) l'utilisateur de l'appareil doit accepter tout brouillage radioélectrique
subi, même si le brouillage est susceptible d'en compromettre le
fonctionnement.
RF exposure warning
This equipment must be installed and operated in accordance with provided
instructions and the antenna(s) used for this transmitter must be installed to
provide a separation distance of at least 20 cm from all persons and must
not be co-located or operating in conjunction with any other antenna or
transmitter. End-users and installers must be provide with antenna
installation instructions and transmitter operating conditions for satisfying RF
exposure compliance."
Cet équipement doit être installé et utilisé conformément aux
instructions fournies et de l'antenne (s) utilisé pour cet émetteur doit être
installé pour fournir une distance de séparation d'au moins 20 cm de toute
personne et ne doit pas être co-localisés ou fonctionnant en conjonction
avec une autre antenne ou transmetteur. Les utilisateurs finaux et
installateurs doivent être fournir des instructions d'installation de l'antenne
et des conditions de fonctionnement du transmetteur de la conformité sur
l'exposition aux RF
CAUTION:
The device for operation in the band 5150-5250 MHz is only for indoor use to reduce the
potential for harmful interference to co-channel mobile satellite systems;
Avertissement:
Les dispositifs fonctionnant dans la bande 5 150-5 250 MHz sont réservés
uniquement pour une utilisation à l’intérieur afin de réduire les risques de
brouillage préjudiciable aux systèmes de satellites mobiles utilisant les
mêmes canaux;