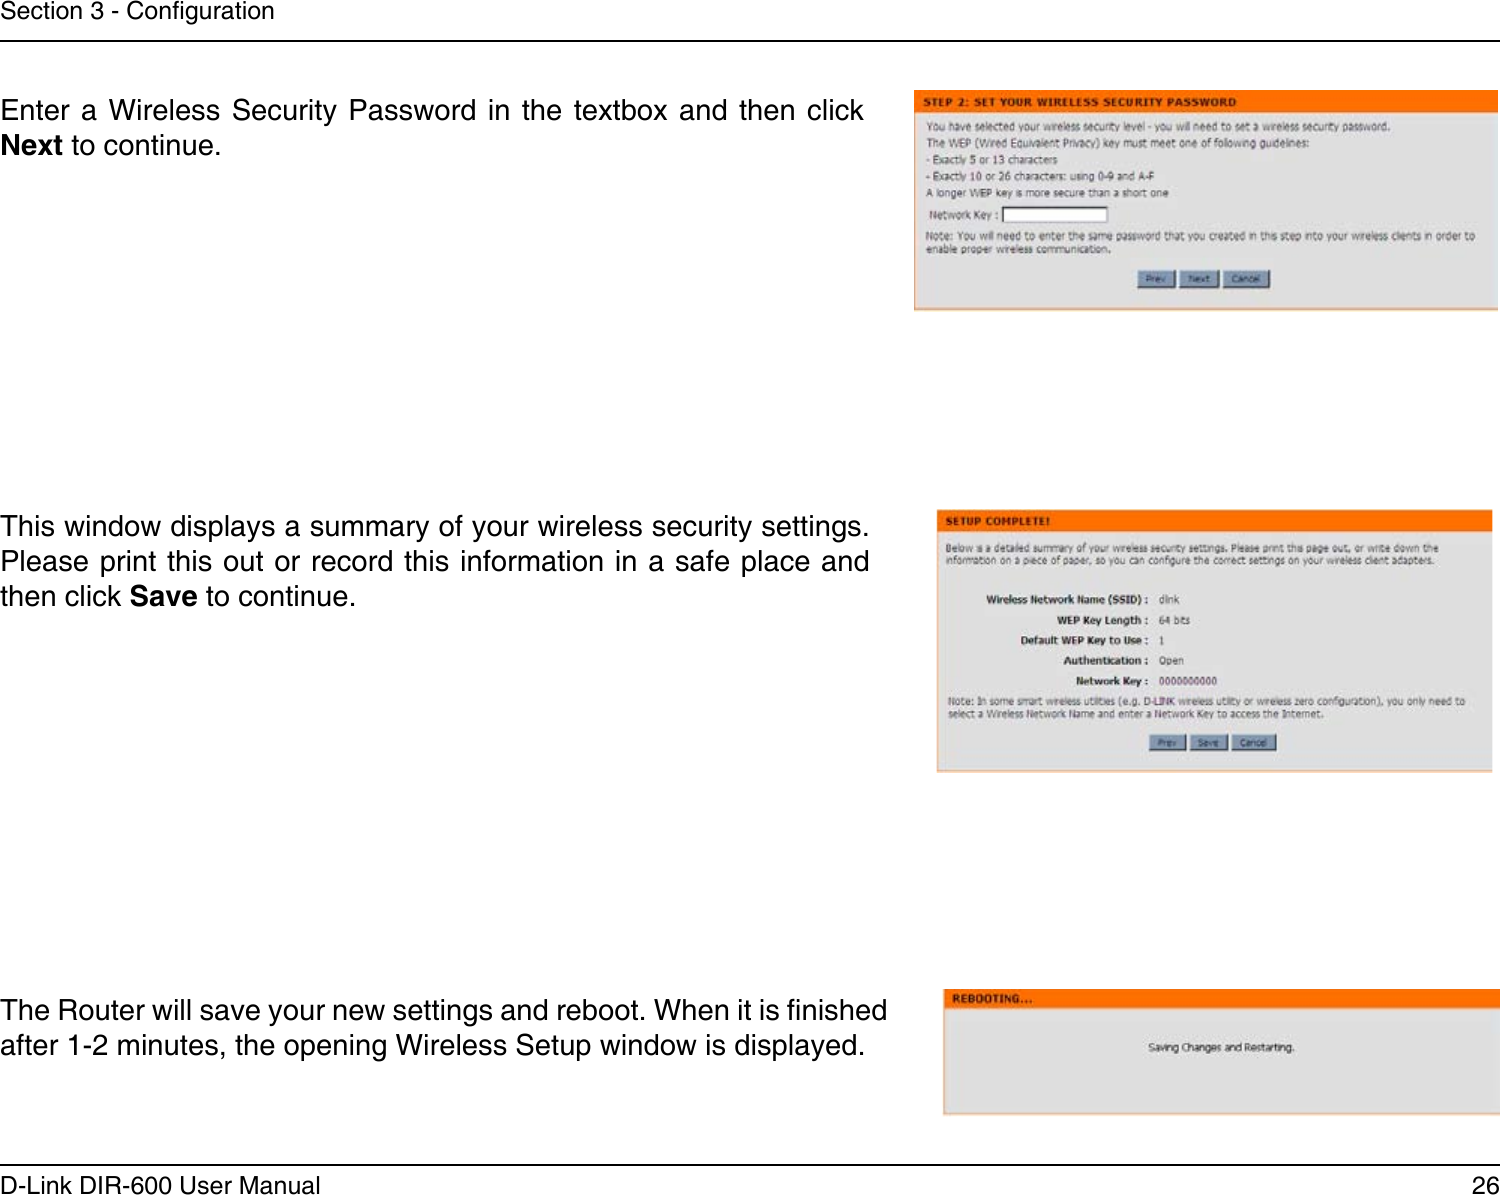
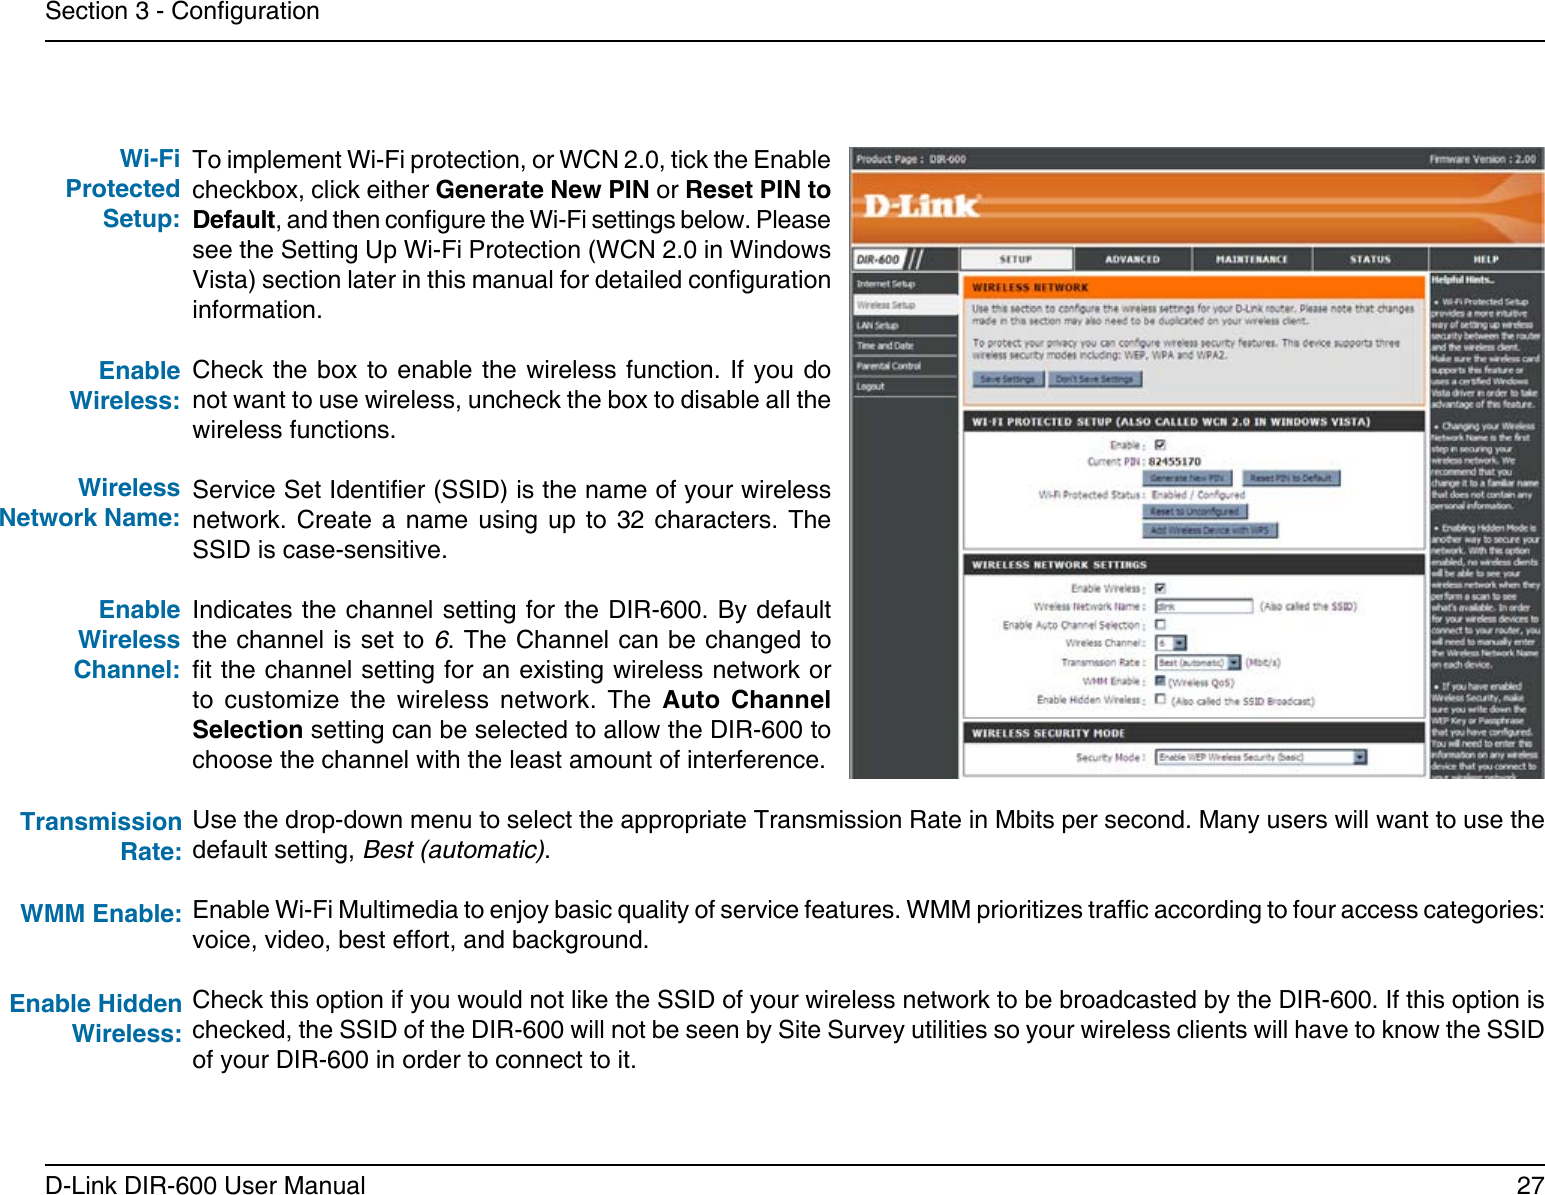
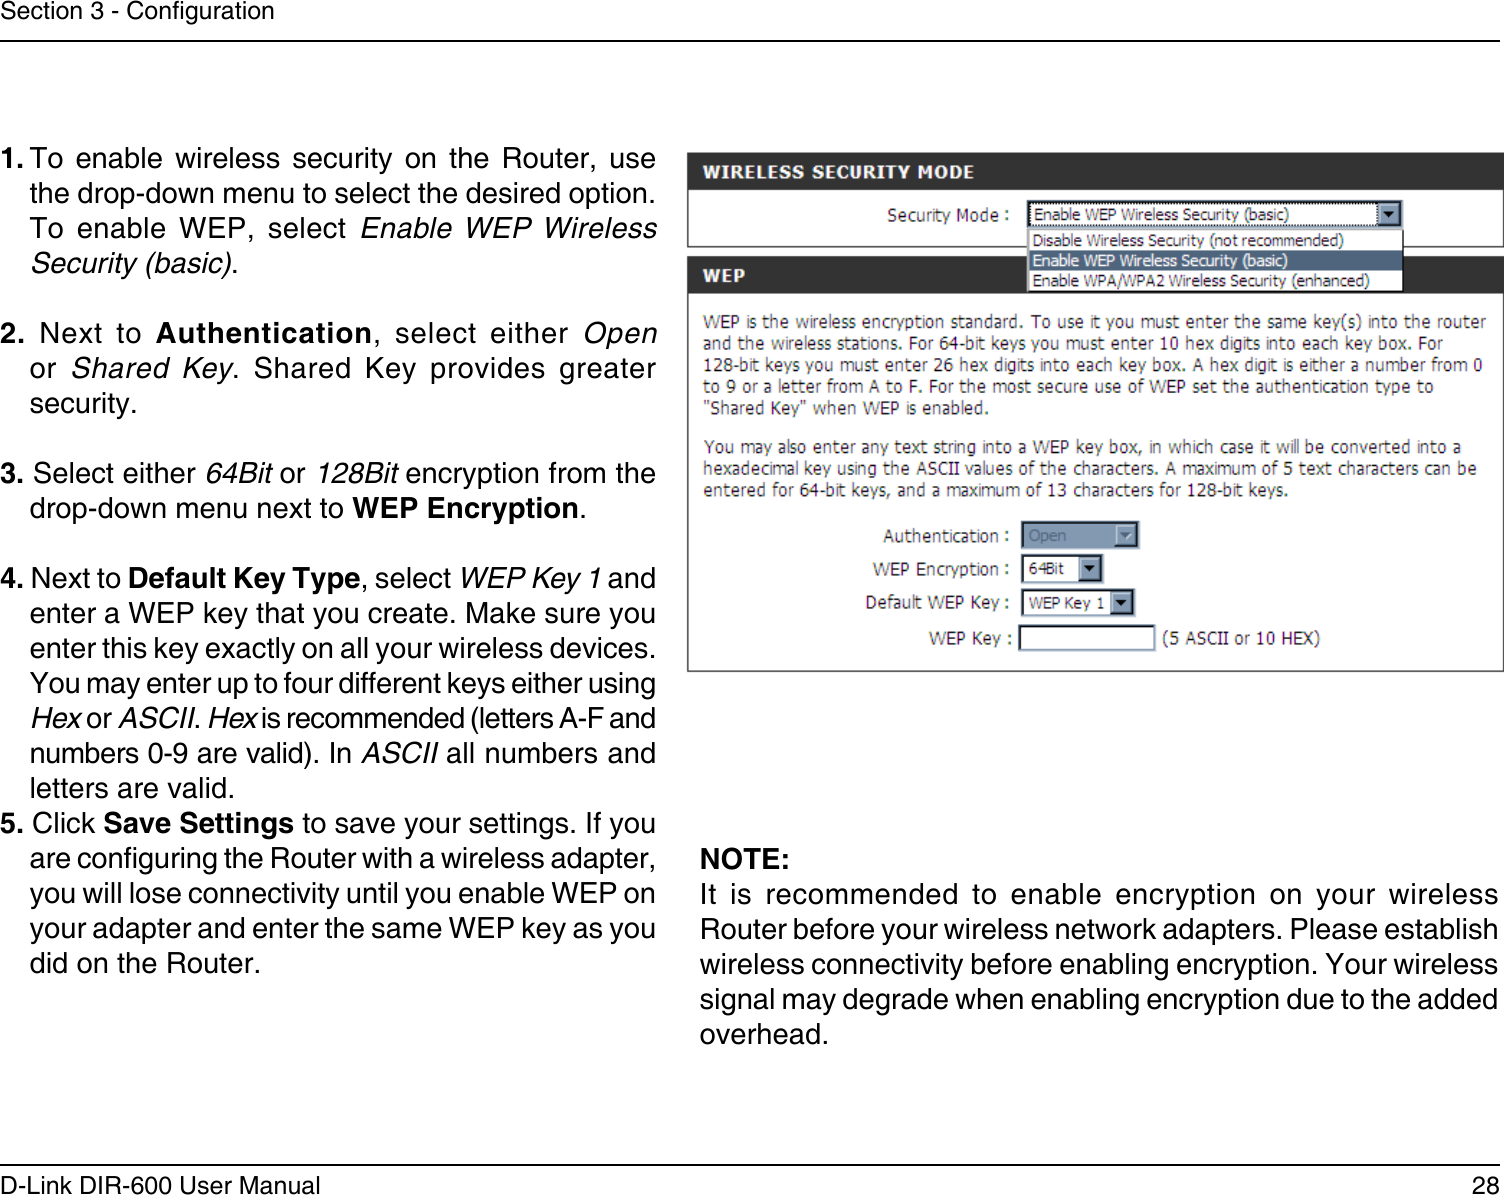
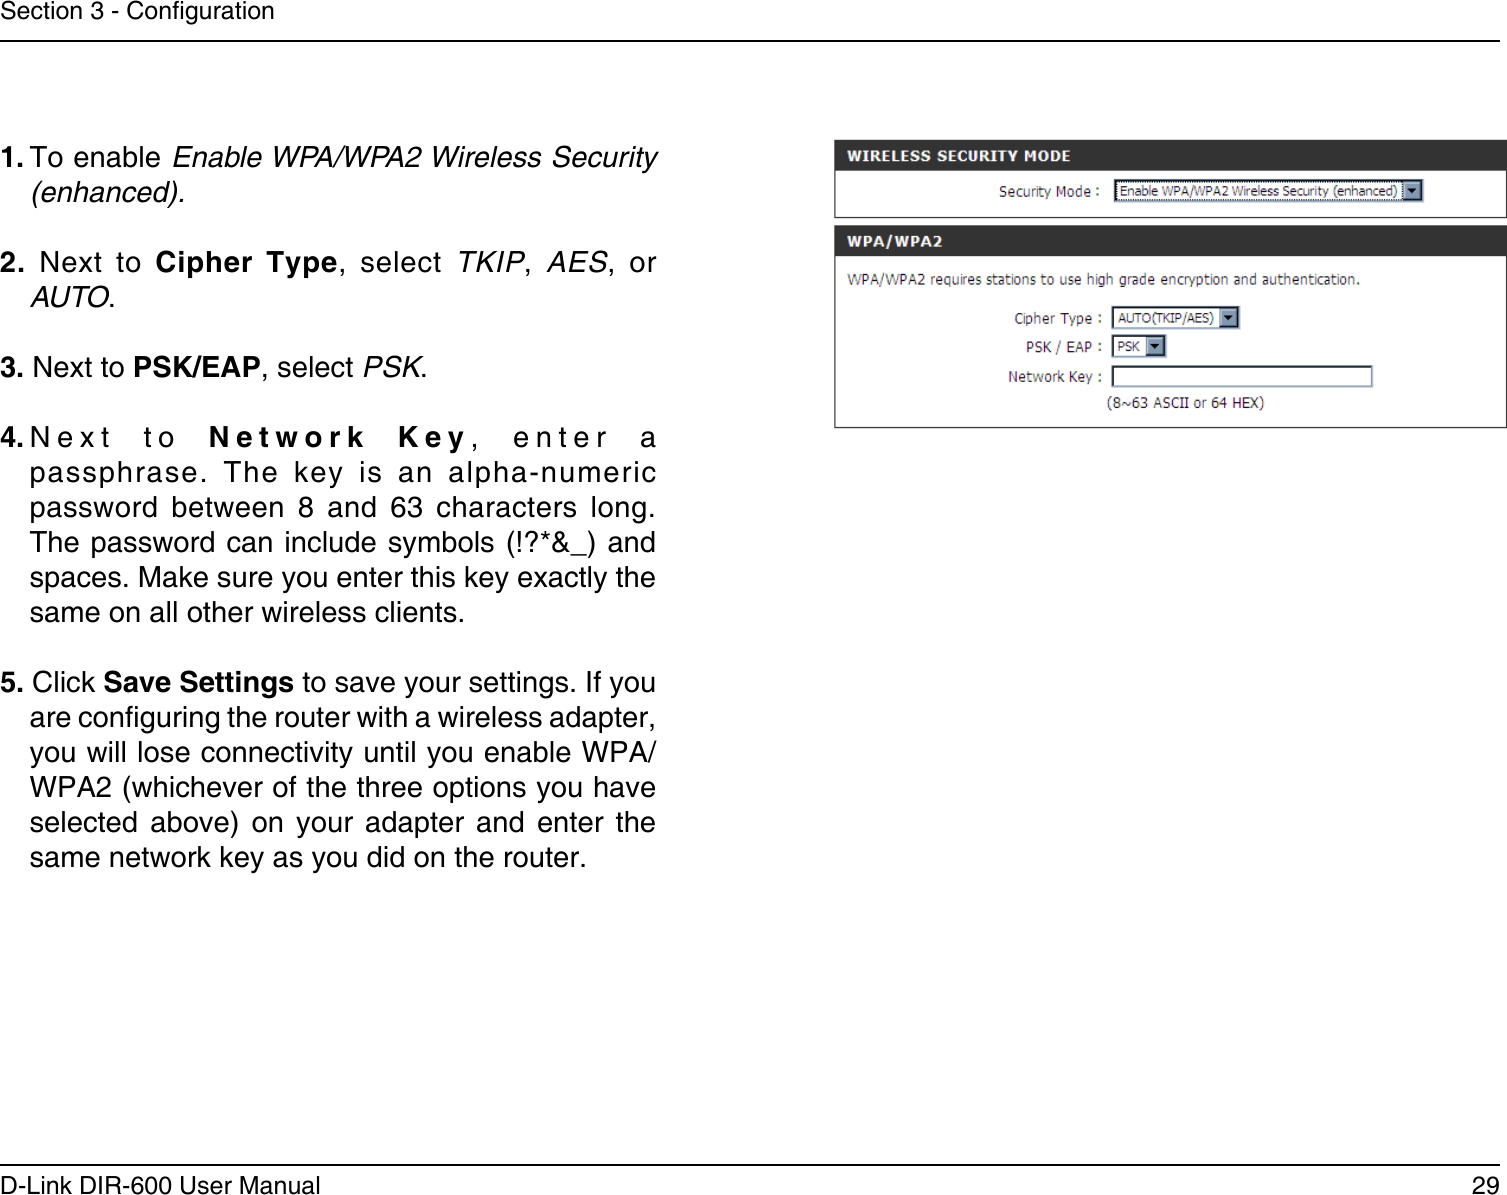
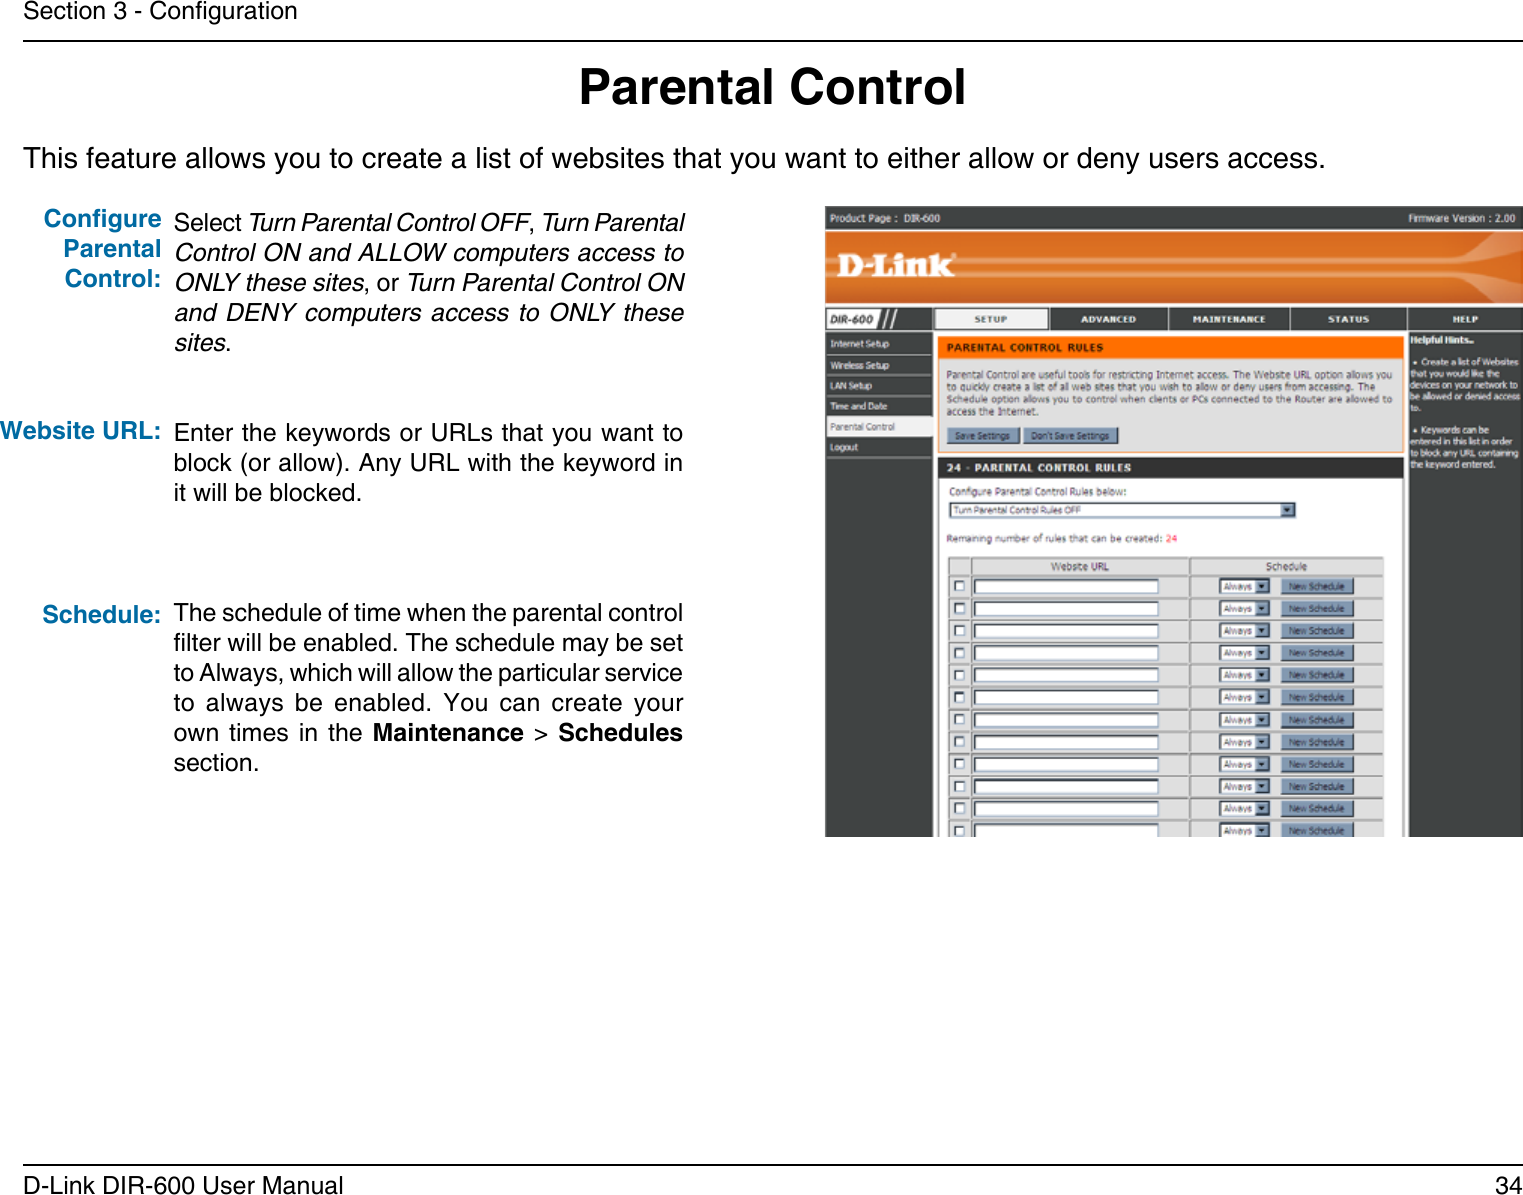
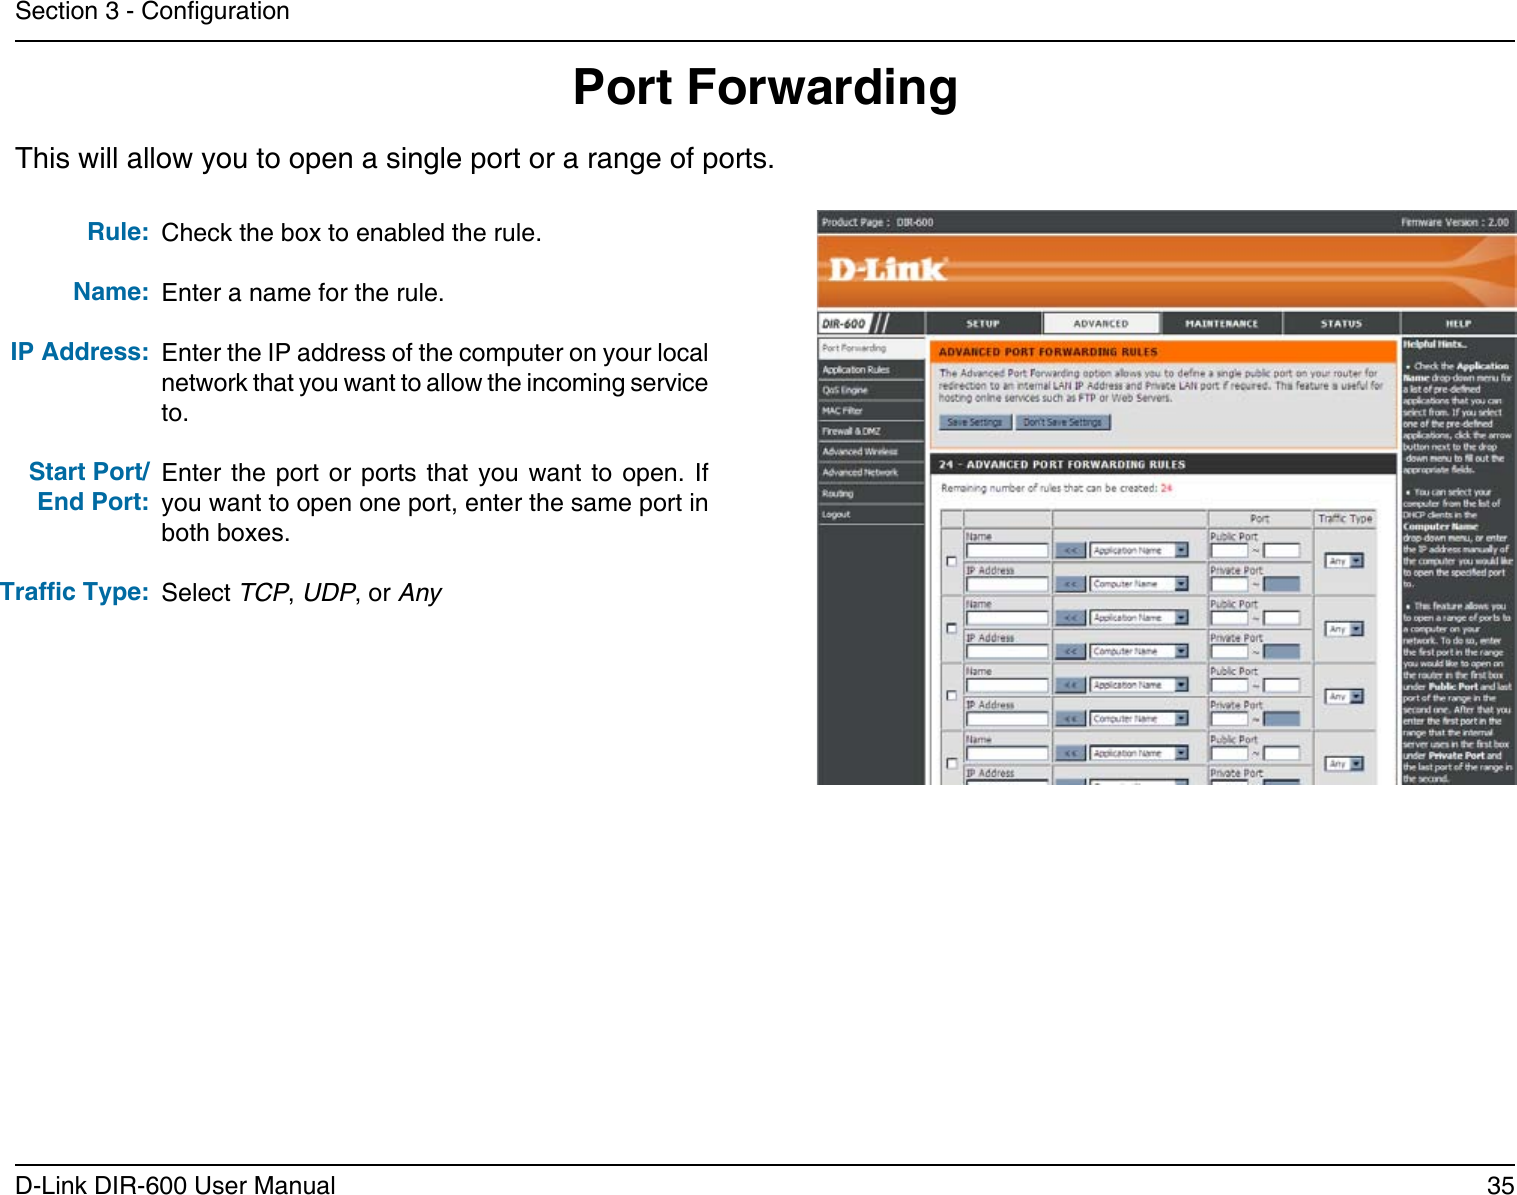
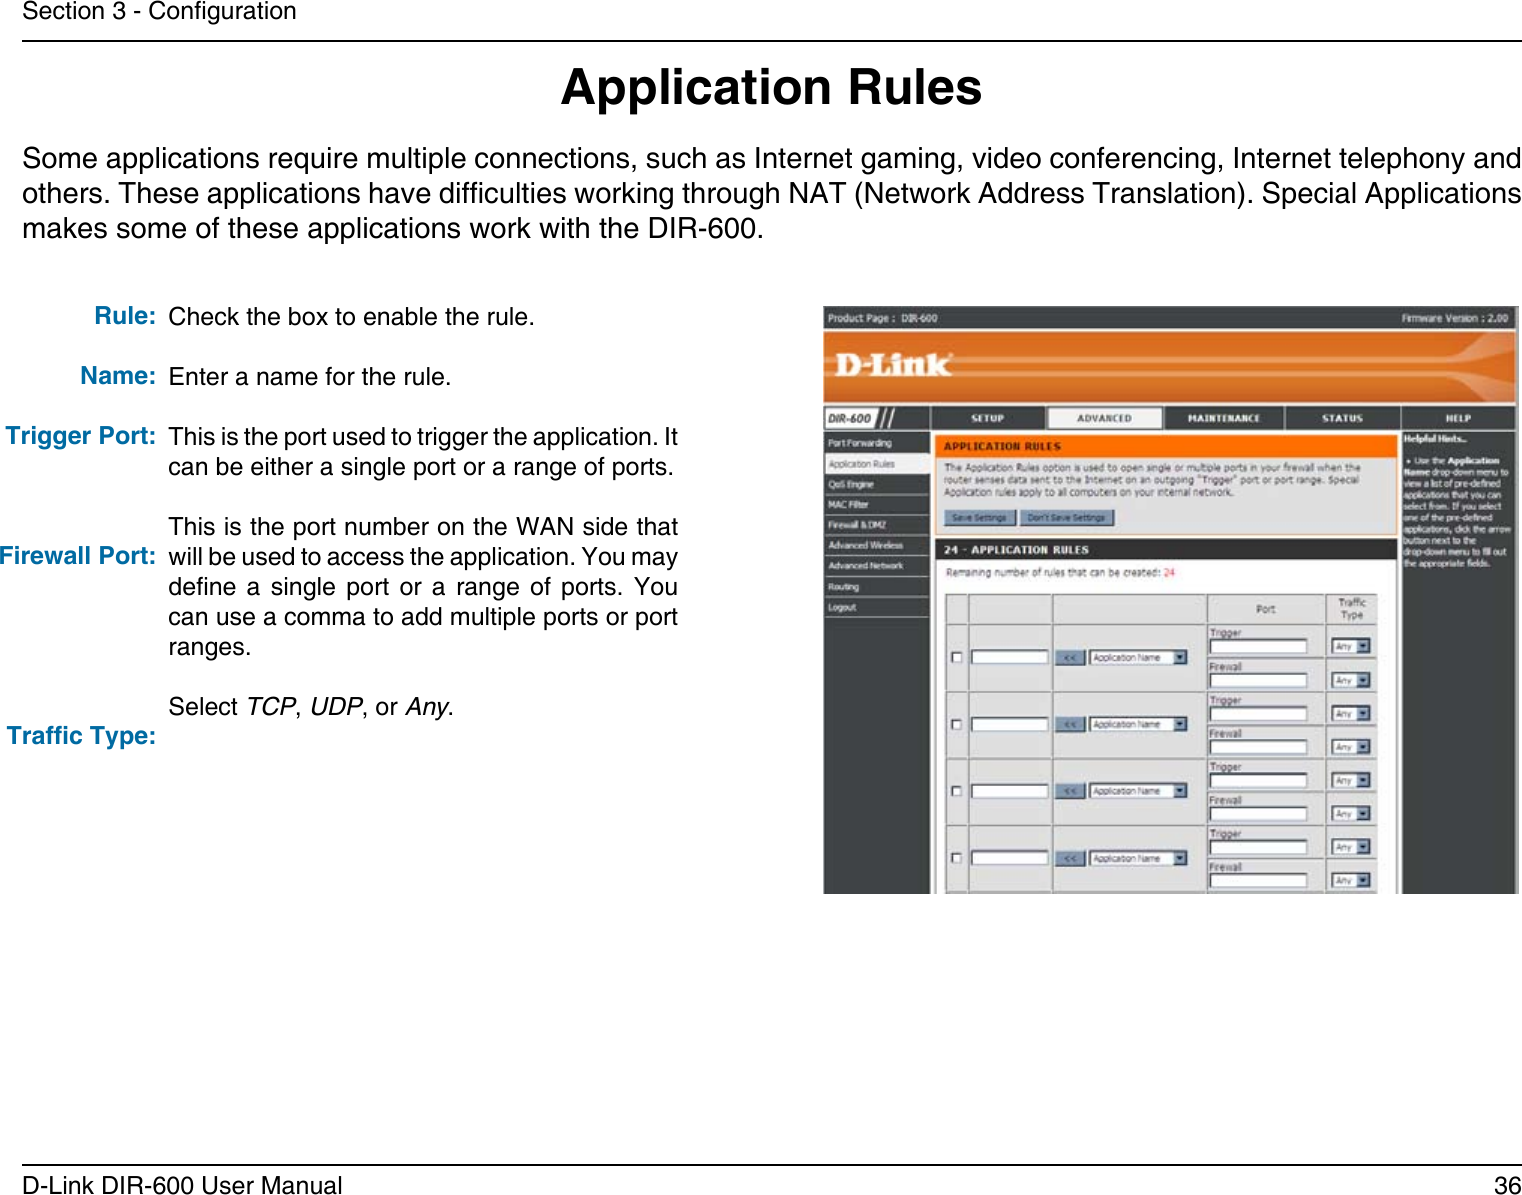
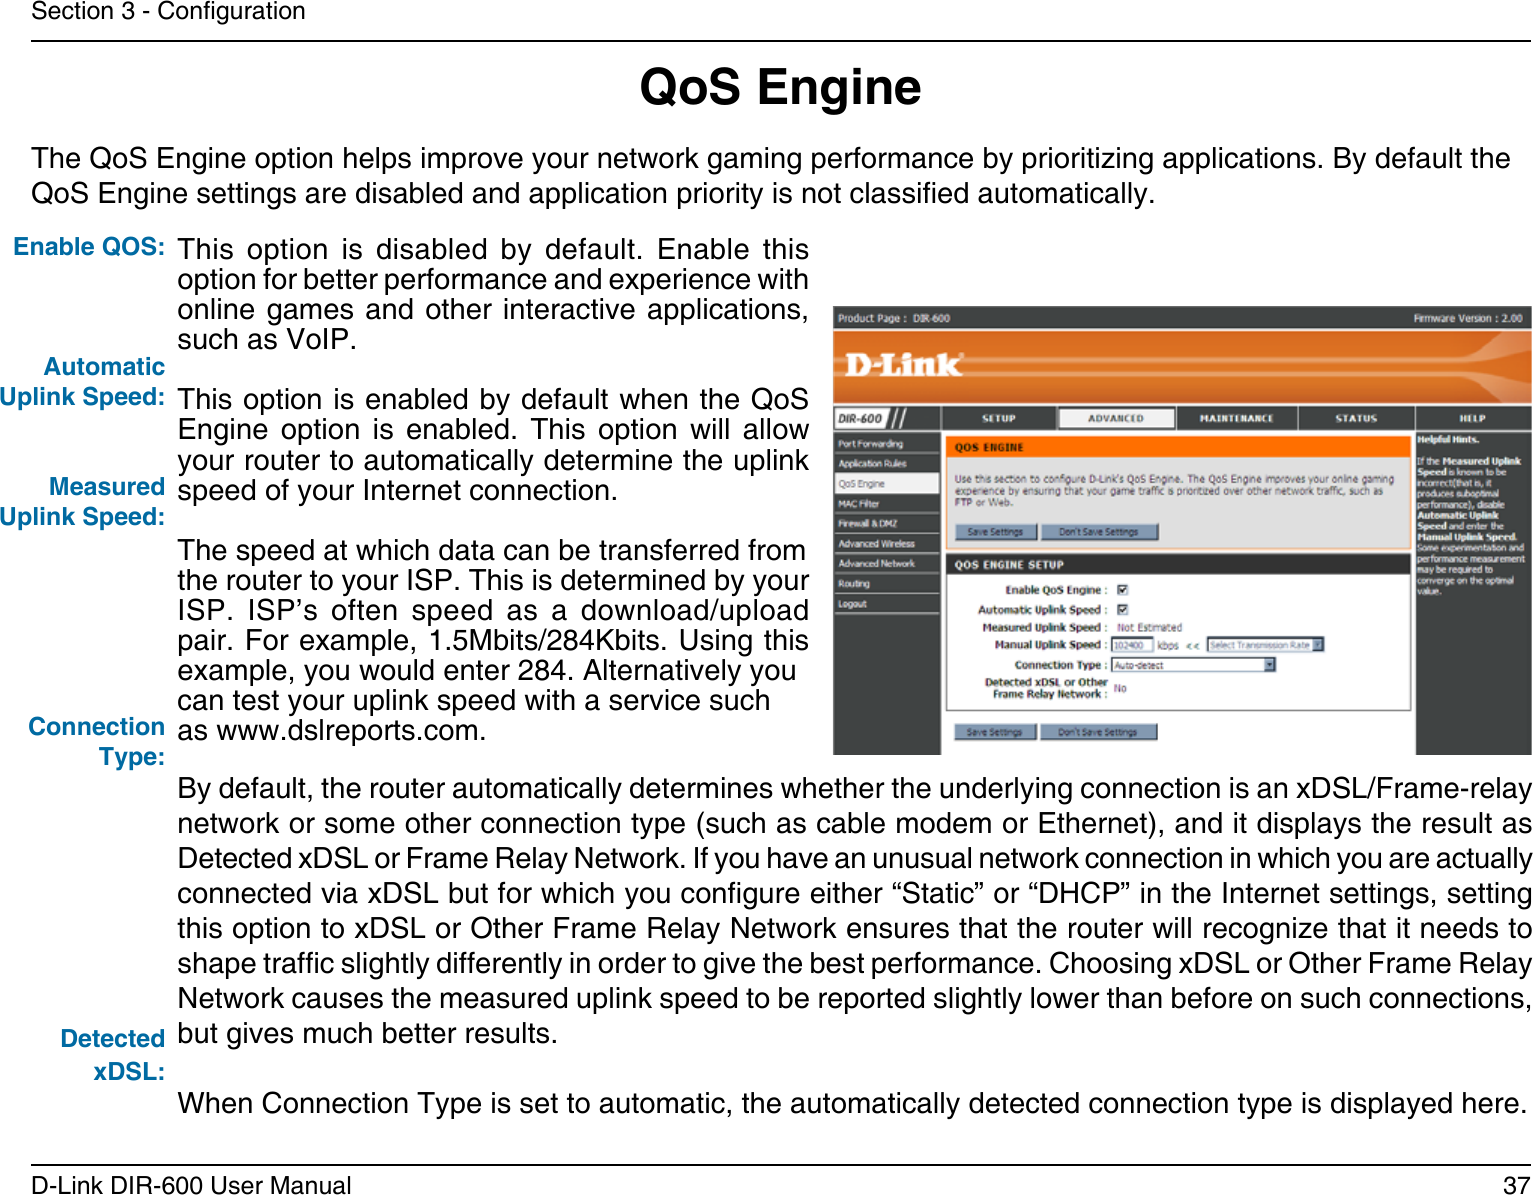
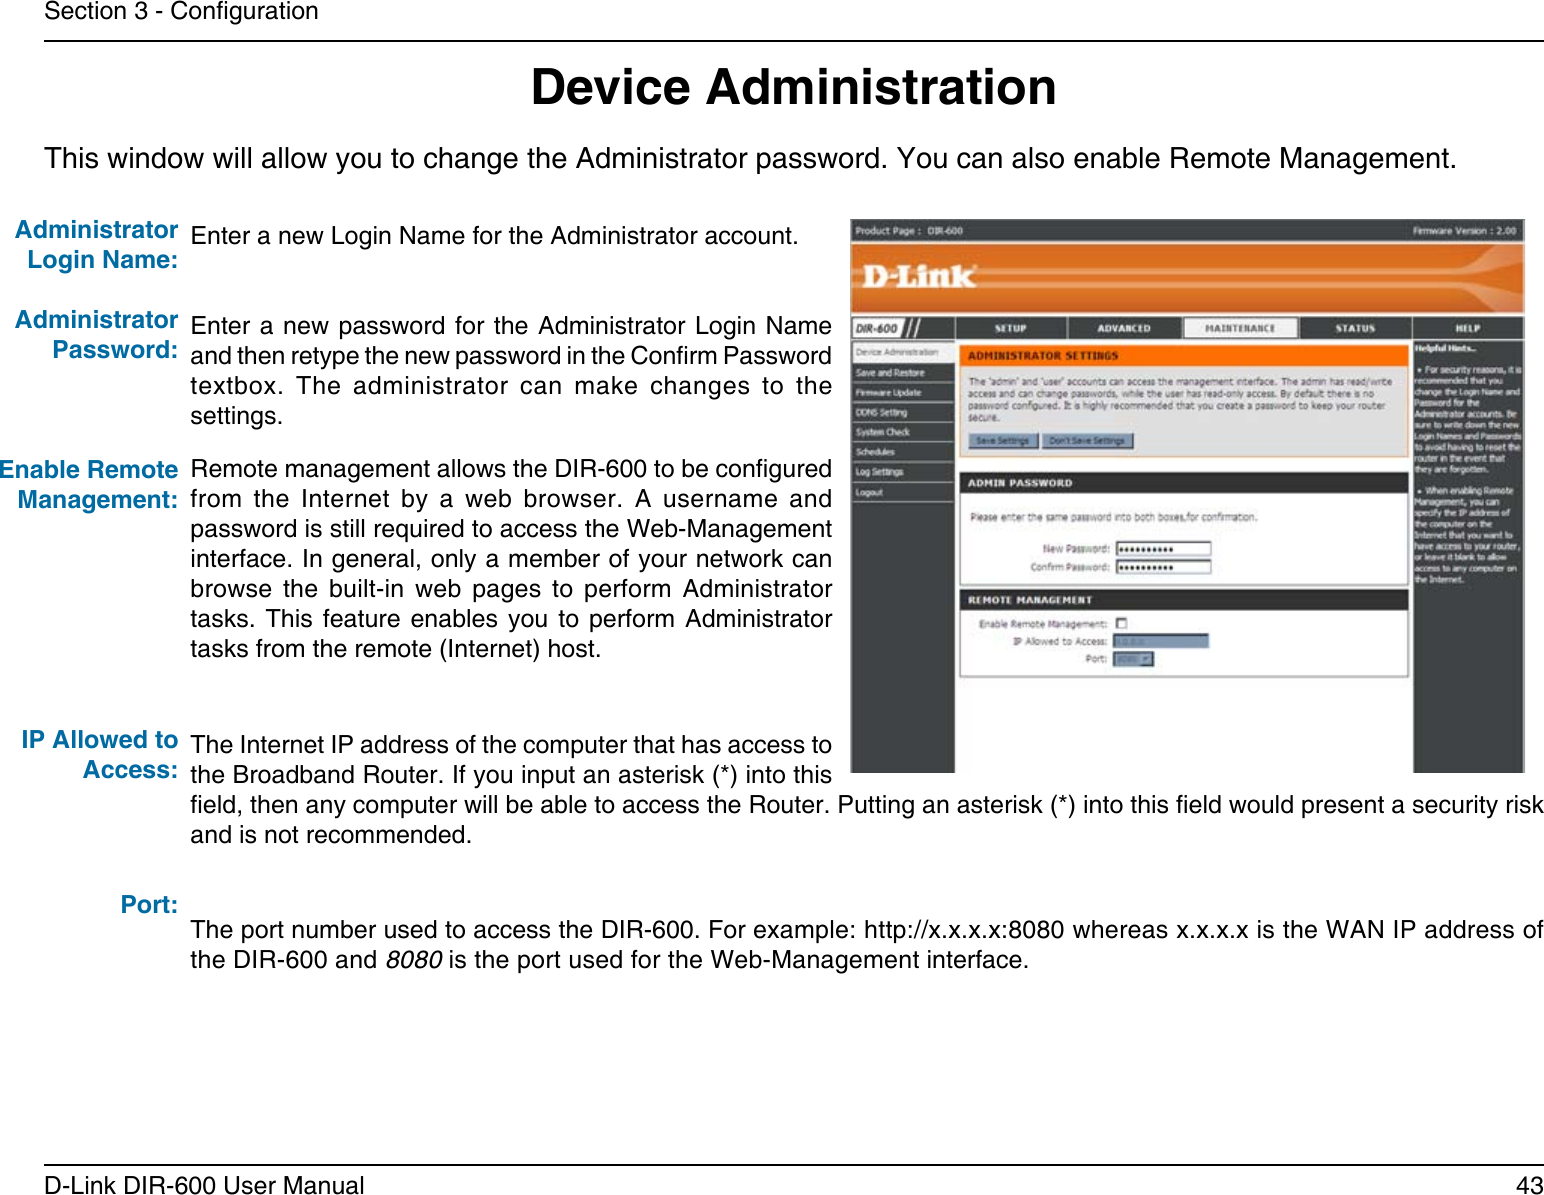
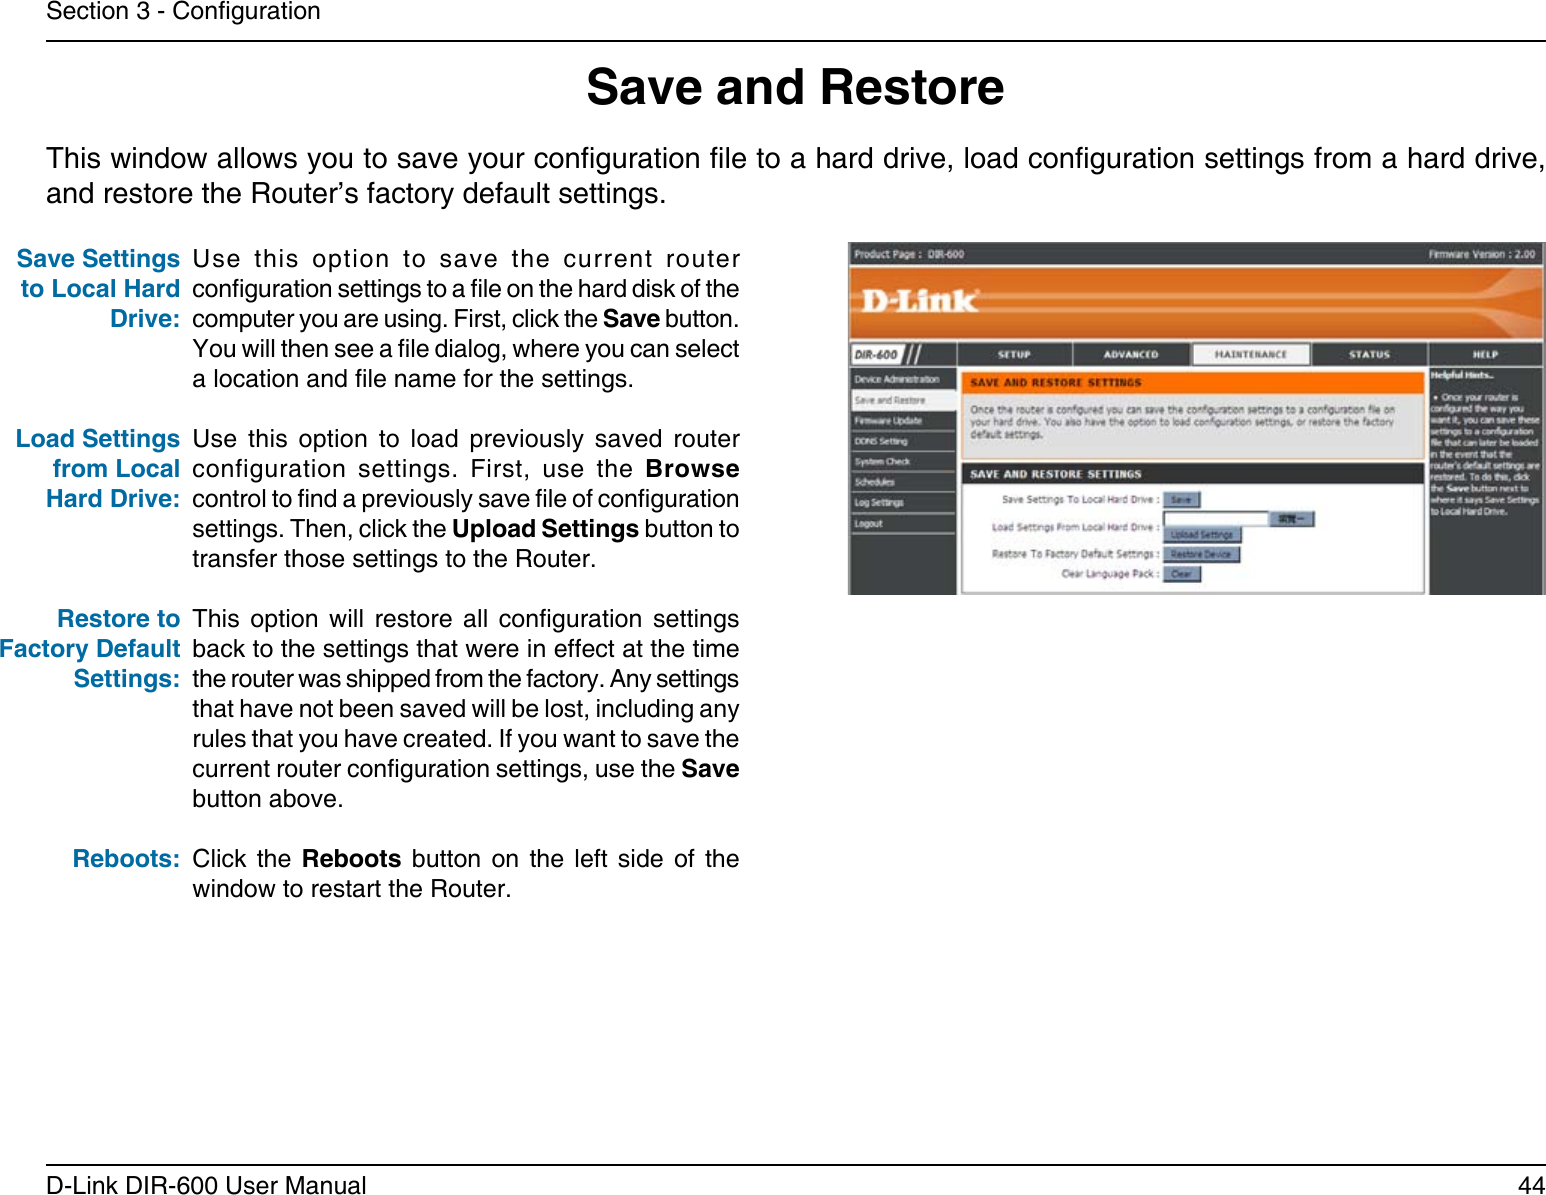
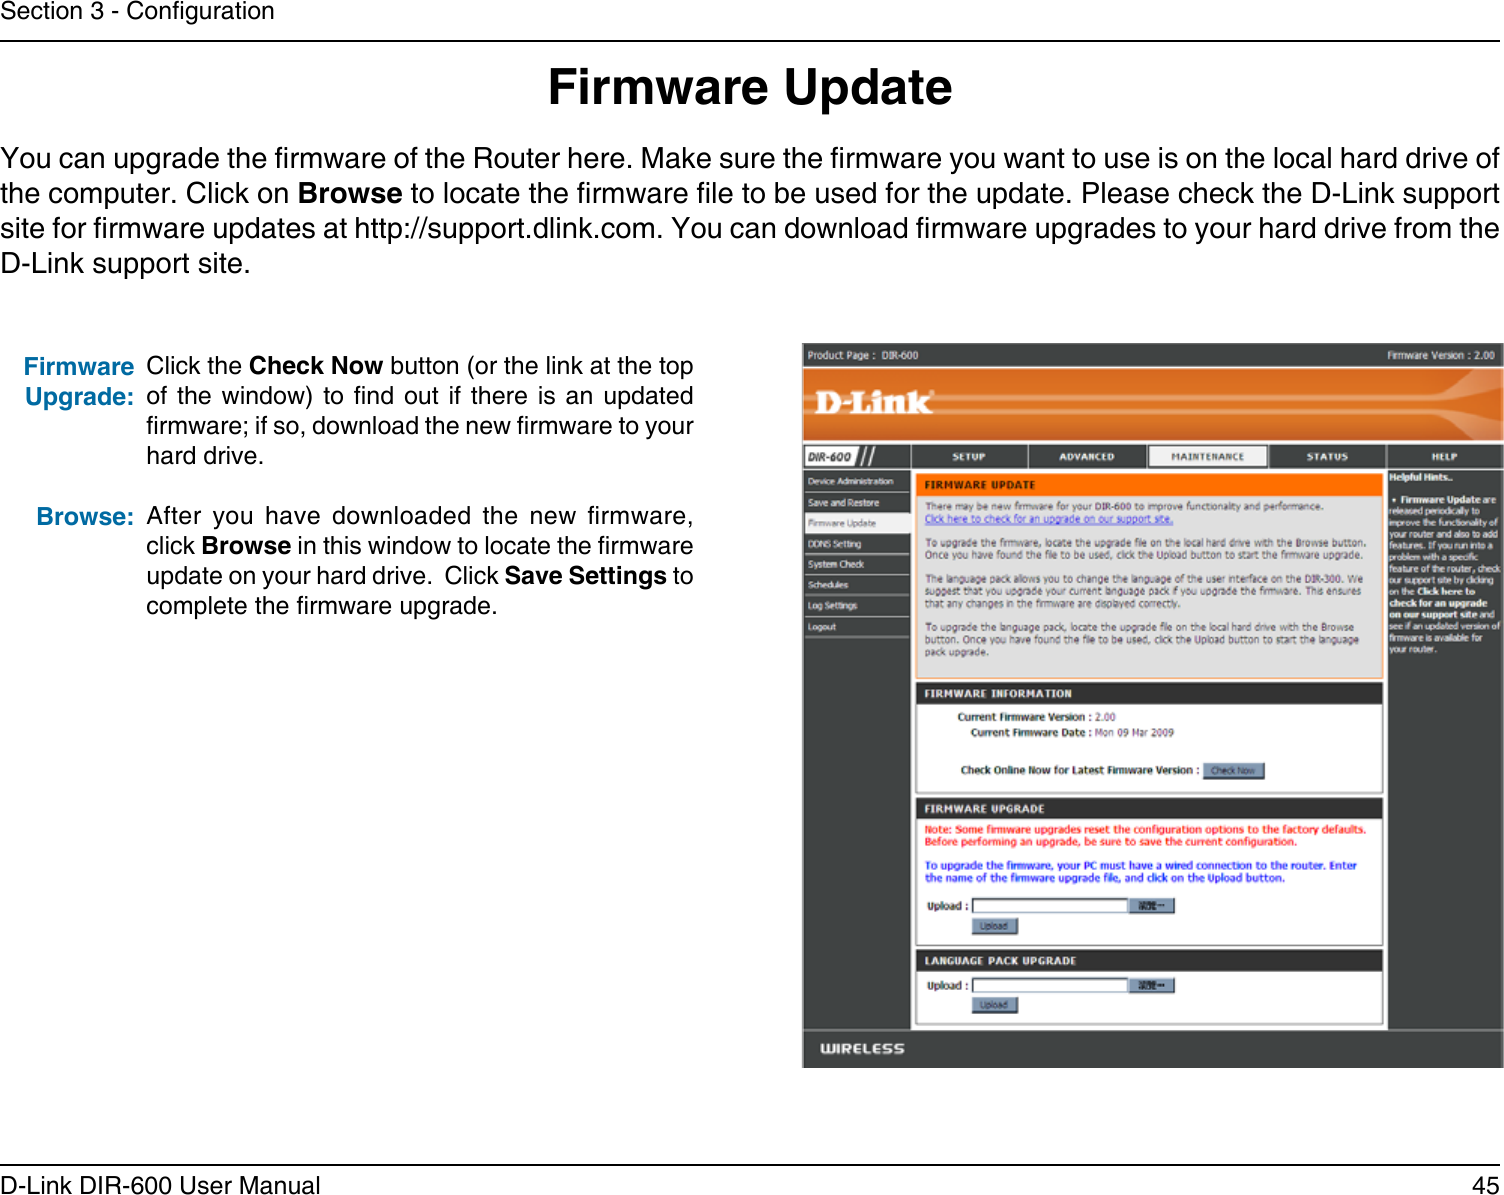
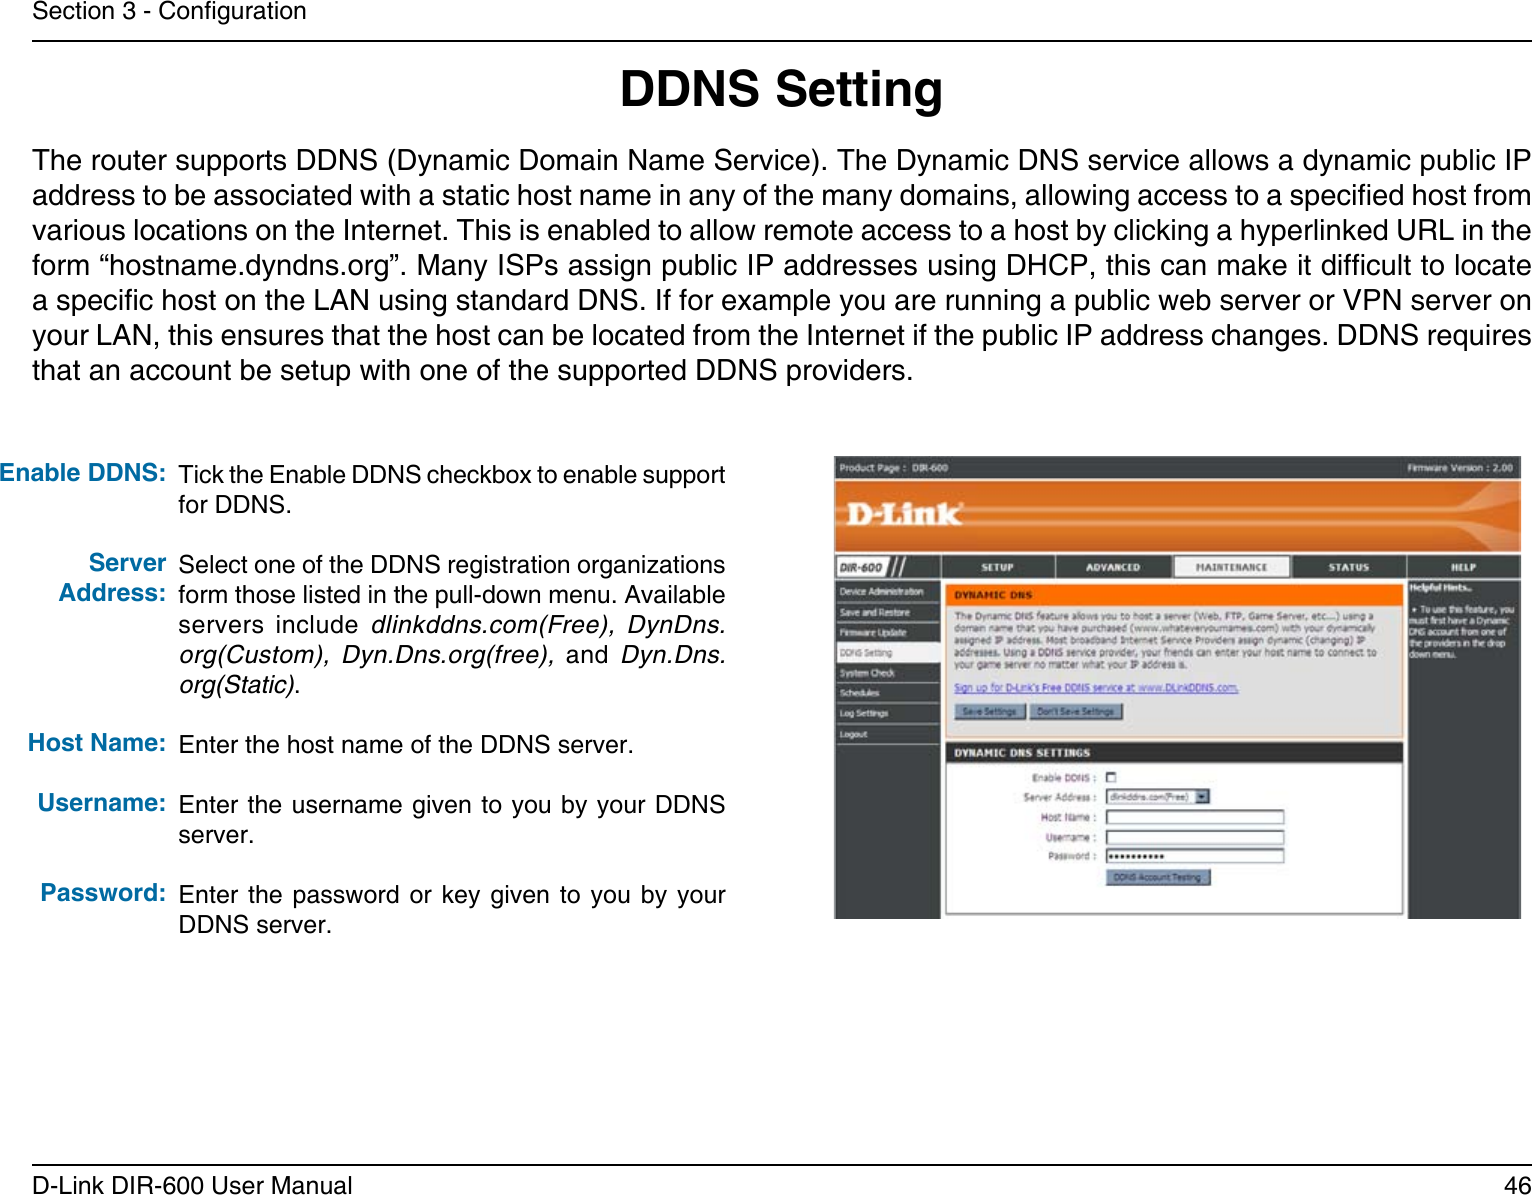
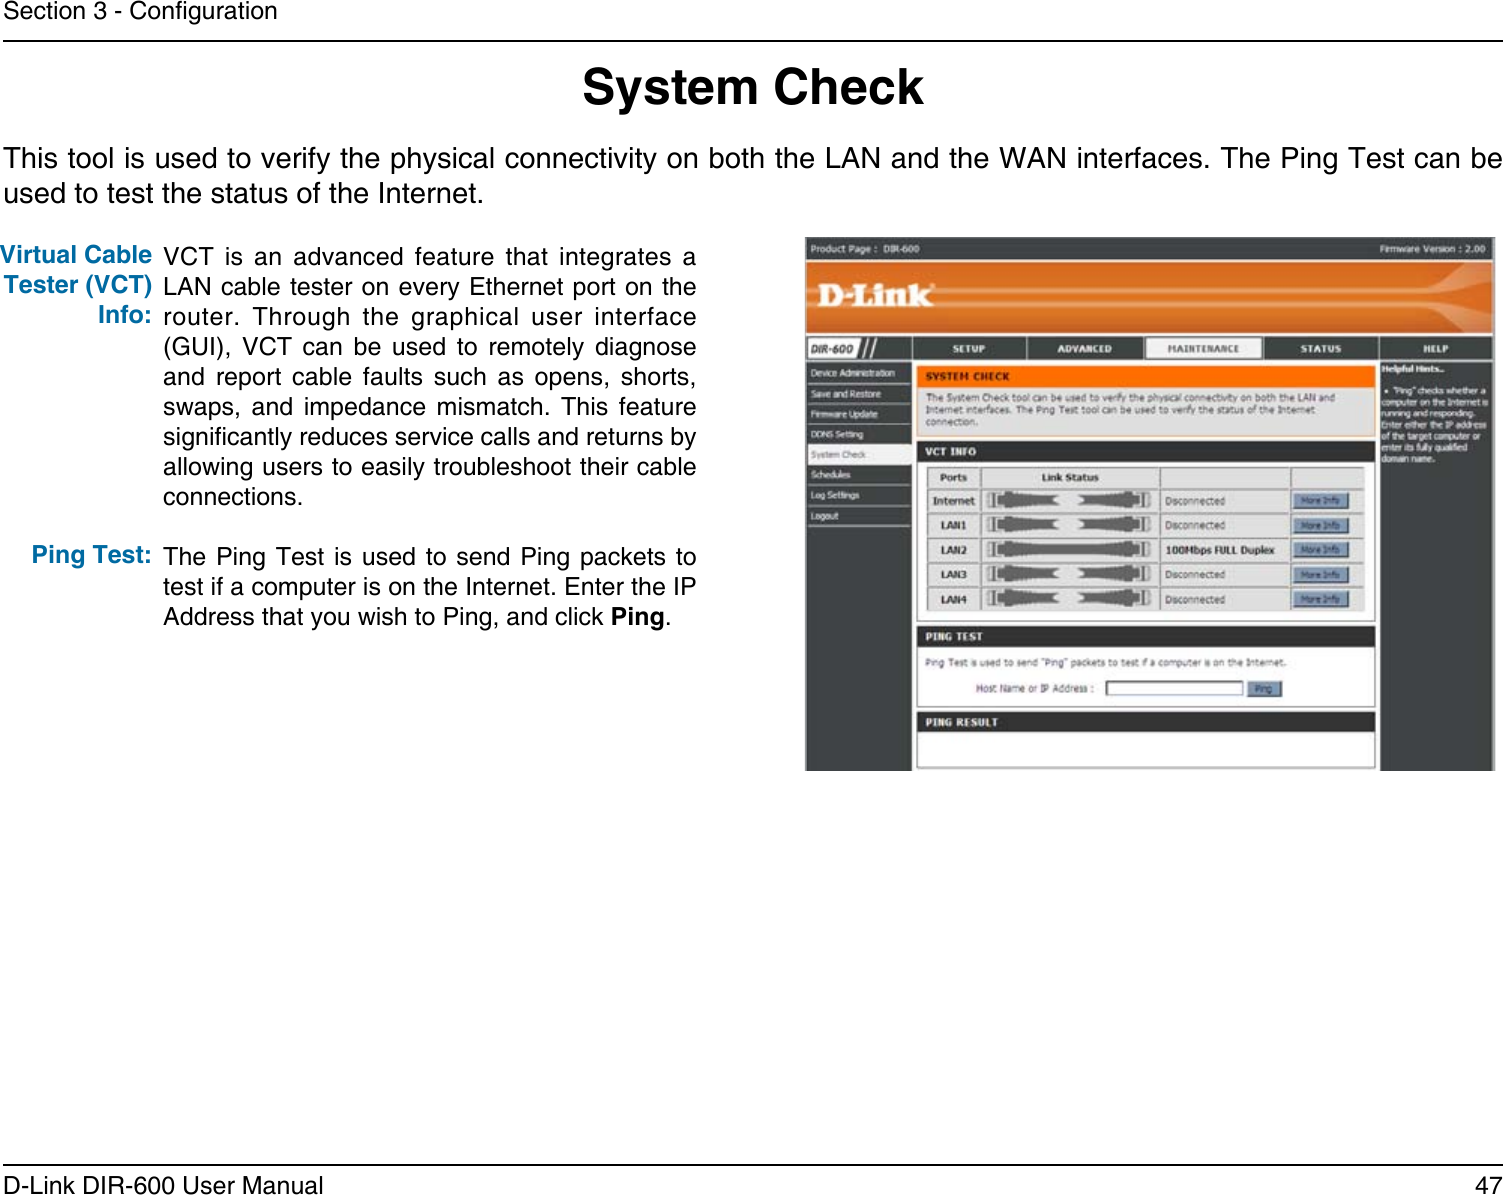
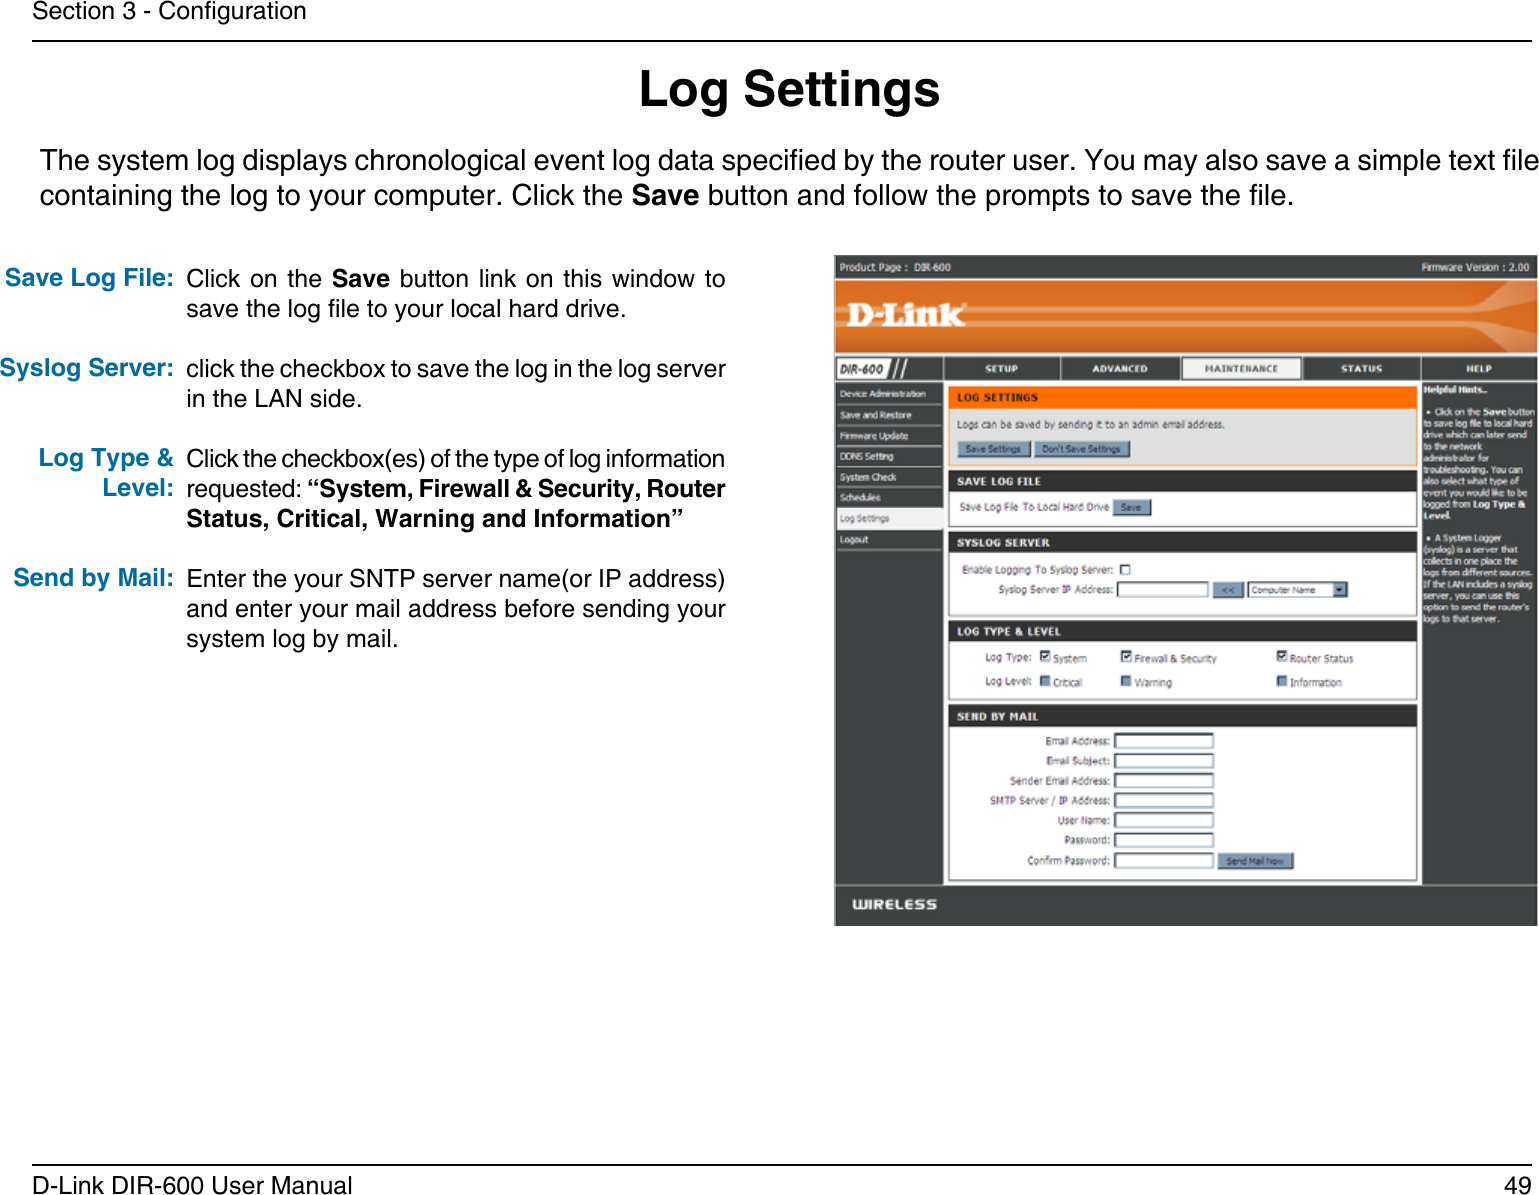
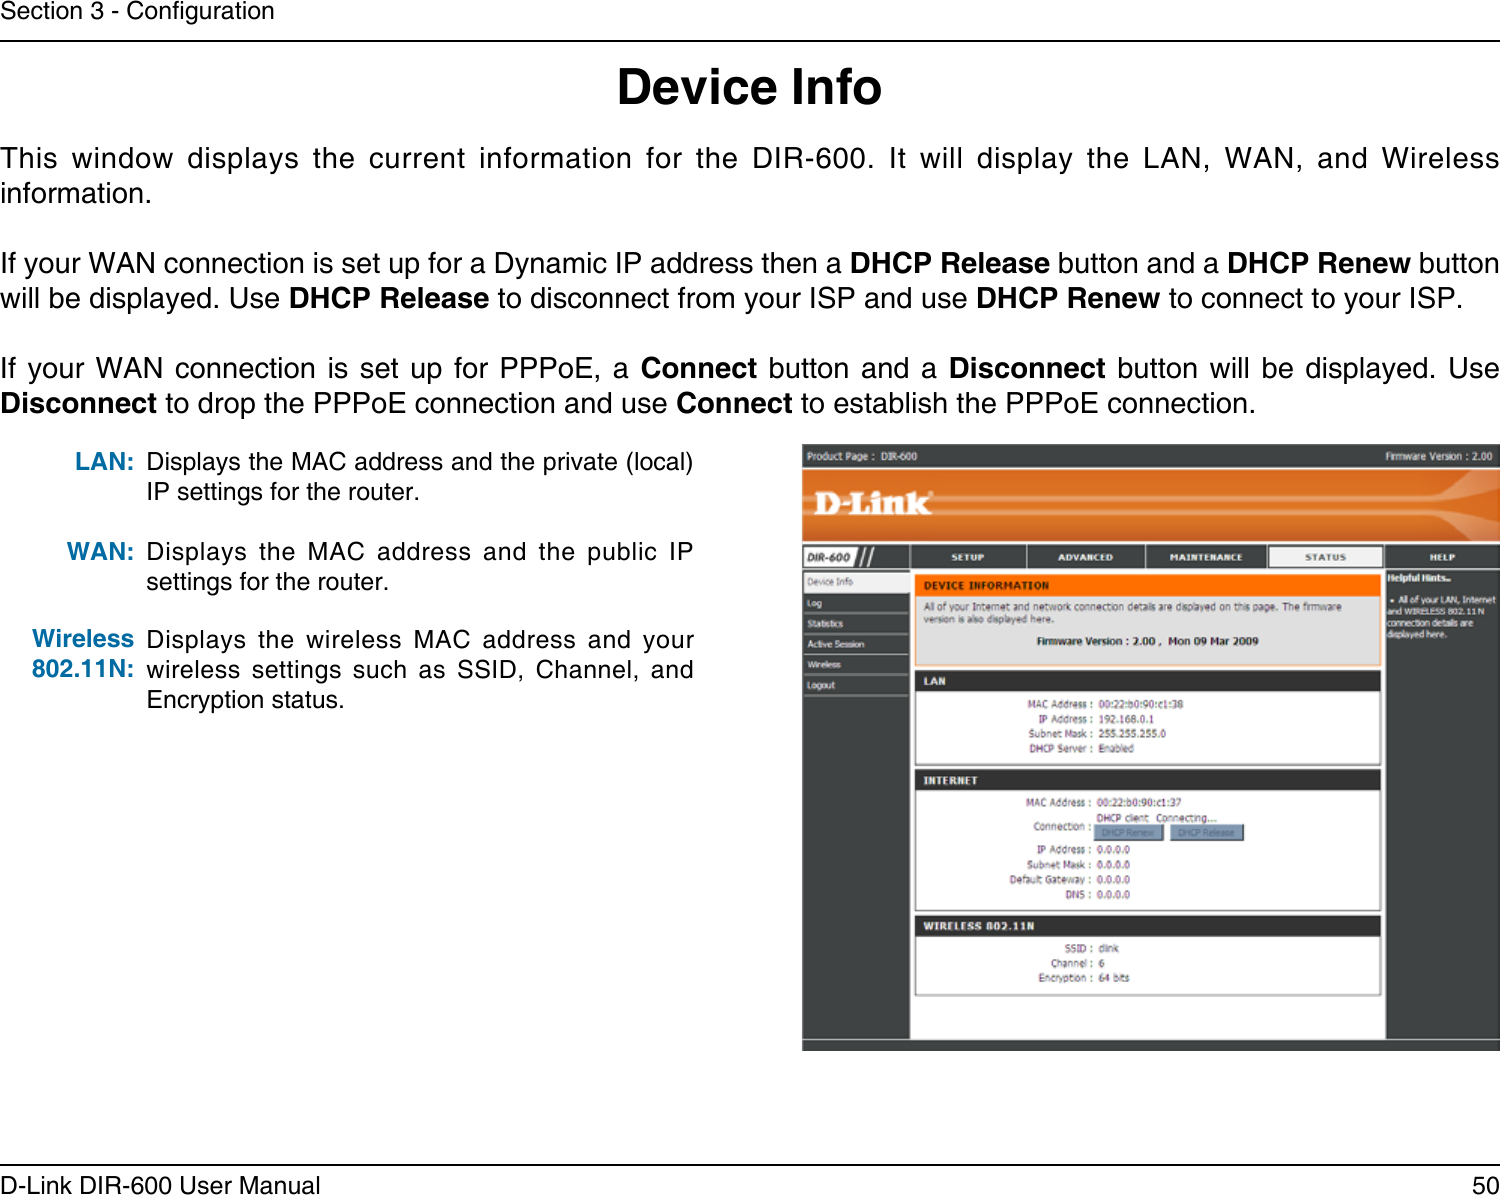
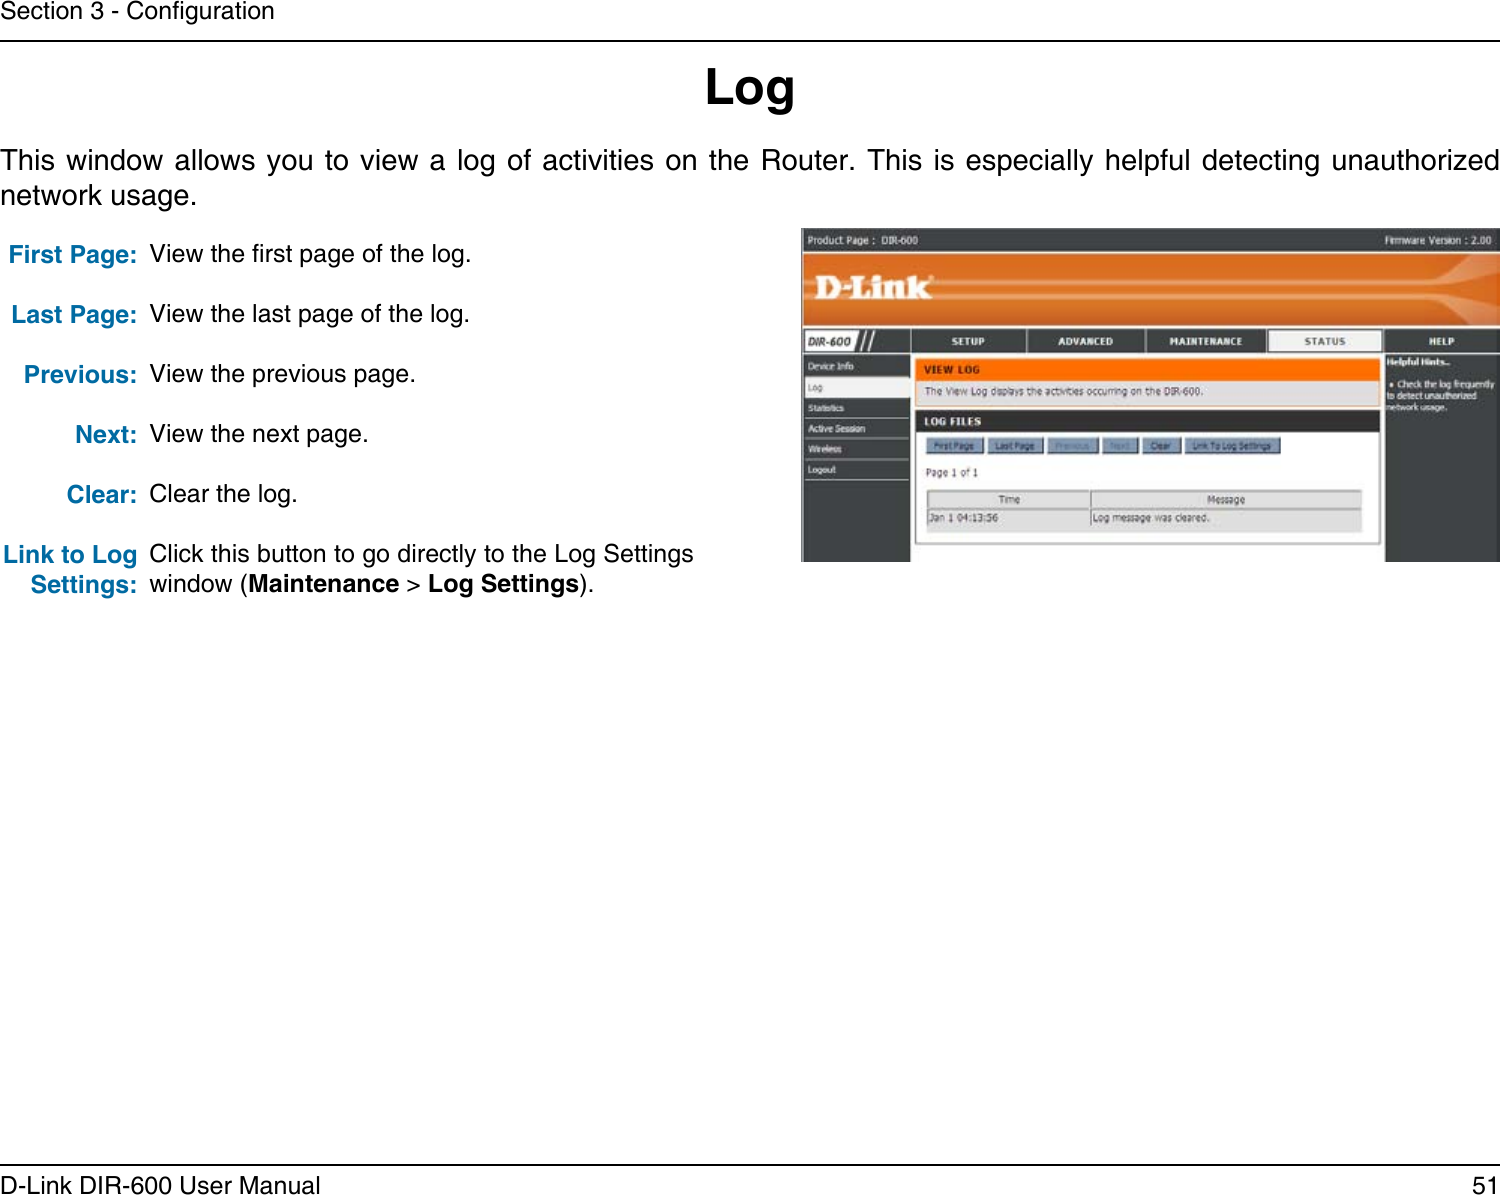
D Link DIR300B1 WIRELESS G ROUTER User Manual DIR 600 User Man 1
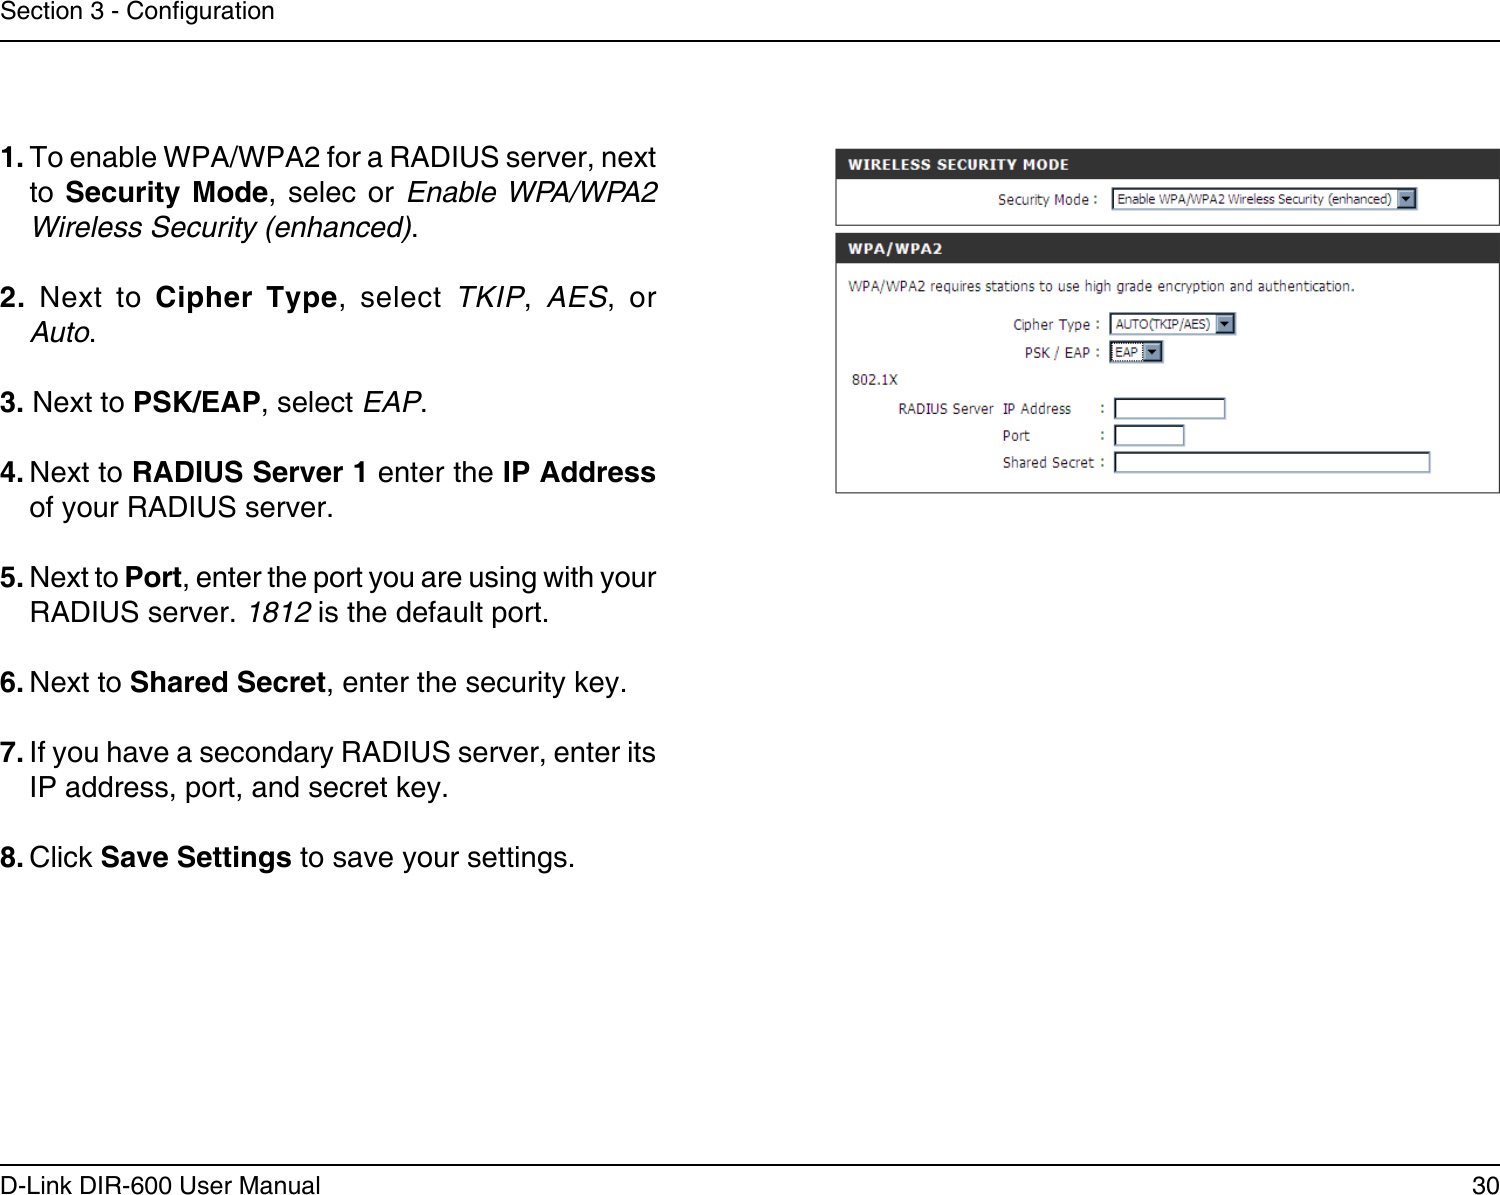
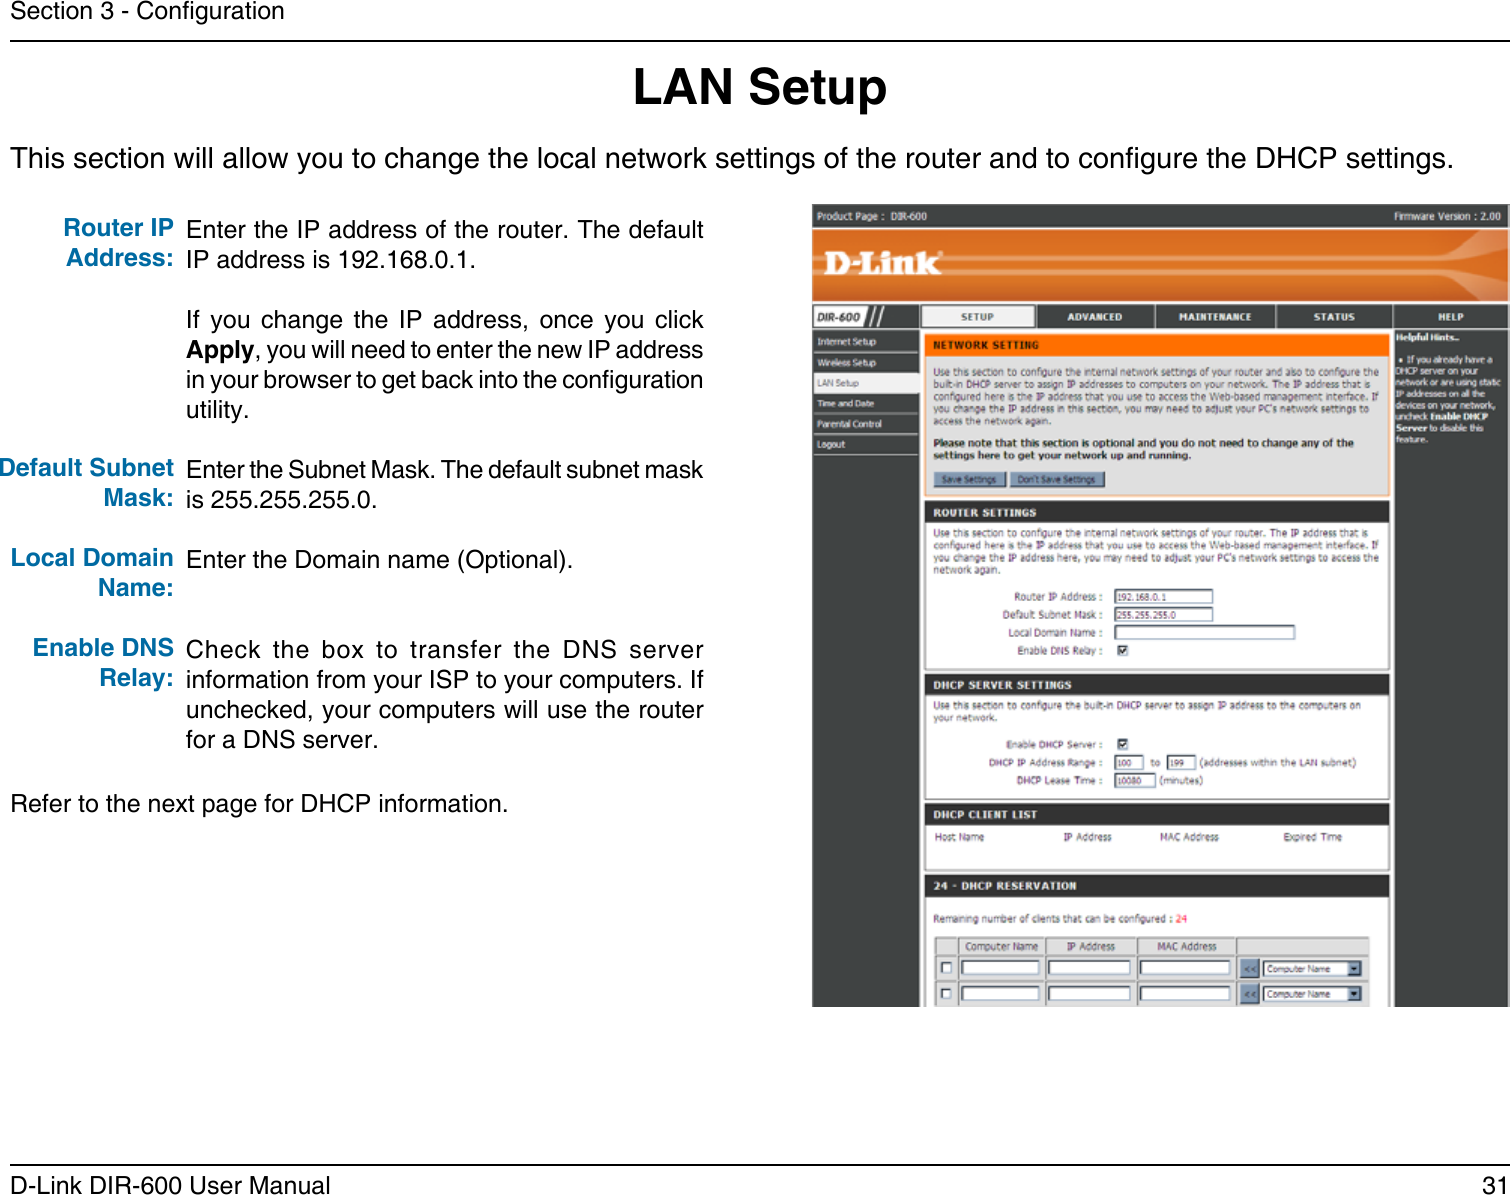
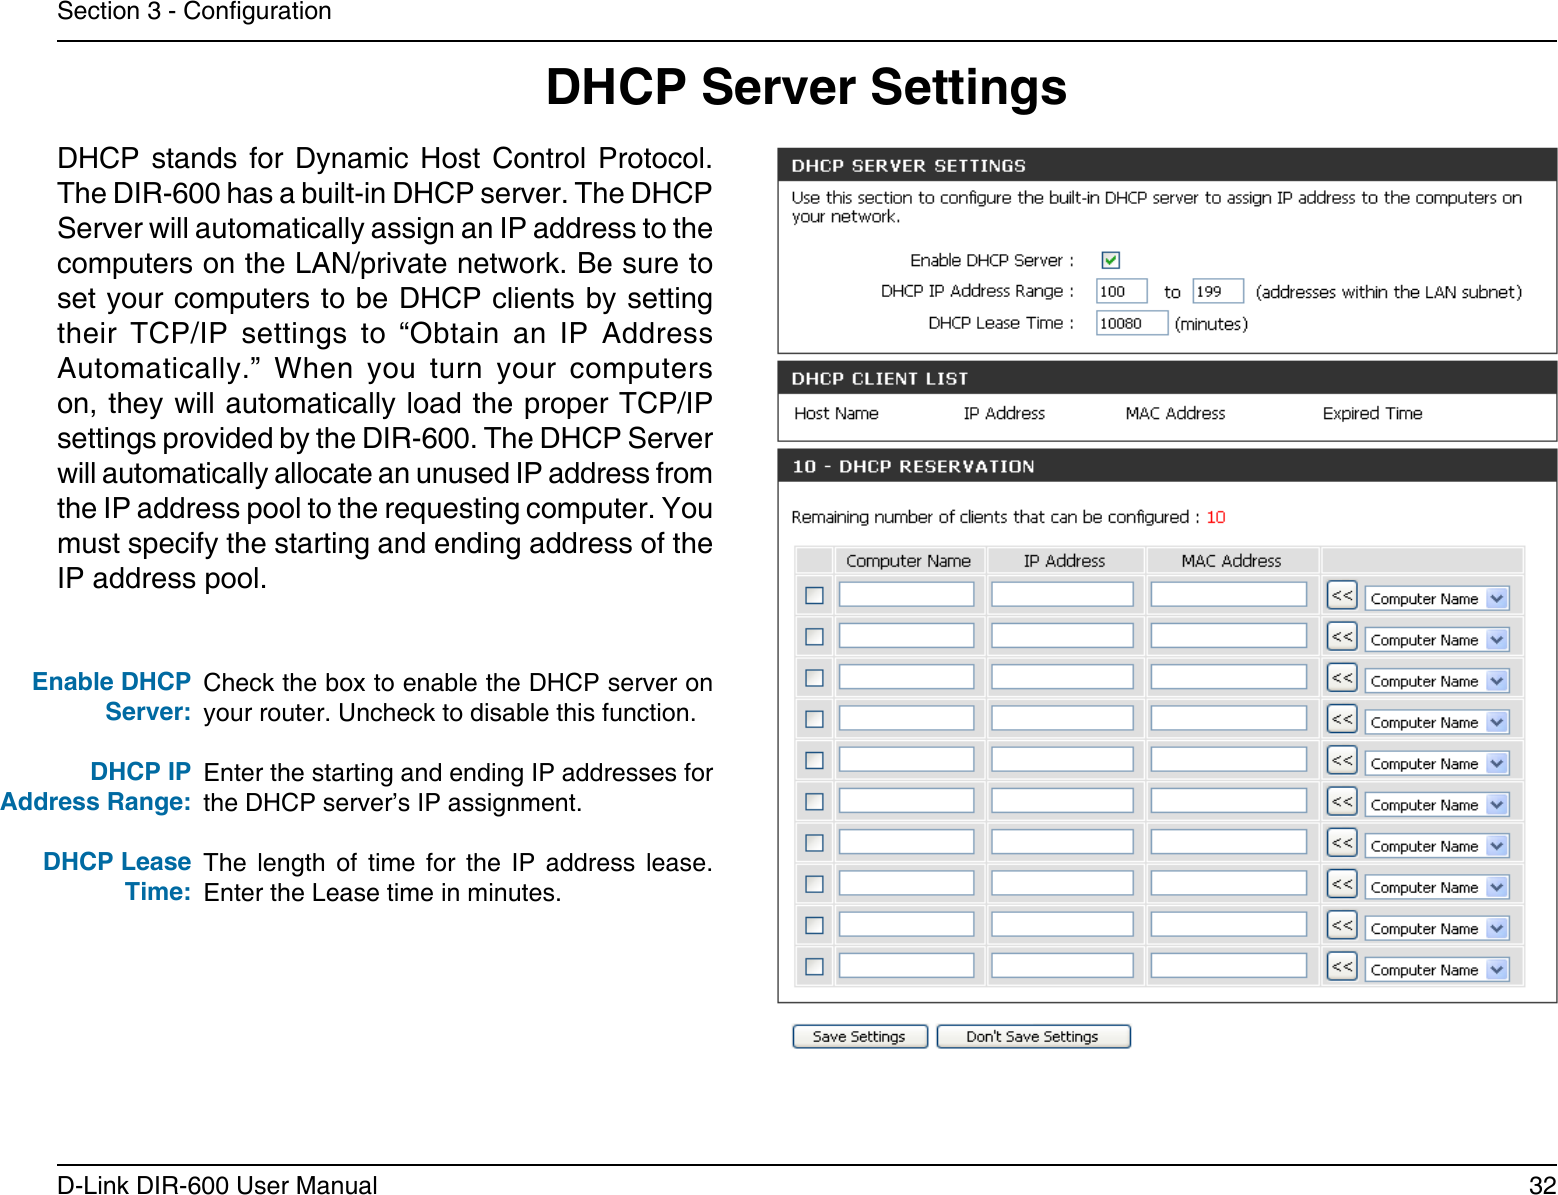
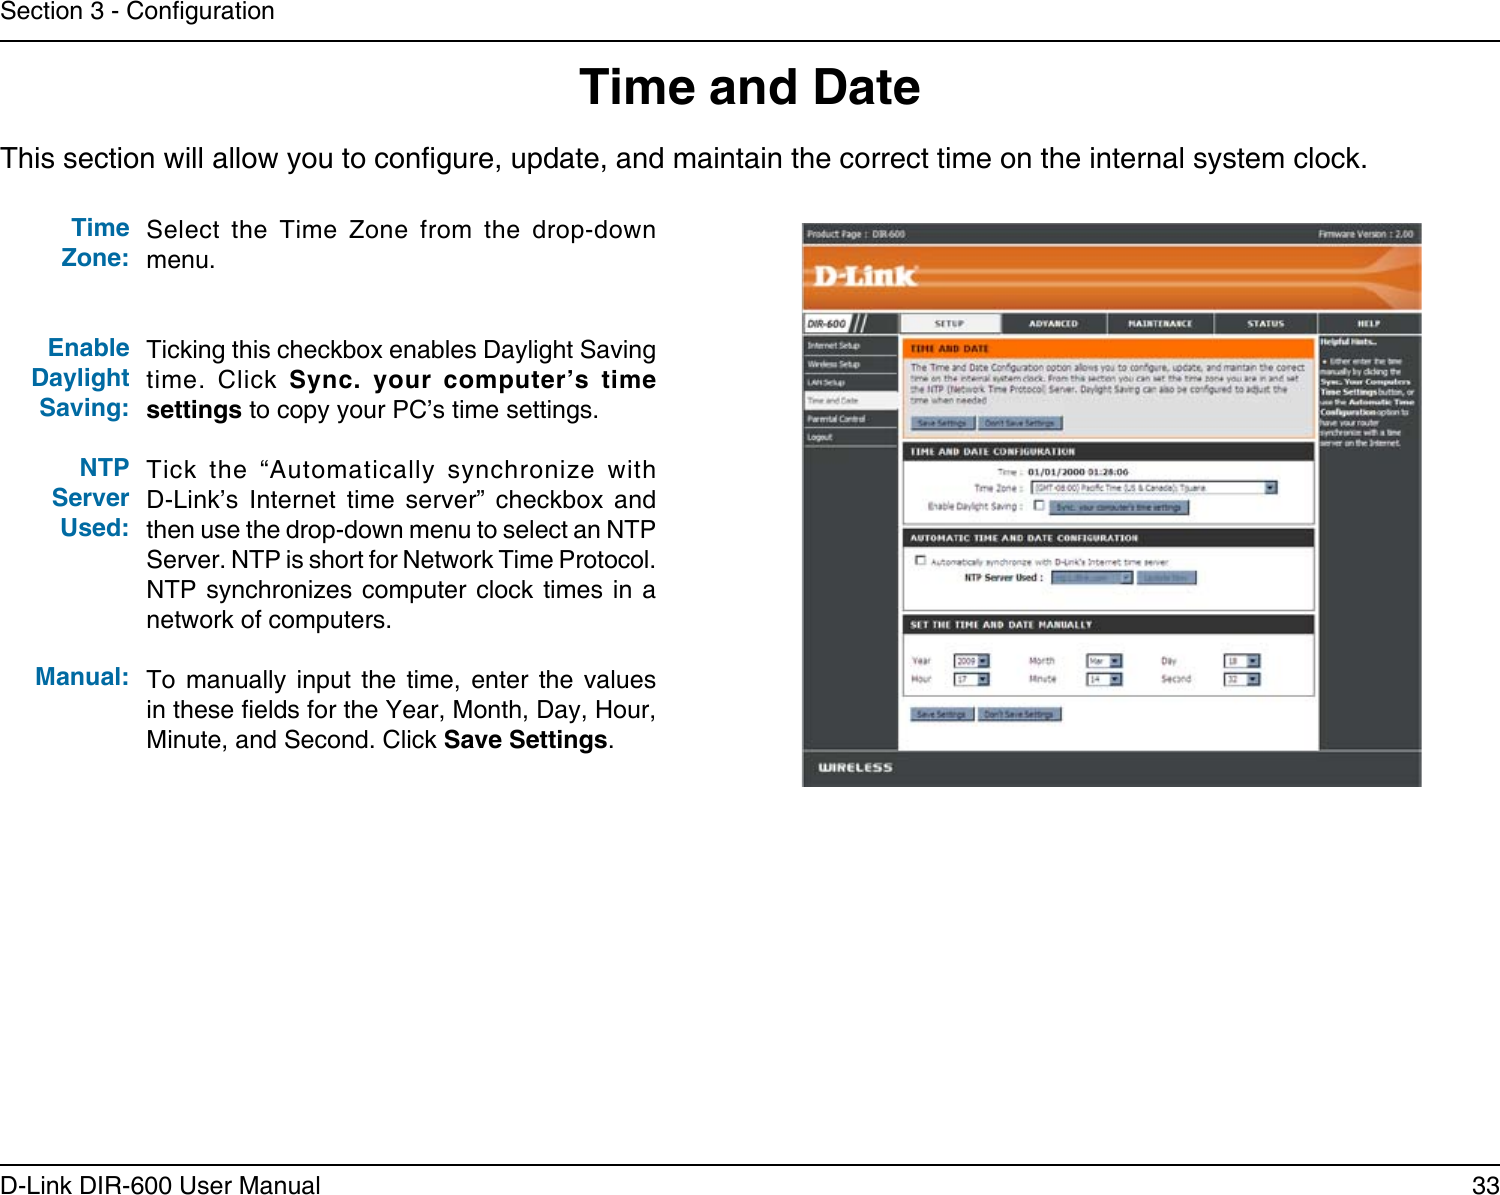
D Link Corporation WIRELESS G ROUTER DIR 600 User Man 1
D Link >
Contents
- 1. DIR 300 User Man 1
- 2. DIR 300 User Man 2
- 3. DIR 600 User Man 1
- 4. DIR 600 User Man 2
DIR 600 User Man 1