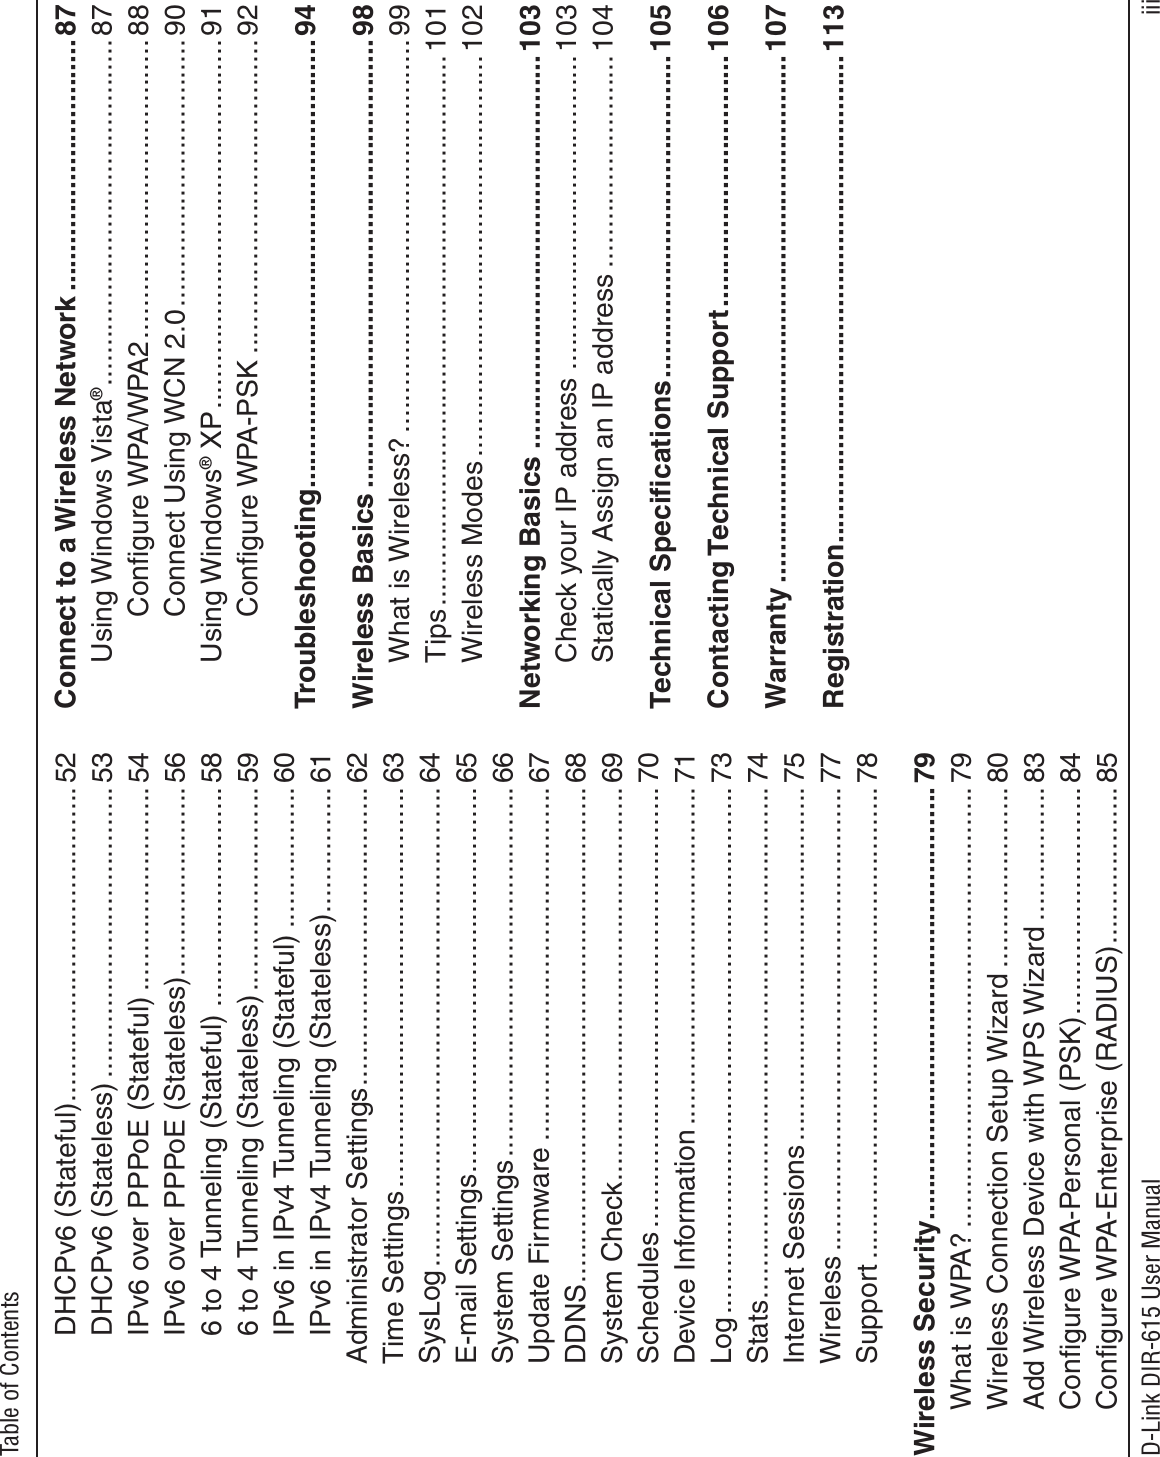
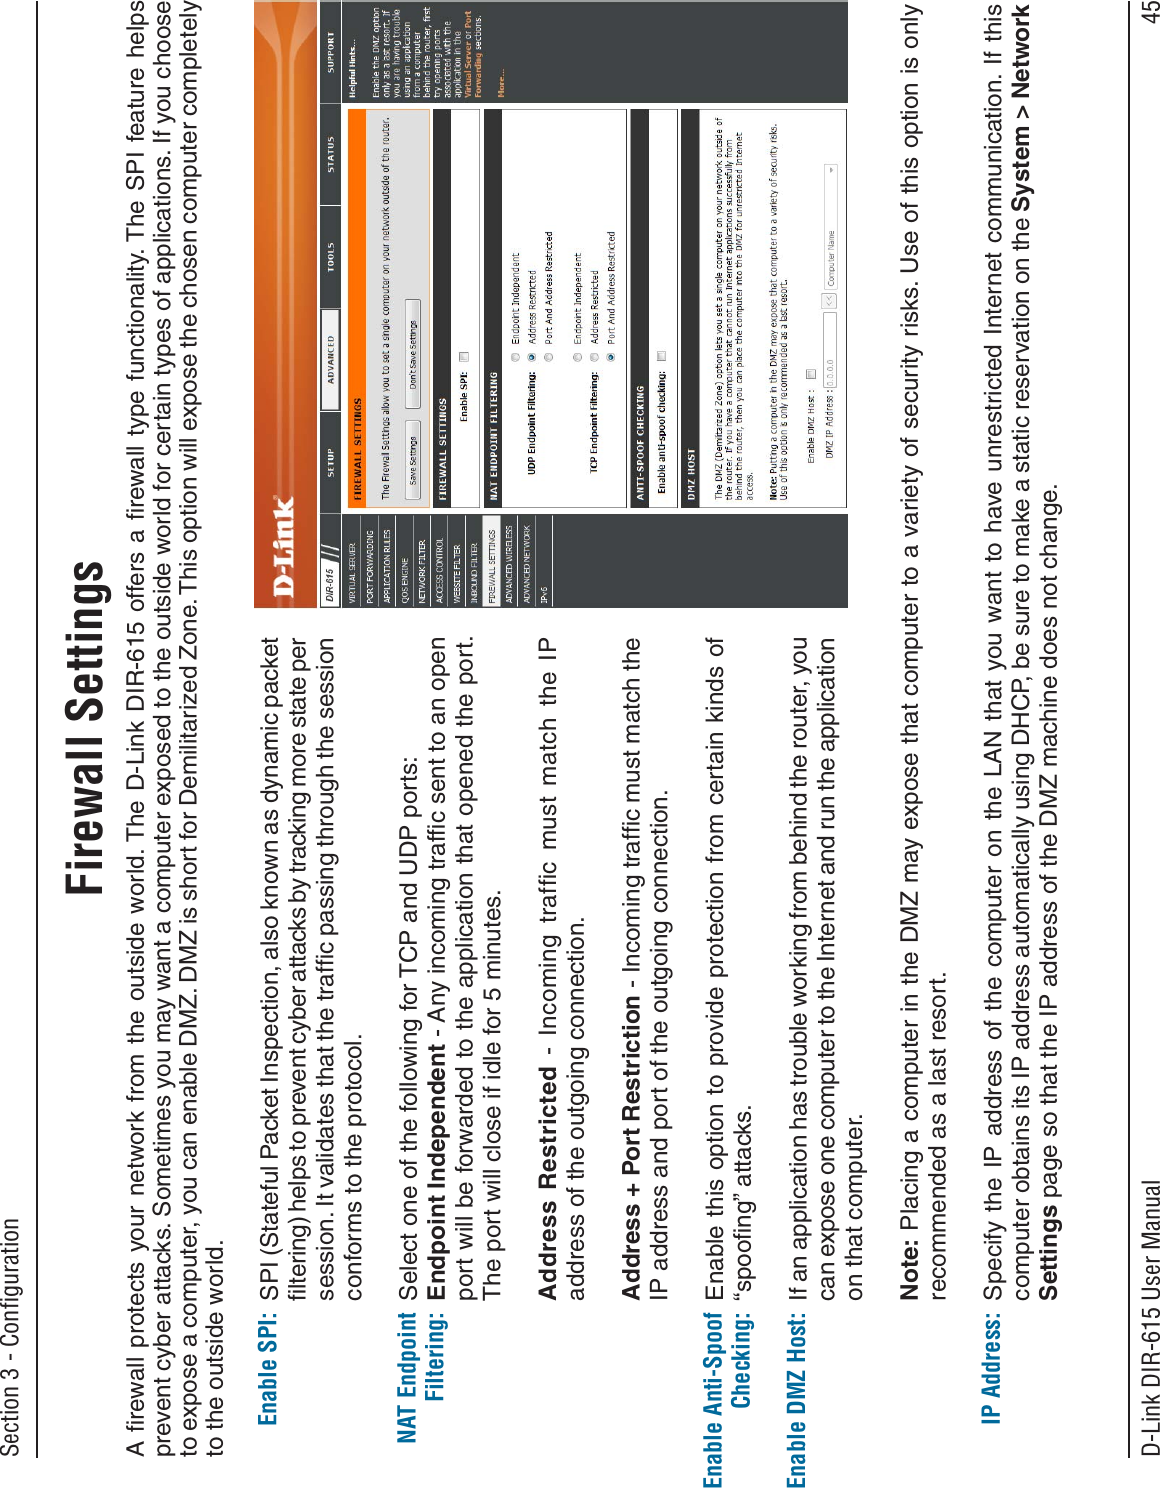
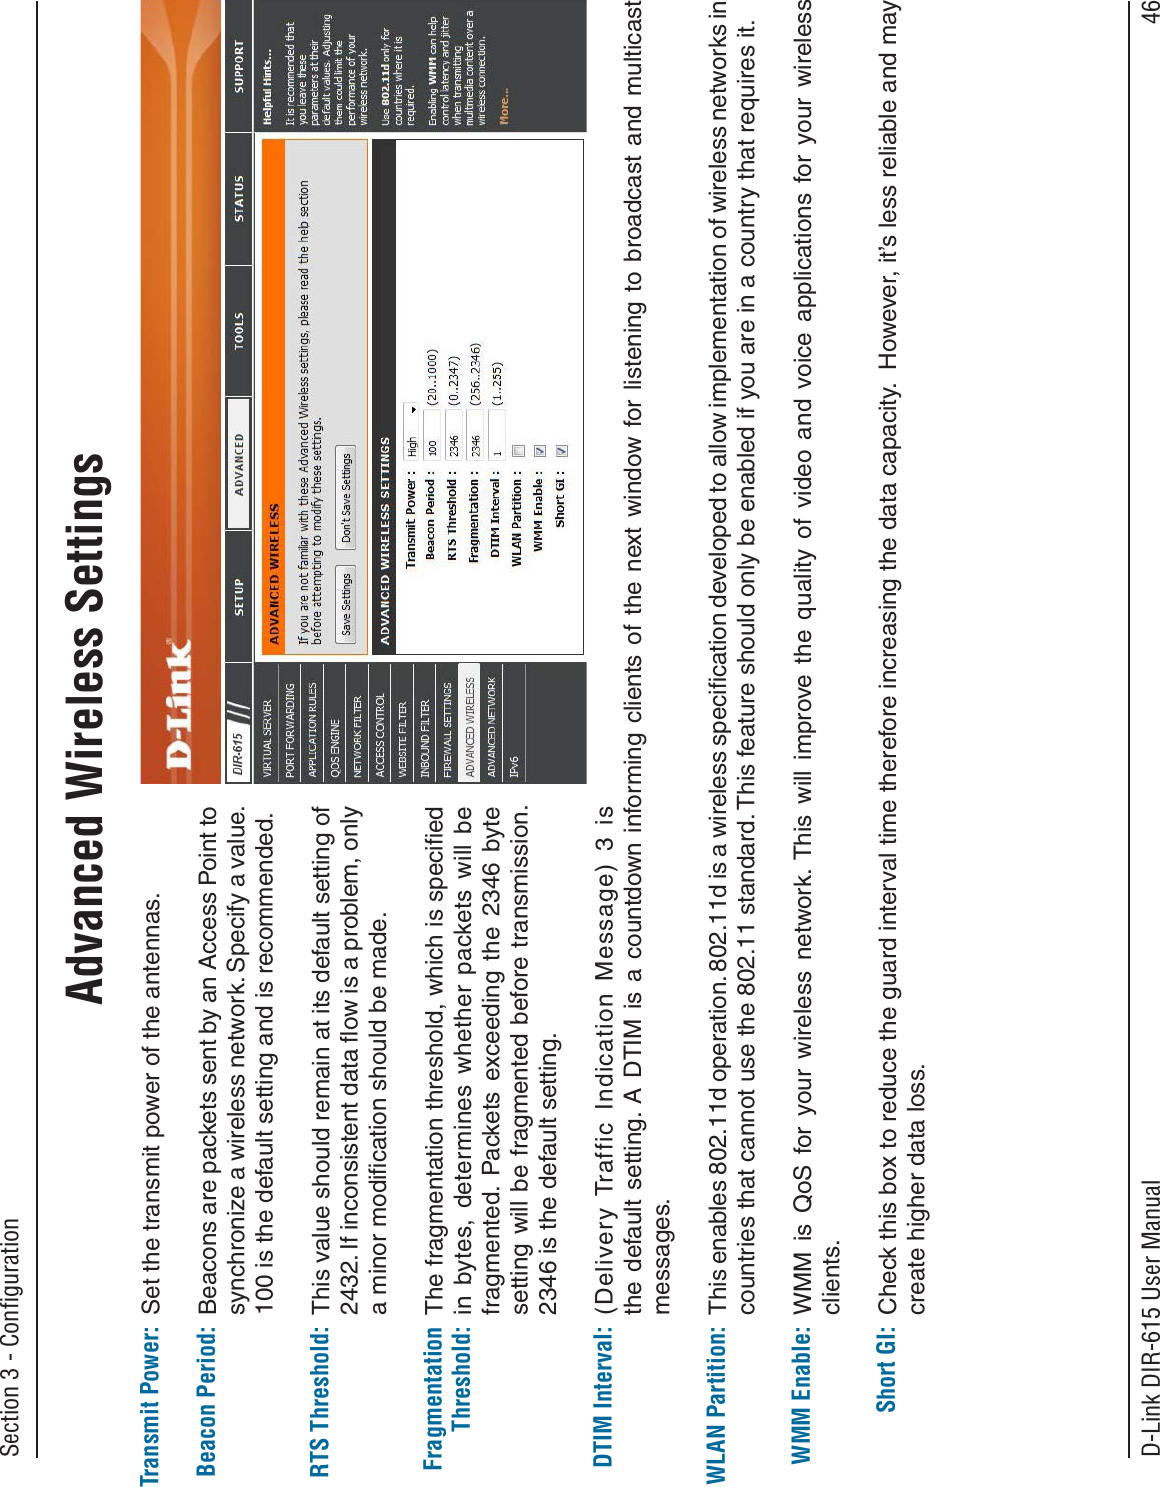
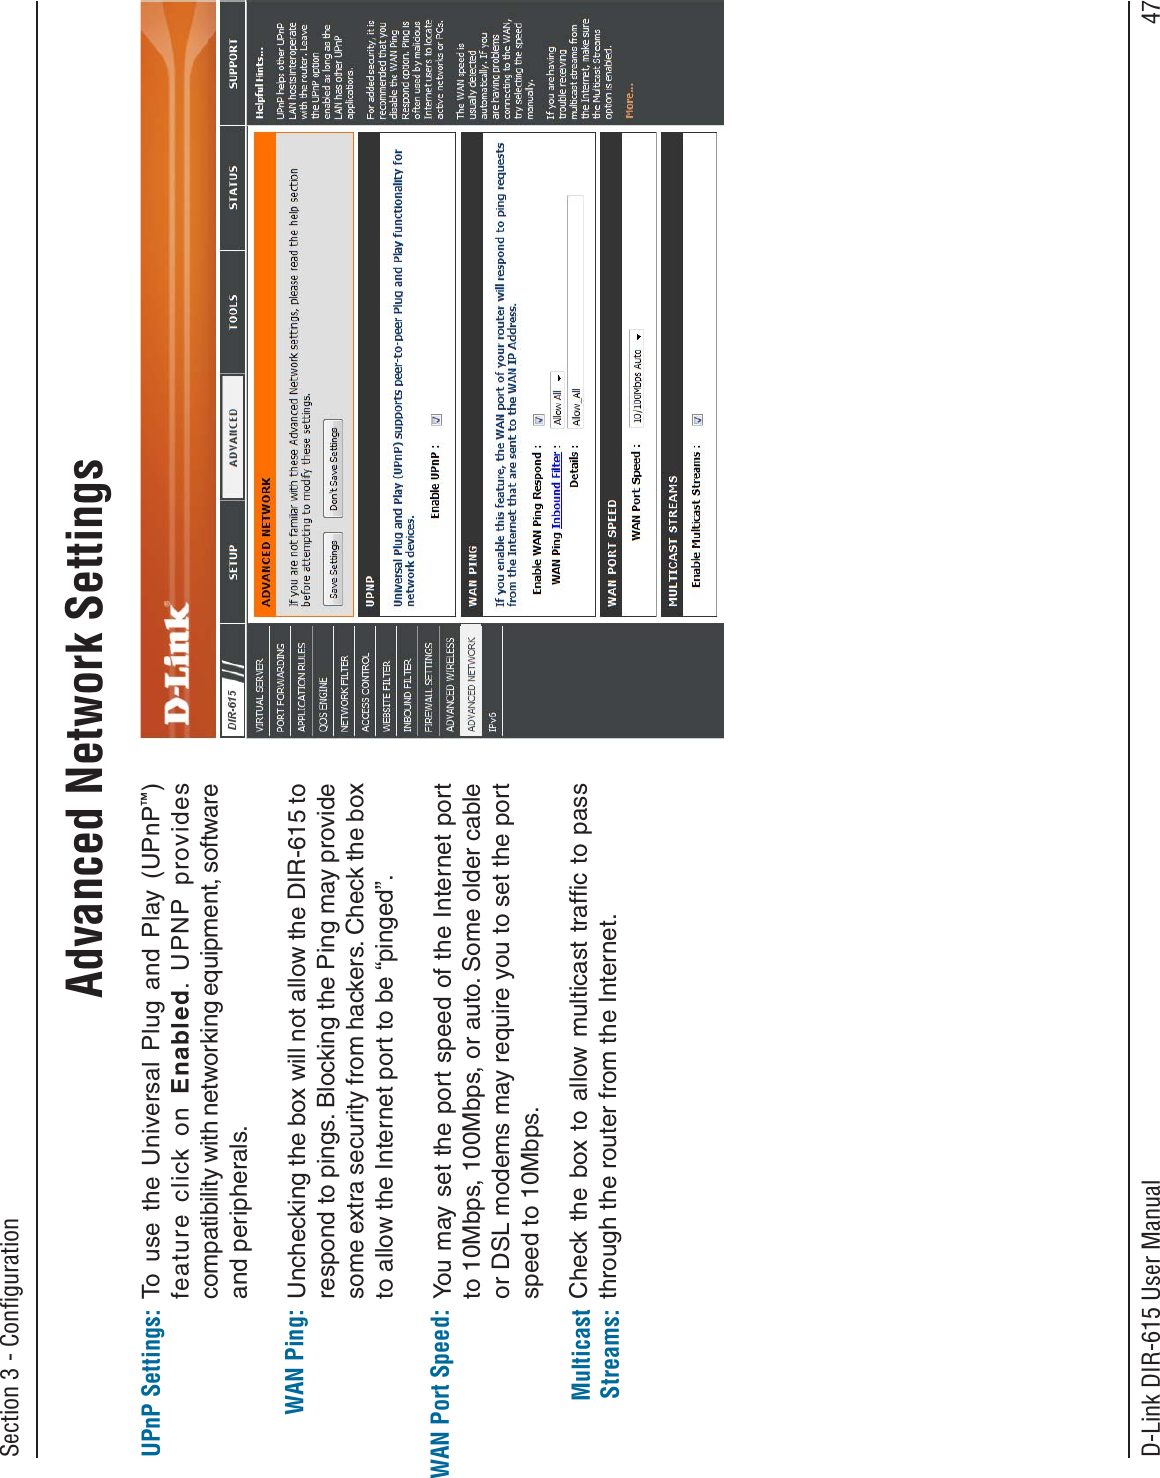
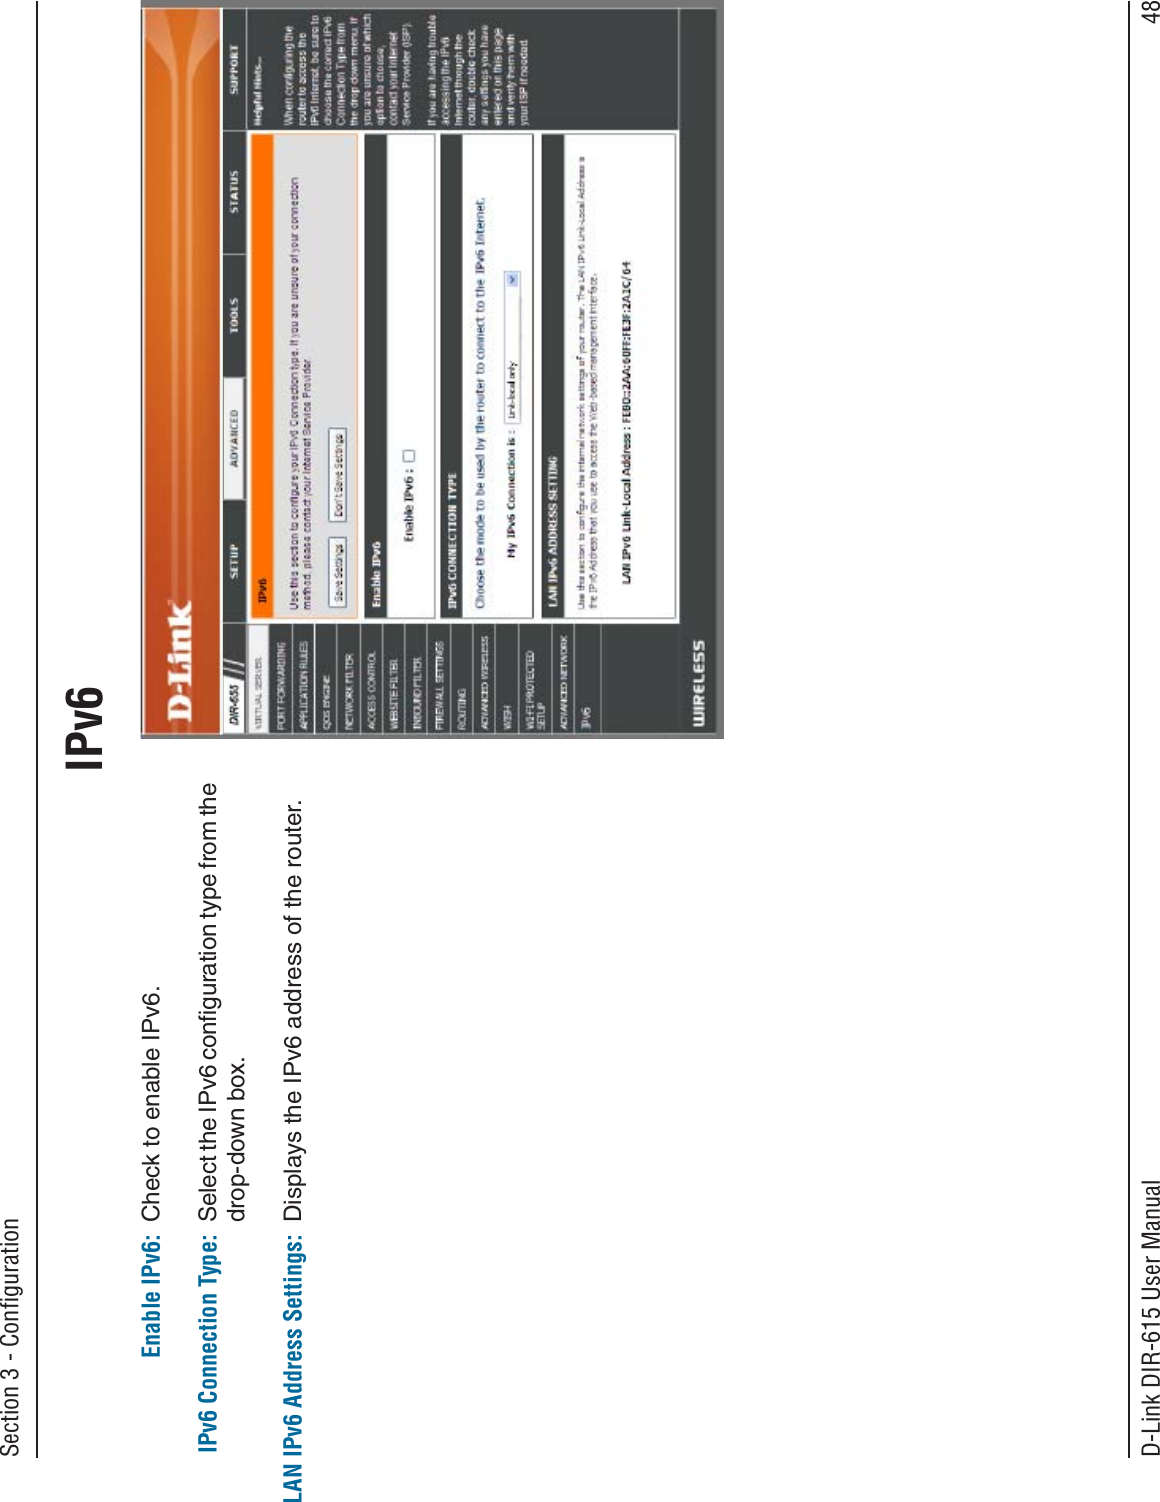
D Link DIR615C1 D-Link DIR-615 Wireless N Router User Manual UserMan KA2DIR615C1
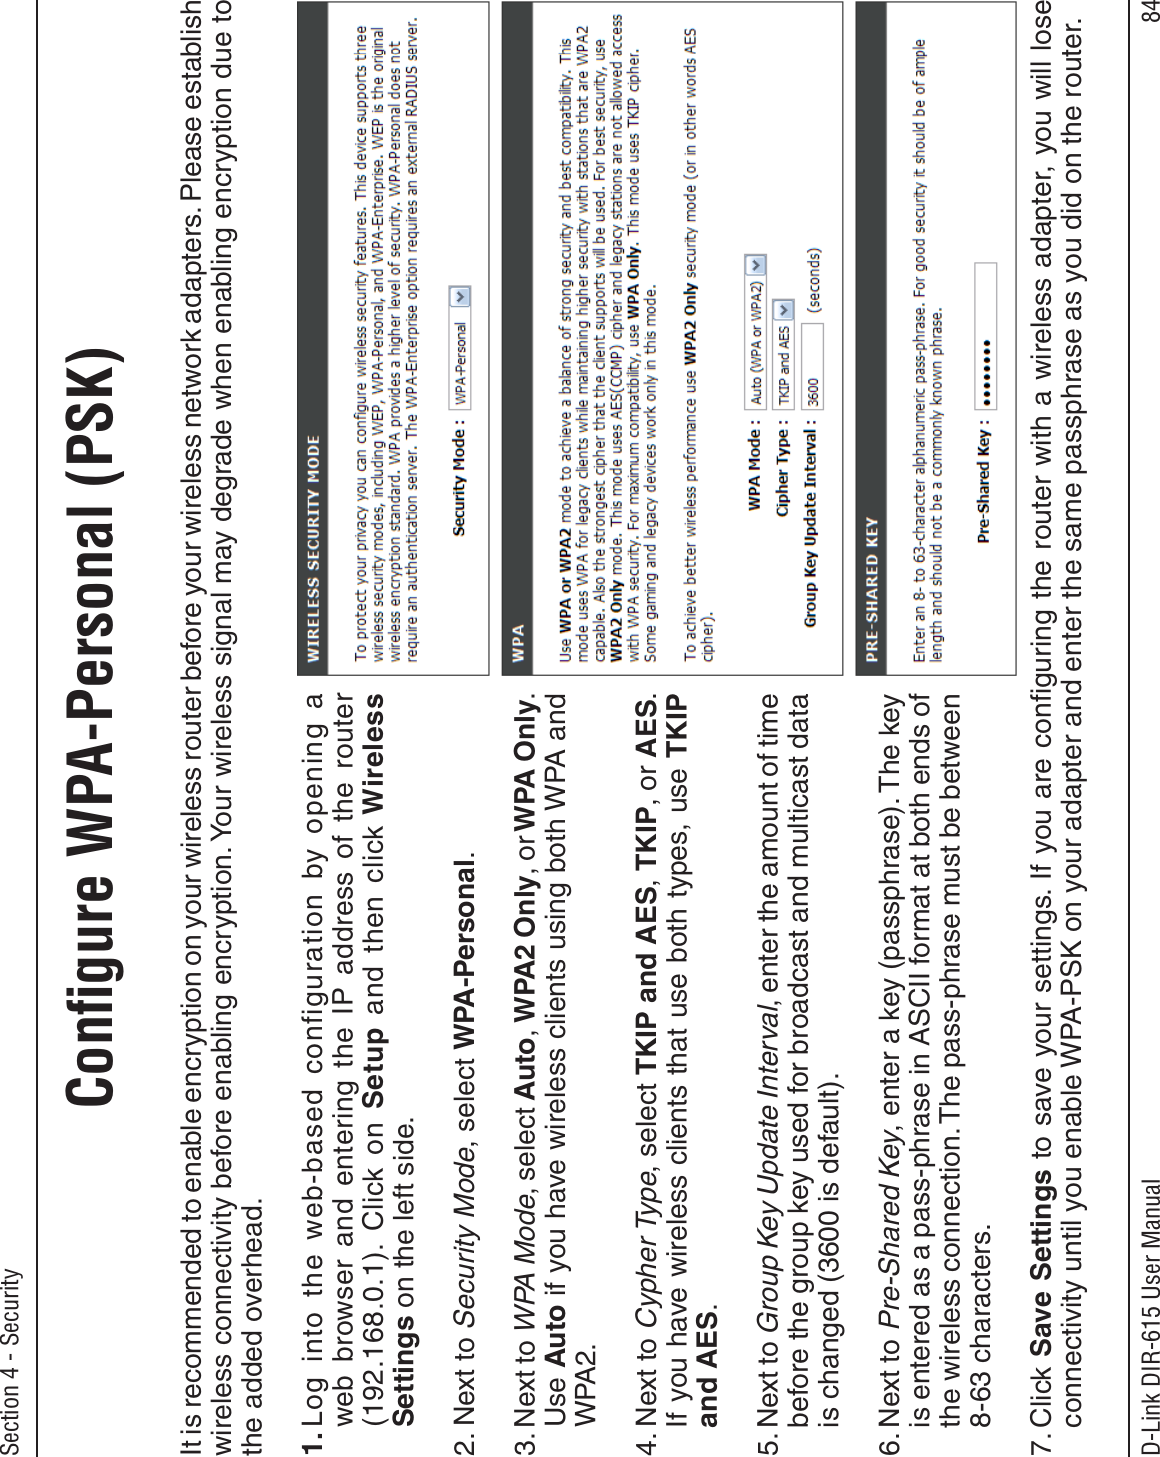
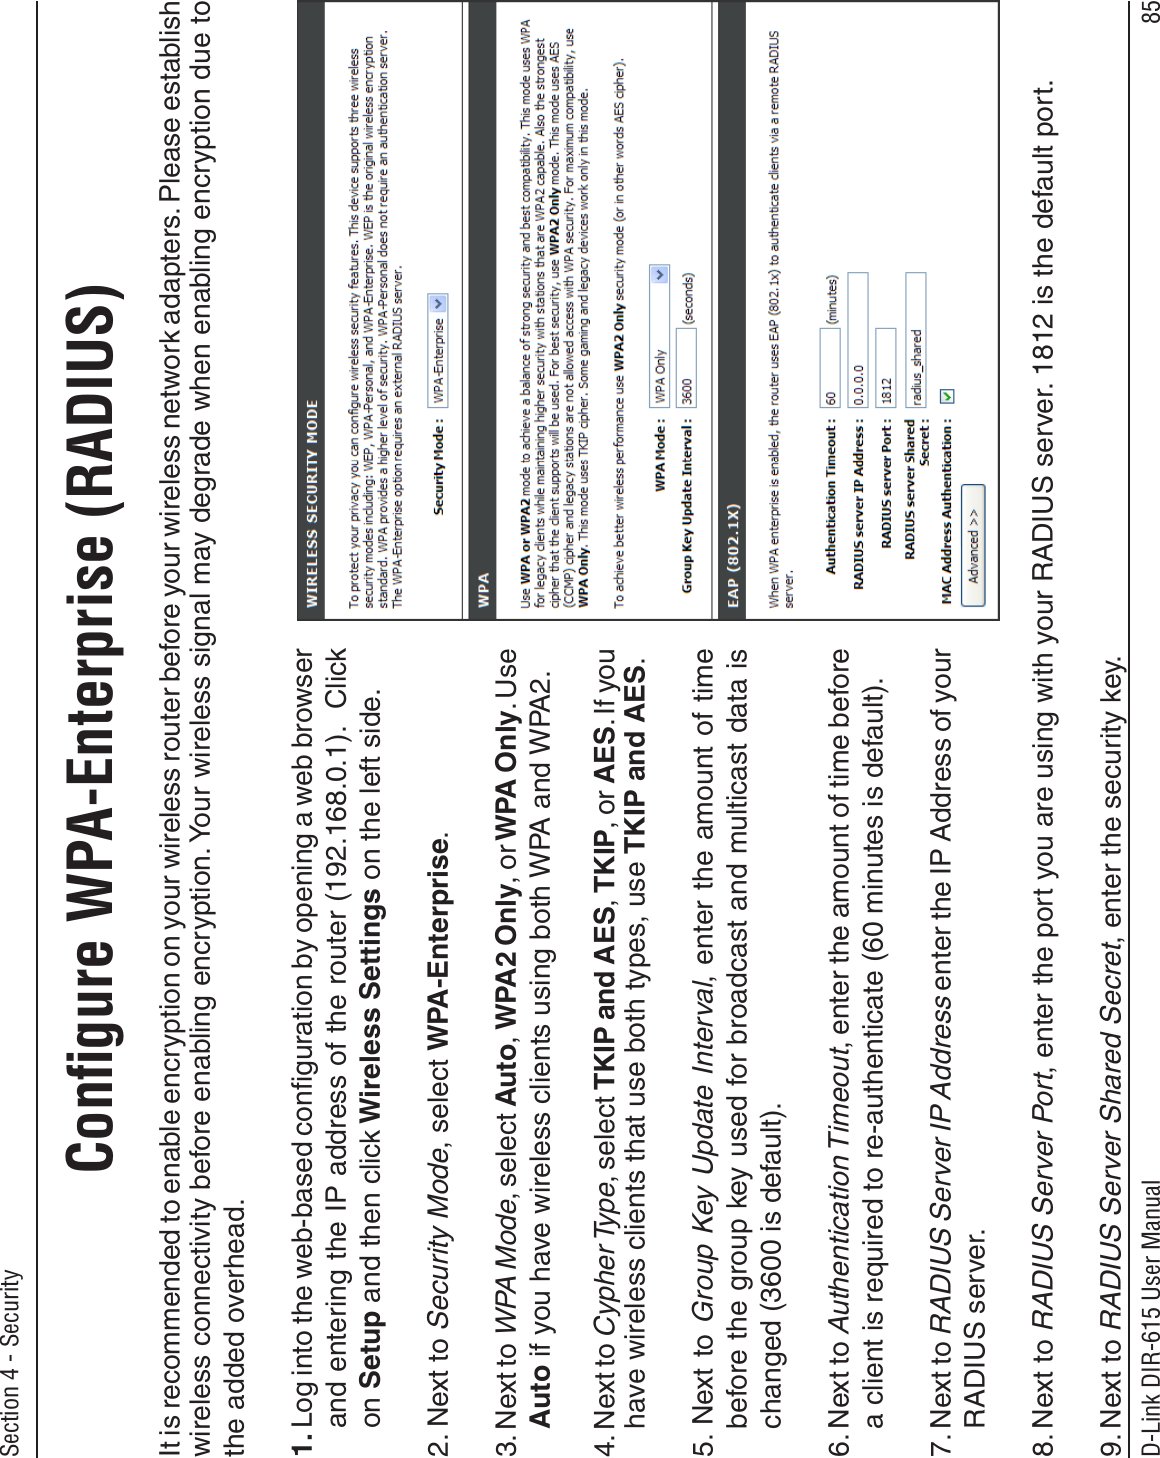
D Link Corporation D-Link DIR-615 Wireless N Router UserMan KA2DIR615C1
UserManual.wiki
>
D Link
>
DIR615C1 User Manual
Manual
Navigation menu
Upload a User Manual
Namespaces
Wiki Guide
HTML
PDF
Info
Views
User Manual
Discussion / Help
Navigation


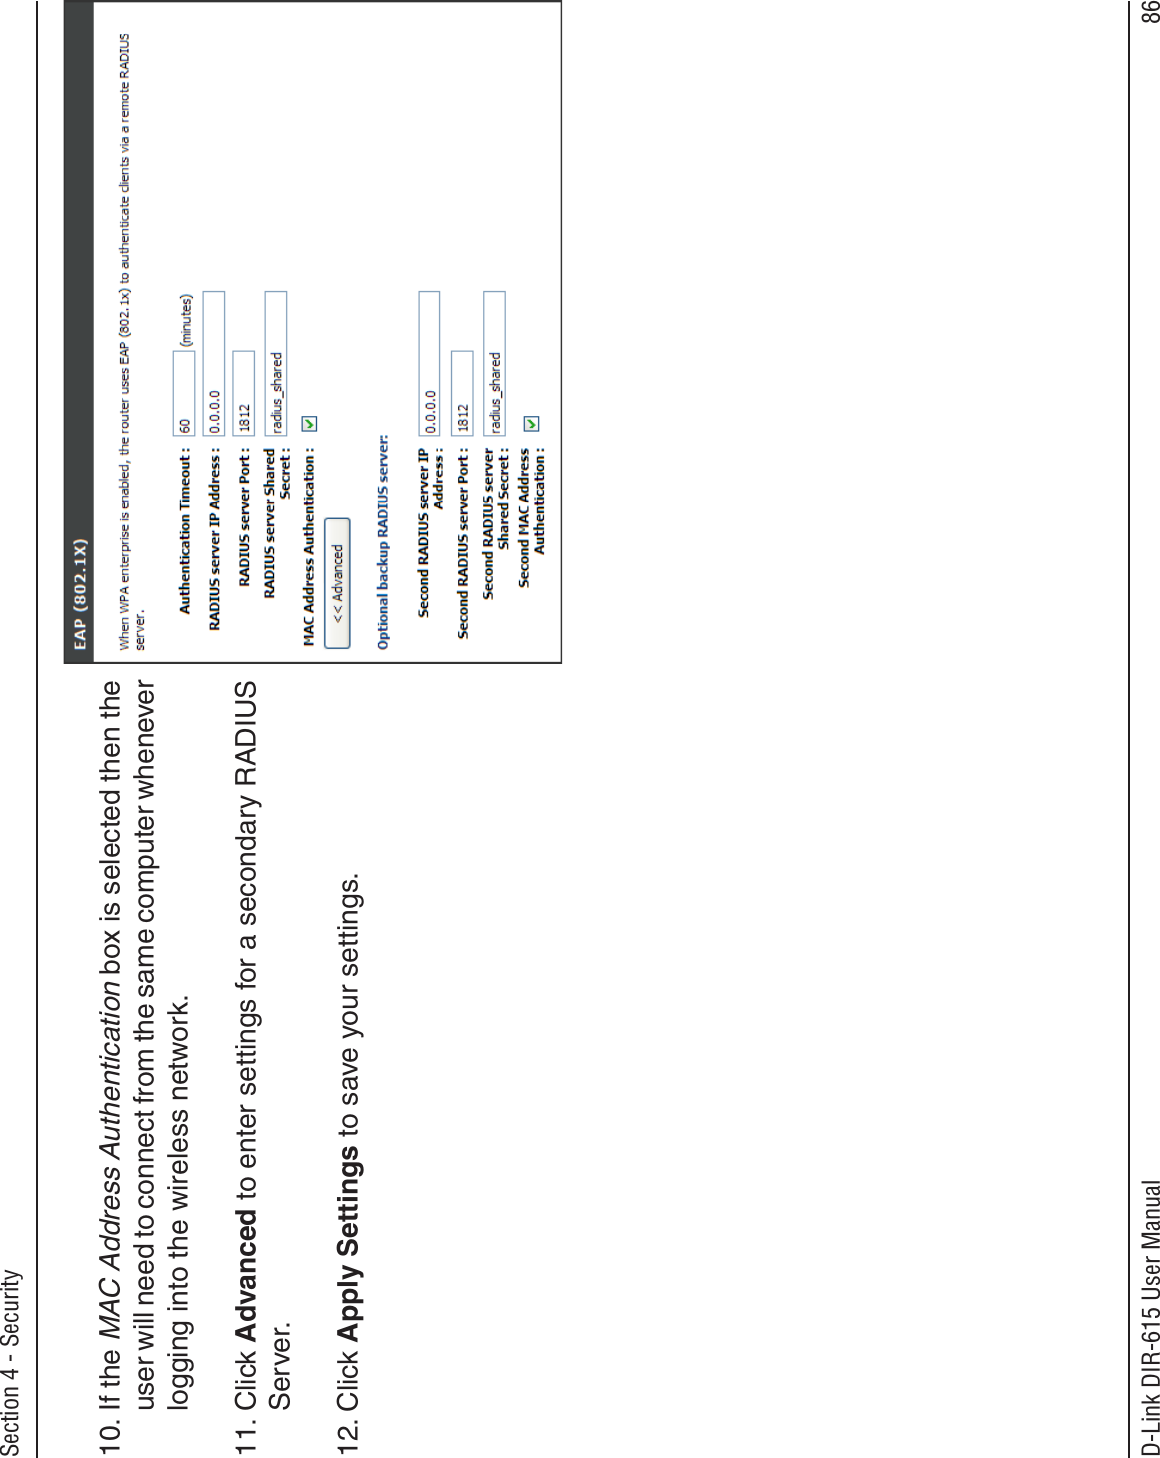
![96D-Link DIR-615 User ManualSection 6 - Troubleshooting3. Why can’t I connect to certain sites or send and receive e-mails when connecting through my router?If you are having a problem sending or receiving e-mail, or connecting to secure sites such as eBay, banking sites, and Hotmail, we suggest lowering the MTU in increments of ten (Ex. 1492, 1482, 1472, etc). Note: AOL DSL+ users must use MTU of 1400.To find the proper MTU Size, you’ll have to do a special ping of the destination you’re trying to go to. A destination could be another computer, or a URL. • Click on Start and then click Run. • Windows® 95, 98, and Me users type in command (Windows® NT, 2000, and XP users type in cmd) and press Enter (or click OK). • Once the window opens, you’ll need to do a special ping. Use the following syntax: ping [url] [-f] [-l] [MTU value]Example: ping yahoo.com -f -l 1472](https://usermanual.wiki/D-Link/DIR615C1/User-Guide-983988-Page-100.png)

![112D-Link DIR-615 User ManualAppendix E - WarrantyIC statementOperation is subject to the following two conditions:1) This device may not cause interference and2) This device must accept any interference, including interference that may cause undesired operation of the device.This device has been designed to operate with an antenna having a maximum gain of 2dBi. Antenna having a higher gain is strictly prohibited per regulations of Industry Canada. The required antenna impedance is 50 ohms.IMPORTANT NOTE:IC Radiation Exposure Statement:This equipment complies with IC radiation exposure limits set forth for an uncontrolled environment. End users must follow the specific operating instructions for satisfying RF exposure compliance. This equipment should be installed and operated with minimum distance 20cm between the radiator & your body. This transmitter must not be co-located or operating in conjunction with any other antenna or transmitter.Règlement d’Industry CanadaLes conditions de fonctionnement sont sujettes à deux conditions:1) Ce périphérique ne doit pas causer d’interférence et.2) Ce périphérique doit accepter toute interférence, y compris les interférences pouvant perturber le bon fonctionnement de ce périphérique.The Class [B] digital apparatus meets all requirements of the Canadian Interference-Causing Equipment Regulation. Cet appareil numerique de la class [B] respecte toutes les exigences du Reglement sur le materiel brouilleur du Canada.](https://usermanual.wiki/D-Link/DIR615C1/User-Guide-983988-Page-116.png)