D Link DP-311U Wireless USB Print Server User Manual DP300U manual 021203
D Link Corporation Wireless USB Print Server DP300U manual 021203
UserManual.wiki
>
D Link
>
DP-311U User Manual
>
users manual 1
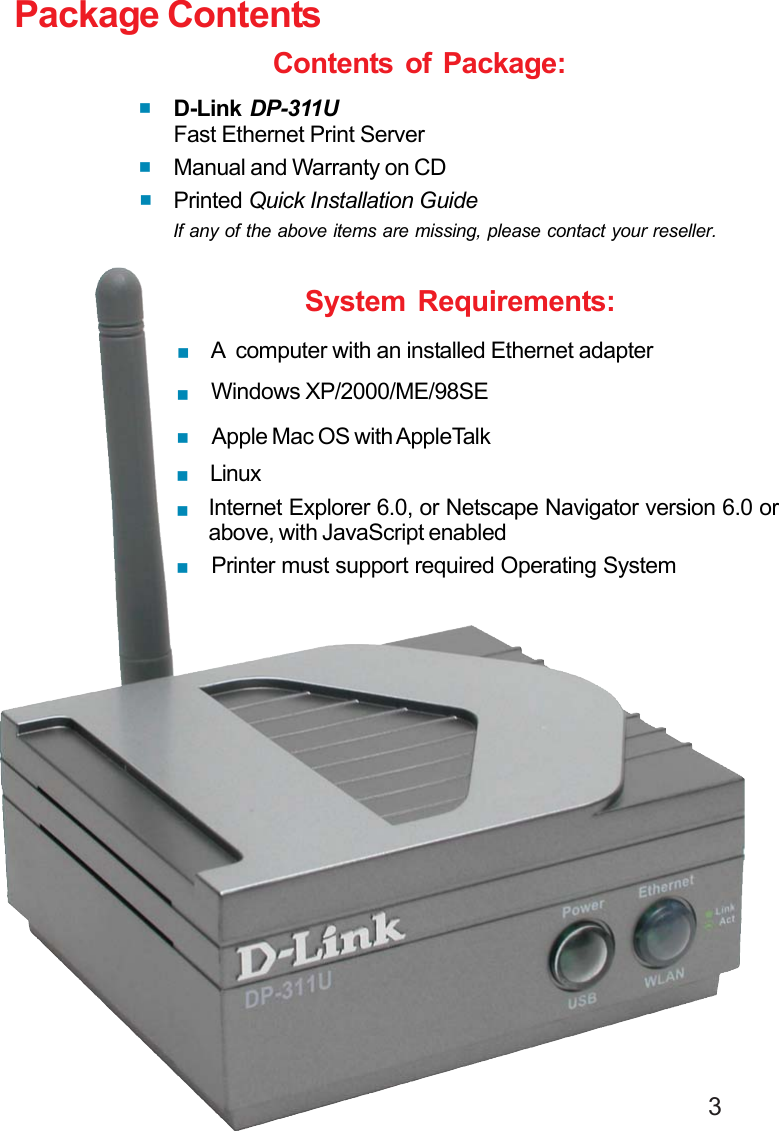
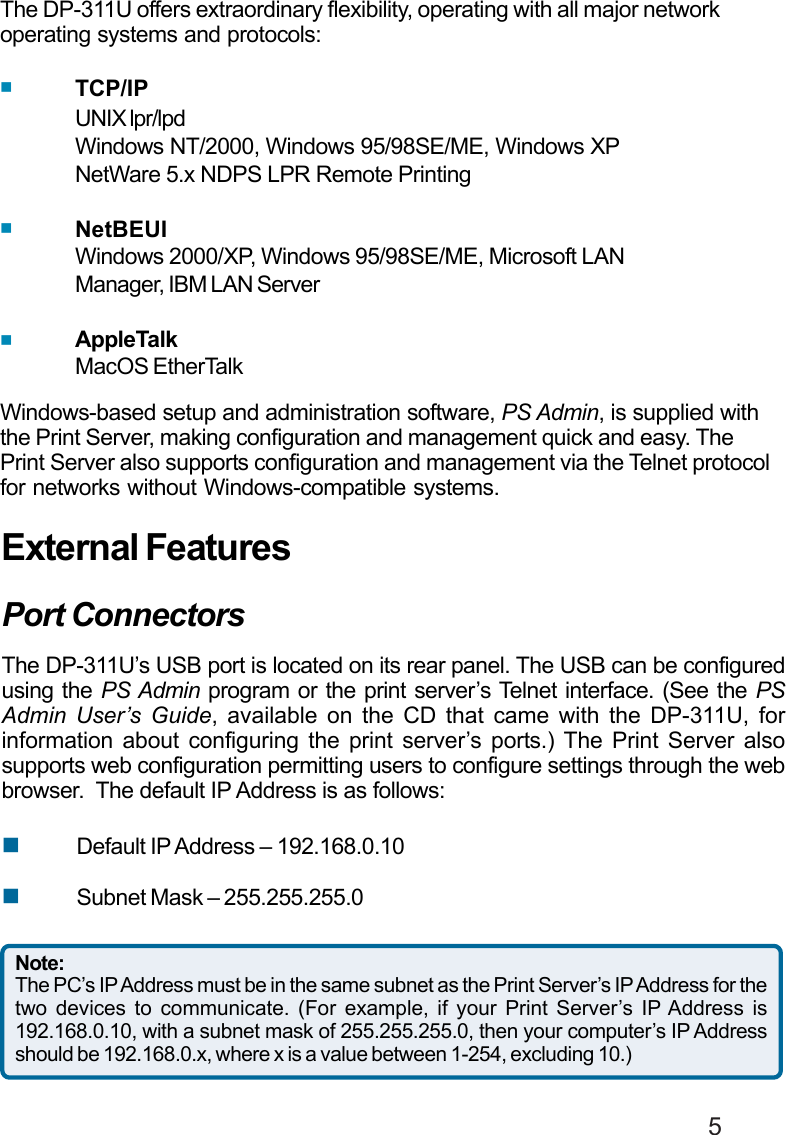
Contents
1.
users manual 1
2.
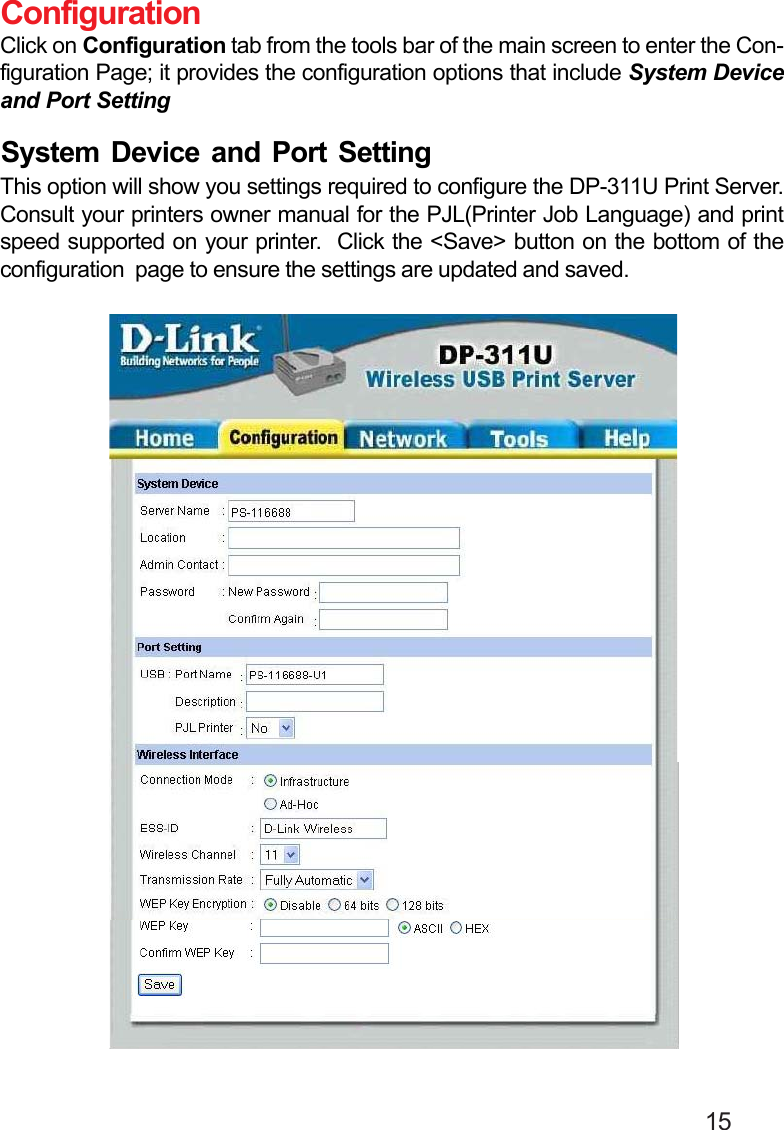
users manual 2
users manual 1
Navigation menu
Upload a User Manual
Namespaces
Wiki Guide
HTML
PDF
Info
Views
User Manual
Discussion / Help
Navigation
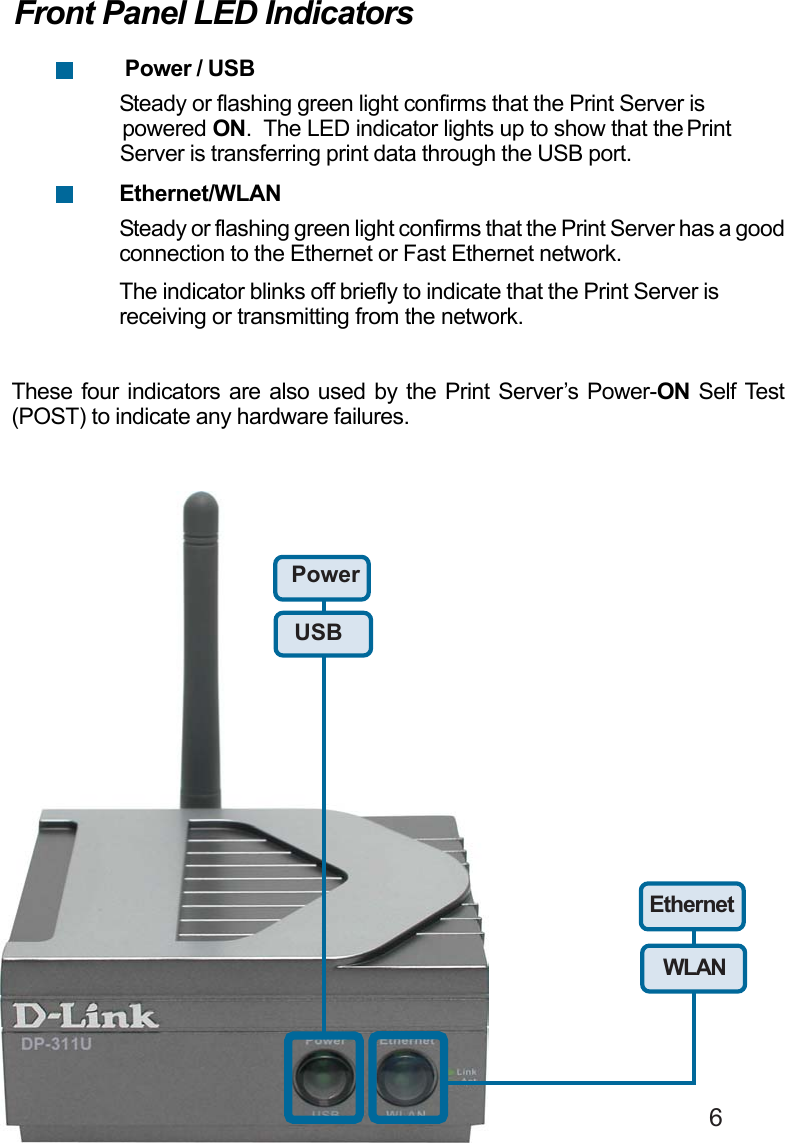

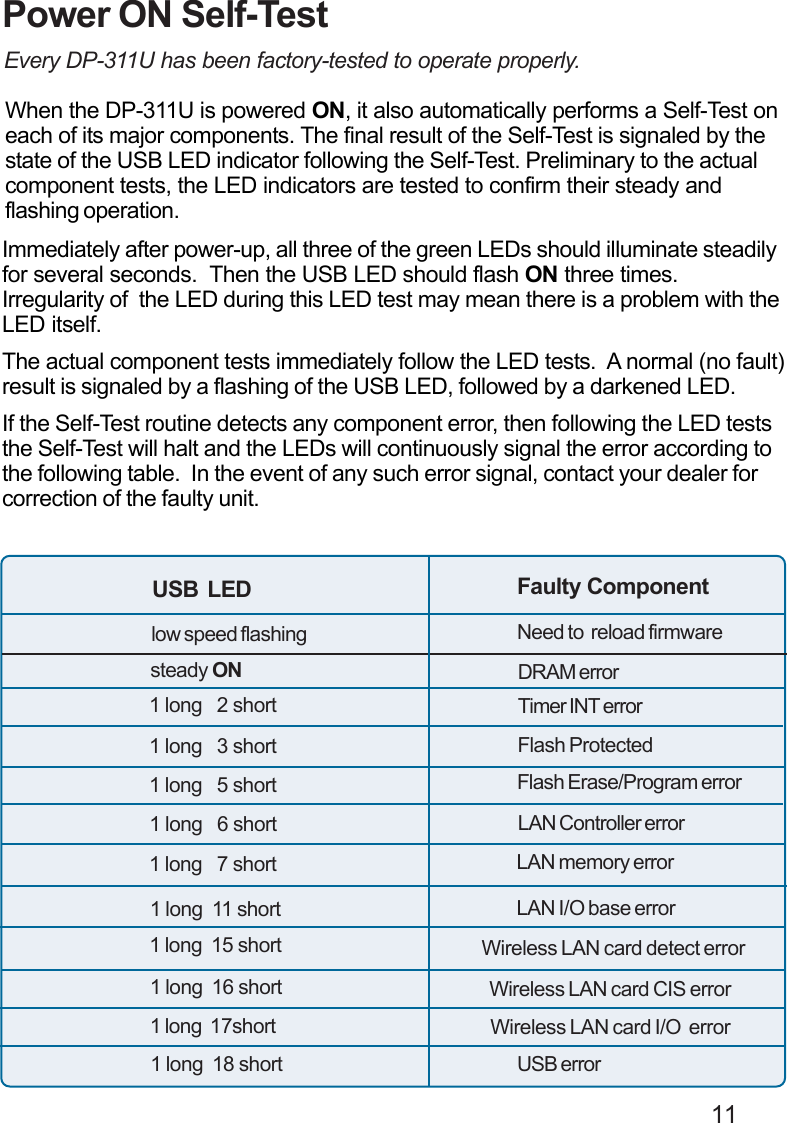
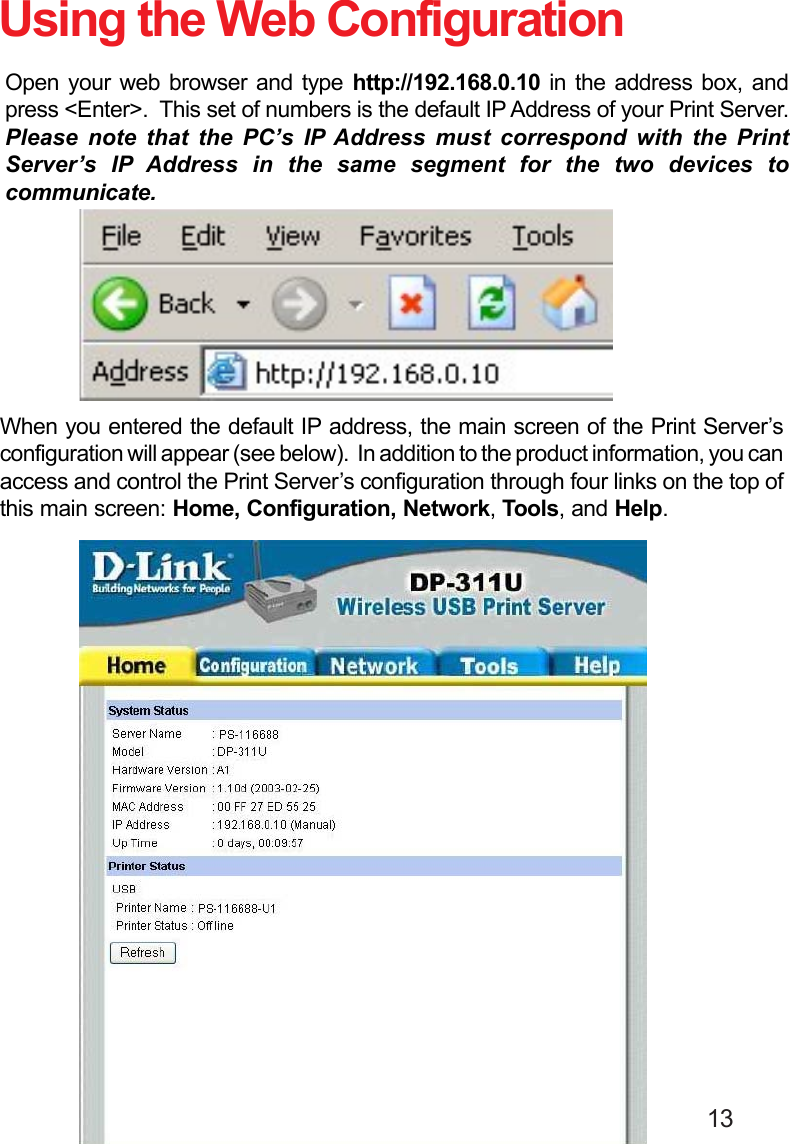
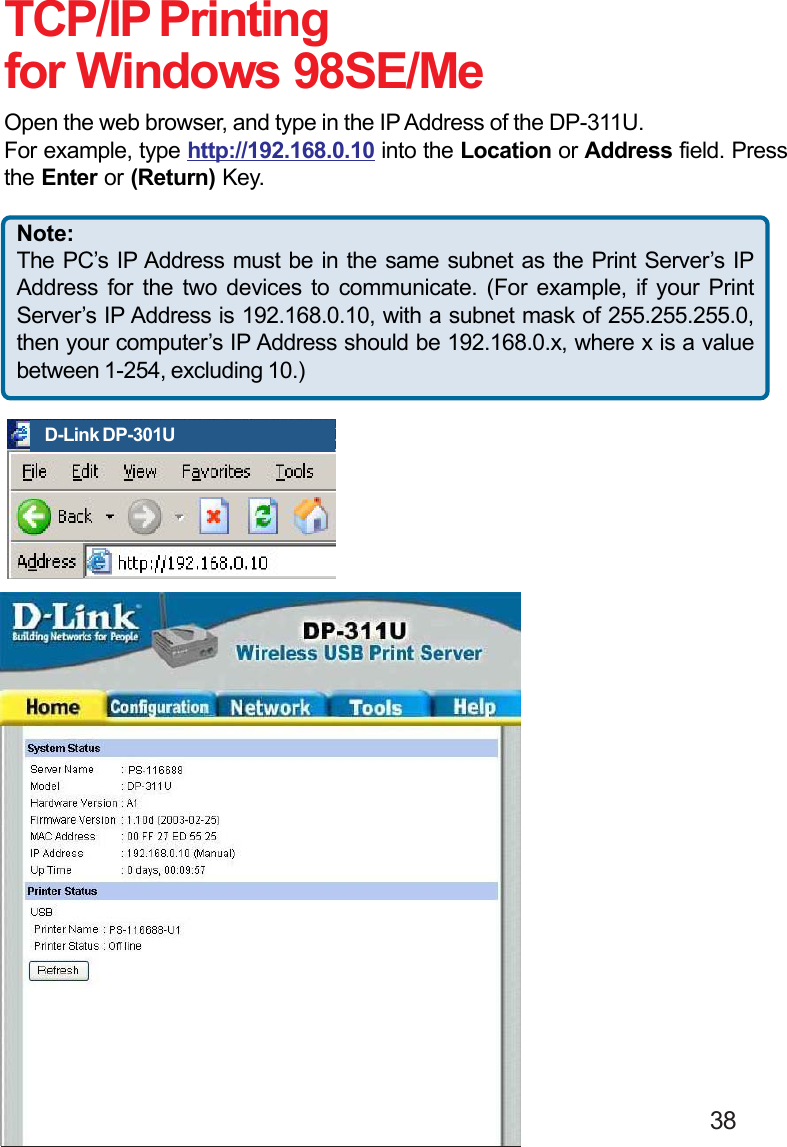
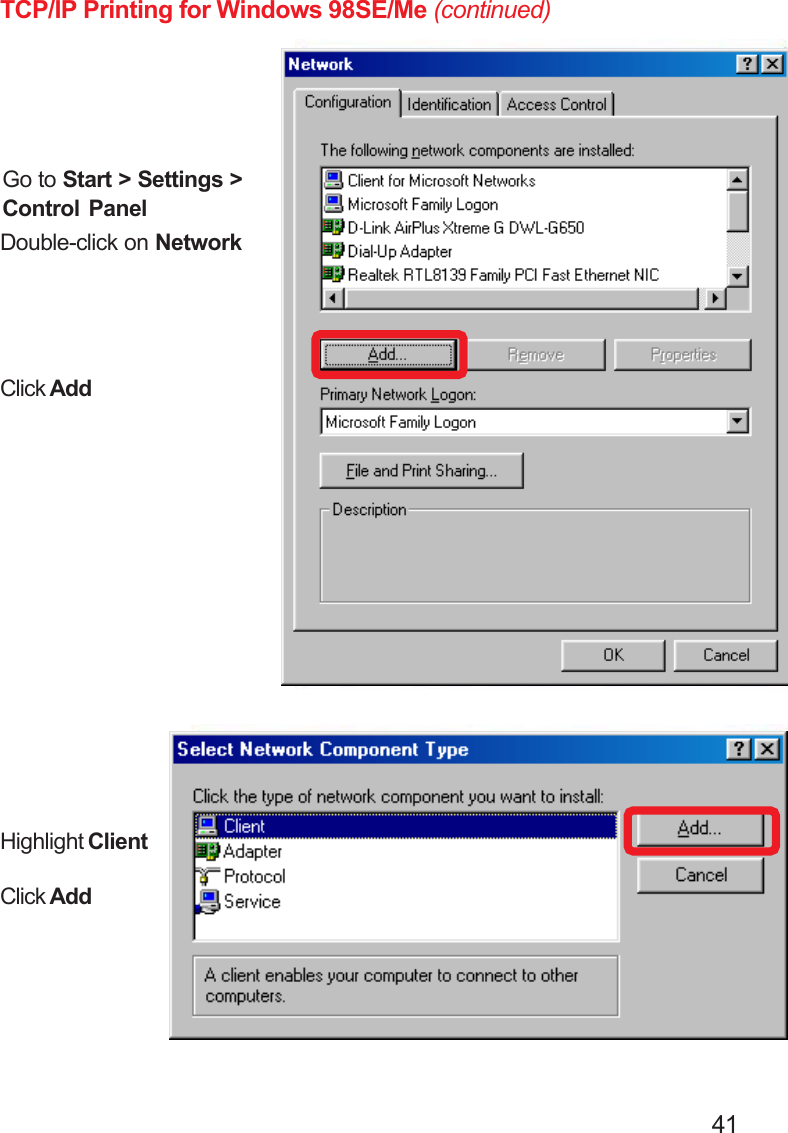
![14HomeClick on Home tab from the tools bar of the main screen to display information ofthe DP-311U’s System Status and Printer Status.When you choose and enter the Home tab, it will show you the system information(see below), providing general information regarding the Print Server. Click on the<Refresh> button to acquire the most updated information. Once a printer isconnected to the Print Server, the Printer Status will show [Online].System Status and Printer StatusServer Name: The name assigned to the Print Server.Model: The model of the Print Server.Hardware Version: The version of the hardware on the Print Server.Firmware Version: The version of the firmware and release date on thePrint Server.MAC Address: The MAC address of the Ethernet port.IP Address: The IP Address of the Print Server.Up Time: The length of time the Print Server has been up.](https://usermanual.wiki/D-Link/DP-311U.users-manual-1/User-Guide-328903-Page-14.png)