D Link IR615E5 Wireless N Router User Manual
D Link Corporation Wireless N Router
UserManual.wiki
>
D Link
>
IR615E5 User Manual
User Manual
Navigation menu
Upload a User Manual
Namespaces
Wiki Guide
HTML
PDF
Info
Views
User Manual
Discussion / Help
Navigation
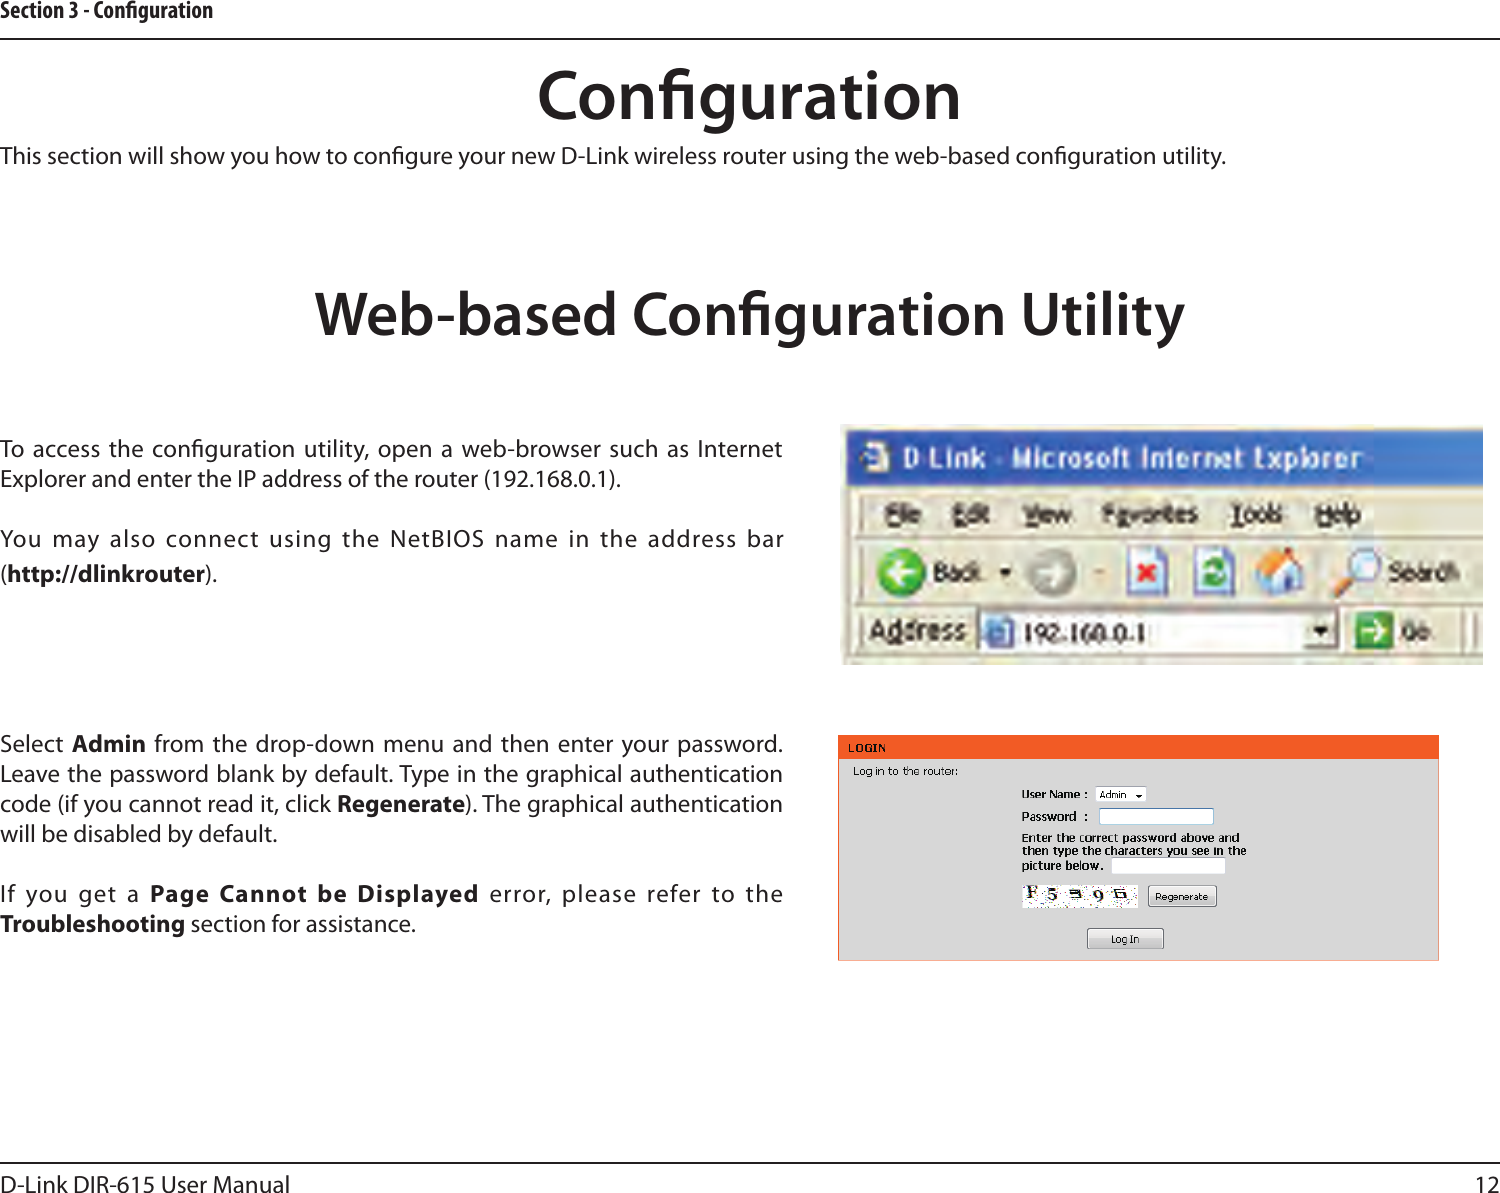


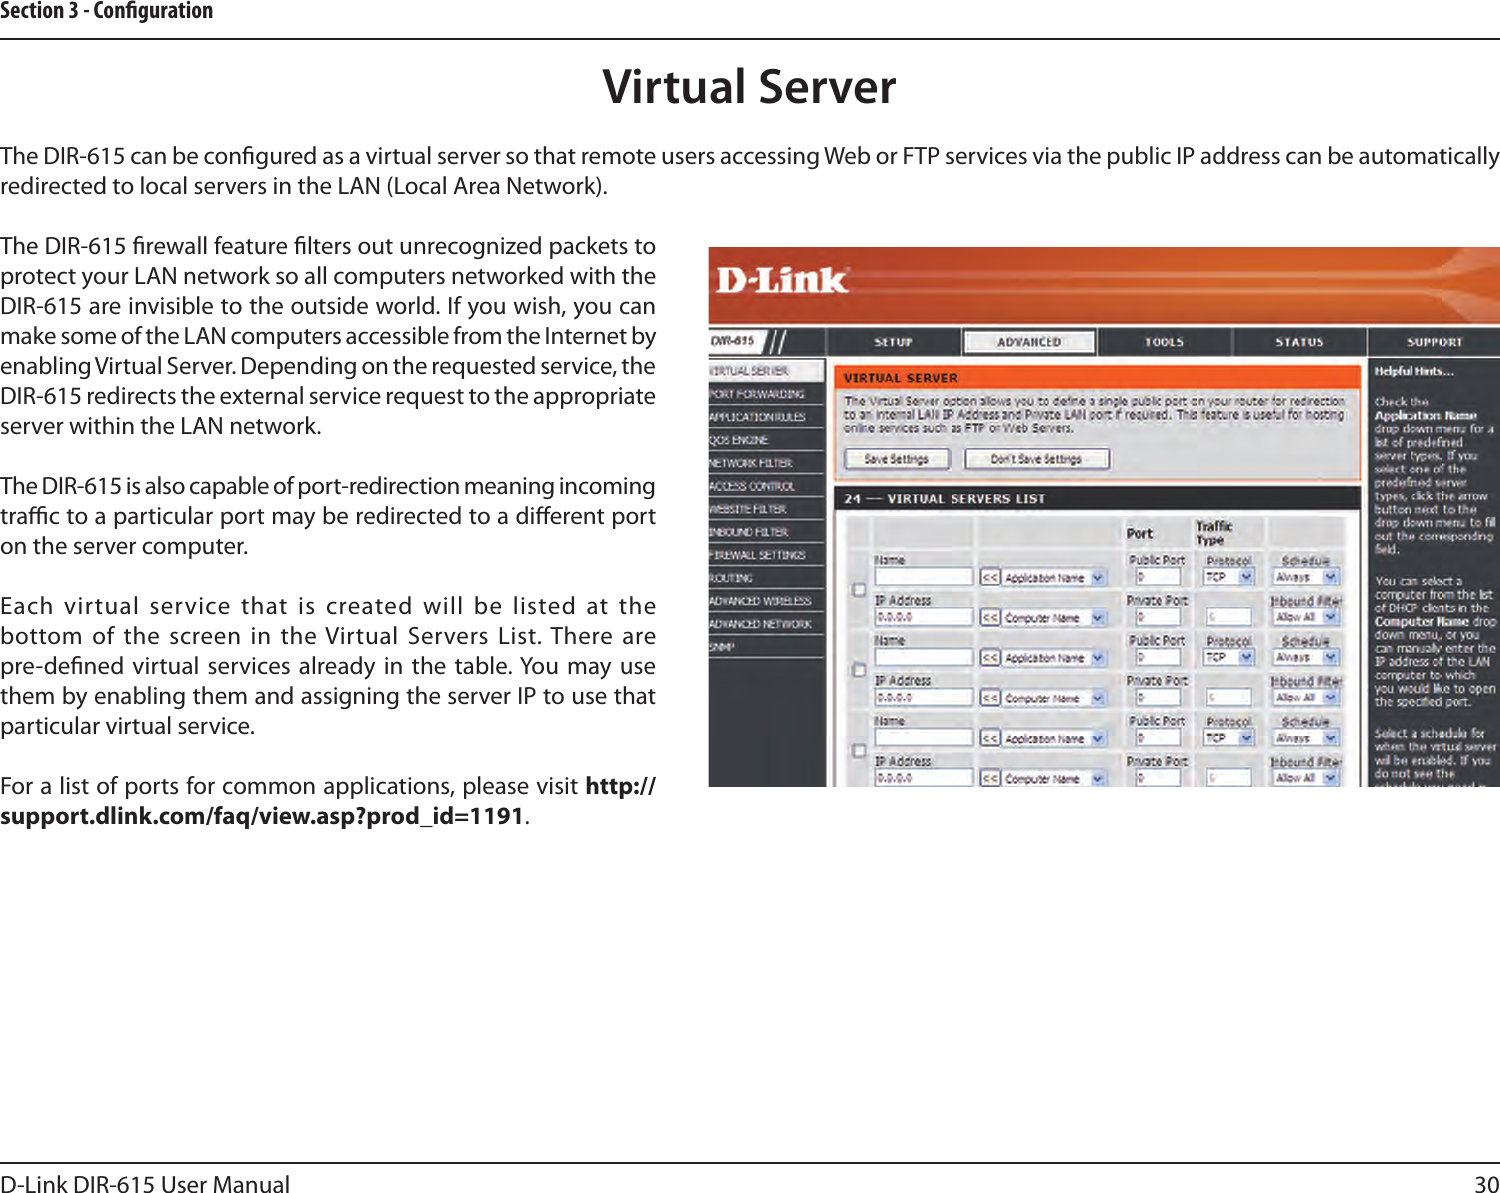

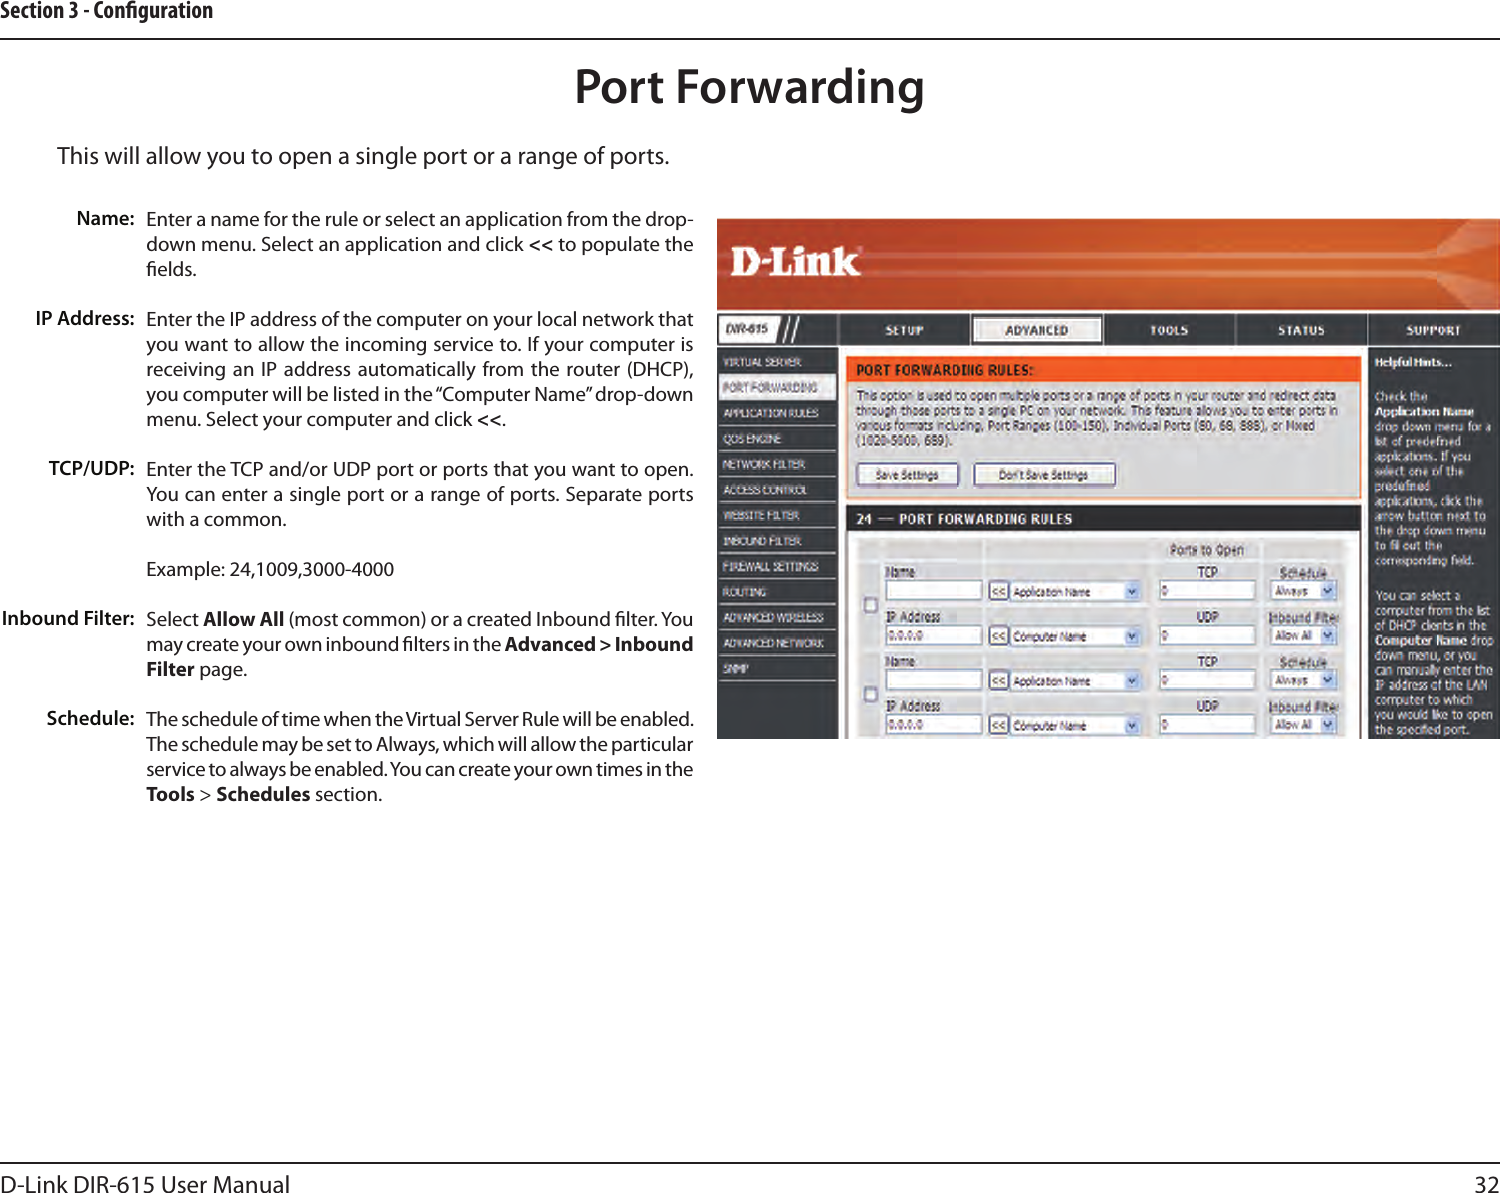
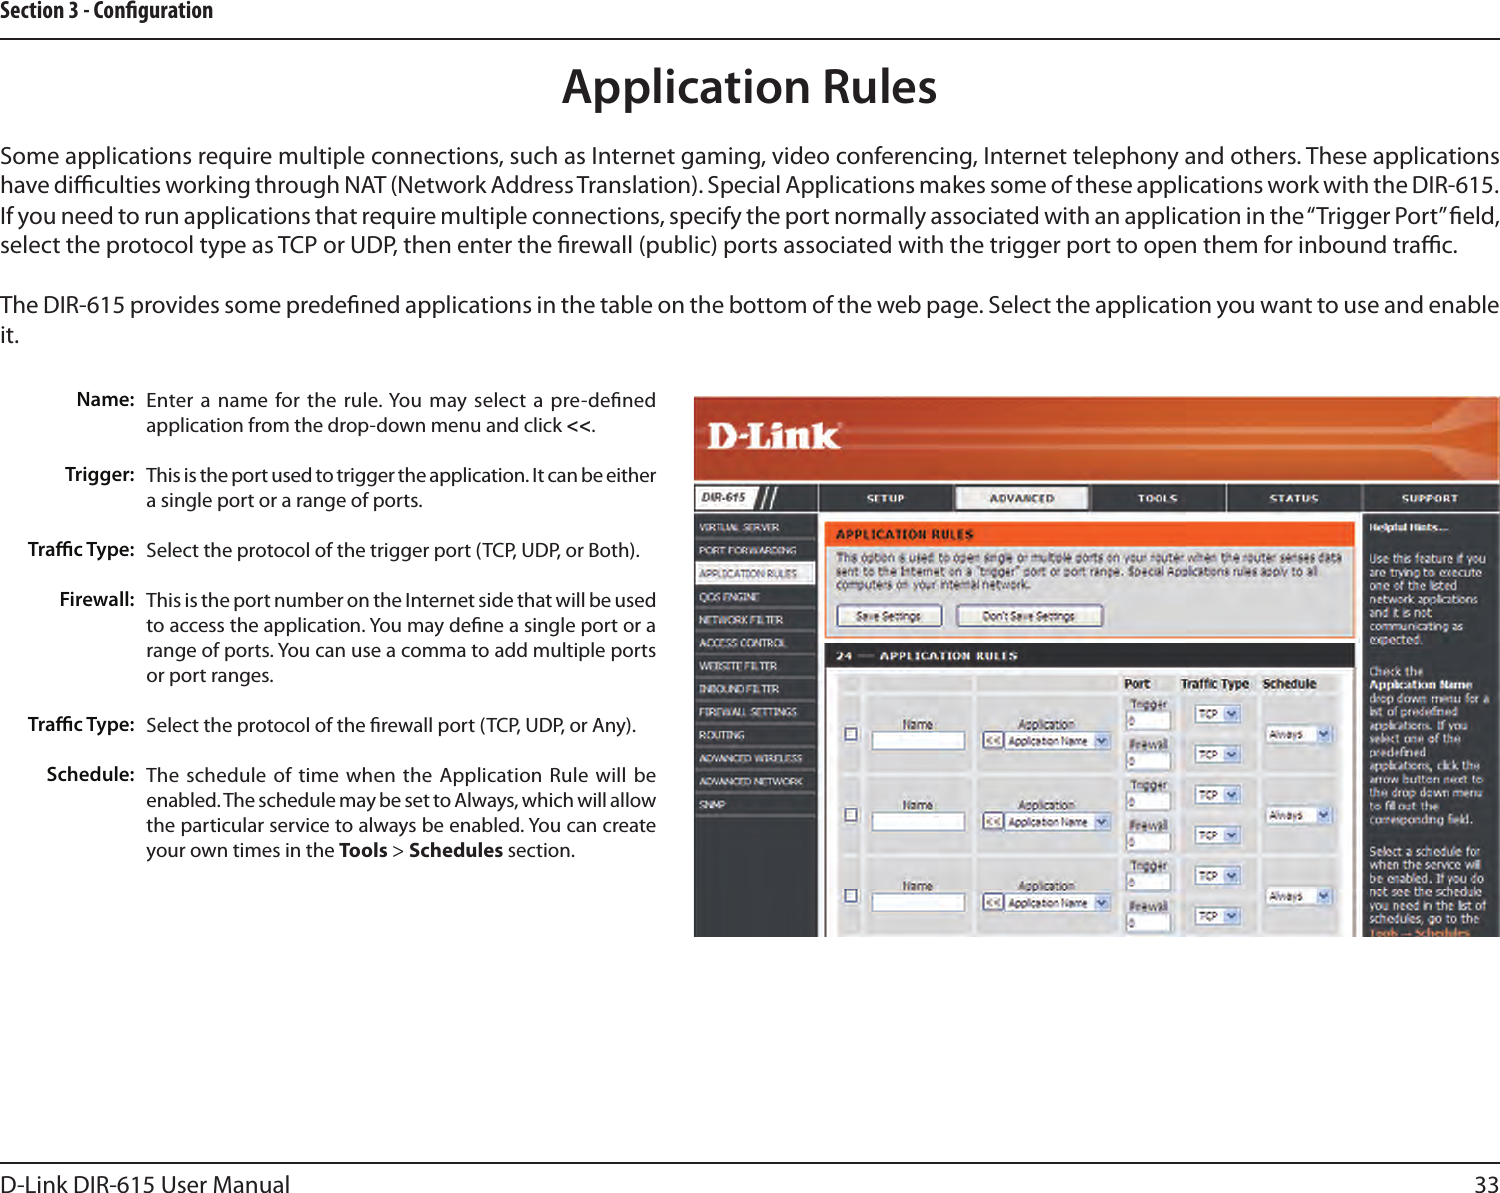
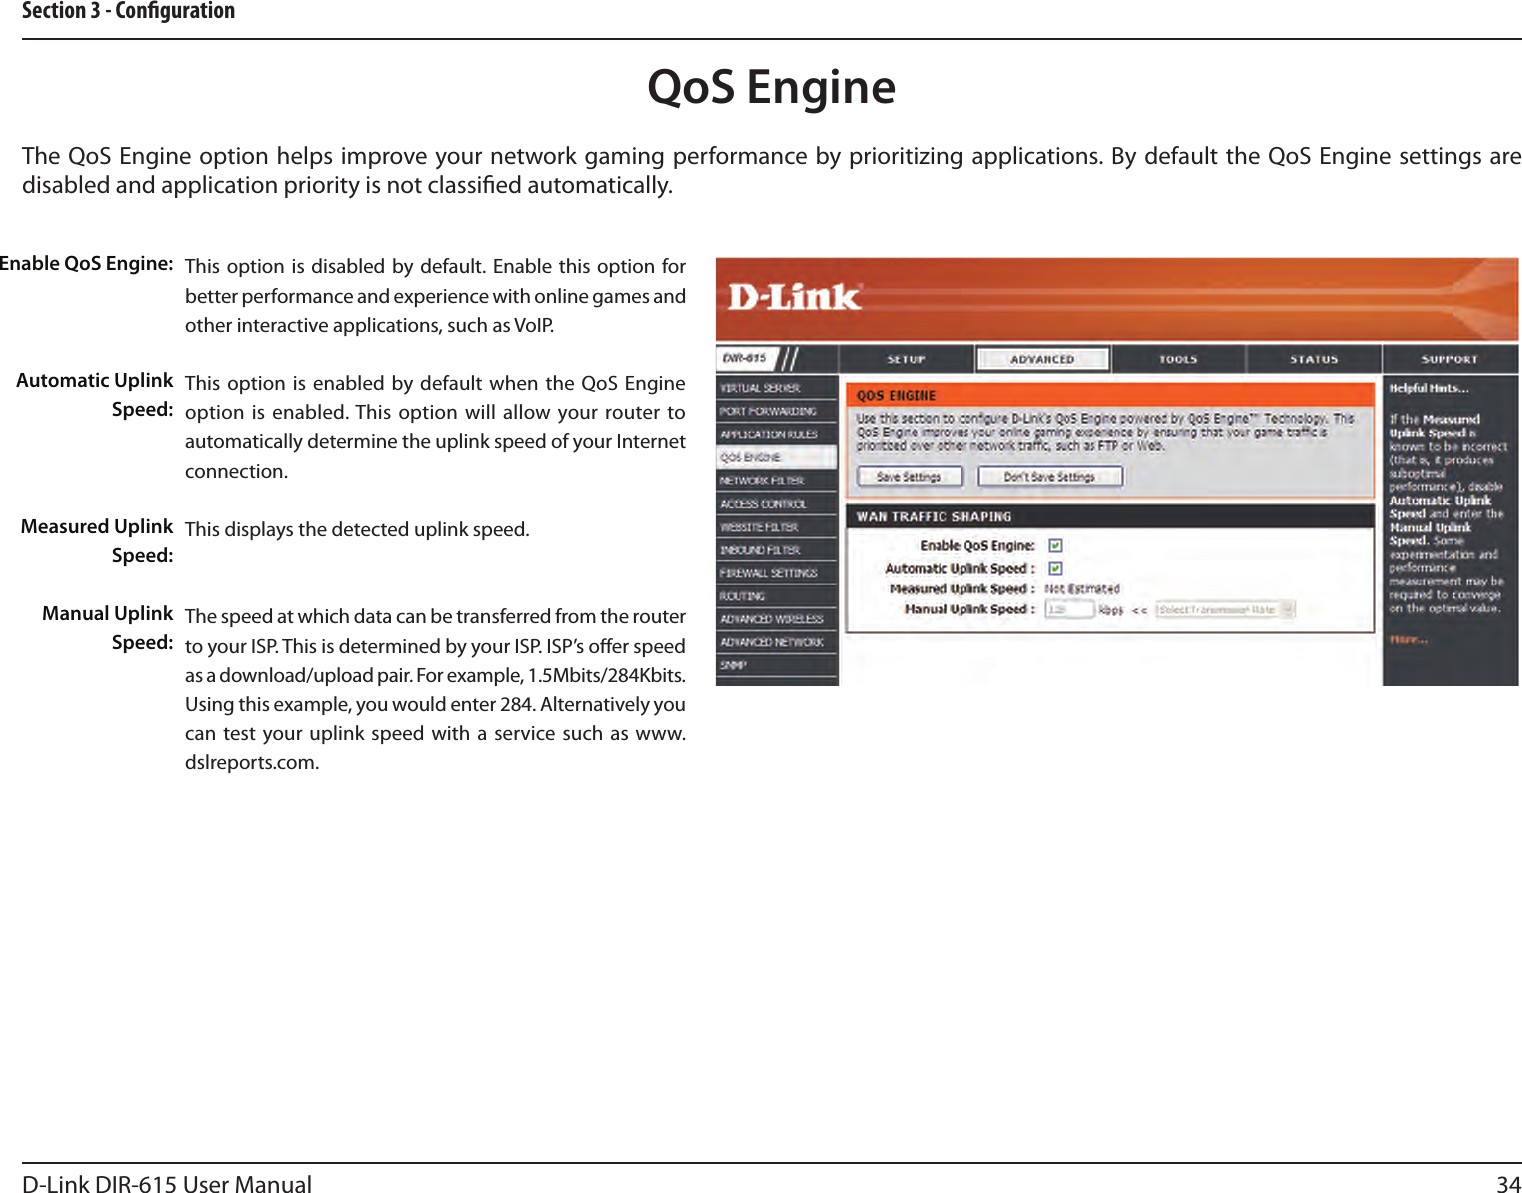
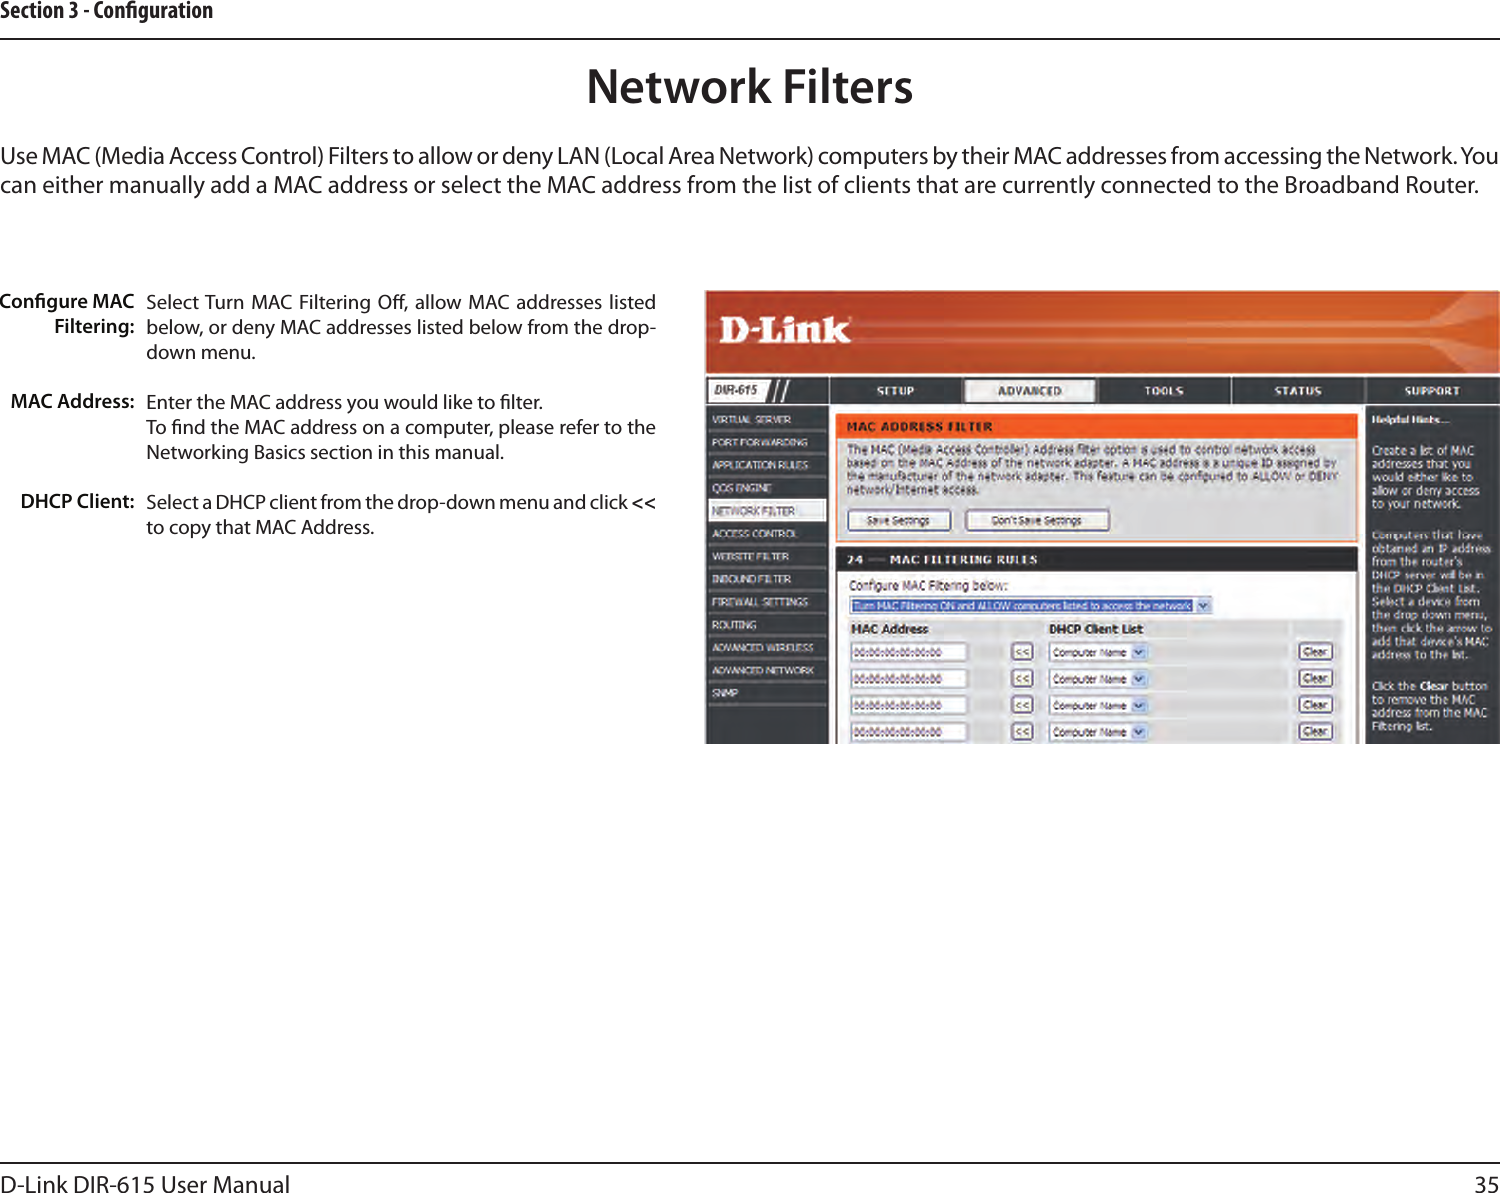
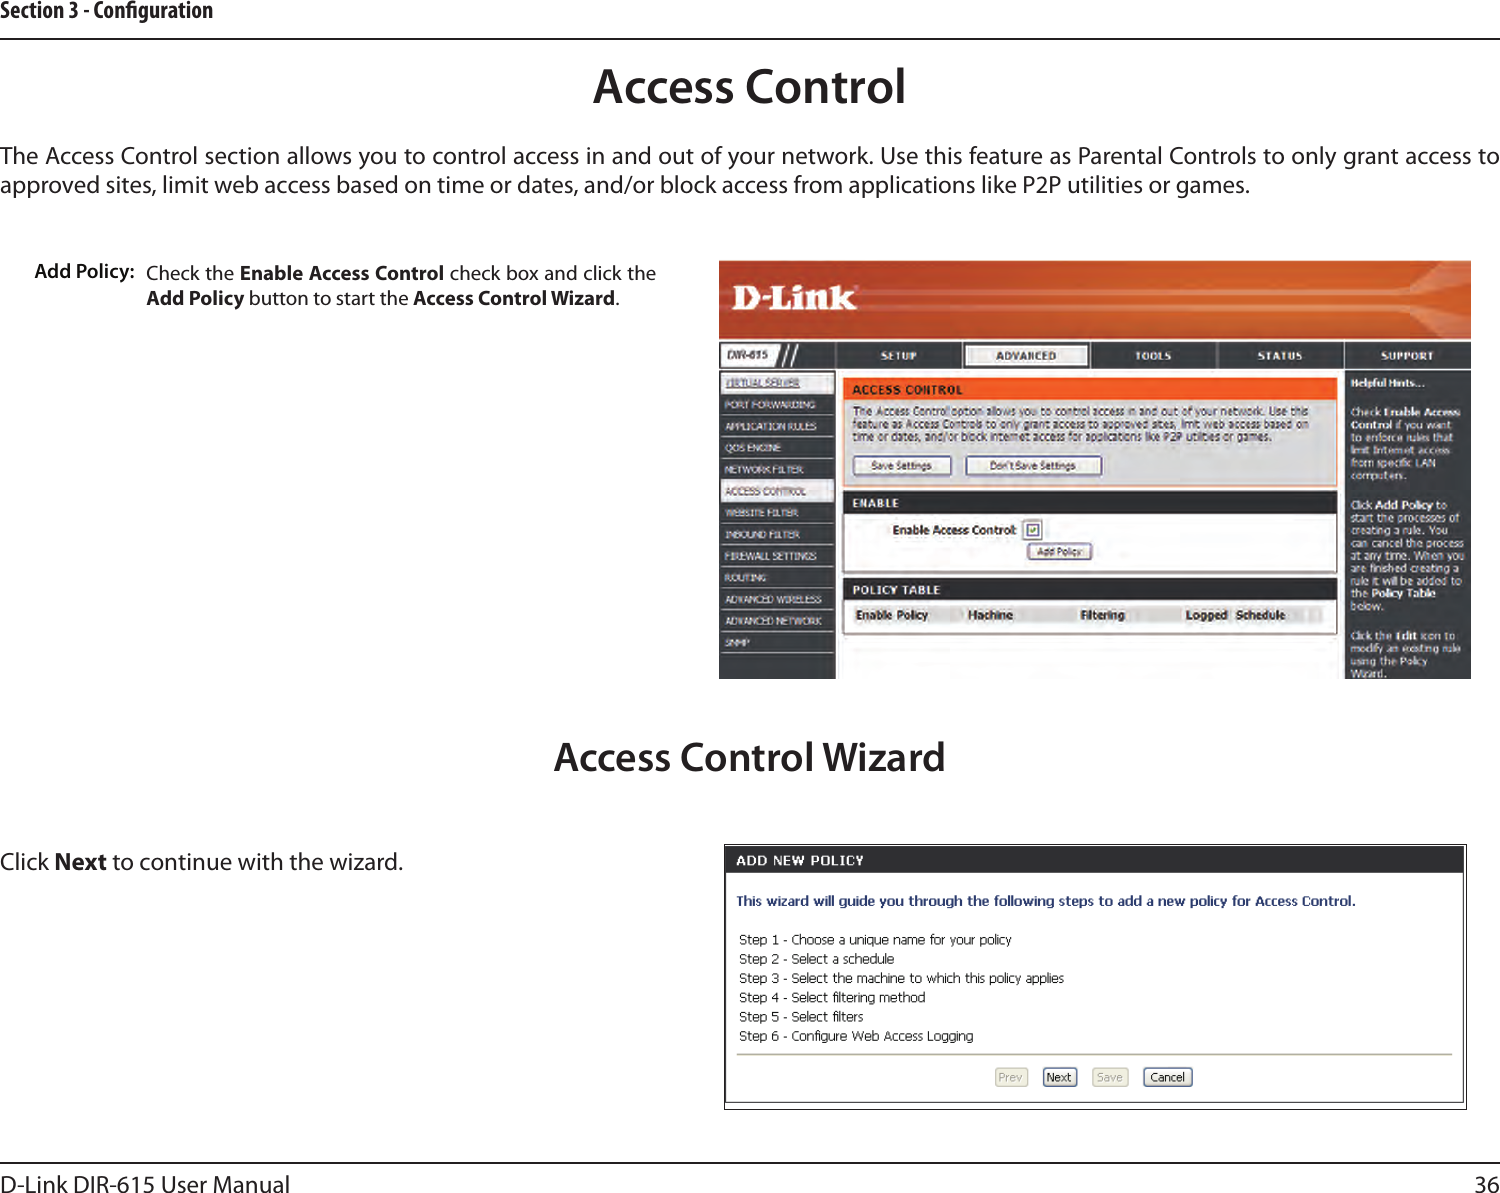
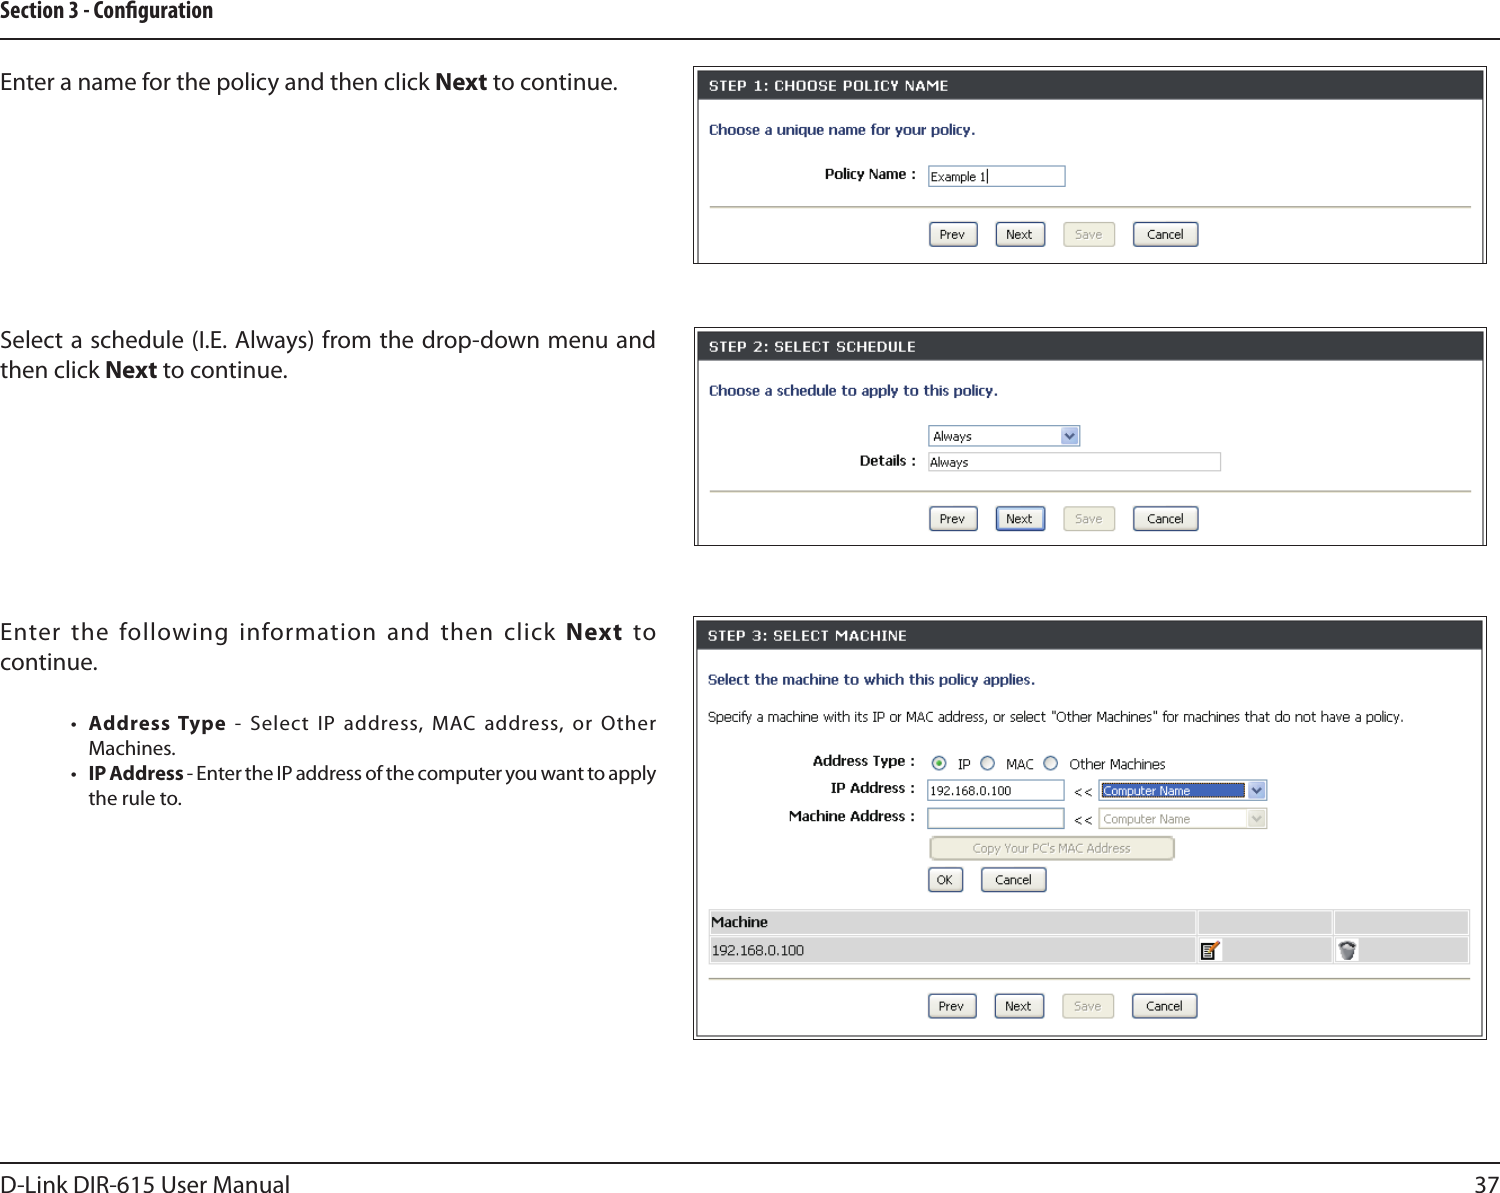
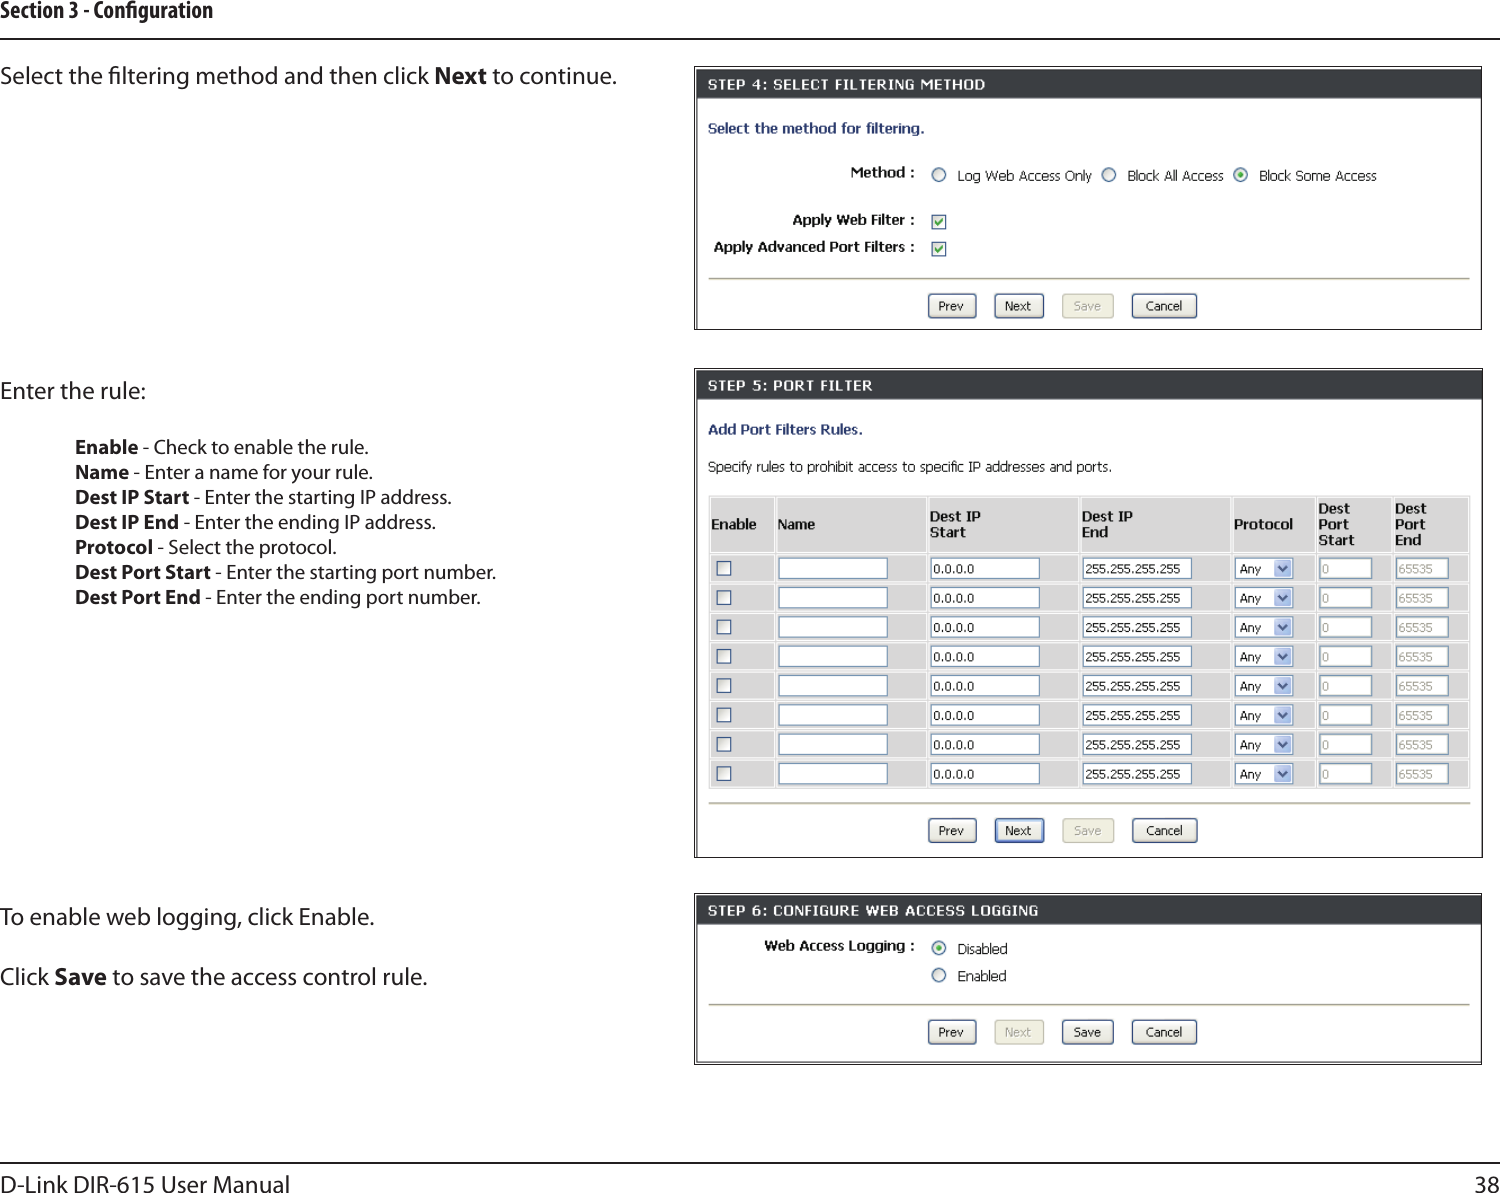
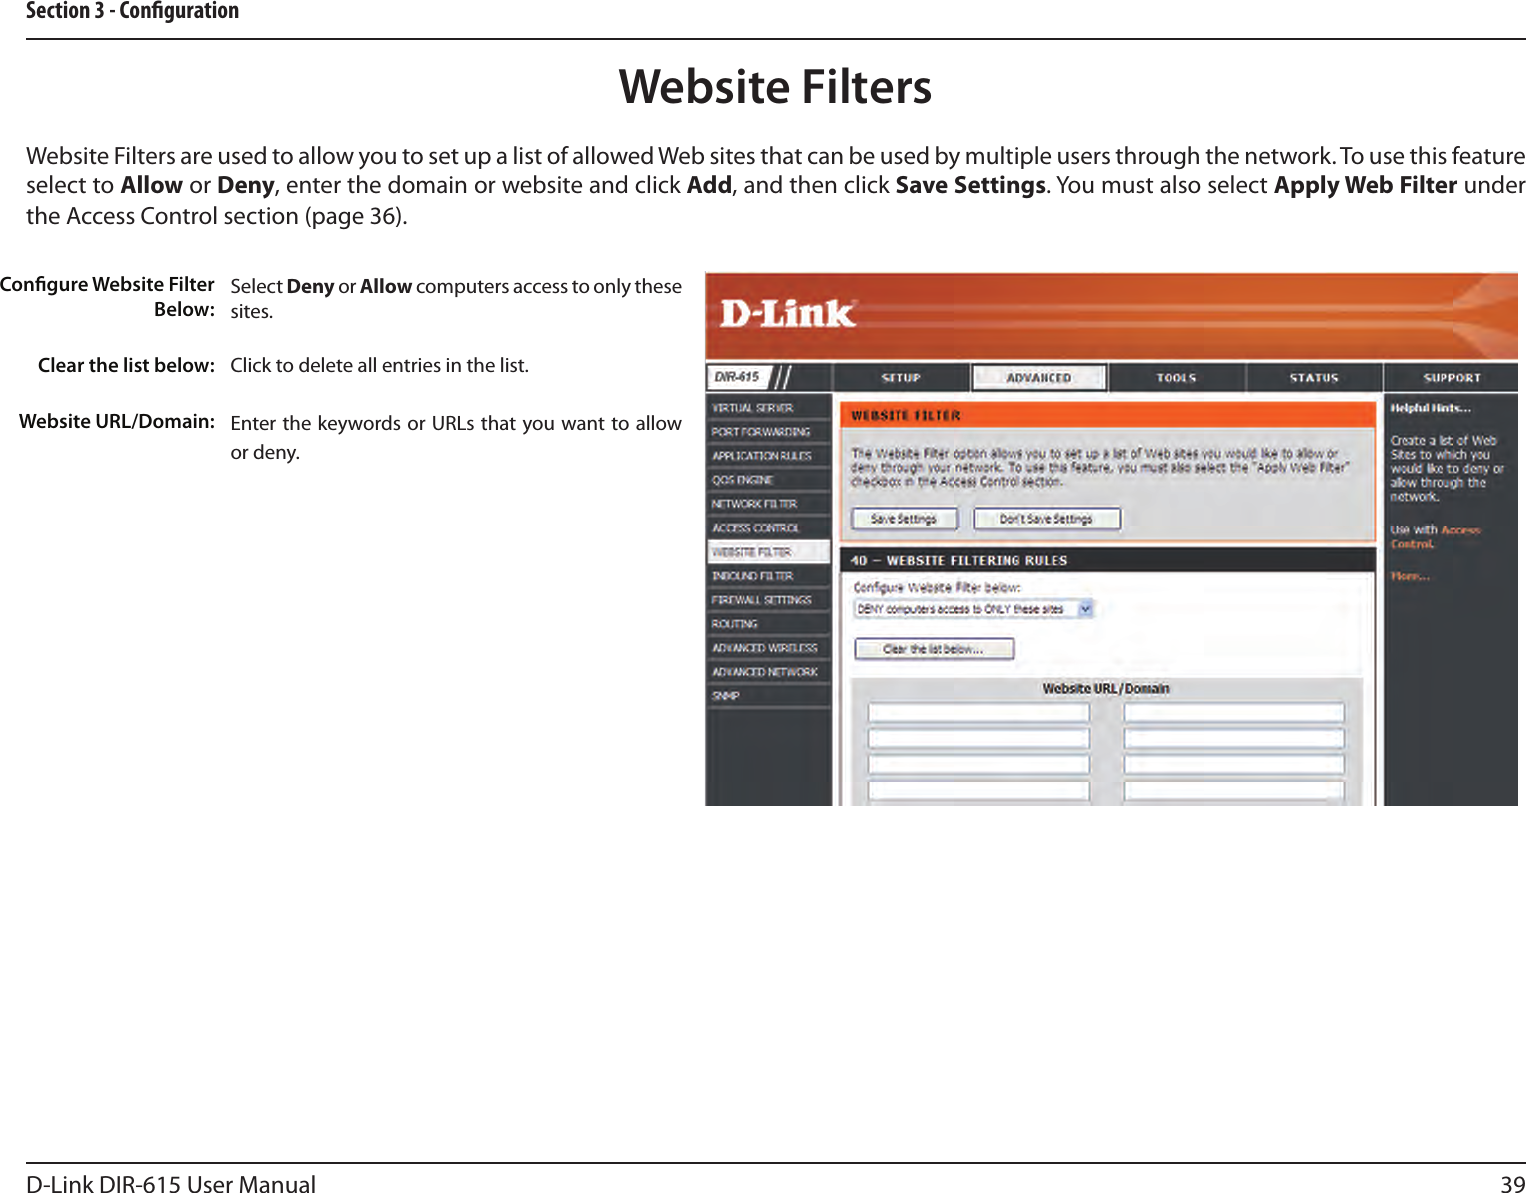

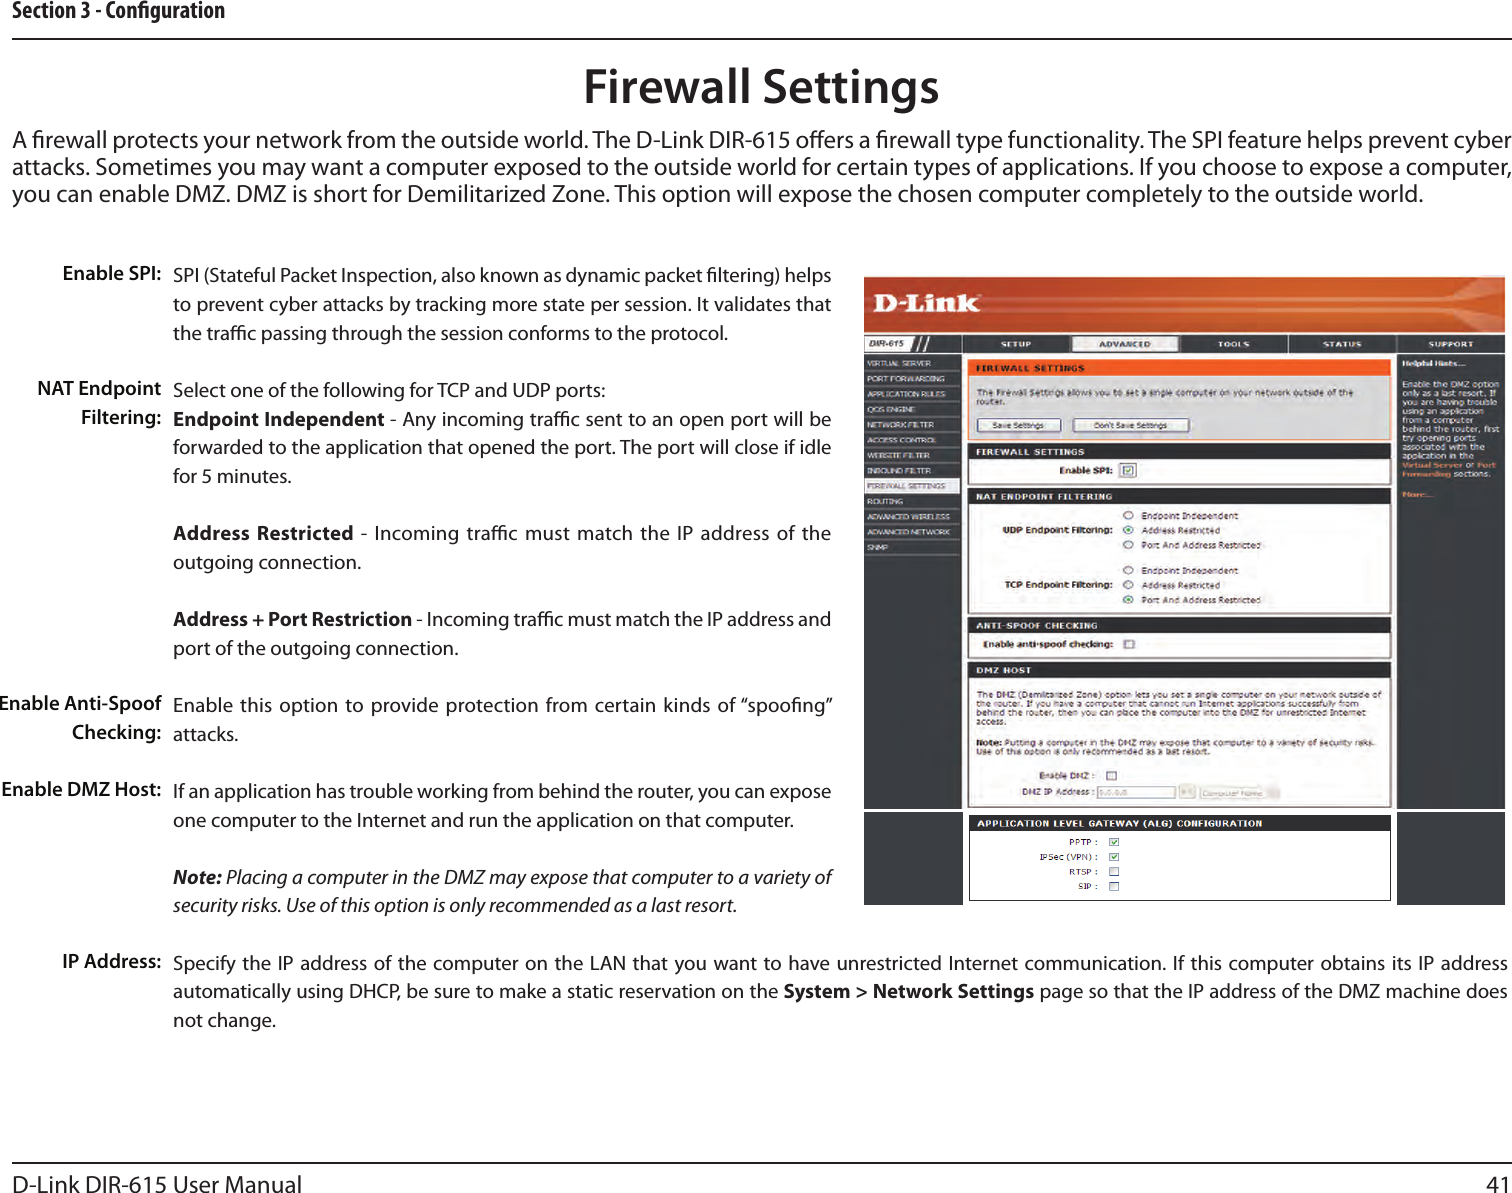
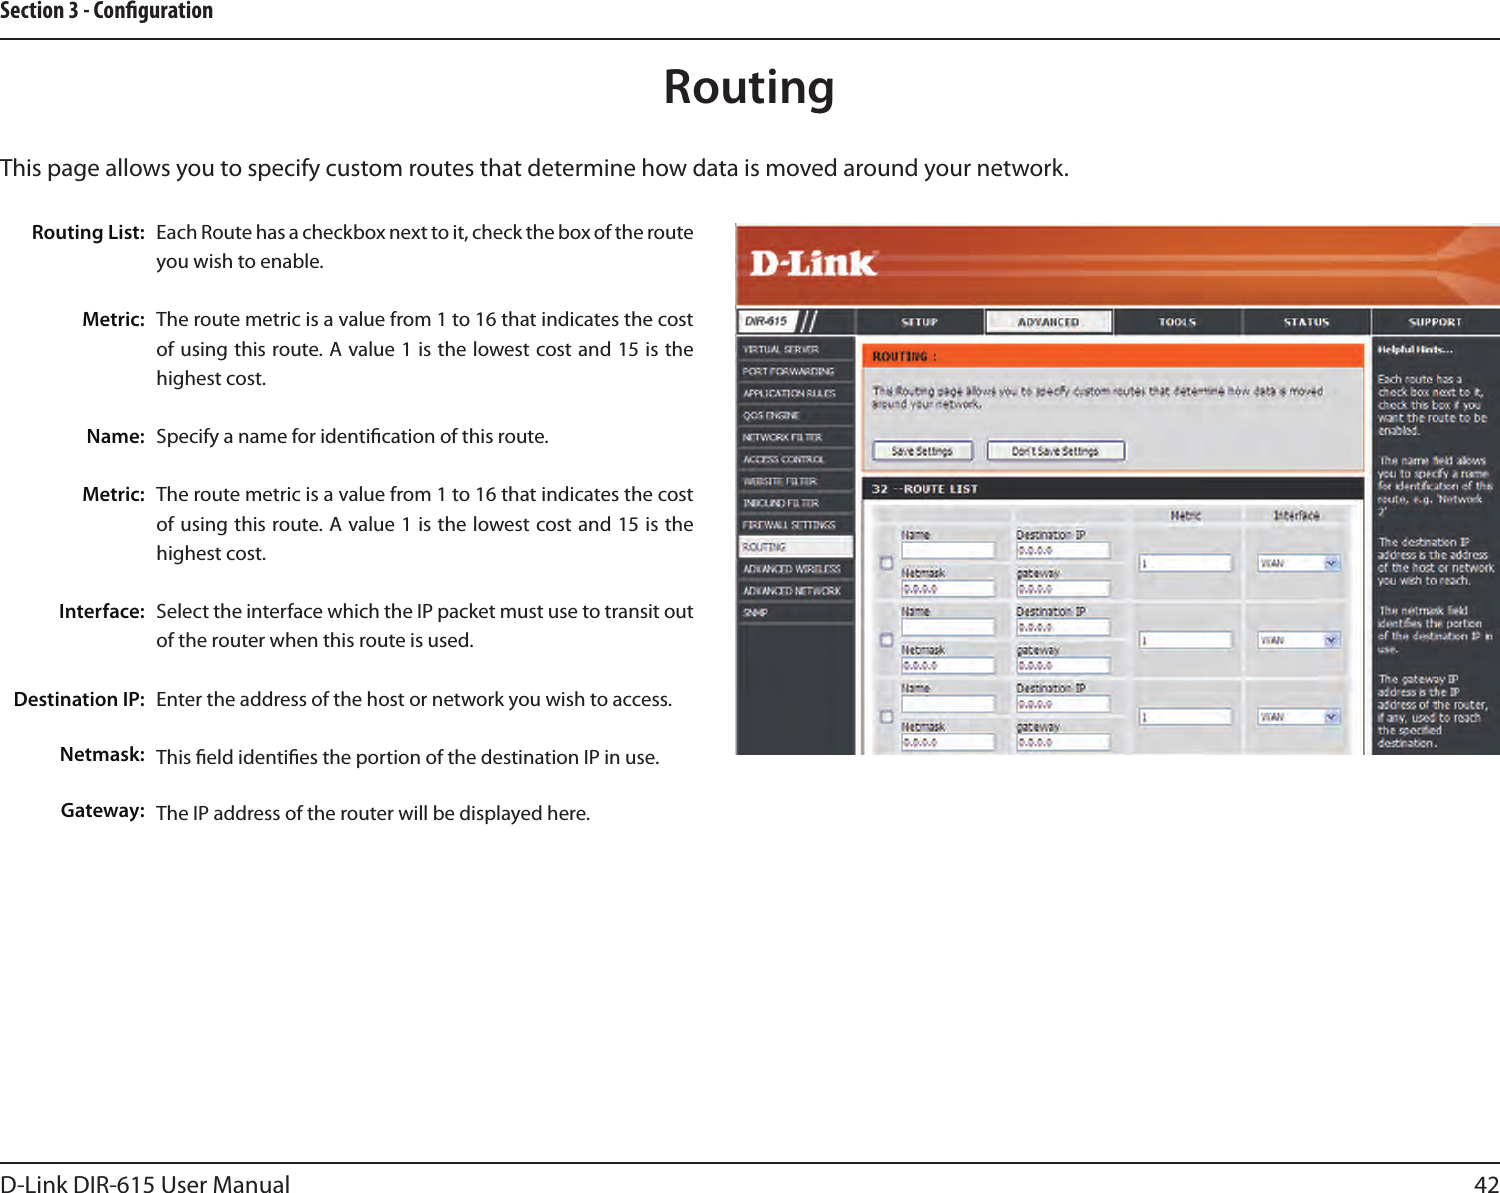
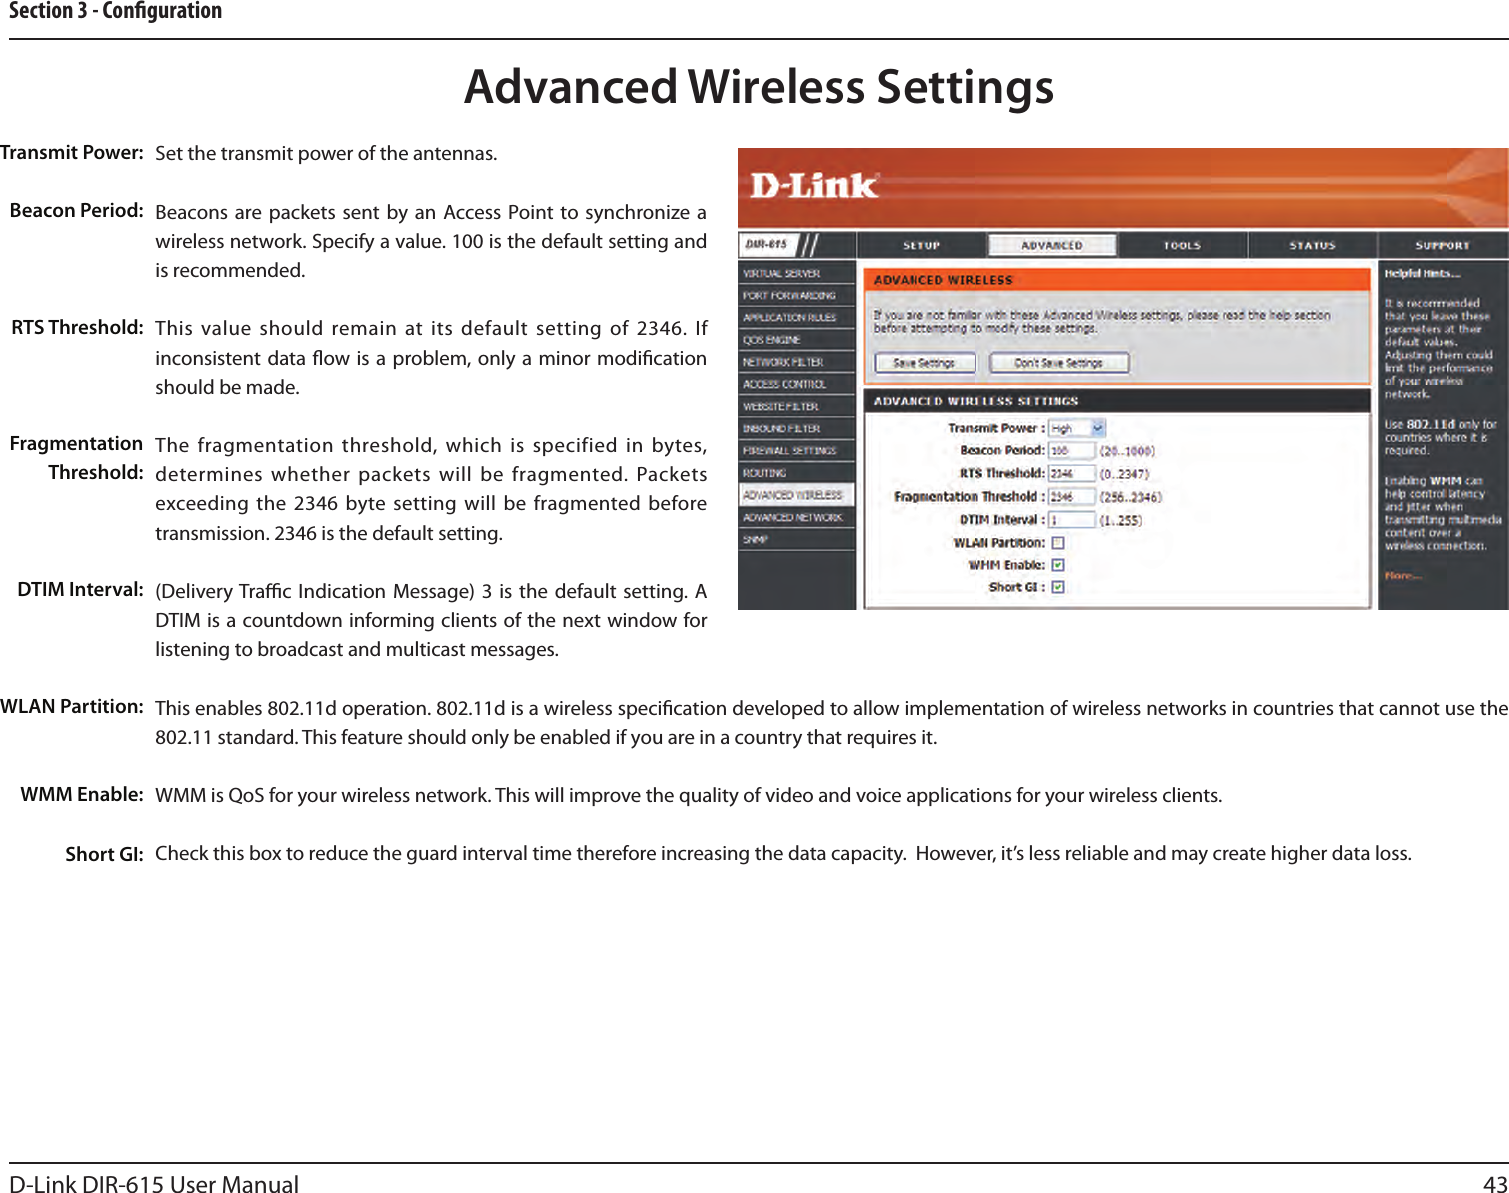
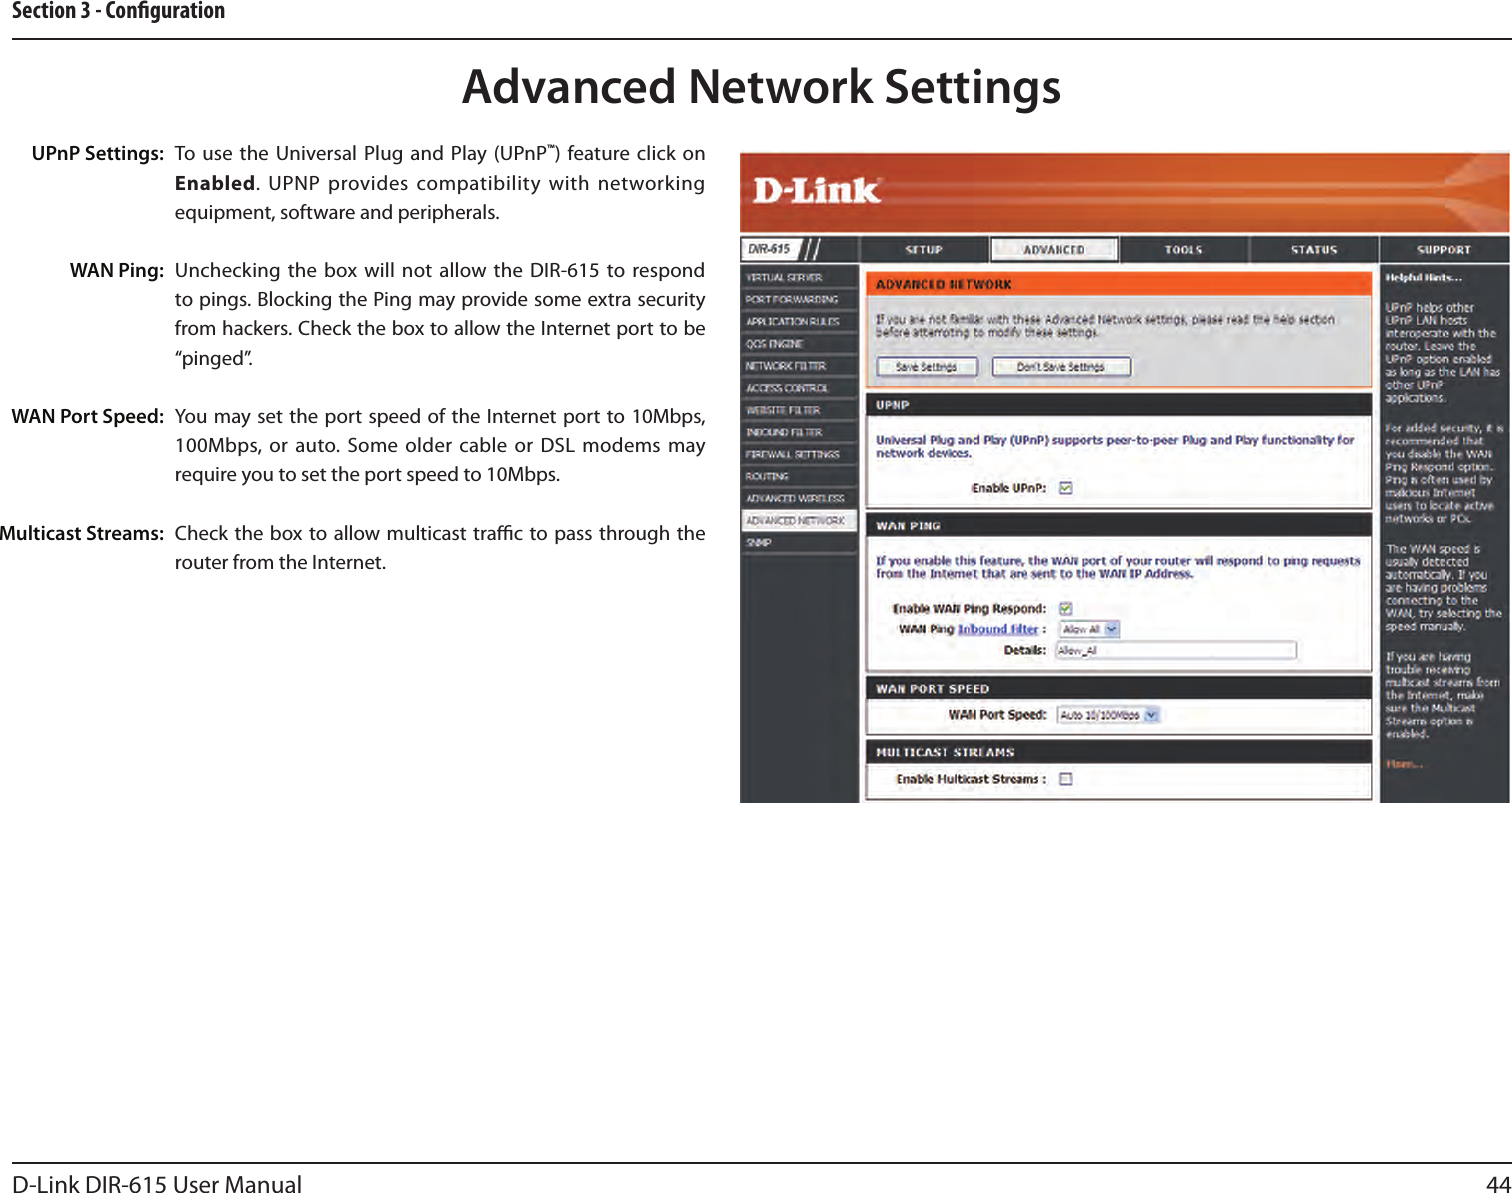
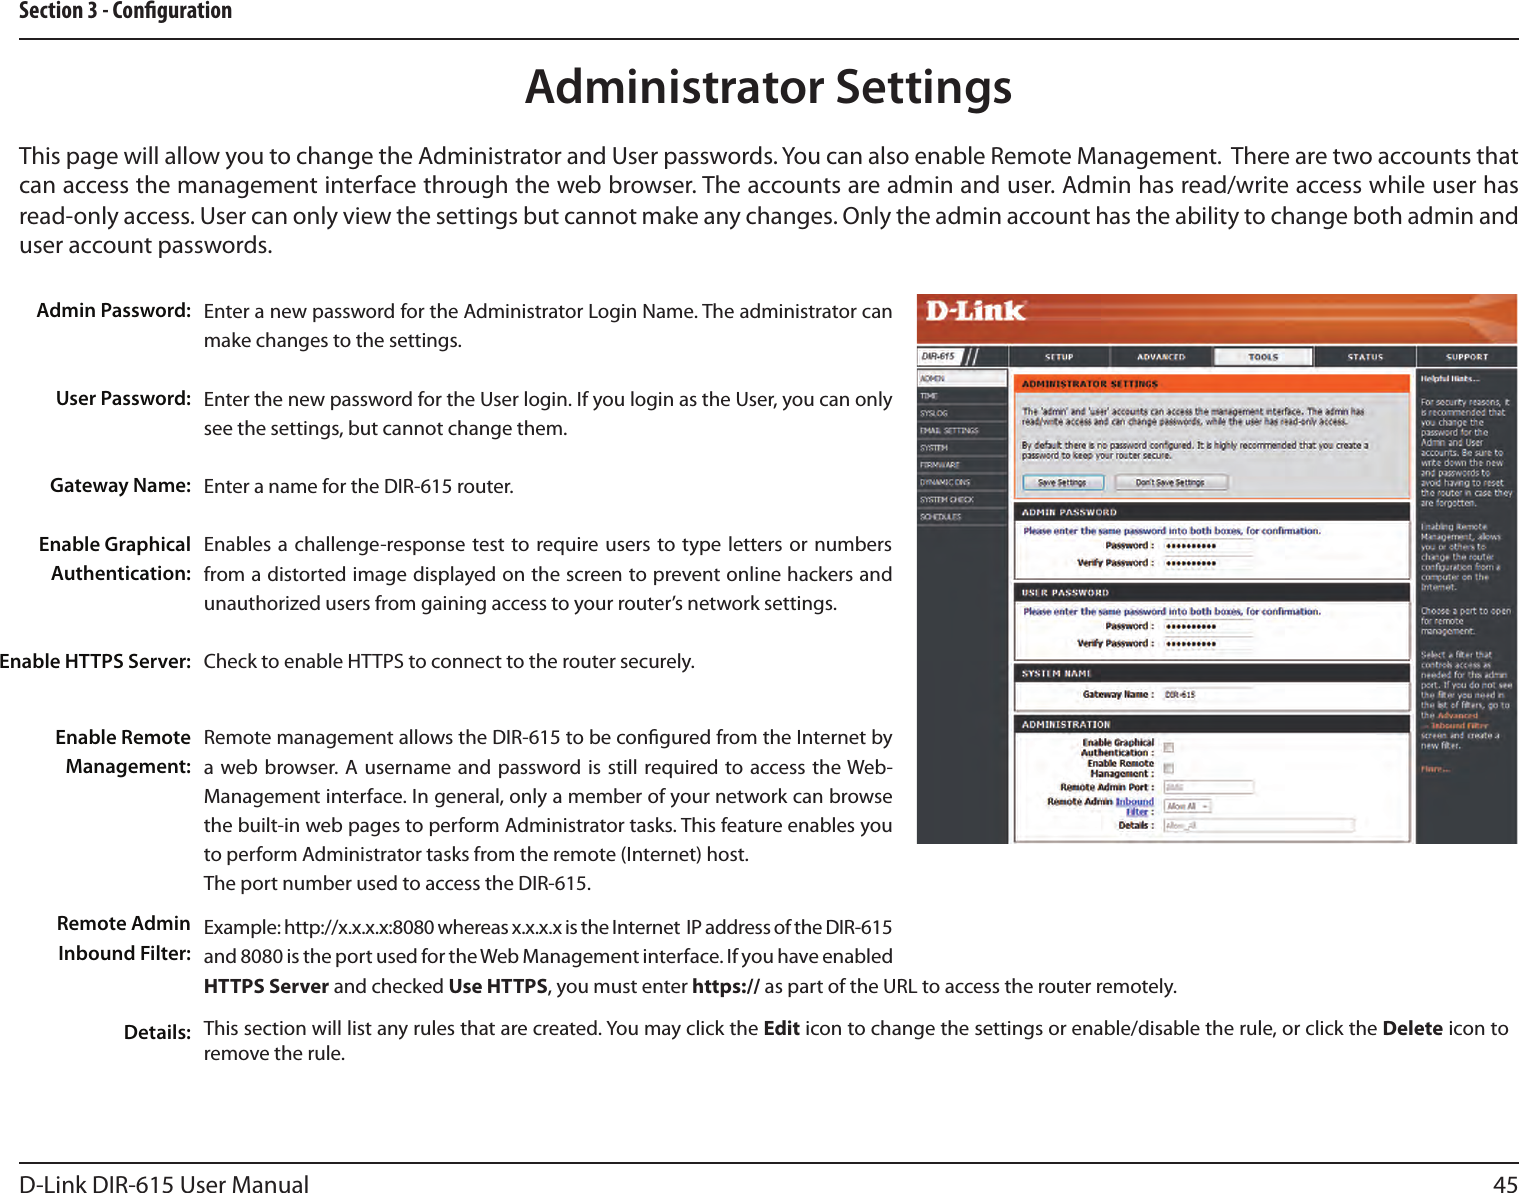
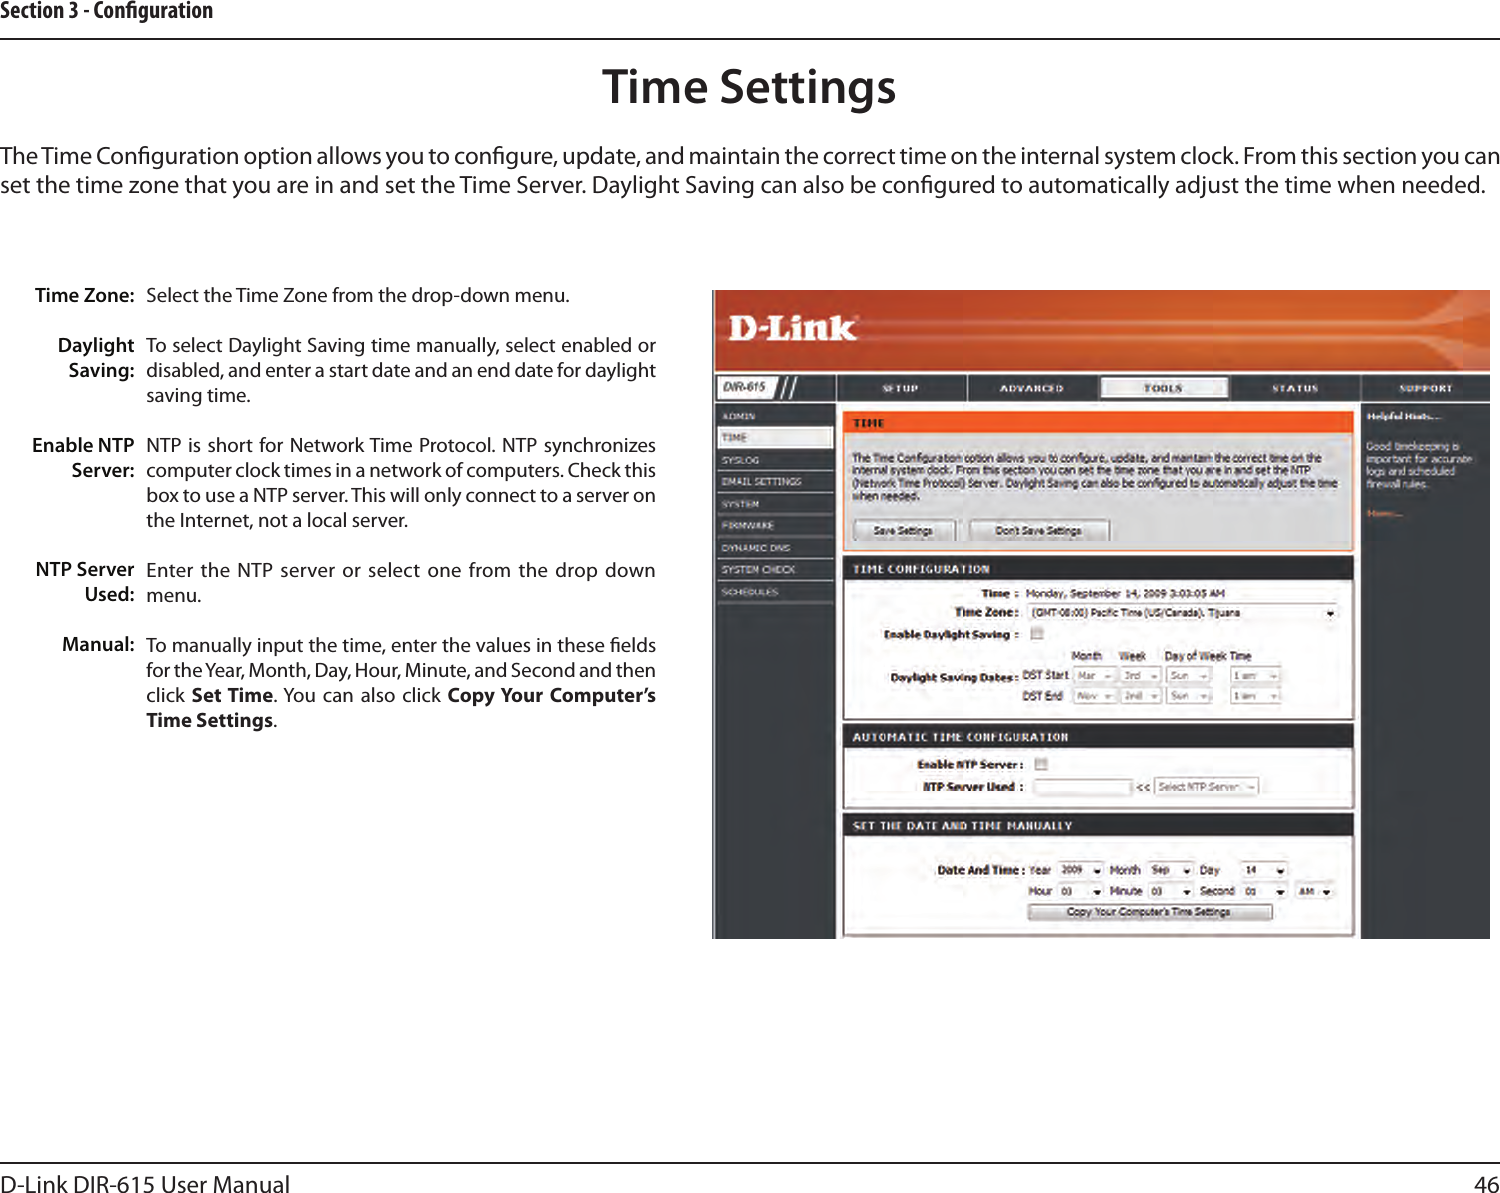
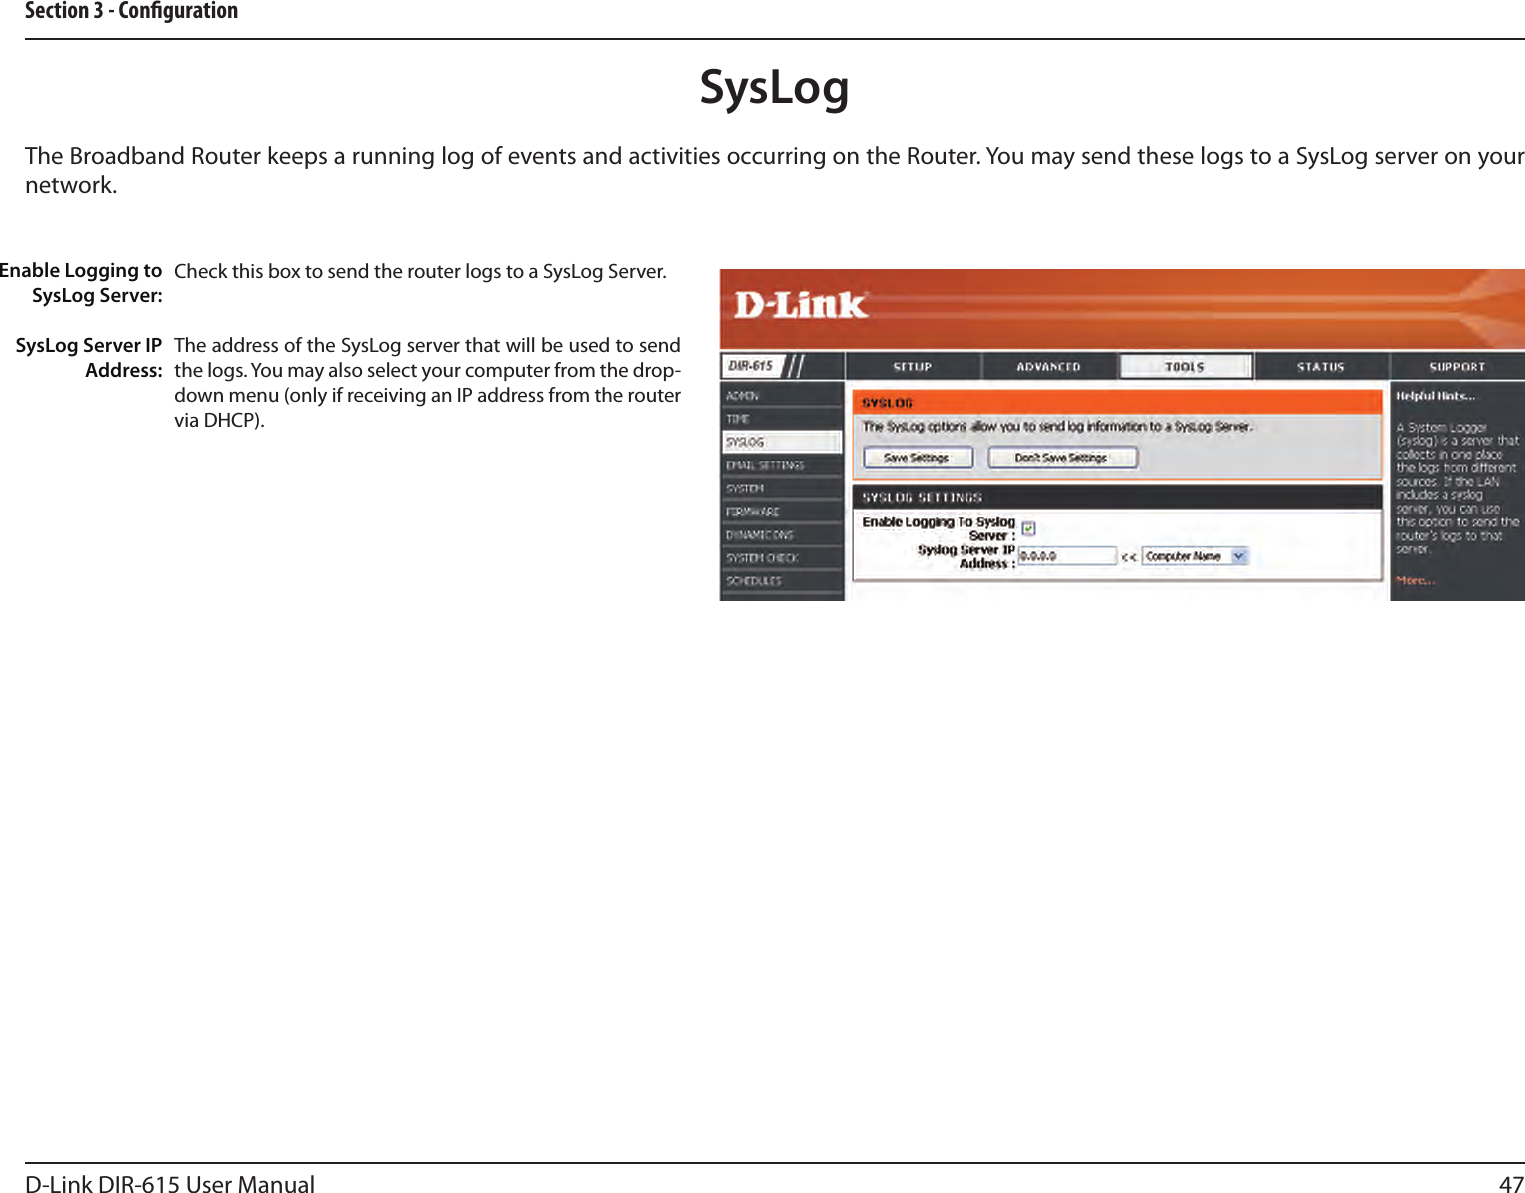
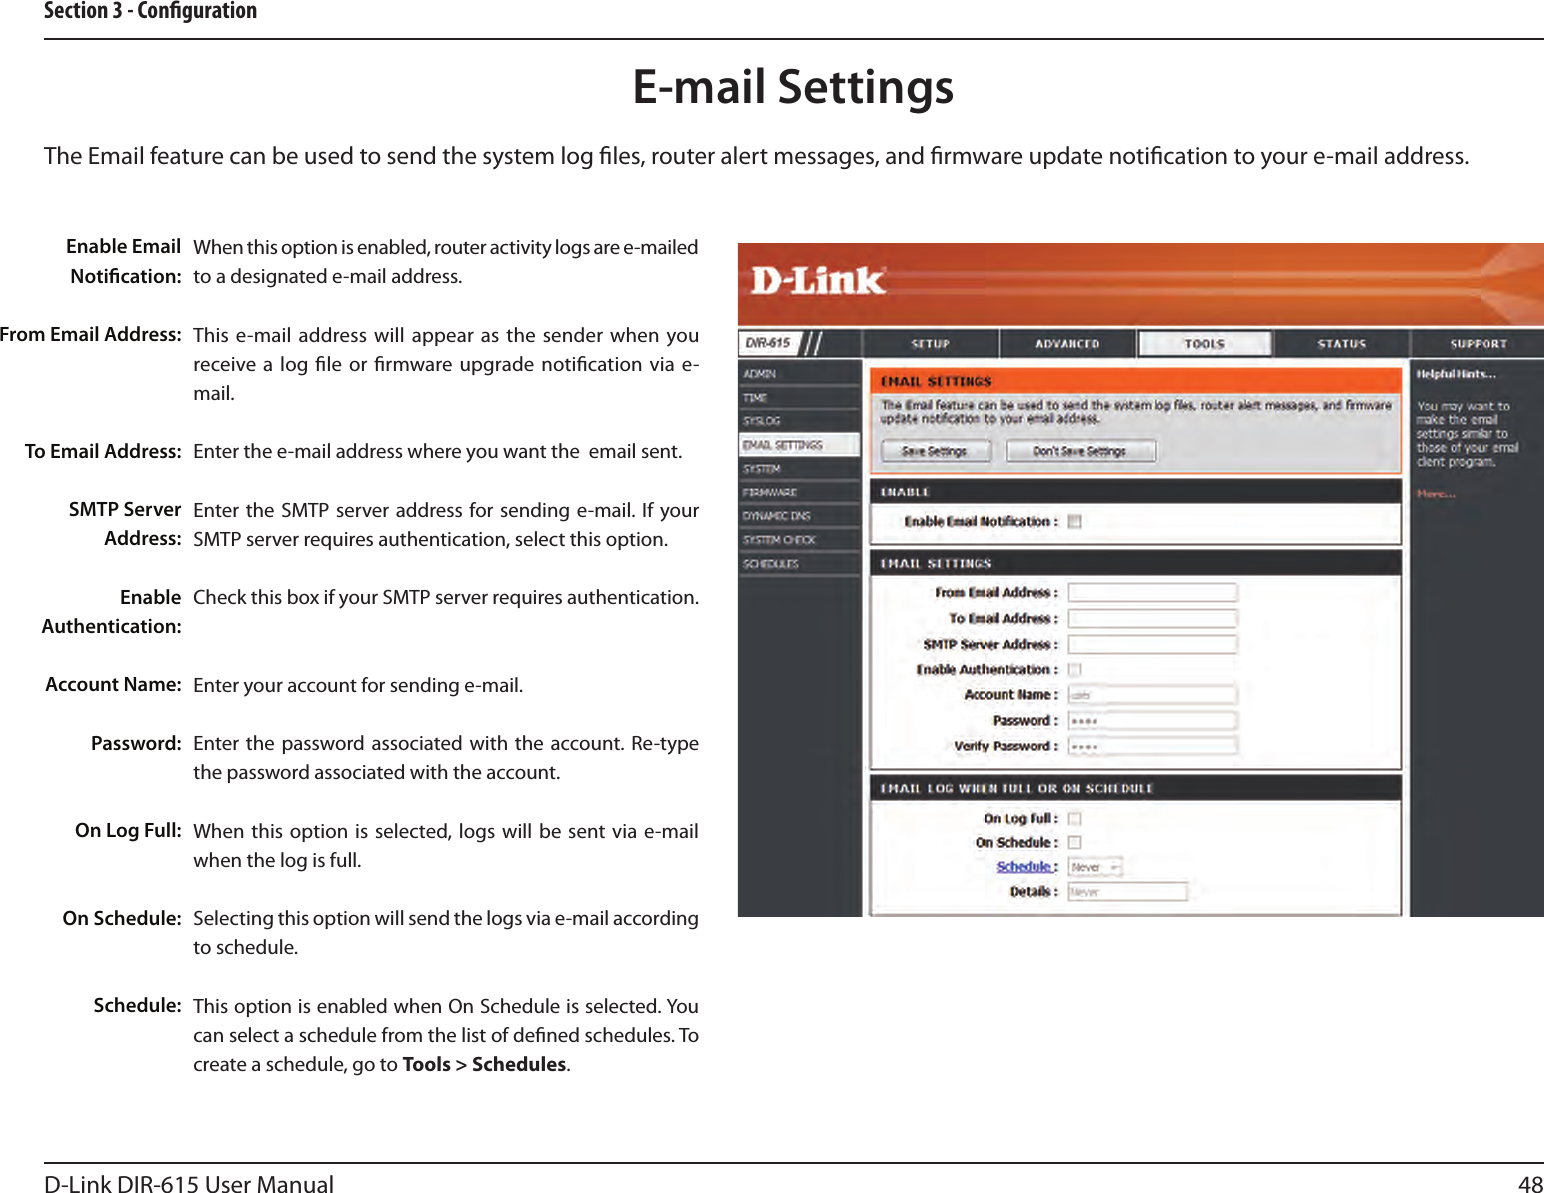
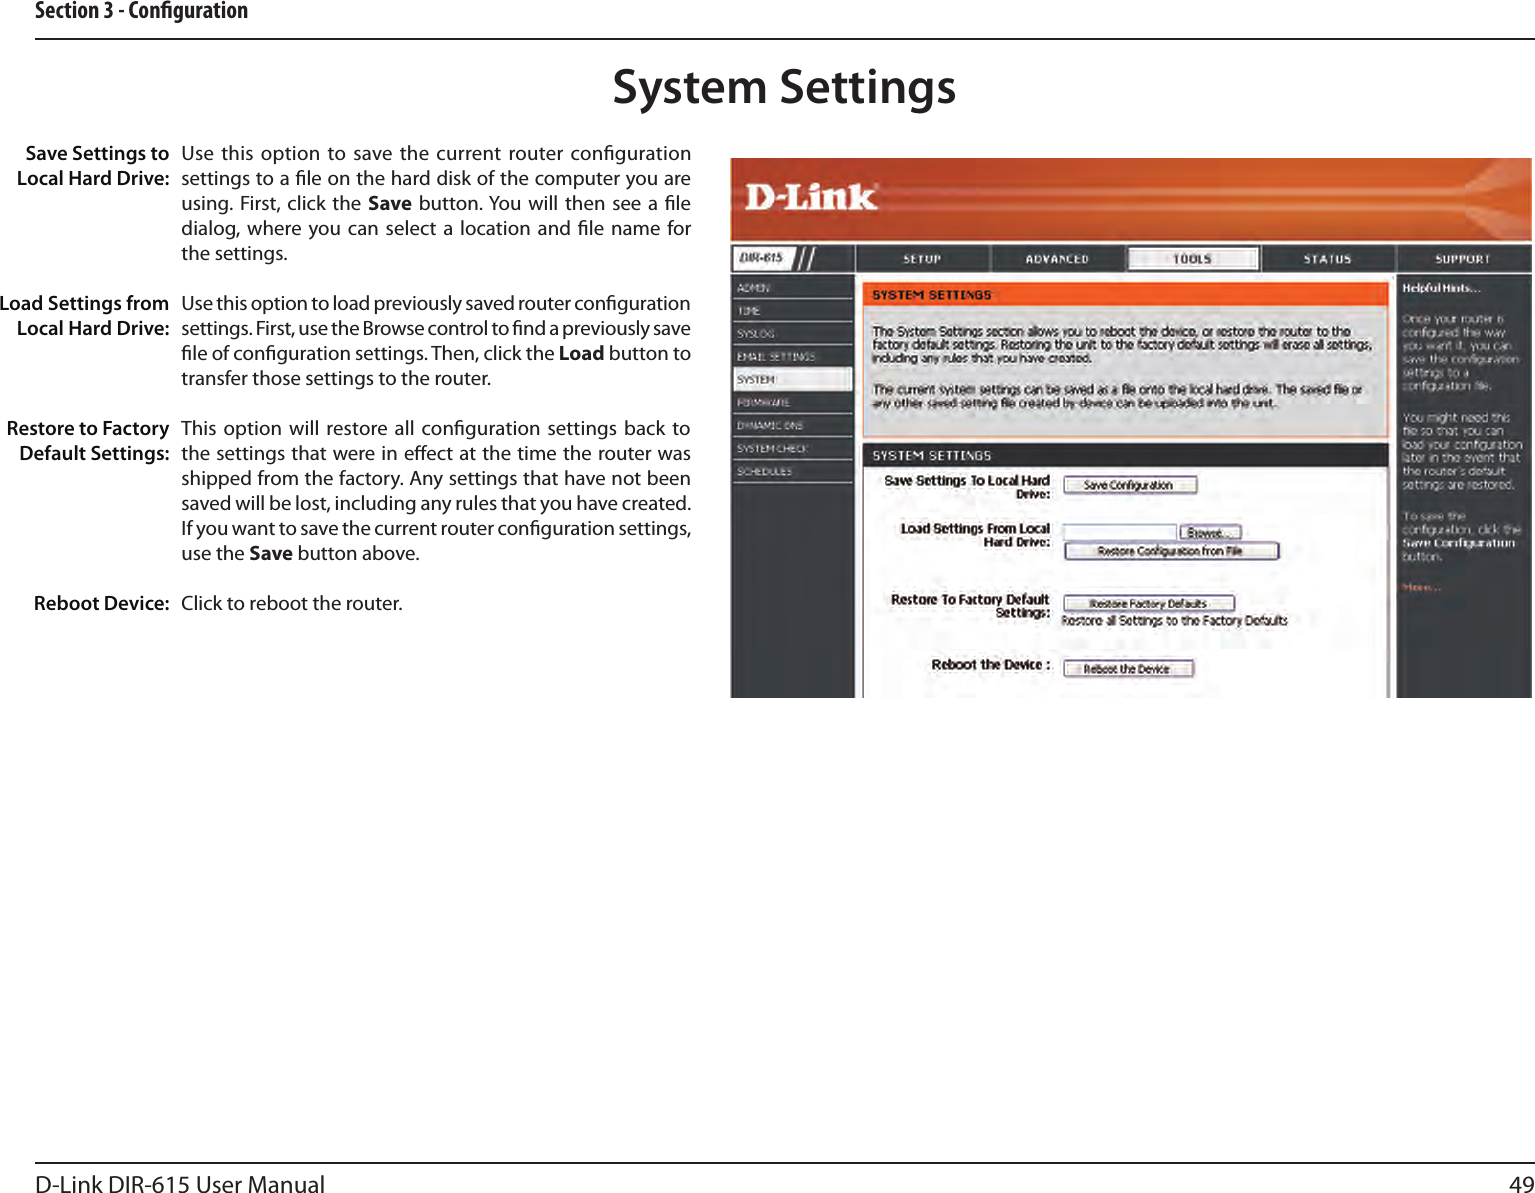
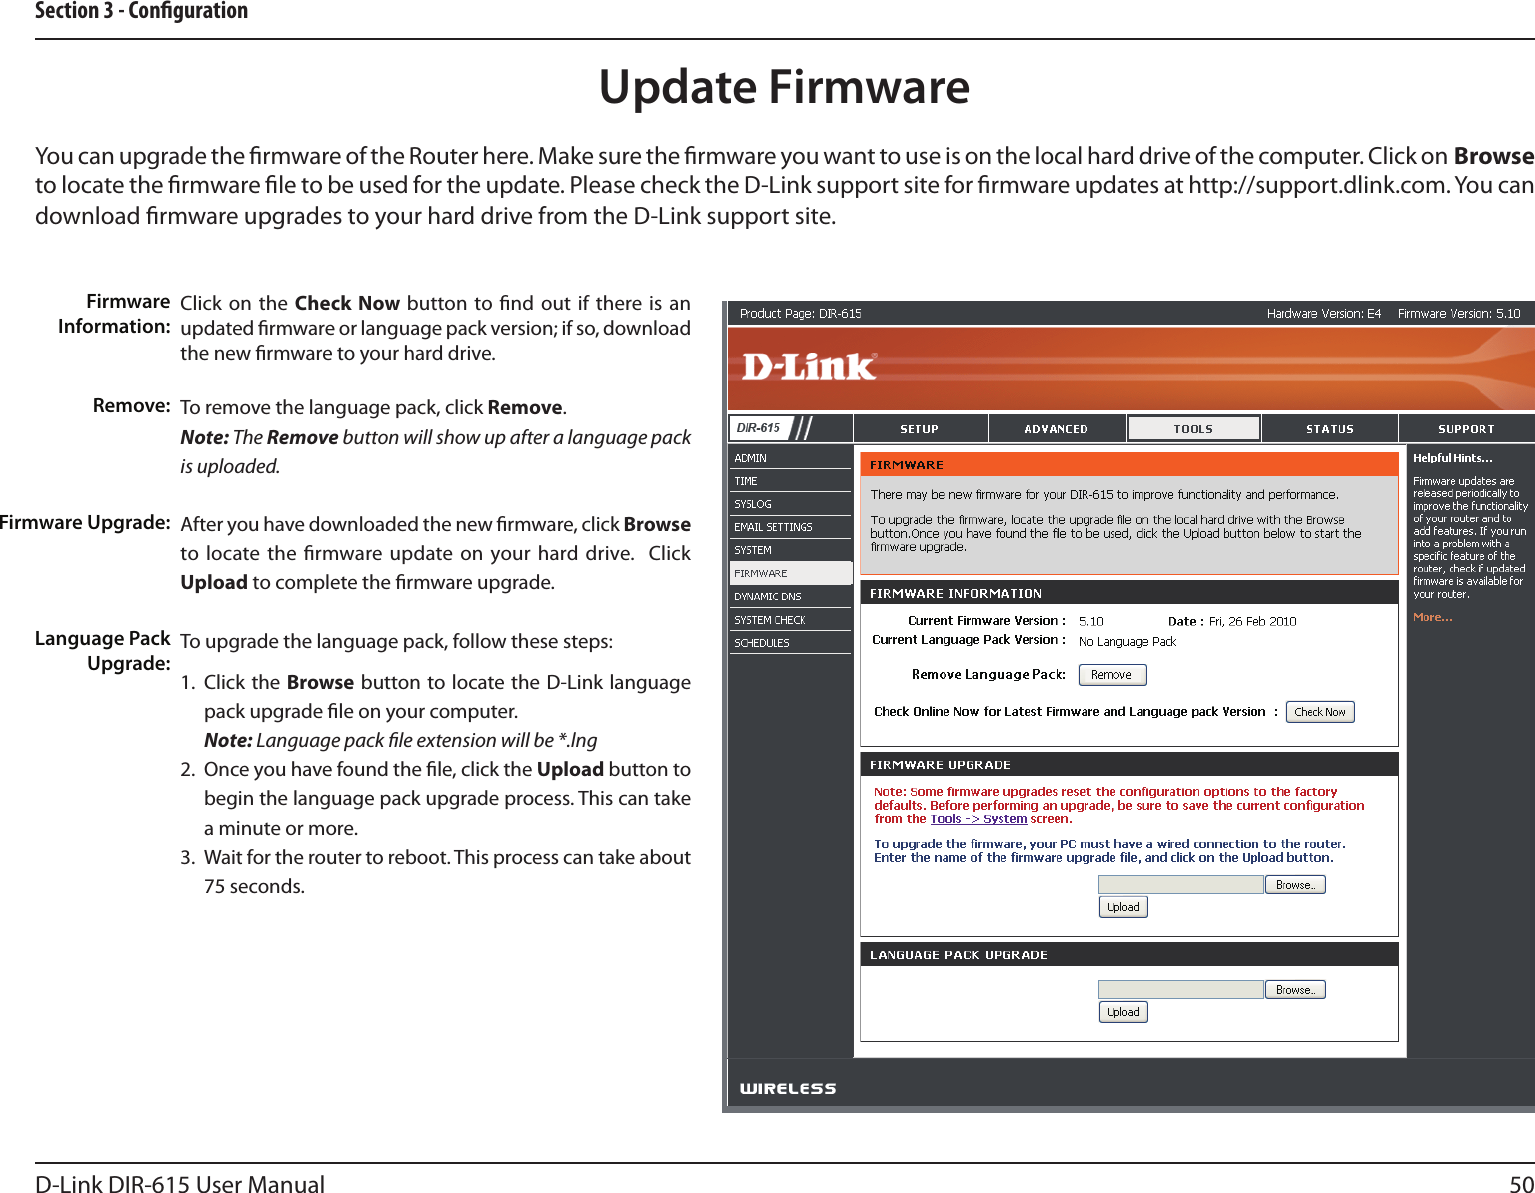

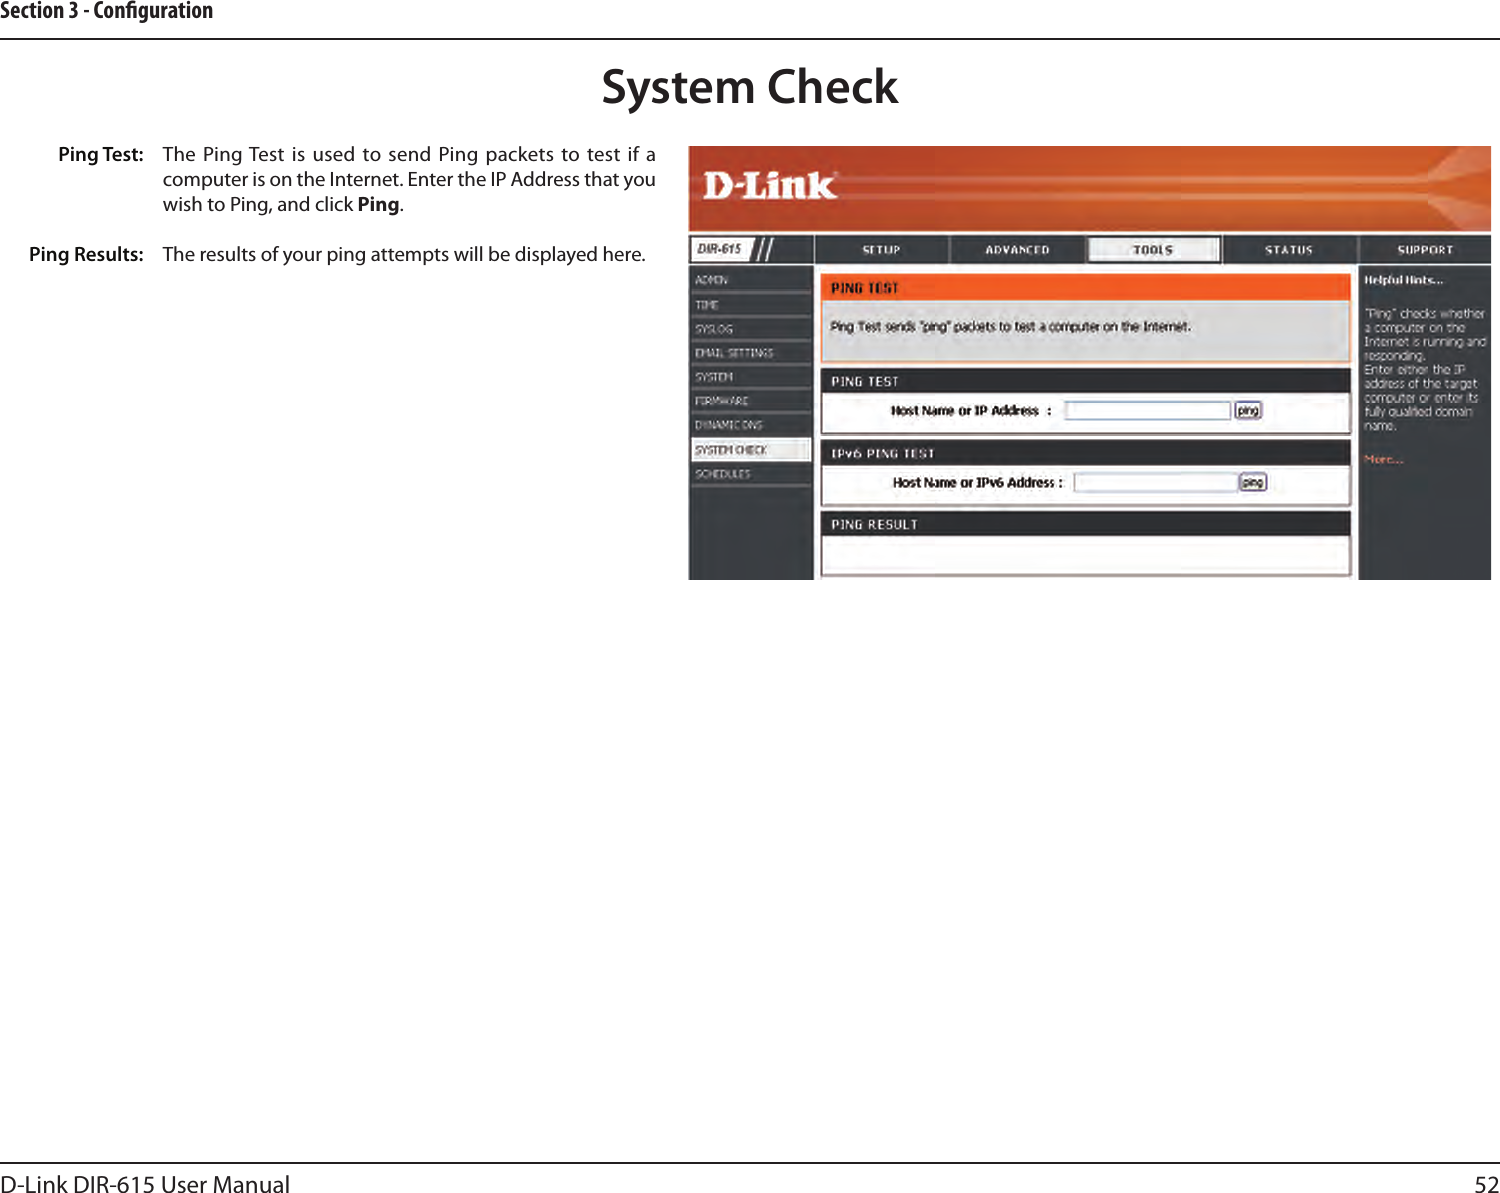

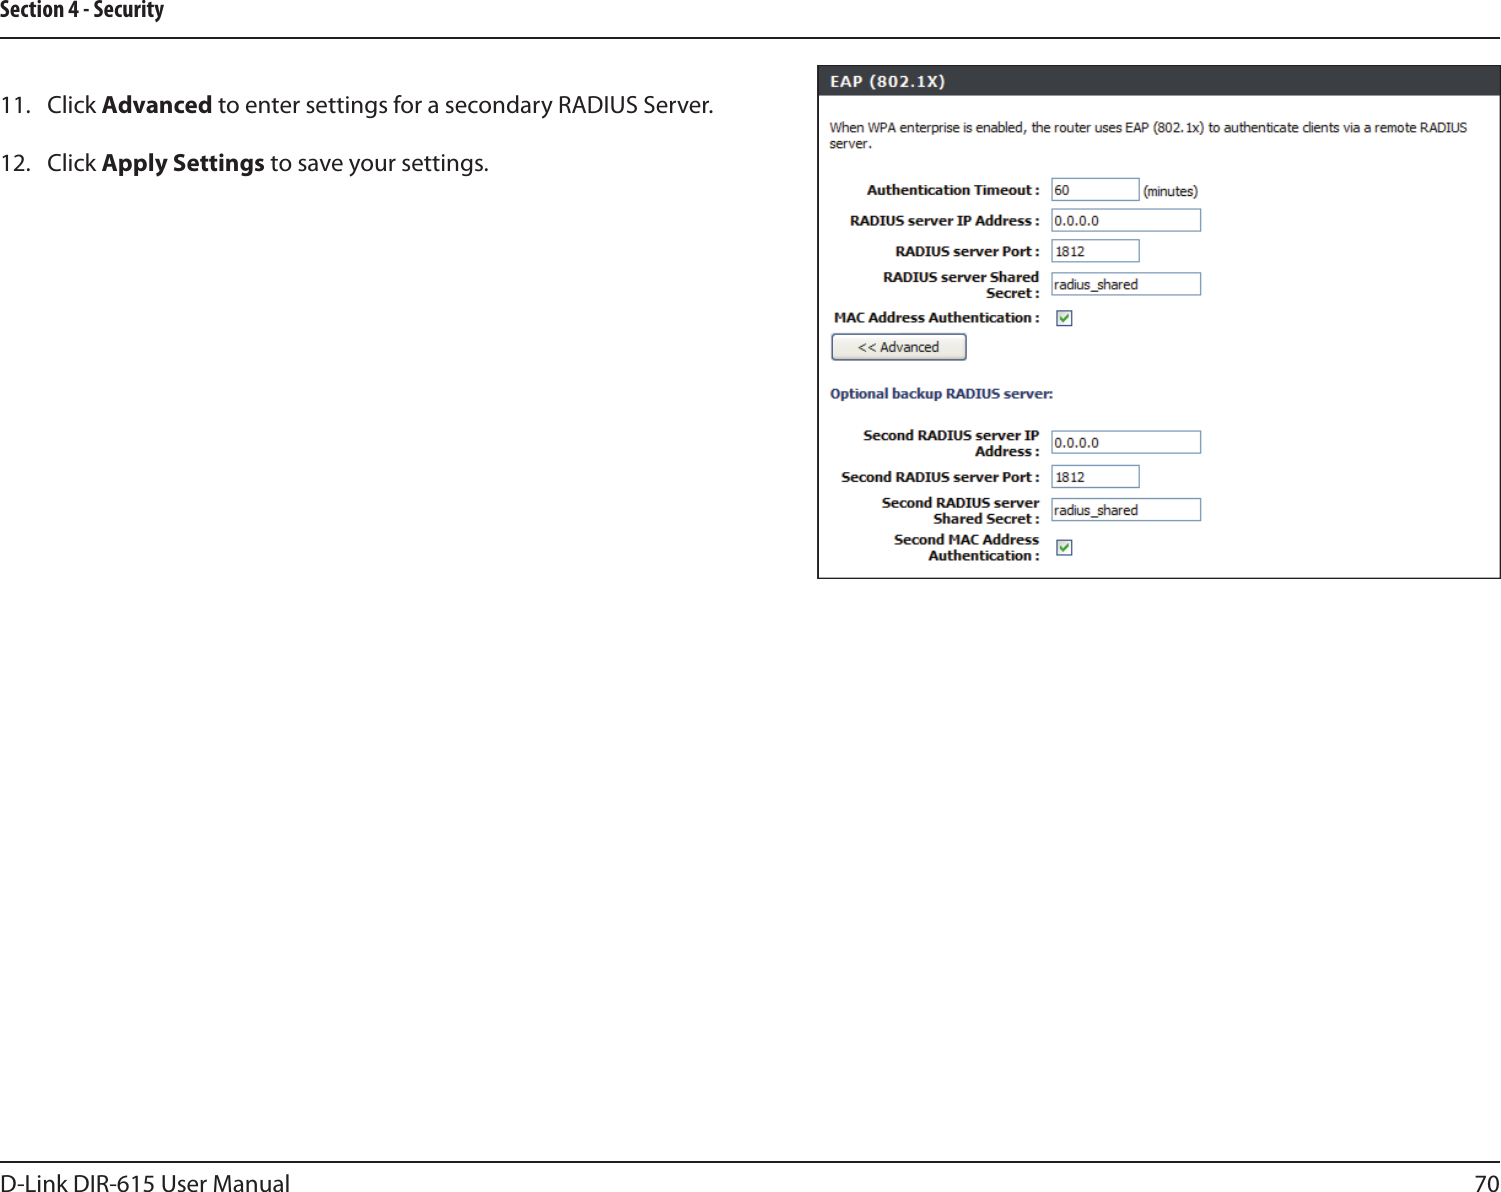


![87D-Link DIR-615 User ManualSection 6 - Troubleshooting3. Why can’t I connect to certain sites or send and receive e-mails when connecting through my router? If you are having a problem sending or receiving e-mail, or connecting to secure sites such as eBay, banking sites, and Hotmail, we suggest lowering the MTU in increments of ten (Ex. 1492, 1482, 1472, etc). Note: AOL DSL+ users must use MTU of 1400. To nd the proper MTU Size, you’ll have to do a special ping of the destination you’re trying to go to. A destination could be another computer, or a URL. • Click on Start and then click Run. • Windows® 95, 98, and Me users type in command (Windows® NT, 2000, and XP users type in cmd) and press Enter (or click OK). • Once the window opens, you’ll need to do a special ping. Use the following syntax: ping [url] [-f] [-l] [MTU value] Example: ping yahoo.com -f -l 1472](https://usermanual.wiki/D-Link/IR615E5/User-Guide-1370691-Page-91.png)