D Link WA126A1 High Power Wireless N 150 USB Adapter User Manual Manual Part 3
D Link Corporation High Power Wireless N 150 USB Adapter Manual Part 3
D Link >
Contents
- 1. Manual Part 1
- 2. Manual Part 2
- 3. Manual Part 3
- 4. Manual Part 4
Manual Part 3
21D-Link DWA-126 User Manual
Section 3 - Configuration
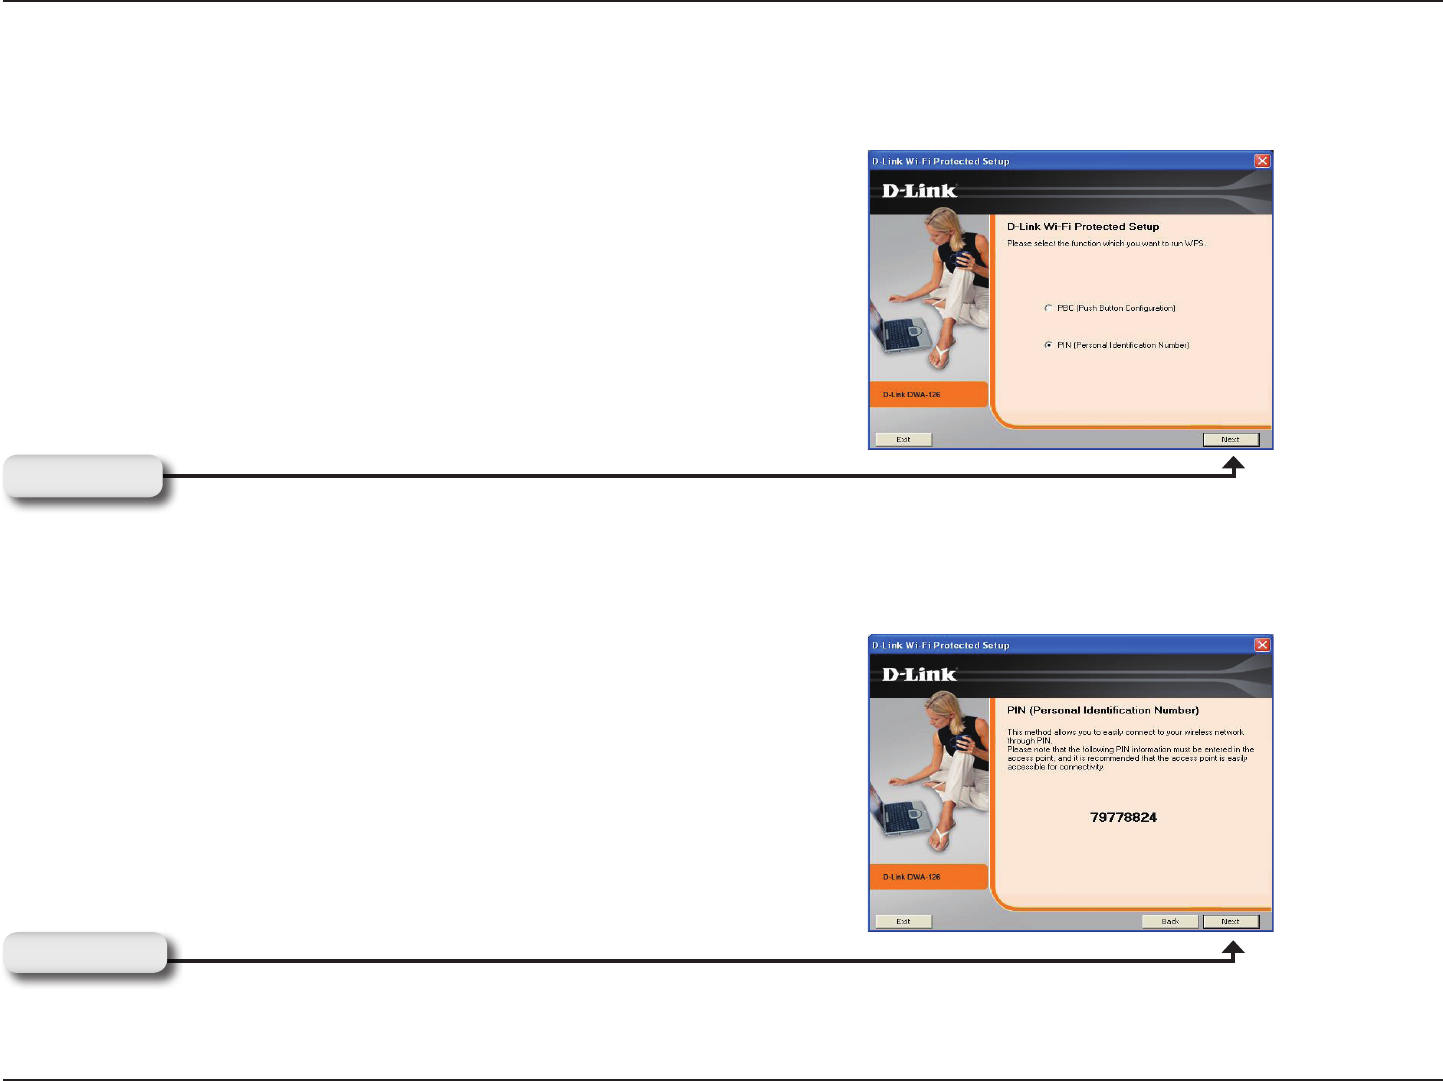
If you want to connect using the PBC method, refer to page 14. To
use the PIN method, select PIN (Personal Identication Number)
and click Next.
Click Next
Make sure your access point or wireless router is close by. Write
down the number on the screen. Enter this number in your access
point or wireless router. Please refer to the manufacture’s manual
for instructions.
Once you click Next, you will have 2 minutes to enter this number
in your access point or wireless router.
Click Next
Personal Identification Number (PIN)
22D-Link DWA-126 User Manual
Section 3 - Configuration
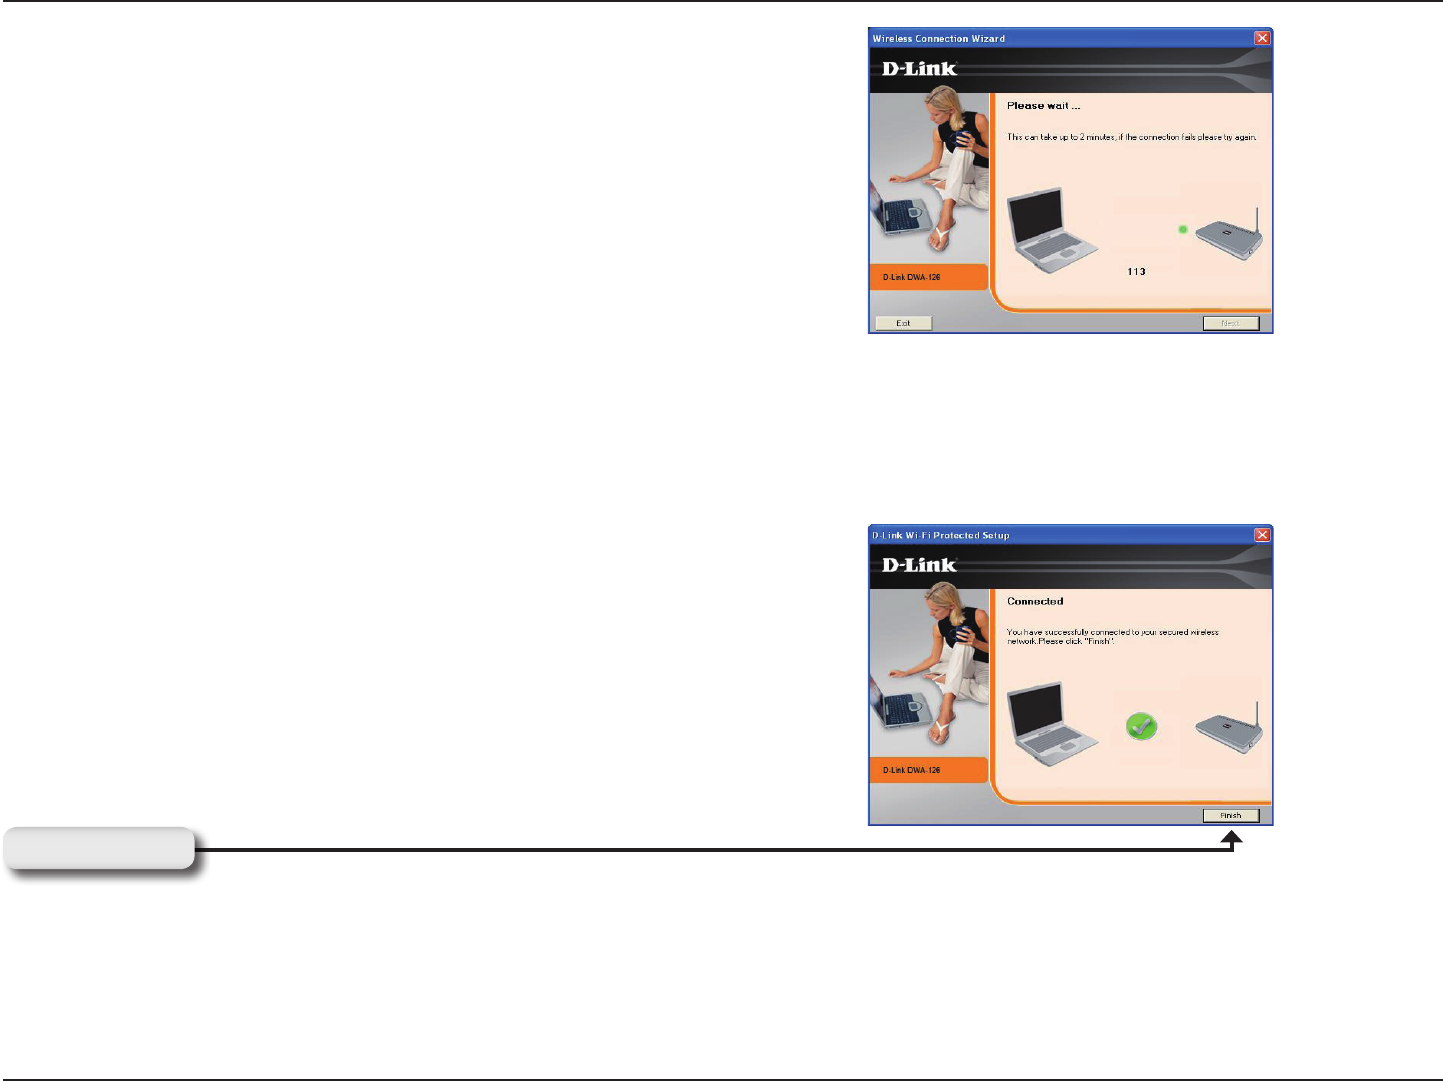
The adapter will try to establish connectivity to your access point
or wireless router.
When this screen appears, you have successfully established
connectivity. Click Finish to complete your setup.
Click Finish
23D-Link DWA-126 User Manual
Section 3 - Configuration
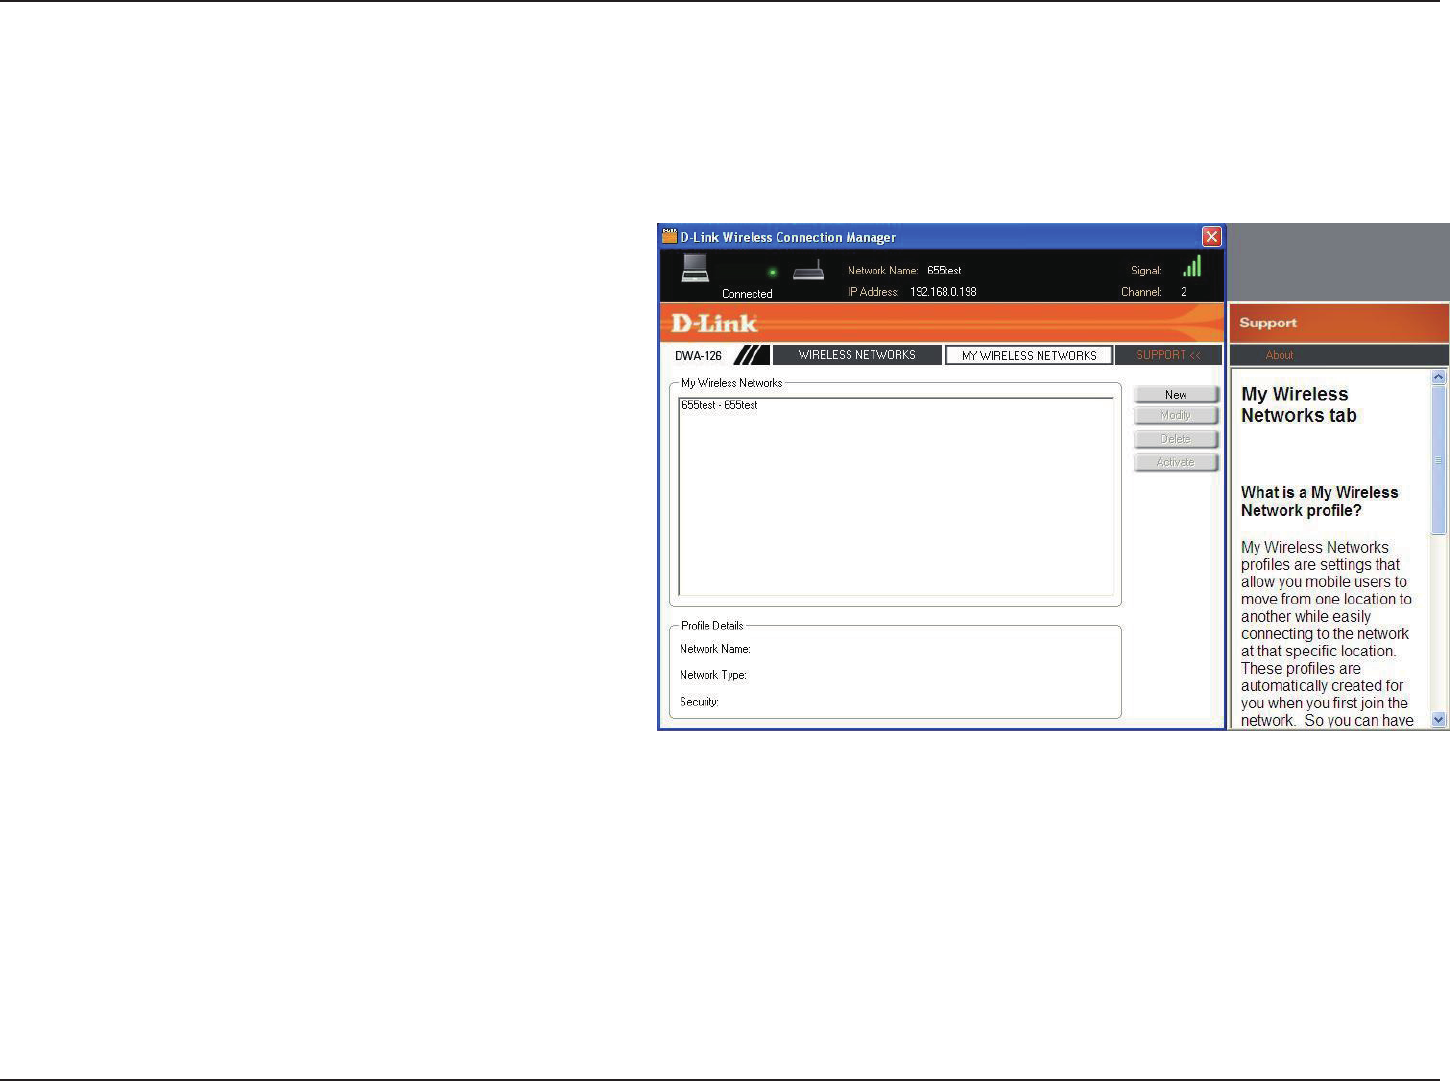
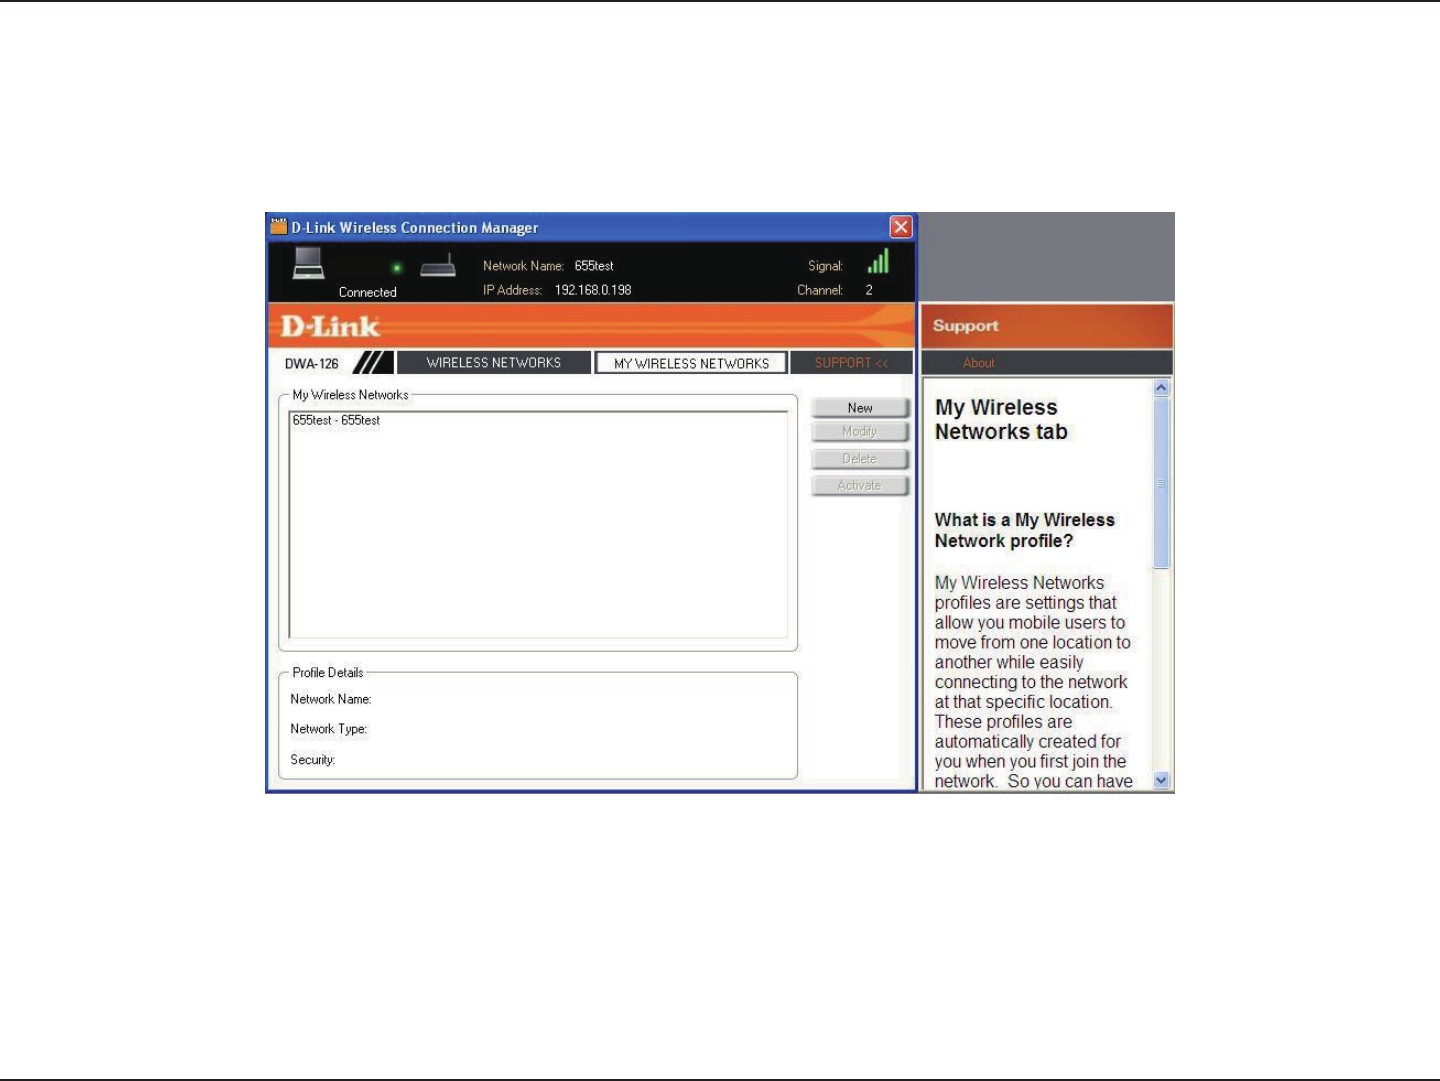
My Wireless Networks
The My Wireless Networks page will allow you to create, edit, and delete wireless network proles. Every time you
connect to a network using the Wireless Networks page, a prole will automatically be created.
New Button:
Modify:
Click New to create a new wireless network
prole (refer to page 23).
Click Modify to edit a current prole (refer to
page 24).
Click Delete to remove a prole.
Click Activate to use a prole. Allow up to 30
seconds to connect to the wireless network.
The Prole Details section will display information
about the wireless network such as the network
name (SSID), network type (Infrastructure), and
if the network is secured.
Delete:
Activate:
Profile Details:
24D-Link DWA-126 User Manual
Section 3 - Configuration
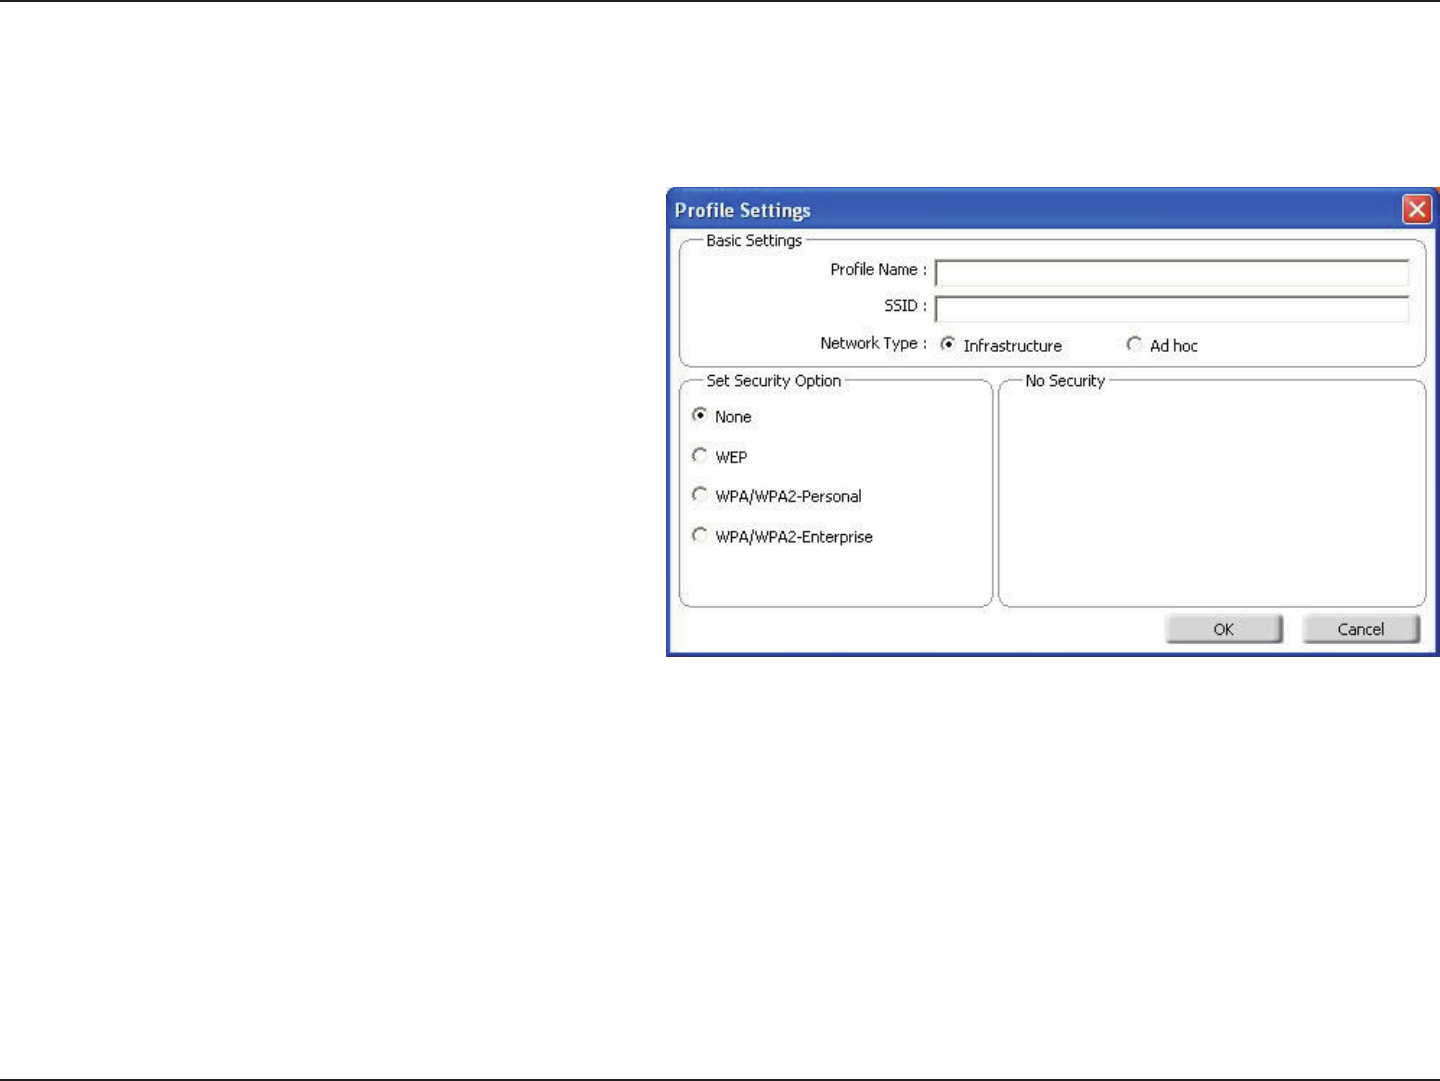
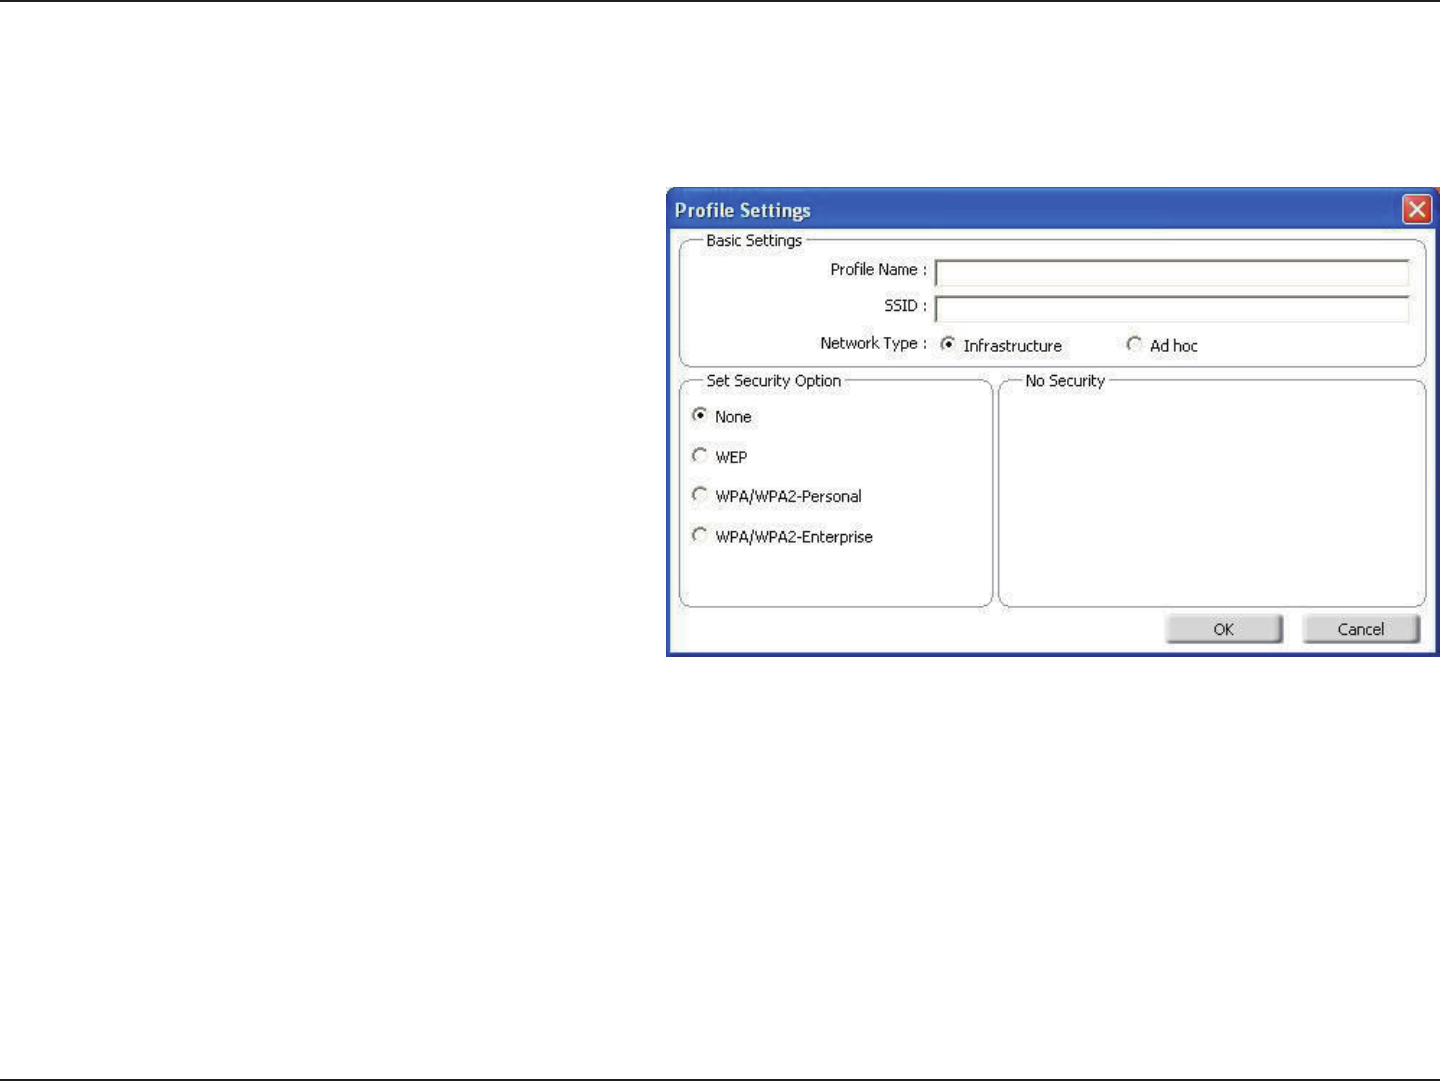
Add Profile
You may add a new network by clicking the New button from the My Wireless Networks page.
Profile Name:
SSID:
Enter a name for your prole (e.g. Home, Ofce,
Coffee Shop).
Enter the SSID of the wireless network.
Select the network type. If you are connecting
to a wireless router or access point, select
Infrastructure. (Ad-hoc mode is not supported)
Select the type of security used. Please refer
to the Wireless Security section for more
information.
Click OK to save your settings.
Network Type:
Security Type:
OK Button:
25D-Link DWA-126 User Manual
Section 3 - Configuration
Modify Profile
You may edit an existing prole by selecting the prole and clicking the Modify button from the My Wireless Networks
page.
Profile Name:
SSID:
Enter a name for your prole (e.g. Home, Ofce,
Coffee Shop).
Displays the SSID of the network.
Displays the network type.
Select the type of security used. Please refer
to the Wireless Security section for more
information.
Click OK to save your settings.
Network Type:
Security Type:
OK Button:
26D-Link DWA-126 User Manual
Section 3 - Configuration
Support
If you need help, click the Support button. A panel will appear to the right of the utility which will display information
about the utility.
27D-Link DWA-126 User Manual
Section 3 - Configuration
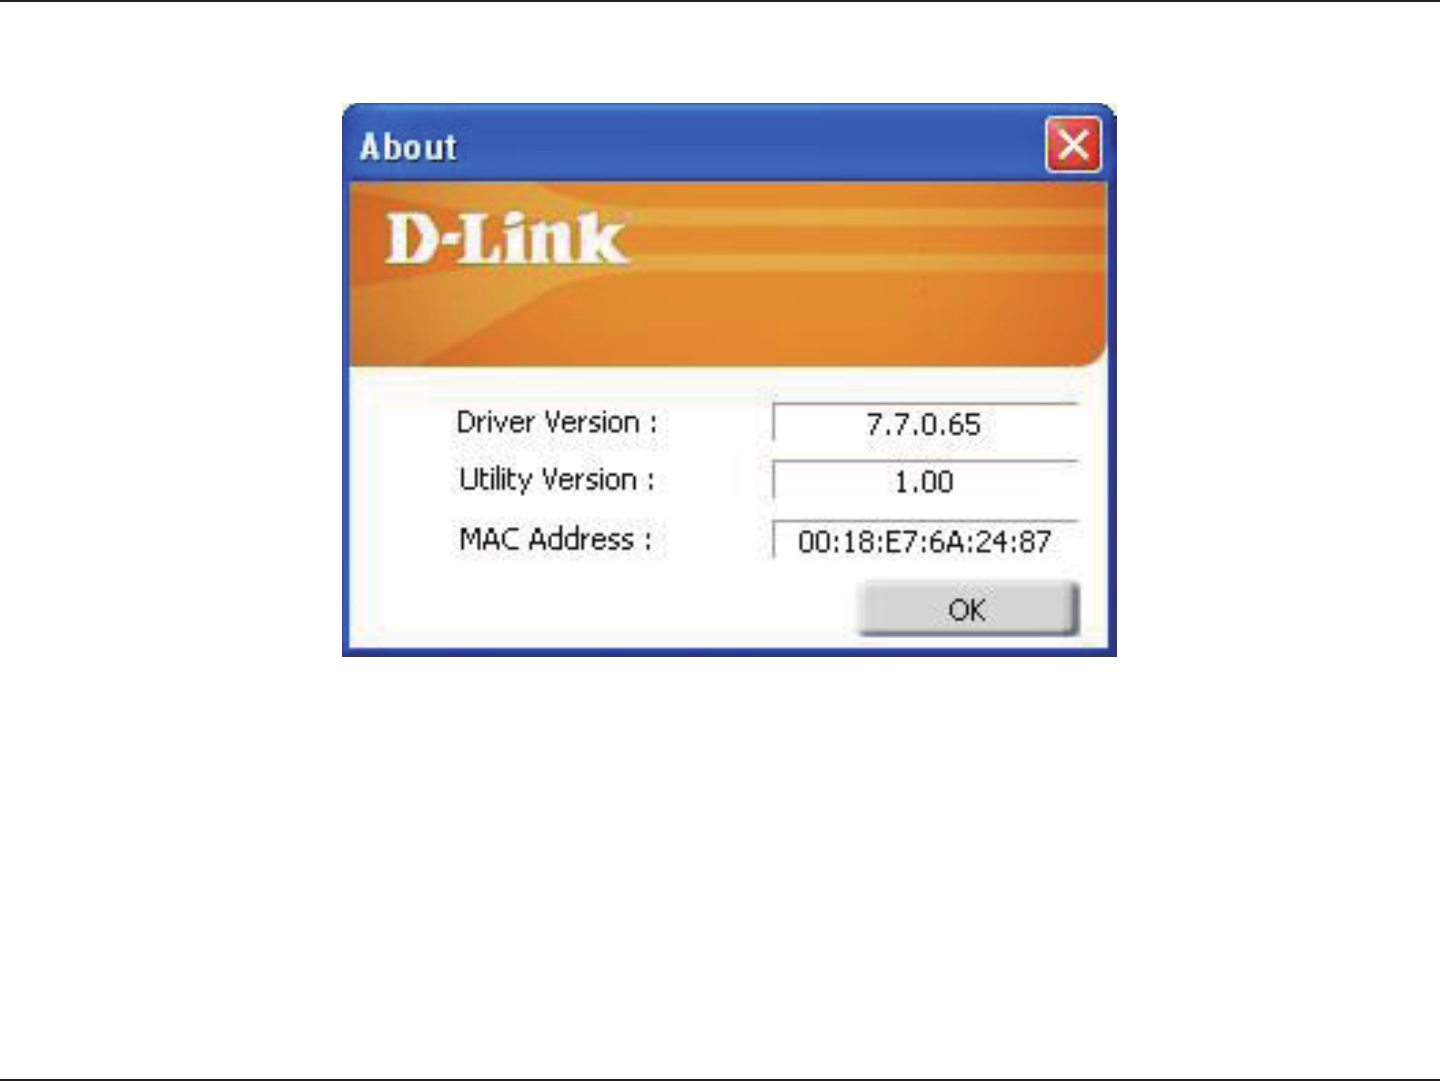
The About screen gives you information about the Firmware and Utility Versions of the DWA-126.
About
28D-Link DWA-126 User Manual
Section 3 - Configuration
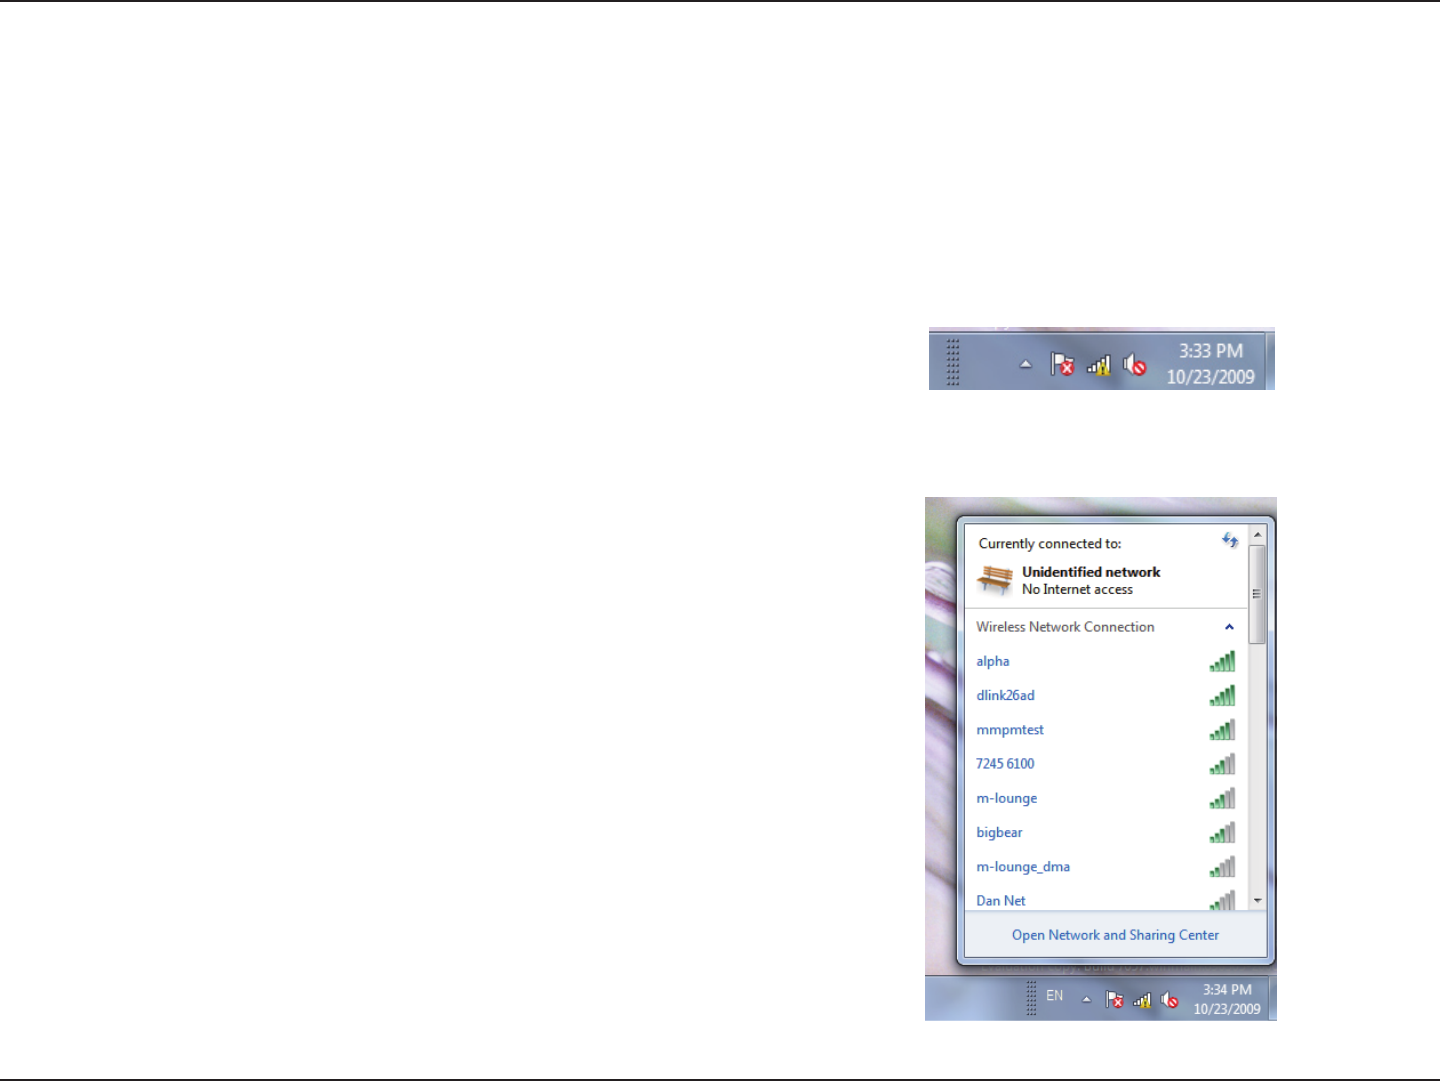
Connect to a Wireless Network
Using Windows® 7
Windows® 7 users may use the built-in wireless utility. If you are using another company’s utility or Windows® 2000,
please refer to the user manual of your wireless adapter for help with connecting to a wireless network. Most utilities
will have a “site survey” option similar to the Windows® 7 utility as seen below.
Right-click on the wireless computer icon in your system tray
(lower-right corner next to the time). Select Connect to a
network.
If you receive the Wireless Networks Detected bubble, click
on the center of the bubble to access the utility.
or
The utility will display any available wireless networks in your
area. Click on a network (displayed using the SSID) and click
the Connect button.
If you get a good signal but cannot access the Internet, check you
TCP/IP settings for your wireless adapter. Refer to the Networking
Basics section in this manual for more information.
29D-Link DWA-126 User Manual
Section 3 - Configuration
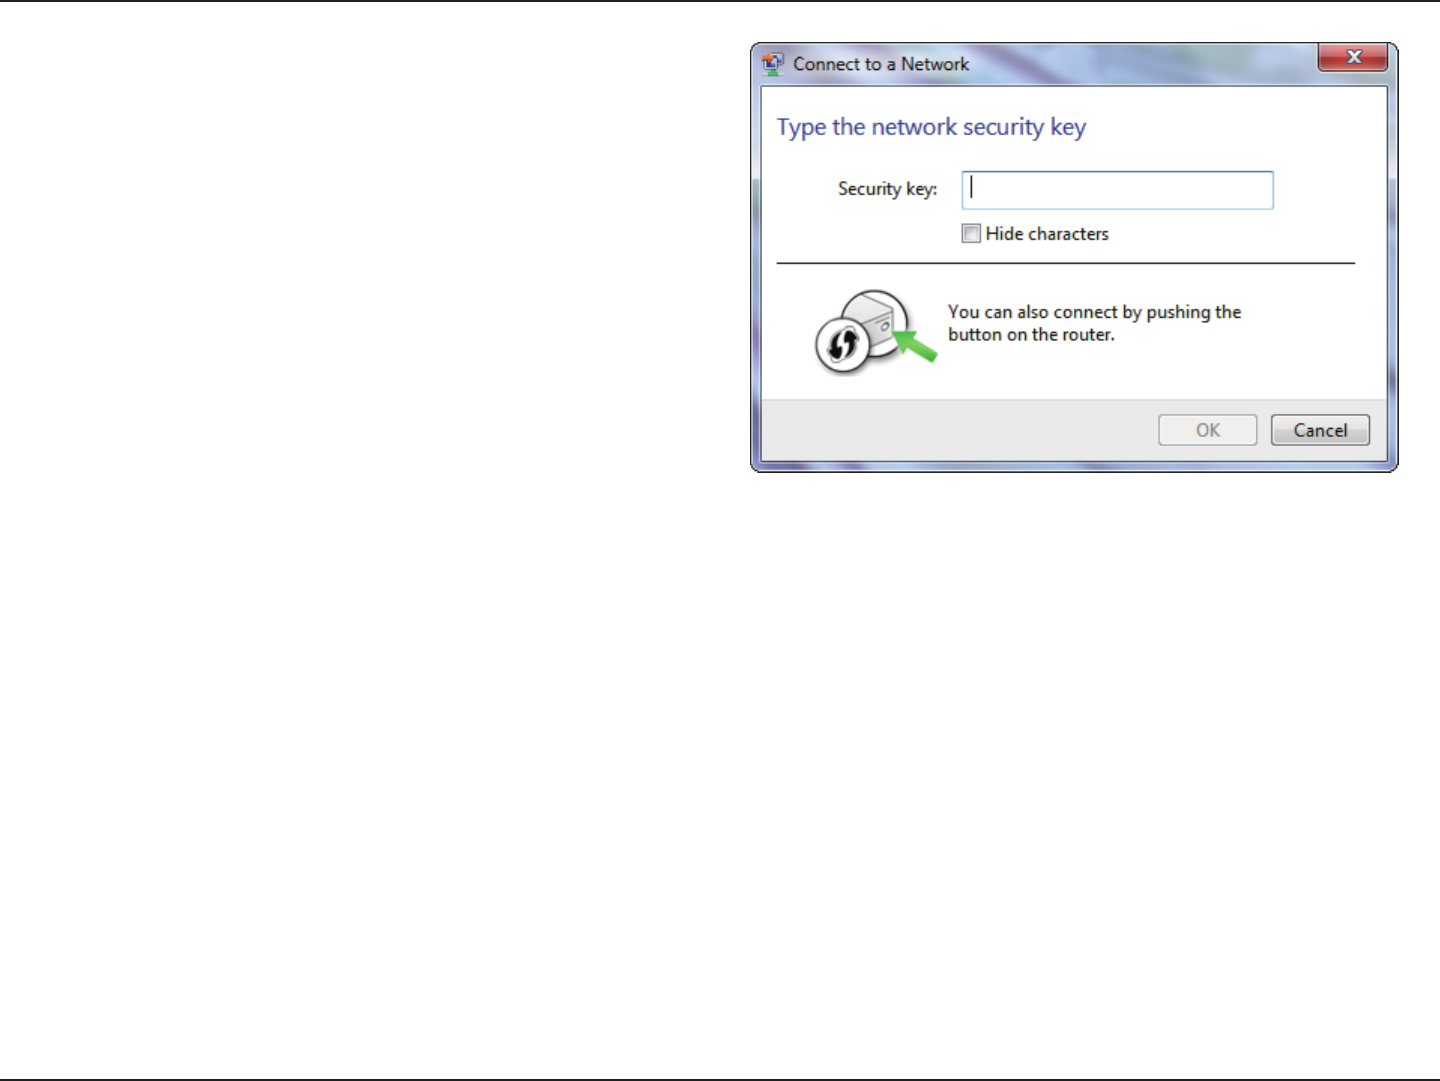
Enter the same security key or passphrase that is
on your router and click Connect.
It may take 20-30 seconds to connect to the wireless
network. If the connection fails, please verify that the
security settings are correct. The key or passphrase
must be exactly the same as on the wireless
router.
30D-Link DWA-126 User Manual
Section 3 - Configuration
Connect to a Wireless Network
Using Windows® Vista™
Windows® Vista™ users may use the built-in wireless utility. If you are using another company’s utility or Windows®
2000, please refer to the user manual of your wireless adapter for help with connecting to a wireless network. Most
utilities will have a “site survey” option similar to the Windows® Vista™ utility as seen below.
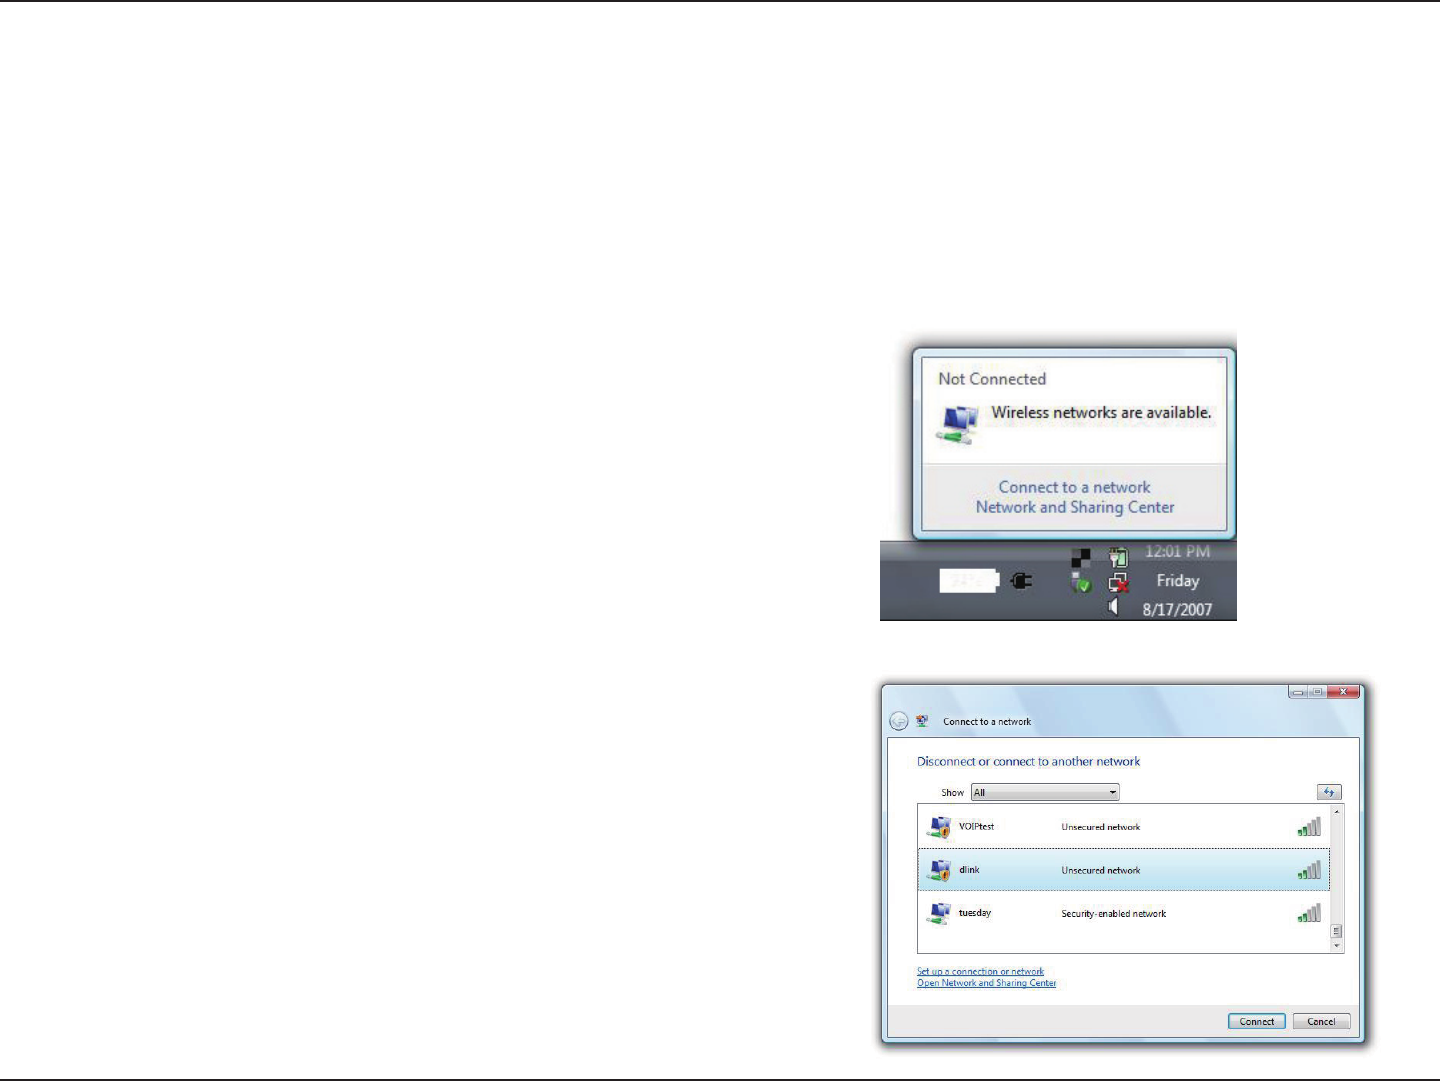
Right-click on the wireless computer icon in your system tray
(lower-right corner next to the time). Select Connect to a
network.
If you receive the Wireless Networks Detected bubble, click
on the center of the bubble to access the utility.
or
The utility will display any available wireless networks in your
area. Click on a network (displayed using the SSID) and click
the Connect button.
If you get a good signal but cannot access the Internet, check you
TCP/IP settings for your wireless adapter. Refer to the Networking
Basics section in this manual for more information.
31D-Link DWA-126 User Manual
Section 3 - Configuration
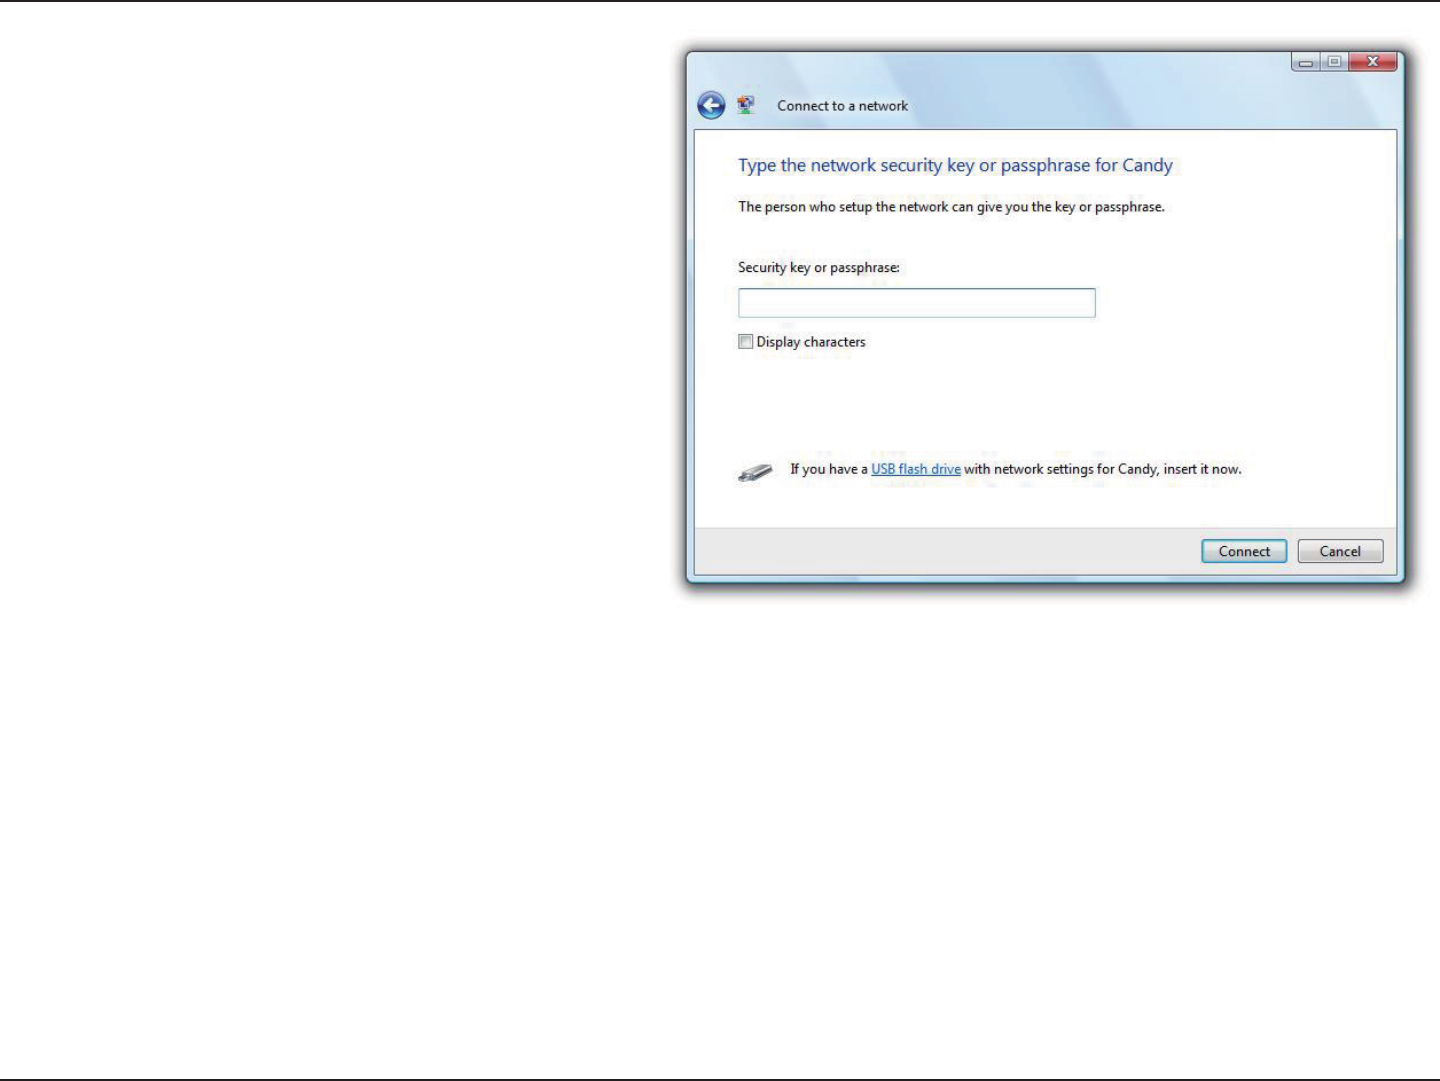
Enter the same security key or passphrase that is
on your router and click Connect.
It may take 20-30 seconds to connect to the wireless
network. If the connection fails, please verify that the
security settings are correct. The key or passphrase
must be exactly the same as on the wireless
router.
32D-Link DWA-126 User Manual
Section 3 - Configuration
Connect to a Wireless Network
Using Windows® XP
Windows® XP users may use the built-in wireless utility (Zero Conguration Utility). The following instructions are for
Service Pack 2 users. If you are using another company’s utility or Windows® 2000, please refer to the user manual
of your wireless adapter for help with connecting to a wireless network. Most utilities will have a “site survey” option
similar to the Windows® XP utility as seen below.
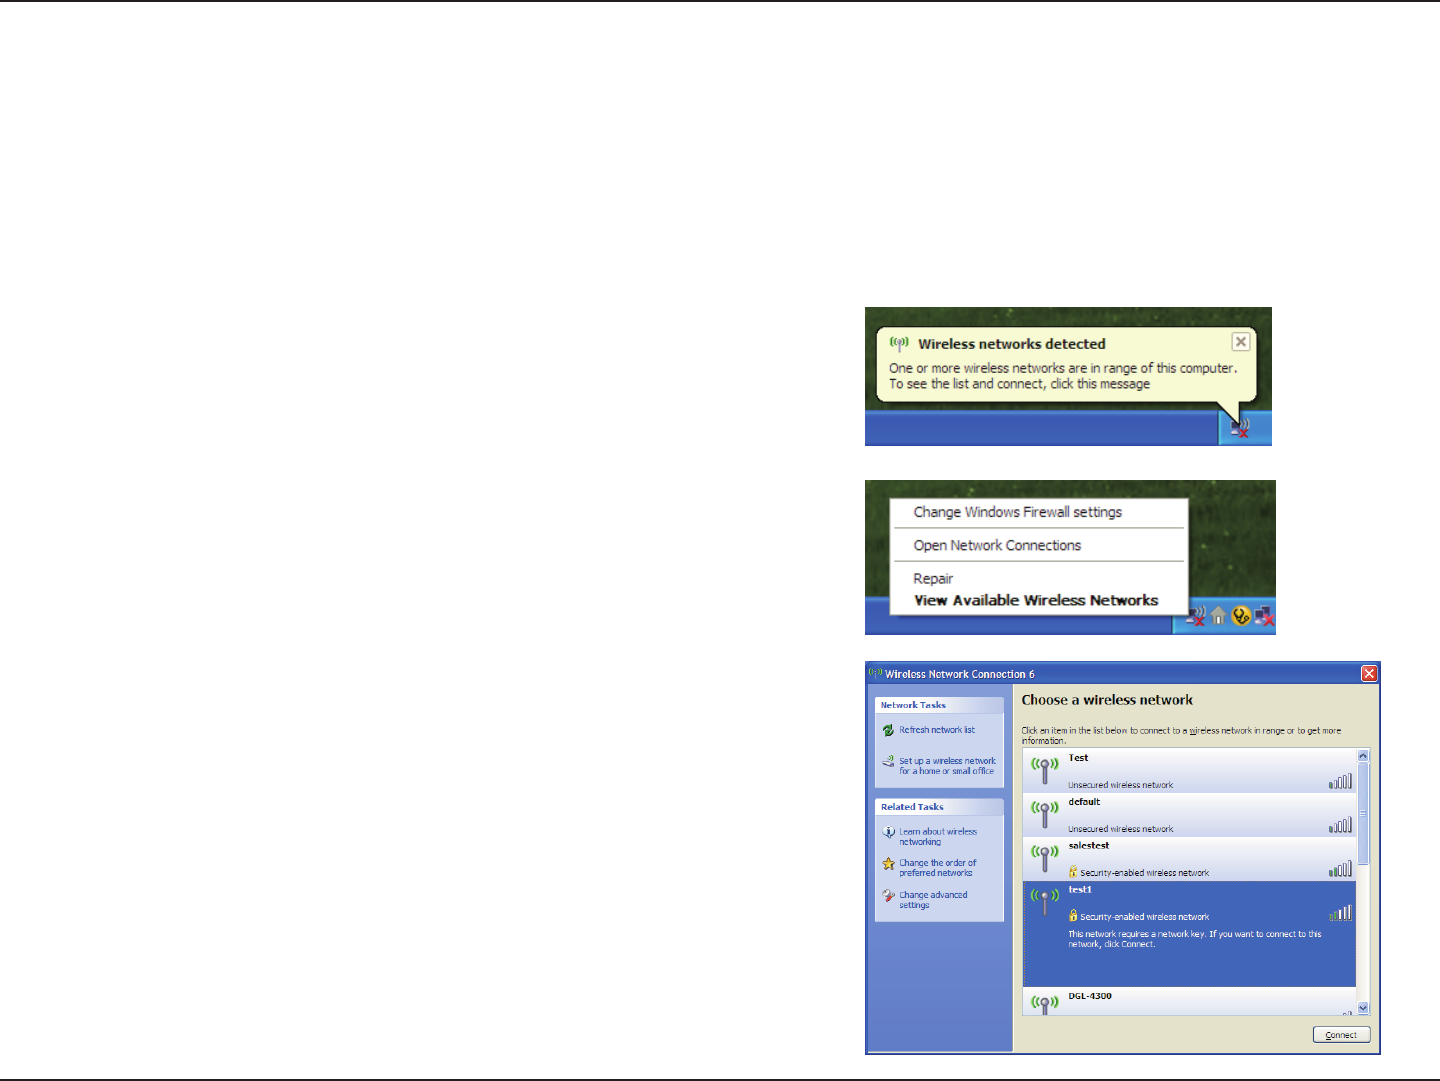
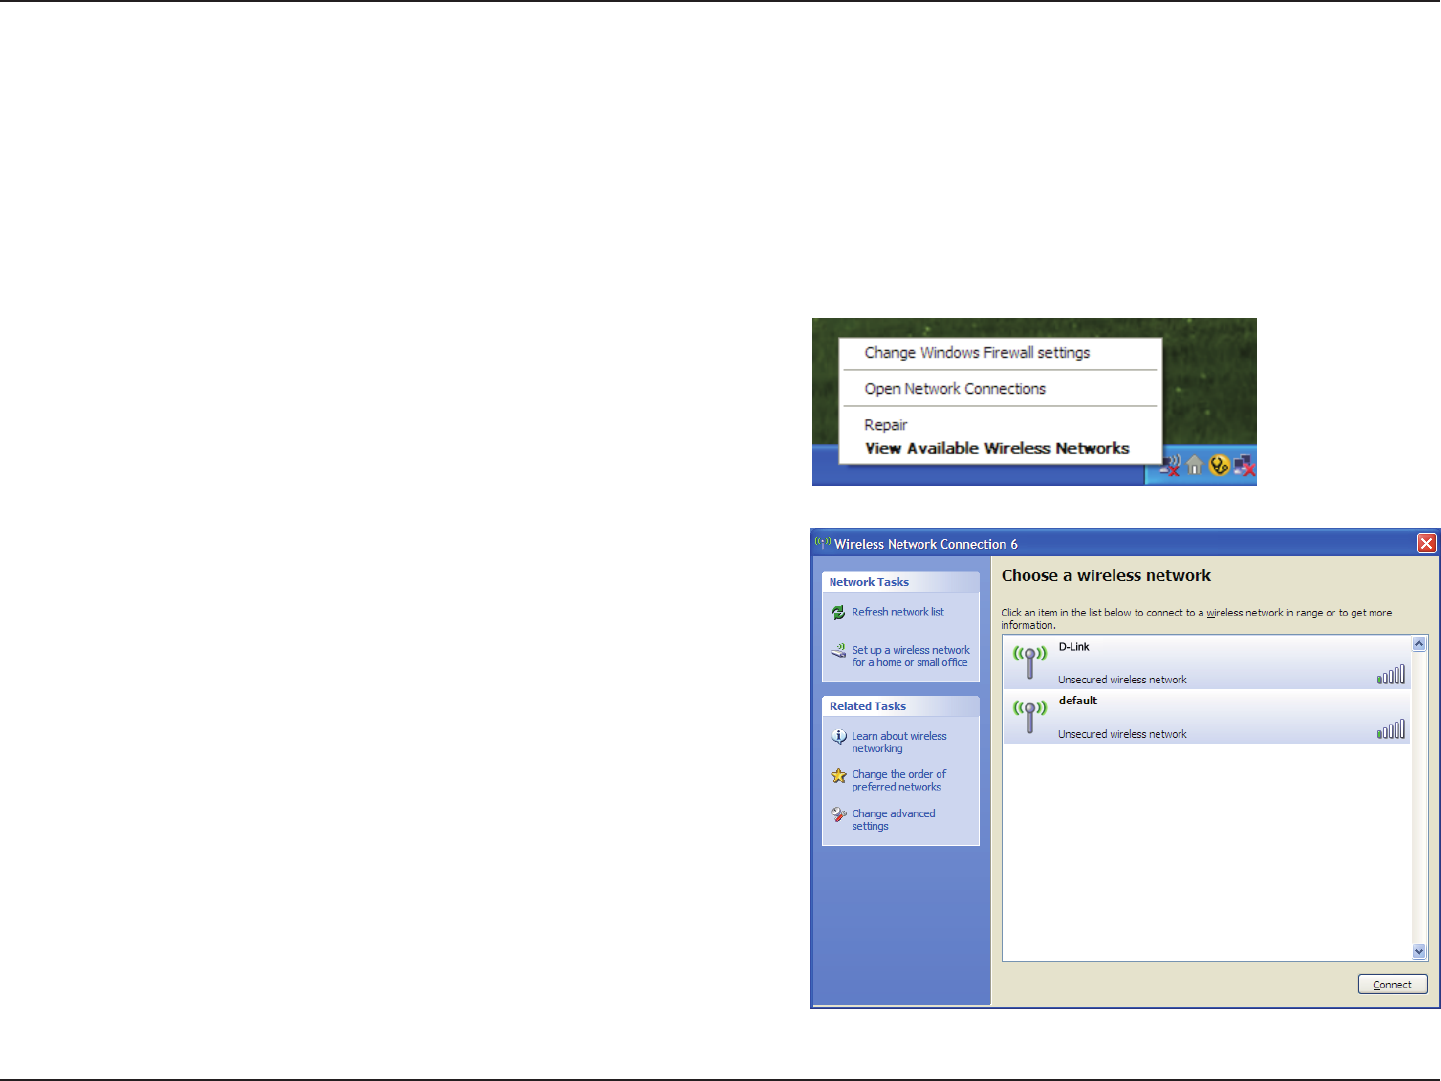
Right-click on the wireless computer icon in your system tray
(lower-right corner next to the time). Select View Available
Wireless Networks.
If you receive the Wireless Networks Detected bubble, click
on the center of the bubble to access the utility.
or
The utility will display any available wireless networks in your
area. Click on a network (displayed using the SSID) and click
the Connect button.
If you get a good signal but cannot access the Internet, check you
TCP/IP settings for your wireless adapter. Refer to the Networking
Basics section in this manual for more information.

33D-Link DWA-126 User Manual
Section 4 - Wireless Security
Wireless Security
This section will show you the different levels of security you can use to protect your data from intruders. The
DWA-126 offers the following types of security:
• WPA2 (Wi-Fi Protected Access 2) • WPA2-PSK (Pre-Shared Key)
• WPA (Wi-Fi Protected Access) • WPA-PSK (Pre-Shared Key)
What is WPA?
WPA, or Wi-Fi Protected Access, is a Wi-Fi standard that was designed to improve the security features of WEP (Wired
Equivalent Privacy).
The 2 major improvements over WEP:
• Improved data encryption through the Temporal Key Integrity Protocol (TKIP). TKIP scrambles the keys
using a hashing algorithm and, by adding an integrity-checking feature, ensures that the keys haven’t been
tampered with. WPA2 is based on 802.11i and uses Advanced Encryption Standard instead of TKIP.
• User authentication, which is generally missing in WEP, through the extensible authentication protocol
(EAP). WEP regulates access to a wireless network based on a computer’s hardware-specic MAC
address, which is relatively simple to be sniffed out and stolen. EAP is built on a more secure public-key
encryption system to ensure that only authorized network users can access the network.
WPA-PSK/WPA2-PSK uses a passphrase or key to authenticate your wireless connection. The key is an alpha-numeric
password between 8 and 63 characters long. The password can include symbols (!?*&_) and spaces. This key must
be the exact same key entered on your wireless router or access point.
WPA/WPA2 incorporates user authentication through the Extensible Authentication Protocol (EAP). EAP is built on a
more secure public key encryption system to ensure that only authorized network users can access the network.
34D-Link DWA-126 User Manual
Section 4 - Wireless Security
Configure WPA/WPA2 Passphrase
Using the D-Link Wireless Connection Manager
It is recommended to enable WPA-PSK on your wireless router or access point before conguring your wireless adapter.
If you are joining an existing network, you will need to know the WPA-PSK passphrase being used.
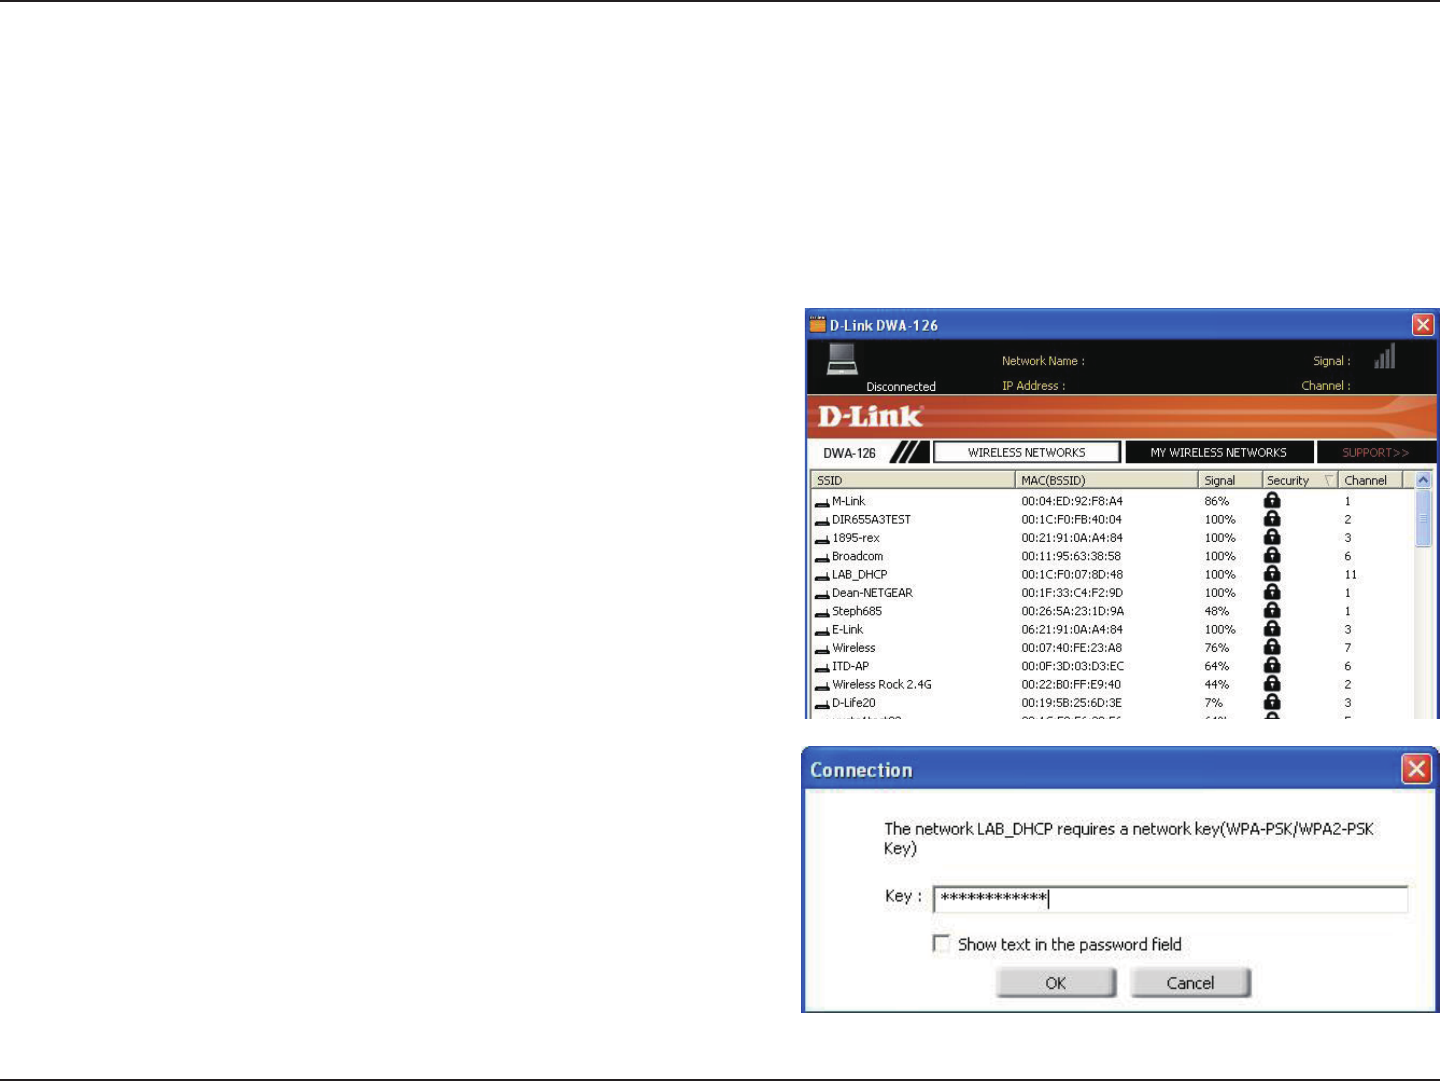
1. Open the Wireless Connection Manager by double-clicking on
the D-Link icon on your desktop.
2. Highlight the wireless network (SSID) you would like to connect
to and click Connect. If the network is using WPA-PSK, the
screen (as shown to the bottom-right) will appear.
3. Enter the WPA-PSK passphrase exactly as it is on your
wireless router or access point. Click the Show text in the
password eld box to see the passphrase. Unchecking it will
hide it.
4. Click OK to connect to the network. Allow up to 30 seconds
to connect.
If you would like to create a new network and enter the WPA-PSK
settings, refer to the next page.
35D-Link DWA-126 User Manual
Section 4 - Wireless Security
It is recommended to enable WPA-PSK on your wireless router or access point before conguring your wireless adapter.
Make sure you enter the passphrase exactly the same on all wireless devices.
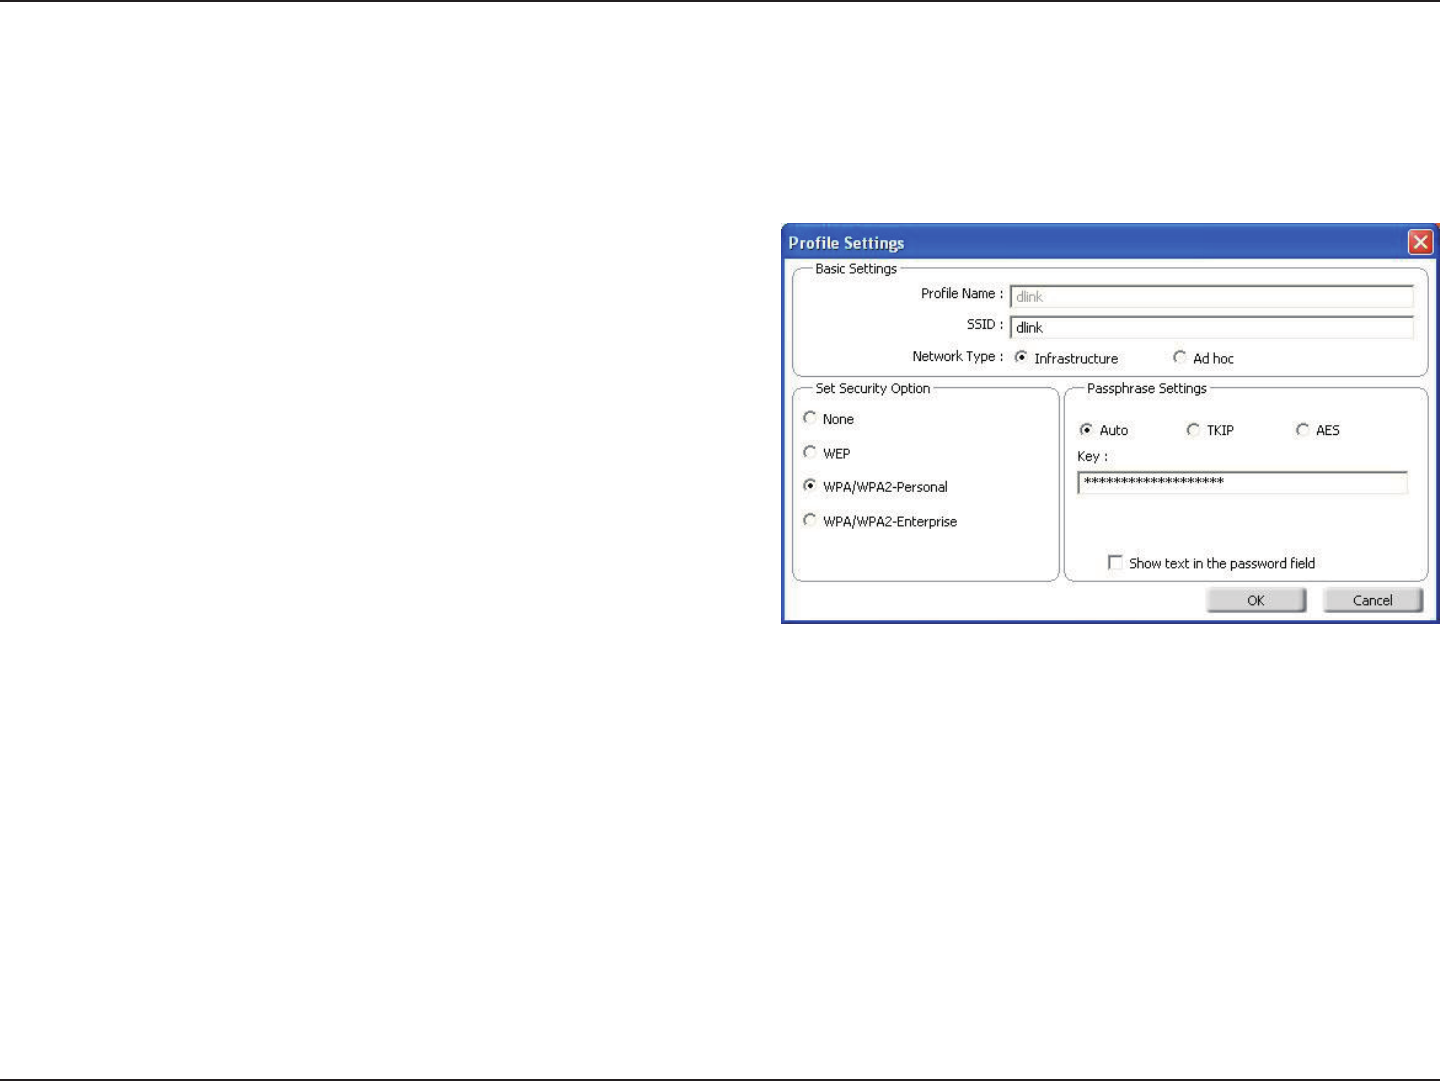
1. Open the Wireless Connection Manager by double-clicking on the D-Link icon on your desktop. Click on New to
create a new prole or highlight an existing prole and click Modify.
2. Select WPA/WPA2-Personal under Set Security Option.
3. Select TKIP or AES.
4. Enter the passphrase exactly as it is on your wireless router
or access point.
5. Click OK to connect to the network. Allow up to 30 seconds
to connect.
36D-Link DWA-126 User Manual
Section 4 - Wireless Security
Configure WPA/WPA2 Passphrase
Using Windows® Vista/Windows 7
It is recommended to enable wireless security (WPA/WPA2) on your wireless router or access point before conguring
your wireless adapter. If you are joining an existing network, you will need to know the security key or passphrase
being used.
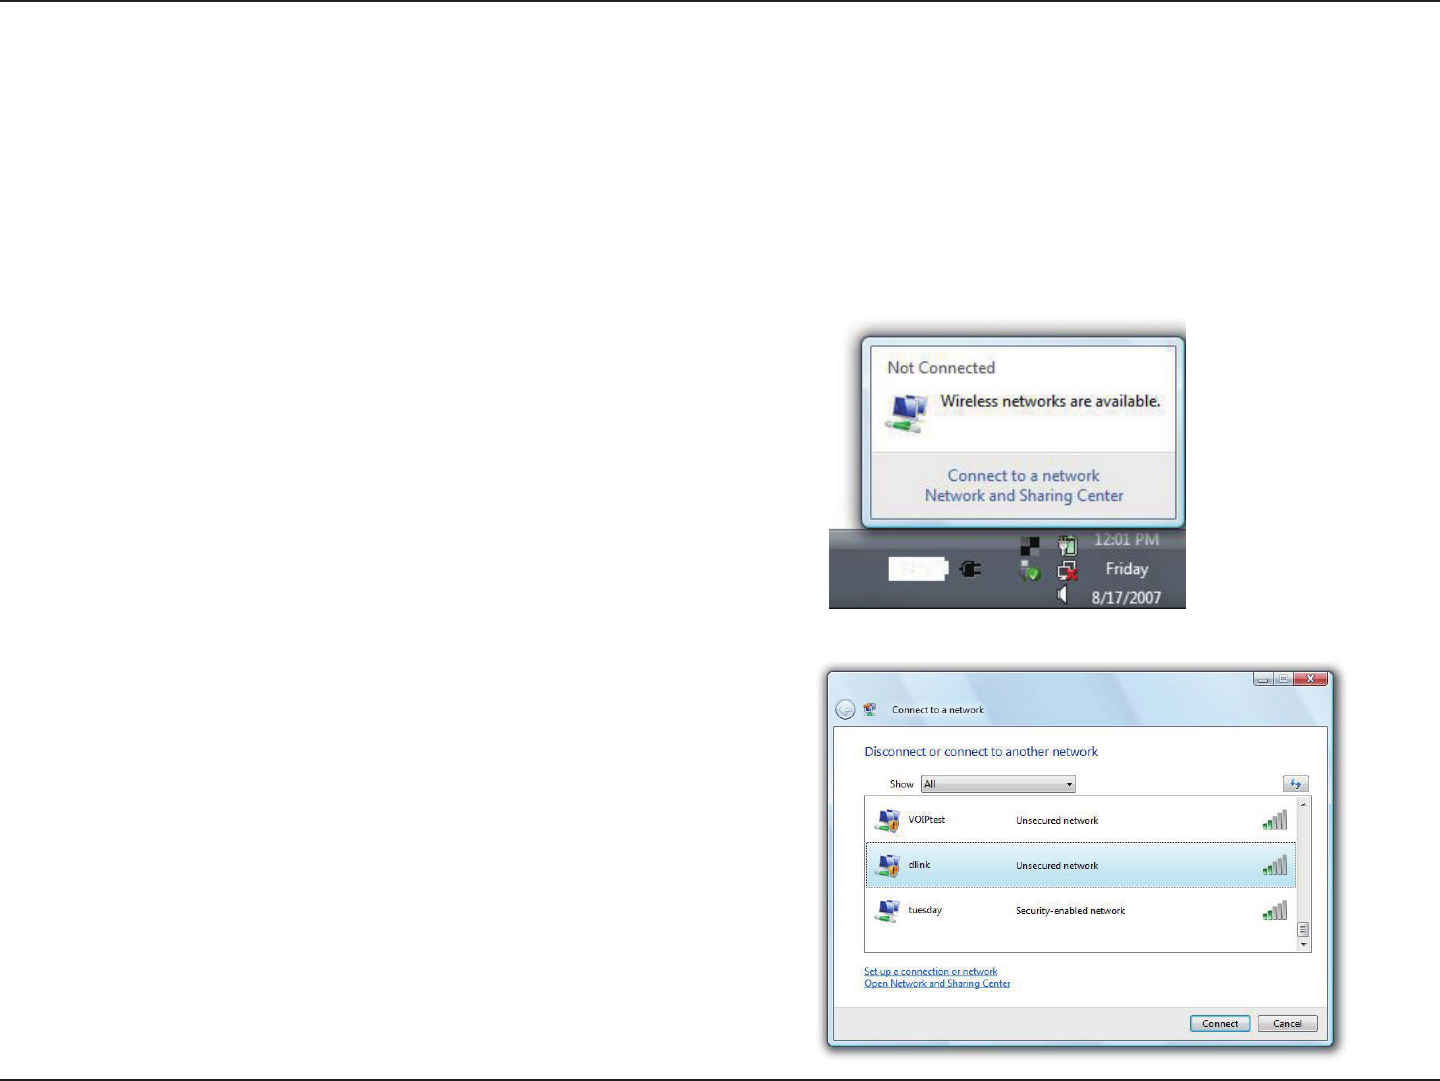
2. Highlight the wireless network (SSID) you would like to
connect to and click Connect.
1. Open the Windows® Vista™/Windows 7 Wireless Utility by
right-clicking on the wireless computer icon in your system
tray (lower right corner of screen). Select Connect to a
network.
37D-Link DWA-126 User Manual
Section 4 - Wireless Security
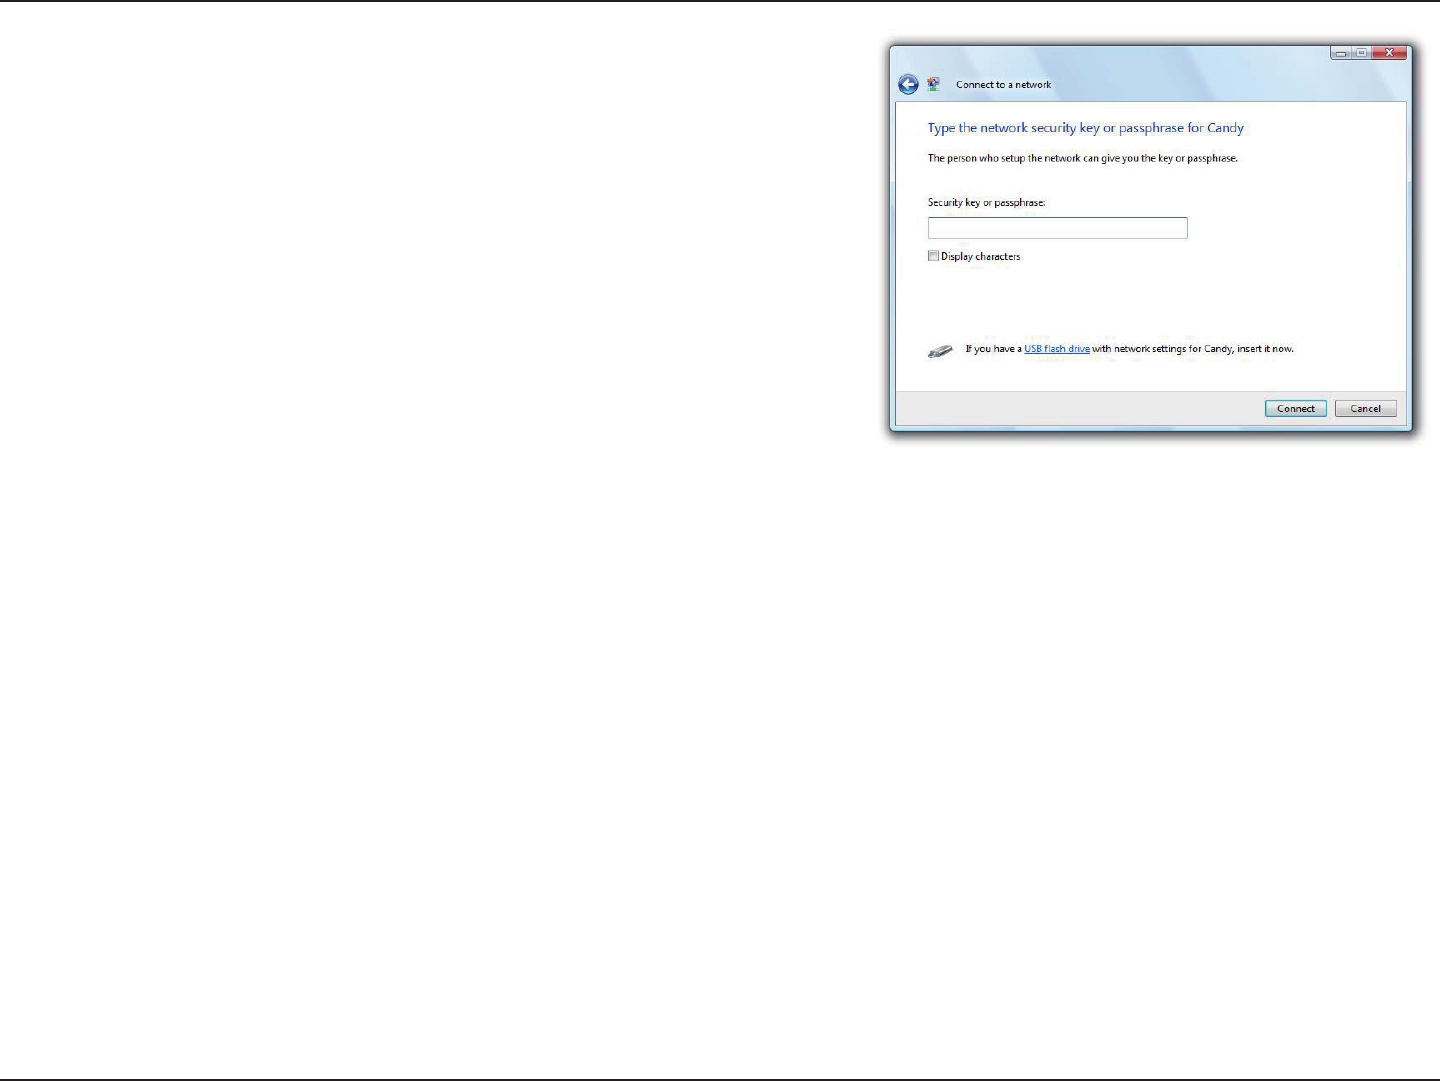
3. Enter the same security key or passphrase that is on your router
and click Connect.
It may take 20-30 seconds to connect to the wireless network. If the
connection fails, please verify that the security settings are correct.
The key or passphrase must be exactly the same as on the wireless
router.
38D-Link DWA-126 User Manual
Section 4 - Wireless Security
Configure WPA/WPA2 Passphrase
Using the Windows® XP Utility
It is recommended to enable WPA-PSK on your wireless router or access point before conguring your wireless adapter.
If you are joining an existing network, you will need to know the WPA-PSK key being used.
2. Highlight the wireless network (SSID) you would like
to connect to and click Connect.
1. Open the Windows® XP Wireless Utility by right-clicking
on the wireless computer icon in your system tray
(lower-right corner of screen). Select View Available
Wireless Networks.
39D-Link DWA-126 User Manual
Section 4 - Wireless Security
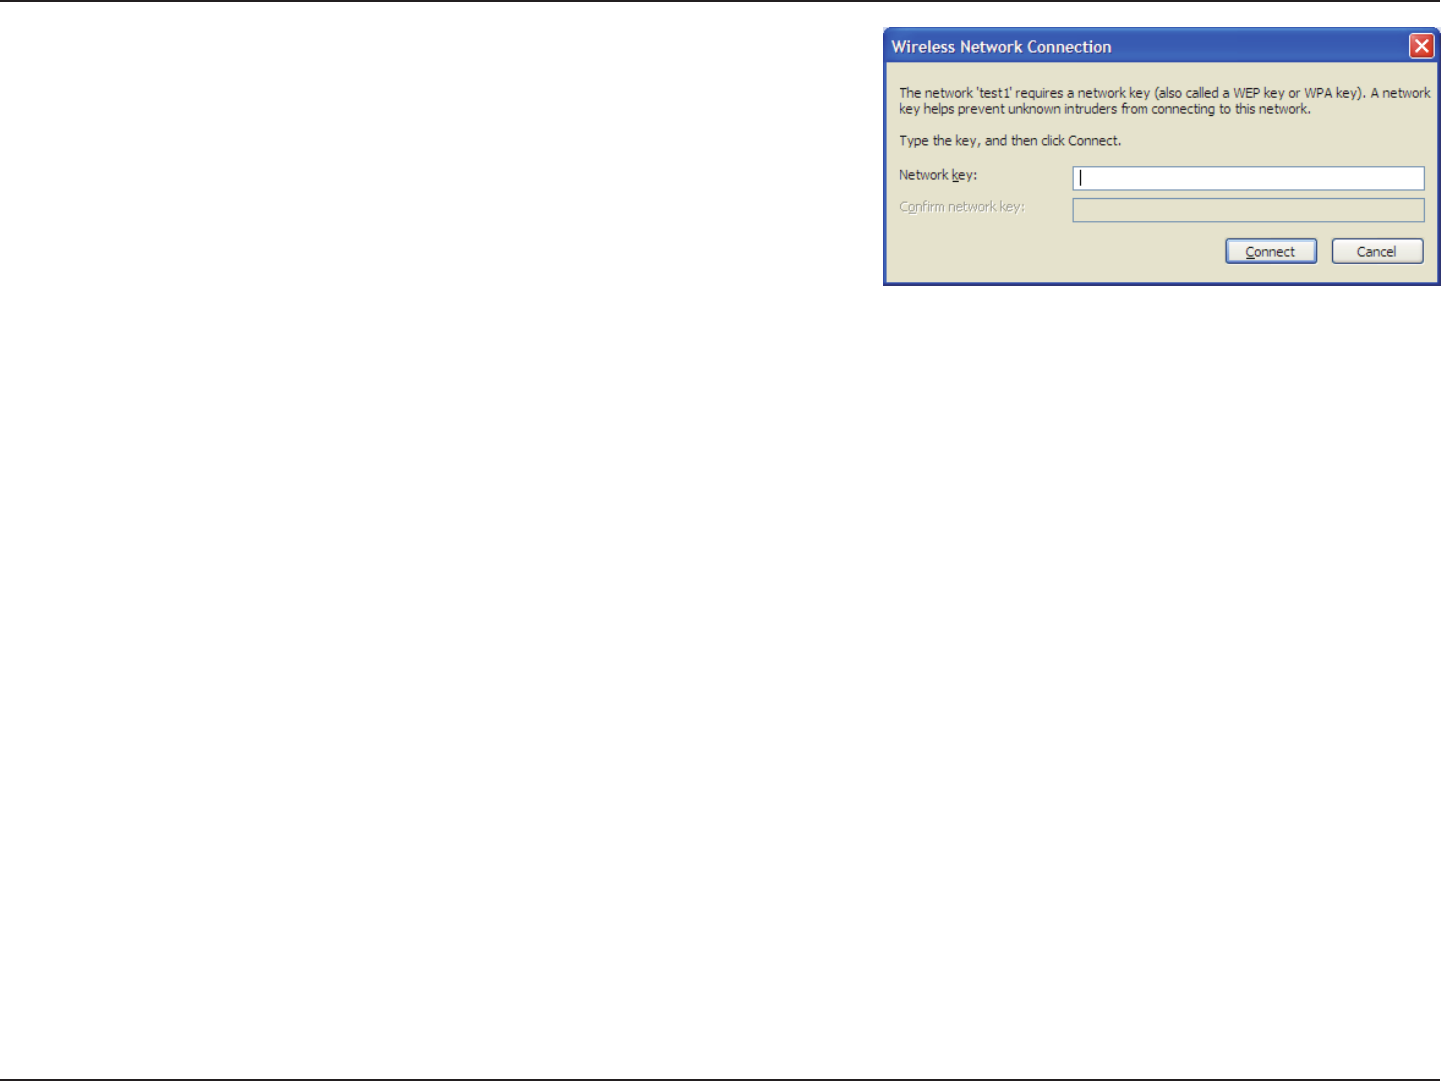
3. The Wireless Network Connection box will appear. Enter the
WPA-PSK passphrase and click Connect.
It may take 20-30 seconds to connect to the wireless network. If the
connection fails, please verify that the WPA-PSK settings are correct.
The WPA-PSK passphrase must be exactly the same as on the
wireless router or access point.

40D-Link DWA-126 User Manual
Section 4 - Wireless Security
Configure WPA/WPA2 (RADIUS)
Using the D-Link Wireless Connection Manager
WPA and WPA2 are for advanced users who are familiar with using a RADIUS server and setting up certicates.
1. Open the Wireless Connection Manager by double-clicking on the D-Link
icon on your desktop. Click on New to create a new prole or highlight an
existing prole and click Modify.
2. Select WPA/WPA2-Enterprise under Set Security Option and then select
TKIP or AES.
3. Click on Advanced Cong to continue.
4. Next to EAP Type, select EAP-TLS, EAP-TTLS, or PEAP. Extensible
Authentication Protocols allow devices on the network to request
authentication from the RADIUS server in the network. All the devices
on the network must use the same EAP type when using a RADIUS
server for authentication. Some RADIUS servers require that the Validate
Server eld be selected. Check this eld if your RADIUS server requires
validation.
5. Select an User Certicate from the drop-down menu.
6. Enter the login information required to authenticate.
7. Click Add to enter the IP address(es) of your RADIUS servers.
8. Click OK to save your settings.
41D-Link DWA-126 User Manual
Section 5 - Troubleshooting
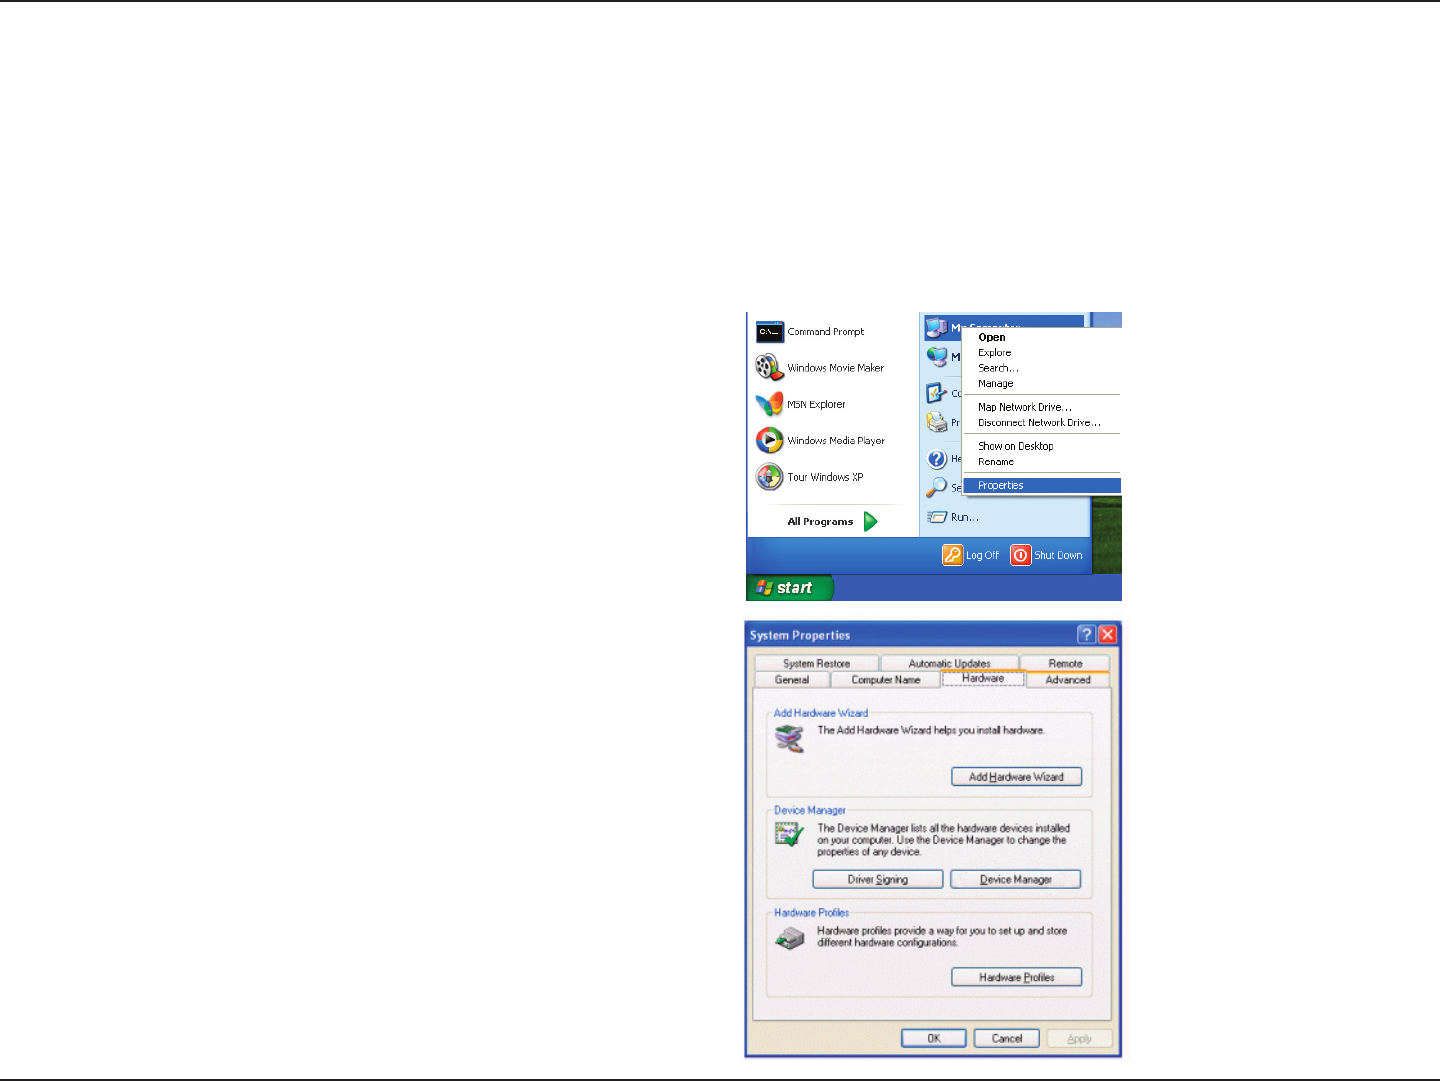
1. How do I know if my adapter is installed properly?
Select the Hardware Tab.
Troubleshooting
This chapter provides solutions to problems that can occur during the installation and operation of the DWA-126. Read
the following descriptions if you are having problems. (The examples below are illustrated in Windows® XP. If you
have a different operating system, the screenshots on your computer will look similar to the following examples.)
Go to Start > My Computer > Properties.

42D-Link DWA-126 User Manual
Section 5 - Troubleshooting
Click the + sign next to Network Adapters.
Right-click on D-Link DWA-126 USB Adapter.
Select Properties to check that the drivers are
installed properly.
Look under Device Status to check that the device
is working properly. Click OK to continue.

43D-Link DWA-126 User Manual
Section 5 - Troubleshooting
Make sure that the DWA-126 Wireless USB Adapter is properly seated in the computer’s USB port.
If Windows does not detect the hardware upon insertion of the adapter, make sure to completely remove drivers that
were previously loaded.
2. The computer does not recognize the DWA-126 Wireless USB Adapter.
• Check that the LED indicators for the broadband modem are indicating normal activity. If not, there may
be a problem with the broadband connection.
• Check that the LED indicators on the wireless router are functioning properly. If not, check that the AC
power and Ethernet cables are rmly connected.
• Check that the IP Address, subnet mask, gateway, and DNS settings are correctly entered for the
network
• In Infrastructure mode, make sure the same Service Set Identier (SSID) is specied on the settings
for the wireless clients and access points. The SSID factory default setting for D-Link products is default.
(Double-click on the WLAN icon in the taskbar. The Link Info screen will display the SSID setting.)
3. The computer with the DWA-126 installed is unable to connect to the wireless network and/or the Internet.

44D-Link DWA-126 User Manual
Section 5 - Troubleshooting
Check that the Network Connection for the wireless client is congured properly. Select AP (Infrastructure) when
connecting to an access point. Double-click on the WLAN icon in the taskbar > click on Conguration to change the
settings for the wireless adapter.
If Security is enabled, make sure that the correct encryption keys are entered on both the DWA-126 and the access
point. Double-click on the WLAN icon in the taskbar > click Encryption. Check to see that the key selected is set to
the same key as other devices on the network.