D Link WM156A2 DWM-156 3.75G HSUPA USB ADAPTER User Manual
D Link Corporation DWM-156 3.75G HSUPA USB ADAPTER Users Manual
UserManual.wiki
>
D Link
>
WM156A2 User Manual
Users Manual
Navigation menu
Upload a User Manual
Namespaces
Wiki Guide
HTML
PDF
Info
Views
User Manual
Discussion / Help
Navigation
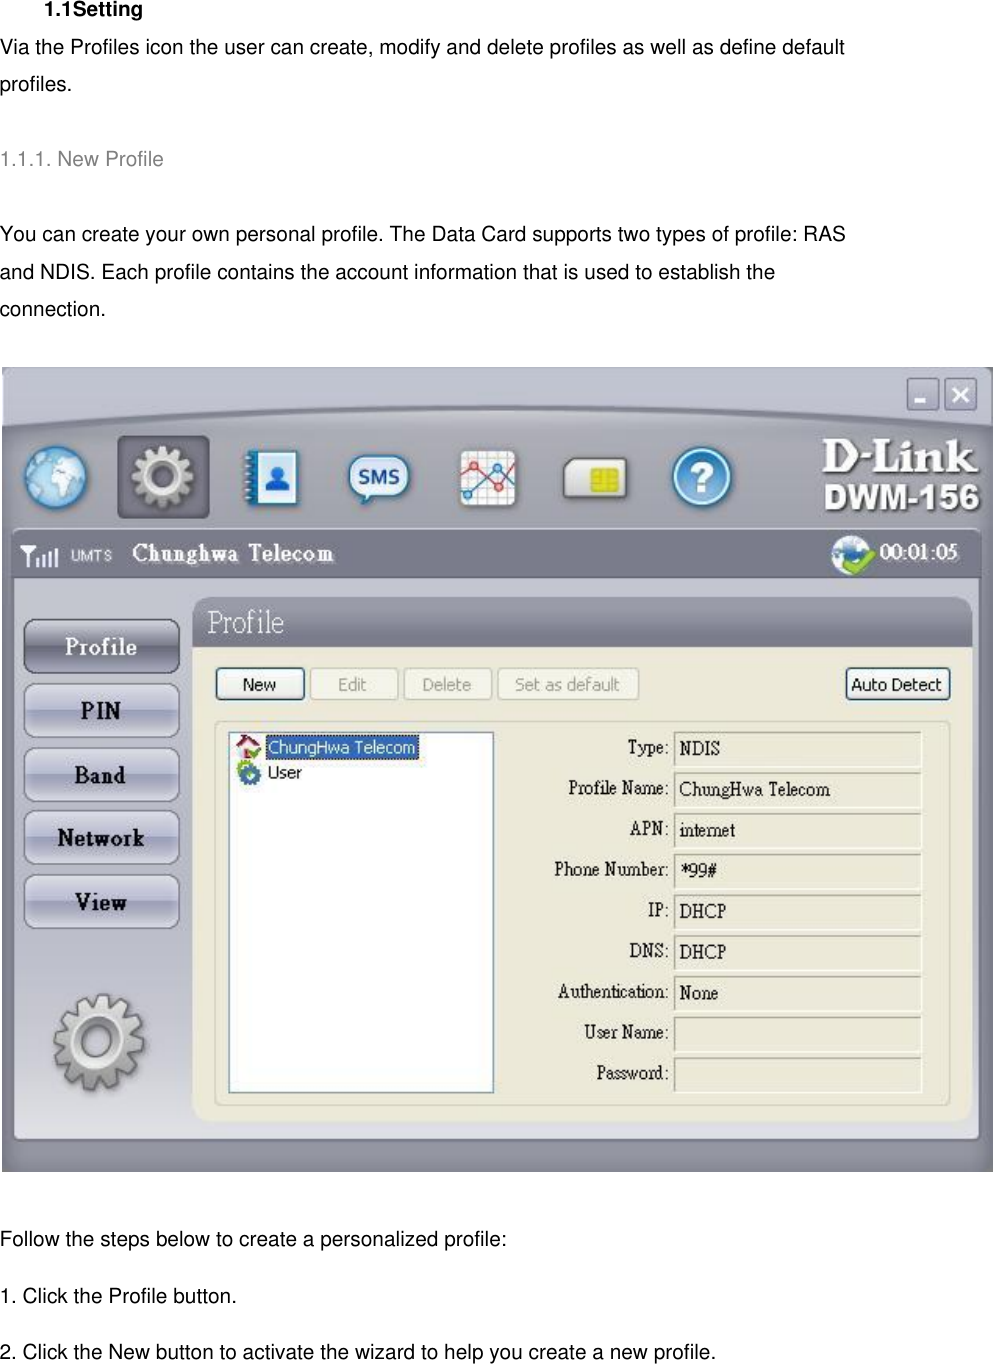
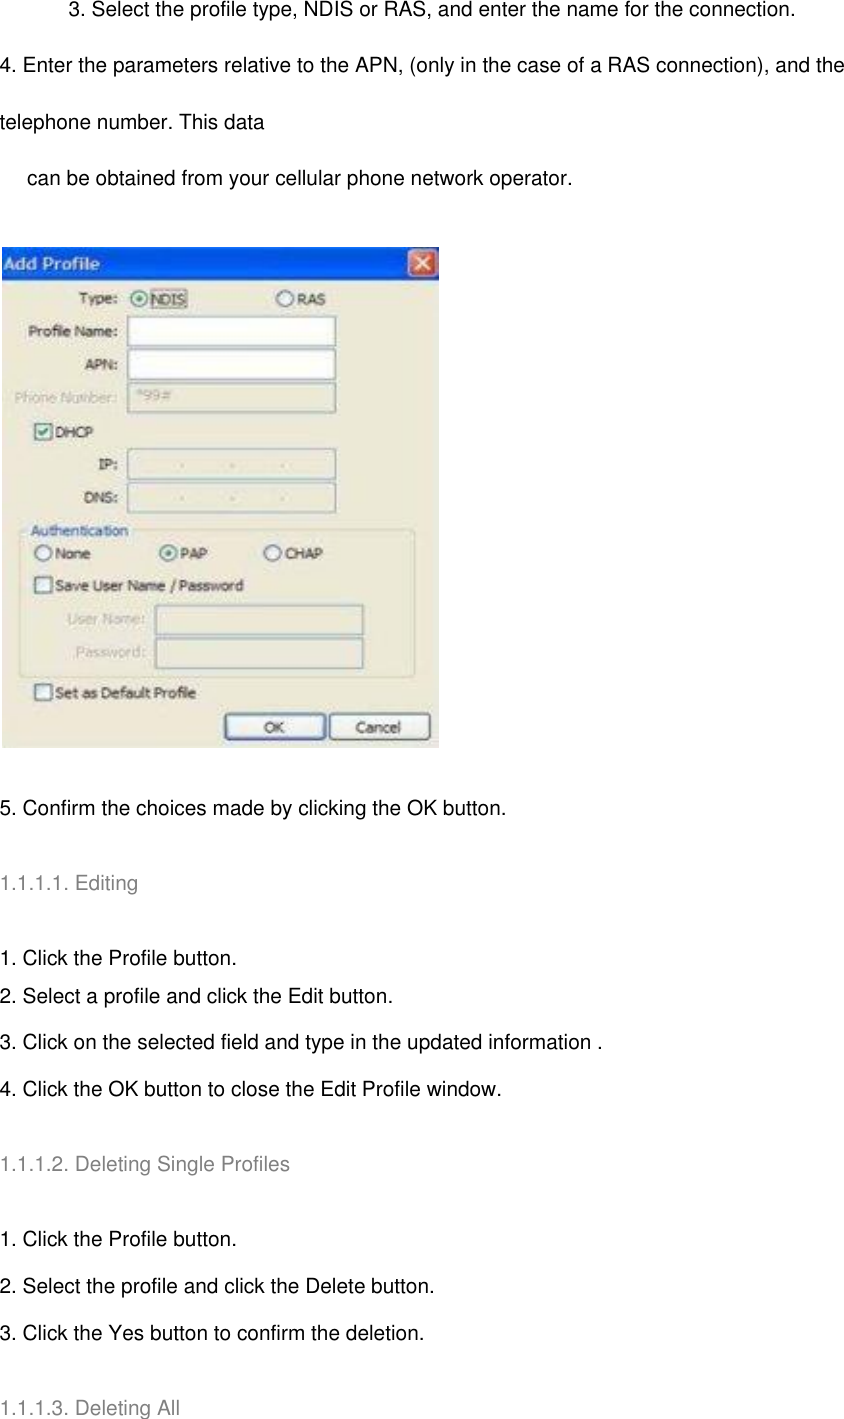
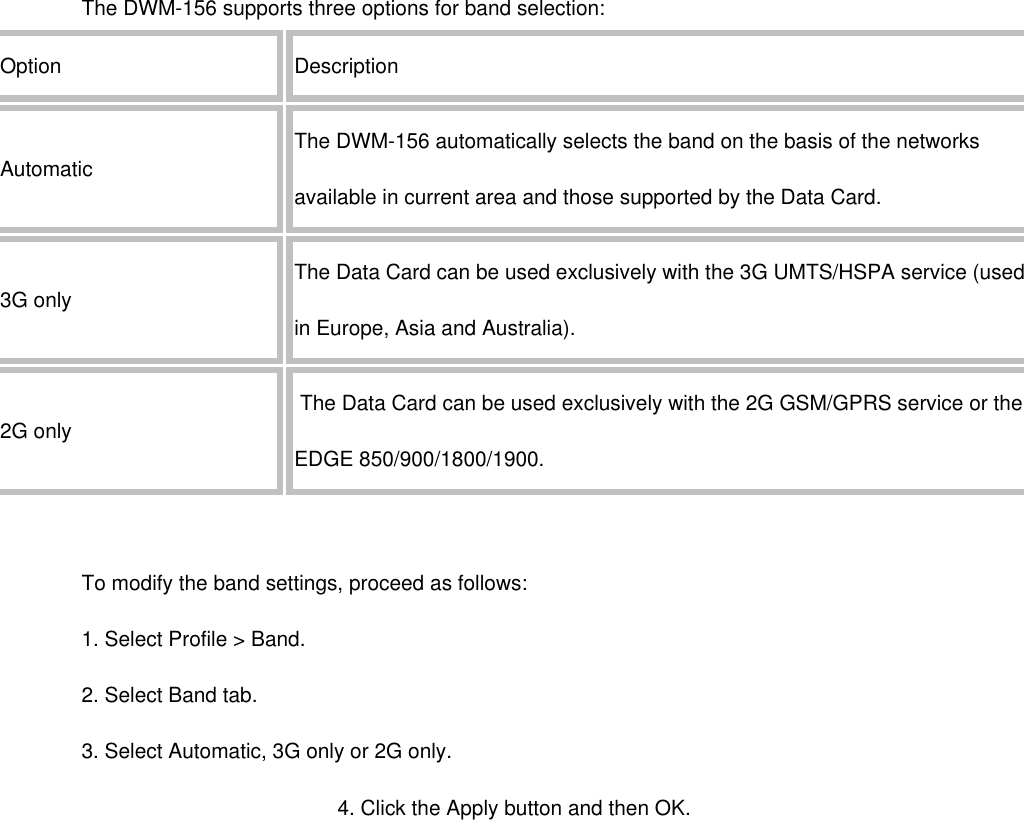
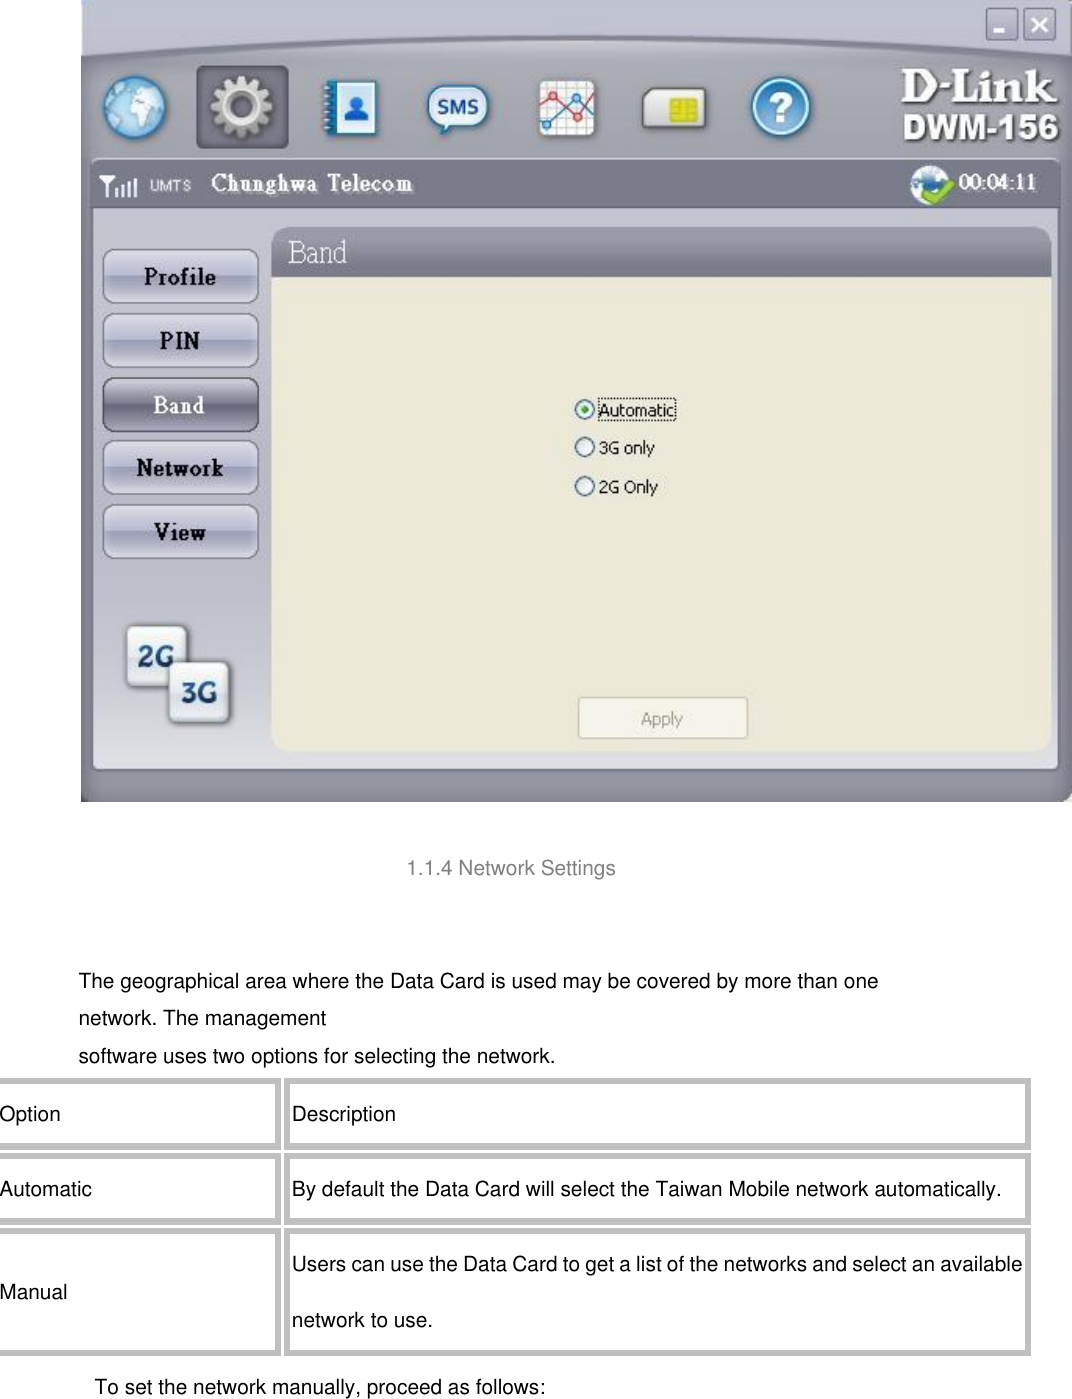
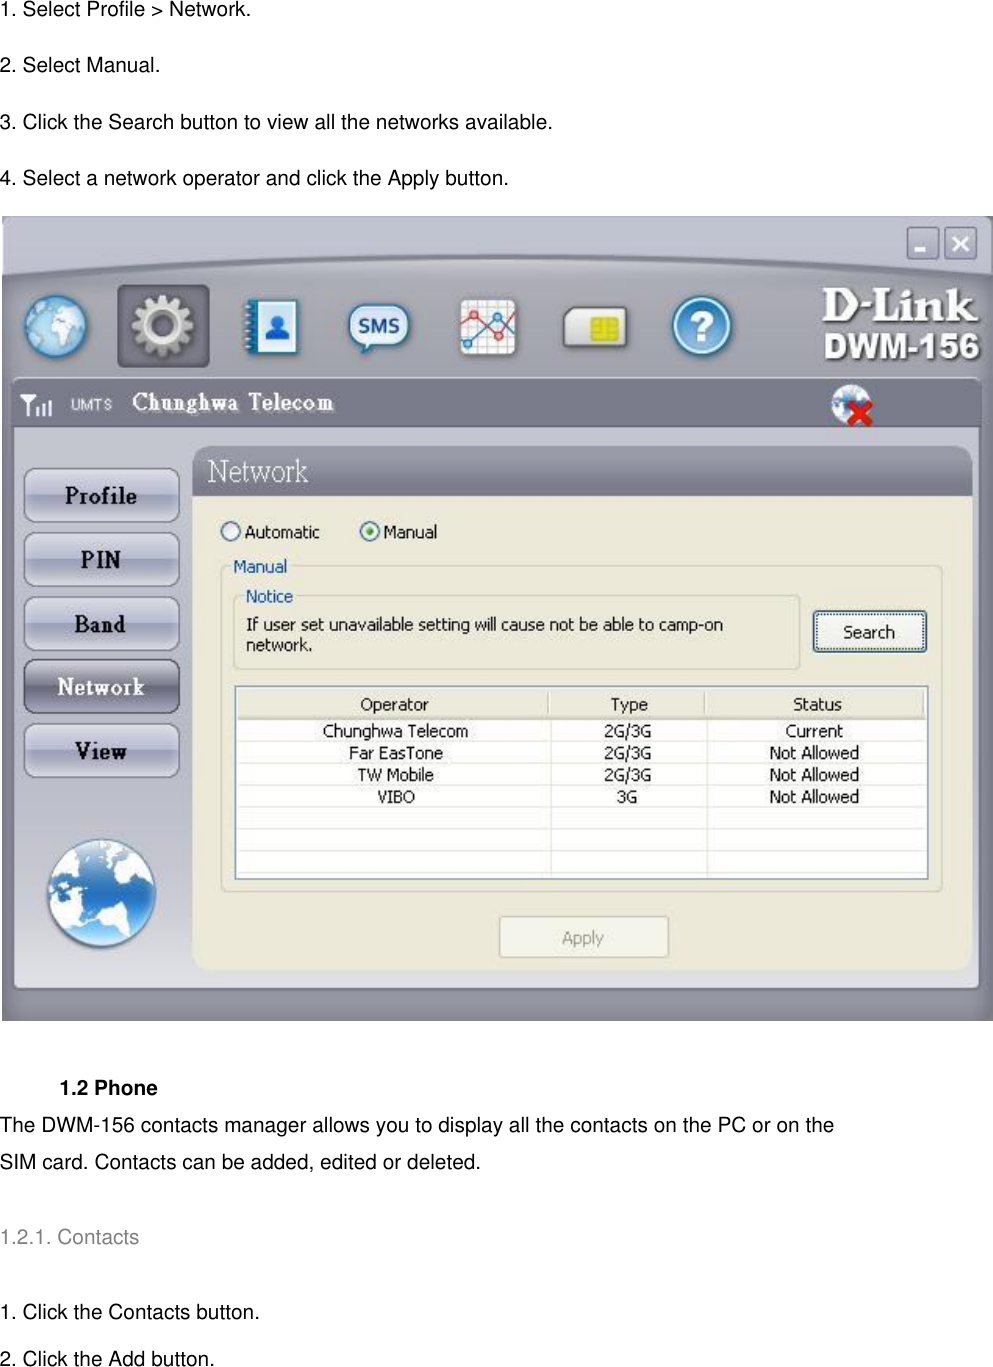
![1. Click the Profile button. 2. Select the profiles to delete. 3. Click the Delete button. 1.1.1.4. Setting as Default Profile 1. Click the Profile button. 2. Select the profile to be used as the Default one . 3. Click Set as Default Profile. 1.1.2 PIN The DWM-156 can manage SIM-related information such as PIN code enabling/disabling, changing PIN1/PIN2. 1.1.2.1. Enabling/Disabling PIN Code To prevent unauthorized use of the SIM card a PIN code can be used for security. Disable (default) 1. Select Profile > PIN > Disable. Enable 1. Select Profile > PIN > Enable. 2. Enter the correct PIN code Note: The PIN is provided by the network provider. 3. Click the OK button to enable. Warning: The PIN code must be entered correctly within three [3] tries. Failure to do so will result in the SIM card being blocked. If a PIN number has been enabled, the user will be asked to enter it before accessing the DWM-156 software. The following window will be displayed. 1.Enter the PIN code.](https://usermanual.wiki/D-Link/WM156A2/User-Guide-1267162-Page-3.png)
![2.Click the OK button. 1.1.2.2 Changing PIN Code SIM cards often contain two PIN codes that can be changed. 1.Select Profile > PIN > Change code. 2.Enter the details in the following fields: Enter Current PIN2 Code, Enter New PIN2 Code and Confirm New PIN2 Code. Warning: The current PIN code must be entered correctly within three [3] tries. Failure to do so will result in the SIM card being blocked. 3.Click the OK button to change. 4.When the procedure completes a window is displayed. Click the OK button to exit. 1.1.3. Band Settings](https://usermanual.wiki/D-Link/WM156A2/User-Guide-1267162-Page-4.png)