User Manual
HSPA+ Le Petit Router
DWR-710
User Manual
Version 1.0 | 10/18/2013
iD-Link DWR-710 User Manual
D-Link reserves the right to revise this publication and to make changes in the content hereof without obligation to notify
any person or organization of such revisions or changes.
Manual Revisions
Trademarks
D-Link and the D-Link logo are trademarks or registered trademarks of D-Link Corporation or its subsidiaries in the United
States or other countries. All other company or product names mentioned herein are trademarks or registered trademarks
of their respective companies.
Copyright © 2014 by D-Link Corporation, Inc.
All rights reserved. This publication may not be reproduced, in whole or in part, without prior expressed written permission
from D-Link Corporation, Inc.
Revision Date Description
1.0 January 15, 2014 • Initial release
Preface

iiD-Link DWR-710 User Manual
Table of Contents
Preface ................................................................................. i
Manual Revisions ........................................................................... i
Trademarks ...................................................................................... i
Product Overview .............................................................. 1
Package Contents ......................................................................... 1
System Requirements ................................................................. 1
Introduction ...................................................................................2
Hardware Overview ..................................................................... 3
Left Side....................................................................................3
Installation ......................................................................... 4
Connecting to Your Network .................................................... 4
Inserting a microSD Card ...........................................................4
Driver Installation ......................................................................... 5
Wireless Installation Considerations ......................................6
Conguration ..................................................................... 7
Initial Connection to the Router .............................................7
Connect via USB .................................................................... 7
Connect via Wi-Fi .................................................................. 8
Web-based Conguration .......................................................10
Conguration Utility ..........................................................10
Home ..............................................................................................11
Navigation .............................................................................11
Device Status ........................................................................12
Home .......................................................................................13
Wizard .............................................................................................14
Internet ...........................................................................................16
Connection ...........................................................................16
2G/3G Modem .....................................................................18
SIM ...........................................................................................19
PLMN .......................................................................................20
Network .........................................................................................21
Wi-Fi .........................................................................................22
DHCP .......................................................................................23
NAT ...........................................................................................24
SMS ..................................................................................................26
New Message .......................................................................26
Local ........................................................................................26
Wi-Fi .................................................................................................27
Basic .........................................................................................27
Wireless Security .................................................................29
Wired Equivalent Privacy (WEP) ...............................29
Wi-Fi Protected Access (WPA) ....................................30
WLAN Authentication and Privacy Infrastructure
(WAPI).................................................................................31
Wi-Fi Protected Setup (WPS) .....................................32
MAC Filter ..............................................................................33
Station Lists ...........................................................................34
Security ..........................................................................................35
Firewall ...................................................................................35
IP Filter ...............................................................................35
Table of Contents

iiiD-Link DWR-710 User Manual
Table of Contents
IPv6 Filter ..........................................................................36
MAC Filter .........................................................................37
DDOS ..................................................................................38
URL Filter ...........................................................................39
Application ...................................................................................40
About ......................................................................................40
Conguration .......................................................................41
Firmware Upgrade ..............................................................42
Standby Mode .....................................................................43
Password ................................................................................44
Date and Time ......................................................................45
Language ...............................................................................47
System Log ............................................................................48
Connecting to a Wireless Network .................................49
Using Windows 8 .......................................................................49
Connecting to a Wireless Network .................................51
Using Windows 7 .......................................................................51
Conguring Wireless Security ........................................53
Using Windows Vista™ ..............................................................56
Conguring Wireless Security ........................................57
Using Windows® XP ....................................................................59
Congure WEP .....................................................................60
Congure WPA-PSK ............................................................62
Troubleshooting ..............................................................64
Networking Basics ...........................................................66
Check your IP address ...............................................................66
Statically Assign an IP address ...............................................67
Technical Specications ..................................................68
Warnings and Declarations ............................................69
1D-Link DWR-710 User Manual
Section 1 - Product Overview
System Requirements
• A compatible (U)SIM card with mobile data service1
• A computer a with Windows®, Macintosh® , or Linux-based operating systems
• Internet Explorer 8, Firefox 12.0, Chrome 20.0 , or Safari 4.0
1 Subject to services and service terms available from your carrier.
Product Overview
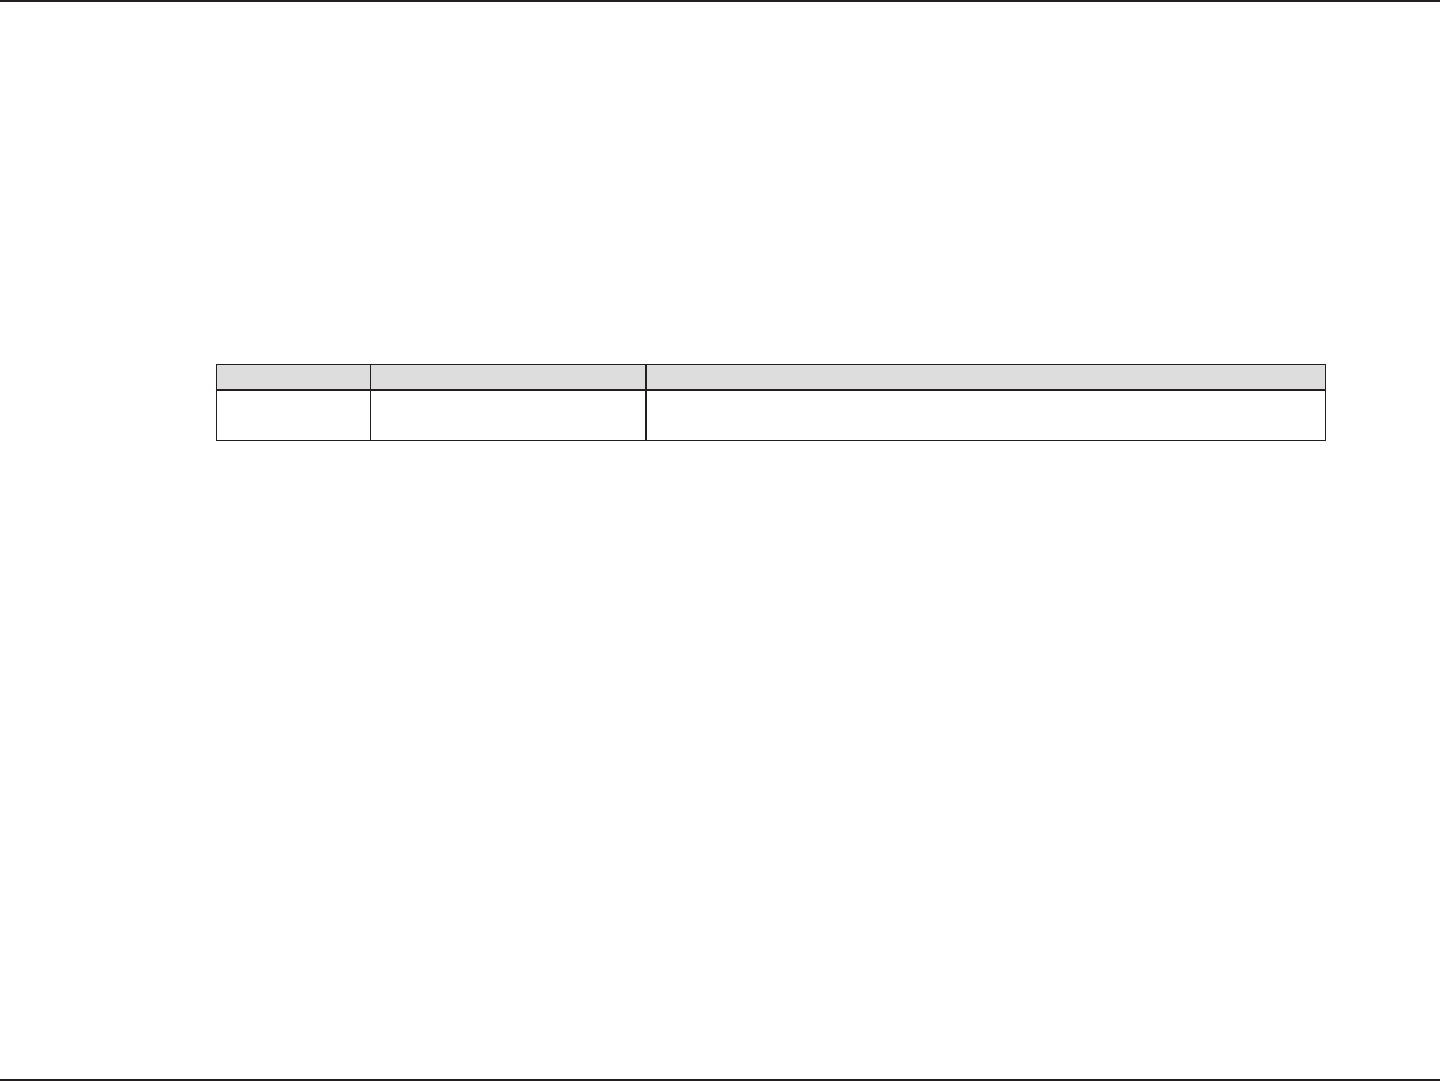
Package Contents
D-Link DWR-710 HSPA+ Mobile Router
Battery
USB Cable
If any of the above items are missing from your package, please contact your reseller.

2D-Link DWR-710 User Manual
Section 1 - Product Overview
Introduction
High-Speed Mobile Internet with 3G Connectivity
The DWR-710 Le Petit HSPA+ Router gives you high-speed access to the Internet wherever you are and lets you share it on the go. Using HSPA+
technology, you can achieve download speeds of up to 21.6 Mbps and upload speeds of up to 5.76 Mbps1. The built-in 3G antenna provides a reliable
connection to your 3G service provider, and a separate Wi-Fi antenna gives extended coverage to the computers and mobile devices connected to
the DWR-710.
Mobile Internet for All of Your Devices
The Le Petit HSPA+ Router lets you share your fast mobile connection over Wi-Fi from a device small enough to t in your pocket. With the DWR-710,
you can get online with your notebook, smartphone, tablet, or any other wireless device using a single 3G mobile connection. The DWR-710 provides
high-speed Wireless N coverage to give high-speed wireless access to everybody – whether you are with colleagues on a business trip, or travelling
with friends and family.
Built-in Software for Instant Access Anywhere
The DWR-710 is truly plug and play, with drivers built right into the router so you can connect without the need to install anything. Open a browser,
connect the router, and you can set up your network right from a web interface. This means that notebooks and netbooks without a CD-ROM drive can
connect and get up and running in no time. Once the device is set up, you can simply power it on to start up your portable mobile network, meaning
that you can share your mobile Internet connection without even needing a computer.
Designed for True Portability
The DWR-710 Le Petit HSPA+ Router is small and slim enough to carry around in your purse, bag, or pocket. It features a microSD card slot for optional
removable storage (up to 32 GB), allowing you to always have your les and contacts on hand.
The D-Link DWR-710 Le Petit HSPA+ Router lets you share a fast mobile Internet connection with multiple PCs and mobile
devices wherever you go. It oers 3G HSPA+ compatibility for fast downlink and uplink data rates, so you get the high-speed
upload and download speeds even when you’re on the go. Set up a personal mobile network anywhere, anytime allowing you
and those around you to access the Internet, and share les.
1 All references to speed are for comparison purposes only. Actual speeds will vary depending on a range of factors including mobile network coverage, signal strength, network activity, and environmental conditions.
3D-Link DWR-710 User Manual
Section 1 - Product Overview
Hardware Overview
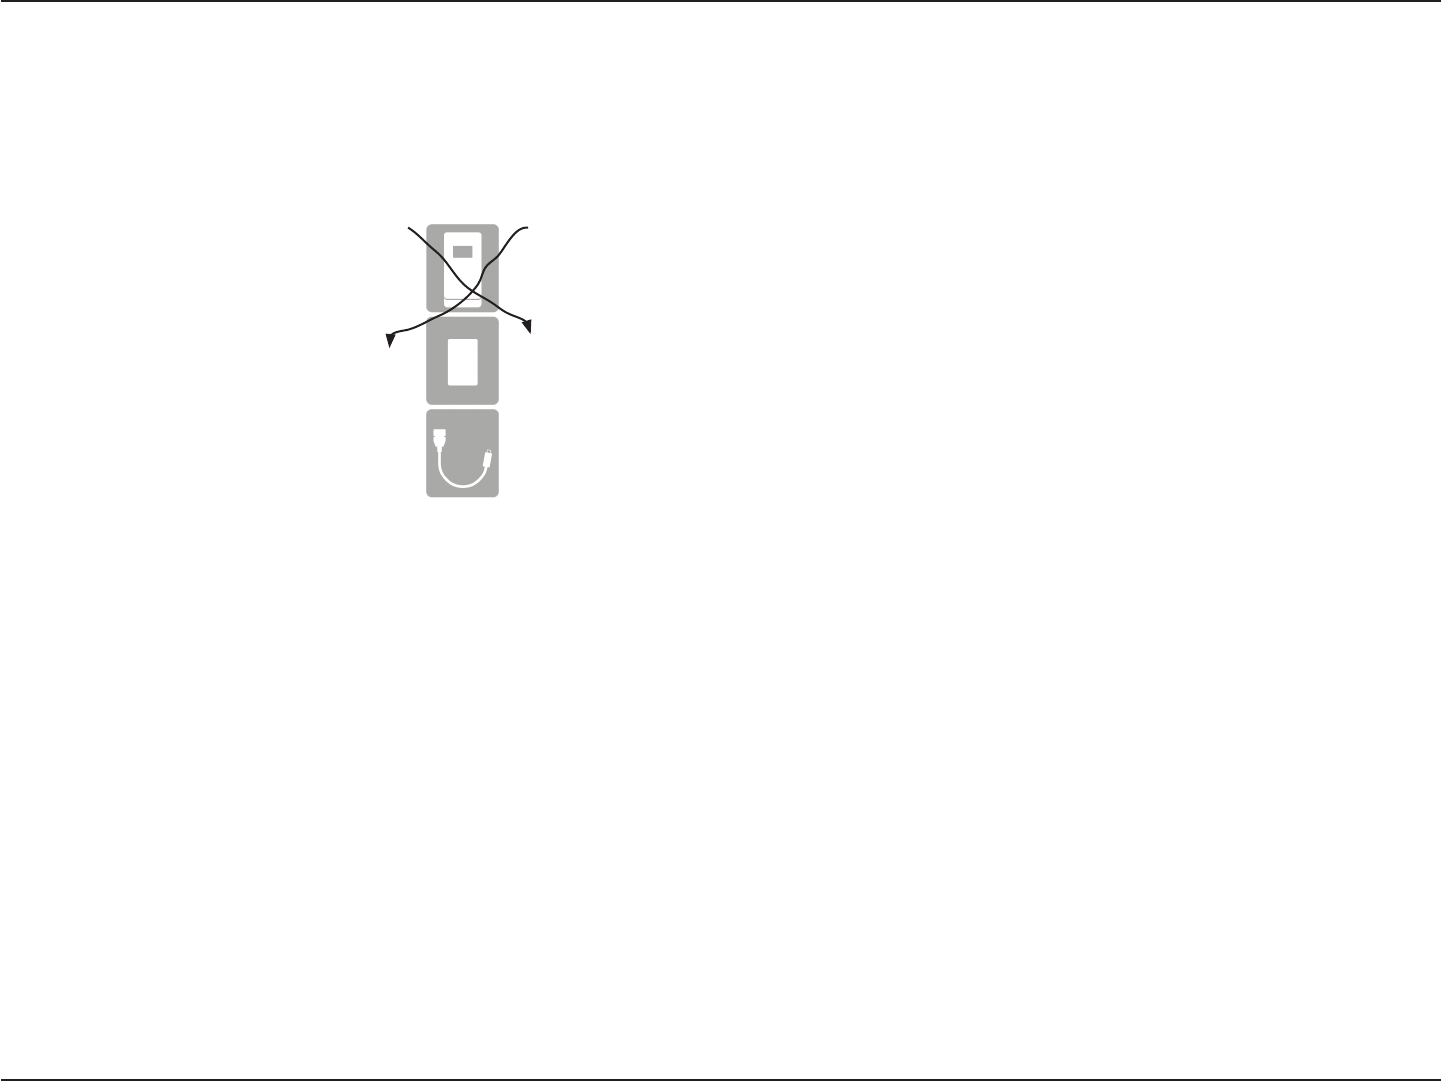
Left Side
microSD Card Slot Insert a microSD Card (up to 32GB) to access and share les and media wherever you go.
micro USB Connector Use the included cable to connect to a powered USB port to charge the device, or to
access the conguration utility.
USB Connector
microSD Card Slot (under removable housing)

4D-Link DWR-710 User Manual
Section 2 - Installation
Connecting to Your Network
Installation
This section will guide you through the installation process.
Remove the back cover. Slide your (U)SIM card into the slot provided, ensuring that the alignment is the same as indicated by the logo next to the
slot. The gold contacts on the card should be facing downwards. “D-Link” will be displayed on the screen as the router performs its initialization
processes.
Caution: Always unplug and turn o the router before installing or removing the SIM card. Never insert or remove the SIM card while the router
is in use.
Inserting a microSD Card
1. Ensure that your DWR-710 Le Petit HSPA+ Router is not plugged in.
2. Remove the cover.
3. Insert the microSD card into the slot and push it in until it locks into place.
5D-Link DWR-710 User Manual
Section 2 - Installation
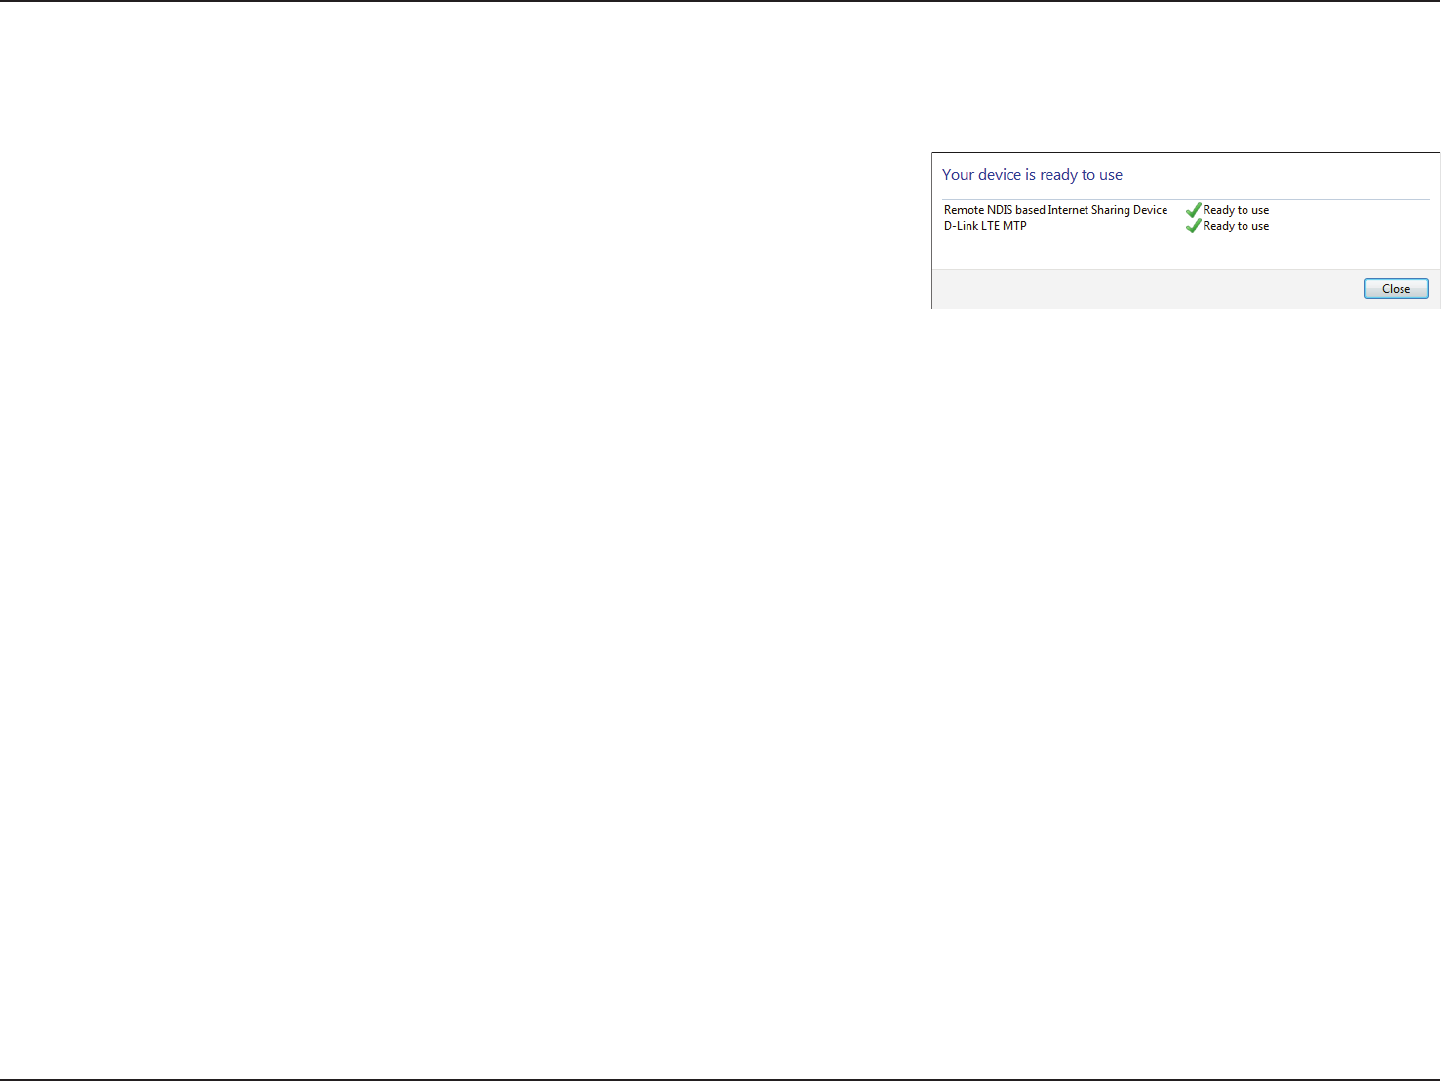
Driver Installation
When you plug the DWR-710 into your computer, any necessary drivers will
immediately install (with your permission).
Note: These drivers are Windows-only. Mac and Linux users will still be able
to congure the DWR-710 using the web conguration utility described in
“Conguration Utility” on page 10.

6D-Link DWR-710 User Manual
Section 2 - Installation
Wireless Installation Considerations
The DWR-710 can be accessed using a wireless connection from anywhere within the operating range of its wireless network. Keep in mind that
the quantity, thickness, and location of walls, ceilings, or other objects that the wireless signals must pass through may adversely aect wireless
signals. Ranges vary depending on the types of materials and background RF (radio frequency) noise in your home or oce. The key to maximizing
the wireless range is to follow these basic guidelines:
1. Minimize the number of walls and ceilings between the router and other network devices. Each wall or ceiling can reduce your adapter’s range
from 3 to 90 feet (1 to 30 meters).
2. Be aware of the direct line between network devices. A wall that is 1.5 feet thick (0.5 meters) appears to be almost 3 feet (1 meter) thick at a
45-degree angle. At a 2-degree angle it appears over 42 feet (14 meters) thick. Position devices so that the signal will travel straight through a
wall or ceiling (instead of at an angle) for better reception.
3. Try to position access points, wireless routers, and computers so that the signal passes through open doorways and drywall. Materials such as
glass, metal, brick, insulation, concrete, and water can aect wireless performance. Large objects such as sh tanks, mirrors, le cabinets, metal
doors, and aluminum studs may also have a negative eect on range.
4. If you are using a 2.4 GHz cordless phone, make sure that the 2.4 GHz phone base is as far away from your wireless device as possible. The base
transmits a signal even if the phone is not in use. In some cases, cordless phones, X-10 wireless devices, and electronic equipment such as ceiling
fans, uorescent lights, and home security systems may dramatically degrade wireless connectivity.

7D-Link DWR-710 User Manual
Section 2 - Installation
Conguration
Initial Connection to the Router
This section will show you how to congure your new D-Link mobile router using the conguration utility that can be obtained through a software
interface or a web-based user interface.
When conguring the router for the rst time, you will need to establish a direct connection with the router in order to access the web-based
conguration utility. This can be done by connecting the router to a powered USB port. Once you have congured your router, you will be able to
connect using the Wi-Fi settings that you have specied in the conguration process. Ensure that the router is connected before commencing the
setup process.
Connect via USB
To connect to the router via USB, plug the router into an available USB port on your computer. Your router is now ready for conguration, please
refer to “Conguration Utility” on page 10 to continue the setup process.
8D-Link DWR-710 User Manual
Section 2 - Installation
Connect via Wi-Fi
Note: The following example uses Windows 7’s built-in wireless connection utility. If you are using a dierent operating system, or a third party
connection utility, the process may be dierent. Please refer to the documentation that came with your operating system or wireless client for
further information on how to connect to a wireless network.
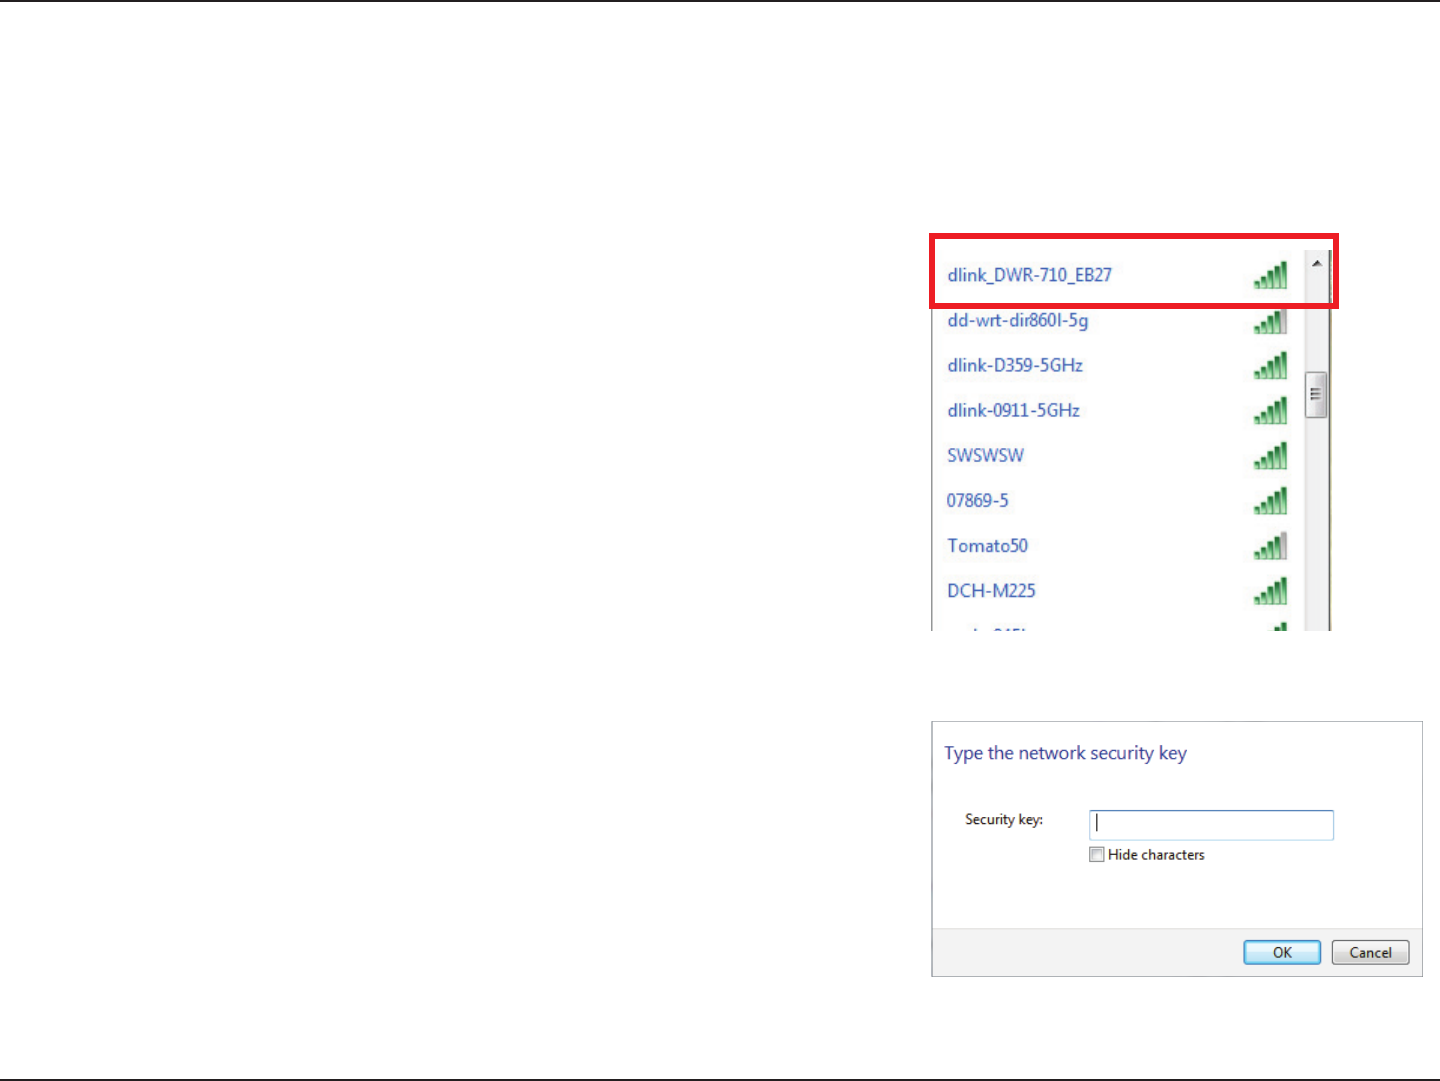
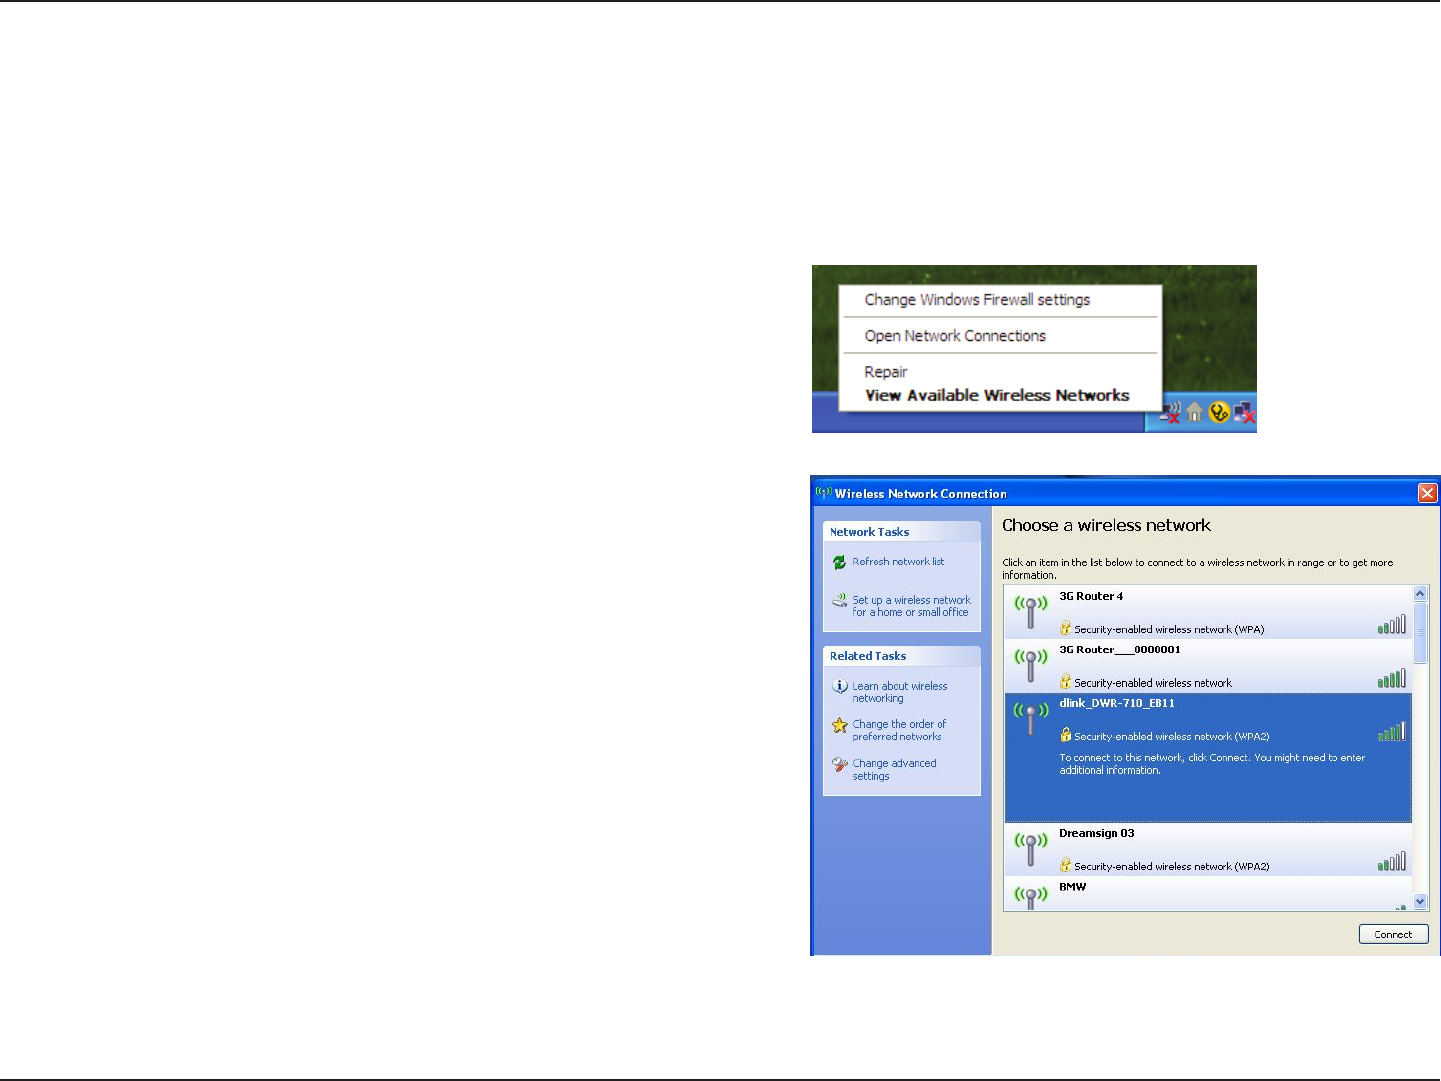
To connect to the router using Wi-Fi, open your operating system’s wireless networking utility
and scan for available networks to connect to. By default, the network name (SSID) of the
DWR-710 will be in the format dlink_DWR-710xxxx, where “xxxx” represents the last four
character’s of the router’s MAC address.
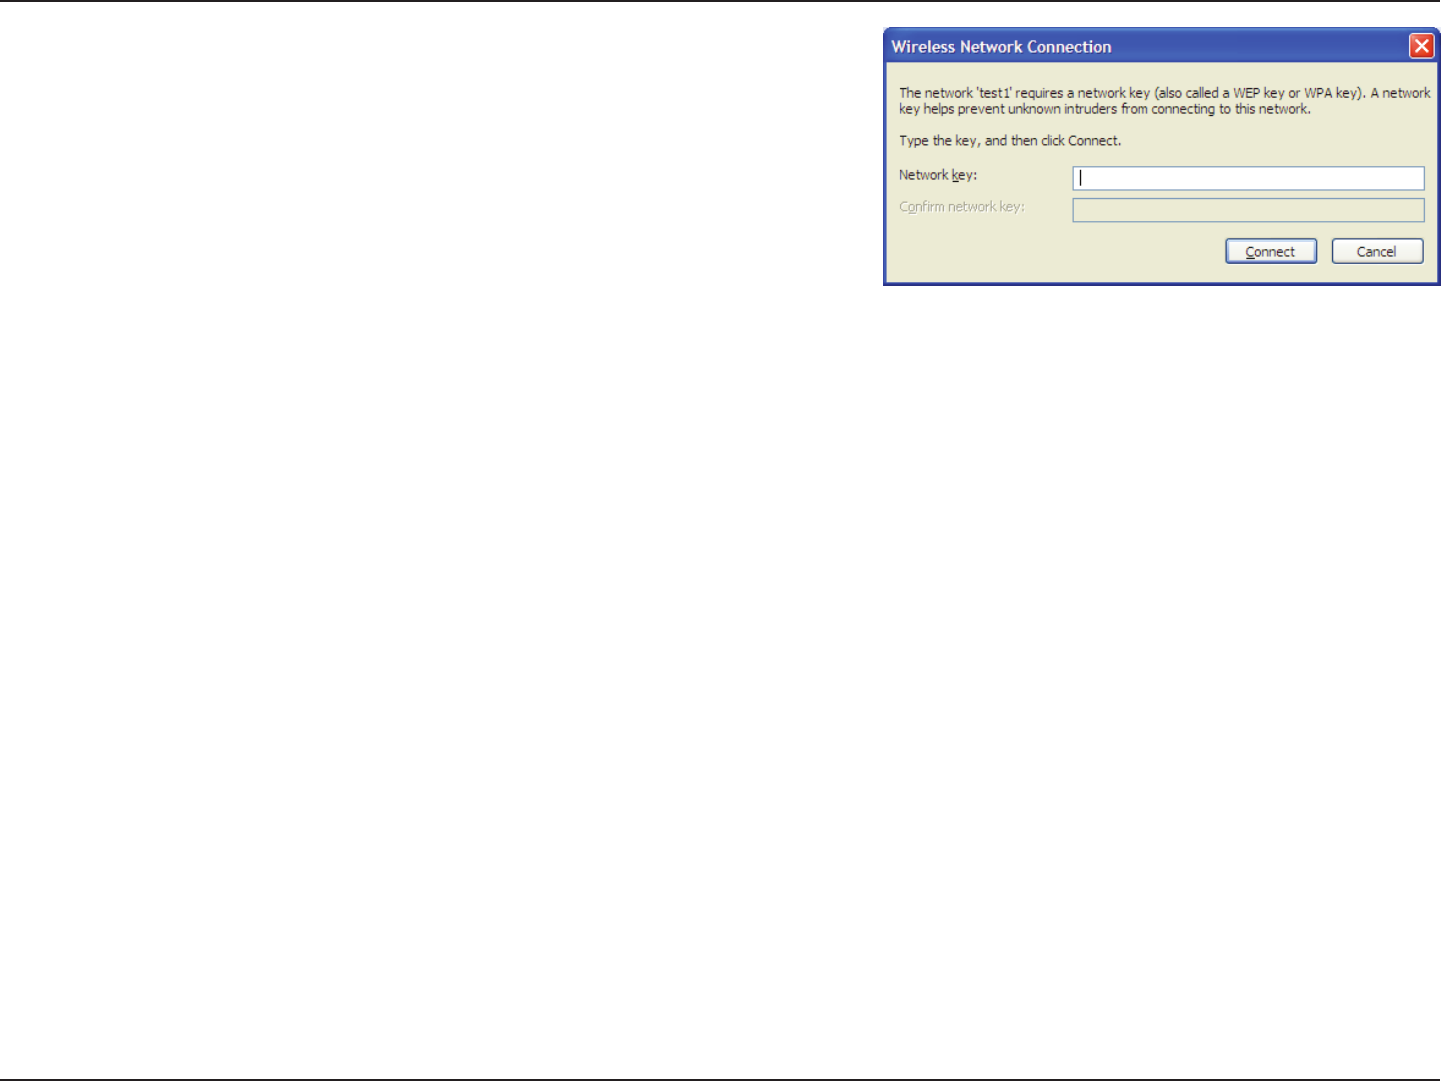
You will then be prompted to enter the network security key for your router. The unique
security key for your router will be displayed on a sticker in the router’s battery bay. Enter
the security key in the box provided and click OK. Your wireless connection utility should
conrm that the connection is successful, and you can move to the next step to continue to
conguration process.
9D-Link DWR-710 User Manual
Section 2 - Installation
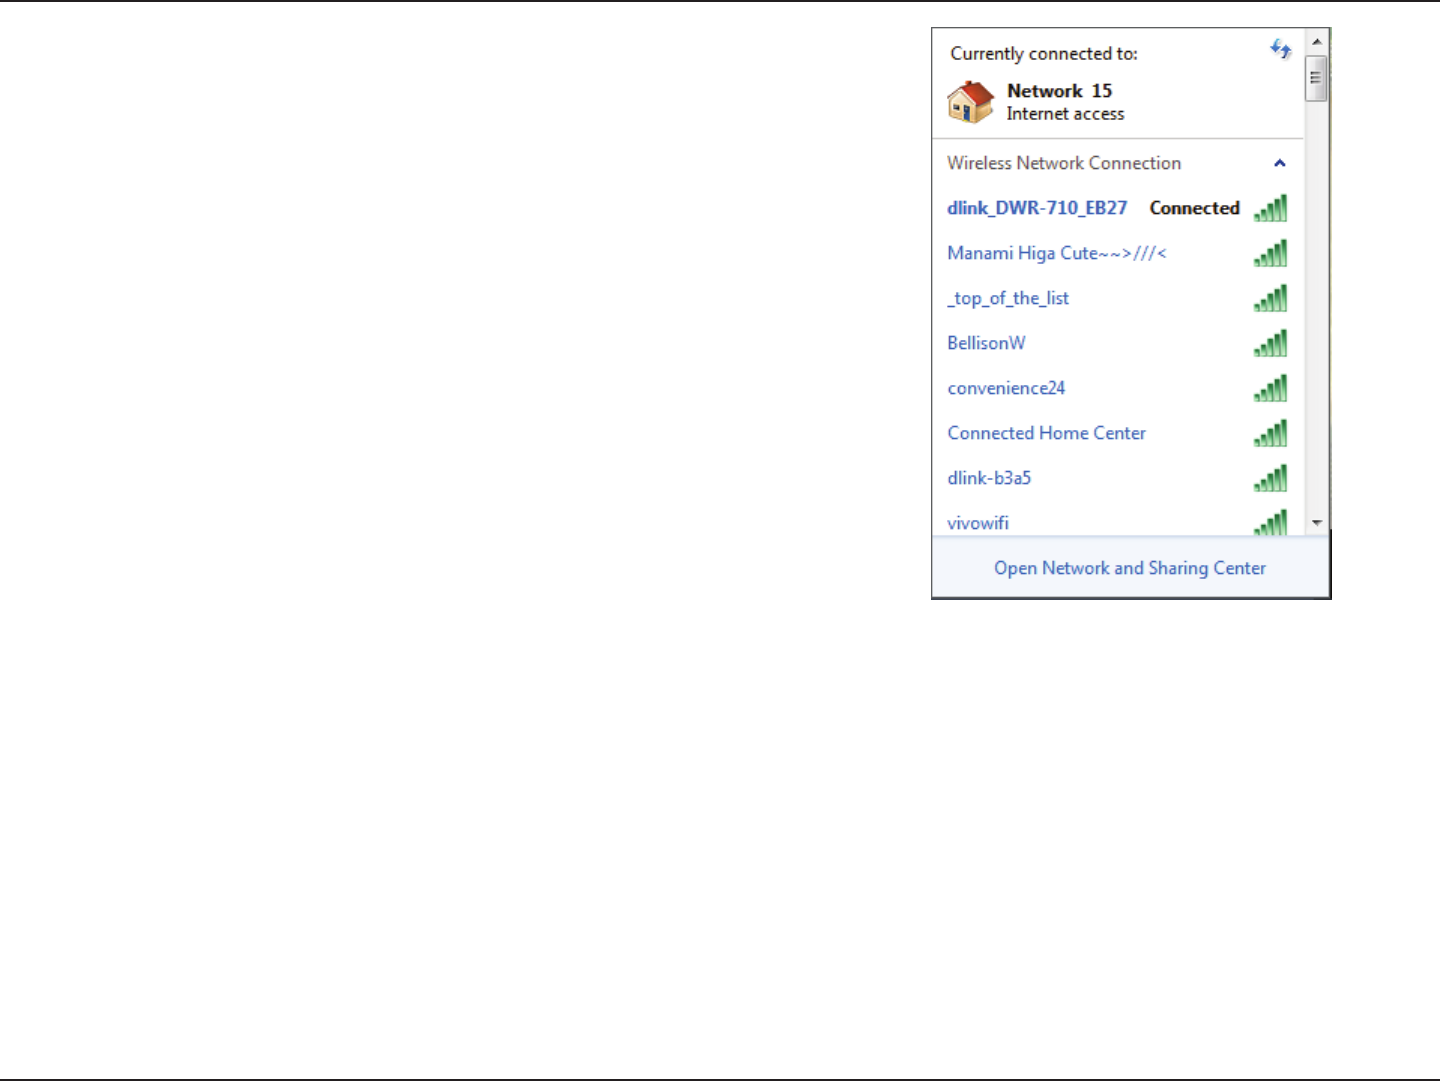
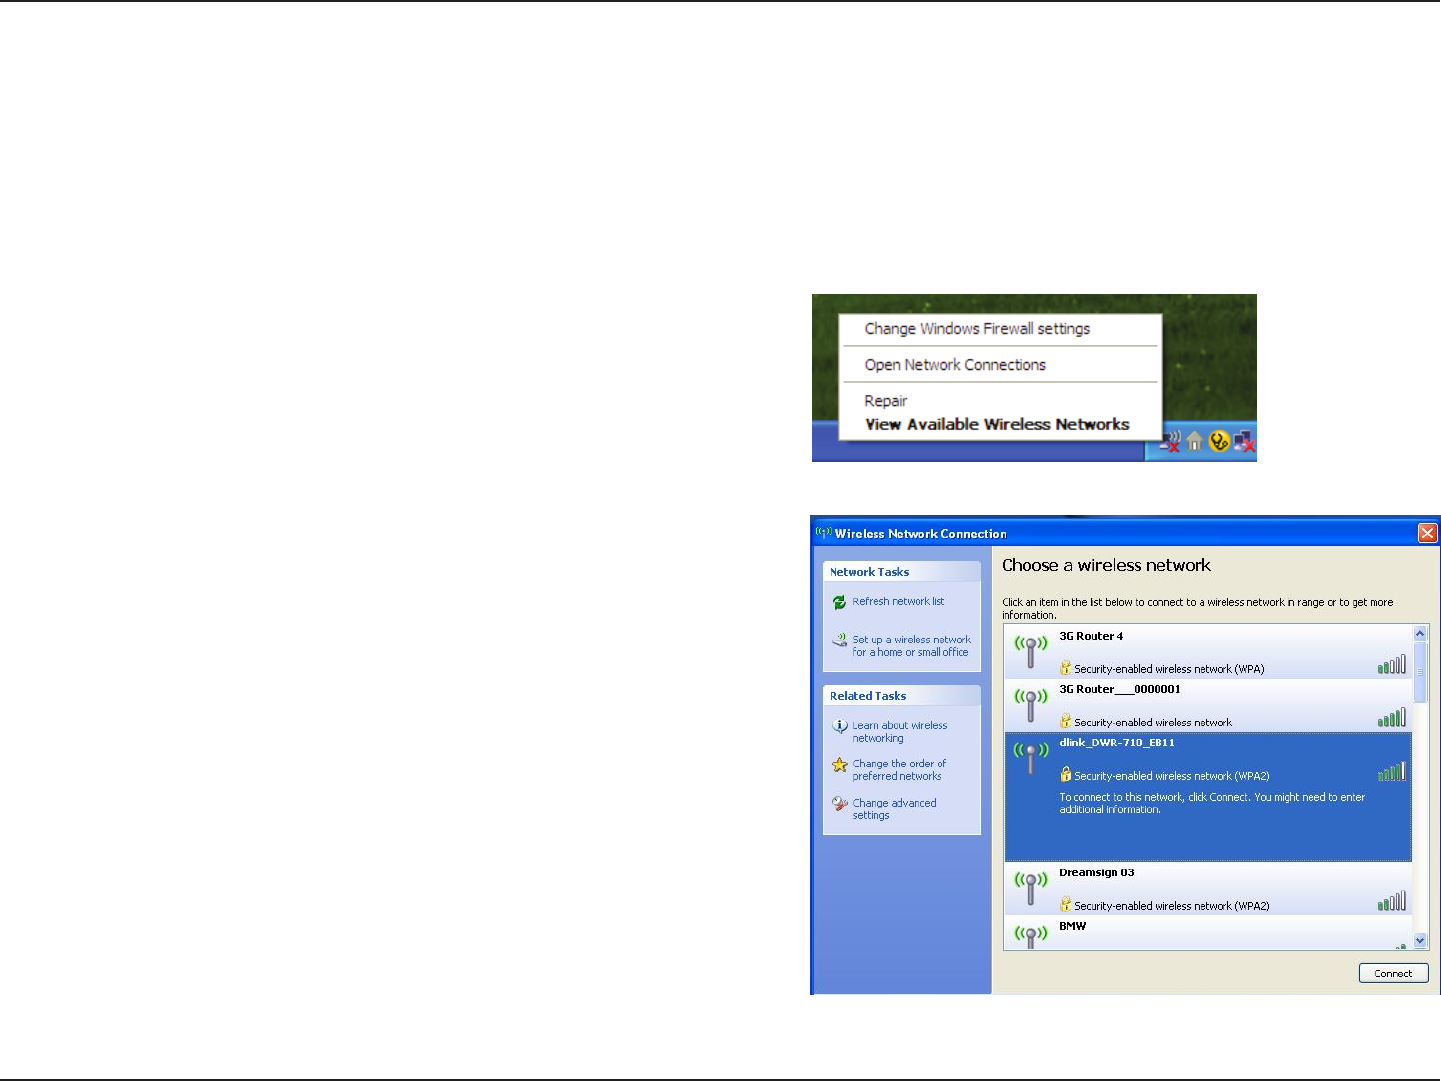
Once you have located this network with your wireless utility, connect to the network using
your wireless networking utility.
10D-Link DWR-710 User Manual
Section 3 - Conguration
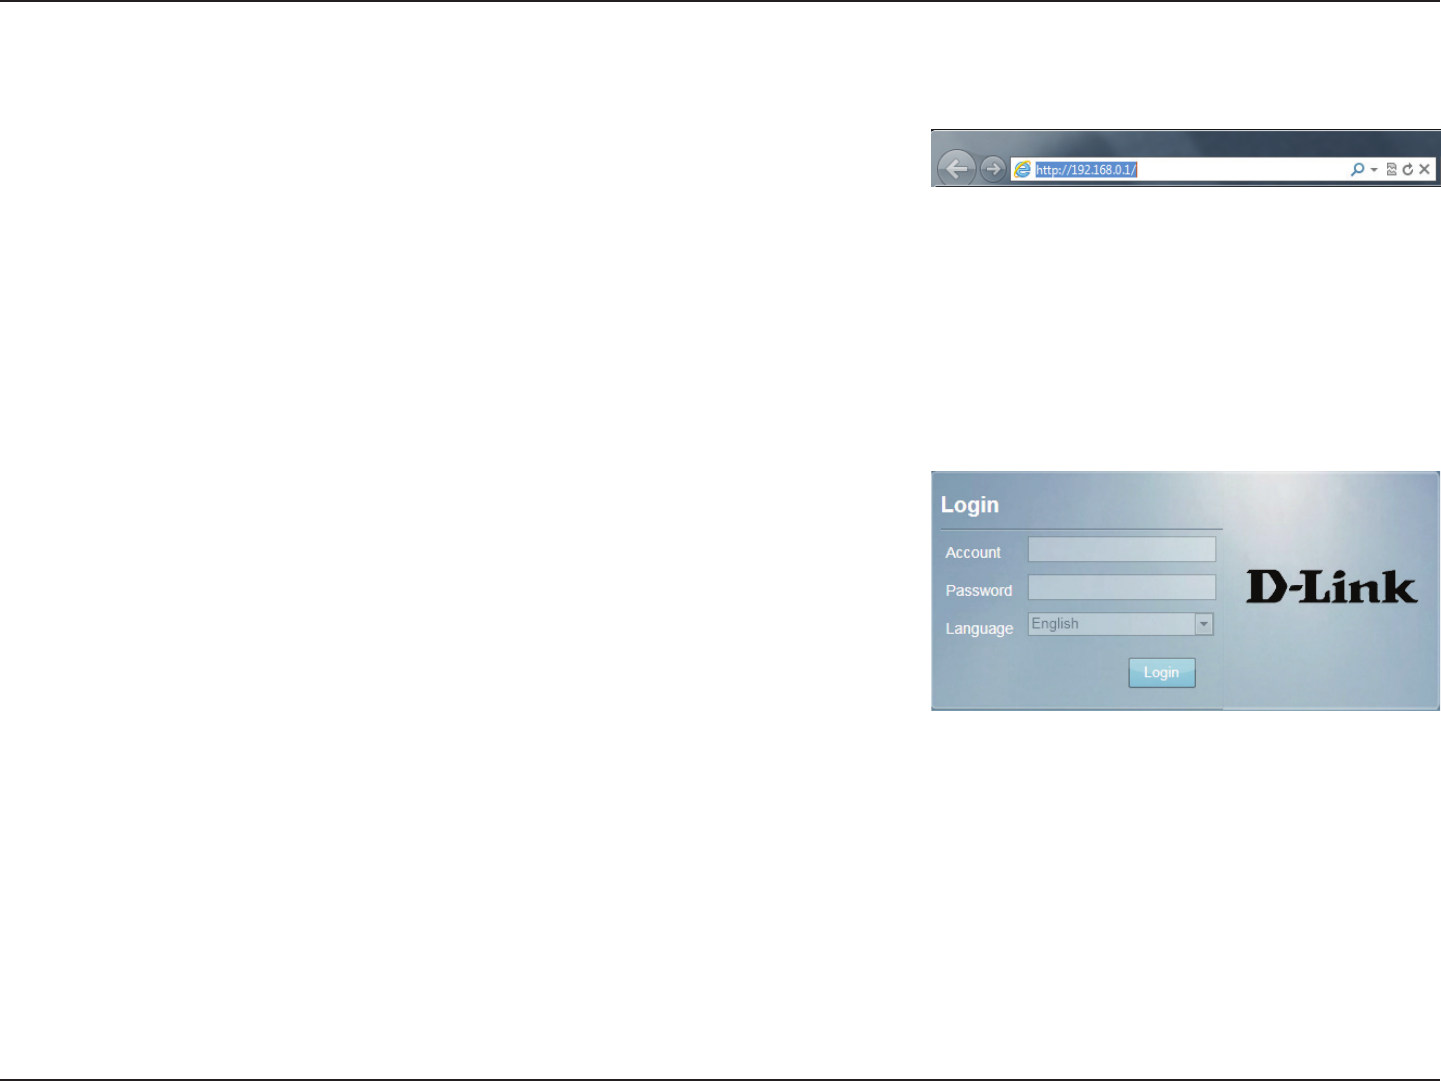
Web-based Conguration
To access the conguration utility, open a web browser (such as Internet Explorer) and enter
the IP address of the router, which is 192.168.0.1 by default.
Once you have reached the conguration utility through the installed software or your
web browser, you will need to log in. Enter admin as the username, and then enter the
password. By default, the password is blank. You can also select your language from the
drop-down menu.
Click Login to continue.
Conguration Utility
11D-Link DWR-710 User Manual
Section 3 - Conguration
Home
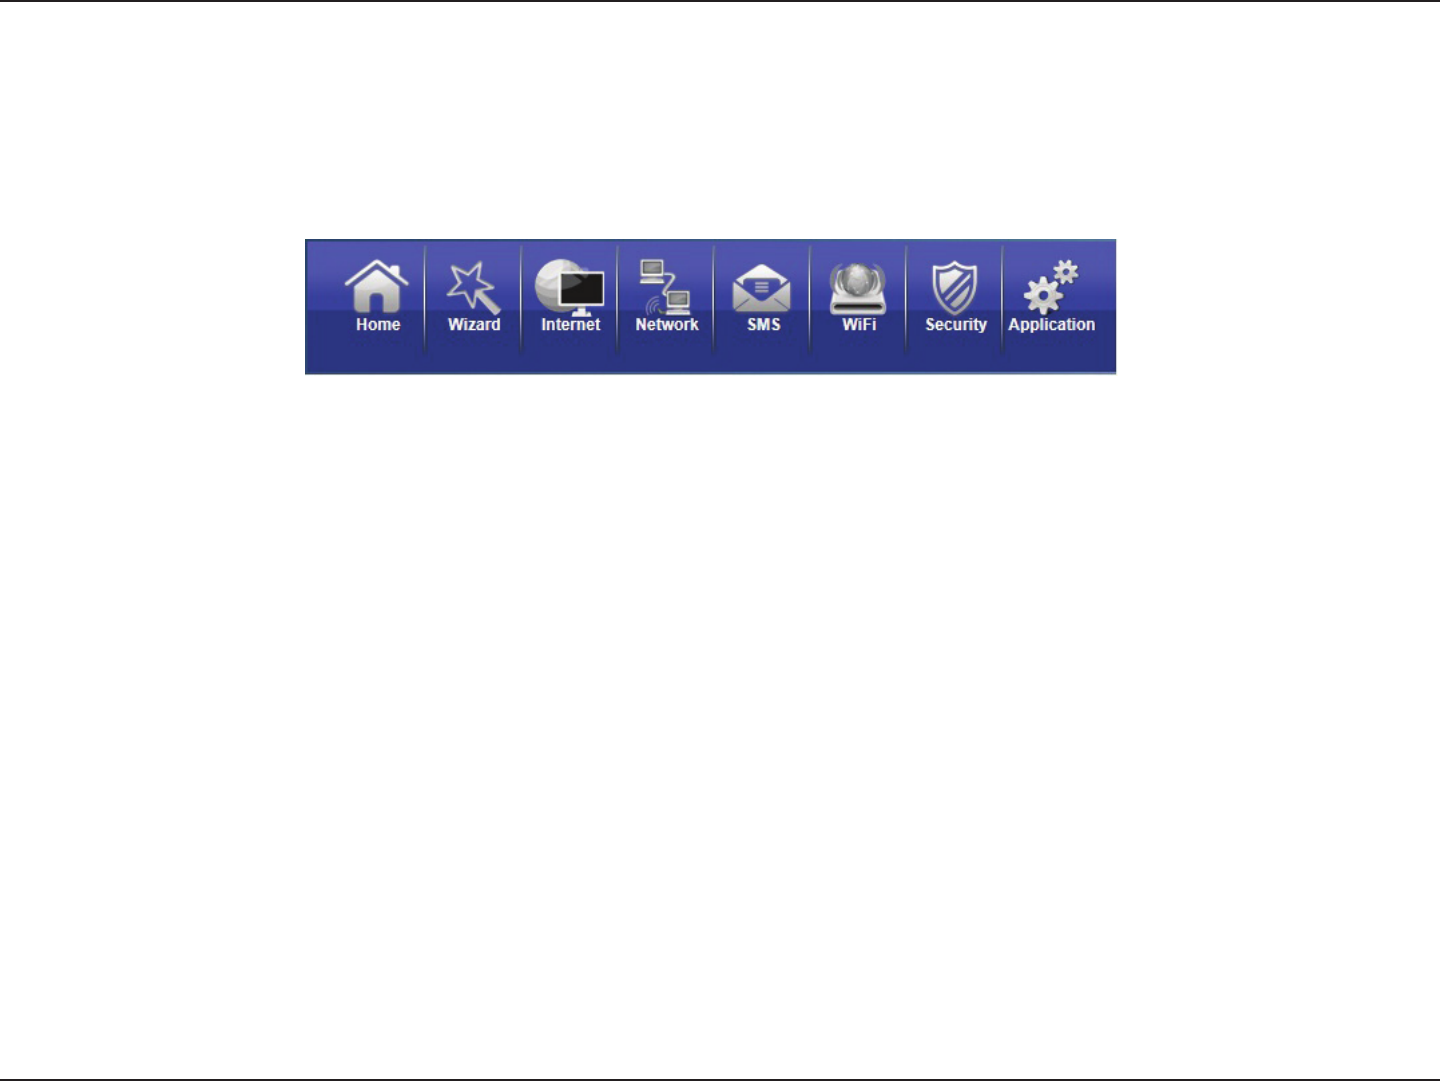
Throughout the interface you will nd a menu bar at the top of the page which includes tabs for easy navigation, and a summary bar in the upper
right corner with a quick view of essential information.
The Home tab will return you the home page, where a summary of the system information is shown.
Click on this tab to start the setup wizard, which will guide you through the basic setup process.
The Internet tab gives you Internet setup and settings options.
The Network tab allows you to congure the network settings for your Local Area Network (LAN).
From the SMS you can view and send SMS messages via your mobile network.
The Wi-Fi allows you to congure your Wi-Fi network, as well as add new devices using WPS.
The Security tab allows you to congure rewall and security settings to protect your network from WAN-side
intrusions.
From this tab, you can manage the administrative conguration of your router, such as time and date, rmware,
language, and remote management.
Navigation
Home
Wizard:
Internet:
Network:
SMS:
Wi-Fi:
Security:
Application:
12D-Link DWR-710 User Manual
Section 3 - Conguration
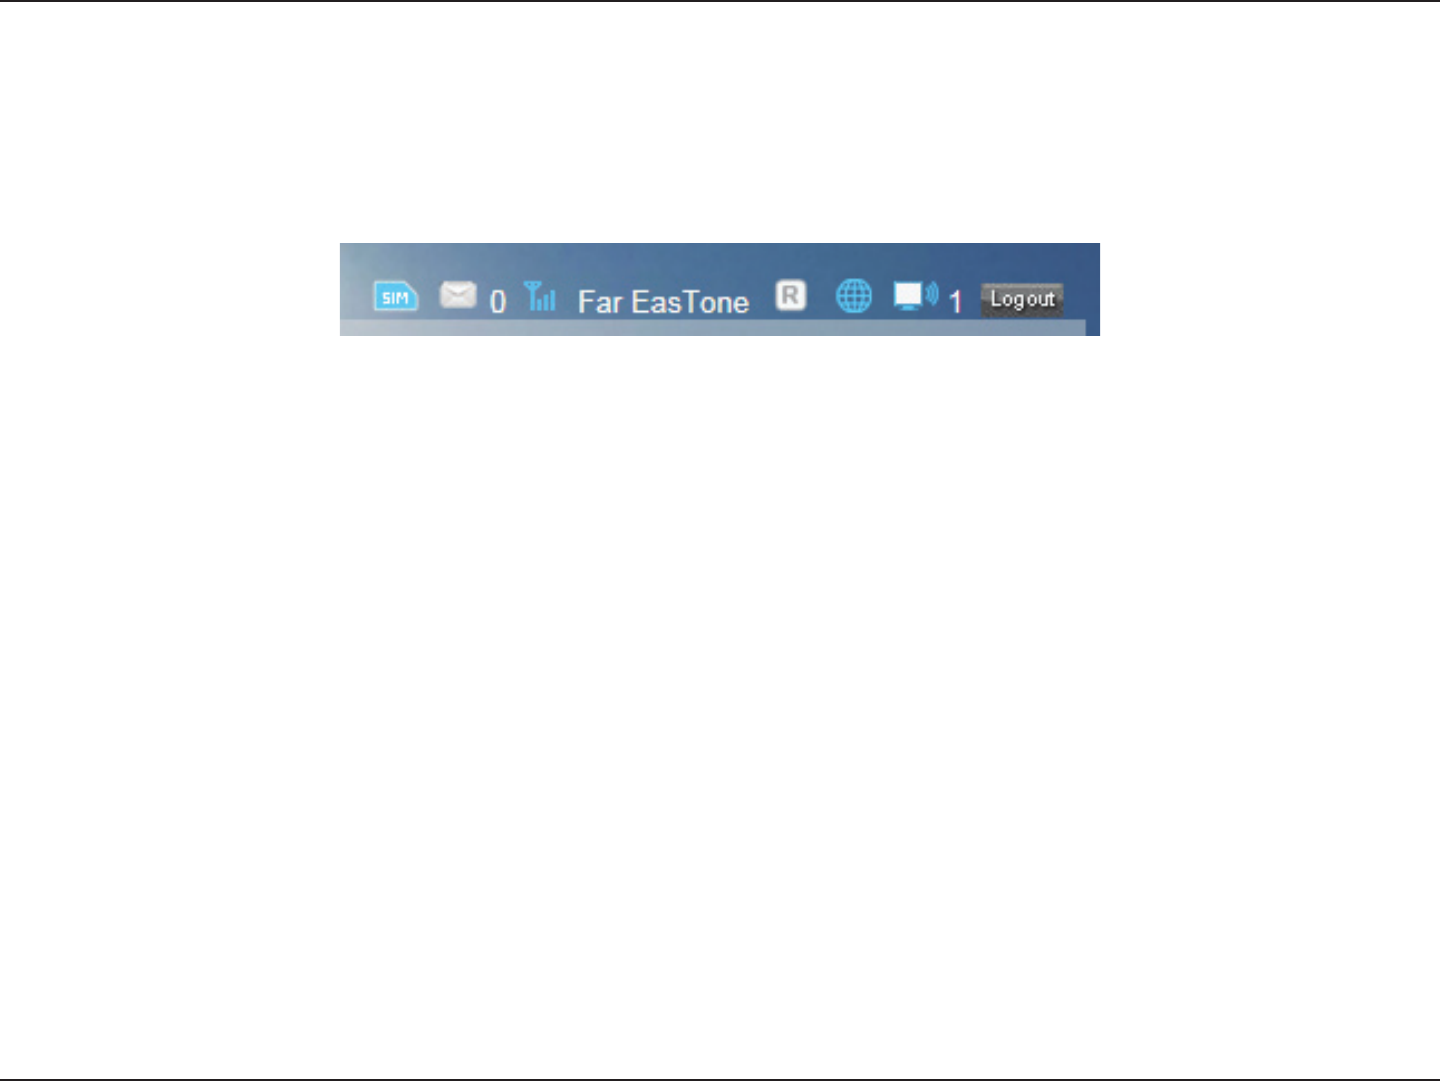
This icon shows whether or not a compatible (U)SIM card has been inserted into the device.
The number to the right of this icon indicates the number of unread messages in the SMS inbox.
Indicates the current strength of the mobile network signal being received.
The name of the mobile network operator to which the device is currently connected.
Indicates that the device is connected to a network other than your service provider’s home network.
Indicates that there is an Internet connection present.
Indicates that the router’s Wi-Fi network is currently active. The number to the right of this icon indicates the number
of wireless clients currently connected to the router’s Wi-Fi network.
Click this button to log out of the conguration interface.
SIM:
SMS:
Signal Strength:
Operator Name:
Roaming:
Internet:
Wi-Fi Network:
Logout:
Device Status
A summary of the device’s current status will be displayed on the information panel at the top of the right-hand side of the navigation bar. The
following is a description of the indications, from left to right.

13D-Link DWR-710 User Manual
Section 3 - Conguration
The Home page acts as a dashboard to quickly display your conguration settings and provide a summary of the current status of your network’s
status.
This area displays the percentage of the router’s memory and
CPU currently being used by the system.
This area displays a summary of the current settings for the
router’s LAN.
This area shows the current status of your 2G or 3G mobile
network connection.
This area displays a summary of the router’s current WAN
settings. These details will reect the mobile network
connection which is being received from the service provider.
This area shows the amount of data which has been sent (TX)
and received (RX) over the mobile network. This information
may not reect the amount recorded by your mobile service
provider.
System Resources:
LAN:
2G/3G Modem:
WAN:
Trac Statistics:
Home
14D-Link DWR-710 User Manual
Section 3 - Conguration
Wizard
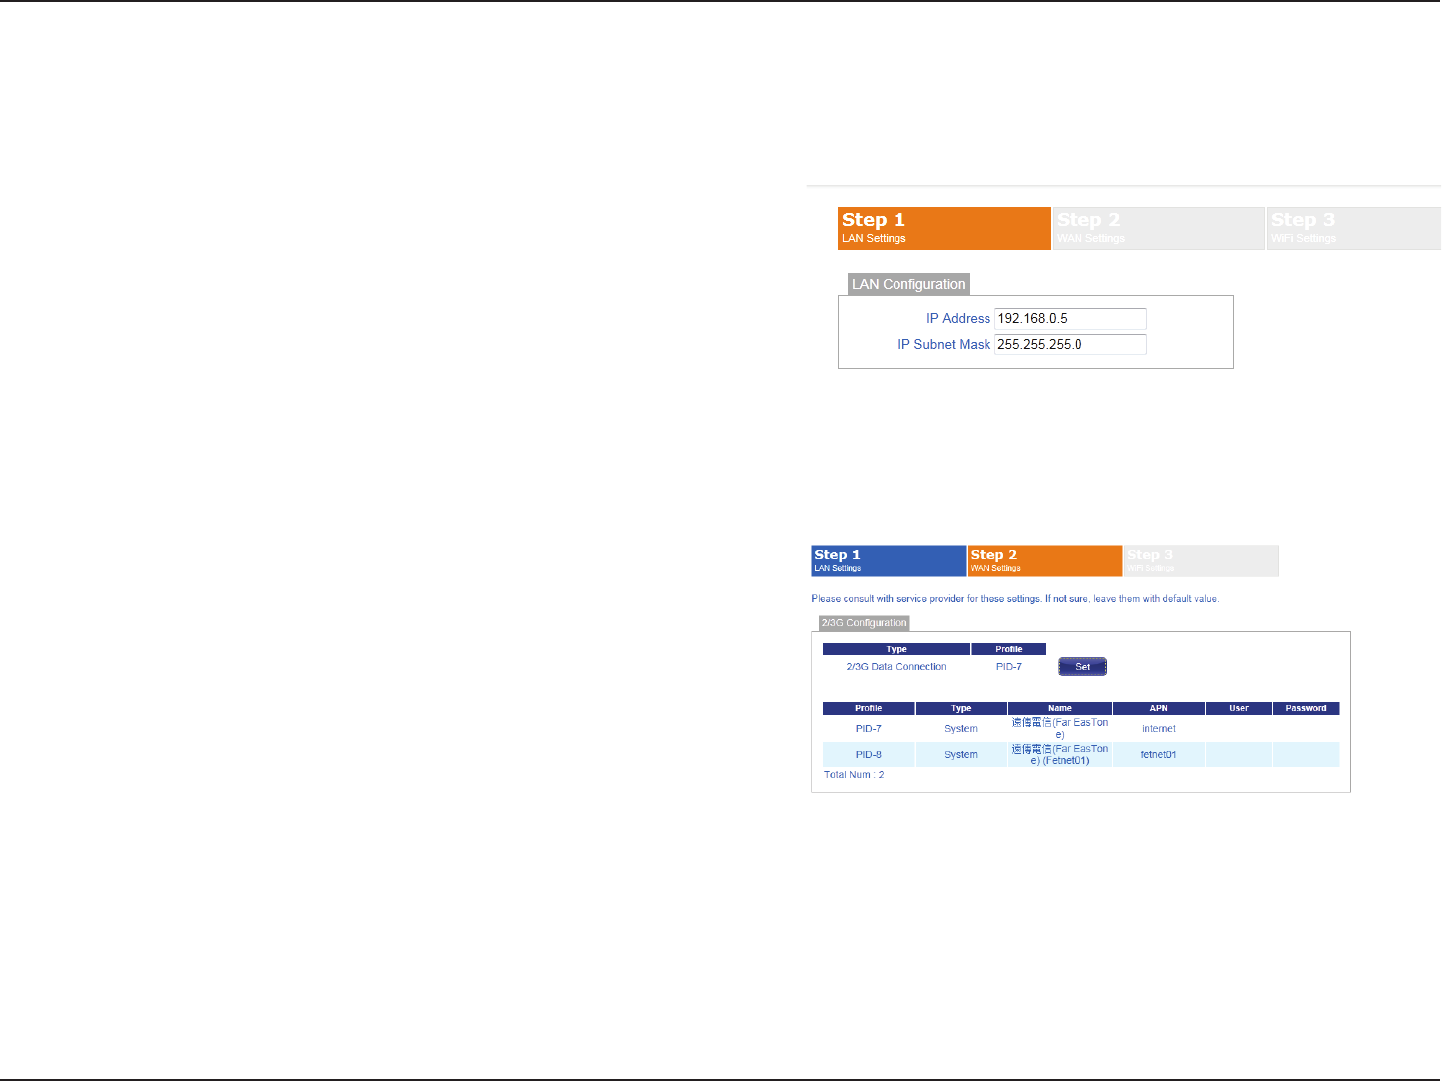
The Wizard page will guide you through the steps required to congure the basic settings of your router such as the IP address, network name
(SSID), and password. Click on the Wizard button on the navigation bar to commence the wizard.
LAN CoNfigurAtioN
If you wish to change the router’s IP address, enter the new
address here. If you change the IP address from the default,
you will need to enter the new address in your Internet
browser’s address bar in order to access the web-based
conguration utility.
If you wish to change the router’s subnet mask, enter it here.
Click Next to continue.
2/3g CoNfigurAtioN
If you wish to change the 2G or 3G service provider or
connection type, click on a prole in the list to highlight it,
and click Set to set that prole as the default.
Click Next to continue, or Back to return to the previous step.
IP Address:
IP Subnet Mask:
15D-Link DWR-710 User Manual
Section 3 - Conguration
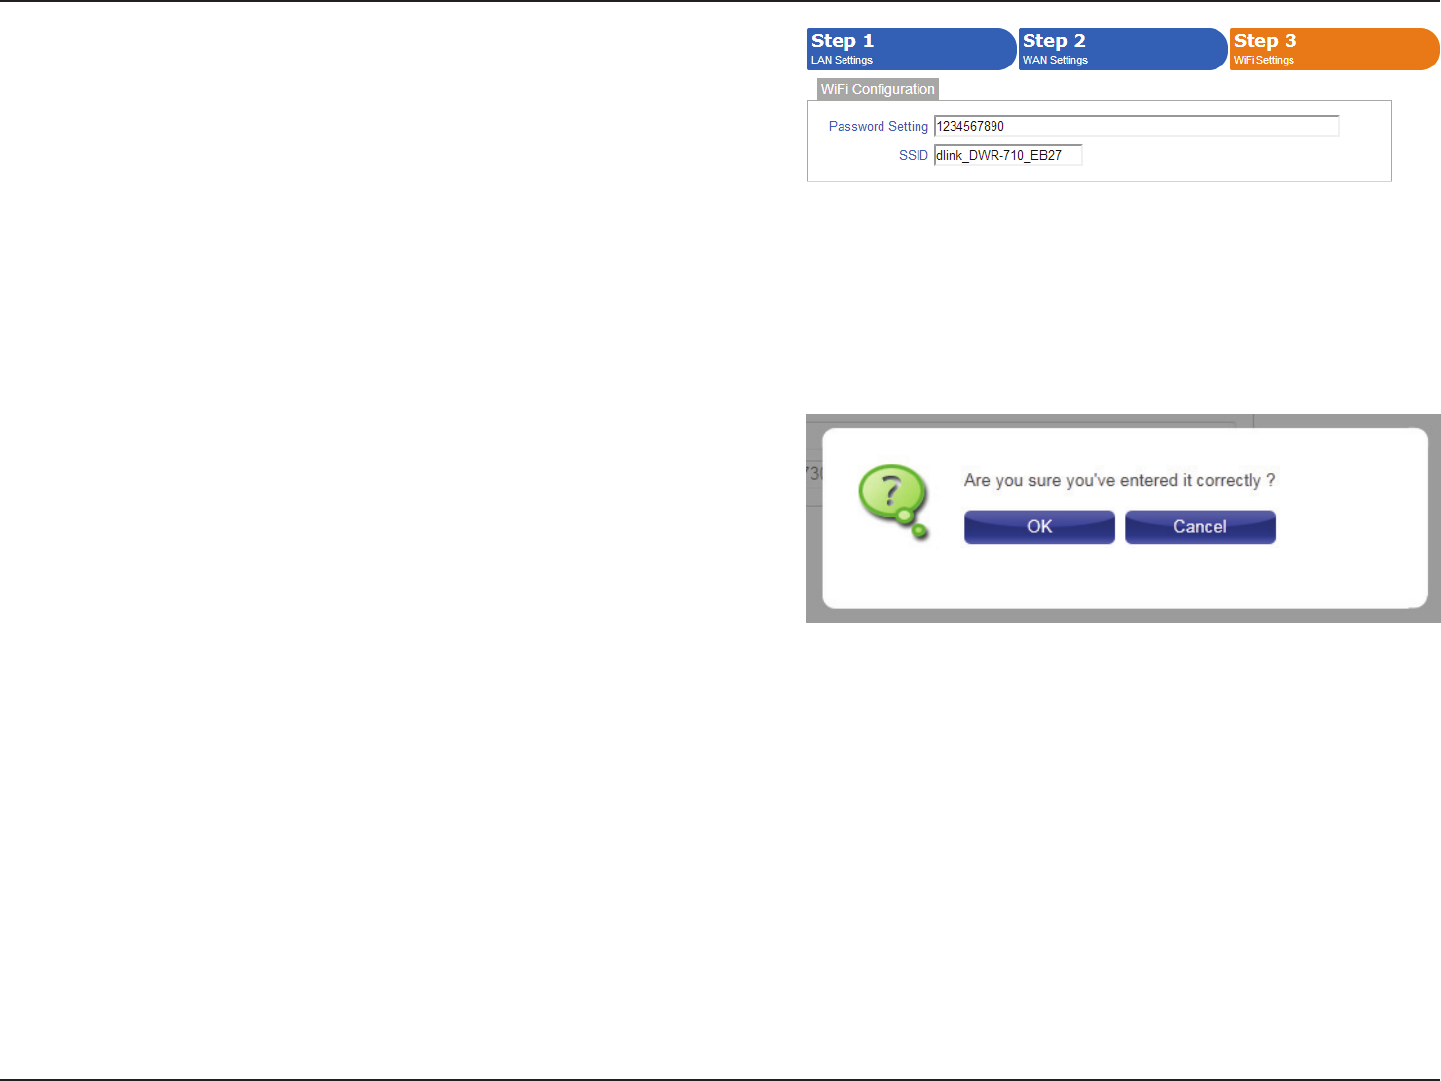
Wi-fi CoNfigurAtioN
Choose a password for your wireless security. Clients
will need this password in order to access your network
wirelessly. If you are currently connected to the router using
Wi-Fi, you will need to reconnect to the router using your
new password once the wizard has been completed.
If you wish to change your wireless network name (SSID),
enter a new name in the eld provided. If you change
the SSID, you may need to re-connect to the router using
the new SSID before you can access your network or the
conguration utility.
Click Done to complete the wizard, or click Back to return to
the previous page.
After you have clicked Done, a conrmation window will
appear. Click OK to save the conguration.
Password Setting:
SSID:
16D-Link DWR-710 User Manual
Section 3 - Conguration
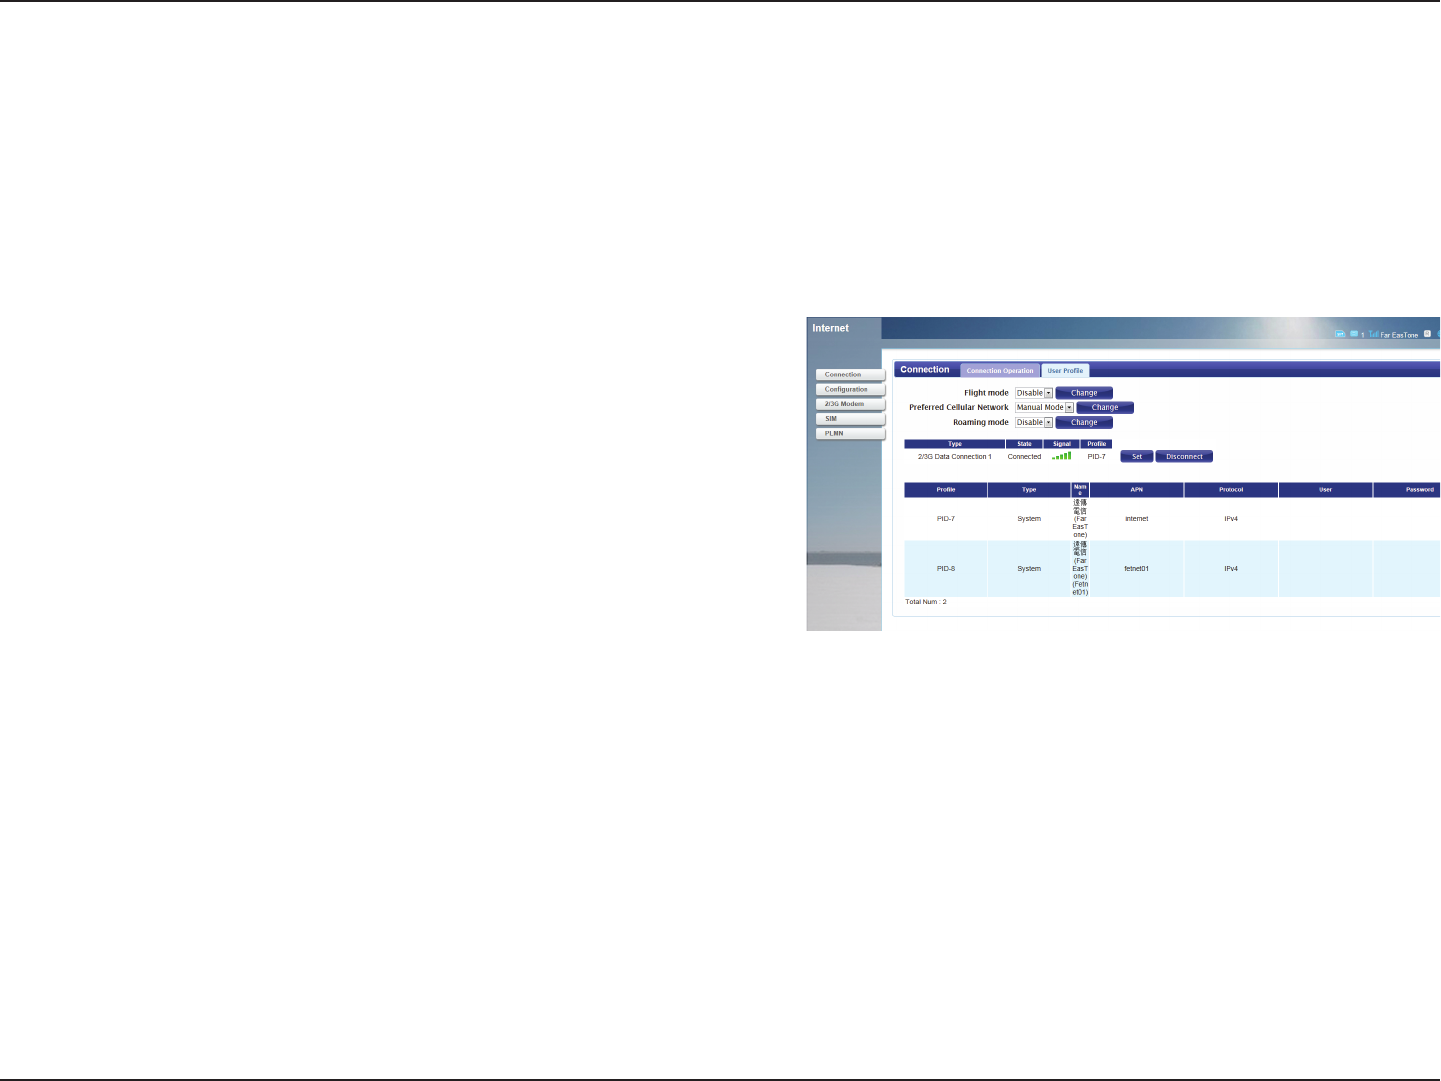
Internet
This page allows you to congure the Internet settings for your mobile network connection. Use the tabs in the left-hand column to navigate
through the dierent settings categories.
CoNNeCtioN operAtioN
Flight mode turns o all communications so that the device
can be powered on safely when in an aircraft. Select whether
you want to Enable or Disable ight mode from the drop-
down menu, and click Change to eect the change.
Select your preferred cellular network connection mode:
Auto Mode - The router will automatically connect to your
preferred mobile network and remain connected while the
device is powered on.
Manual Mode - You must manually connect to the preferred
mobile network.
On Demand - The router will connect to the preferred mobile
network when Internet access is required.
Click Change to eect the change.
Select whether you would like to Enable or Disable mobile
network roaming from the drop-down menu.
Caution: Roaming on networks other than your own may
incur additional usage charges.
Flight Mode:
Preferred Cellular
Network:
Roaming Mode:
Connection
17D-Link DWR-710 User Manual
Section 3 - Conguration
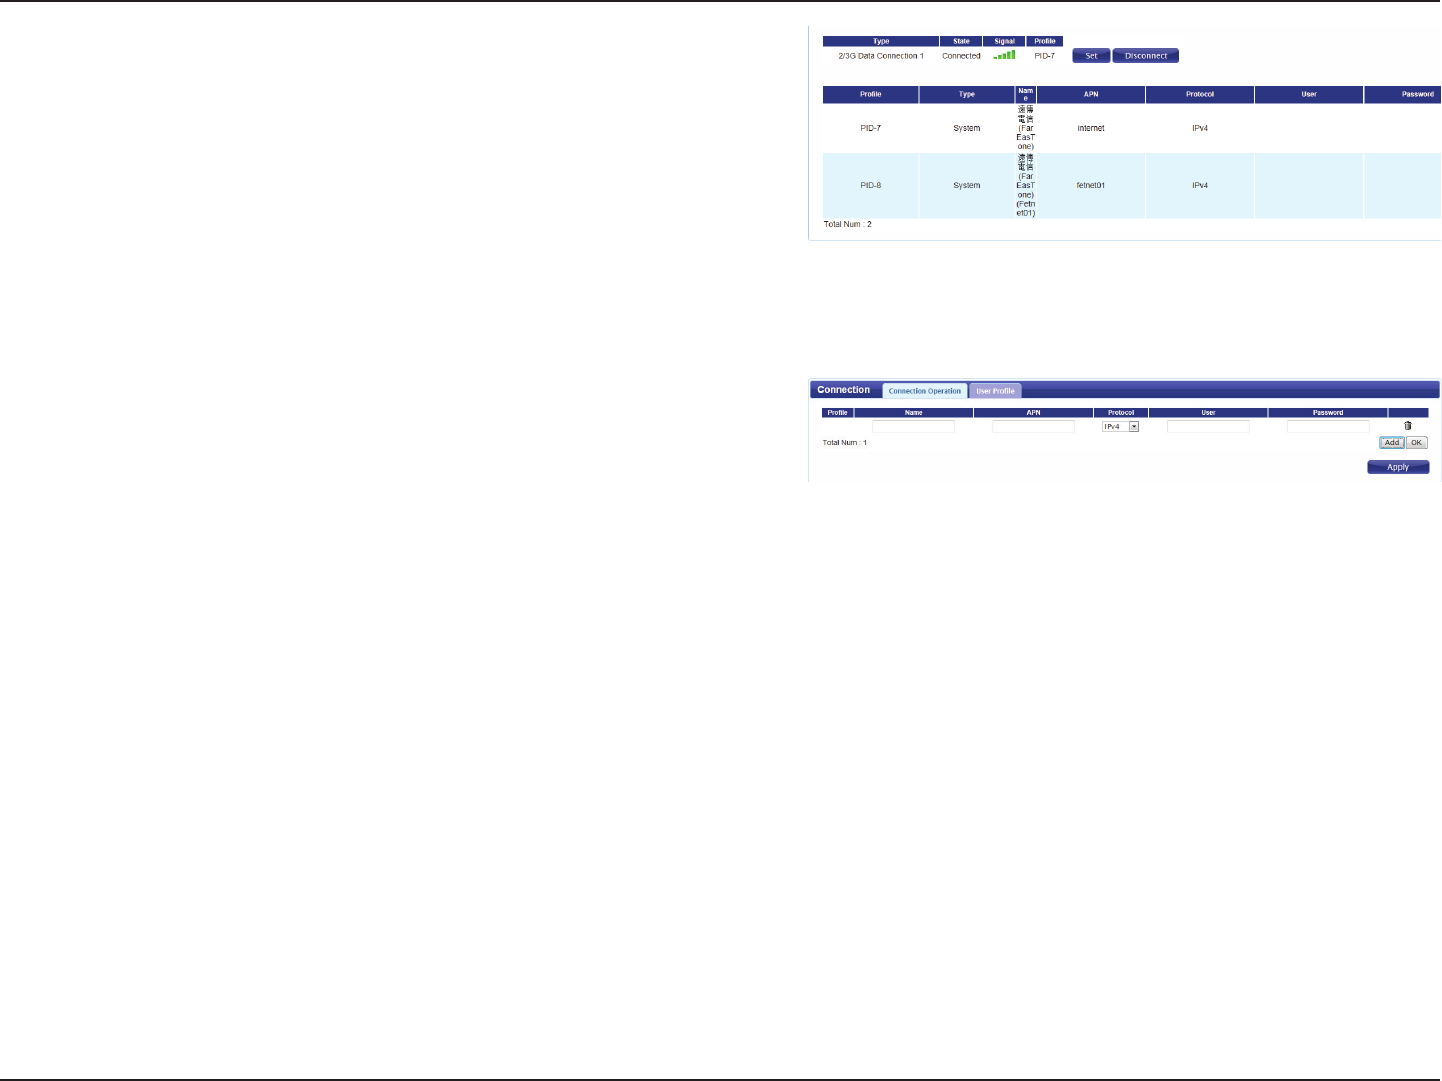
user profiLe
Click Add to add a new user prole.
Enter a name to identify the new user prole.
Enter the Access Point Name (APN) for the connection. If you
do not know this information, please contact your service
provider.
Select the protocol to be used for the connection from the
drop-down menu.
Enter the username to be used for this connection.
Enter the password to be used for this connection.
Click the delete icon to delete this prole from the list.
Click OK to save the prole.
Click Apply to apply the prole settings and return to the
Internet menu.
Name:
APN:
Protocol:
User:
Password:
Delete:
Connection:
Proles:
Shows the type and status of the current mobile connection.
To change the connection prole, select a user prole from
the table below and click Set to activate the prole. Click
Disconnect to manually disconnect the current mobile data
service.
The proles table shows the details of currently congured
user proles. To add a new user prole, navigate to the User
Prole tab at the top of this section.
18D-Link DWR-710 User Manual
Section 3 - Conguration
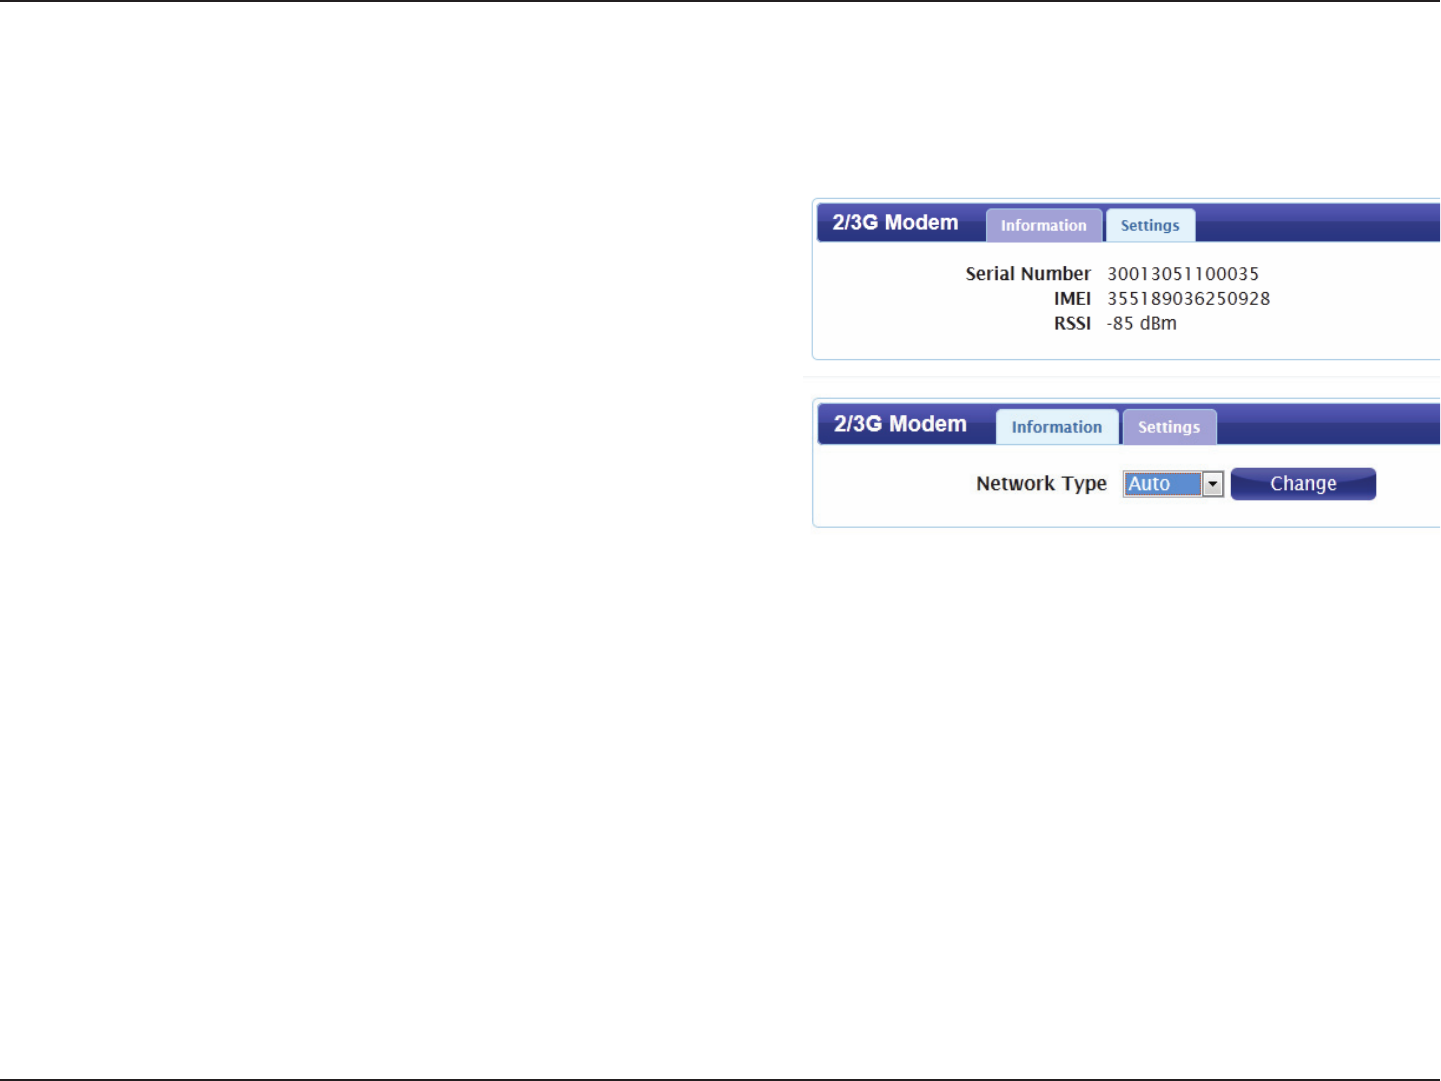
2G/3G Modem
iNformAtioN
Displays information about your 2G or 3G modem.
settiNgs
Select your preferred modem type from the drop-down
menu:
Auto - The modem will automatically select the modem type
depending on the network it is connected to.
3G Only - The modem will only connect to 3G networks.
2G Only - The modem will only connect to 2G networks.
If you wish to change the modem type, select your new
modem type and click Change to eect the change.
Re-enter the new PIN code.
Click Apply to apply the changes.
Information:
Network:
This section displays information about your 2G or 3G modem connection.

19D-Link DWR-710 User Manual
Section 3 - Conguration
SIM
Enter the PIN code for the SIM card. Click Enable to turn on
SIM lock, or click Disable to turn o SIM lock.
PIN Code:
This section allows you to turn SIM lock on or o for the SIM card which is currently inserted into the router.

20D-Link DWR-710 User Manual
Section 3 - Conguration
PLMN
Select Automatic to allow the router to automatically
connect to the rst available network when roaming. Select
Manual to choose your preferred roaming network from the
list below.
If you have selected Manual mode, click on the preferred
network to select it, and then click the Update button to
select that network as the preferred network. Click Query to
refresh the list of available networks.
Note: You will need to manually disconnect the current
mobile data service before selecting a network using PLMN.
Please refer to “Connection” on page 16 for further information
on how to do this.
Mode:
This page allows you to view available Public Land Mobile Networks (PLMN). This page can also be used to select a preferred
network when you are roaming outside of your home network.

21D-Link DWR-710 User Manual
Section 3 - Conguration
Network
The Network pages allow you to check the current status of your Local Area Network (LAN), and make changes to LAN settings.
22D-Link DWR-710 User Manual
Section 3 - Conguration
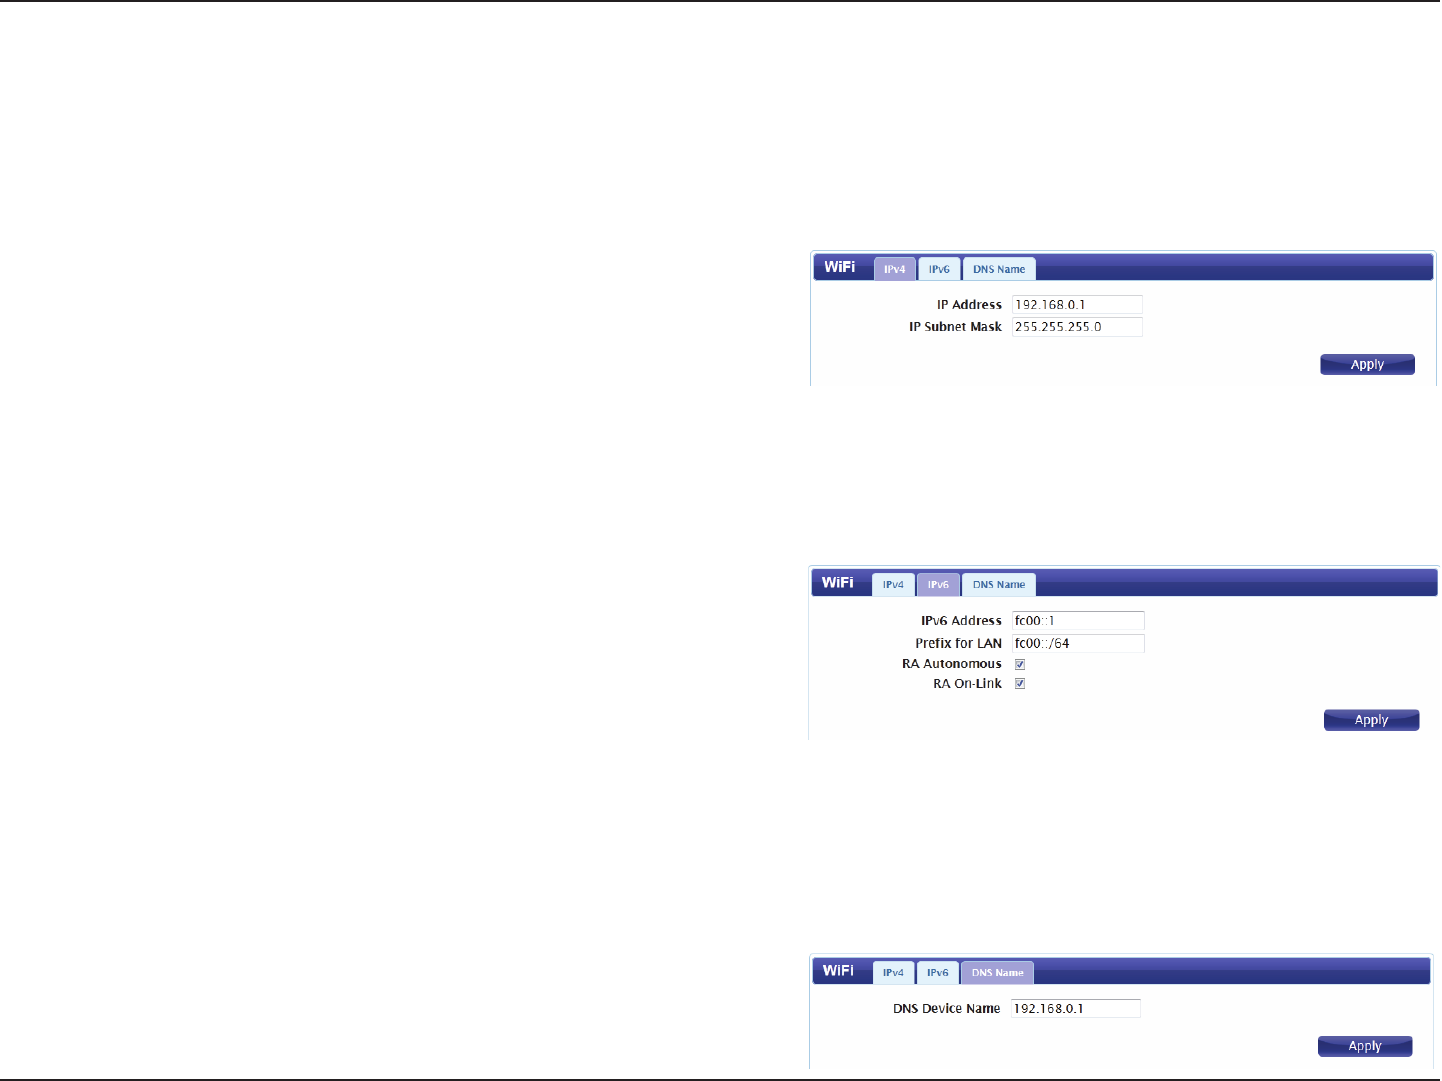
Wi-Fi
This section allows you to congure the IP settings for your
wireless network.
ipv4
Enter the IPv4 address for your Wi-Fi network. If you change
this address, you will need to enter the new address in your
web browser’s address bar in order to access the web-based
conguration utility.
Enter the IPv4 subnet mask for your Wi-Fi network.
Click Apply to save the current conguration.
ipv6
Enter the IPv6 address for your Wi-Fi network.
Enter the prex to be used to delegate IPv6 addresses to the
LAN.
Check the box to set the router announcement mode to
autonomous.
Check the box to enable router announcement on-link
Click Apply to save the current conguration.
DNs NAme
Enter your router’s DNS device name in the eld provided.
Click Apply to save the current conguration.
IP Address:
IP Subnet Mask:
IPv6 Address:
Prex for LAN:
RA Autonomous:
RA On-Link:
DNS Device Name:
23D-Link DWR-710 User Manual
Section 3 - Conguration
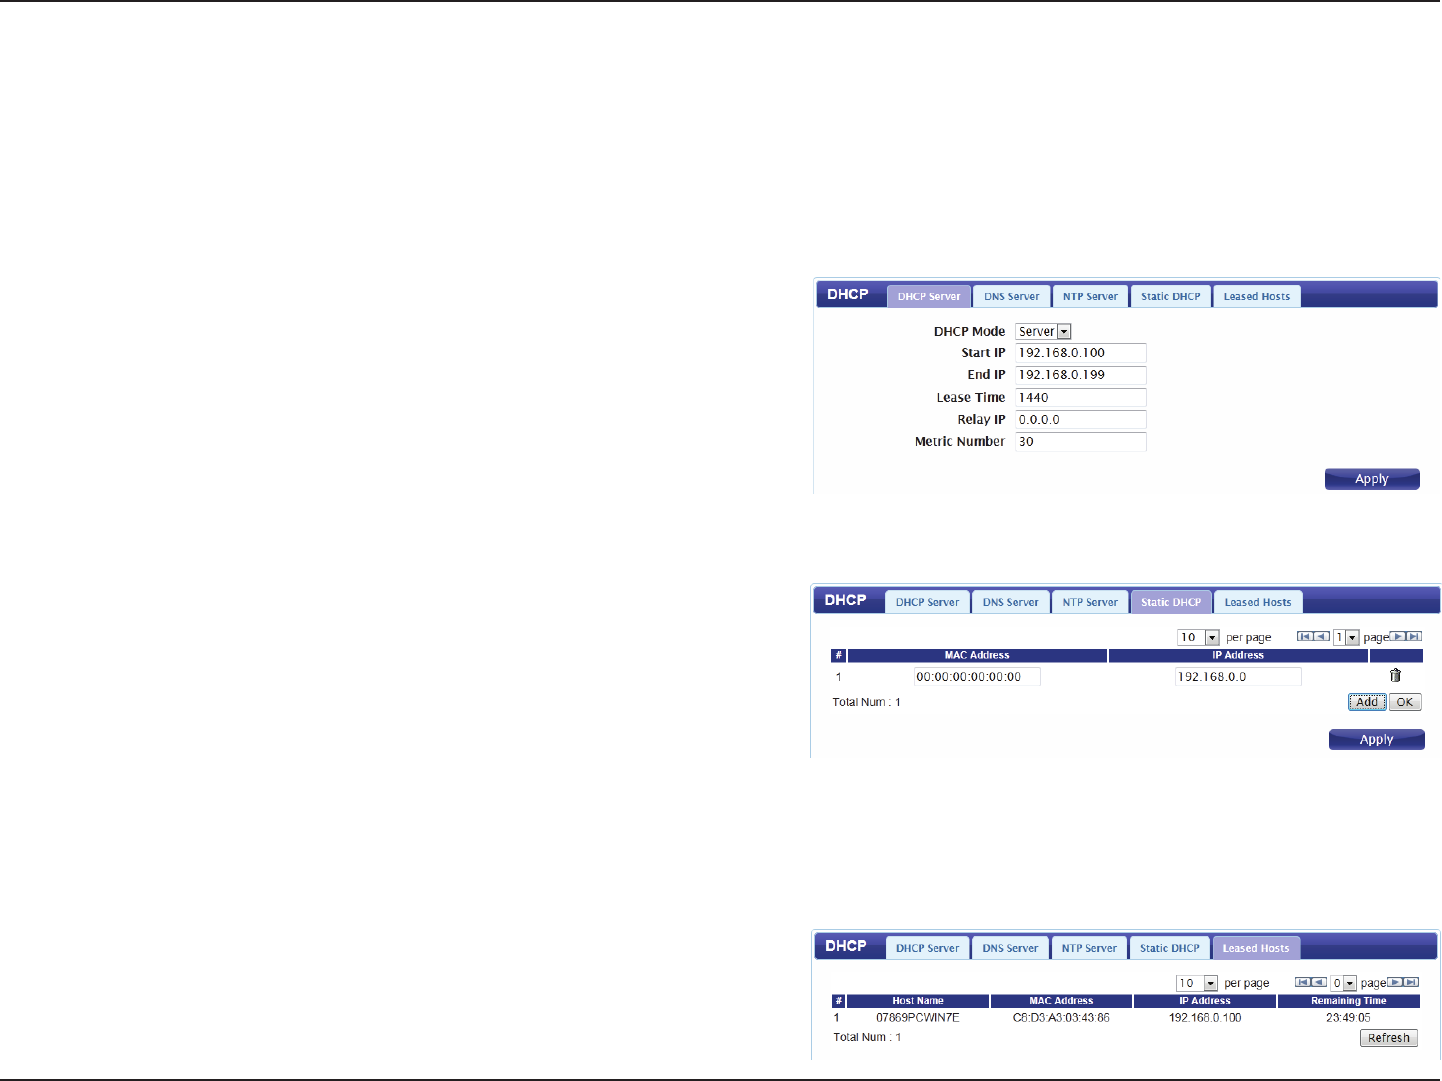
DHCP
The DWR-710 has a built-in DHCP server which can assign
IP addresses to connected clients. This section allows you to
congure the DHCP settings.
DNs server
Select None from the drop-down menus if you do not wish to
specify a rst, second, or third DNS server. Select User Dene
to specify a DNS server, and enter the address of the server in
the eld provided.
Click Apply to save the current conguration.
First/Second/
Third DNS
Server:
stAtiC DHCp
Use this option to specify a DHCP address reservation to a
particular device or machine based on MAC address. To add a
new reservation, click Add.
Enter the MAC address of the device or machine for which
you wish to make the DHCP reservation.
Enter the IP address that you wish to reserve. This address
must be within the DHCP address pool.
Click OK to save the reservation.
LeAseD Hosts
This table shows the details of clients currently receiving a
DHCP address from the DHCP server. Click Refresh to update
the table.
MAC Address:
IP Address:
24D-Link DWR-710 User Manual
Section 3 - Conguration
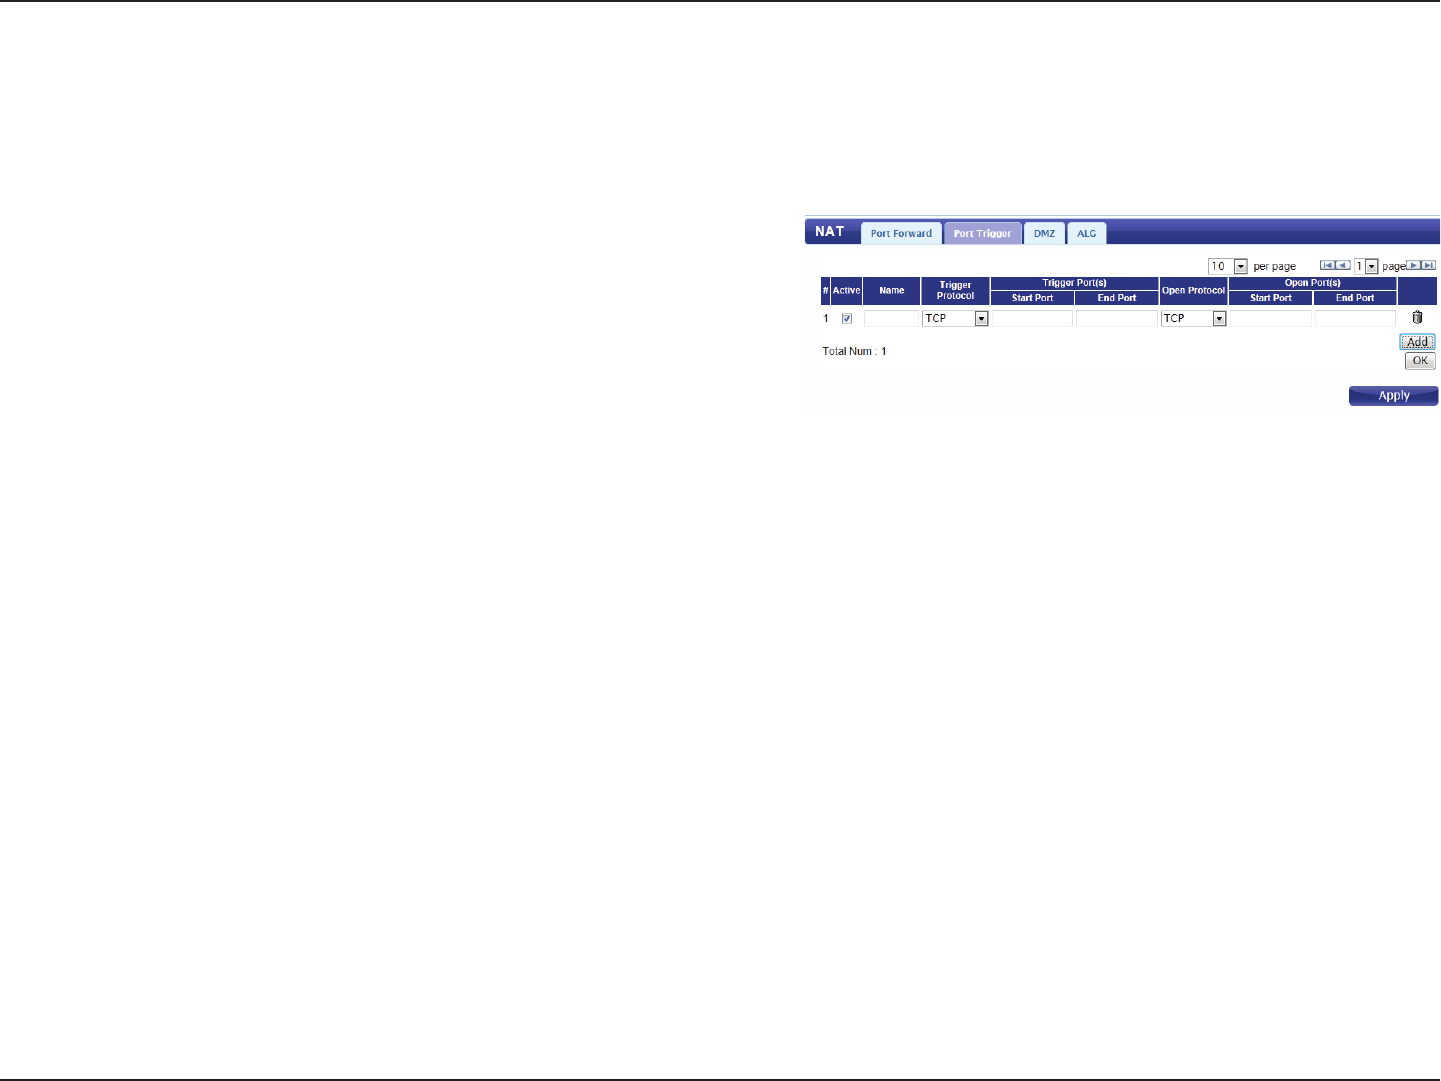
NAT
This section allows you to congure functions related to Network Address Translation (NAT) such as port triggering.
port trigger
Use this option to have inbound trac automatically
forwarded to a dynamic address on the LAN when triggered
by outbound trac. To add a new port triggering rule, click
Add.
Check the box to activate this rule.
Specify a name to identify the rule.
Select TCP or UDP as the protocol for the trigger ports from
the drop-down menu.
Enter the starting and ending trigger port for the rule.
Select TCP or UDP as the protocol for the ports to be opened
from the drop-down menu.
Enter the starting and ending ports to be opened when the
trigger occurs.
Click the Delete icon to delete the rule.
Click OK to save the rule. Click Apply to apply the current
rules and return to the Network page.
Active:
Name:
Trigger
Protocol:
Trigger Port:
Open Protocol:
Open Port(s):
Delete:
25D-Link DWR-710 User Manual
Section 3 - Conguration
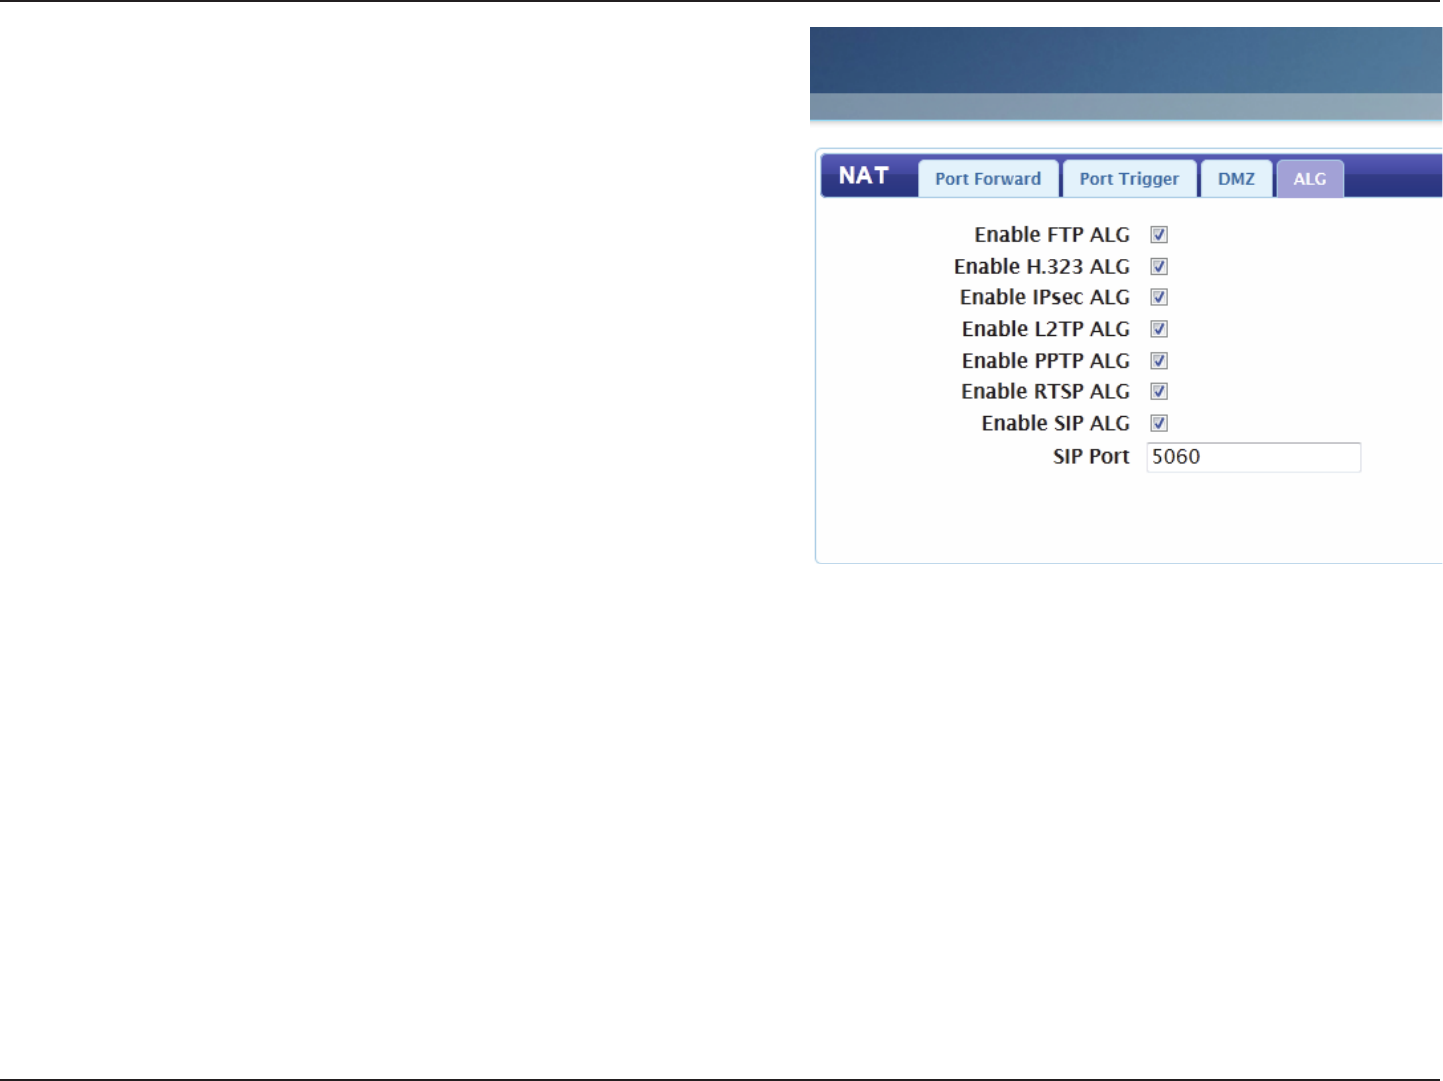
ALg
Application Level Gateways (ALG) allow certain applications
to augment a network’s rewall or NAT. This section
enables you to enable various ALGs as required by specic
applications. To enable an ALG, check the box next to the
name of the rule.
Enter the Session Initiation Protocol (SIP) port required by
your applications.
Click Apply to save the settings and return to the Network
page.
SIP Port:
26D-Link DWR-710 User Manual
Section 3 - Conguration
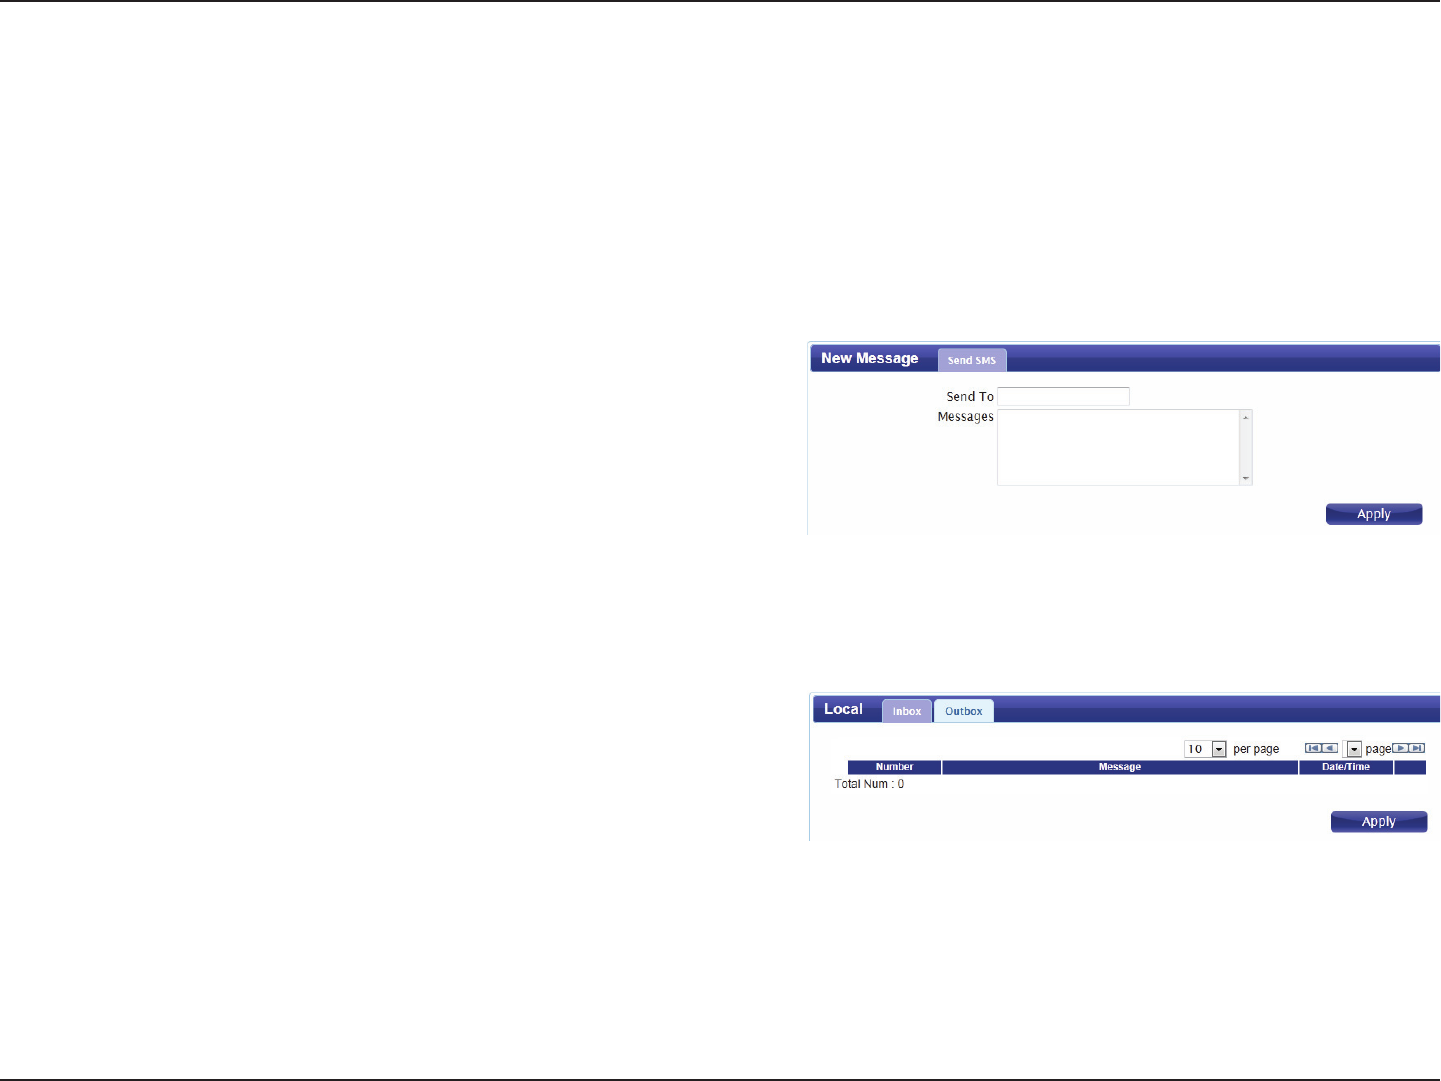
SMS
The DWR-710 can send and receive SMS text messages through the mobile network’s SMS function. In this section you can
check the SIM card’s inbox and outbox, as well as send new messages.
New Message
Send To:
Messages:
Enter the phone number that you wish to send the message
to
Enter the body of the message to be sent.
Click Apply to save the current conguration.
iNbox
This tab shows a summary of SMS messages in the inbox.
outbox
This tab shows a summary of messages in the outbox which
are yet to be sent.
Local
27D-Link DWR-710 User Manual
Section 3 - Conguration
Wi-Fi
The Wi-Fi pages allow you to check the current status of your Wi-Fi network, and make changes to Wi-Fi settings.
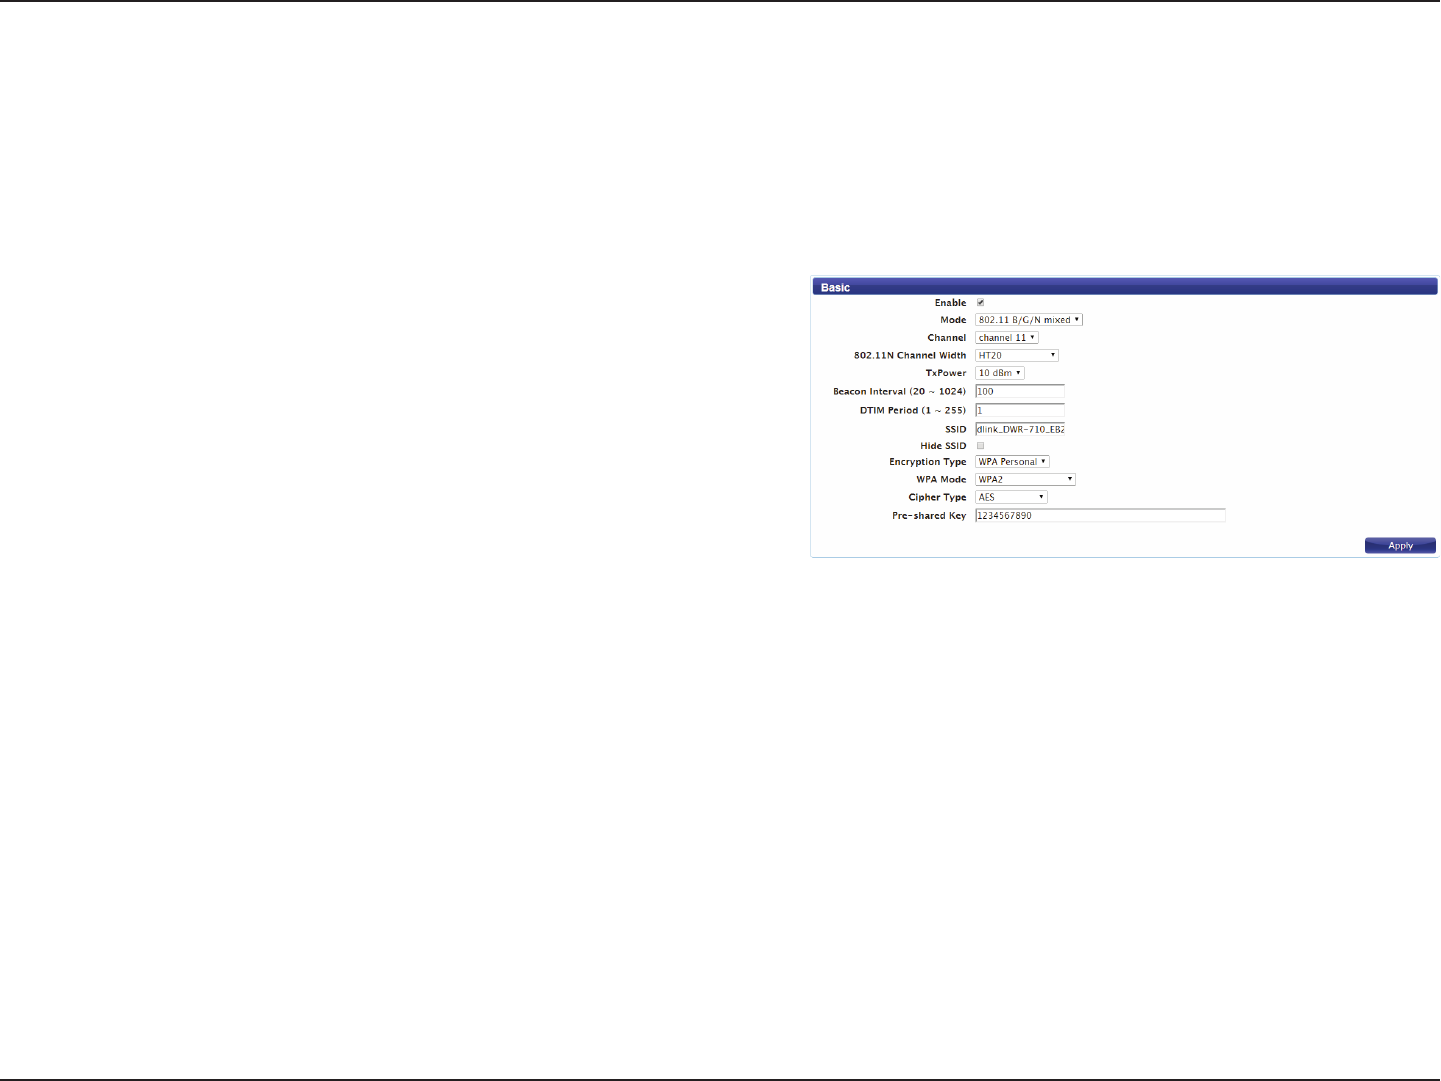
This section allows you to congure your Wi-Fi network and specify the wireless security method to be used to secure your network.
Basic
Check the box to enable the Wi-Fi function.
Select the desired 802.11 wireless mode from the drop-
down menu. You should make your selection based on
the standards supported by the wireless clients which
will be connecting to your network.
To have the router automatically select the optimal
wireless channel, select Auto from the drop-down
menu. If you wish to select a particular channel, select
it from the drop-down menu.
If you are using the 802.11n standard, you can
manually select the channel width which best suits
your network environment.
Select the desired transmission power from the drop-
down menu.
The beacon interval determines how often information
about the wireless network is broadcast. It is
recommended that you do not adjust this setting
unless instructed to do so.
Enable
Mode:
Channel:
802.11N
Channel Width:
TxPower:
Beacon Interval:
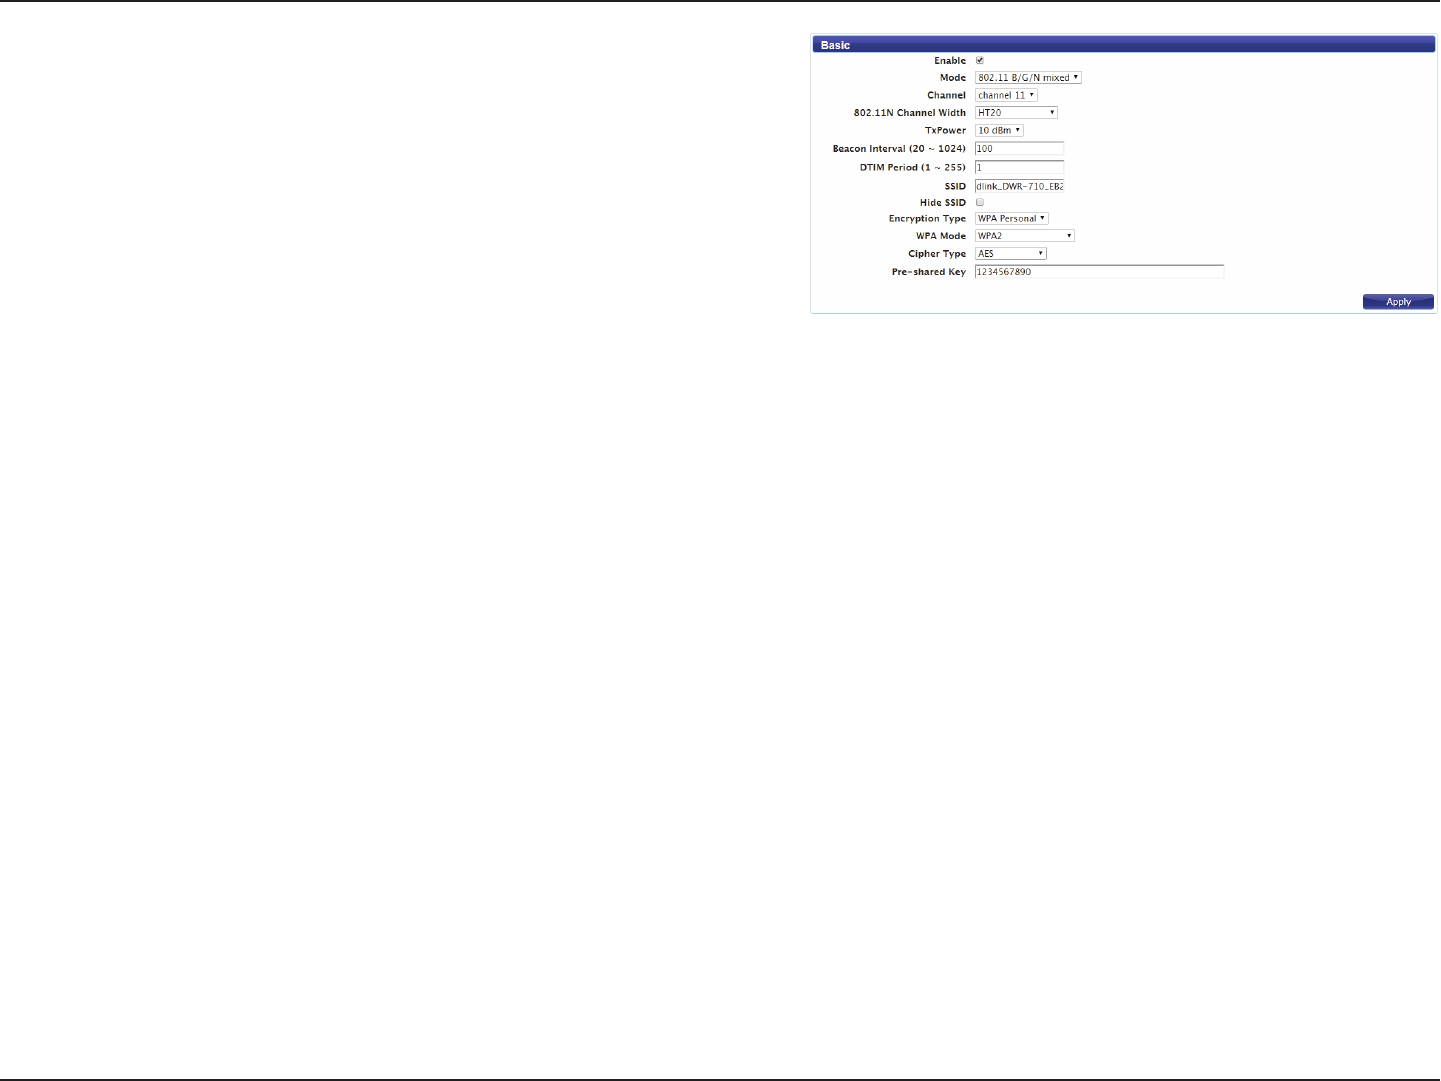
28D-Link DWR-710 User Manual
Section 3 - Conguration
The Delivery Trac Indication Message broadcasts
information about buered data to clients that are currently
in low-power mode. Enter the desired DTIM period as a
number of beacon intervals.
Enter the SSID (network name) to identify your wireless
network.
Check the box to hide the SSID of your network. If the SSID
is hidden, wireless clients must manually enter it in order to
connect to your network.
Select the wireless encryption method that you wish to use
from the drop-down menu. Depending on the method that
you select, you may need to congure additional settings.
For more information regarding wireless encryption and how
to congure it, please refer to “Wireless Security” on page 29. If
you do not wish to enable wireless security, select None from
the drop-down menu.
Click Apply to save the current settings.
DTIM Period:
SSID:
Hide SSID:
Encryption
Type:
29D-Link DWR-710 User Manual
Section 3 - Conguration
Wireless Security
It is recommended that you enable wireless security on your router in order to protect your wireless network from unauthorized access. You should
select a wireless security protocol that is compatible with the wireless clients which will be accessing your network.
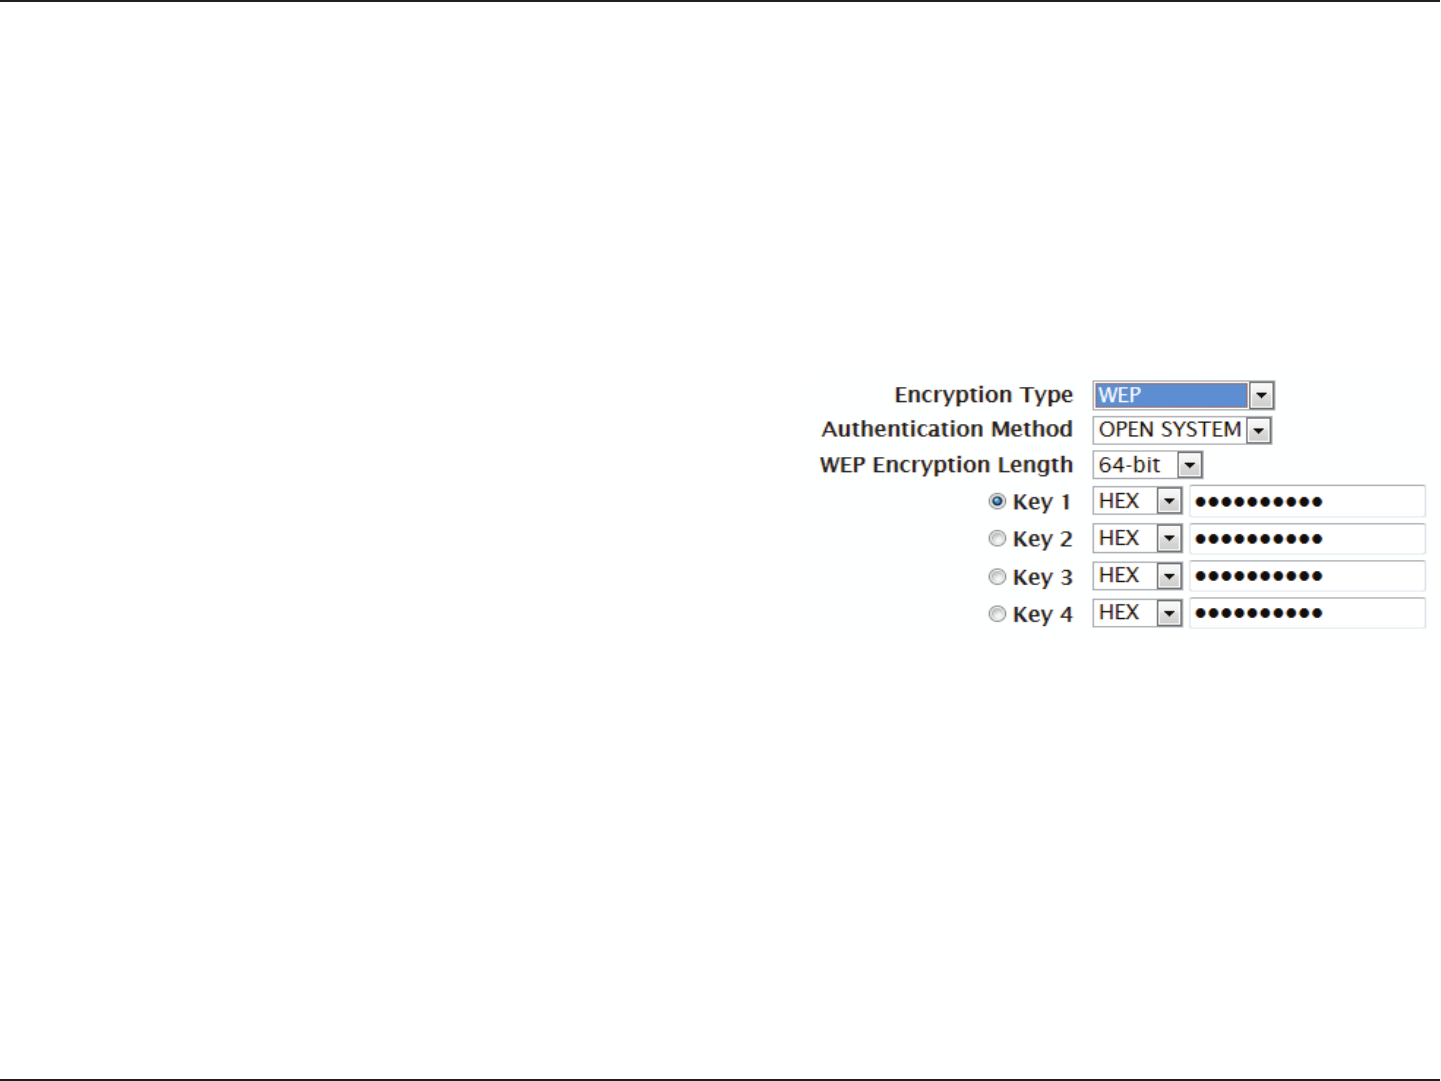
Wired Equivalent Privacy (WEP)
Wired Equivalent Privacy (WEP) is an older wireless security standard, which although providing more protection than no security at all, has some
weaknesses which could make it vulnerable to intrusion. It is recommended that you only use WEP if your wireless clients do not support Wi-Fi
Protected Access (WPA). WEP is not supported by the 802.11n standard, and therefore you will not be able to achieve 802.11n speeds if using WEP.
Encryption Type:
Authentication
Method:
WEP Encryption
Length:
Key 1-4:
Select WEP from the drop-down menu.
Select the desired authentication method from the drop-
down menu:
Auto - The router will automatically determine the
authentication method based on the client that is connecting
to it.
Open System - Clients do not require authentication in order
to associate with the router. The encryption key will be used
to encrypt data packets sent over the network.
Shared - The encryption key is used for authentication as
well as to encrypt data packets.
Select the length of the encryption key to be used.
64-bit - A 64-bit key comprises a string of 10 hexadecimal
characters, or 5 ASCII characters.
128-bit - A 128-bit key comprises a string of 26 hexadecimal
characters, or 13 ASCII characters.
You can predetermine up to 4 WEP keys. Select the WEP key
you wish to use by clicking on the radio buttons next to the
keys. Select whether you wish to use HEX or ASCII characters
in your key using the drop-down menu. Enter the desired key
in the eld provided. Click Apply to save the current settings.
30D-Link DWR-710 User Manual
Section 3 - Conguration
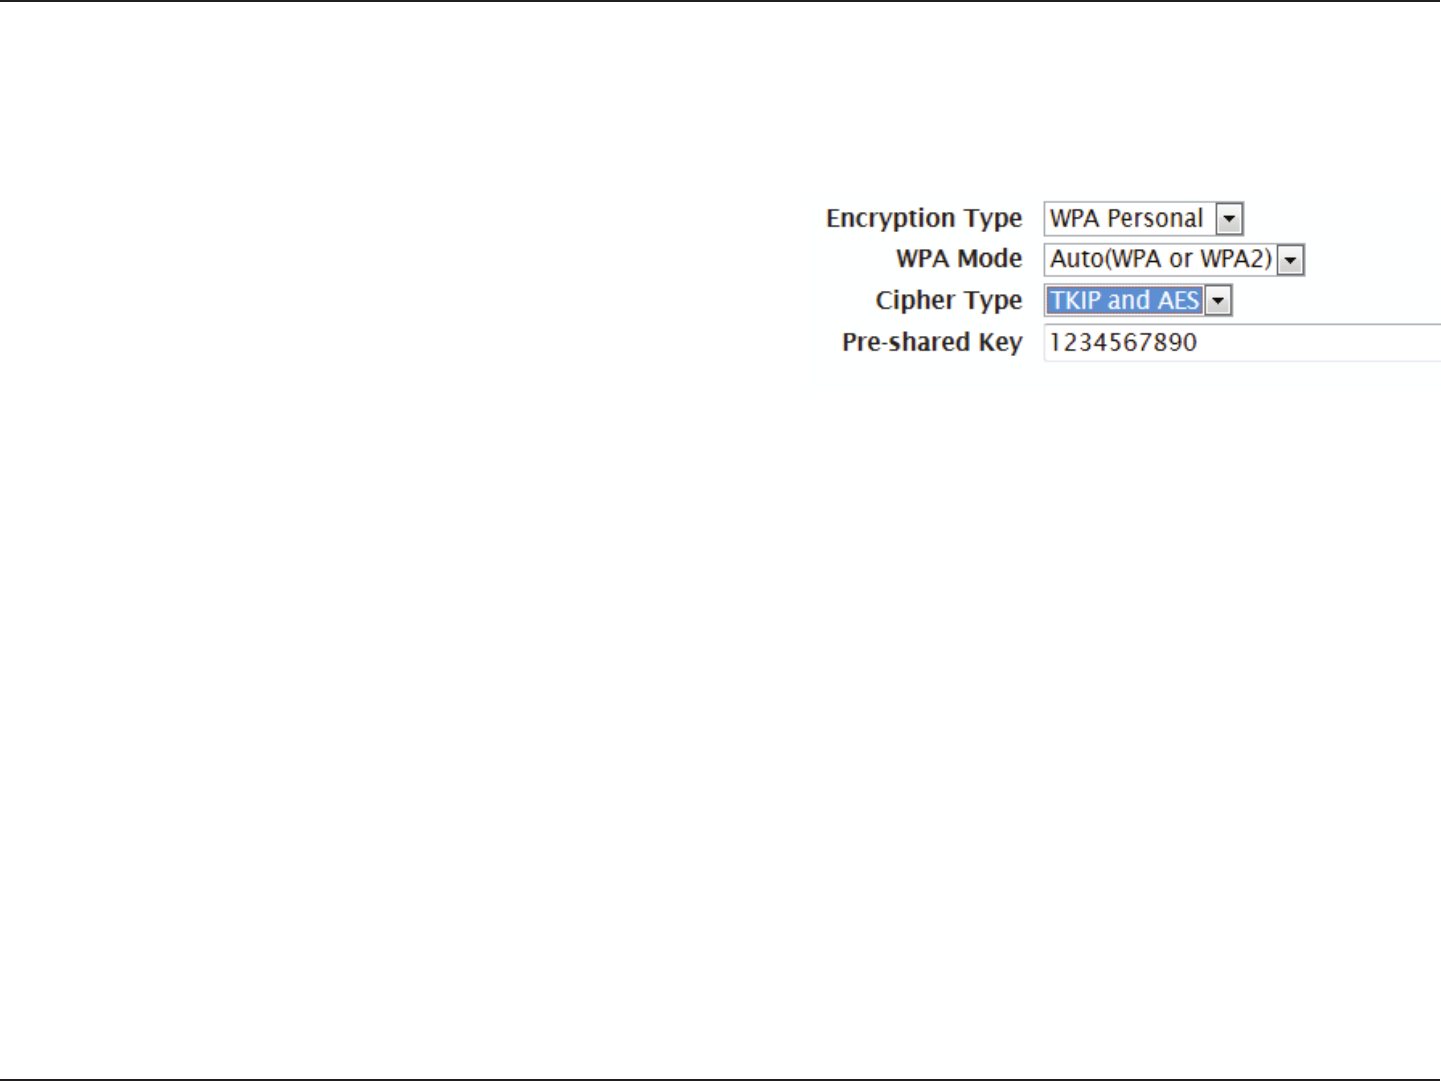
Wi-Fi Protected Access (WPA)
Wi-Fi Protected Access (WPA) is a newer and more secure encryption protocol which makes signicant improvements over WEP. There are two
versions of WPA; the original WPA, and the newer WPA2.
Encryption Type:
WPA Mode:
Cipher Type:
Pre-Shared Key
Select WPA Personal from the drop-down menu.
Select the desired authentication method from the drop-
down menu:
Auto (WPA or WPA2) - The router will automatically
determine the version of WPA to be used based on the client
that is connecting to it.
WPA - Clients will only be able to associate with the router
using the WPA standard.
WPA2 - Clients will only be able to associate with the router
using the WPA2 standard. Clients which do not support WPA2
will not be able to associate with the router.
Select the desired cipher type from the drop-down menu:
TKIP - This cipher is used by the WPA standard.
AES - A newer cipher used by the WPA2 standard. Use of this
cipher type is required in order to achieve 802.11 speeds.
The pre-shared key is the password which clients will require
in order to connect to your network. Enter a password of
between 8 and 63 characters in length.
Click Apply to save the current settings
31D-Link DWR-710 User Manual
Section 3 - Conguration
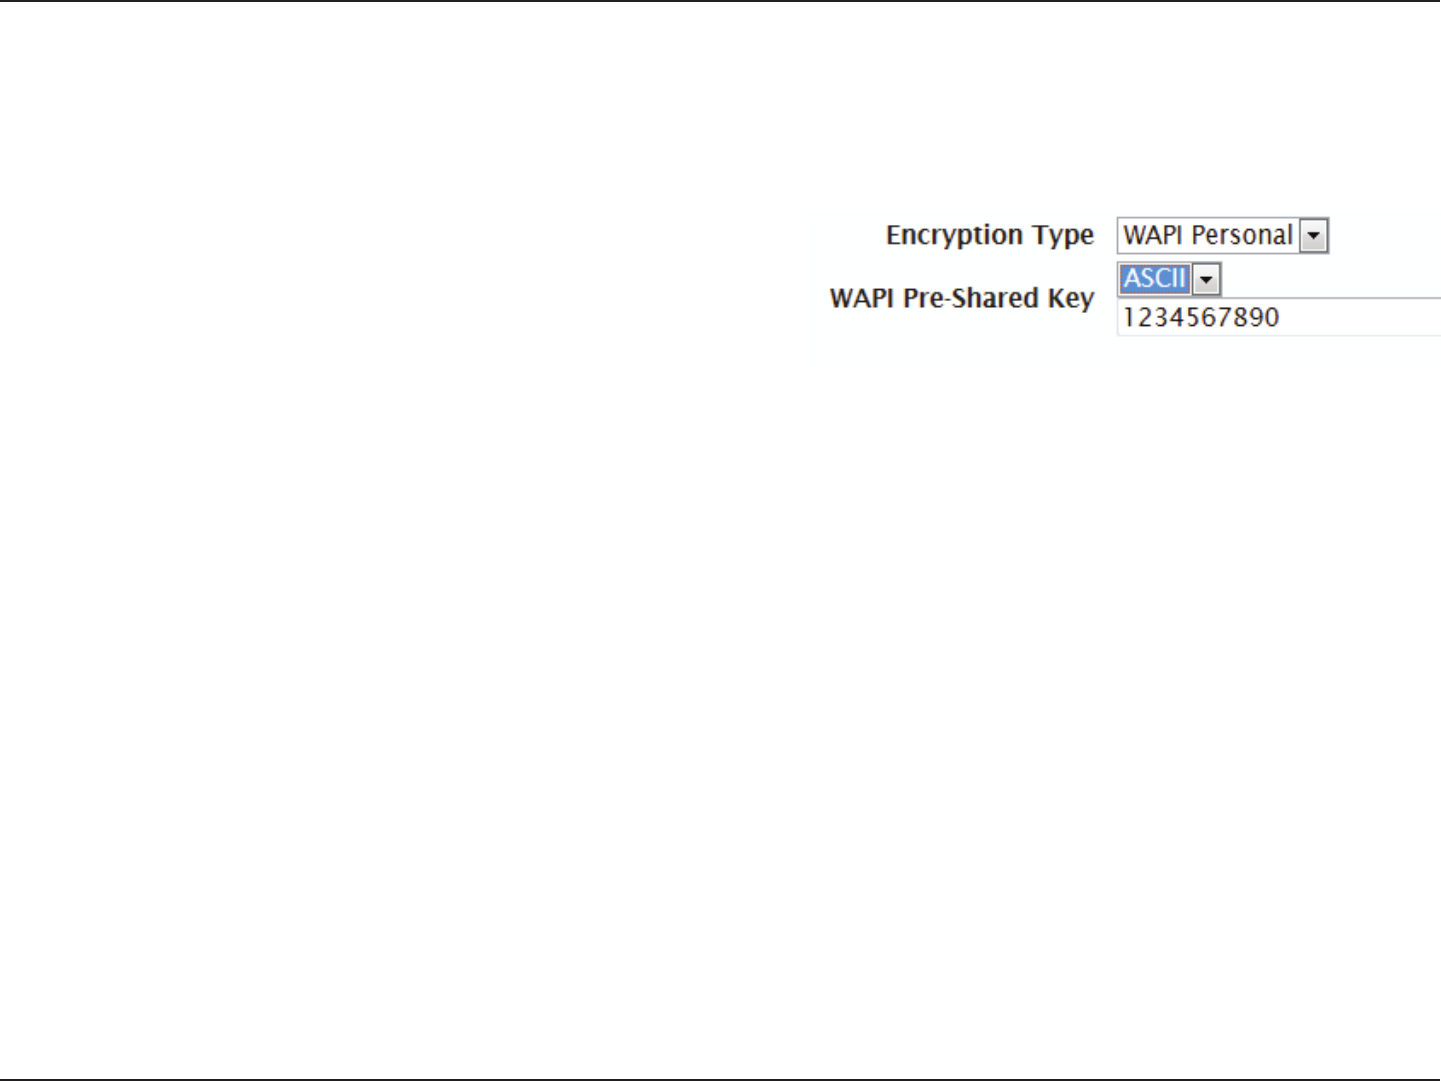
WLAN Authentication and Privacy Infrastructure (WAPI)
WLAN Authentication and Privacy Infrastructure (WAPI) is a wireless security standard which is implemented in China. You should only use this
protocol if your wireless clients do not support any of the other security methods provided by the DWR-710.
Encryption Type:
WAPI Pre-Shared
Key:
Select WAPI Personal from the drop-down menu.
Select whether your key should use ASCII or HEX characters
using the drop down menu. Enter your desired key in the
eld provided.
Click Apply to save the current settings.

32D-Link DWR-710 User Manual
Section 3 - Conguration
Wi-Fi Protected Setup (WPS)
Check the box to enable the Wi-Fi Protected Setup feature.
Select whether you wish to Congure or Uncongure the
WPS function using the radio buttons.
Select the WPS method that you wish to use. If your device
supports Push Button Connection (PBC), simply select this
option and click Apply to start the connection process. You
will then have 120 seconds to press the WPS button on your
wireless device in order to initiate the connection. If your
device does not support PBC, you can select the PIN method
and continue to the next step.
A PIN is a unique number that can be used to add the router
to an existing network or to create a new network.
For extra security, a new PIN can be generated. Click
Generate to create a new PIN. The current PIN will be shown
in the eld next to Current PIN. This PIN can be used by
wireless clients to join your network using the PIN method.
If the device you are trying to add to the network was
provided with a PIN number, select this option and enter the
device’s PIN in the eld.
Click Apply to commence the connection process.
Enable:
Congure State:
Congure Method:
Current PIN:
Generate PIN:
Enrollee PIN:
Wi-Fi Protected Setup (WPS) enables you to quickly and securely add compatible devices to your wireless network.
33D-Link DWR-710 User Manual
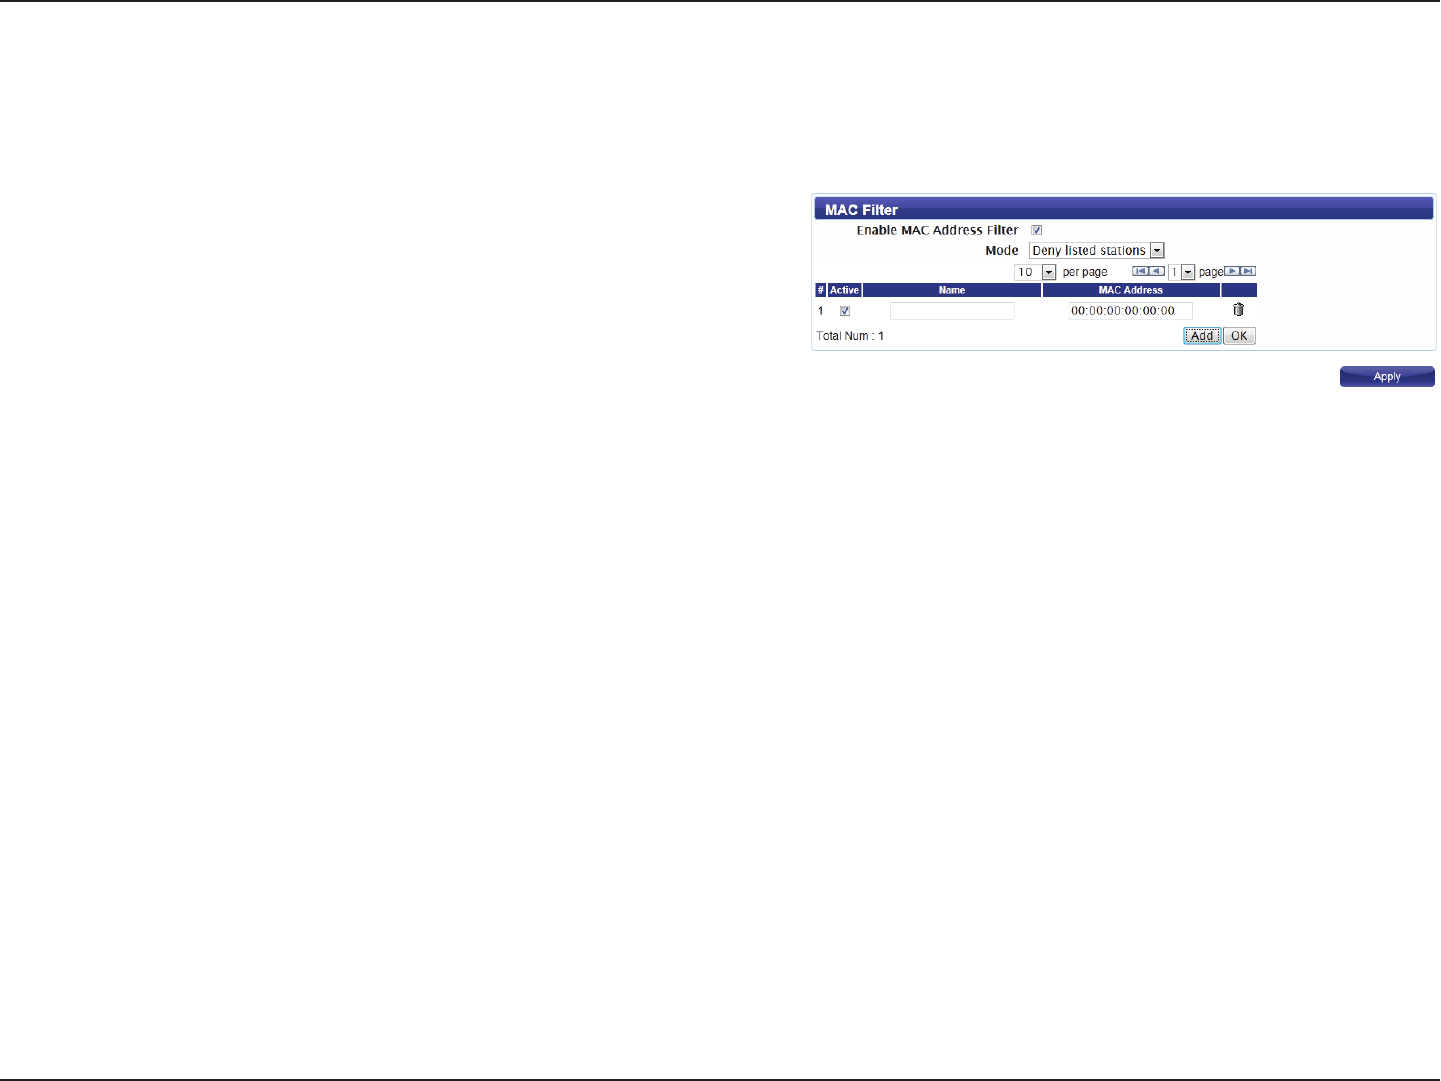
Section 3 - Conguration
Check the box to enable the MAC ltering feature.
Select the ltering mode from the drop-down menu. You can
choose to Deny Listed Stations access to your network, or
Allow Listed Stations access.
ListeD stAtioNs tAbLe
To add a new ltering rule, click Add.
Check the box to activate the rule.
Enter a name to identify the machine or station which will be
ltered.
Enter the MAC address of the machine or station which you
wish to lter.
Click the Delete icon to delete the rule from the table.
Click OK to save the current rule and add it to the table.
Click Apply to save all changes and return to the Wi-Fi page.
Enable MAC Address
Filter:
Mode:
Active:
Name:
MAC Address:
Delete:
The MAC ltering option allows you to allow or deny access to wireless clients based on their MAC address.
MAC Filter

34D-Link DWR-710 User Manual
Section 3 - Conguration
The Station List tab shows a list of all wireless clients currently connected to your wireless network.
Station Lists
35D-Link DWR-710 User Manual
Section 3 - Conguration
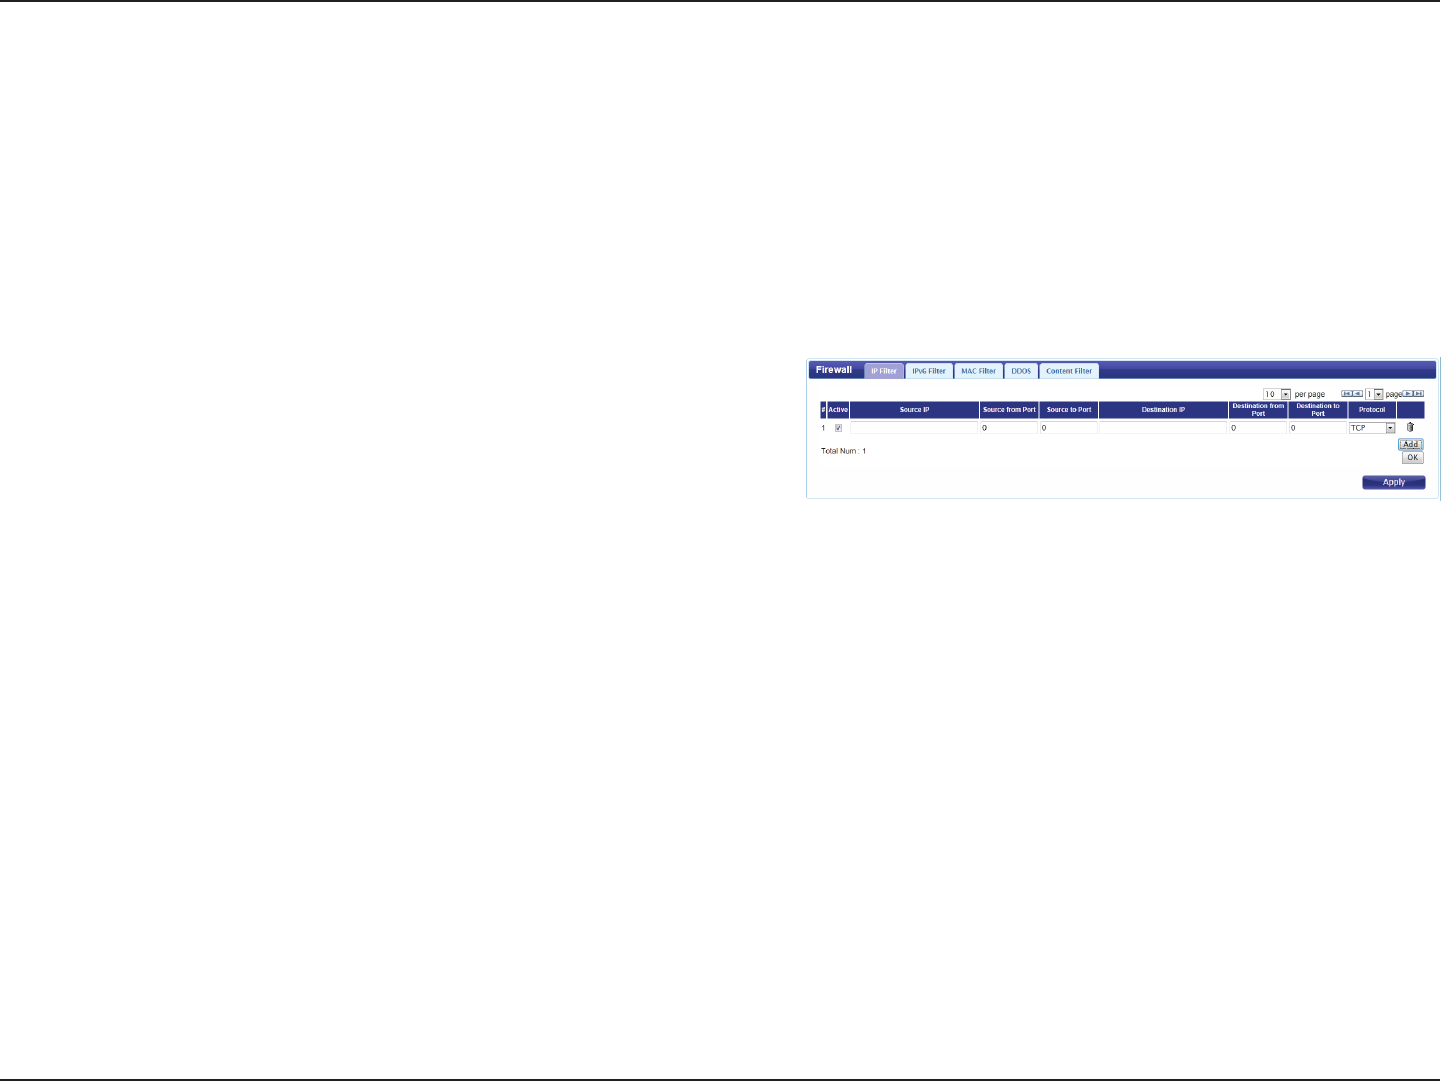
Firewall
Security
The Security tab allows you to congure your router’s rewall settings and enable features to protect your network from outside intrusions and
malicious attacks.
Click Add to add a new ltering rule.
Check the box to activate the IP lter rule.
Enter the source IP address to be ltered.
Enter the starting port on the source IP.
Enter the ending port on the source IP.
Enter the destination IP address to be ltered.
Enter the starting port of the destination IP.
Enter the ending port of the destination IP.
Select the protocol for the IP lter rule.
Click the icon to delete the IP ltering rule.
Click OK to save the ltering rule. Click Apply to save the
current conguration.
Active:
Source IP:
Source From
Port:
Source To Port:
Destination IP:
Destination From
Port:
Destination To
Port:
Protocol:
Delete:
IP Filter
36D-Link DWR-710 User Manual
Section 3 - Conguration
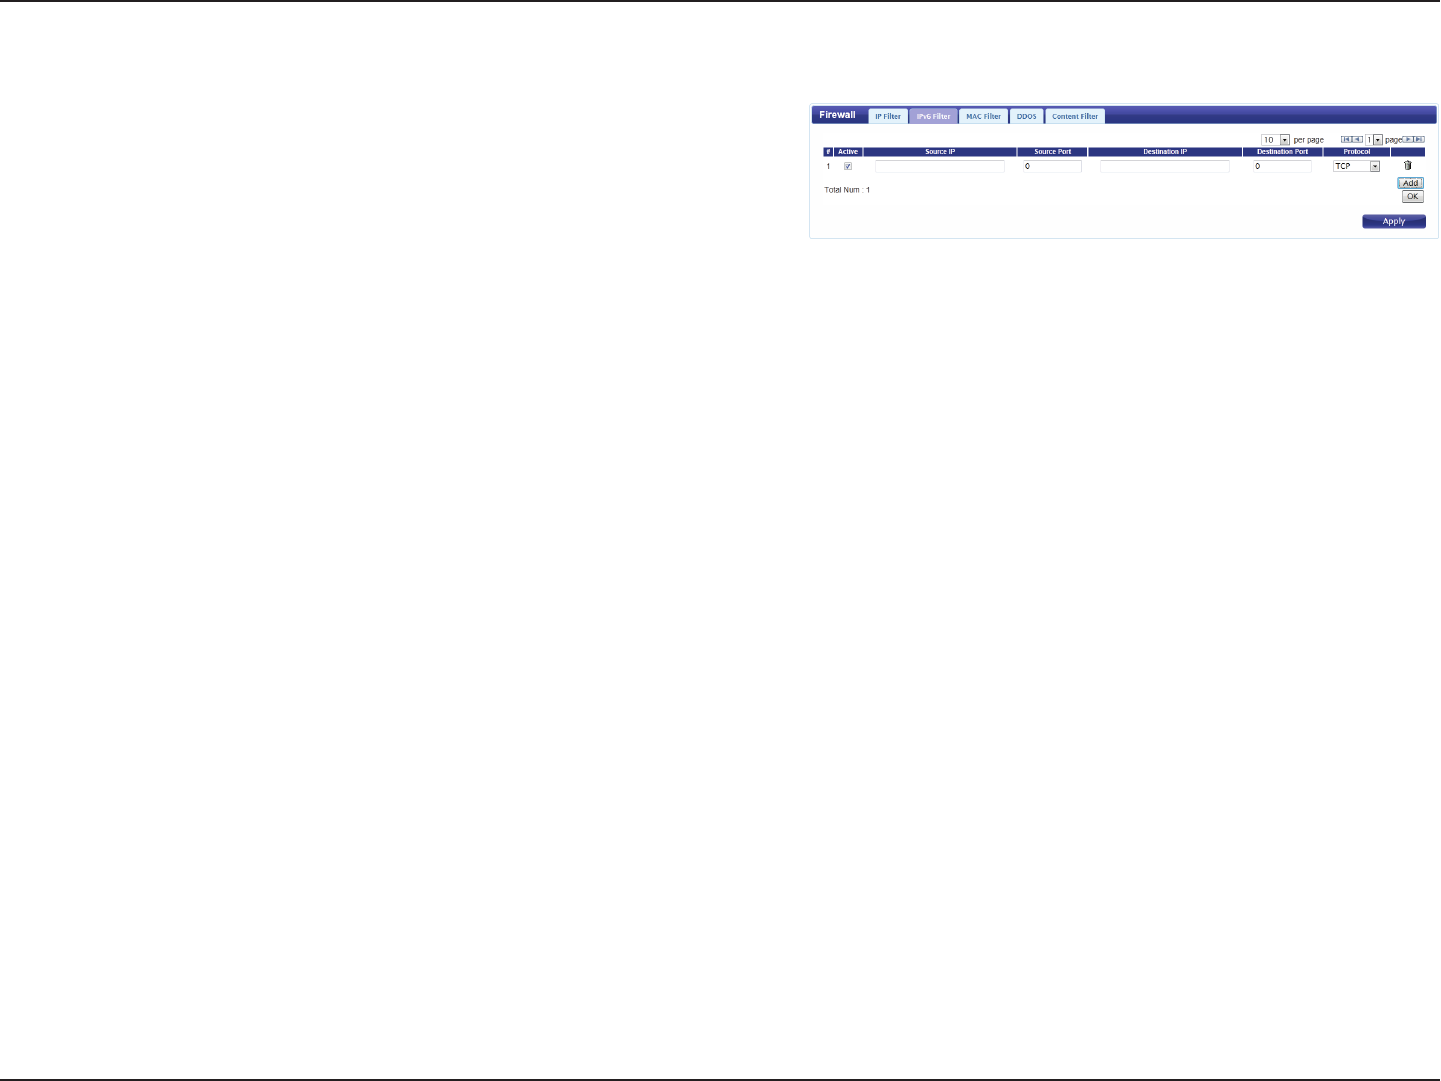
IPv6 Filter
Click Add to add a new ltering rule.
Check the box to active the IP lter rule.
Enter the source IP address to be ltered.
Enter the port for the source IP.
Enter the destination IP address to be ltered.
Enter the port on the destination IP.
Select the protocol for the IP lter rule.
Click the icon to delete the IP ltering rule.
Click OK to save the current ltering rule. Click Apply to save
the current conguration.
Active:
Source IP:
Source Port:
Destination IP:
Destination Port:
Protocol:
Delete:
37D-Link DWR-710 User Manual
Section 3 - Conguration
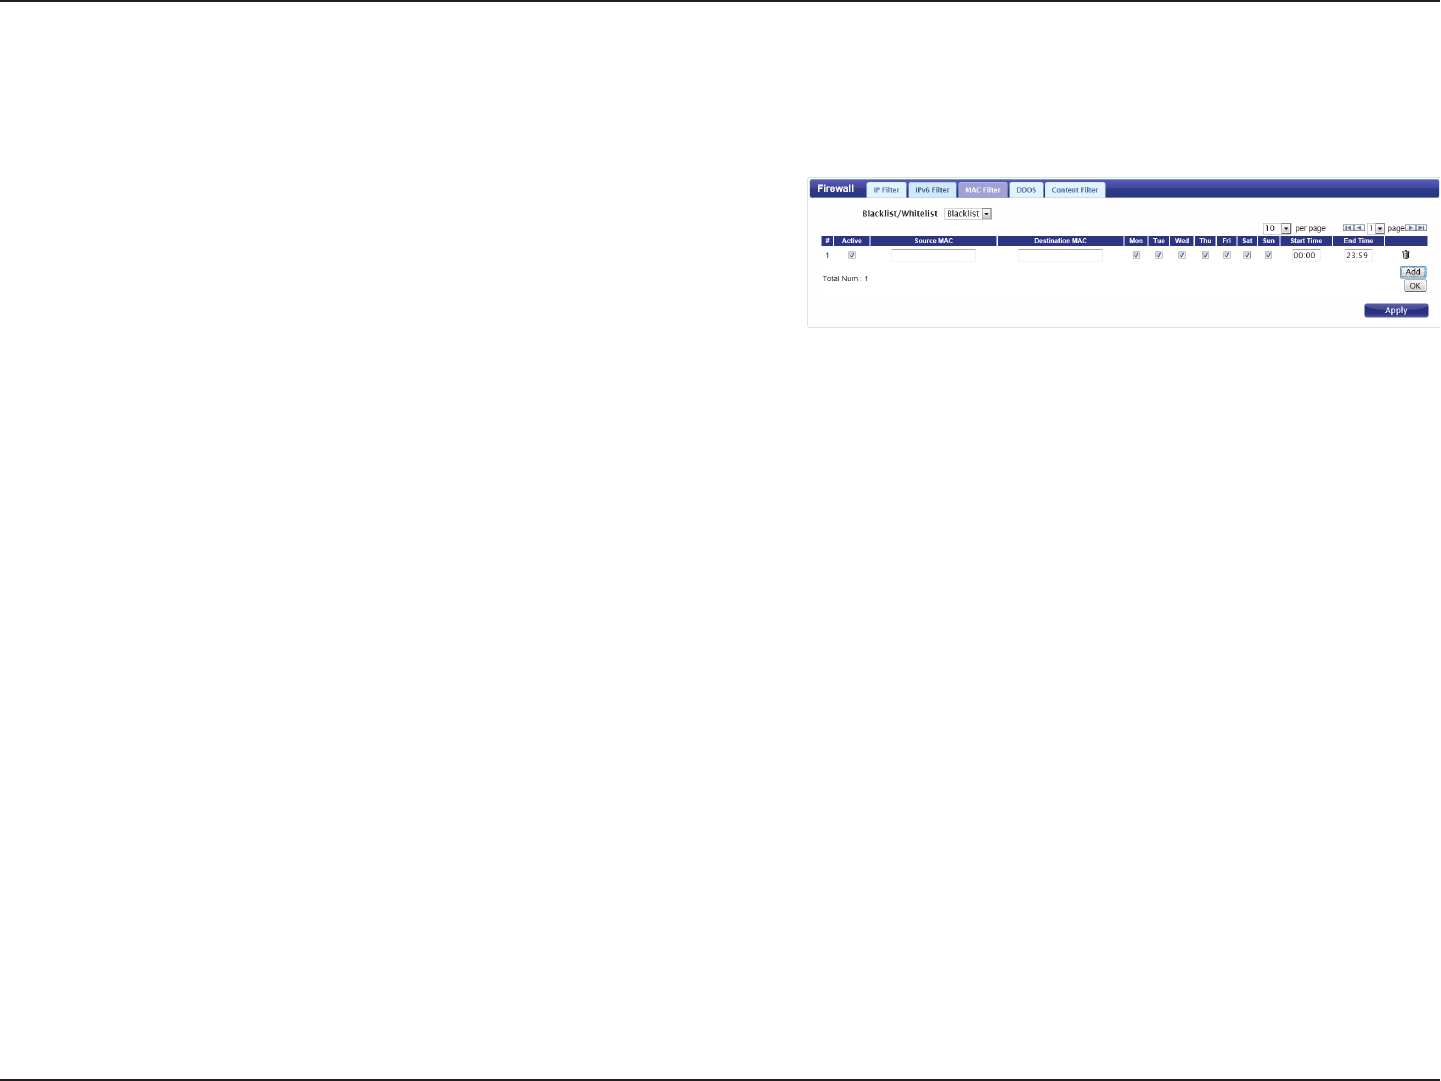
MAC Filter
Click Add to add a new MAC ltering rule.
Select Blacklist to deny access to only the MAC addresses
listed below. Select Whitelist to allow access to only the MAC
addresses listed below.
Check the box to activate the MAC lter rule.
Enter the MAC address of the machine or device which you
wish to lter packets coming from.
Enter the MAC address of the machine you wish to lter
packets.
Check the box for each day that you wish to activate the MAC
ltering rule.
Enter the starting time at which you wish to activate the MAC
ltering rule each day.
Enter the ending time at which you wish to deactivate the
MAC ltering rule each day.
Click the icon to delete this MAC ltering rule.
Click OK to add the current rule to the rules list. Click Apply
to save the current conguration.
Blacklist/
Whitelist:
Active:
Source MAC:
Destination MAC:
Day:
Start Time:
End Time:
Delete:
The MAC lter lets you to allow or deny access to your wireless network based on a client’s MAC address.
38D-Link DWR-710 User Manual
Section 3 - Conguration
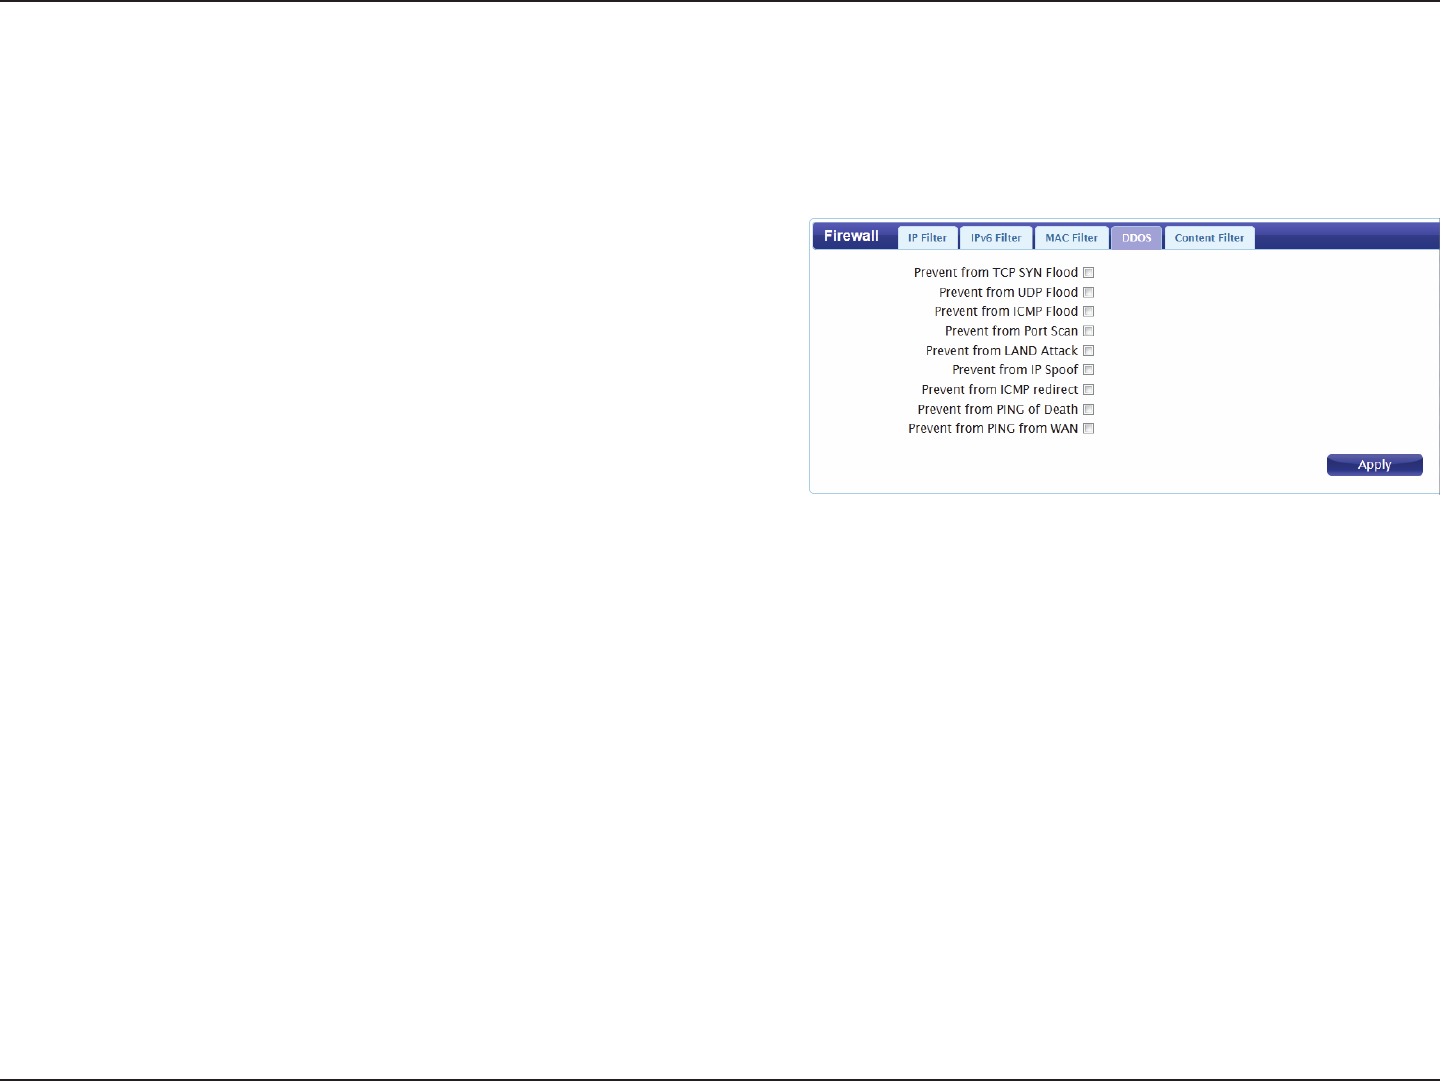
DDOS
Check the box next to the rule to enable prevention against
that specic kind of DoS attack.
Click Apply to save the current conguration.
DoS Prevention
Filters:
This section allows you to enable various security features to protect against Denial of Service (DoS) attacks.
39D-Link DWR-710 User Manual
Section 3 - Conguration
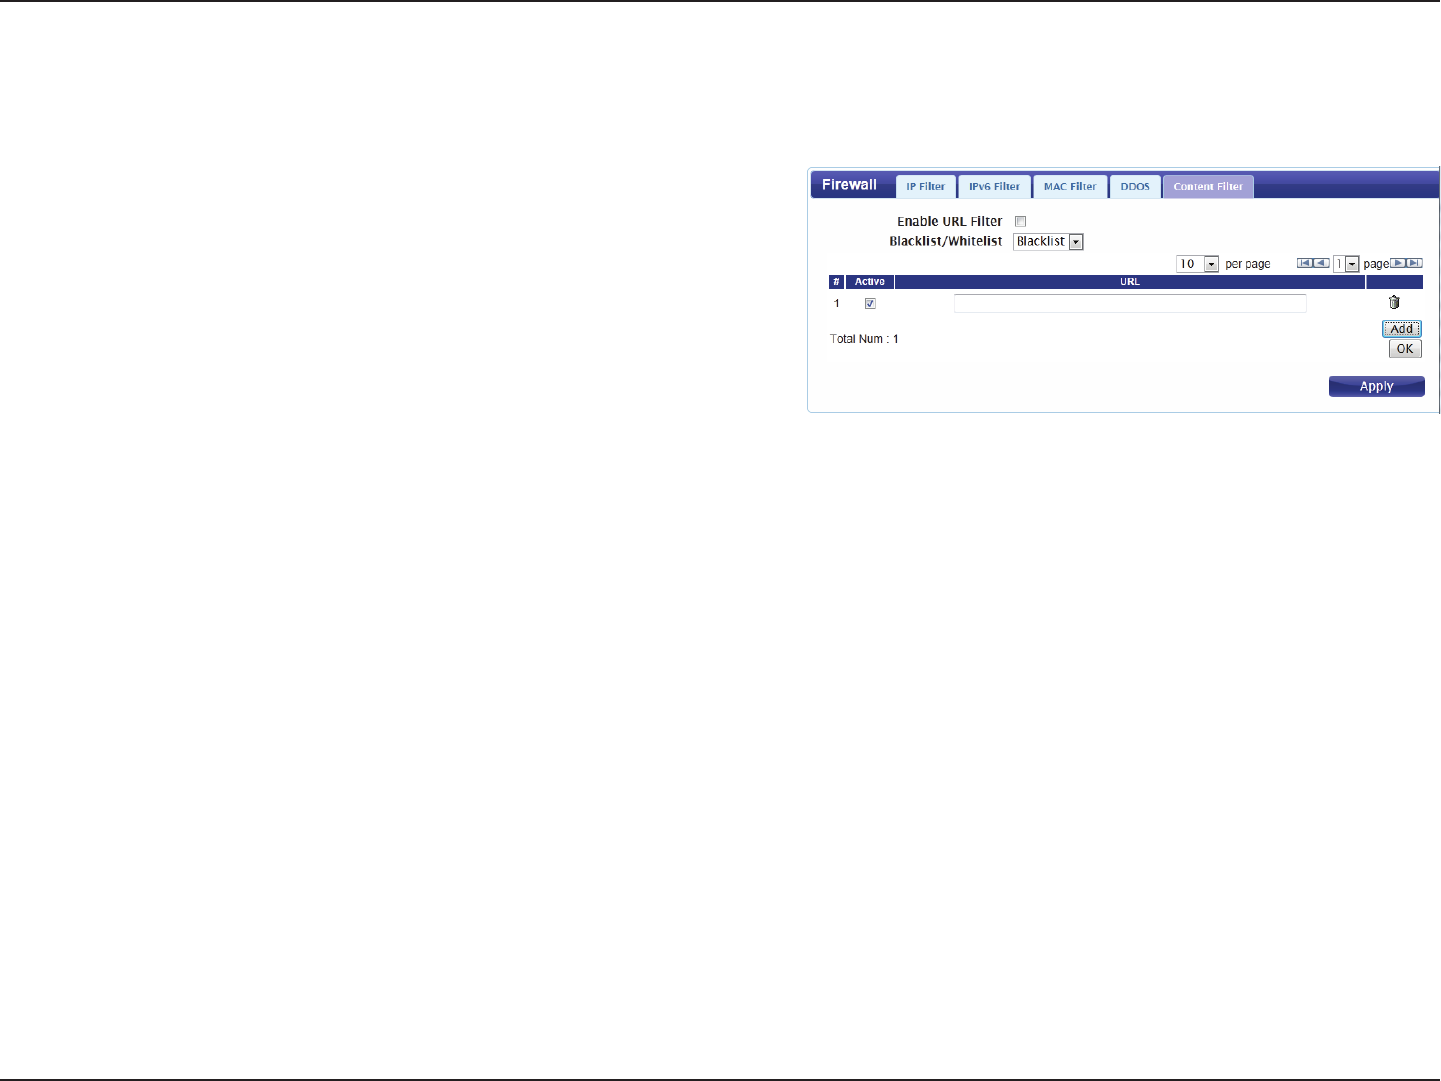
URL Filter
Check the box to enable URL ltering.
Select Blacklist to deny access to only URLs listed in the rule
table. Select Whitelist to allow access to only URLs listed in
the rule list.
Check the box to activate the URL ltering rule.
Enter the URL that you wish to allow or deny access to. If you
enter a domain name, all URLs under this domain will be
allowed or denied access.
Click the icon to delete the rule.
Click Add to save the rule and add it to the rule table. Click
Apply to save the current conguration.
Enable URL Filter:
Blacklist/
Whitelist:
Active:
URL:
Delete:
The content lter allows you to allow or deny access to specic URLs.

40D-Link DWR-710 User Manual
Section 3 - Conguration
About
This tab shows the router’s basic information.
Application
This tab allows you to congure the router’s administrative functions, such as time & date, remote access, and rmware. You can also access the
system log.
41D-Link DWR-710 User Manual
Section 3 - Conguration
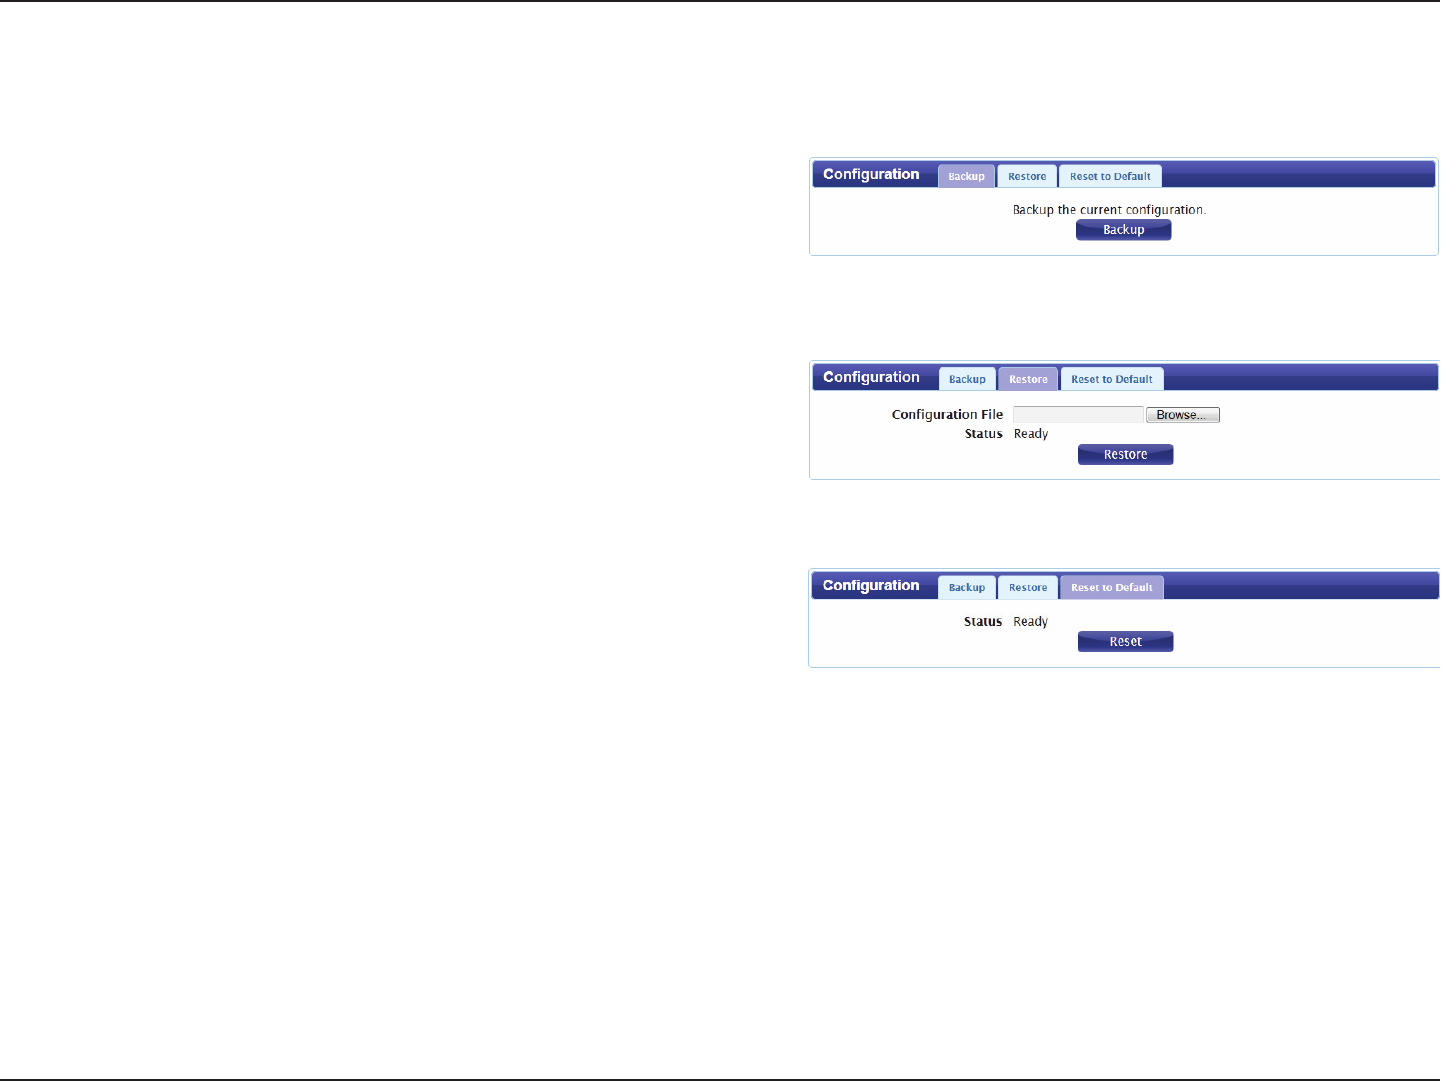
bACkup
Click Backup to save the router’s current conguration to
a le on your computer. You will then be prompted with a
“save le” dialogue, where you can choose where to save
the conguration le.
restore
Click Browse to locate a previously saved conguration
le on your computer. Once you have located the le, click
Restore to congure the router according to the selected
conguration le.
reset to DefAuLt
Click Reset to restore the router’s settings to the factory
defaults.
Important: All settings stored on the router will be lost
following a factory reset.
Conguration
42D-Link DWR-710 User Manual
Section 3 - Conguration
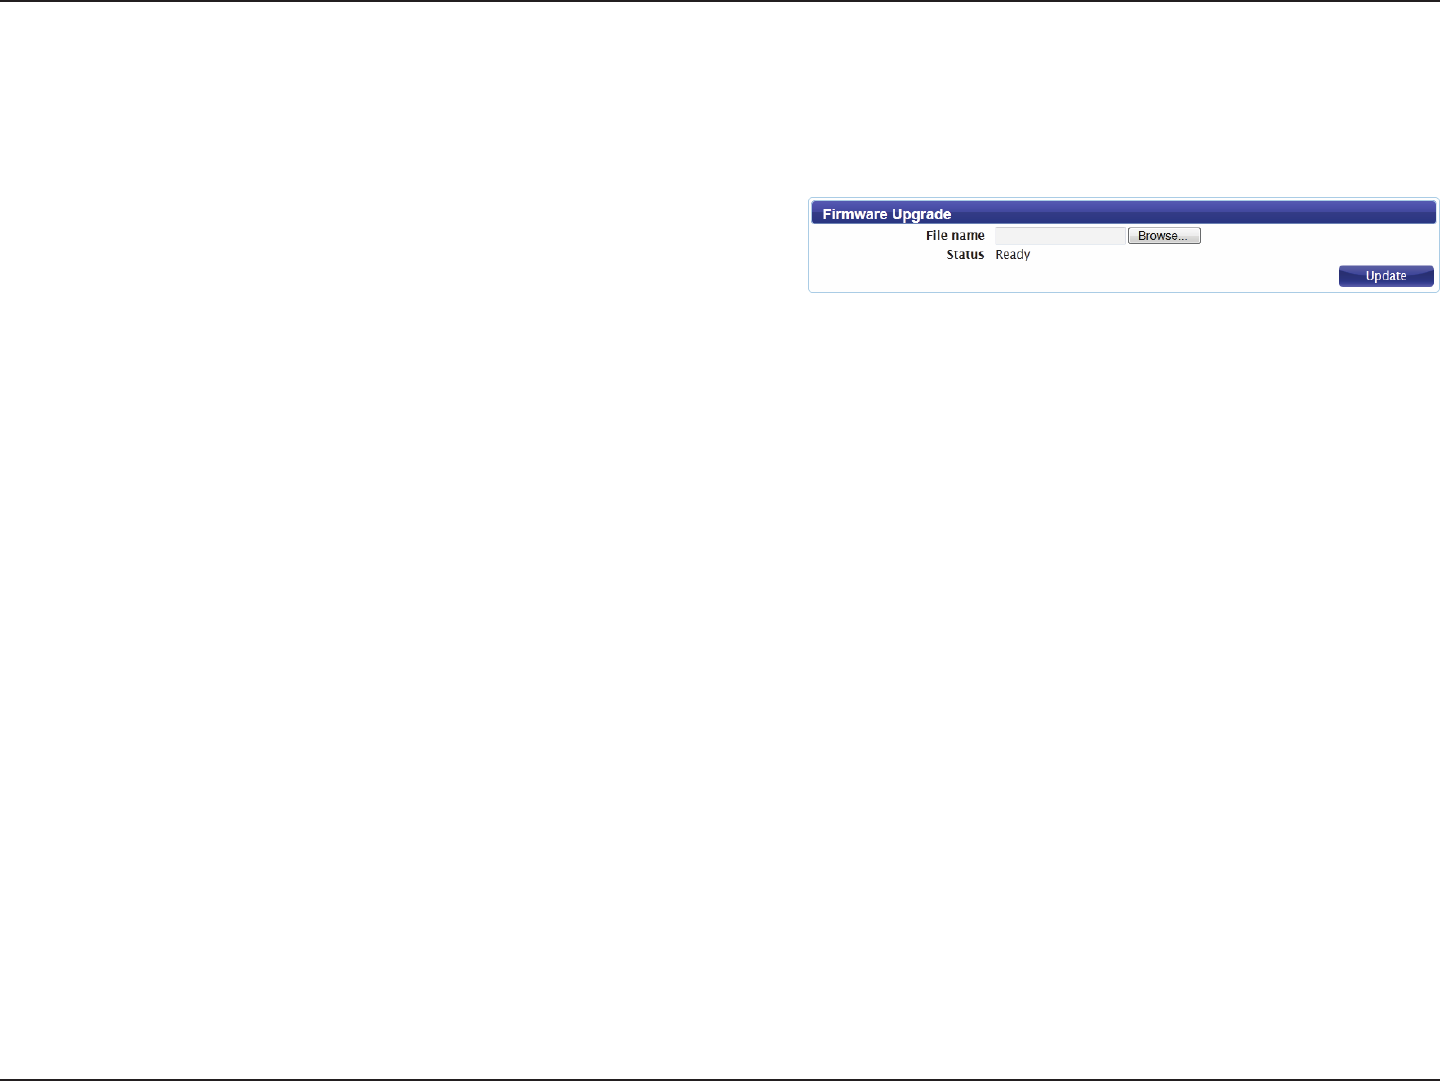
Firmware Upgrade
Click Browse to locate a previously downloaded rmware le on your computer.
Once the le has been located, click Update to carry out the rmware upgrade
process.
Important: All current settings will be restored to their factory defaults following
a rmware upgrade.
You can upgrade the rmware of the router here. Make sure the rmware le you want to use is on the local hard drive of the computer. Please
check your local D-Link support site or http://support.dlink.com for rmware updates and language packs.
43D-Link DWR-710 User Manual
Section 3 - Conguration
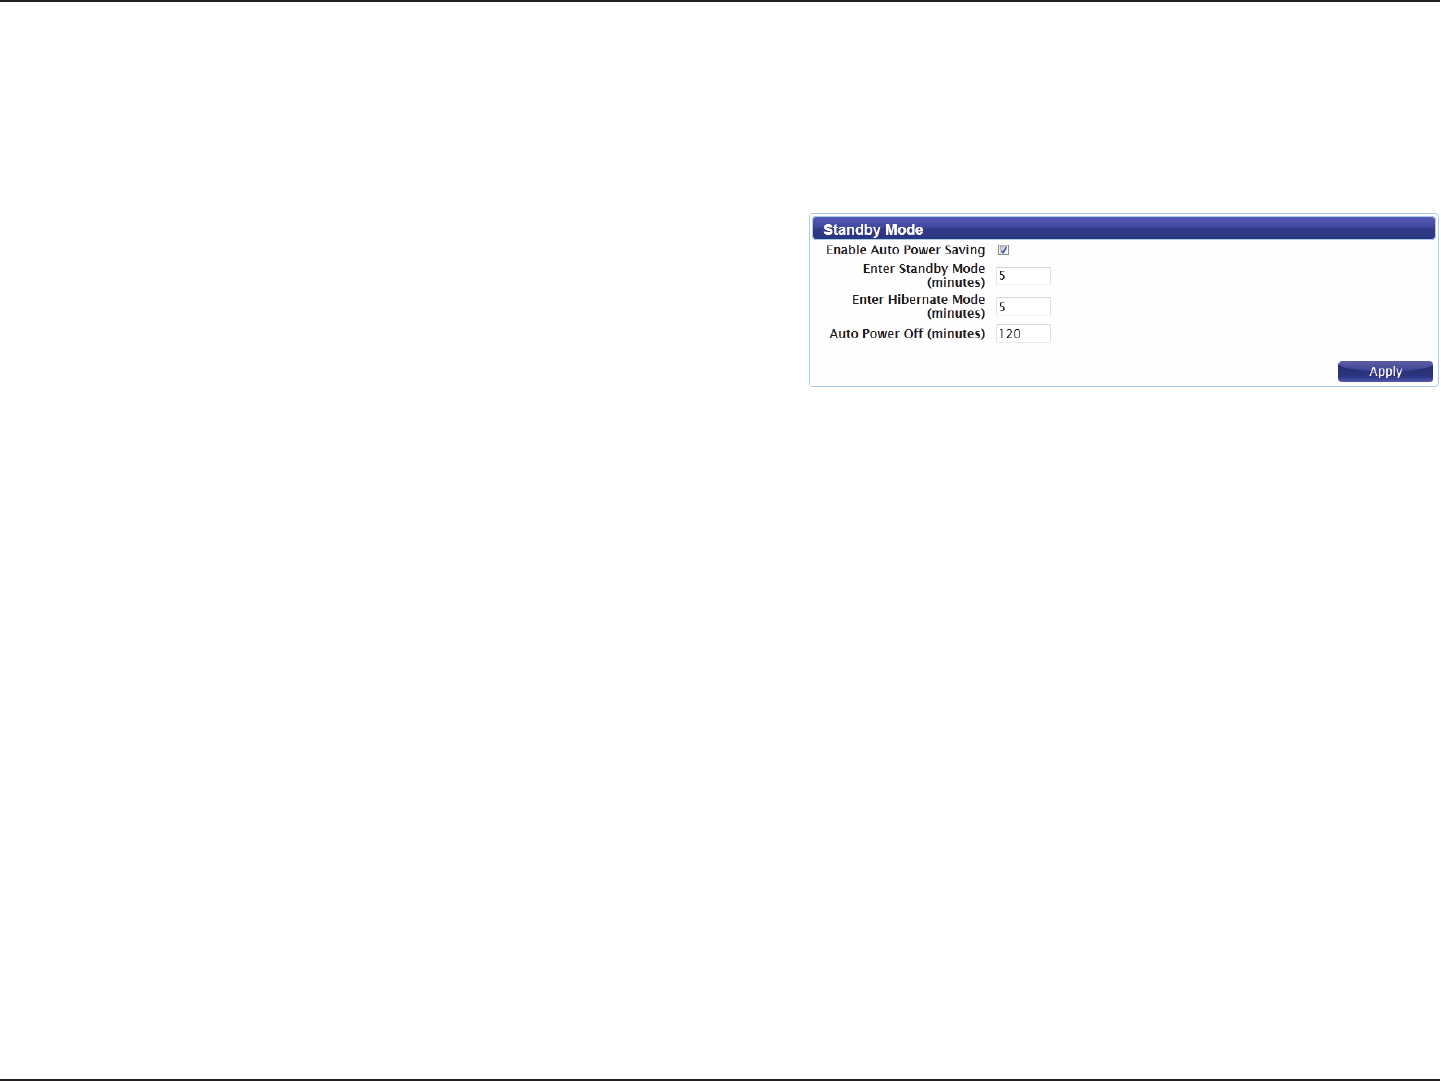
Standby Mode
This section allows you to congure the router’s automatic power-saving modes.
Check the box to enable the automatic power saving
features.
Enter the number of minutes after which the router will enter
standby mode if no activity is detected.
Enter the number of minutes after which the router will enter
hibernate mode if no activity is detected.
Enter the number of minutes after which the router will shut
down if no activity is detected.
Click Apply to save the current conguration.
Enable Auto
Power Saving:
Enter Standby
Mode:
Enter Hibernate
Mode:
Auto Power O:
44D-Link DWR-710 User Manual
Section 3 - Conguration
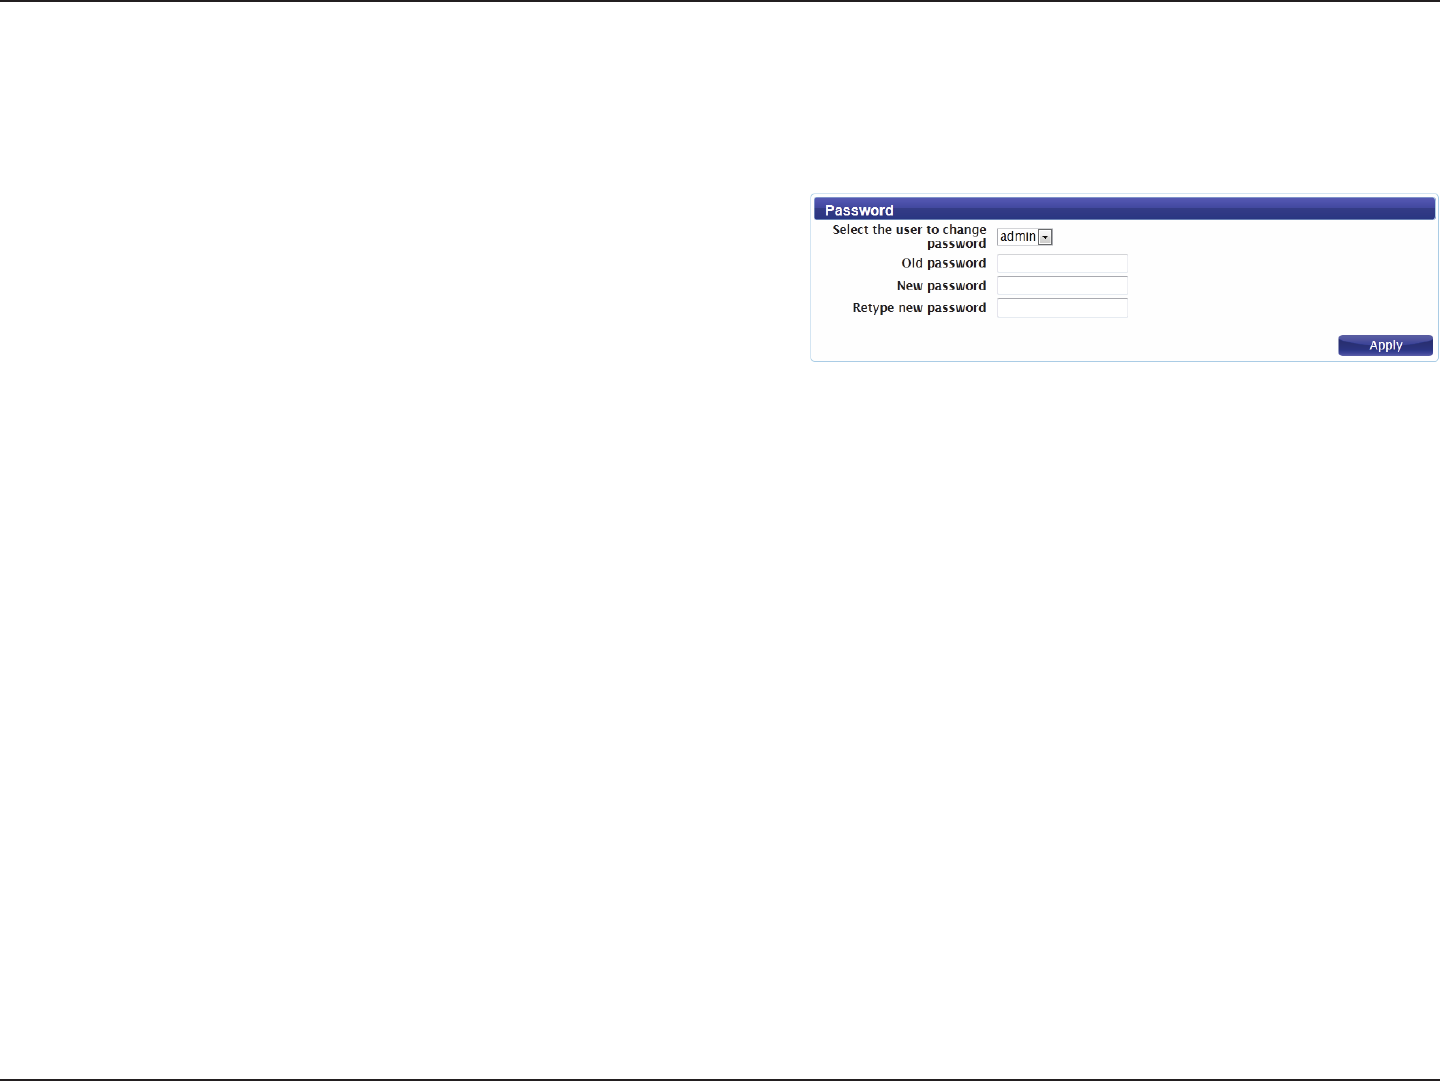
Password
Select whether you wish to change the password for the
admin or user account from the drop down menu.
Enter the existing password for this account.
Enter the new password for this account.
Type the new password again to conrm.
Click Apply to save the current conguration.
Select the user
to change
password:
Old Password:
New Password:
Retype New
Password:
This page lets you change the conguration interface passwords for the Administrator (Admin) and User accounts.
45D-Link DWR-710 User Manual
Section 3 - Conguration
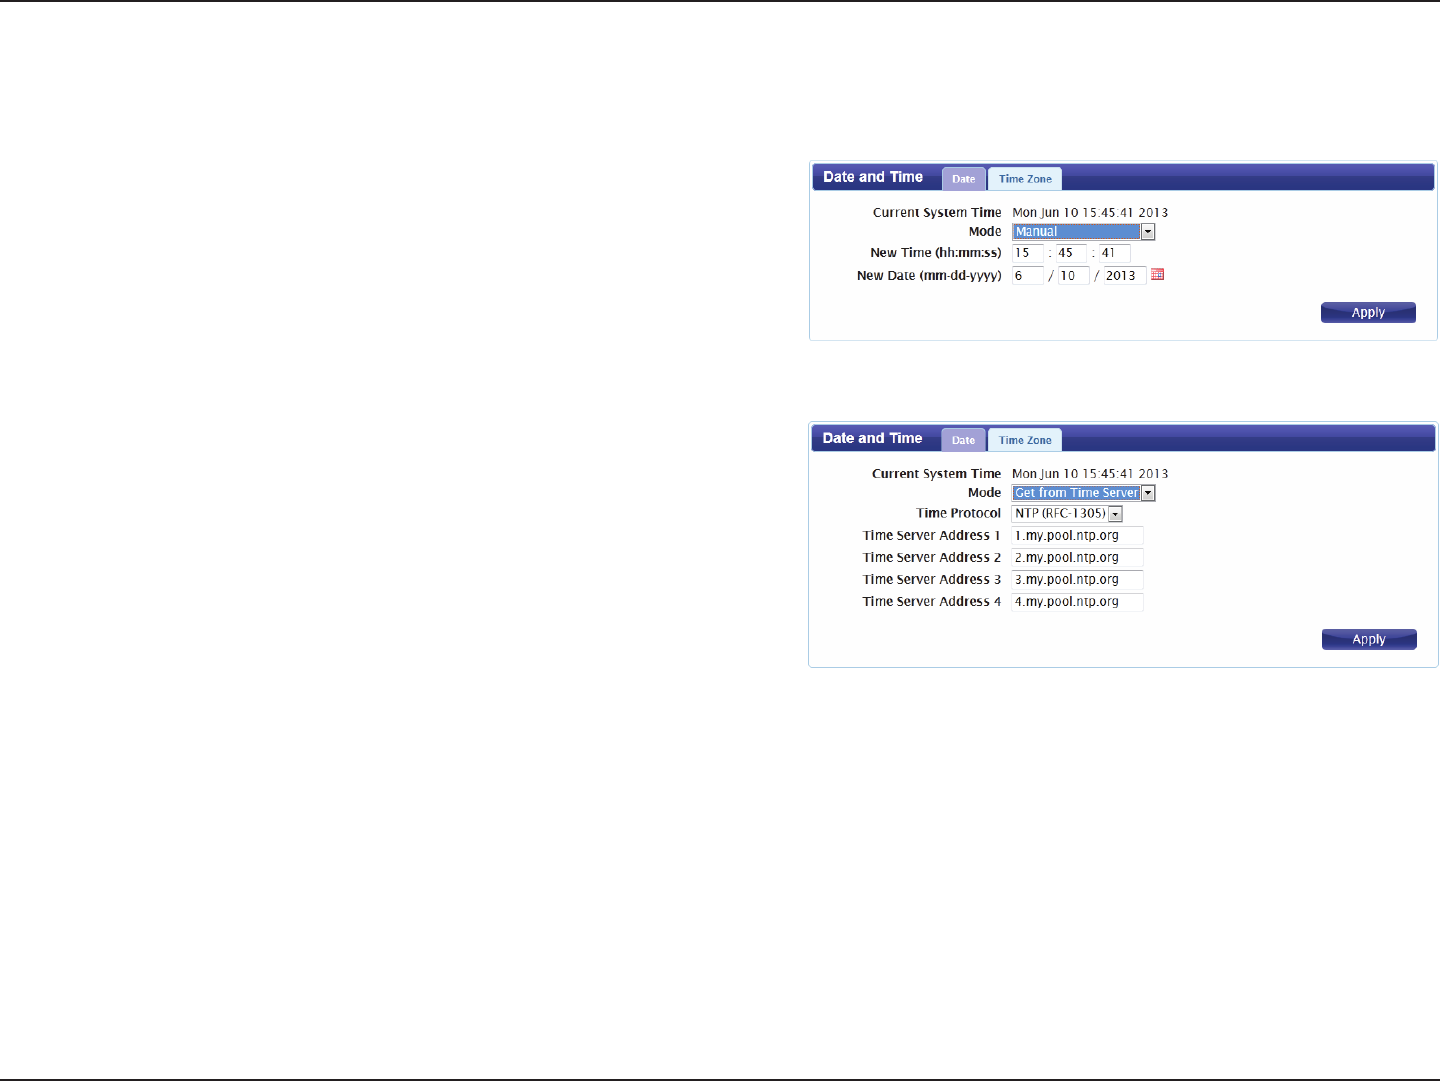
DAte
Displays the current time and date according to the router’s
system clock.
Select Manual to manually set the time and date, or select
Get from Time Server to have the router automatically
synchronize the time with a Network Time Protocol (NTP)
server.
If you selected Manual mode, enter the current time.
If you selected Manual mode, enter the current date.
If you selected Get time From Server, select the desired time
protocol from the drop-down menu.
Enter up to four NTP server addresses which will be used to
synchronize the router’s system time and date.
Click Apply to save the current settings.
Current System
Time:
Mode:
New Time:
New Date:
Time Protocol:
Time Server
Address 1-4:
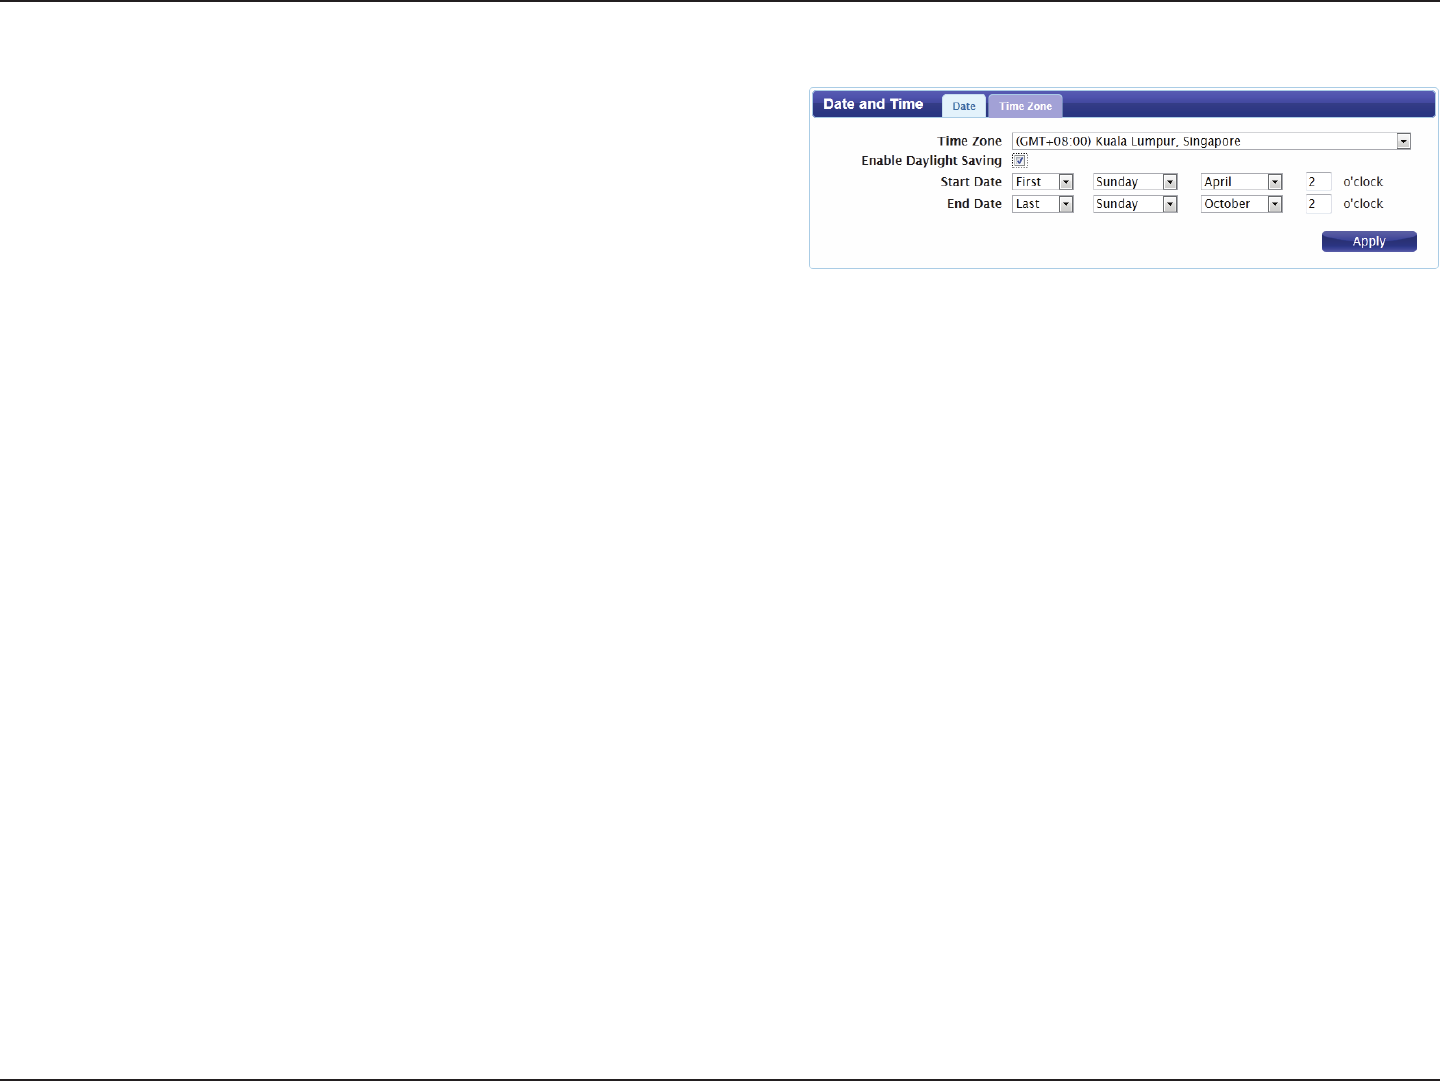
Date and Time
This page lets you set the time and date for your router, and also congure automatic time synchronization and daylight savings time.
46D-Link DWR-710 User Manual
Section 3 - Conguration
Time Zone:
Enable Daylight
Saving:
Start Date:
End Date:
time ZoNe
Select your time zone from the drop-down menu.
Check the box to enable automatic adjustment for daylight
saving.
Enter the details of the starting date and time for daylight
saving time in your region.
Enter the details of the ending date and time for daylight
saving time in your region.
Click Apply to save the current settings.

47D-Link DWR-710 User Manual
Section 3 - Conguration
Language
Language: Select your preferred language from the drop-down menu.
Click Apply to save the current conguration.
48D-Link DWR-710 User Manual
Section 3 - Conguration
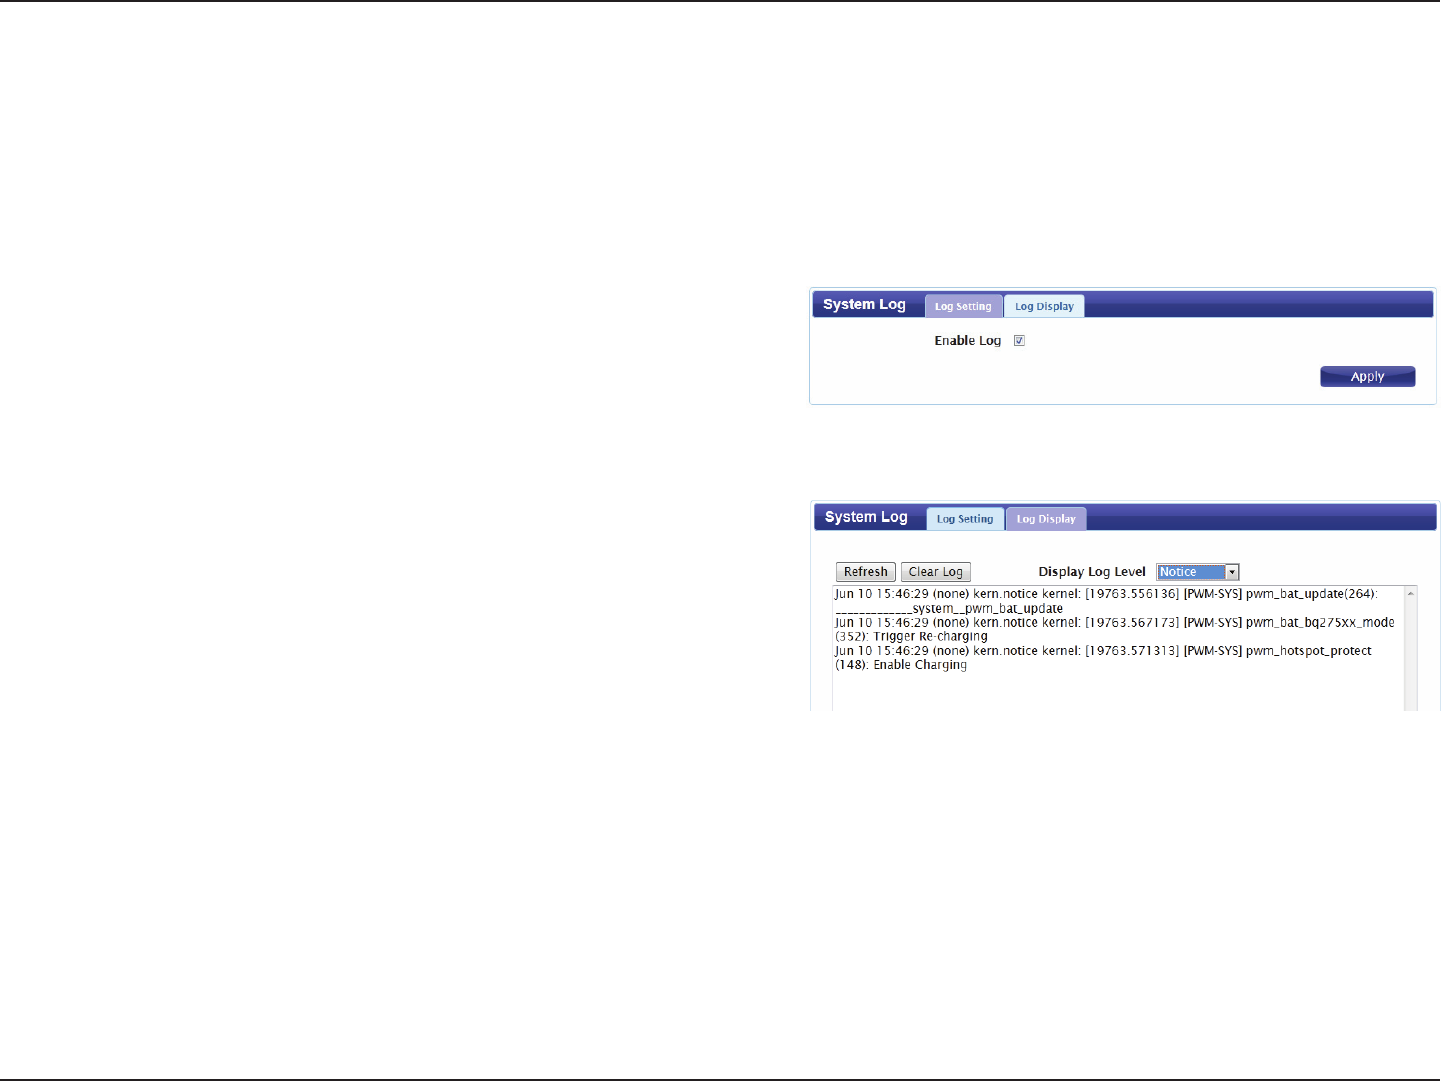
System Log
Enable Log:
Refresh:
Clear Log:
Display Log
Level:
Log settiNg
Check the box to enable the router’s log-keeping function.
Click Apply to save the current conguration.
Log DispLAy
Click to update the log display.
Click to clear all log entries.
Select the level of log event which you wish to view from the
drop-down menu.
The system log displays a record of all events which occur while the router is running.
49D-Link DWR-710 User Manual
Section 4 - Connecting to a Wireless Network
It is recommended to enable wireless security (WPA/WPA2) on your wireless router or access point before conguring your
wireless adapter. If you are joining an existing network, you will need to know the security key (Wi-Fi password) being used.
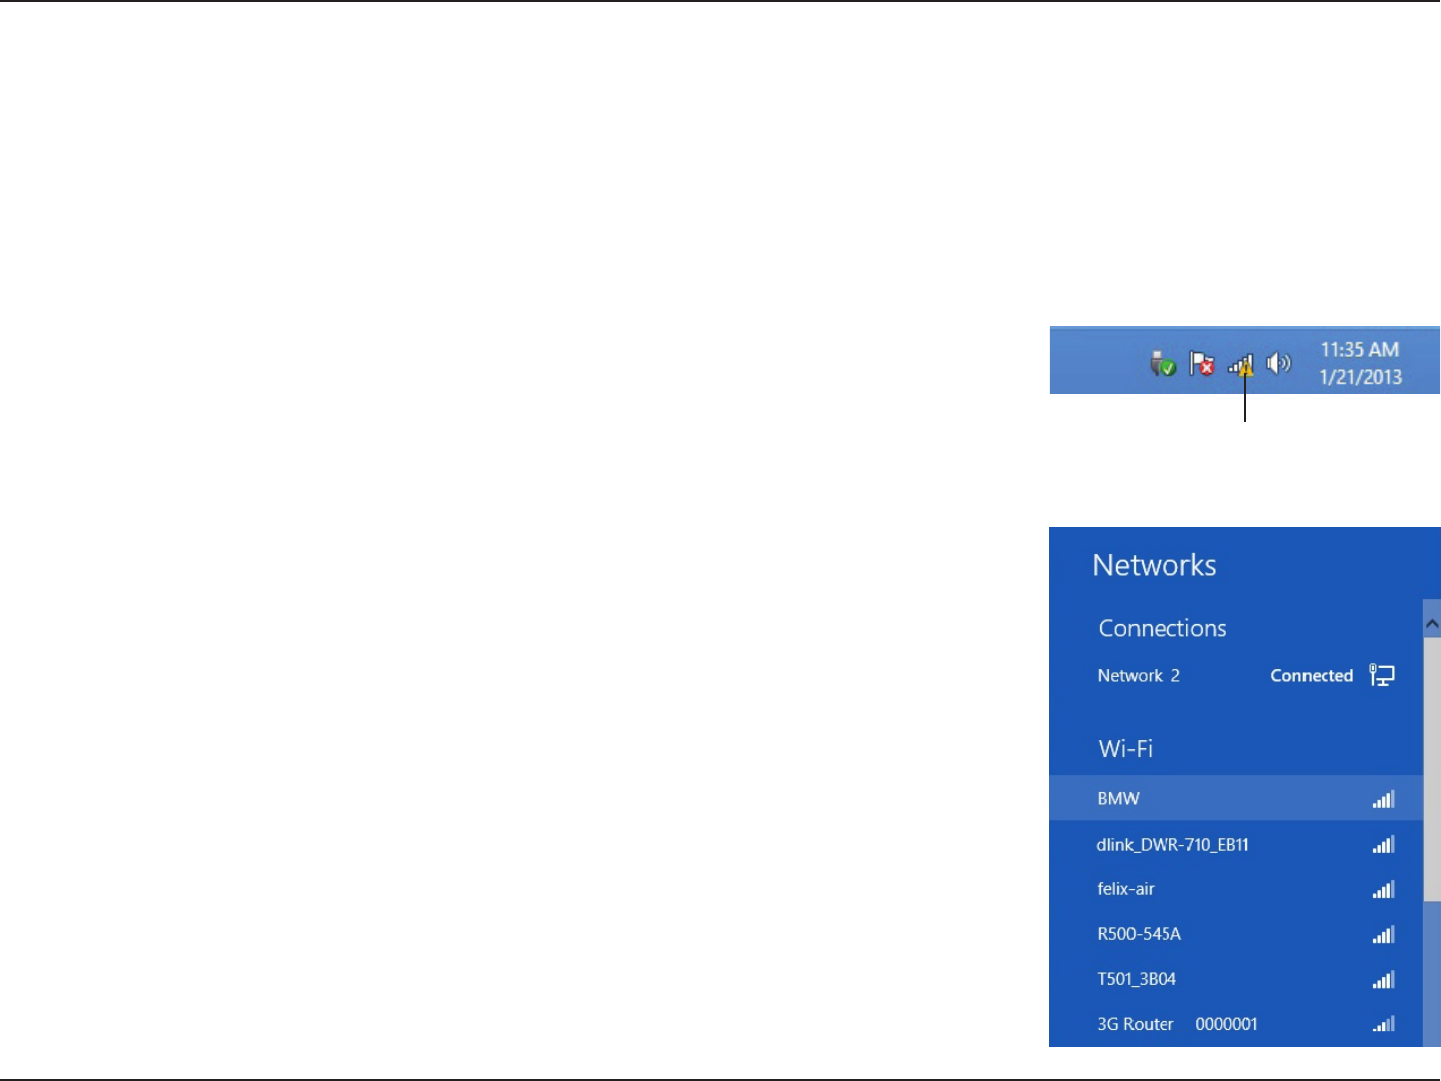
To join an existing network, locate the wireless network icon in the taskbar, next to the time display.
¨ Wireless Icon
Clicking on this icon will display a list of wireless networks which are within connecting proximity of your
computer. Select the desired network by clicking on the network name.
Connecting to a Wireless Network
Using Windows 8
50D-Link DWR-710 User Manual
Section 4 - Connecting to a Wireless Network
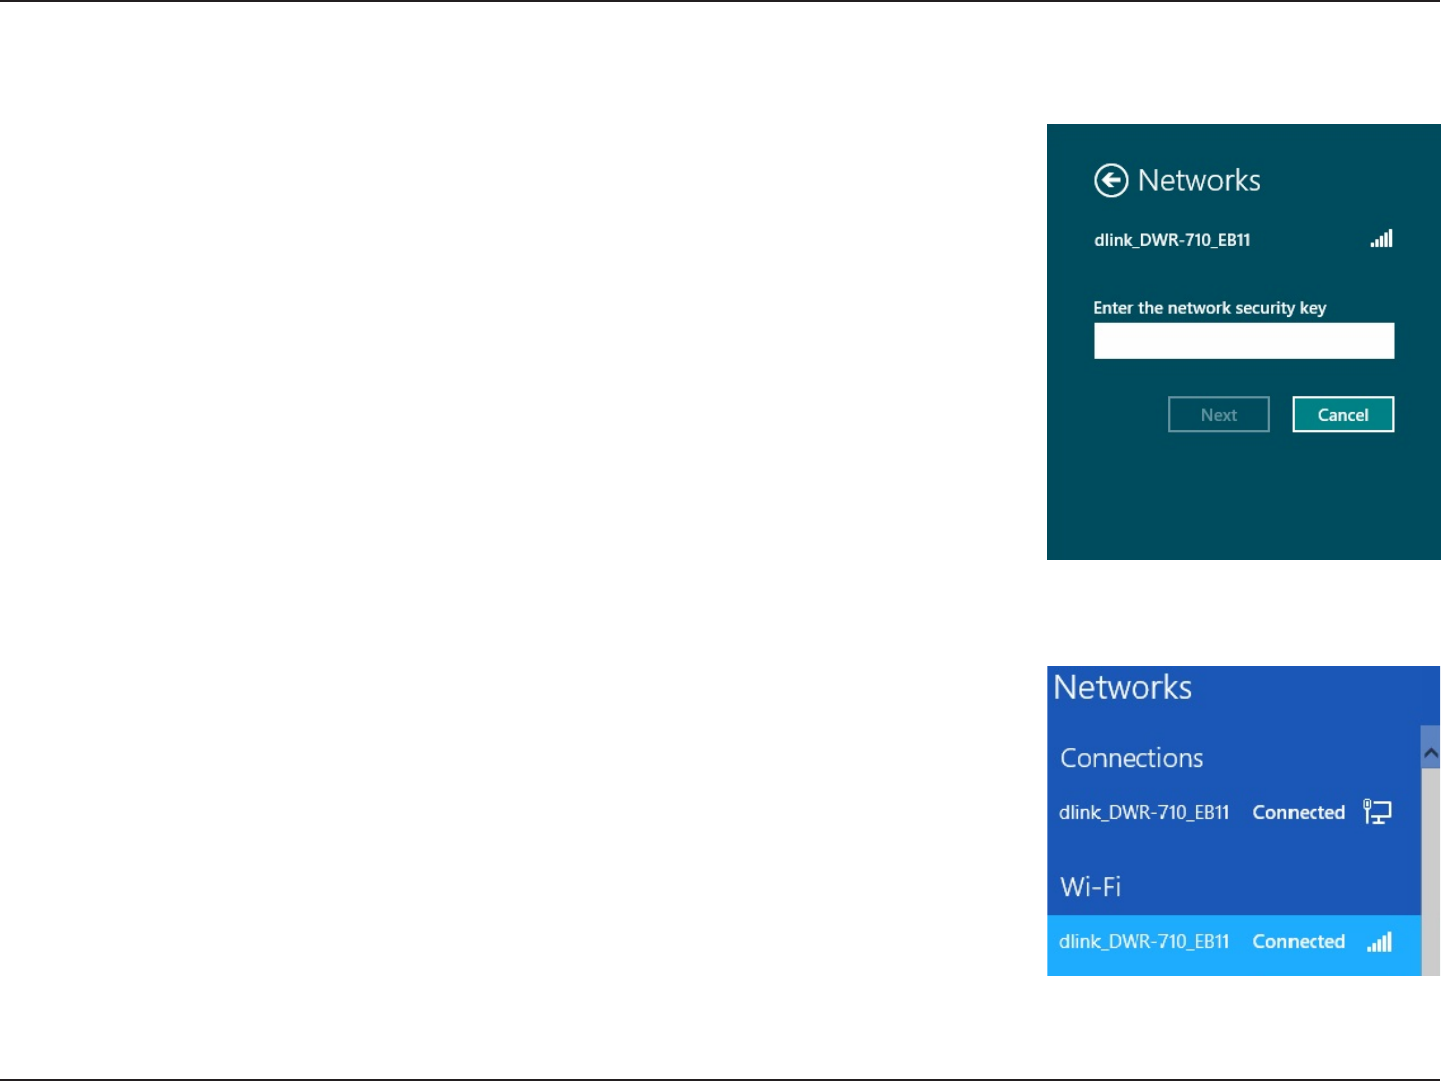
You will then be prompted to enter the network security key (Wi-Fi password) for the wireless
network. Enter the password into the box and click Next.
If you wish to use Wi-Fi Protected Setup (WPS) to connect to the router, you can also press the WPS
button on your router at this point to enable the WPS function.
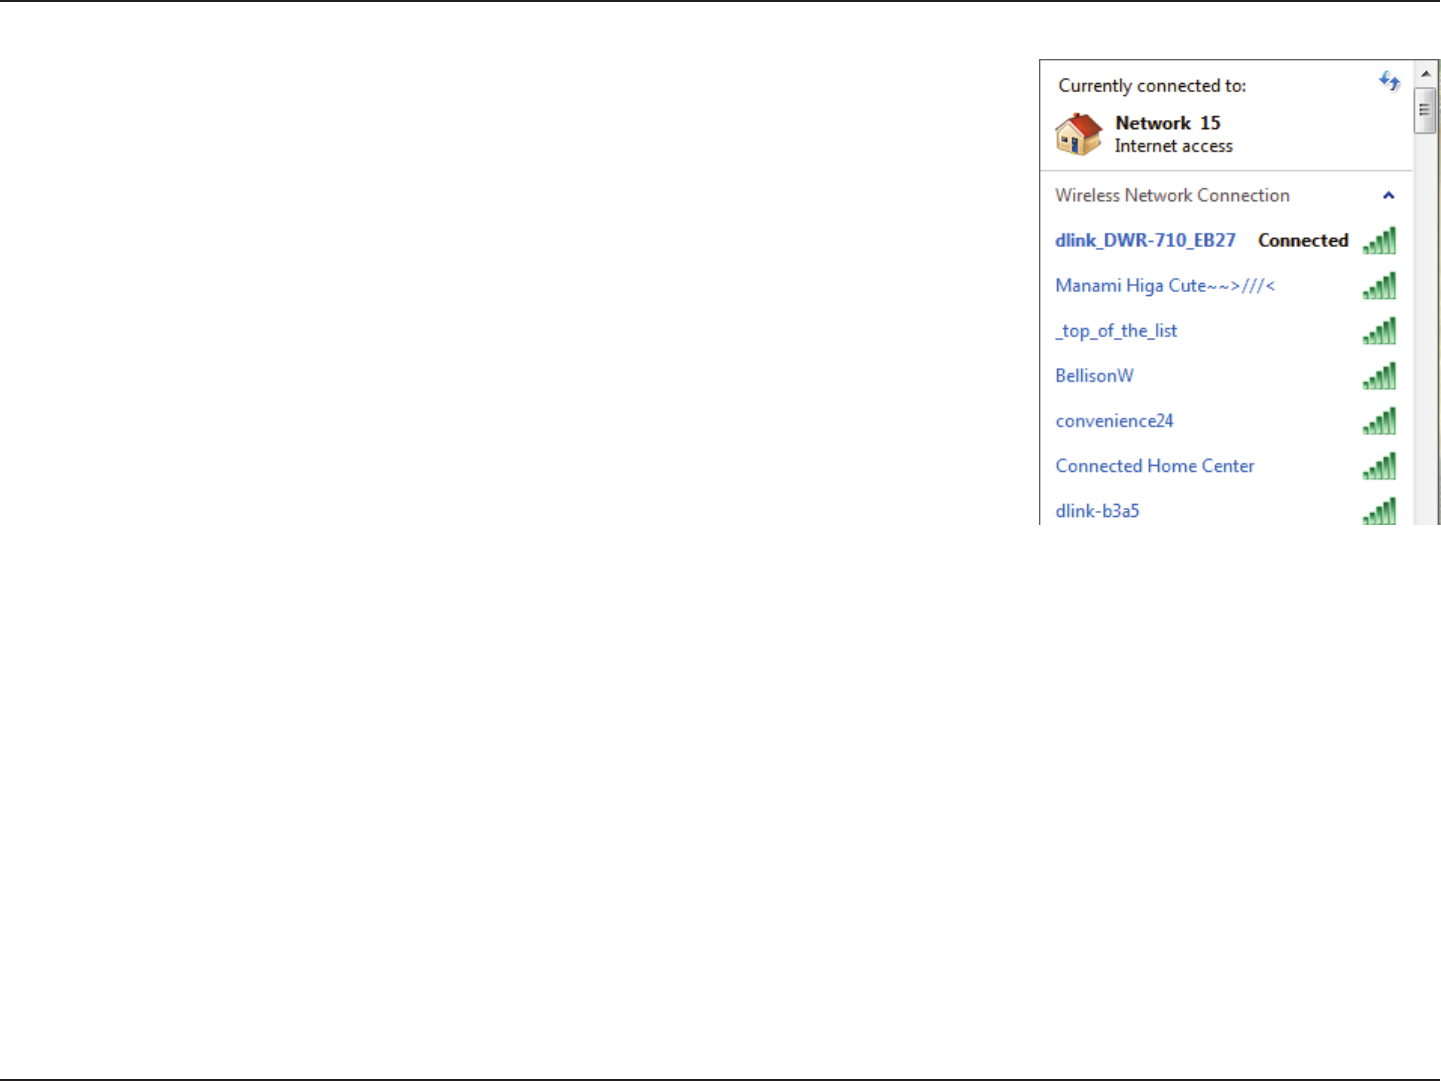
When you have established a successful connection to a wireless network, the word Connected will
appear next to the name of the network to which you are connected.

51D-Link DWR-710 User Manual
Section 4 - Connecting to a Wireless Network
Connecting to a Wireless Network
Using Windows 7
Windows 7 users may use the built-in wireless utility to connect to a wireless network. If you are using another company’s utility or Windows 2000,
please refer to the user manual of your wireless adapter for help with connecting to a wireless network. Most utilities will have a “site survey” option
similar to the Windows 7 utility as seen below.
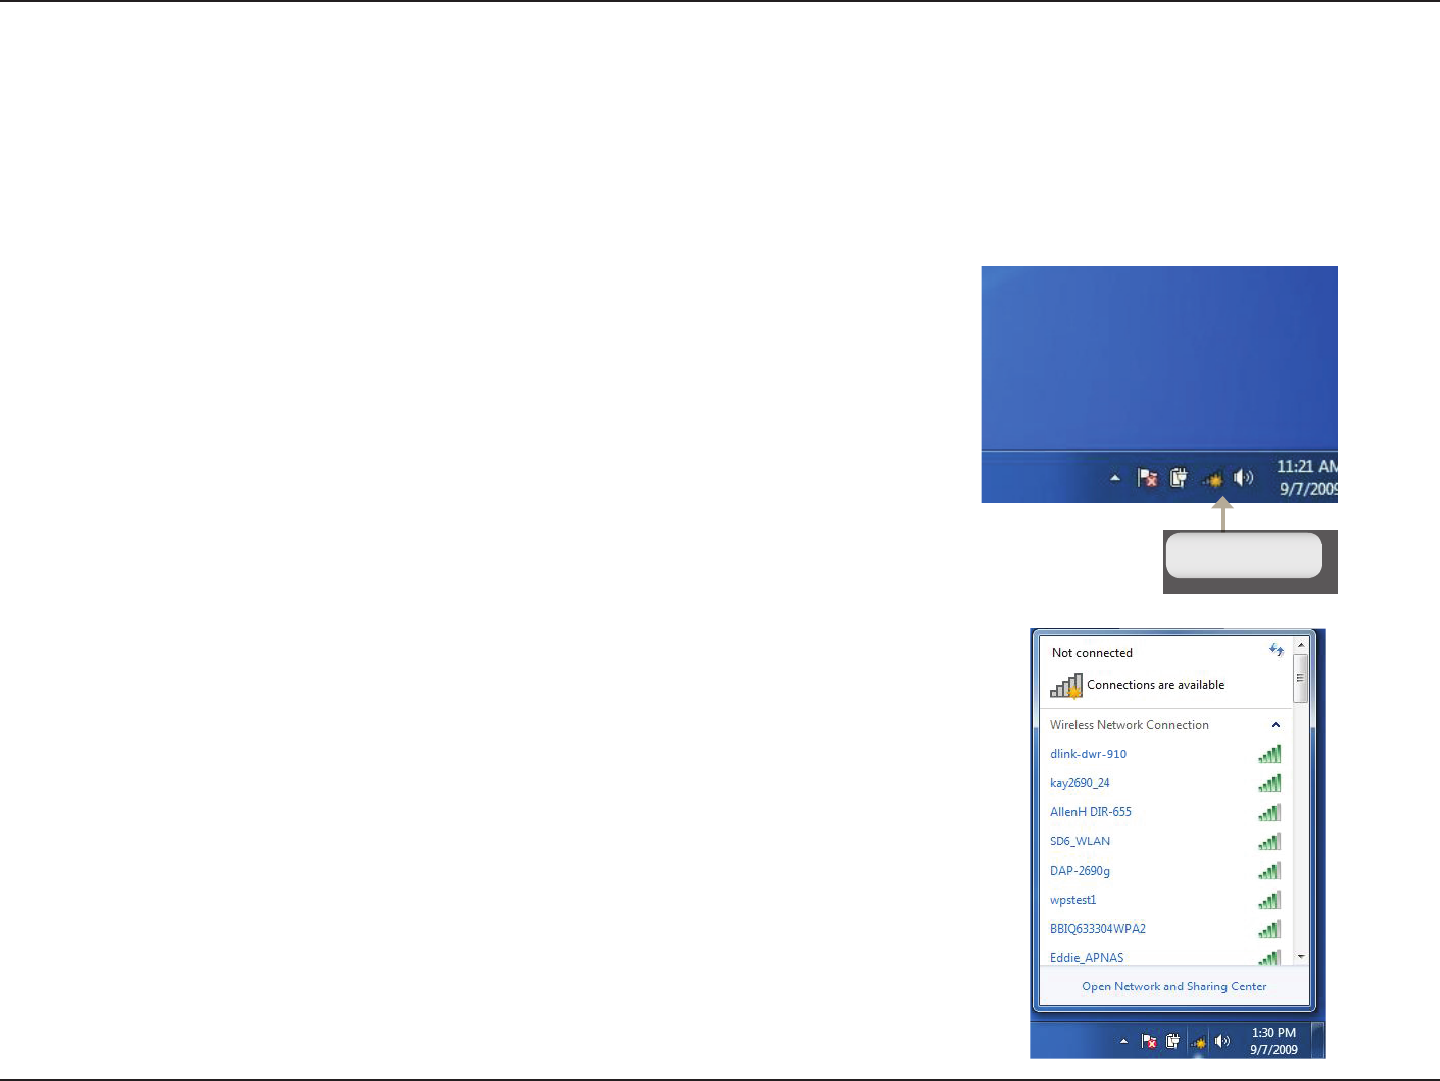
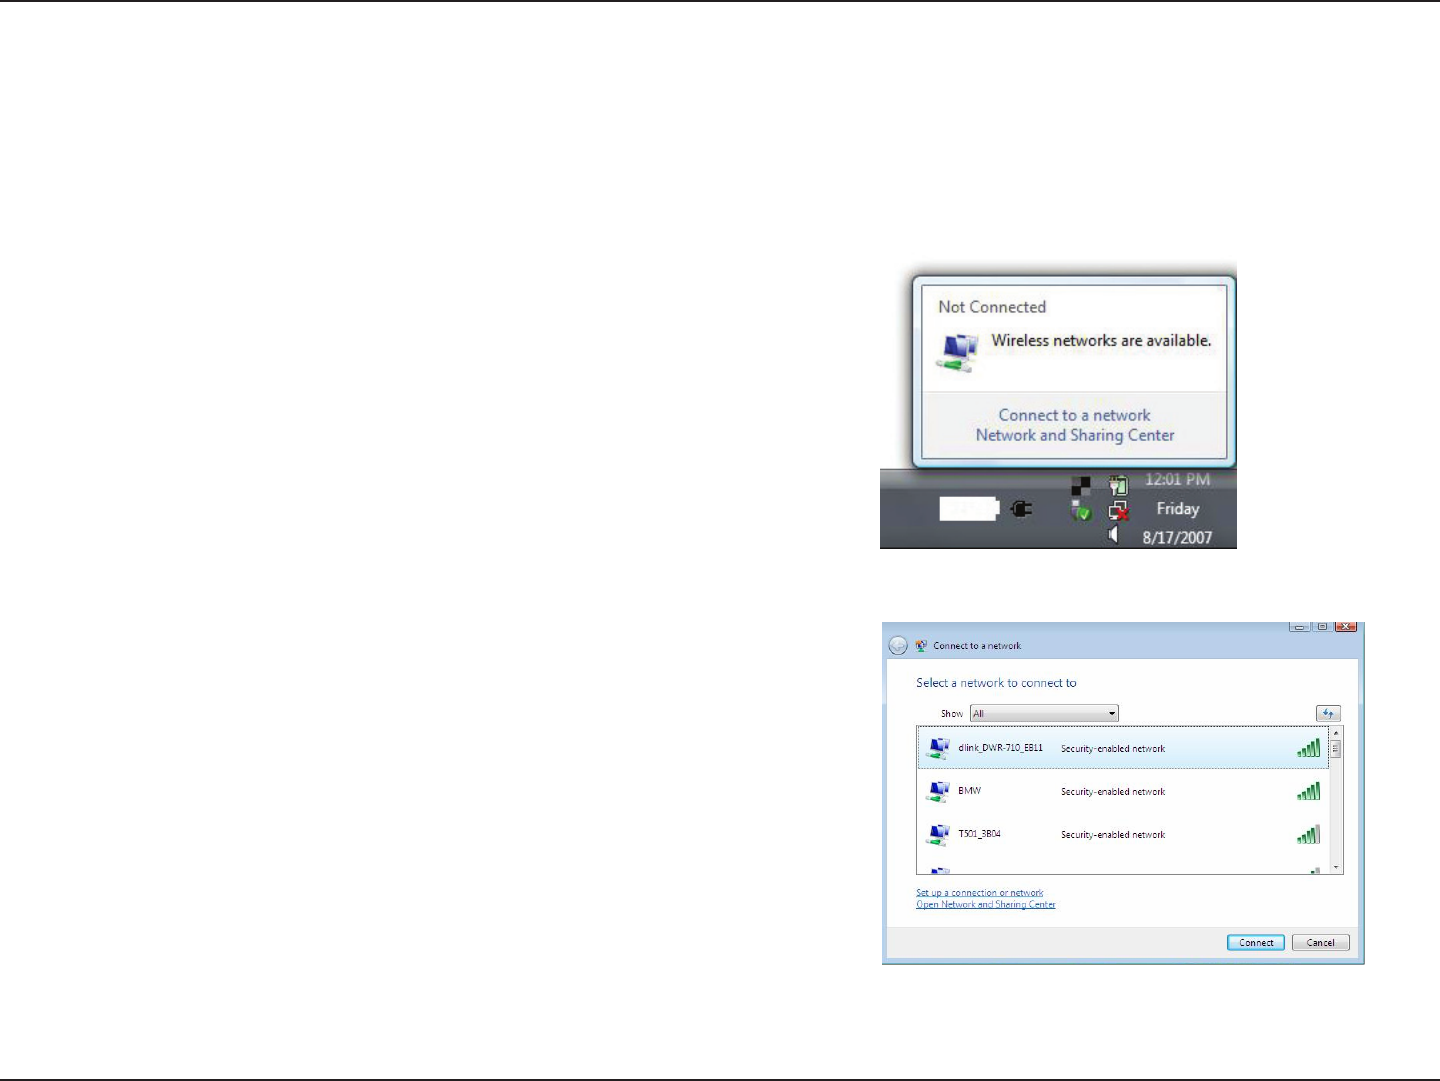
If you receive the Wireless Networks Detected bubble, click on the center of
the bubble to access the utility. You can also click on the wireless icon in your
system tray (lower-right corner).
The utility will display any available wireless networks in your area. Wireless
52D-Link DWR-710 User Manual
Section 4 - Connecting to a Wireless Network
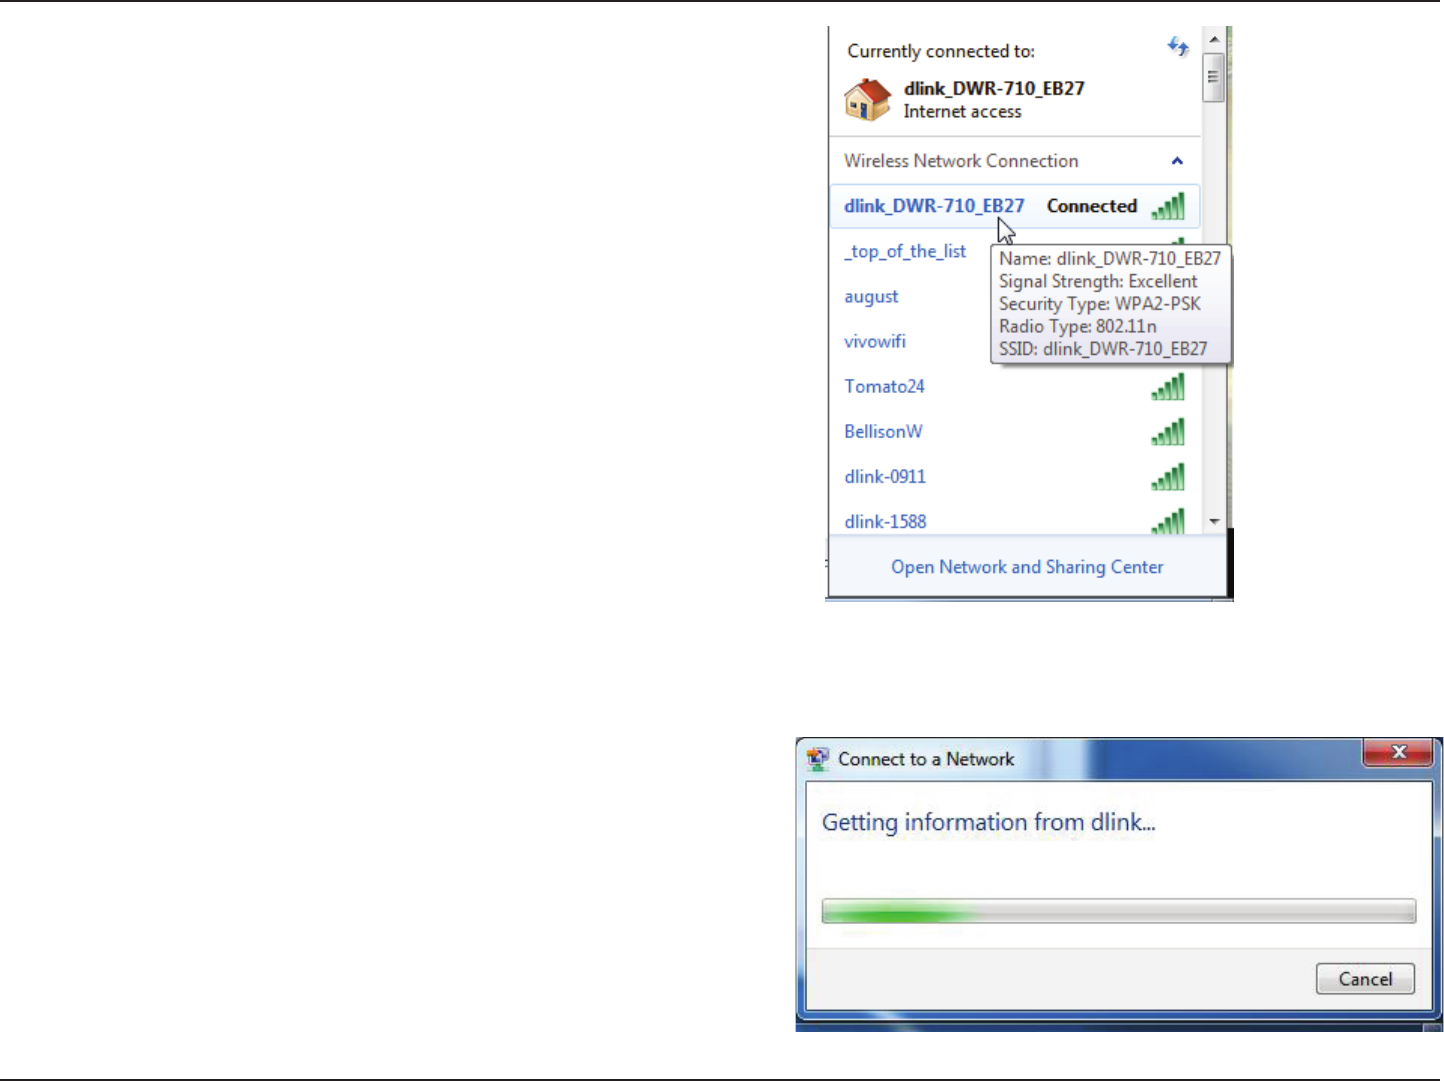
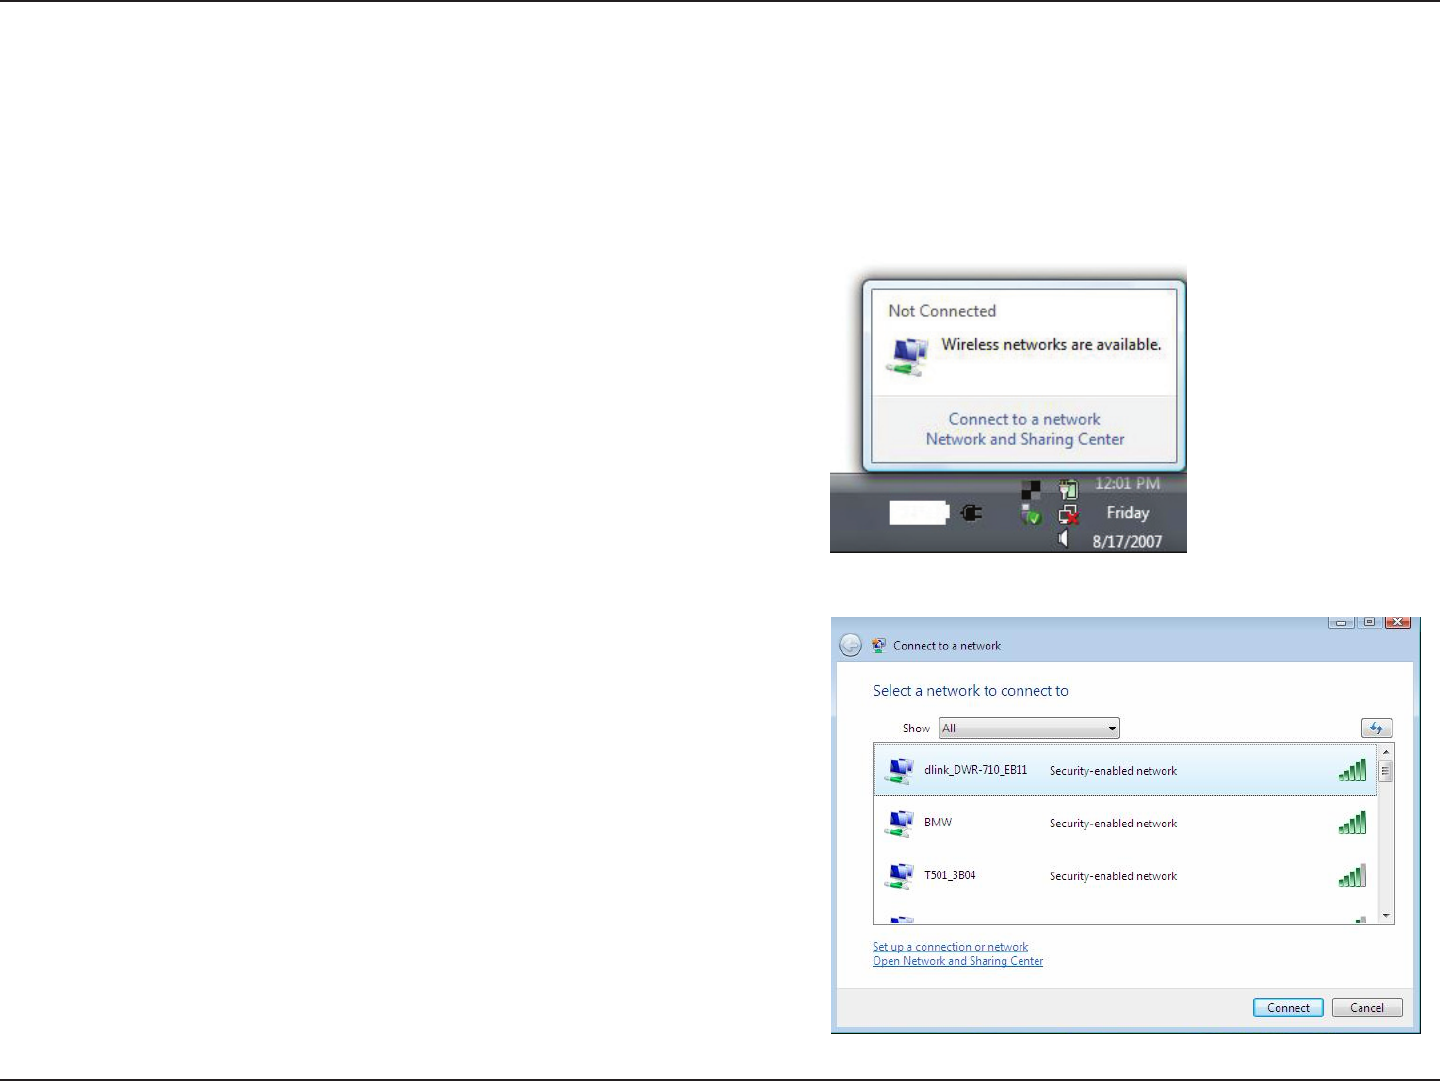
Highlight the wireless network (SSID) you would like to connect to and click
the Connect button.
If you get a good signal but cannot access the Internet, check your TCP/IP
settings for your wireless adapter. Refer to “Networking Basics” on page 66
for more information.
53D-Link DWR-710 User Manual
Section 4 - Connecting to a Wireless Network
Conguring Wireless Security
It is recommended to enable wireless security (WPA/WPA2) on your wireless router or access point before conguring your wireless adapter. If you
are joining an existing network, you will need to know the security key or passphrase being used.
2. The utility will display any available wireless networks in your area.
1. Click on the wireless icon in your system tray (lower-right corner).
Wireless
54D-Link DWR-710 User Manual
Section 4 - Connecting to a Wireless Network
3. Highlight the wireless network (SSID) you would like to connect to and
click the Connect button.
4. The following window appears while your computer tries to connect to
the router.
55D-Link DWR-710 User Manual
Section 4 - Connecting to a Wireless Network
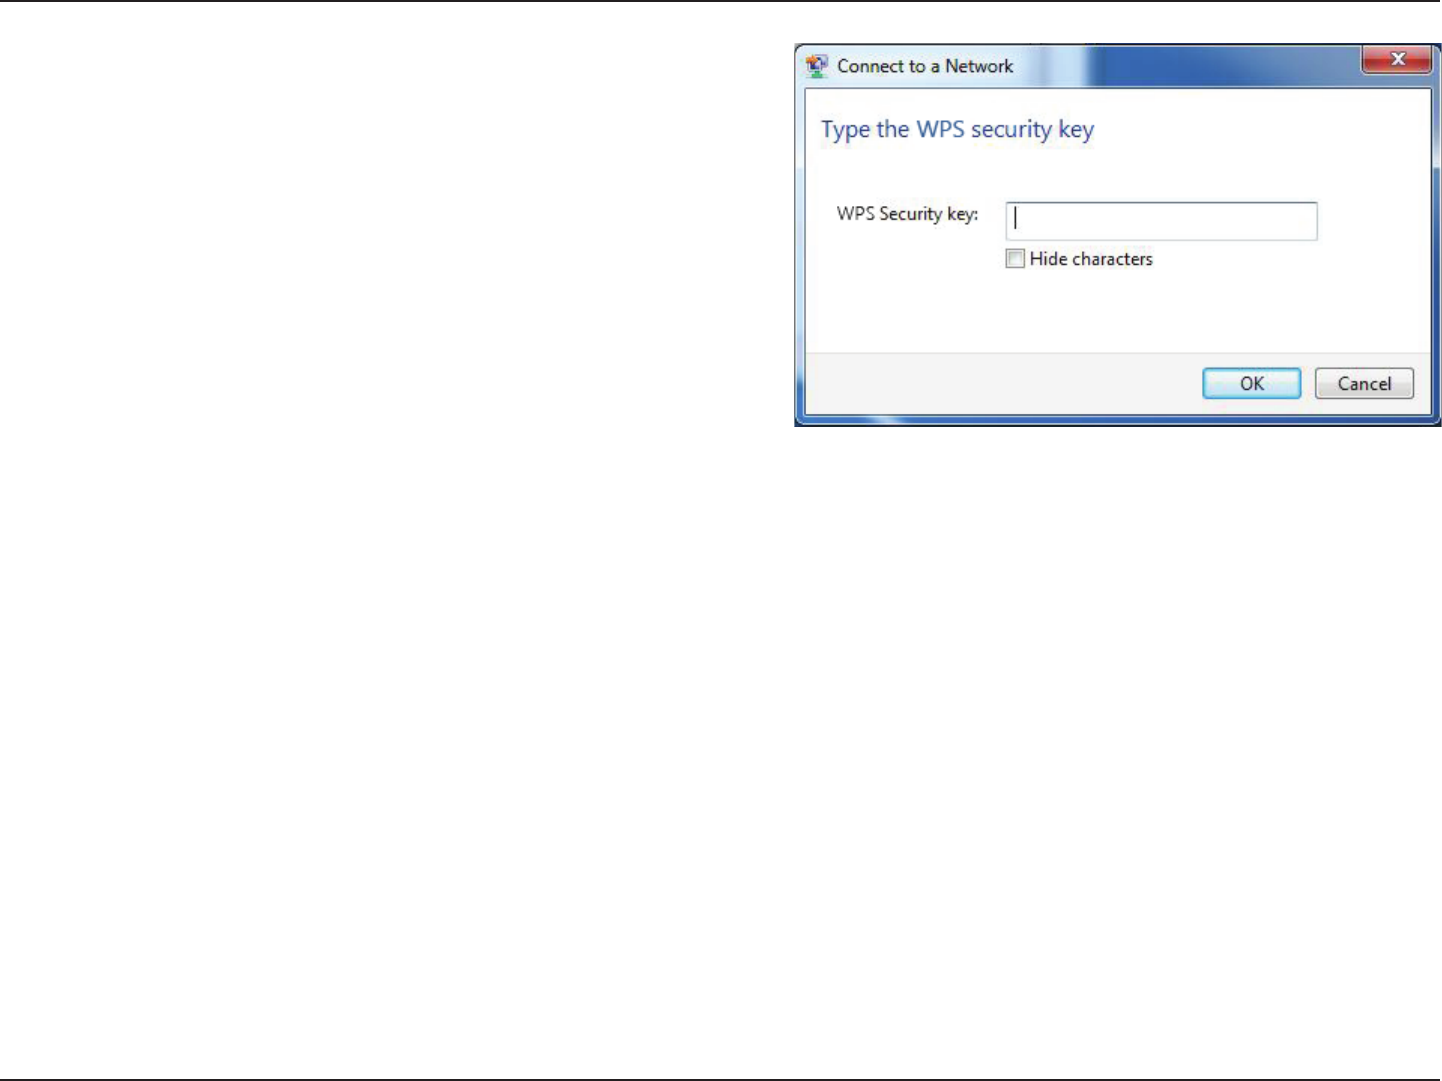
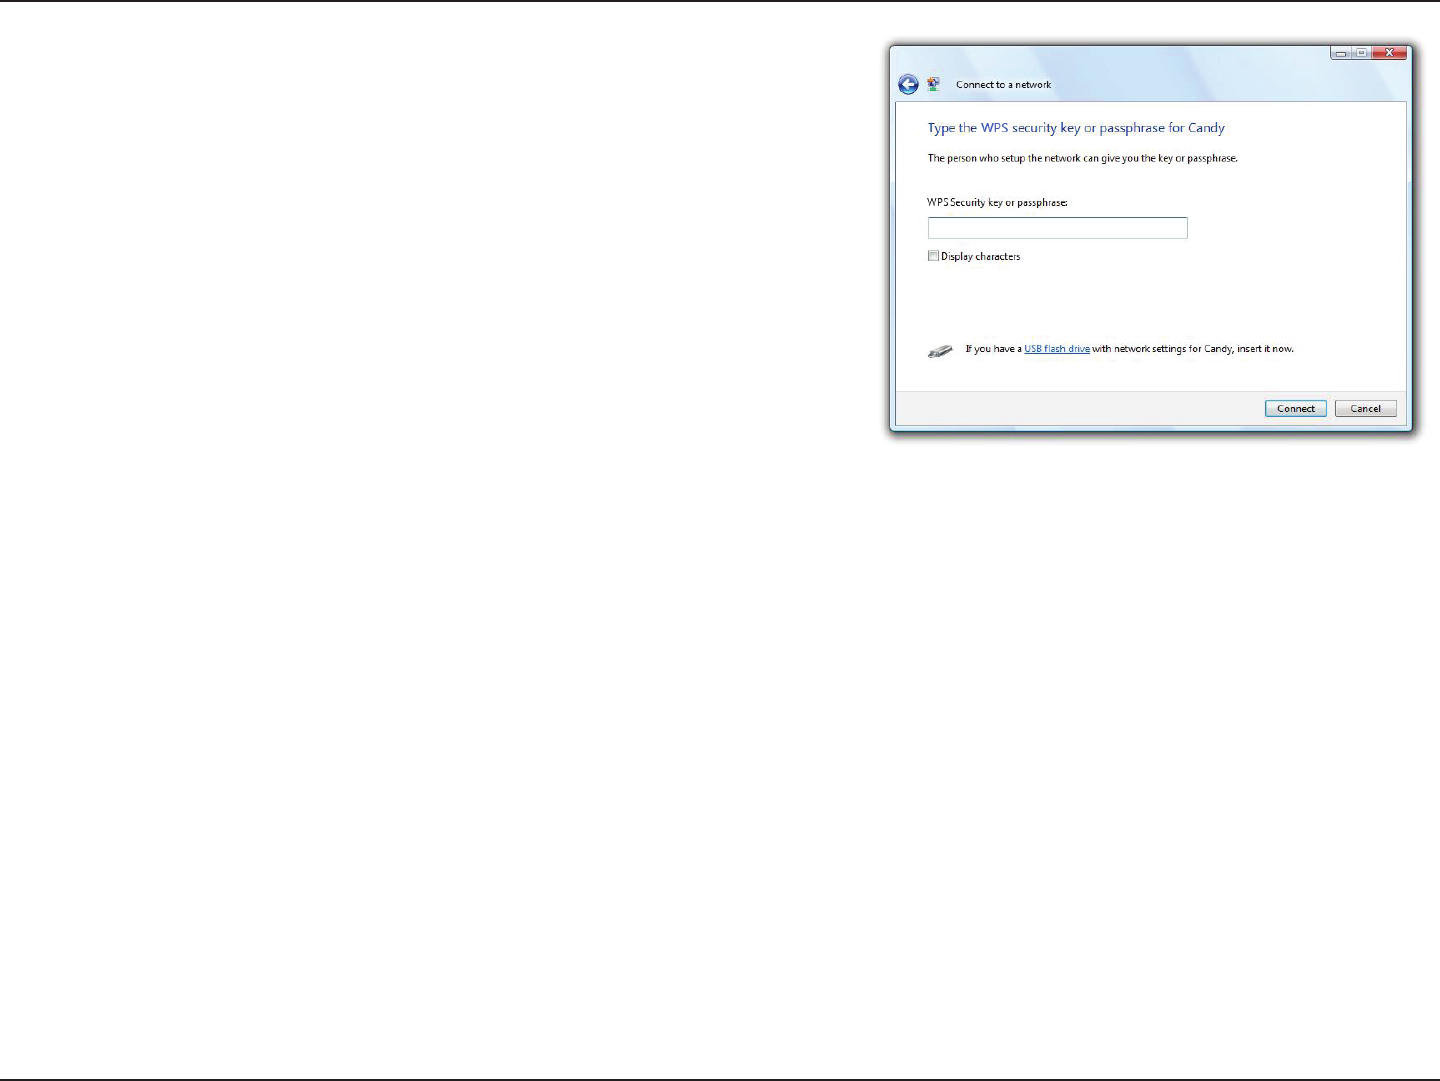
5. Enter the same security key or passphrase that is on your router and click
Connect.
It may take 20-30 seconds to connect to the wireless network. If the
connection fails, please verify that the security settings are correct. The key
or passphrase must be exactly the same as on the wireless router.
56D-Link DWR-710 User Manual
Section 4 - Connecting to a Wireless Network
Using Windows Vista™
Windows® Vista™ users may use the built-in wireless utility. If you are using another company’s utility or Windows® 2000, please refer to the user
manual of your wireless adapter for help with connecting to a wireless network. Most utilities will have a “site survey” option similar to the Windows®
Vista™ utility as seen below.
Right-click on the wireless computer icon in your system tray (lower-right corner
next to the time). Select Connect to a network.
If you receive the Wireless Networks Detected bubble, click on the center of
the bubble to access the utility.
or
The utility will display any available wireless networks in your area. Click on a
network (displayed using the SSID) and click the Connect button.
If you get a good signal but cannot access the Internet, check the TCP/IP settings
for your wireless adapter. Refer to “Networking Basics” on page 66 for more
information.
57D-Link DWR-710 User Manual
Section 4 - Connecting to a Wireless Network
Conguring Wireless Security
It is recommended to enable wireless security (WEP/WPA/WPA2) on your wireless router or access point before conguring your wireless adapter.
If you are joining an existing network, you will need to know the security key or passphrase being used.
2. Highlight the wireless network (SSID) you would like to connect to and click
Connect.
1. Open the Windows® Vista™ Wireless Utility by right-clicking on the wireless
computer icon in your system tray (lower right corner of screen). Select
Connect to a network.
58D-Link DWR-710 User Manual
Section 4 - Connecting to a Wireless Network
3. Enter the same security key or passphrase that is on your router and click Connect.
It may take 20-30 seconds to connect to the wireless network. If the connection fails,
please verify that the security settings are correct. The key or passphrase must be
exactly the same as on the wireless router.
59D-Link DWR-710 User Manual
Section 4 - Connecting to a Wireless Network
Connect to a Wireless Network
Using Windows® XP
Windows® XP users may use the built-in wireless utility (Zero Conguration Utility). The following instructions are for Service Pack 2 users. If you are
using another company’s utility or Windows® 2000, please refer to the user manual of your wireless adapter for help with connecting to a wireless
network. Most utilities will have a “site survey” option similar to the Windows® XP utility as seen below.
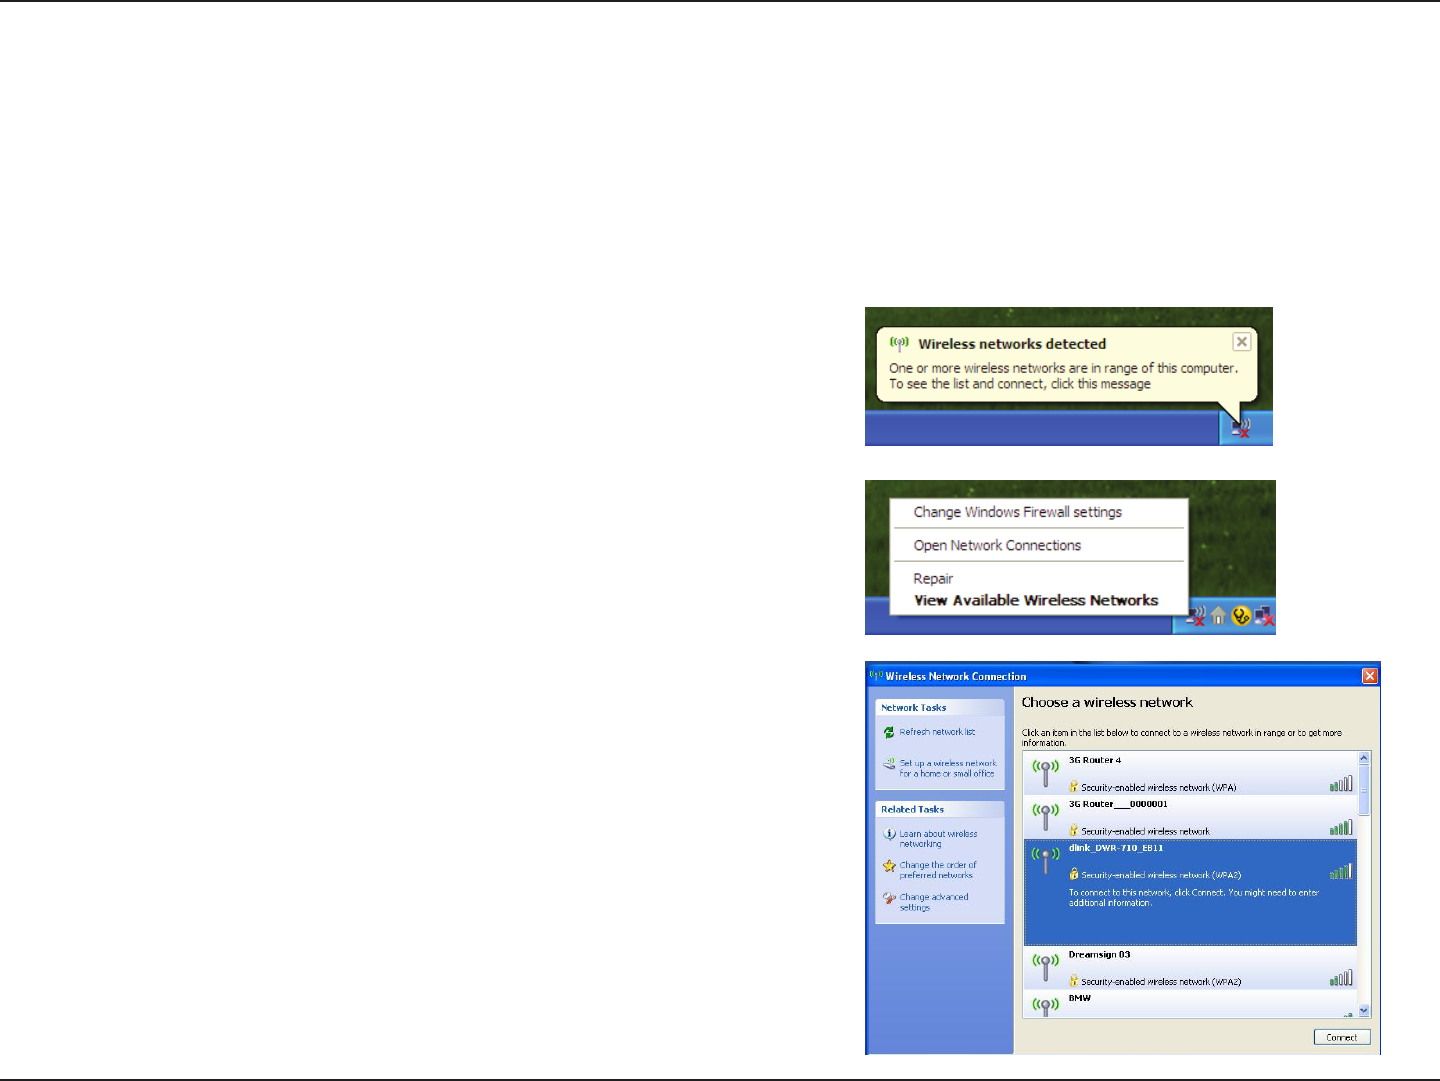
Right-click on the wireless computer icon in your system tray (lower-right corner
next to the time). Select View Available Wireless Networks.
If you receive the Wireless Networks Detected bubble, click on the center of the
bubble to access the utility.
or
The utility will display any available wireless networks in your area. Click on a
network (displayed using the SSID) and click the Connect button.
If you get a good signal but cannot access the Internet, check the TCP/IP settings for
your wireless adapter. Refer to “Networking Basics” on page 66 for more information.
60D-Link DWR-710 User Manual
Section 4 - Connecting to a Wireless Network
Congure WEP
It is recommended to enable WEP on your wireless router or access point before conguring your wireless adapter. If you are joining an existing
network, you will need to know the WEP key being used.
2. Highlight the wireless network (SSID) you would
like to connect to and click Connect.
1. Open the Windows® XP Wireless Utility by right-clicking on
the wireless computer icon in your system tray (lower-right
corner of screen). Select View Available Wireless Networks.

61D-Link DWR-710 User Manual
Section 4 - Connecting to a Wireless Network
3. The Wireless Network Connection box will appear. Enter the same WEP key that is
on your router and click Connect.
It may take 20-30 seconds to connect to the wireless network. If the connection fails,
please verify that the WEP settings are correct. The WEP key must be exactly the same
as on the wireless router.
62D-Link DWR-710 User Manual
Section 4 - Connecting to a Wireless Network
Congure WPA-PSK
It is recommended to enable WPA on your wireless router or access point before conguring your wireless adapter. If you are joining an existing
network, you will need to know the WPA key being used.
2. Highlight the wireless network (SSID) you would
like to connect to and click Connect.
1. Open the Windows® XP Wireless Utility by right-clicking on
the wireless computer icon in your system tray (lower-right
corner of screen). Select View Available Wireless Networks.
63D-Link DWR-710 User Manual
Section 4 - Connecting to a Wireless Network
3. The Wireless Network Connection box will appear. Enter the WPA-PSK passphrase
and click Connect.
It may take 20-30 seconds to connect to the wireless network. If the connection fails,
please verify that the WPA-PSK settings are correct. The WPA-PSK passphrase must be
exactly the same as on the wireless router.

64D-Link DWR-710 User Manual
Section 5 - Troubleshooting
Troubleshooting
This chapter provides solutions to problems that can occur during the installation and operation of the DWR-710. Read the following descriptions
if you are having problems.
1. Why can’t I access the web-based conguration utility?
When entering the IP address of your router (192.168.0.1 for example), you are not connecting to a website on the Internet or have to be connected
to the Internet. The device has the utility built-in to a ROM chip in the device itself. Your computer must be on the same IP subnet to connect to
the web-based utility.
• Make sure you have an updated Java-enabled web browser. We recommend the following:
- Internet Explorer 8 or higher, Chrome 19.0, Firefox 12.0, or Safari 4.0.
• If attempting to connect wirelessly, ensure that the wireless icon on LED is illuminated. Also, ensure that you are connected to the
correct SSID for your mobile router.
• Make sure that the computer you are using is not connected to any other devices (such as routers or switches) which might have the
same IP address as the DWR-710, as this may cause an IP address conict. If you have a conict, temporarily unplug any other devices
from your computer while you congure the DWR-710. You can also change the IP address of the DWR-710 in the Network section
of the conguration utility. Please refer to “Wi-Fi” on page 22 for further information on changing the IP address. You may also need
to renew your computer’s IP address conguration. To do this, start the Command utility: Click on Start > Run. In the run box type
cmd and click OK. (Windows Vista users type cmd in the Start Search box.) This will bring up a black screen with white text. At the
command prompt, type ipcong /release and wait for the process to be completed. Next, type ipcong /renew which will renew
your computer’s IP address conguration.
• Disable any Internet security software running on the computer. Software rewalls such as ZoneAlarm, BlackICE, Sygate, Norton
Personal Firewall, and Windows® XP rewall may block access to the conguration pages. Check the help les included with your
rewall software for more information on disabling or conguring it.
Reset Button
65D-Link DWR-710 User Manual
Section 5 - Troubleshooting
• Congure your Internet settings:
- Go to Start > Settings > Control Panel. Double-click the Internet Options Icon. From the Security tab, click the Default Level
button to restore the settings to their defaults.
- Click the Connection tab and set the dial-up option to Never Dial a Connection. Click the LAN Settings button. Make sure nothing
is checked. Click OK.
- Go to the Advanced tab and click the button to restore these settings to their defaults. Click OK three times.
- Close your web browser (if open) and re-open it.
2. What can I do if I forgot my password?
If you forgot your password, you must reset your router. Please note that this process will change all your settings back to the factory defaults.
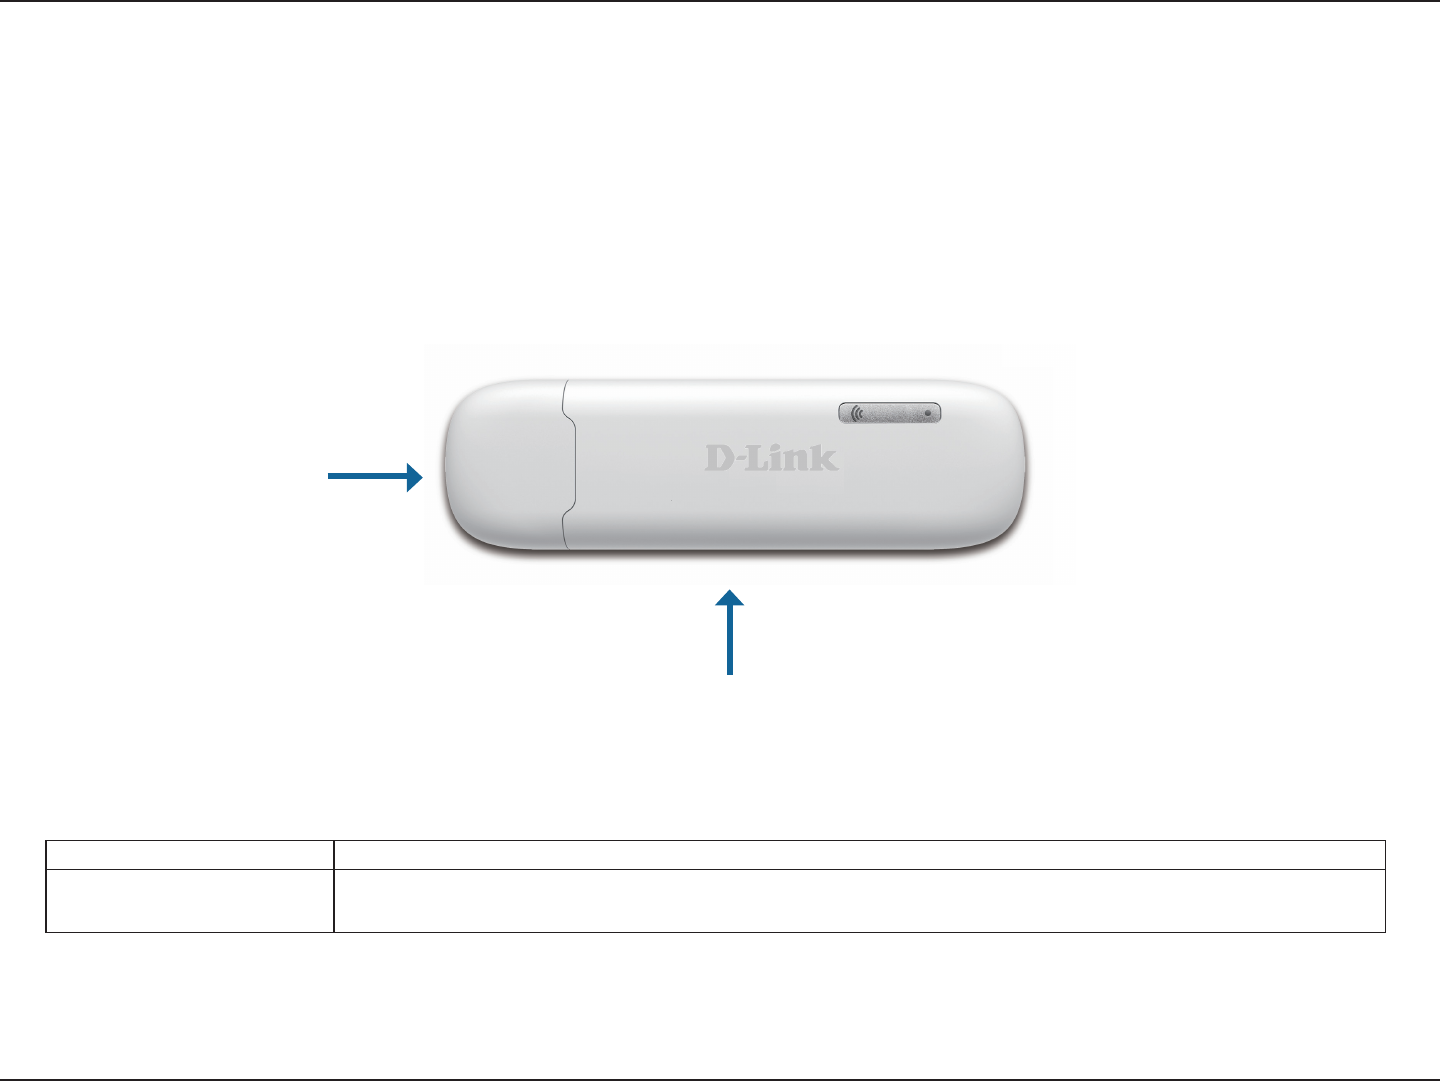
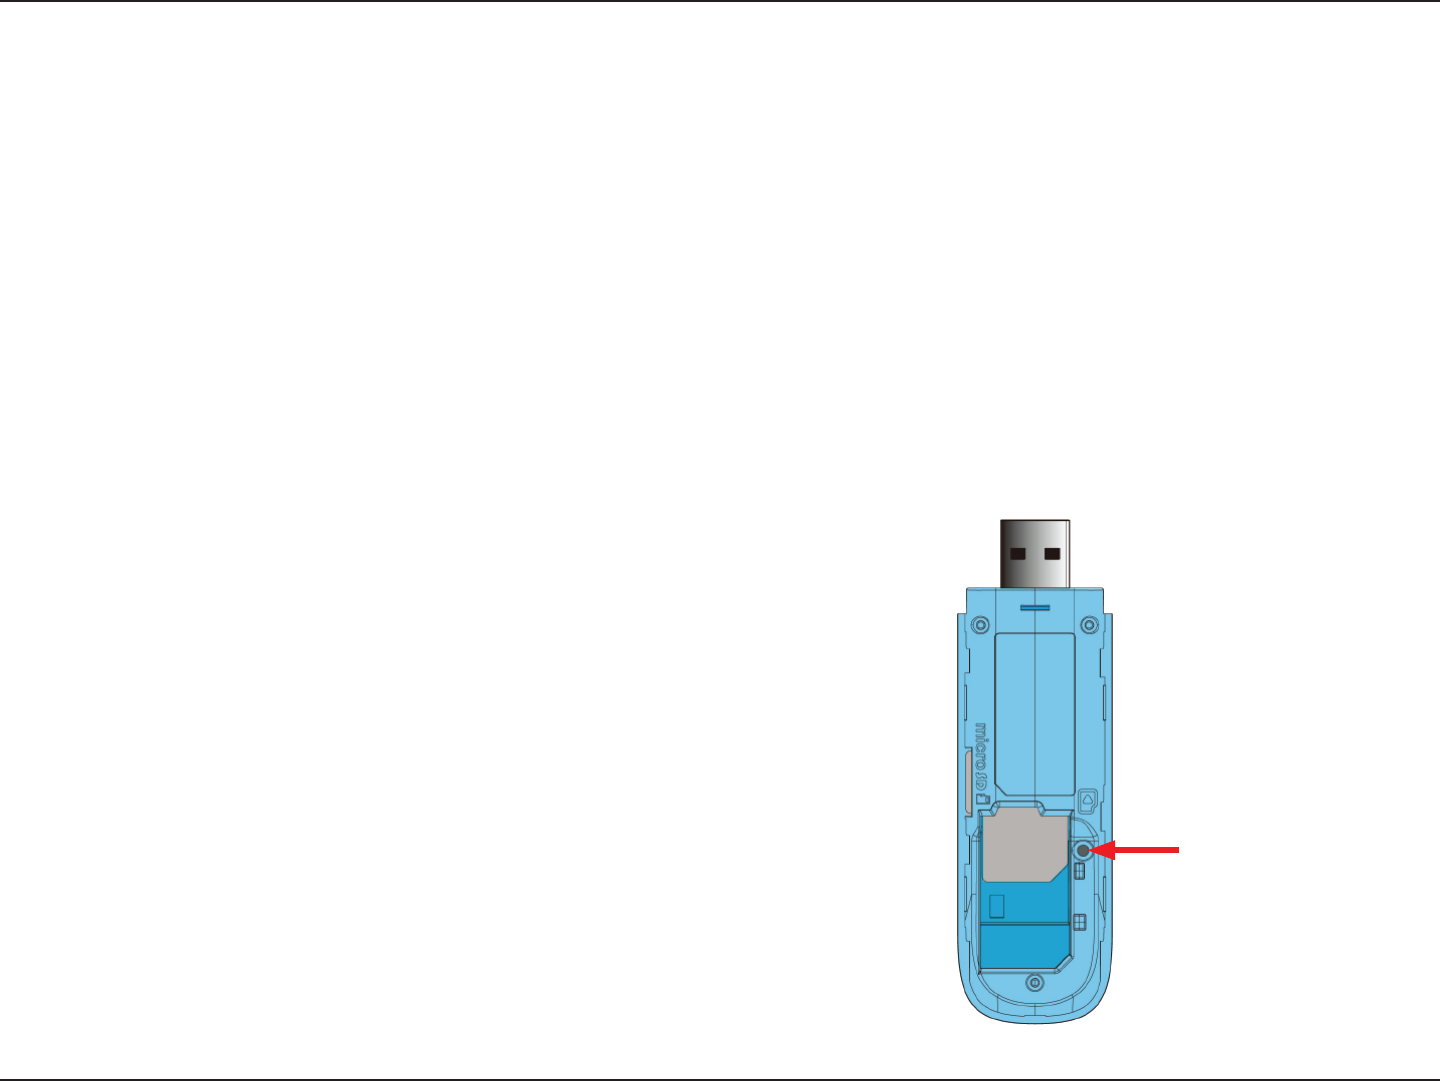
To reset the router, rst remove the back cover of the router to expose the battery. Using
a paperclip or similar object, press and hold the reset button, which is located inside
the hole to the upper-left of the SIM card slot (see diagram). The DWR-710 will restore
the factory default settings. Wait about 30 seconds for the router to restart before you
attempt to reconnect to it. The default IP address is 192.168.0.1, and the default username
is admin and the password should be left blank.
66D-Link DWR-710 User Manual
Appendix B - Networking Basics
Networking Basics
Check your IP address
After you install your new D-Link adapter, by default, the TCP/IP settings should be set to obtain an IP address from a DHCP server (i.e. wireless
router) automatically. To verify your IP address, please follow the steps below.
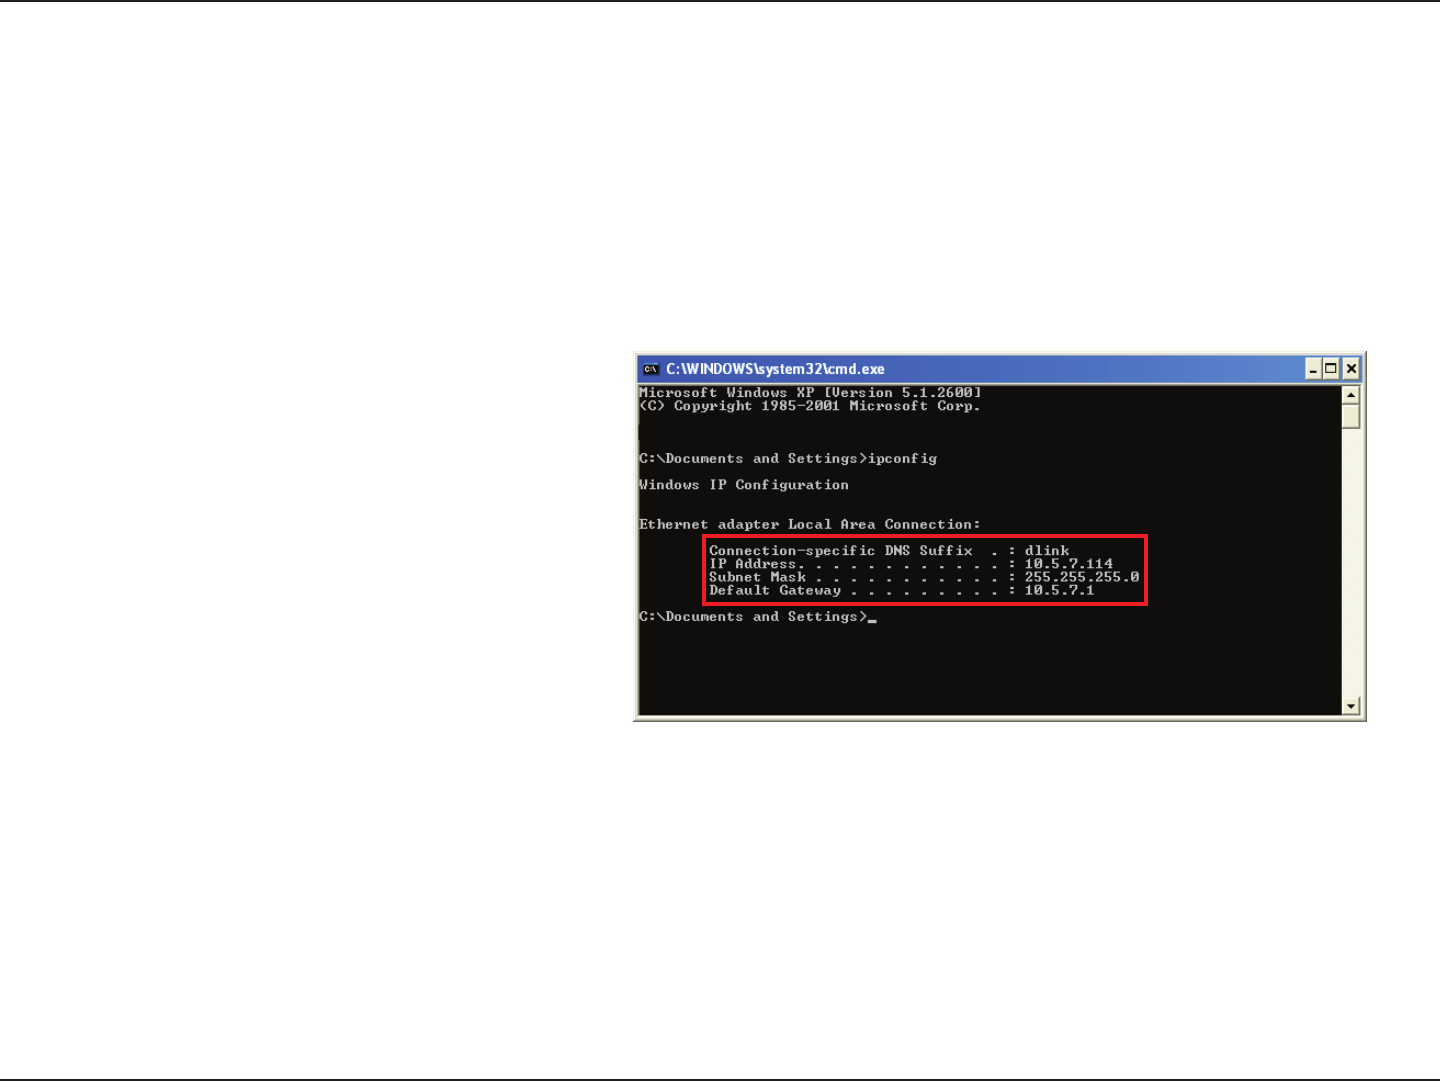
Click on Start > Run. In the run box type cmd and click OK.
(Windows® Vista™ users type cmd in the Start Search box.)
At the prompt, type ipcong and press Enter.
This will display the IP address, subnet mask, and the default
gateway of your adapter.
If the address is 0.0.0.0, check your adapter installation, security settings, and the settings on your router. Some rewall software programs may
block a DHCP request on newly installed adapters.
67D-Link DWR-710 User Manual
Appendix B - Networking Basics
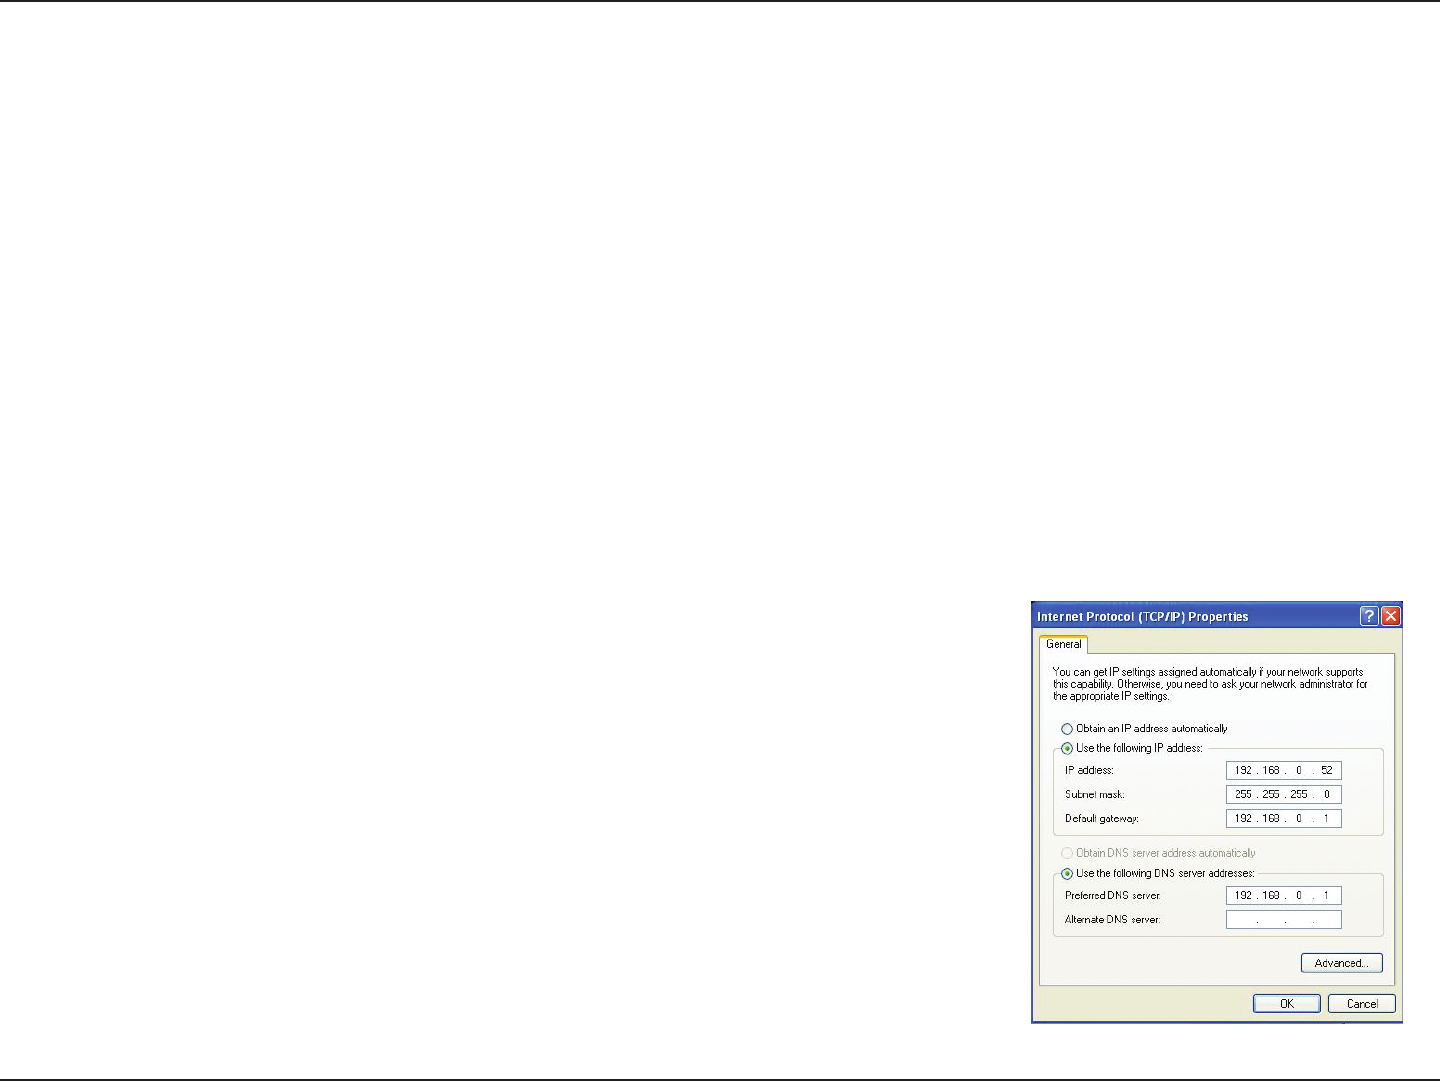
Statically Assign an IP address
Step 2
Right-click on the Local Area Connection which represents your network adapter and select Properties.
Step 3
Highlight Internet Protocol (TCP/IP) and click Properties.
Step 4
Click Use the following IP address and enter an IP address that is on the same subnet as your network
or the LAN IP address on your router.
Example: If the router´s LAN IP address is 192.168.0.1, make your IP address 192.168.0.X where X is a
number between 2 and 99. Make sure that the number you choose is not in use on the network. Set
Default Gateway the same as the LAN IP address of your router (192.168.0.1).
Set Primary DNS the same as the LAN IP address of your router (192.168.0.1). The Secondary DNS is not
needed or you may enter a DNS server from your ISP.
Step 5
Click OK twice to save your settings.
Click on Start > Control Panel > Network and Internet Connections > Network Connections > Congure your Internet
Protocol (IP) settings.
Step 1
If you are not using a DHCP capable gateway/router, or you need to assign a static IP address, please follow the steps below:
Windows® 8
Windows® 7
Windows® Vista™
Windows® XP
Click on Start > Control Panel > Network and Internet > Network and Sharing Center > Manage Network Connections.
Click on Start > Control Panel > Network and Internet > Network and Sharing Center > Manage Network Connections.
Click on Start > Control Panel > Network Connections.

HSUPA/HSPDA/UMTS: 850/900/1900/2100 MHz
68D-Link DWR-710 User Manual
Appendix C - Technical Specications
Technical Specications
Radio Frequency Bands
•
• EDGE/GPRS/GSM: 850/900/1800/1900 MHz
• Power Class 4 (850/900 MHz)
Cellular Access
• HSPA+
• Downlink: 21 Mbps
• Uplink: 11 Mbps
Wi-Fi Access Point
• 802.11n (150 Mbps compatible)
• 802.11g (54 Mbps)
• 802.11b (11 Mbps)
Antennas
• Internal 3G main antenna
• Internal 3G diversity antenna
• Internal Wi-Fi antenna
USB Interface
• micro USB port
USIM Slot
• Standard 6-pin SIM card interface
Status Indicators
• Signal LED
• Wi-Fi LED
Storage
• microSD card slot
Wireless Security
• Built-in rewall
• WEP/WPA/WPA2
Firewall
• Network Address Translation (NAT)
Dimensions (L x W x H)
• 91.5 x 27 x 11 mm (3.60 x 1.06 x 0.43 inches)
Weight
• 25 grams (0.88 ounces)
Operating Temperature
• 0 to 40 °C (32 to 104 °F)
Certications
• FCC/CE
• Wi-Fi Certied

have the Positive Opinion of Notied Body:
The device Complies with the essential requirements of Article 3 of the R&TTE 1999/5/EC Directive and All the reports of the applied standards
Specific Absorption Rate (SAR)
Users have to use the connection to USB interfaces with USB 2.0 version or higher.
To comply with radiofrequency radiation (RF) exposure guidelines during body worn operation, this device must be used with a minimum of 0.5
69D-Link DWR-710 User Manual
Appendix D - Safety
. . .
This mobile device is a radio transmitter and receiver. It is not designed to exceed the limits for exposure to radio waves recommended by
international guidelines. These guidelines were developed by the independent scientic organization ICNIRP and include safety margins
designed to assure the protection of all persons, regardless of age and health.
The guidelines use a unit of measurement known as the Specic Absorption Rate, or SAR.
The SAR limit for mobile devices is 2 W/kg and the highest SAR value for this device when tested complied with this limit.
cm separation from the body.
Failure to observe these instructions could result in your RF exposure exceeding the relevant guideline limits.
Warnings and Declarations
WarnigCE
PHONEIX TESTLAB, Königswinkel 10 D-32825 Blomberg, Germany

FCC Regulations
Caution:
WarnigFCC
70D-Link DWR-710 User Manual
Appendix D - Safety
This device complies with part 15 of the FCC Rules. Operation is subject to the following two conditions: (1) This device may n ot cause
harmful interference, and (2) this device must accept any interference received, including interference that may cause undesired operation.
This device has been tested and found to comply with the limits for a Class B digital device, pursuant to Part 15 of the FCC Rules. These limits
are designed to provide reasonable protection against harmful interference in a residential installation. This equipment generates, uses and can
radiated radio frequency energy and, if not installed and used in accordance with the instructions, may cause harmful interference to radio
communications. However, there is no guarantee that interference will not occur in a particular installation If this equipment does cause
harmful interference to radio or television reception, which can be determined by turning the equipment o and on, the user is encouraged to
try to correct the interference by one or more of the following measures:
-Reorient or relocate the receiving antenna.
-Increase the separation between the equipment and receiver.
-Connect the equipment into an outlet on a circuit dierent from that to which the receiver is connected.
-Consult the dealer or an experienced radio/TV technician for help.
Changes or modications not expressly approved by the party responsible for compliance could void the user‘s authority to operate the
equipment.

FCC RF exposure guidelines for USB dongle, as described in this user guide, is 0.65W/kg.
product(s) with substantially similar physical dimensions, construction, and electrical and RF characteristics. The highest SAR value, tested per
tested with USB slot configurations including Horizontal-UP, Horizontal-Down, Vertical-Front, Vertical-Back. This device can be used in host
SAR compliance has been established in the host product(s) (laptop computers), tested at 5mm separation distance to the human body, and
www.fcc.gov/oet/ea/fccid after searching on FCC ID: KA2WR710B1.
RF Exposure Information (SAR)
71D-Link DWR-710 User Manual
Appendix D - Safety
. . .
This device meets the government’s requirements for exposure to radio waves.
This device is designed and manufactured not to exceed the emission limits for exposure to radio frequency (RF) energy set by the Federal
Communications Commission of the U.S. Government.
The exposure standard for wireless devices employs a unit of measurement known as the Specic Absorption Rate, or SAR. The SAR limit set by
the FCC is 1.6W/kg. *Tests for SAR are conducted using standard operating positions accepted by the FCC with the device transmitting at its
highest certied power level in all tested frequency bands. Although the SAR is determined at the highest certied power level, the actual SAR
level of the device while operating can be well below the maximum value. This is because the device is designed to operate at multiple power
levels so as to use only the poser required to reach the network. In general, the closer you are to a wireless base station antenna, the lower the
power output.
The FCC has granted an Equipment Authorization for this device with all reported SAR levels evaluated as in compliance with the FCC RF
exposure guidelines. SAR information on this device is on le with the FCC and can be found under the Display Grant section of