DAQRI DQR001001 AR Smart Helmet with WLAN and Bluetooth User Manual part2
DAQRI LLC AR Smart Helmet with WLAN and Bluetooth part2
DAQRI >
Contents
User manual part2

DAQRI
SMART HELMET™
Getting Started Guide
Guía de introducción
Guide d’introduction
Kurzanleitung


1
One (1) DAQRI Smart HelmetTM
Un (1) casco Smart Helmet™
Two (2) Rechargeable
Lithium -ion Batteries
Dos (2) baterías recargables
de iones de litio
One (1) USB- C Hub
Un (1) Hub USB-C
One (1) Wireless Bluetooth® Keyboard and
Trackpad with Mini USB Adapter
Un (1) teclado y panel táctil inalámbrico
Bluetooth® con adaptador USB Mini
One (1) Battery Charger with Power Supply,
60W, USB- C
Un (1) cargador de batería con fuente de
alimentación, 60 W, USB-C
USB-C Power Cords (US, UK, EU)
Cables de alimentación USB-C (US, UK, EU)
Welcome Note
Getting Started Guide
Important Safety and Product Information
Nota de bienvenida
Guía de introducción
Información importante de seguridad y sobre
el producto
Un (1) DAQRI Smart HelmetTM
Eine (1) DAQRI Smart HelmetTM
Deux (2) batteries lithium-ion
rechargeables
Zwei (2) wiederaufladbare
Lithium-Ionen-Batterien
Un (1) Hub USB-C
Ein (1) USB-C-Hub
Un (1) clavier et trackpad sans fil Bluetooth® avec
un adaptateur Mini USB
Eine (1) kabellose Bluetooth®-Tastatur und ein
Trackpad mit Mini-USB Adapter
Un (1) chargeur de batterie avec alimentation
électrique, 60W, USB-C
Ein (1) Batterieladegerät mit Netzteil,
60 W, USB-C
Cordons d’alimentation USB-C (US, UK, EU)
USB-C-Netzkabel (US, UK, EU)
Note de Bienvenue
Guide d’introduction
Informations importantes sur le produit et la
sécurité
Willkommen Hinweis
Kurzanleitung
Wichtige Sicherheits- und Produktinformationen
4
G.
A.
B.
C.
D.
E.
F.
WHAT’S IN THE
BOX
CONTENU
WAS IST IN
DER BOX
CONTENIDO DE
LA CAJA

5
B. D.
C.
A.
G.
E. F.
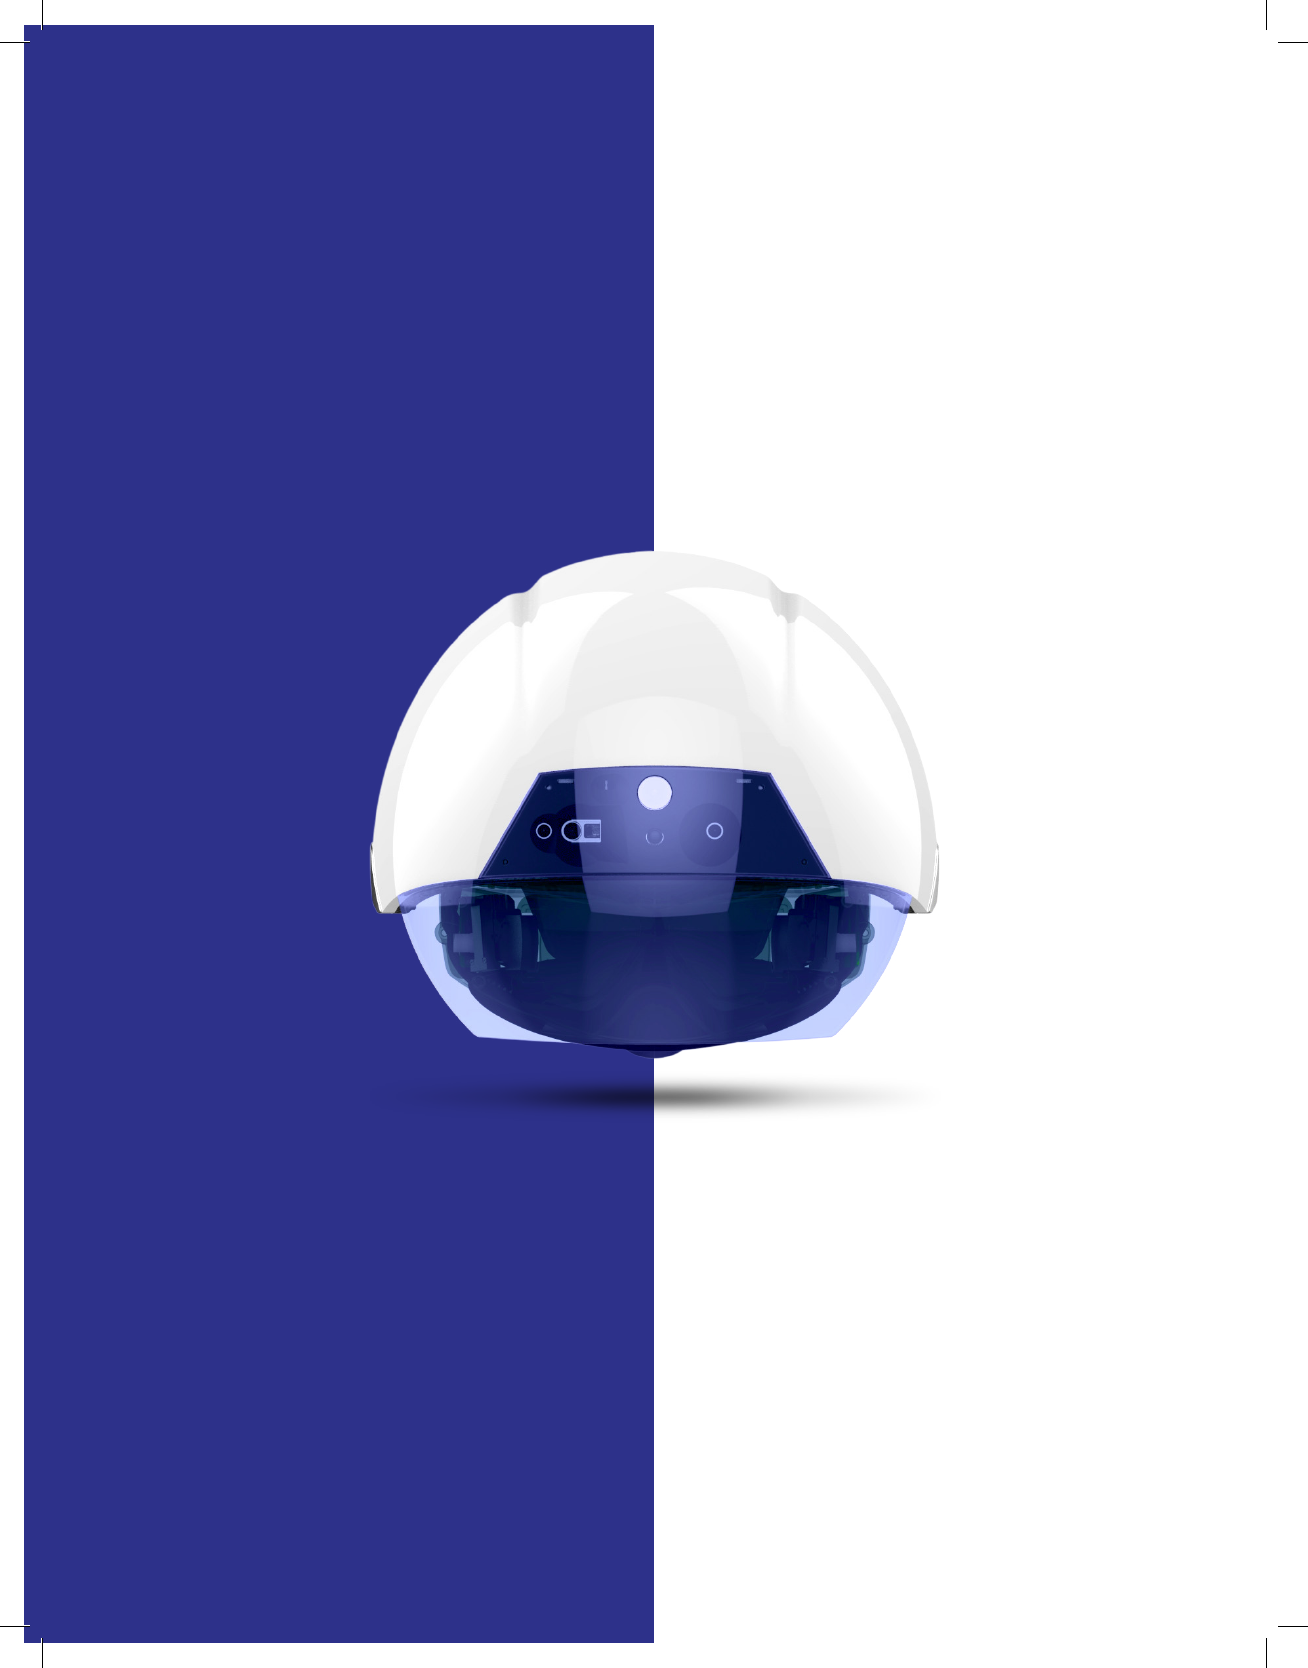
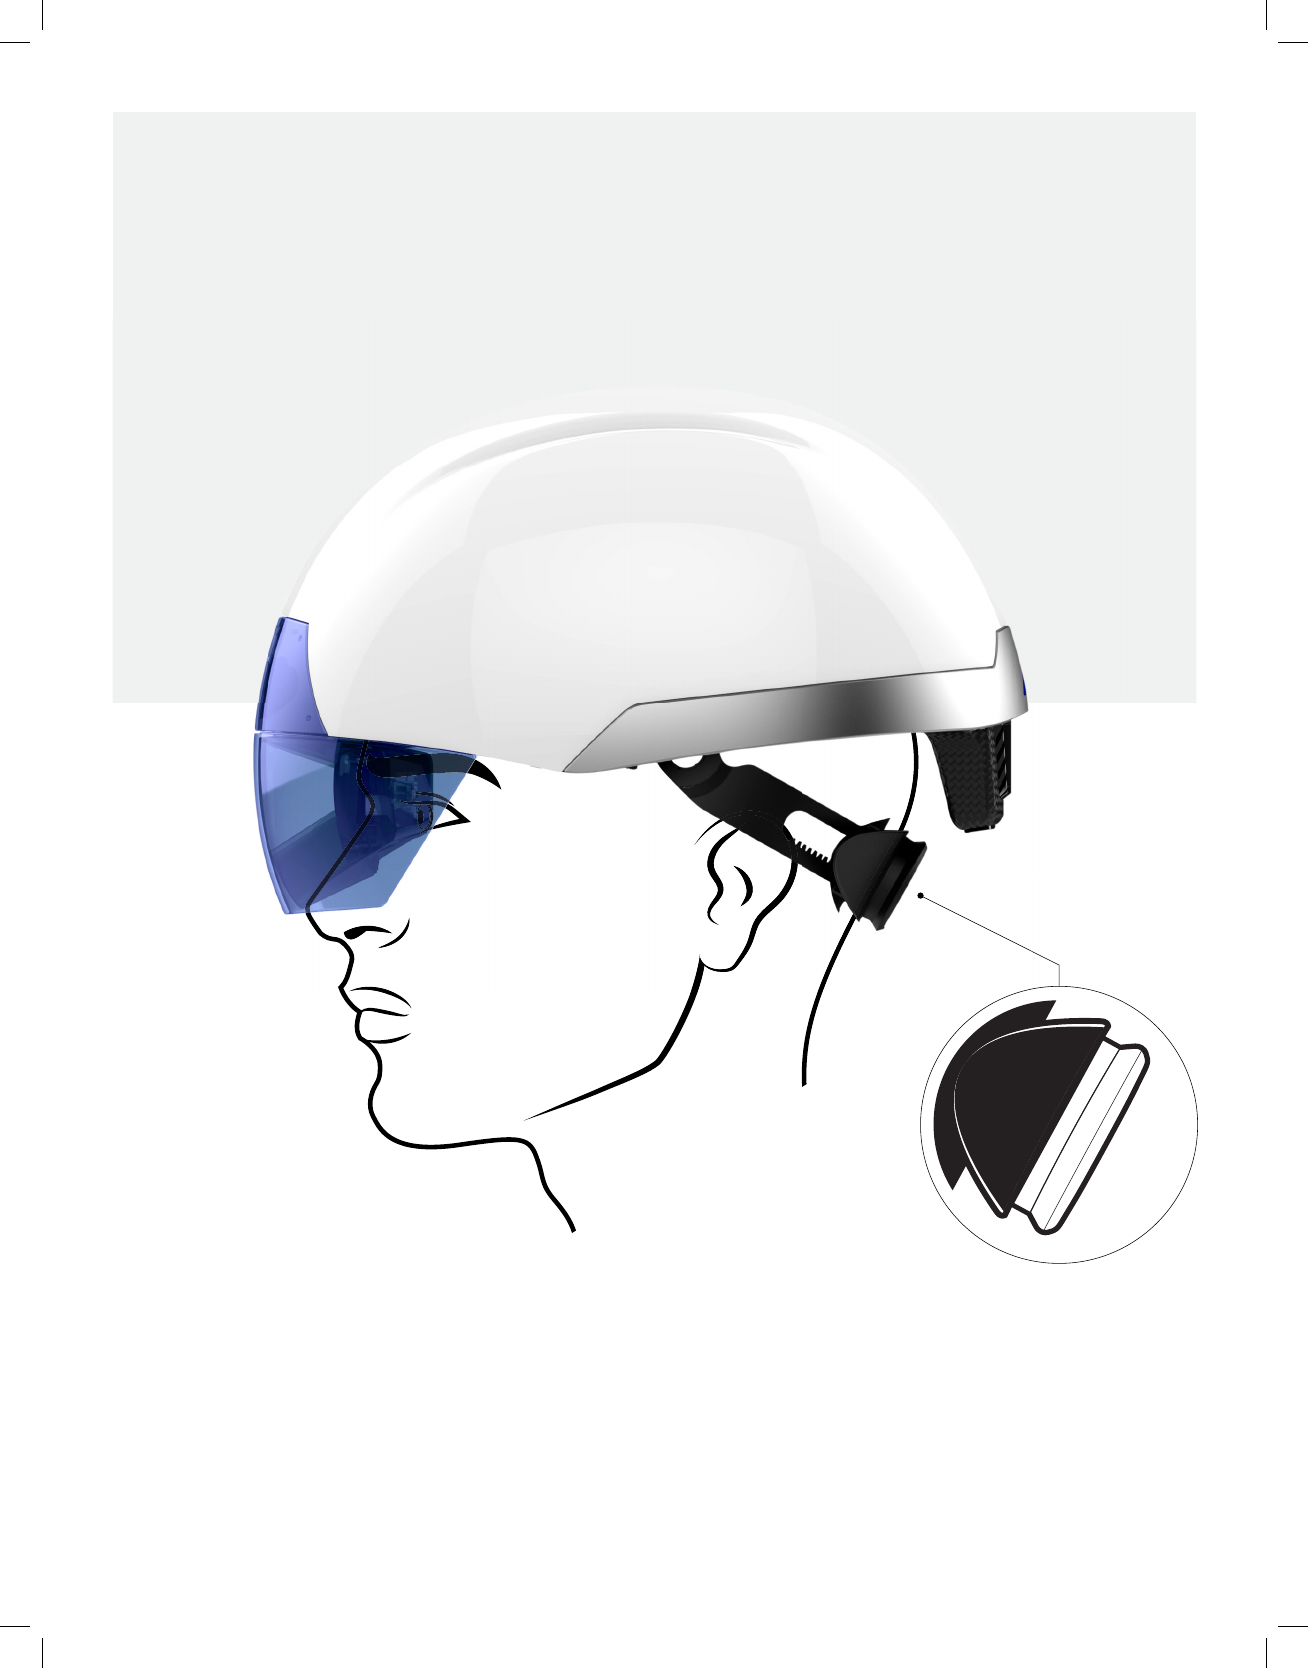
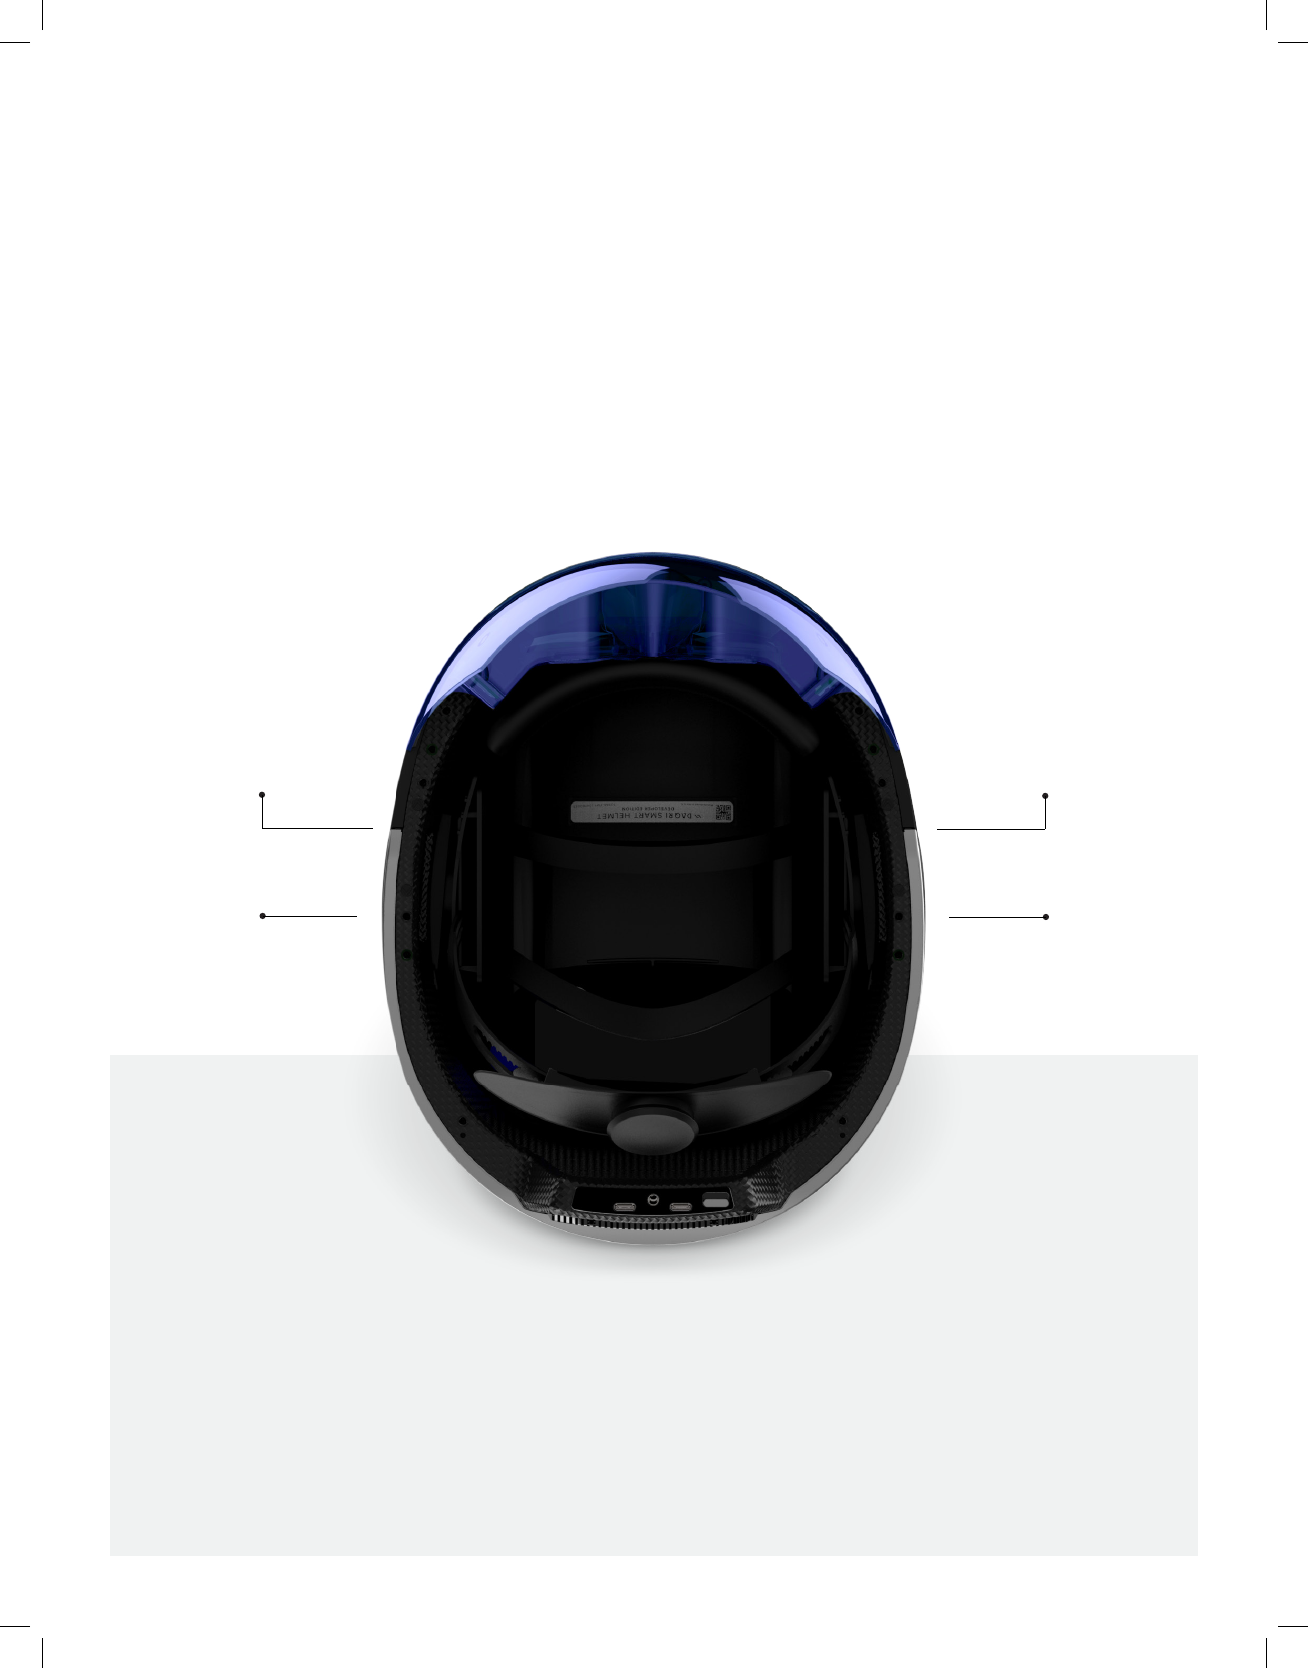
When not wearing the
device, set it on a flat
stable surface, upside
down, with the lenses
and face shield up.
TO HELP KEEP
YOUR DEVICE
IN GREAT SHAPE:
PARA MANTENER
SU DISPOSITIVO
EN EXCELENTES
CONDICIONES:
DAMIT IHR GERÄT IN
GUTEM ZUSTAND BLEIBT:
POUR MAINTENIR VOTRE
APPAREIL EN PARFAIT
ÉTAT:
Lorsque vous ne portez pas
le casque, posez-le sur une
surface stable, à l’envers,
avec les lentilles et la visière
vers le haut.
Cuando no esté usando el
dispositivo, colóquelo sobre
una superficie estable,
volteado, con los lentes y el
protector facial hacia arriba.
Legen Sie das Gerät,
wenn Sie es nicht tragen,
umgedreht auf einer
stabilen, flachen Oberfläche
ab, mit den Linsen und dem
Visier nach oben.
HANDLING
AND CARE OF
YOUR DEVICE
MANIPULATION
ET ENTRETIEN DE
VOTRE APPAREIL
HANDHABUNG
UND PFLEGE
IHRES GERÄTS
2
MANIPULACIÓN
Y CUIDADO DEL
DISPOSITIVO
6
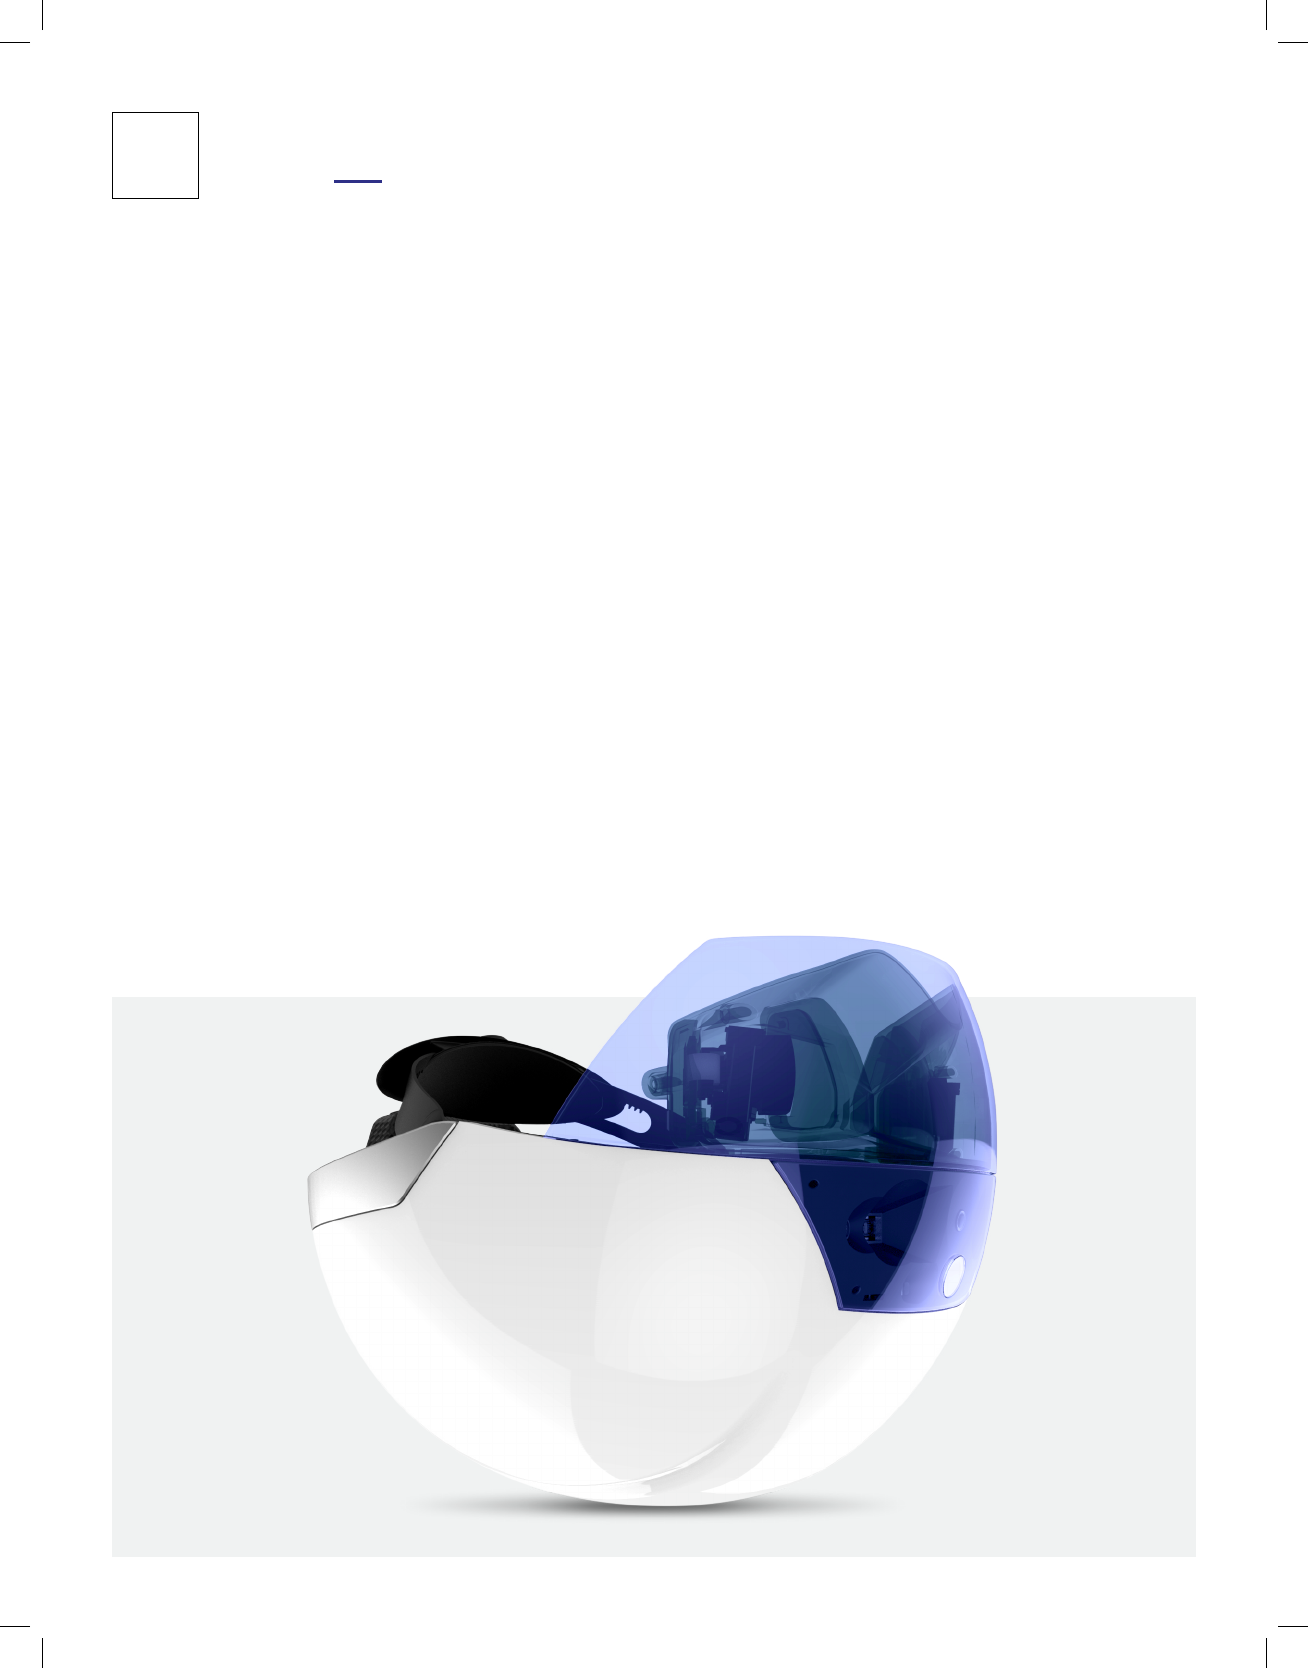
Do not try to balance
DAQRI Smart HelmetTM on
unstable surfaces where
it could easily be knocked
over.
No trate de equilibrar el
Smart HelmetTM de DAQRI
sobre superficies inestables
donde lo puedan tumbar
fácilmente.
N’essayez pas de poser le
DAQRI Smart HelmetTM sur
des surfaces instables où il
pourrait facilement tomber
suite à un choc.
Versuchen Sie nicht, den DAQRI
Smart HelmetTM auf instabilen
Oberflächen zu stabilisieren, da
er so leicht umgestoßen werden
kann.
a.
7
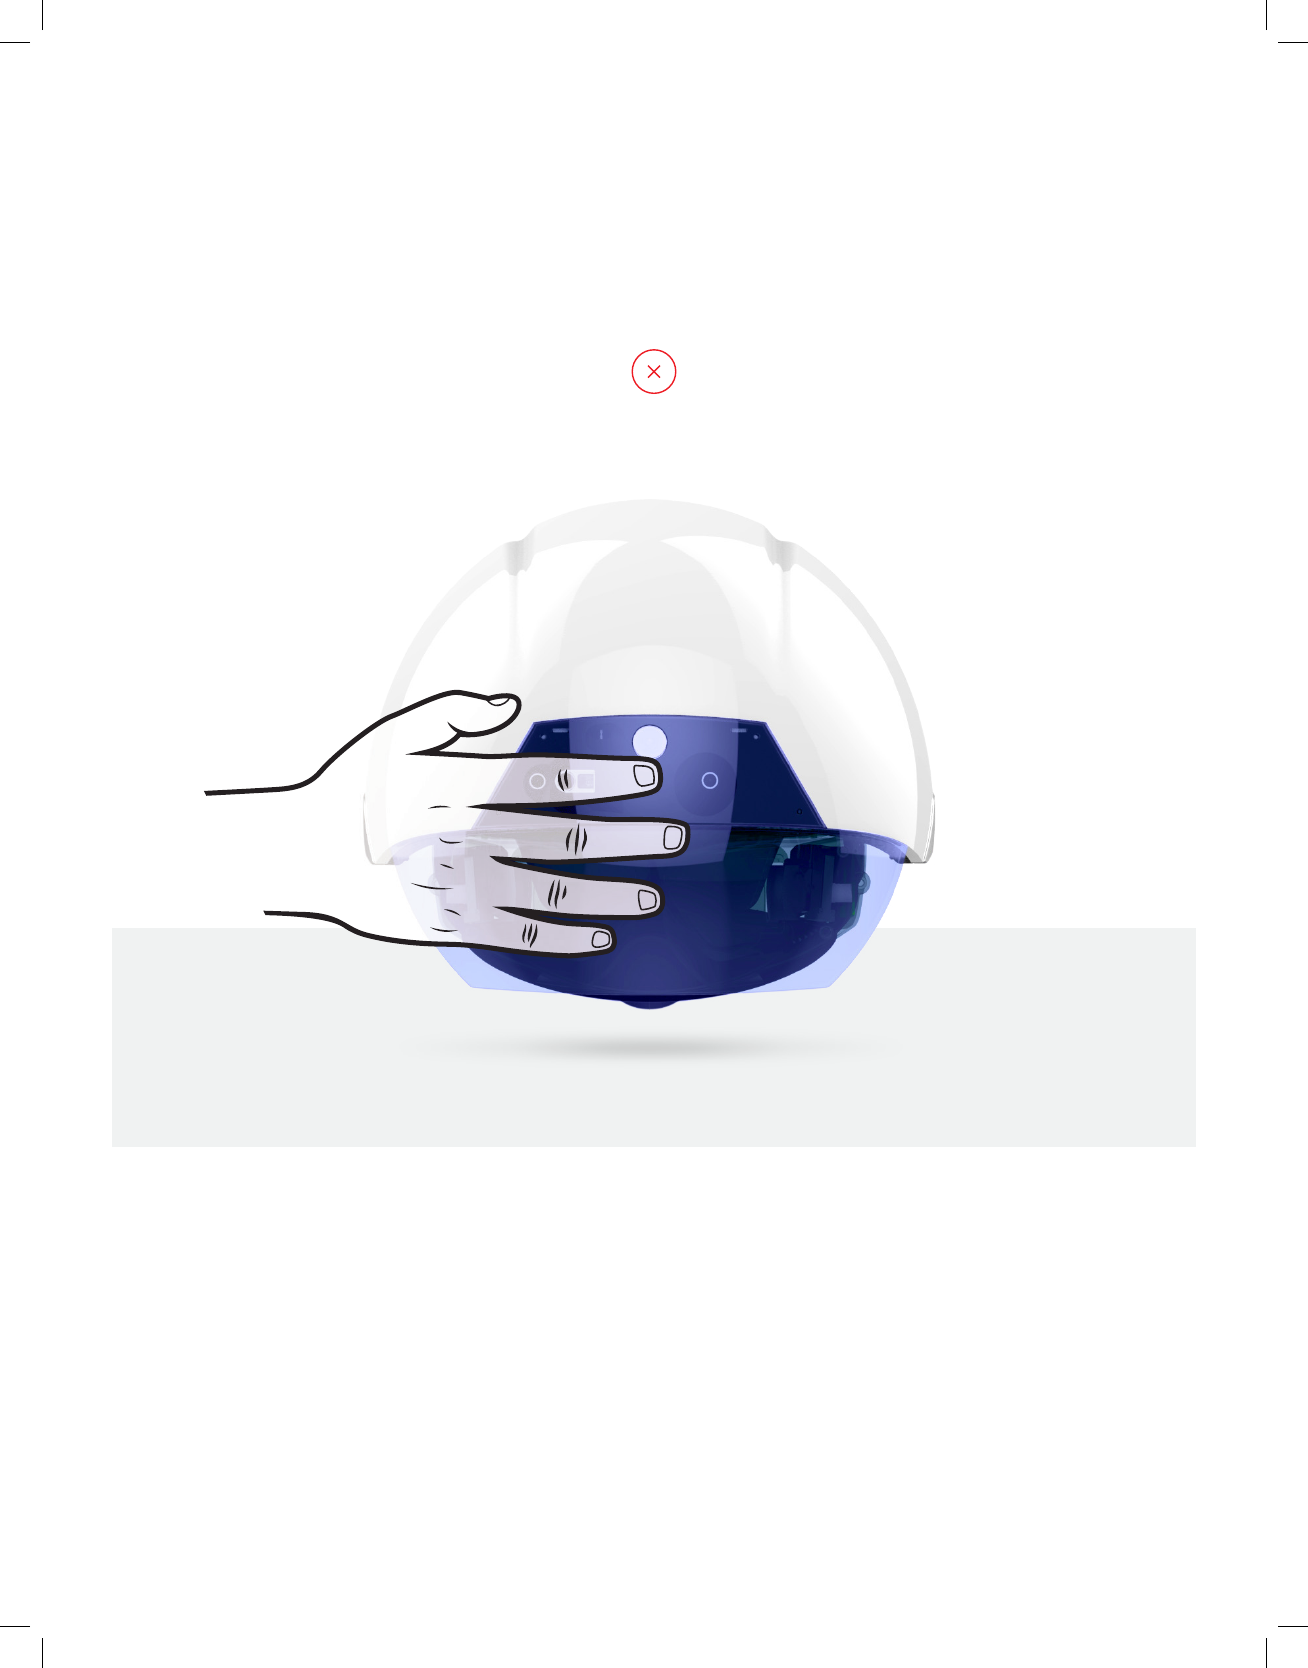
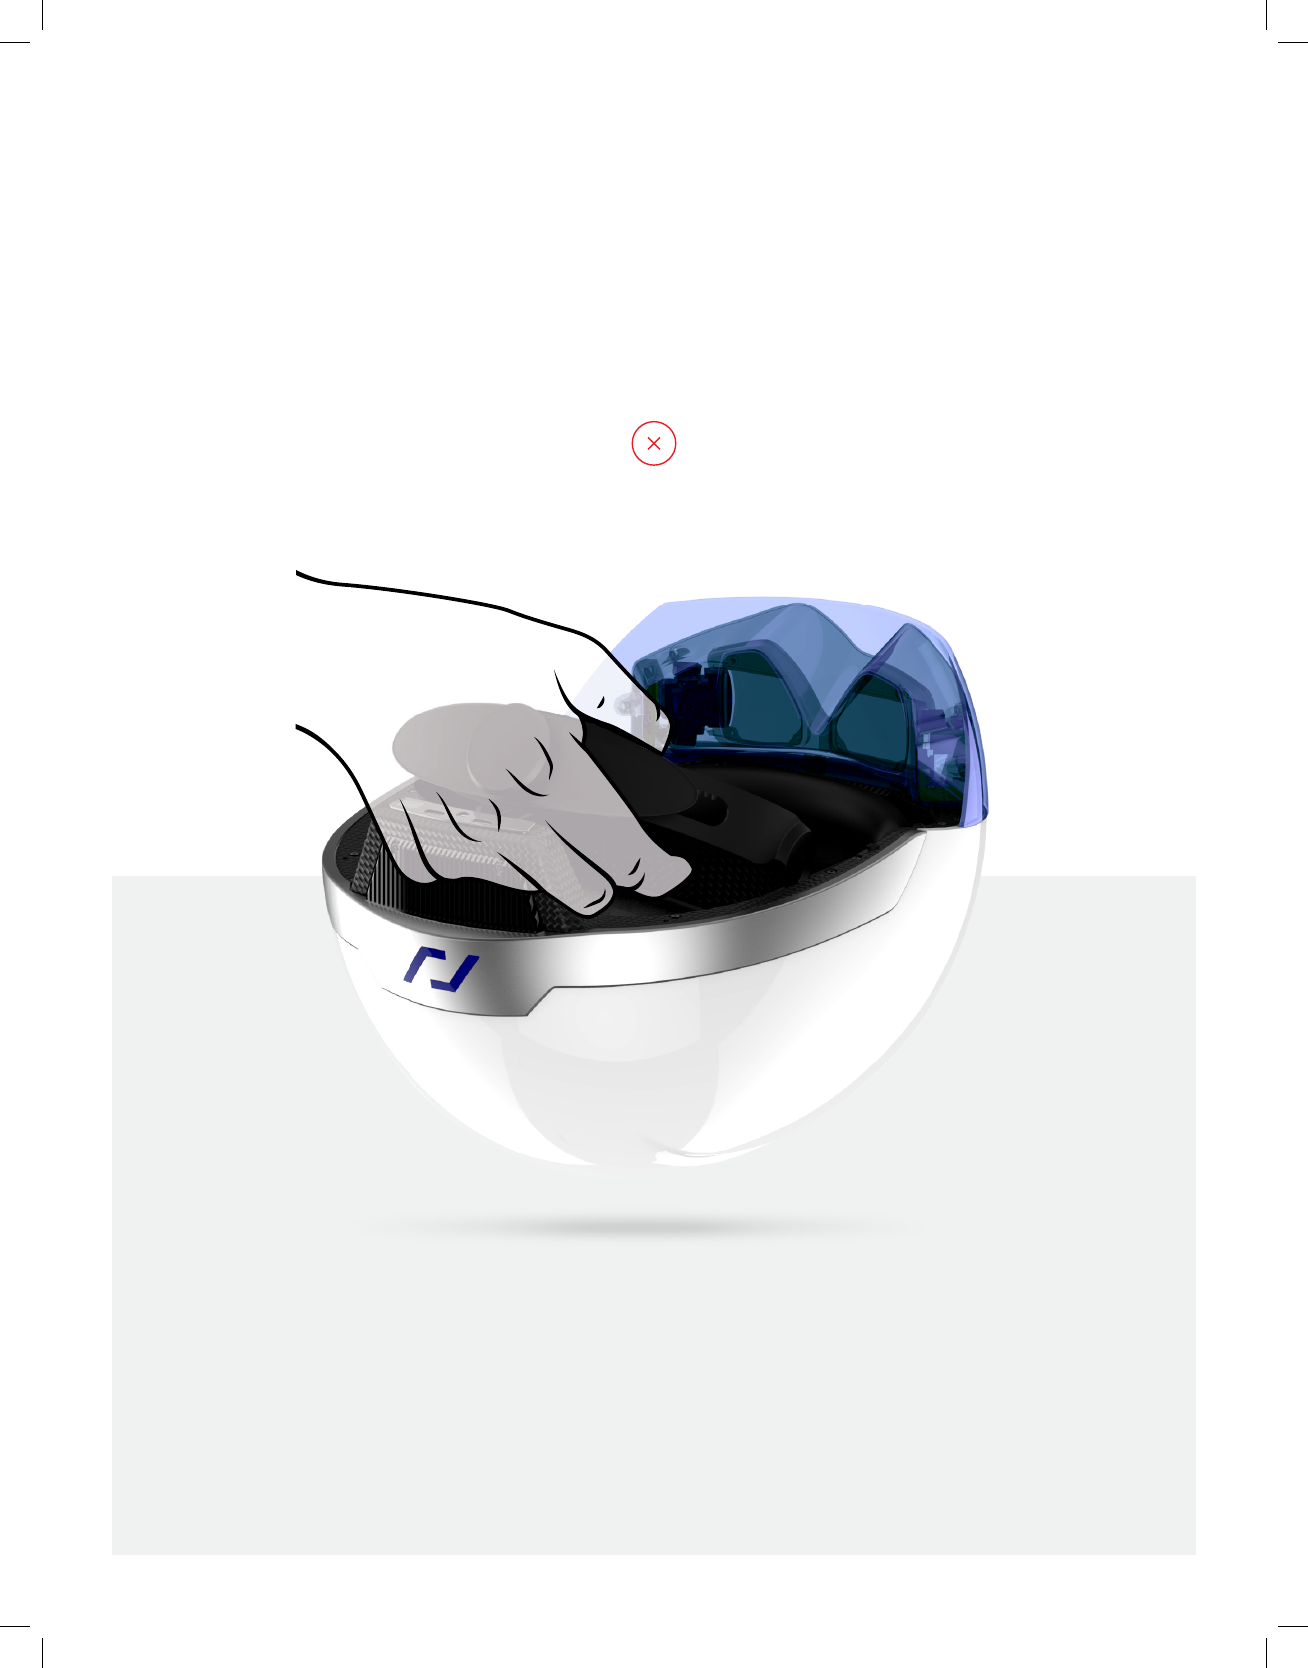
Do not touch the lenses
with your hands.
The face shield and lenses
should only be wiped with a
soft, dust-free cloth.
La visière et les lentilles
doivent uniquement
être nettoyées avec un
chion doux et exempt de
poussières.
Das Visier und die Linsen
sollten nur mit einem
weichen, staubfreien Tuch
abgewischt werden.
El protector facial y los
lentes solo deben limpiarse
con un paño suave y libre
de polvo.
Ne touchez pas les lentilles
avec vos mains.
No toque los lentes con las
manos.
Berühren Sie die Linsen nicht
mit der Hand.
b.
c.
8
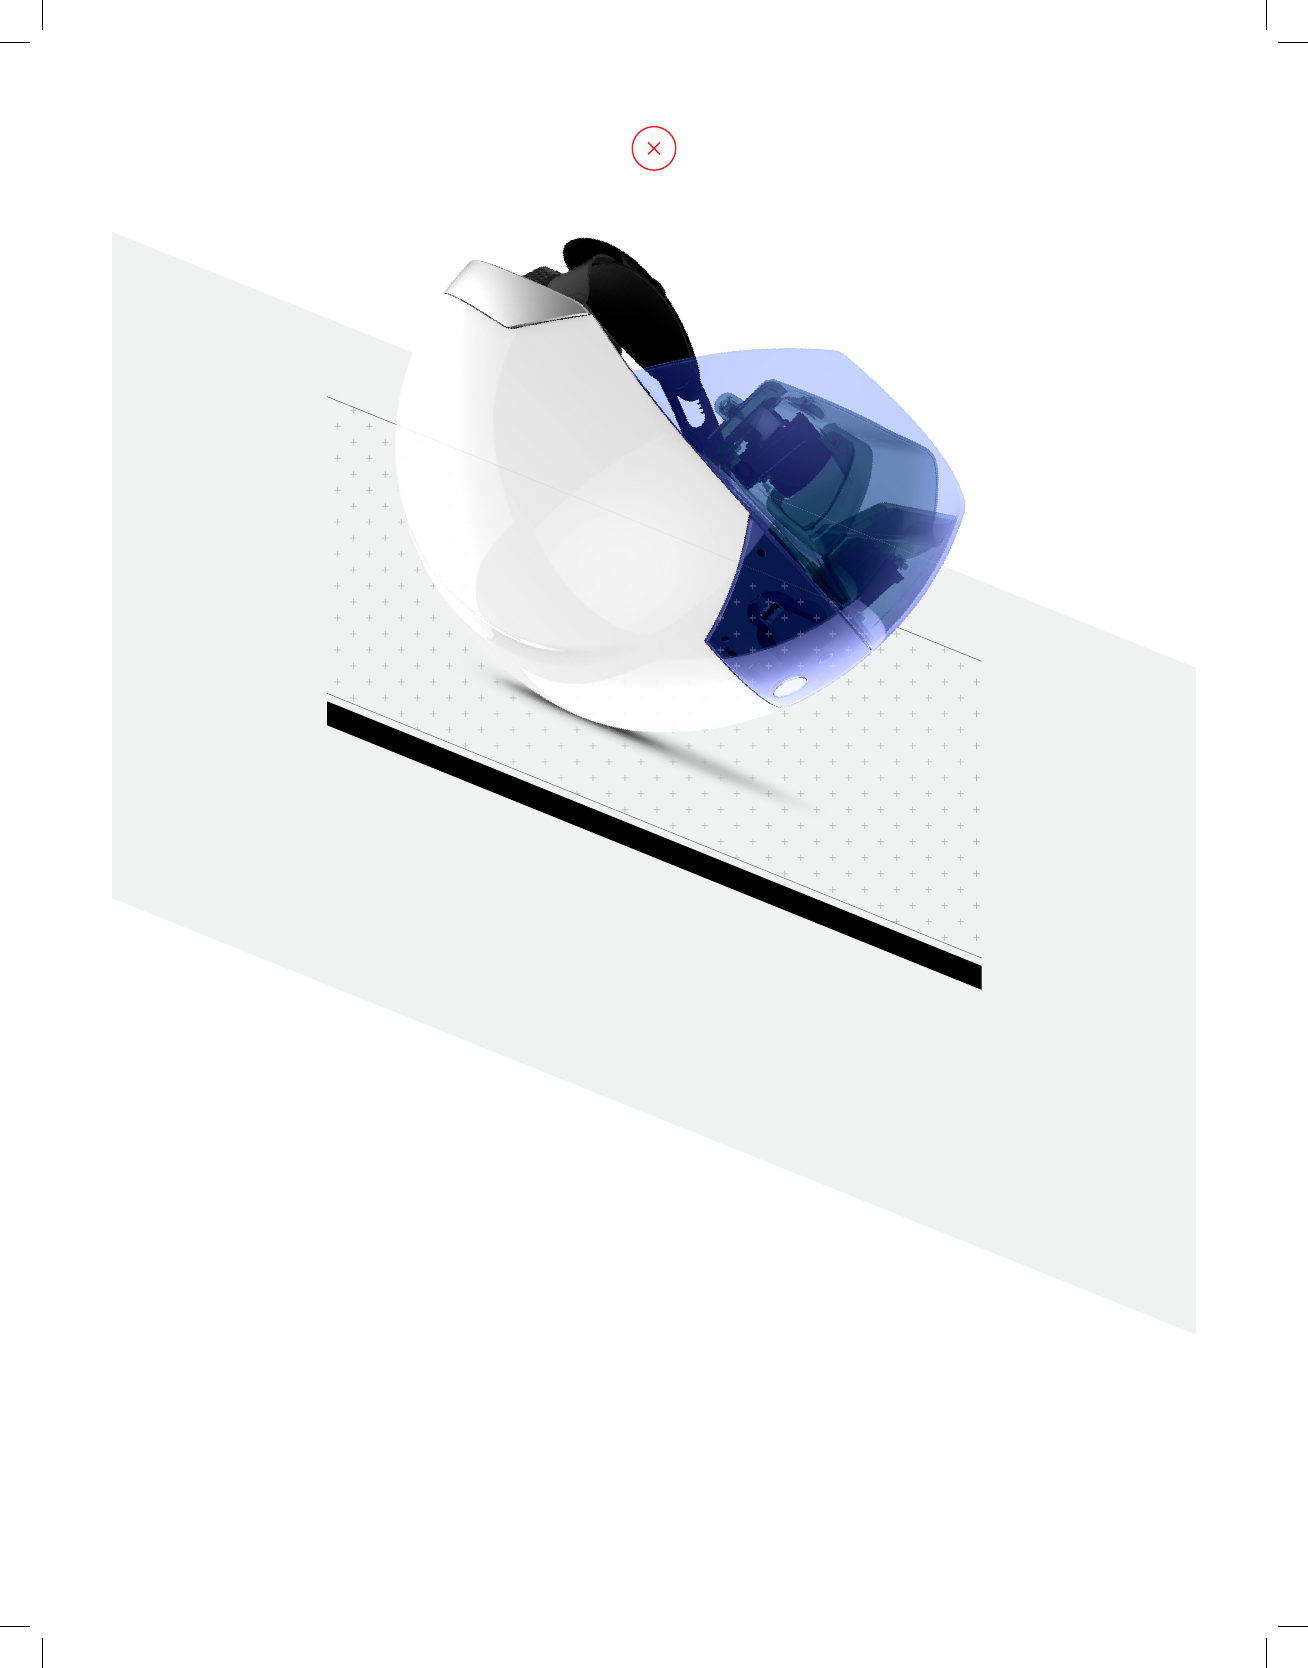
Never carry the device by
its harness.
Nunca tome el dispositivo
por su arnés.
Tragen Sie den Helm
niemals am Gurt.
Ne tenez jamais l’appareil
par son harnais.
d.
9
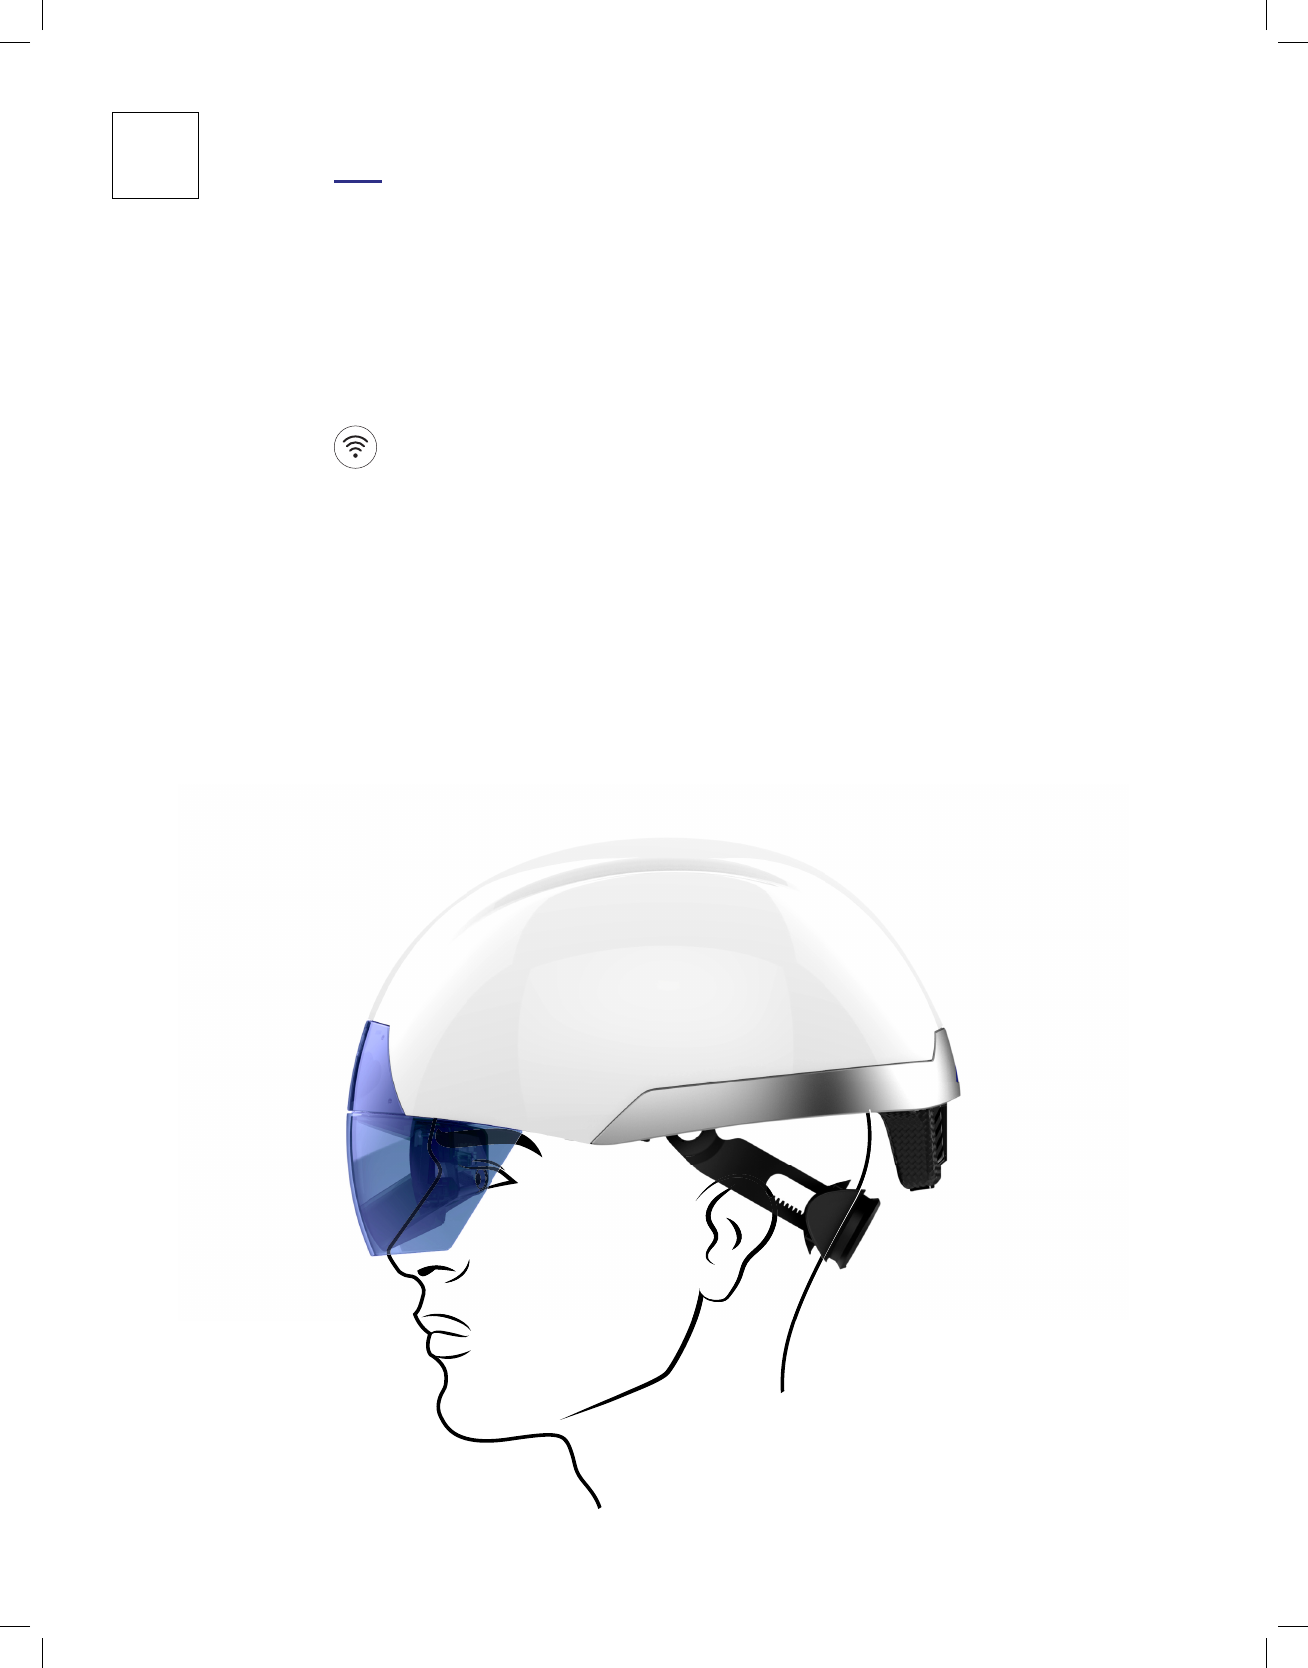
WEARING
YOUR DEVICE
PORTER VOTRE
APPAREIL
TRAGEN DES
GERÄTS
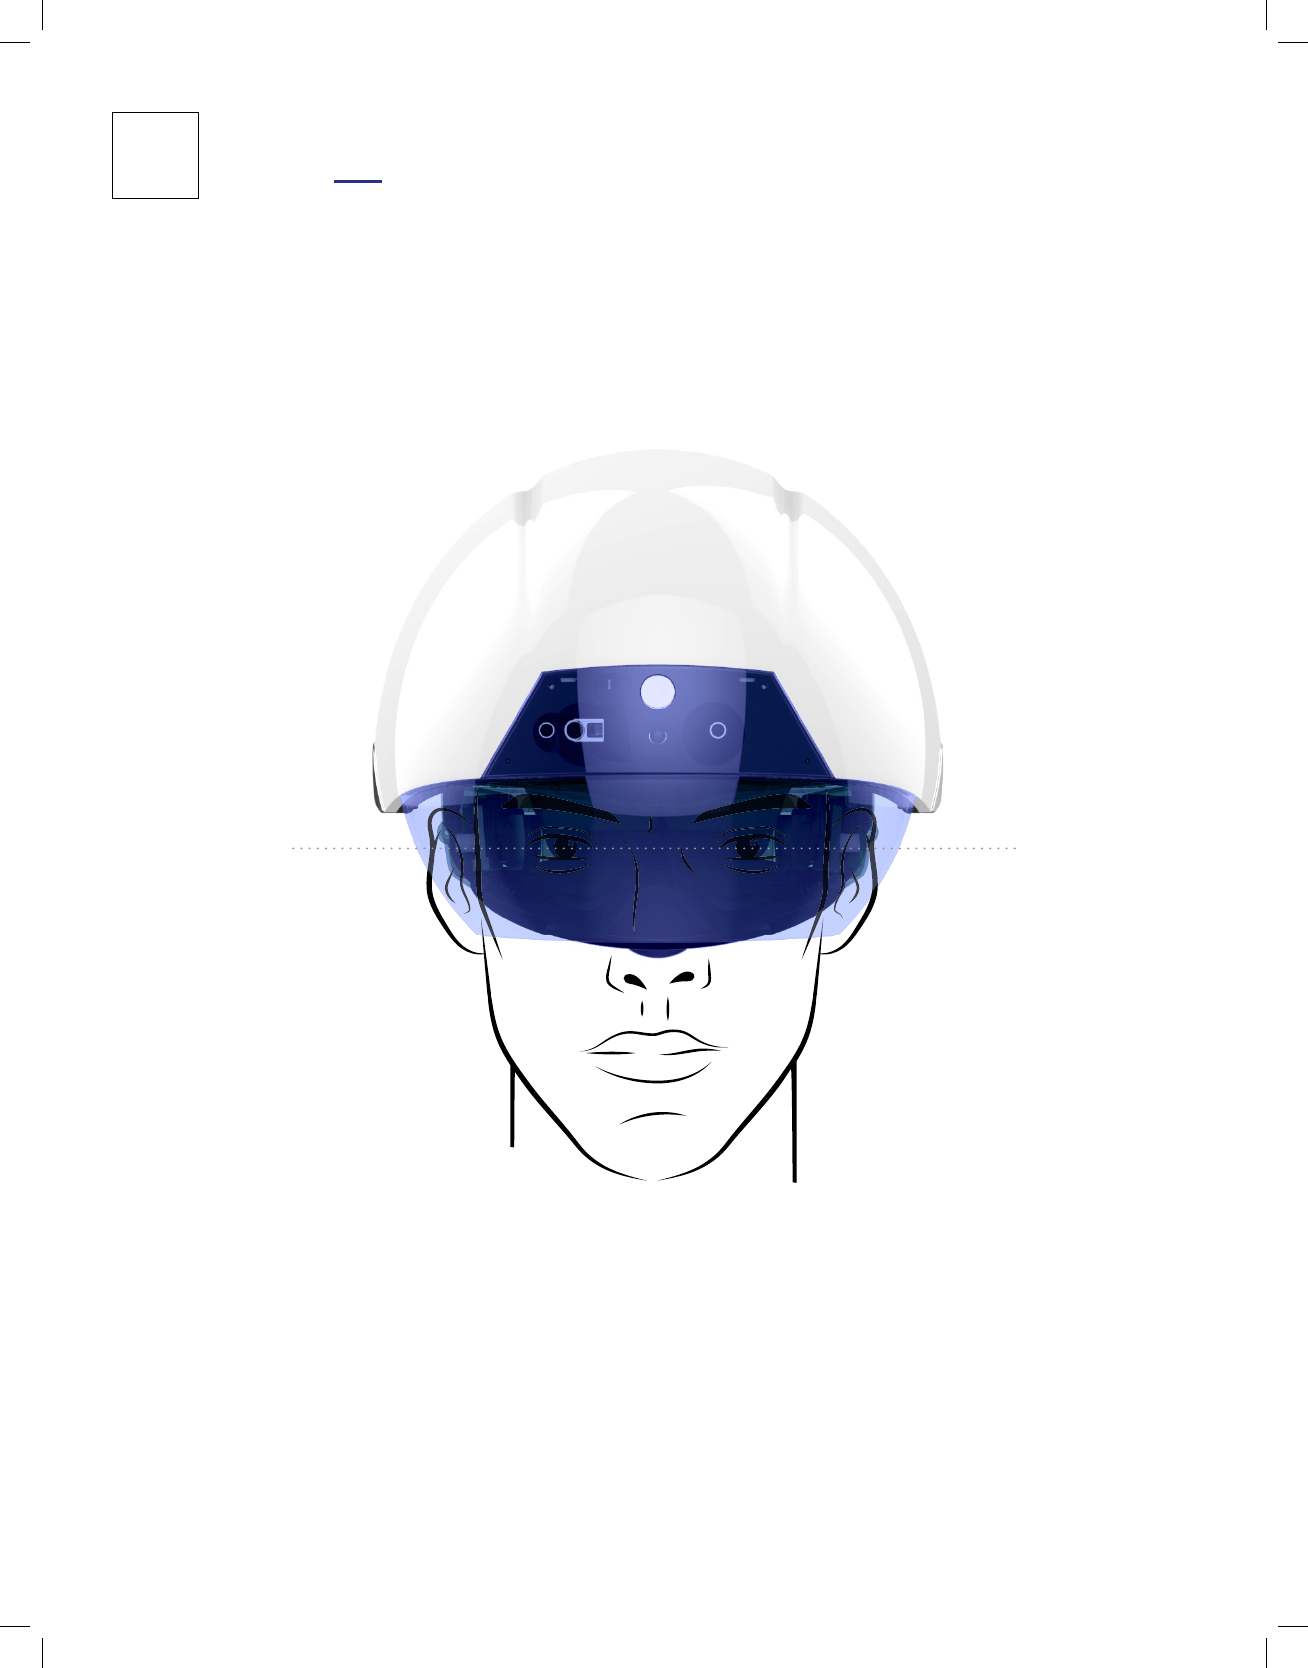
a. Adjust the position of the
device on your head so that
the display is aligned.
Ajustez la position de
l’appareil sur votre tête afin
que l’écran soit aligné.
Ajuste la posición del
dispositivo en la cabeza de
modo que la pantalla quede
alineada.
Stellen Sie die Position
des Helms auf Ihrem Kopf
so ein, dass das Display
korrekt ausgerichtet ist.
10
3
USO DEL
DISPOSITIVO
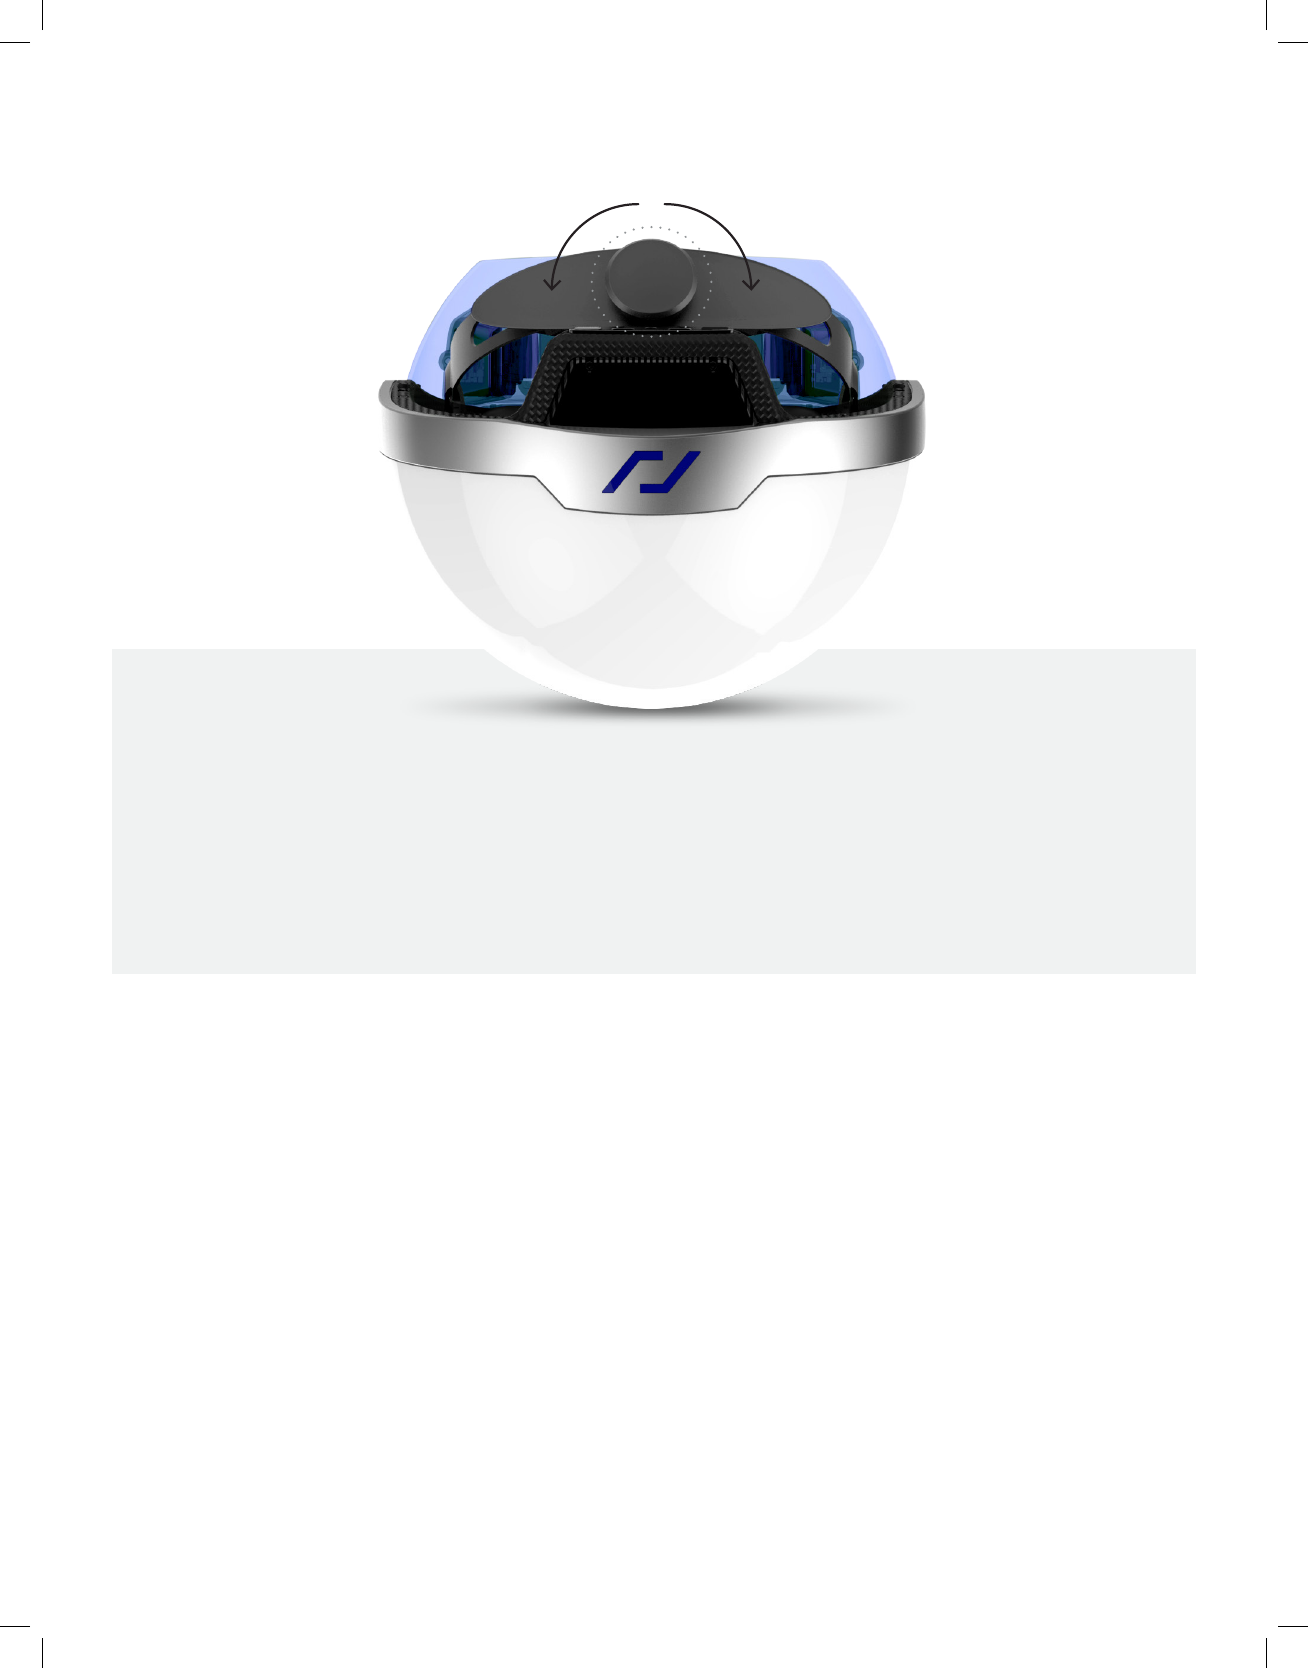
LOOSEN
AFLOJAR
DESSERRER
LOCKERN
(Counter clockwise)
(Sentido antihorario)
(Sens inverse des
aiguilles d’une montre)
(Entgegen dem
Uhrzeigersinn)
TIGHTEN
APRETAR
SERRER
STRAFFEN
(Clockwise)
(Sentido horario)
(Sens des aiguilles
d’une montre)
(Im Uhrzeigersinn)
Loosen the harness by
turning the knob
counter clockwise.
Pull the harness back and
away from the lenses.
b.
Afloje el arnés girando
la perilla en sentido
antihorario. Tire del arnés
hacia atrás y sepárelo de
los lentes.
Desserrez la jugulaire en
tournant le bouton dans le
sens inverse des aiguilles
d’une montre.
Tirez la jugulaire vers
l’arrière à l’opposé de la
lentille.
Lockern Sie den Gurt, indem
Sie den Knopf entgegen dem
Uhrzeigersinn drehen.
Ziehen Sie den Gurt zurück
und von den Linsen weg.
11
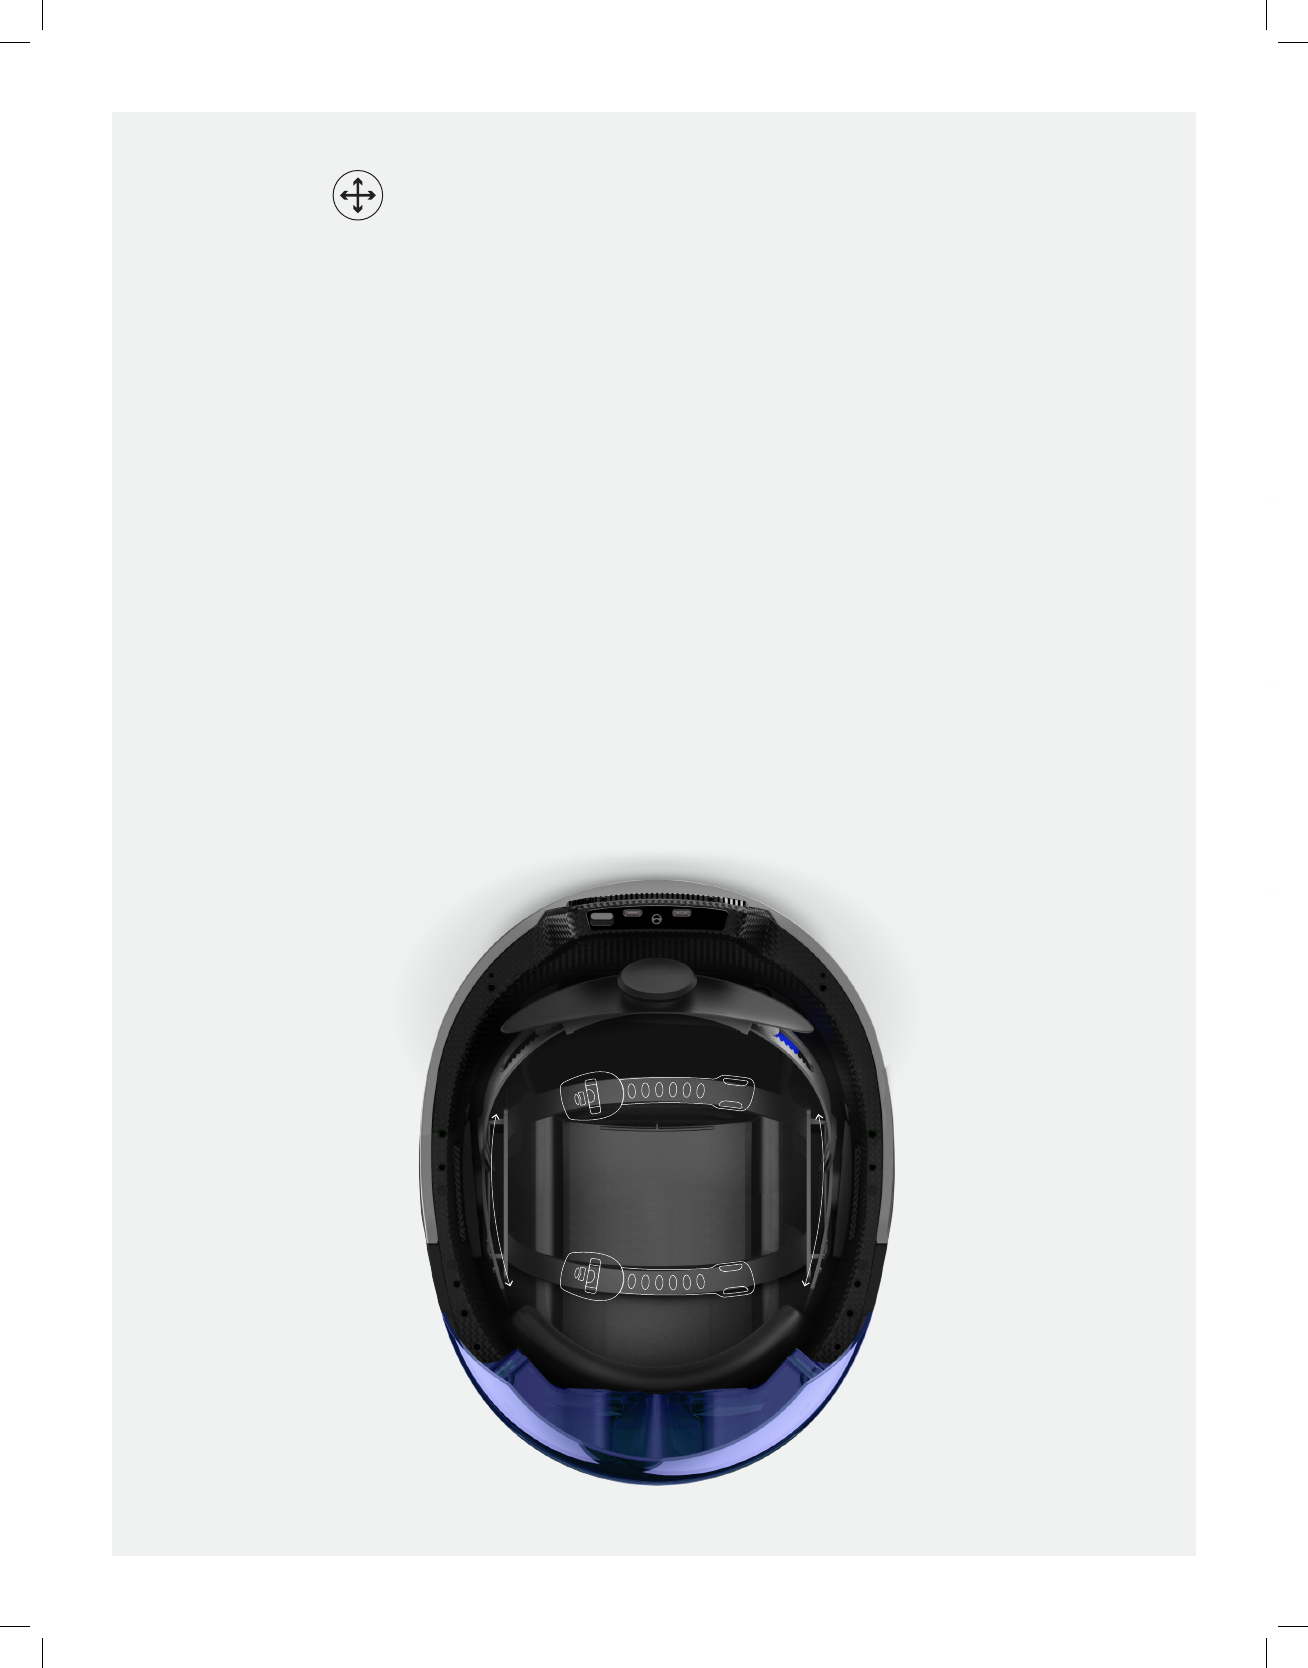
Place DAQRI Smart HelmetTM
on your head and tighten the
harness so that the device
is secure and comfortable.
The harness can be adjusted
horizontally and vertically.
Póngase el casco Smart
HelmetTM de DAQRI y ajuste
el arnés de modo que el
dispositivo quede firme y
cómodo. El arnés se puede
ajustar de forma horizontal y
vertical.
Setzen Sie den DAQRI
Smart HelmetTM auf und
ziehen Sie den Gurt fest,
bis der Helm sicher und
bequem sitzt. Der Gurt
kann horizontal und vertikal
eingestellt werden.
Placez le casque DAQRI
Smart HelmetTM sur votre
tête et serrez la jugulaire
afin que l’appareil soit
bien fixé et confortable.
La jugulaire peut être
ajustée horizontalement et
verticalement.
c.
12
A. B.
A.
A.
B.B.
Vertical Adjust
Ajuste vertical
Ajustement vertical
Vertikal einstellen
Horizontal Adjust
Ajuste horizontal
Ajustement horizontal
Horizontal einstellen
13
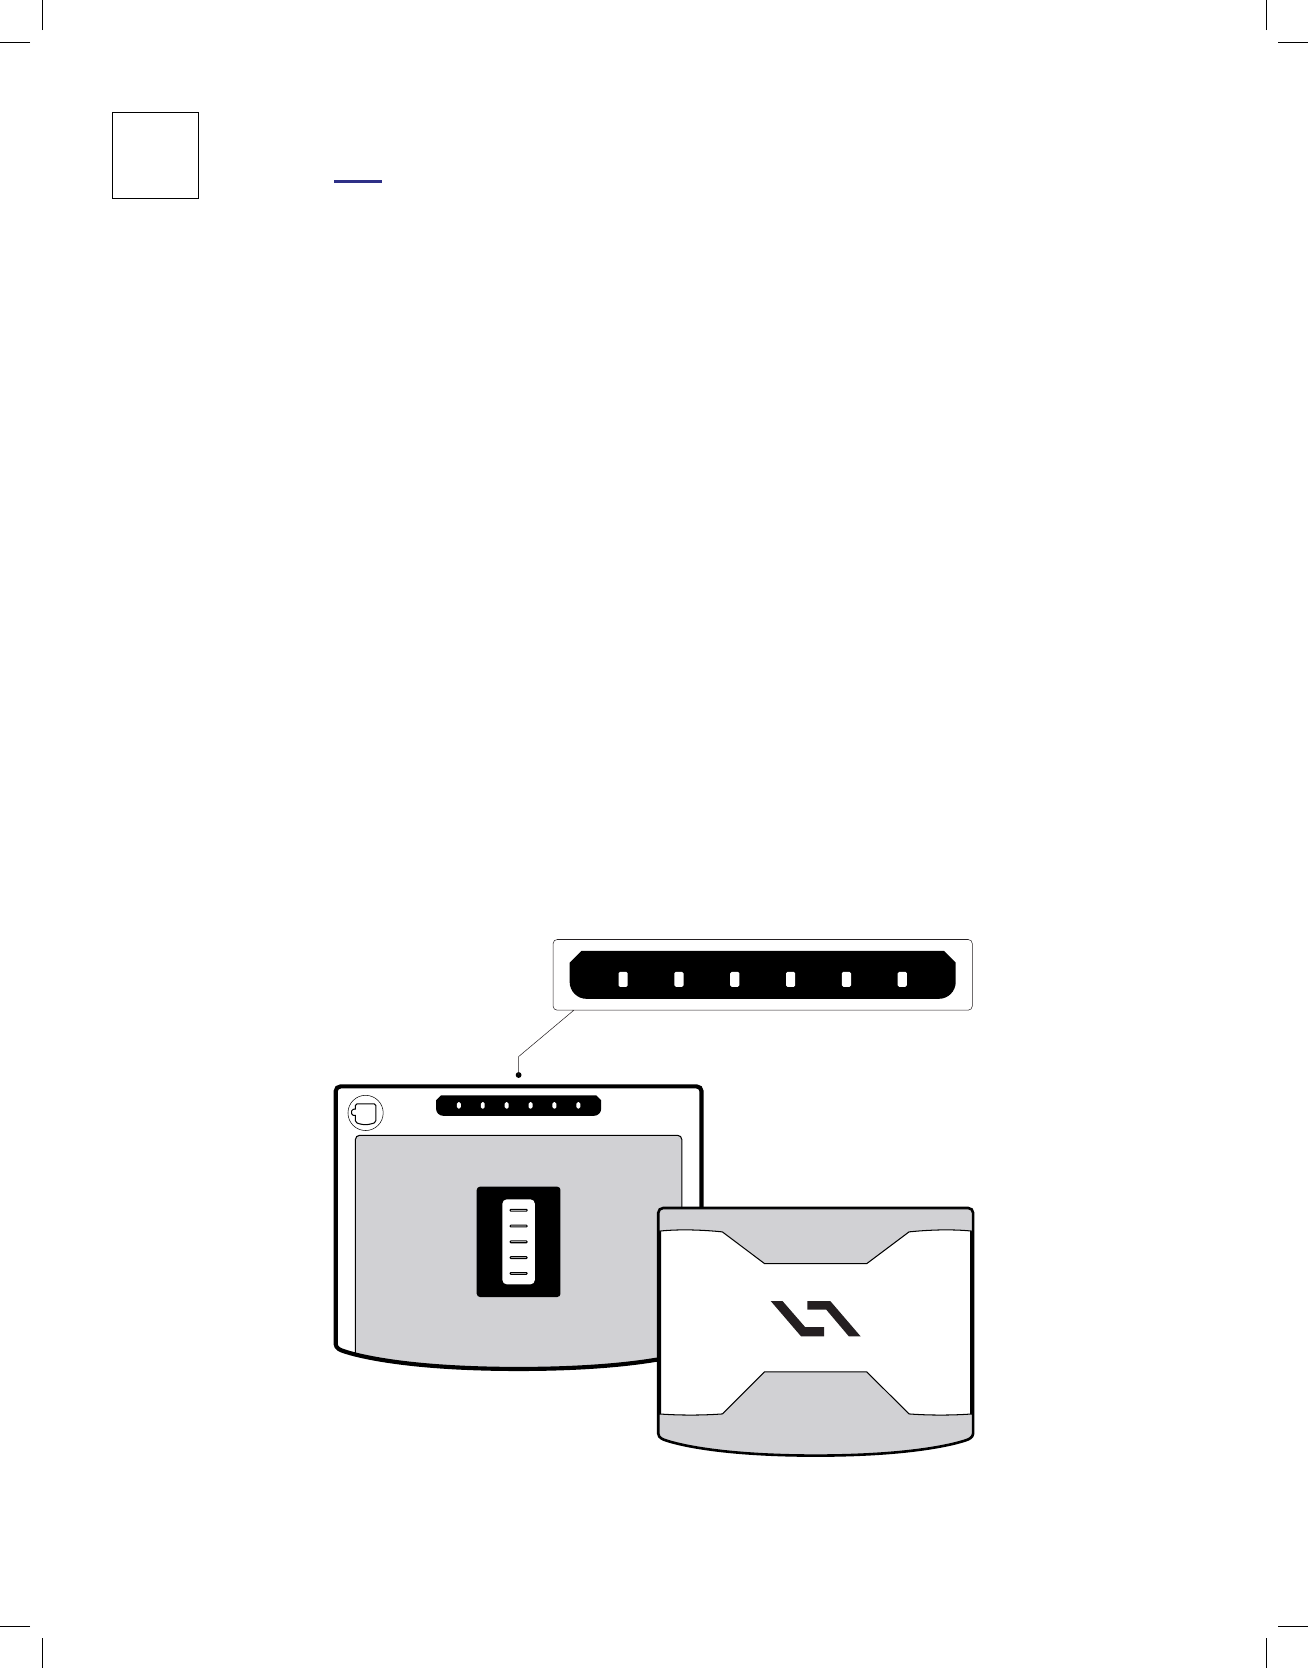
The batteries should only
be charged using
the included charger.
Charging status is shown
here.
Additionally, DAQRI Smart
HelmetTM charges an
installed battery
when the device is
connected to a power
source.
Les batteries devraient
uniquement être
rechargées au moyen du
chargeur inclus. Le statut du
chargement est aché ici.
De plus, le DAQRI Smart
HelmetTM recharge une
batterie installée lorsque
l’appareil est connecté à
une source d’alimentation.
Die Batterien sollten nur
mit dem mitgelieferten
Ladegerät aufgeladen
werden. Hier wird der
Ladezustand angezeigt.
Zusätzlich dazu lädt der
DAQRI Smart HelmetTM auch
eine installierte Batterie auf,
wenn das Gerät mit einer
Stromquelle verbunden ist.
Las baterías solo se deben
cargar usando el cargador
incluido. El estado de carga
se muestra aquí.
Además, el Smart
HelmetTM de DAQRI carga
una batería instalada
cuando el dispositivo está
conectado a una fuente de
alimentación.
BATTERIES BATTERIES
BATTERIENBATERÍAS
CHARGING
CARGA LADEN
CHARGEMENT
14
AC IN ERROR2 5
%50%75%100
%
4
Battery
Batería
Batterie
Batterie
Battery charger
Cargador de batería
Chargeur de batterie
Batterieladegerät
Charging status
Estado de carga
Statut de chargement
Ladezustand
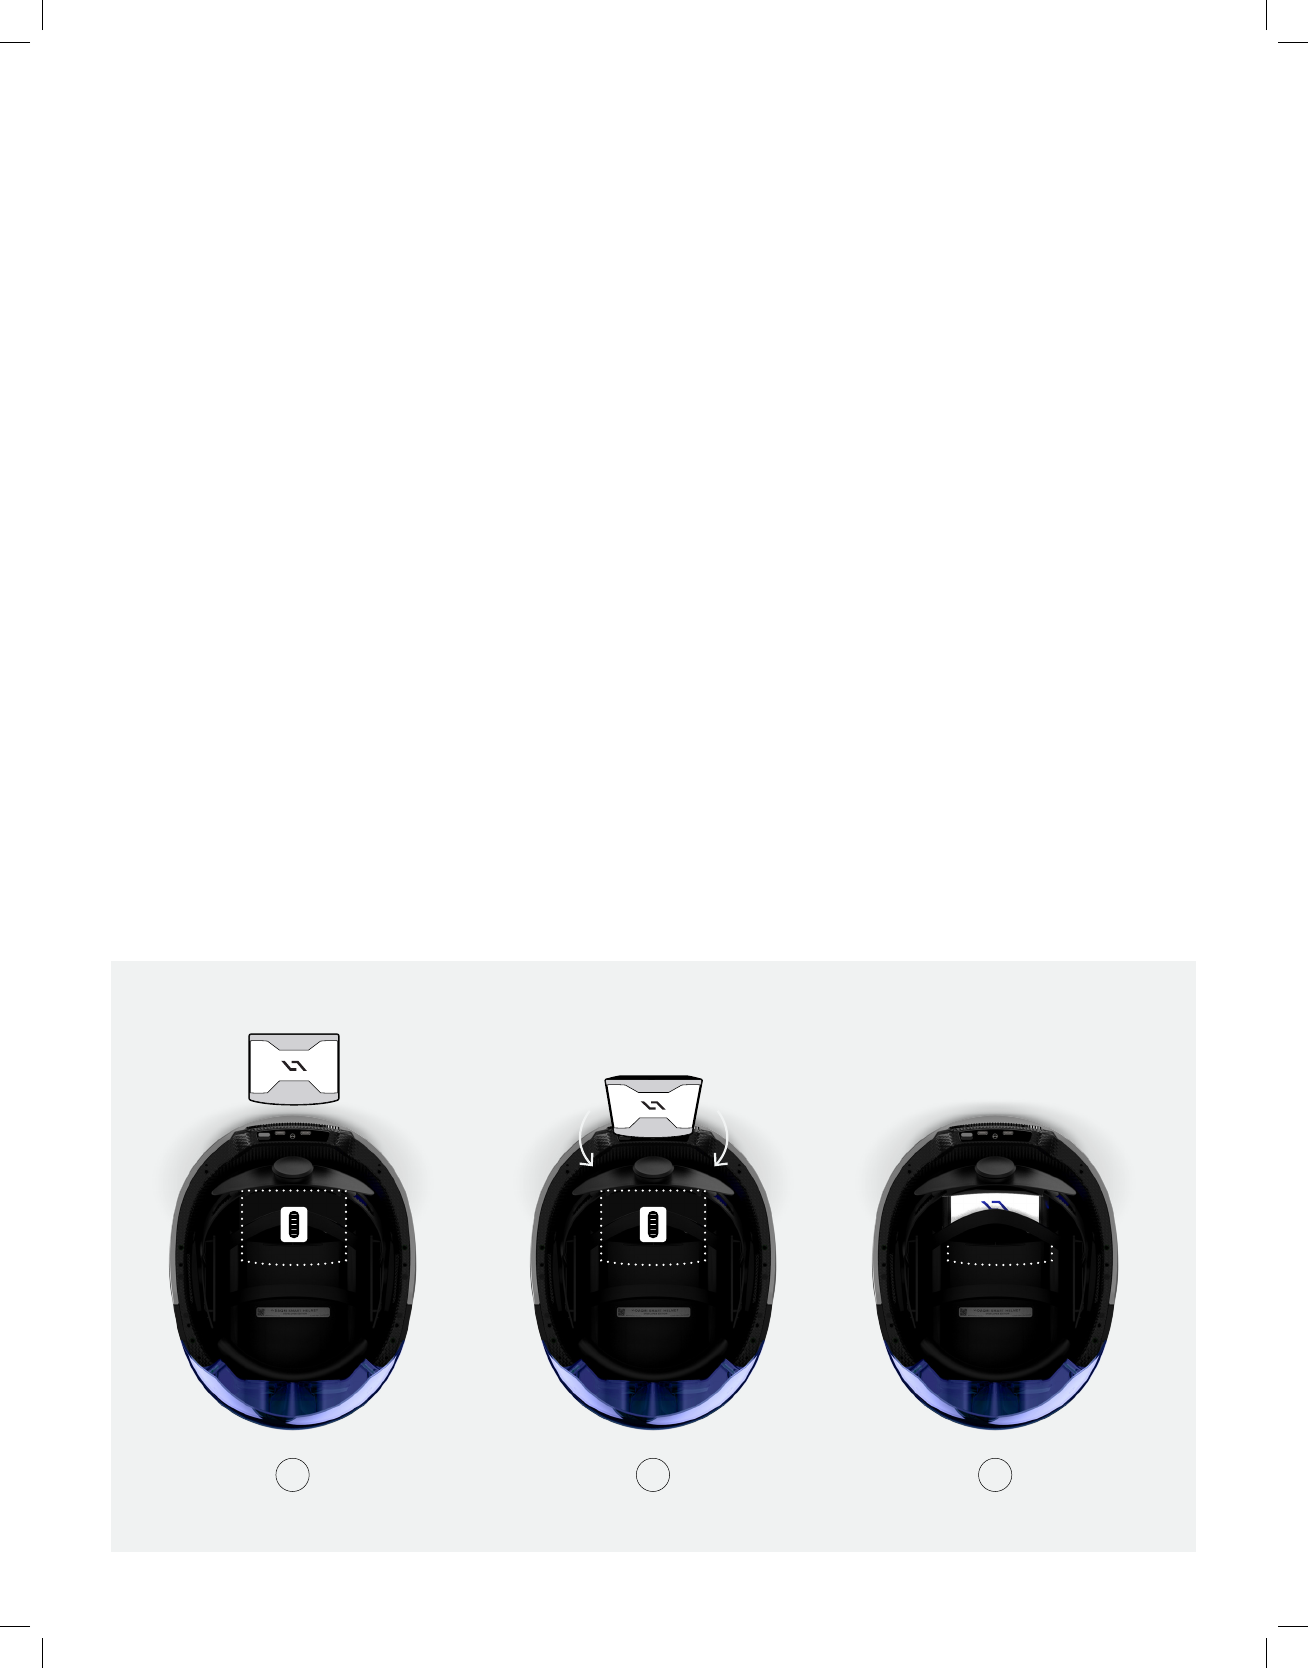
The battery cradle includes an icon
showing the proper orientation of the
battery in the charging dock.
One side of the battery cradle is
spring- loaded.
Insert the battery into the other side first,
then press the tabbed side of the battery
down into the spring- loaded cradle until it
snaps into place.
La station de recharge inclut une icône
montrant la bonne orientation de la batterie
dans celle-ci.
Un des côtés de la station de recharge est
équipé de ressort.
Insérez d’abord la batterie de l’autre côté,
puis appuyez sur le côté de la batterie
disposant d’un onglet dans la station
de recharge à ressort jusqu’à ce qu’elle
s’emboîte dedans.
Die Batterieladestation verfügt über ein
Symbol, das die korrekte Ausrichtung der
Batterie im Ladedock angibt.
Eine Seite der Batterieladestation ist
federbelastet.
Legen Sie die Batterie zuerst in die andere
Seite ein und drücken Sie dann die
Seite der Batterie in die federbelastete
Ladestation hinein, bis sie einrastet.
1 2
El soporte de batería incluye un icono que
indica la orientación correcta de la batería
en la base de carga.
Un lado del soporte de batería está
provisto de un resorte.
Inserte la batería en el otro lado primero y
luego presione el lado con lengüeta de la
batería hacia el soporte de resorte hasta
que la batería encaje en su lugar.
3
INSTALLATION
INSTALACIÓN INSTALLATION
INSTALLATION
15
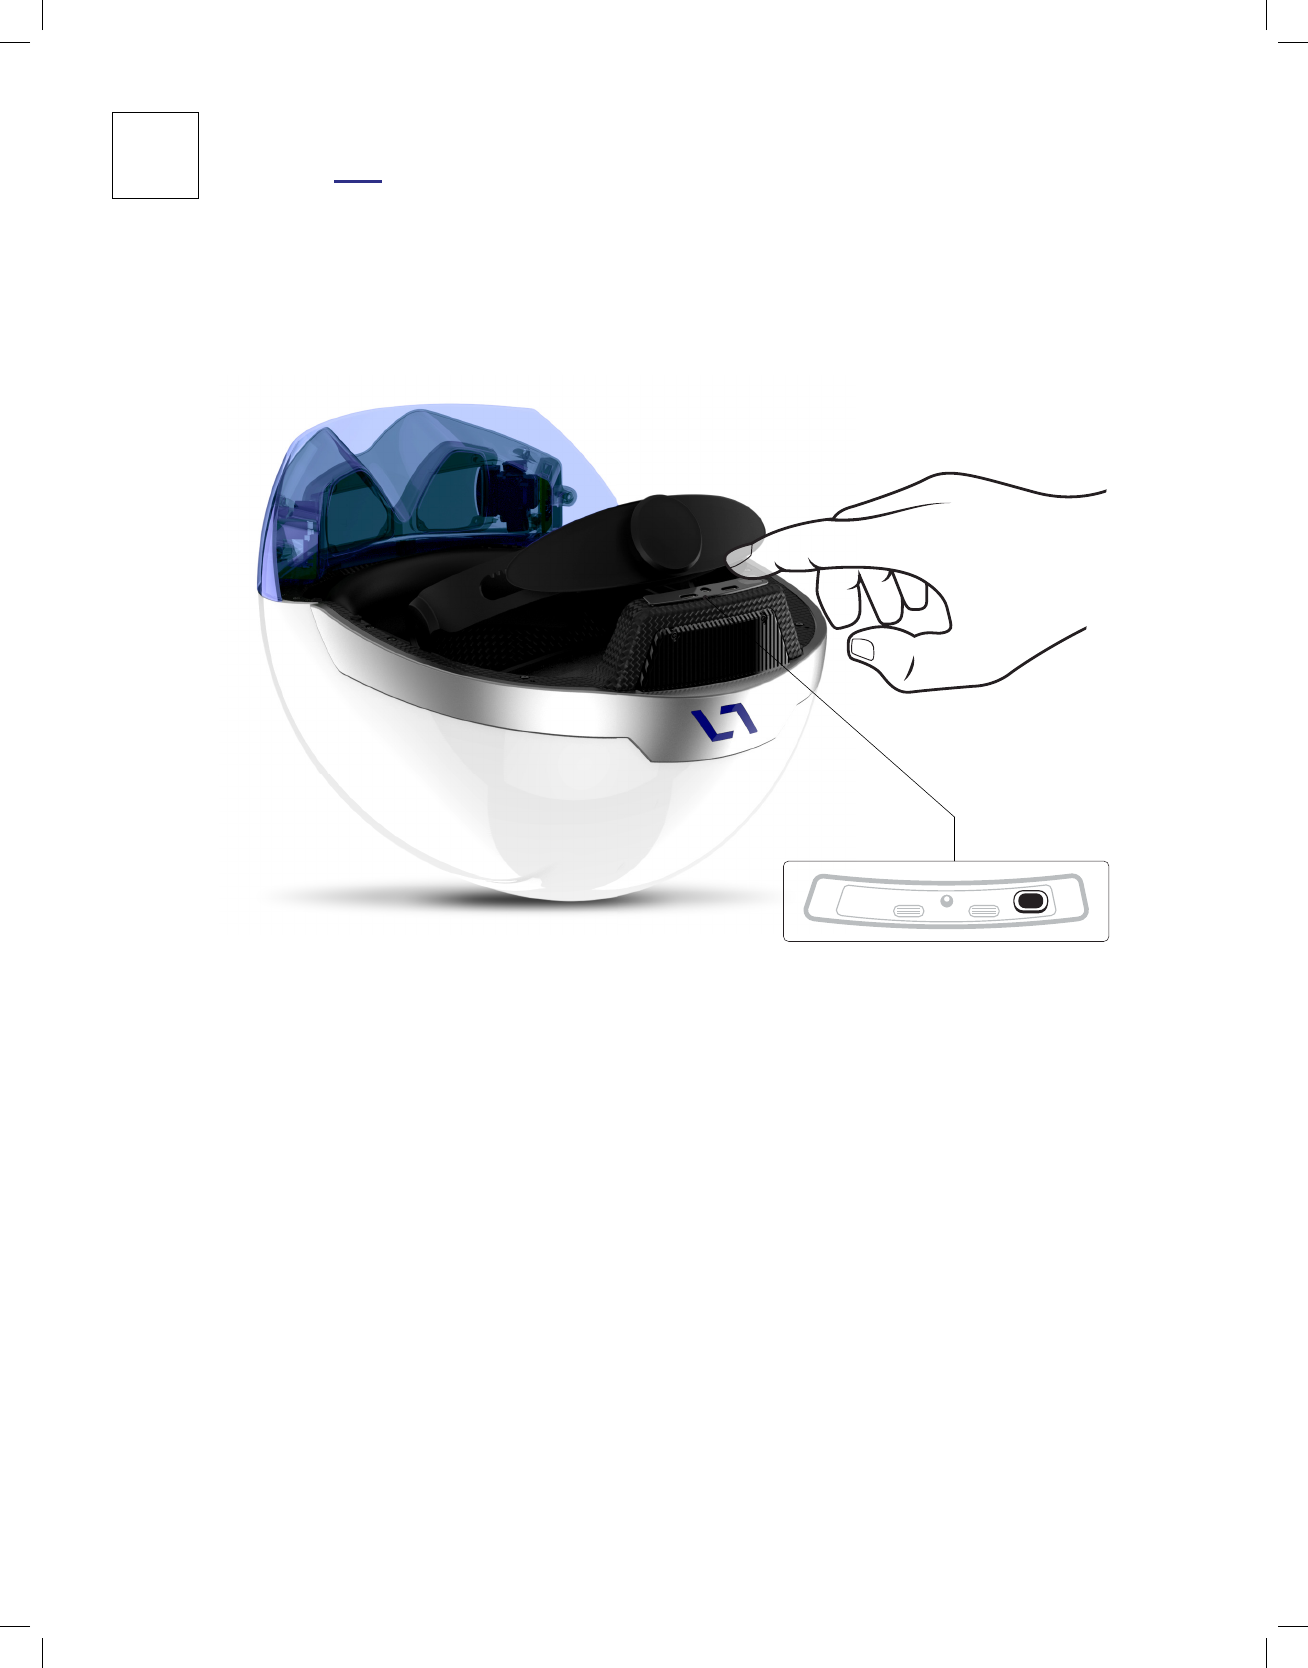
POWERING
ON / OFF
MISE SOUS
TENSION / ARRÊT
EIN- /
AUSSCHALTEN
Press and hold the power
button until the DAQRI logo
LED lights up. Your device
is now on.
Repeat to turn o.
Pressez le bouton de mise
sous tension et restez
appuyé jusqu’à ce que
la LED du logo DAQRI
s’allume. Votre appareil est
maintenant sous tension.
Répétez l’opération pour
éteindre.
Mantenga presionado el
botón de encendido hasta
que la luz LED del logotipo
de DAQRI se ilumine.
Ahora el dispositivo está
encendido.
Repita el procedimiento
para apagar.
Halten Sie die Netztaste
gedrückt, bis das LED
DAQRI-Logo aufleuchtet. Ihr
Gerät ist jetzt eingeschaltet.
Zum Ausschalten
wiederholen Sie den
Vorgang.
16
5
ENCENDIDO /
APAGADO
Power on
Encender
Allumer
Einschalten
17
FUNCTION BUTTONS BOUTONS DE FONCTION
BOTONES DE FUNCIÓN FUNKTIONSTASTEN
Button
Boton
Bouton
Taste
Button
Boton
Bouton
Taste
Button
Boton
Bouton
Taste
Button
Boton
Bouton
Taste
After you power on the
device for the first time,
follow the instructions on
the DAQRI Smart HelmetTM
s creen to setup your
device.
Después de encender el
dispositivo por primera vez,
siga las instrucciones que
aparecen en la pantalla del
Smart HelmetTM de DAQRI
para configurarlo.
Après avoir mis sous
tension votre appareil pour
la première fois, suivez les
instructions s’achant sur
l’écran du DAQRI Smart
HelmetTM pour configurer
votre appareil.
Nachdem Sie das
Gerät zum ersten Mal
eingeschaltet haben, folgen
Sie den Anweisungen auf
dem Bildschirm des DAQRI
Smart HelmetTM, um das
Gerät einzurichten.
CONNECTING TO
WIFI AND SETTING
UP YOUR DEVICE
WIFI-VERBINDUNG
UND EINRICHTUNG
IHRES GERÄTS
CONNEXION AU WIFI
ET CONFIGURATION
DE VOTRE APPAREIL
18
6
CONEXIÓN A RED WI-FI
Y CONFIGURACIÓN DEL
DISPOSITIVO

For complete details and to
access all of the available
training material for
DAQRI Smart HelmetTM
please visit:
http://developer.daqri.com
Para obtener más detalles y
acceder a todo el material
de entrenamiento disponible
para el casco Smart
HelmetTM de DAQRI, visite:
http://developer.daqri.com
Pour des détails complets
sur le DAQRI Smart
HelmetTM et pour accéder à
l’intégralité du matériel de
formation, rendez-vous sur:
http://developer.daqri.com
Für vollständige Details und
Zugang zu allen verfügbaren
Trainingsmaterialien für
den DAQRI Smart HelmetTM
besuchen Se bitte: http://
developer.daqri.com
LEARNING AND
SUPPORT
FORMATION ET
ASSISTANCE
19
7
ENTRENAMIENTO Y
APOYO
TRAINING UND
SUPPORT

310-00005