DASAN Zhone Solutions SZ1424 SKYZHONE WI-FI ACCESS POINT User Manual SkyZhone 1x00 UG 121907A
Zhone Technologies, Inc. SKYZHONE WI-FI ACCESS POINT SkyZhone 1x00 UG 121907A
UserManual.wiki
>
DASAN Zhone Solutions
>
SZ1424 User Manual
>
USERS MANUAL 1
Contents
1.
USERS MANUAL
2.
USERS MANUAL 1
3.
USERS MANUAL 2
USERS MANUAL 1
Navigation menu
Upload a User Manual
Namespaces
Wiki Guide
HTML
PDF
Info
Views
User Manual
Discussion / Help
Navigation

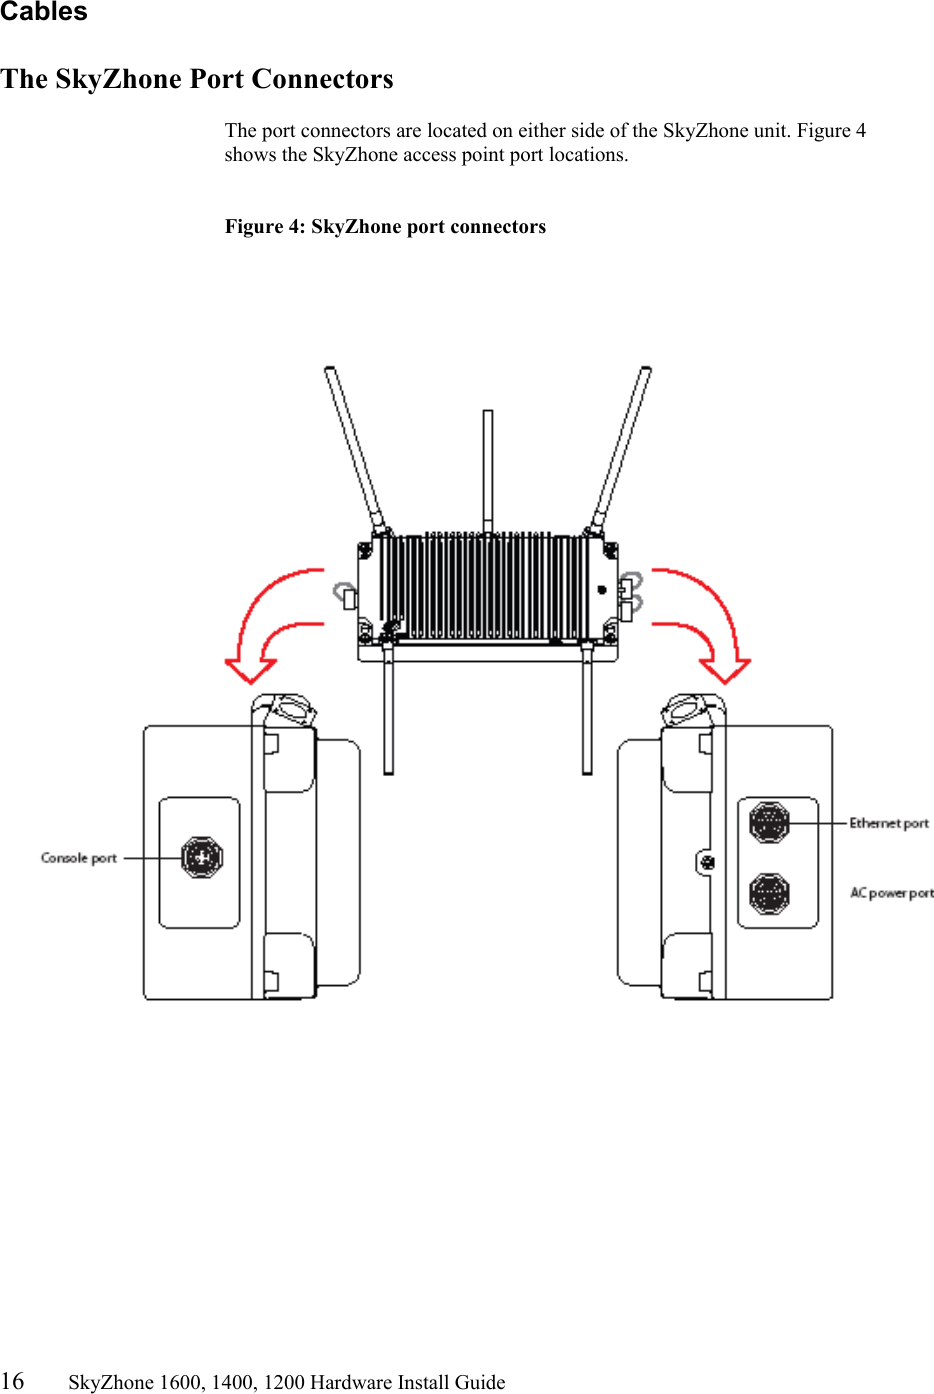
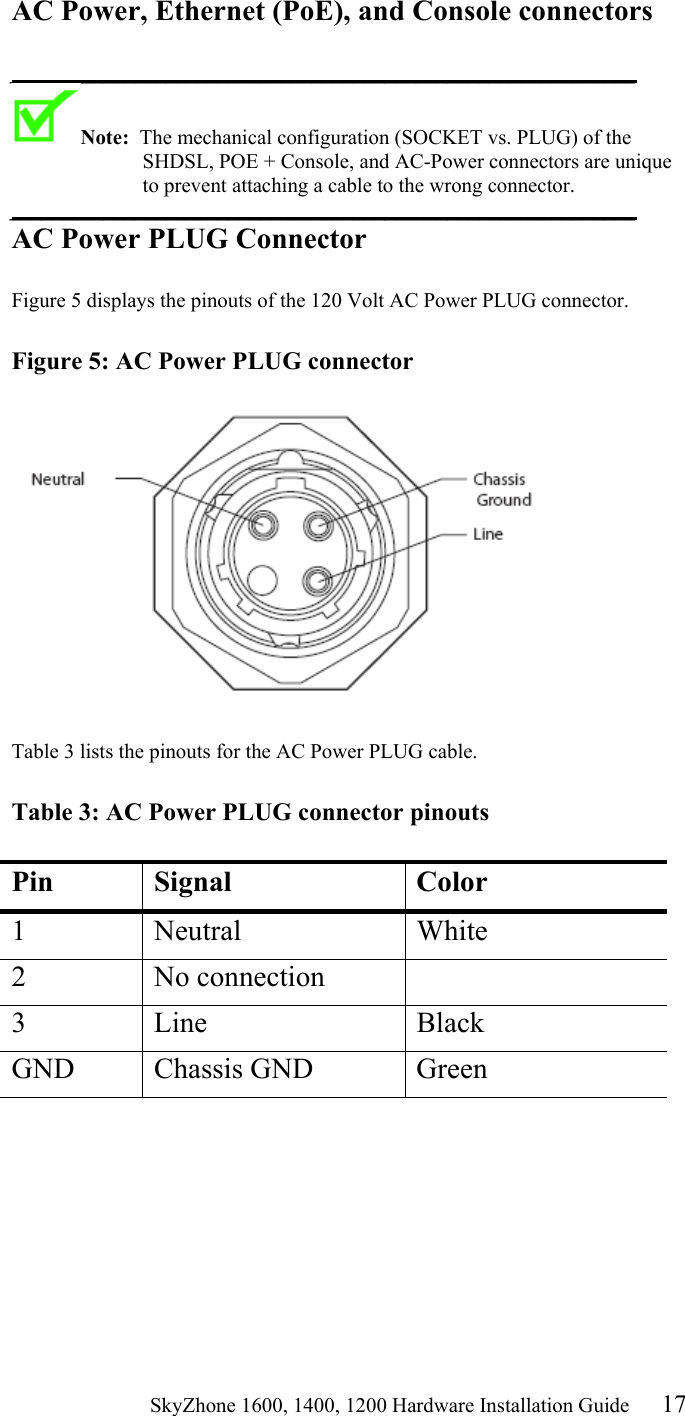
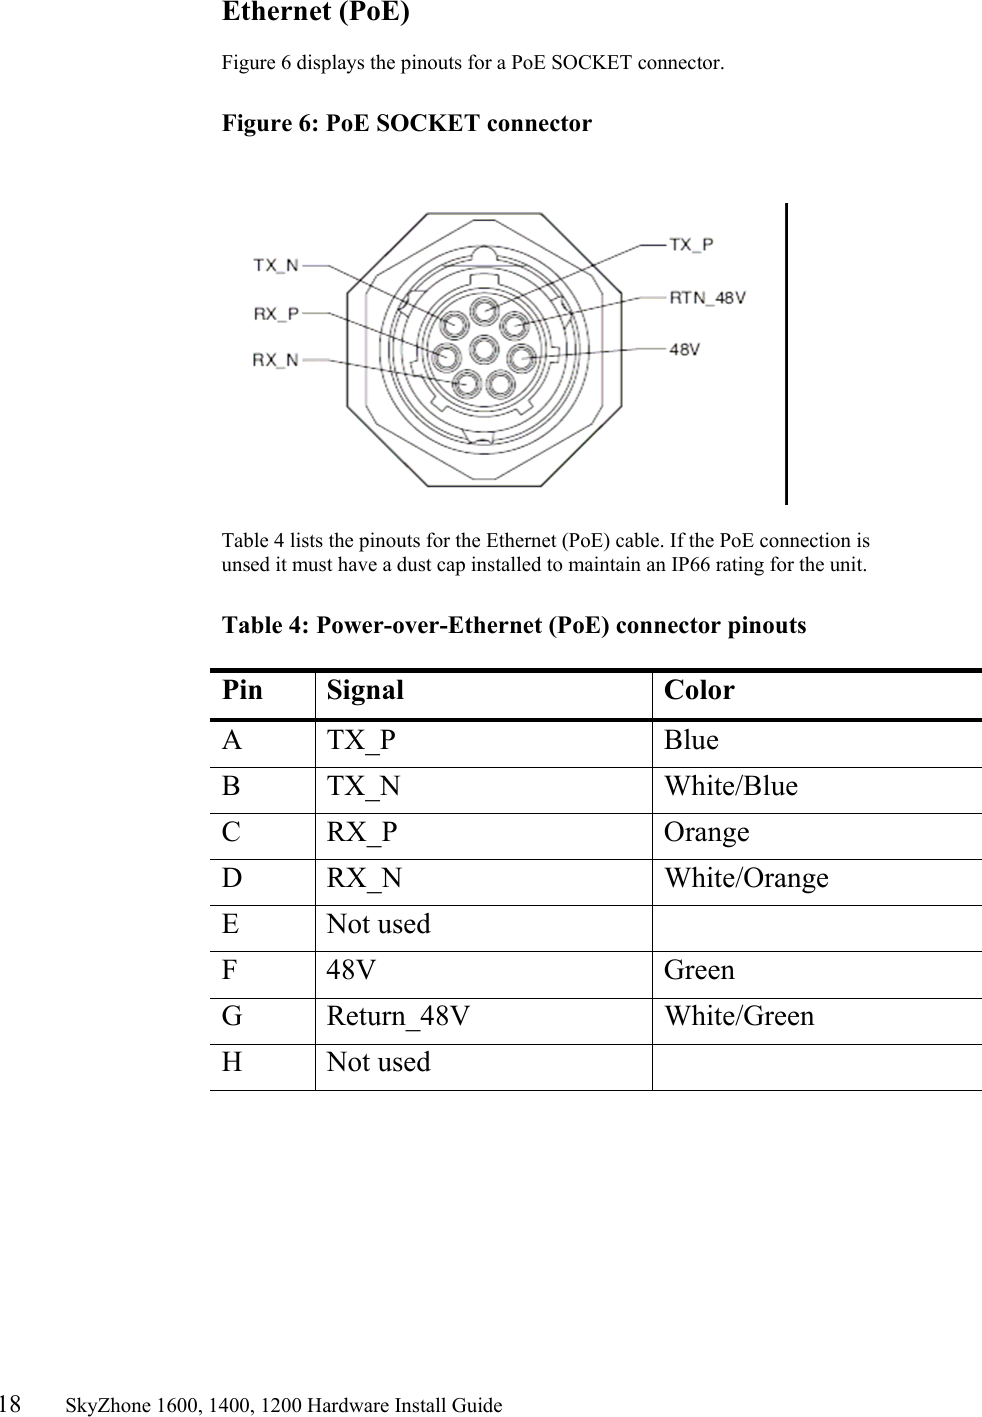
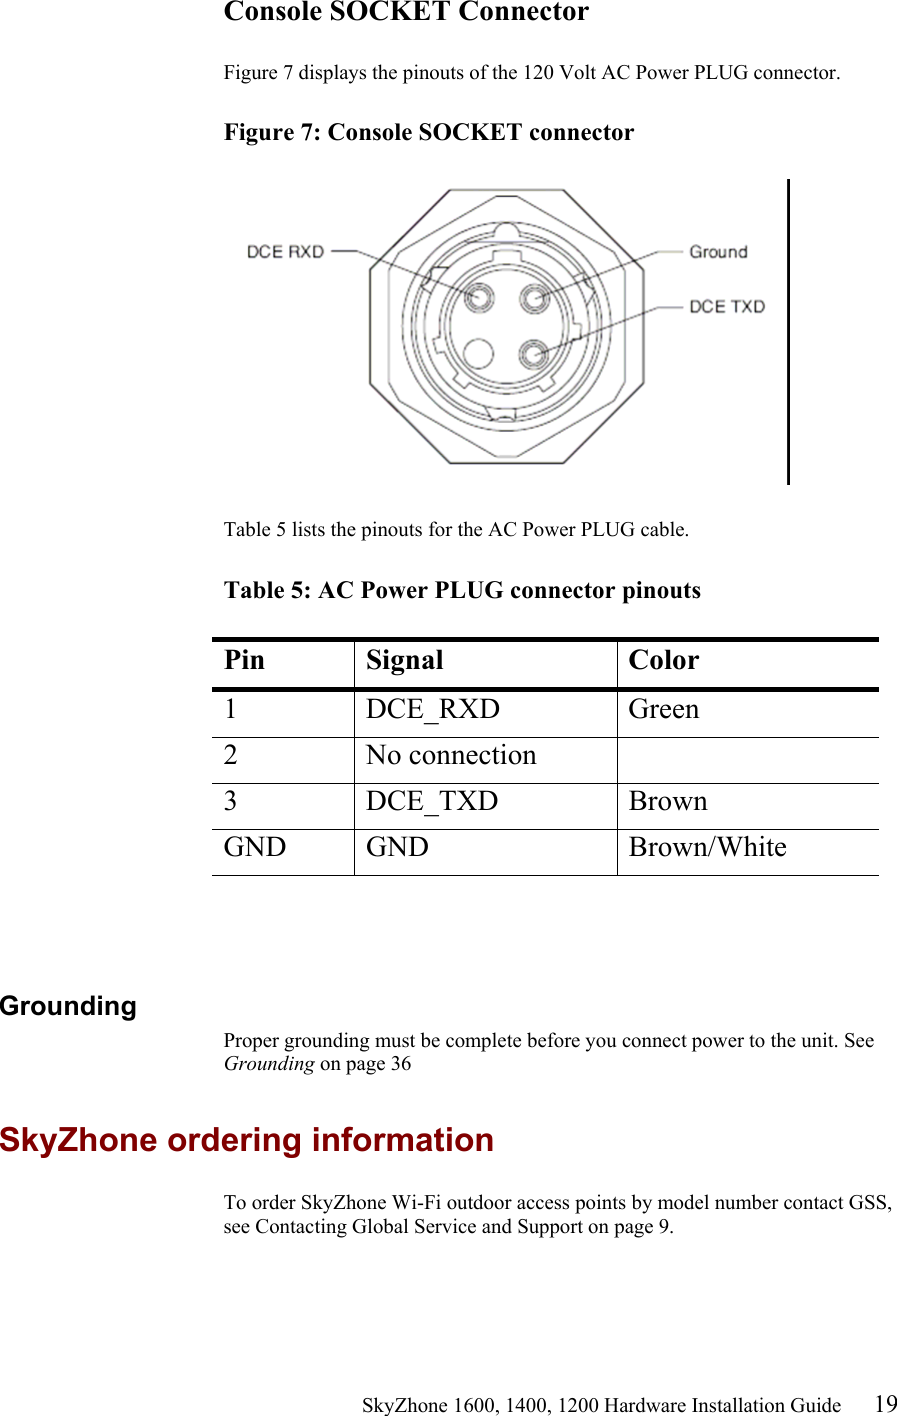
![8 SkyZhone 1600, 1400, 1200 Hardware Install Guide Typographical conventions The following typographical styles are used in this guide to represent specific types of information. Bold Used for names of buttons, dialog boxes, icons, menus, profiles when placed in body text, and property pages (or sheets). Also used for commands, options, parameters in body text, and user input in body text. Fixed Used in code examples for computer output, file names, path names, and the contents of online files or directories. Fixed Bold Used in code examples for text typed by users. Fixed Bold Italic Used in code examples for variable text typed by users. Italic Used for book titles, chapter titles, file path names, notes in body text requiring special attention, section titles, emphasized terms, and variables. PLAIN UPPER CASE Used for environment variables. Command Syntax Brackets [ ] indicate optional syntax. Vertical bar | indicates the OR symbol. Related documentation Refer to the following publication for additional information: SkyZhone CLI Reference Guide explains how to use the Zhone command line interface (CLI) and describes the system commands and parameters. SkyZhone WEB Configuration Tool User Guide explains how to configure and manage SkyZhone using the Web interface. Refer to the release notes for software installation information and for changes in features and functionality of the product, if any. Acronyms The following acronyms are related to Zhone products and may appear throughout this manual: Table 1: Acronyms and their descriptions Acronym Description ADSL Asymmetrical Digital Subscriber Line AP Access Point ACS Auto Configuration Server DHCP Dynamic Host Configuration Protocol DSL Digital Subscriber Line EFM Ethernet in the First Mile](https://usermanual.wiki/DASAN-Zhone-Solutions/SZ1424.USERS-MANUAL-1/User-Guide-890275-Page-8.png)