DAZA Electronics MID MID User Manual 223 english manuel
DAZA Electronics Company MID 223 english manuel
UserManual.wiki
>
DAZA Electronics
>
MID User Manual
Users Manual
Navigation menu
Upload a User Manual
Namespaces
Wiki Guide
HTML
PDF
Info
Views
User Manual
Discussion / Help
Navigation
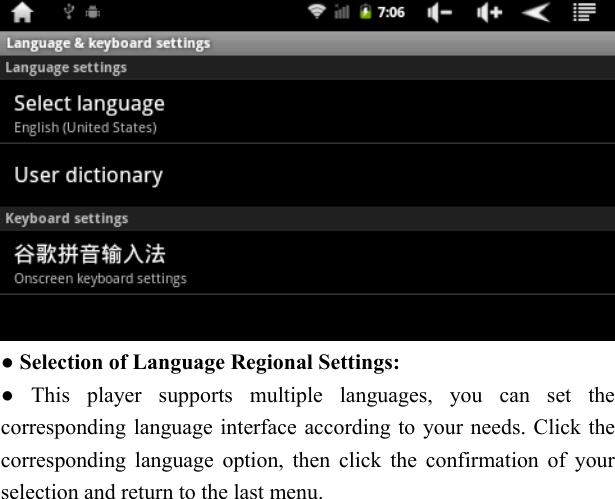
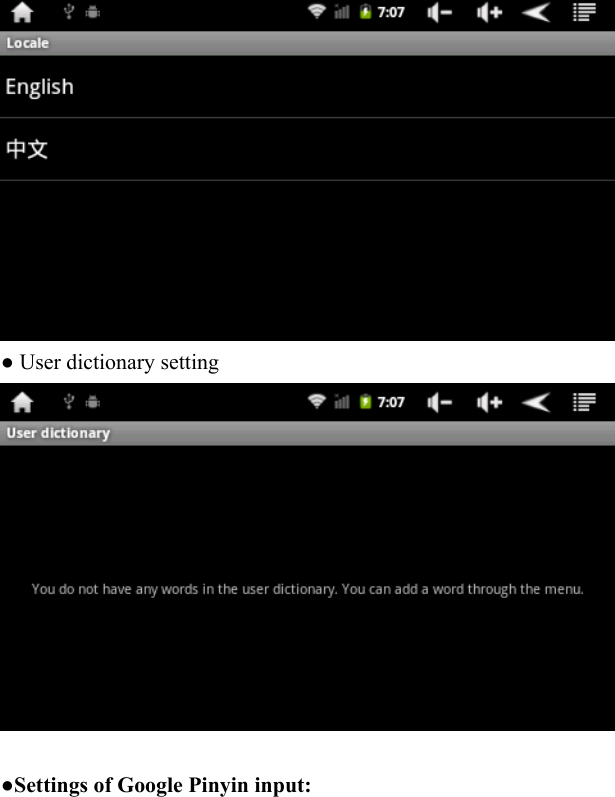
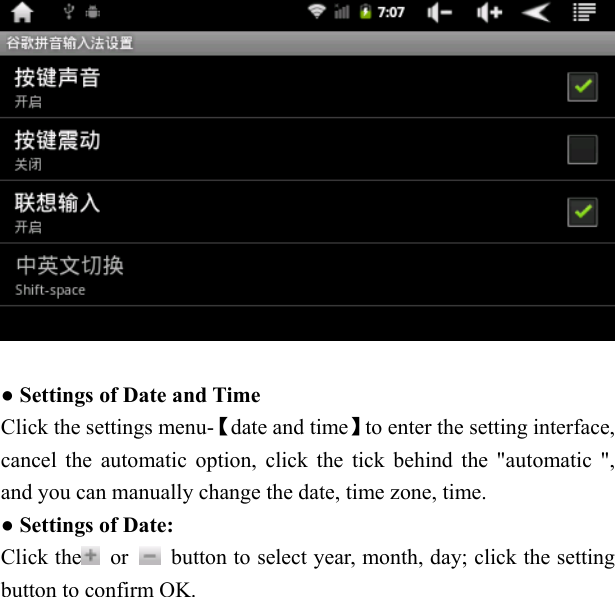
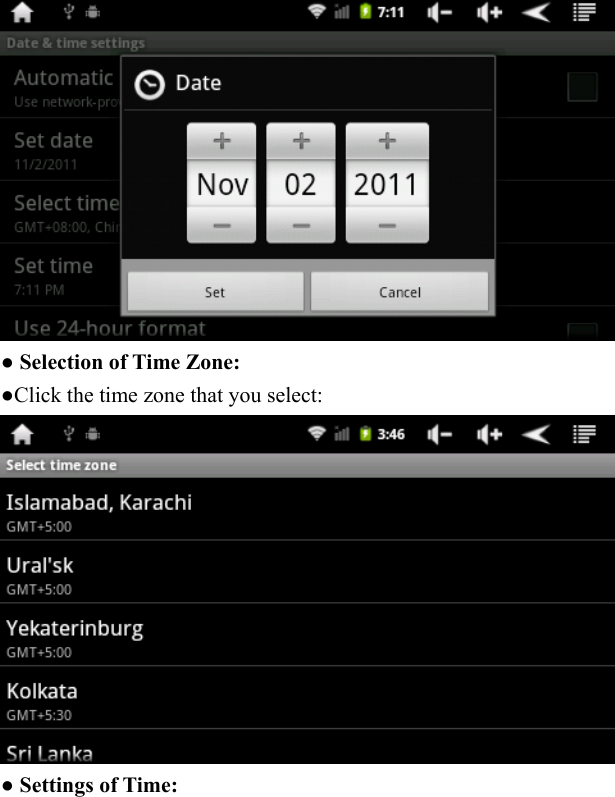
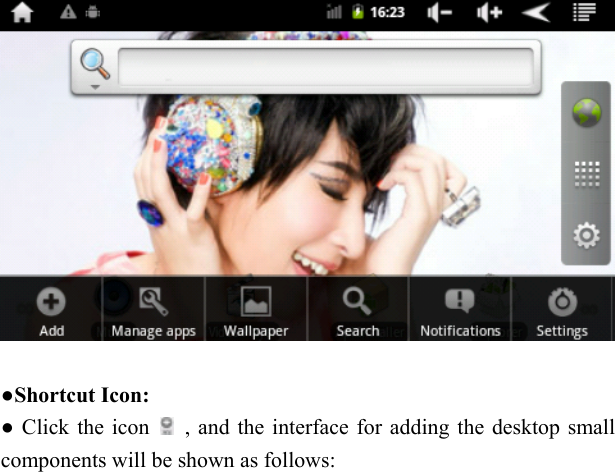
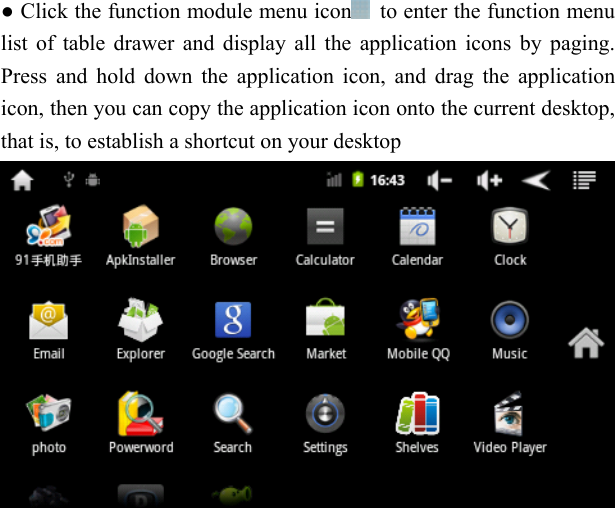
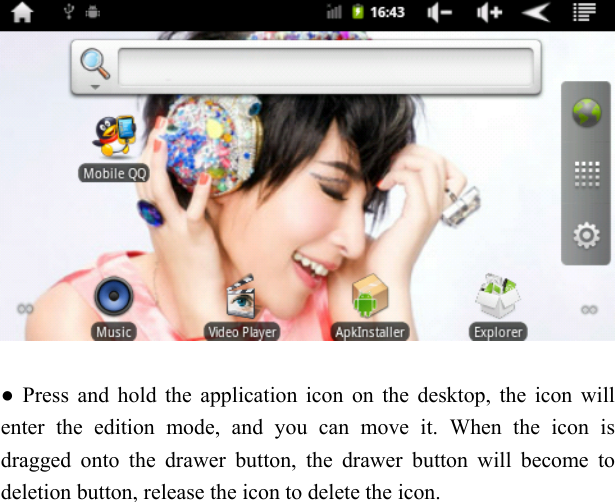
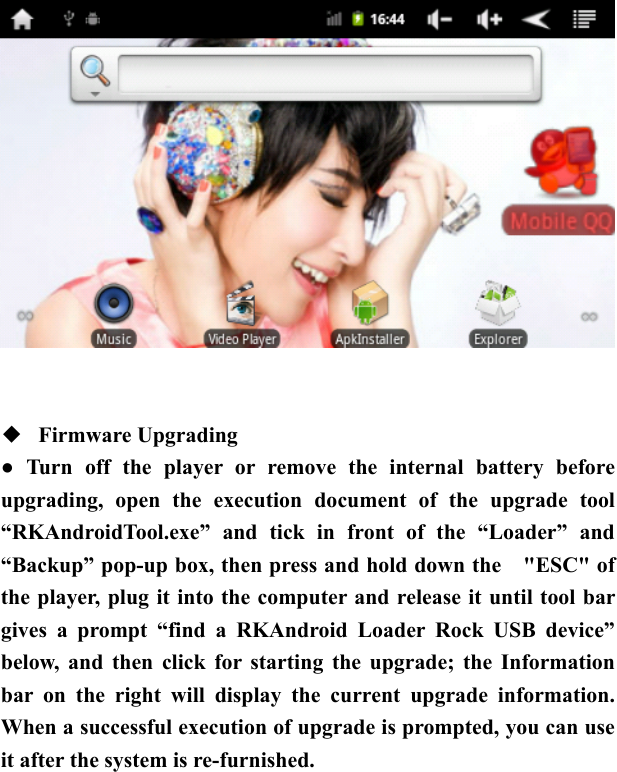
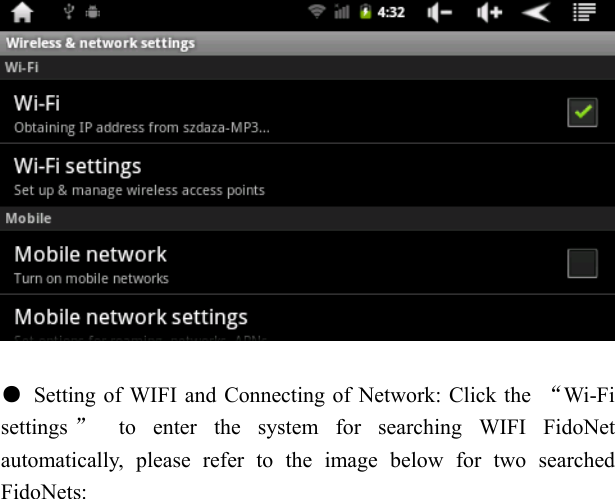
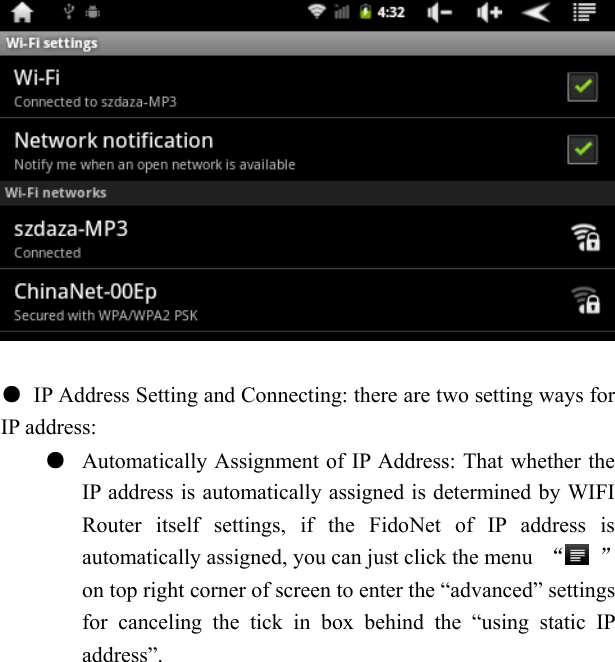
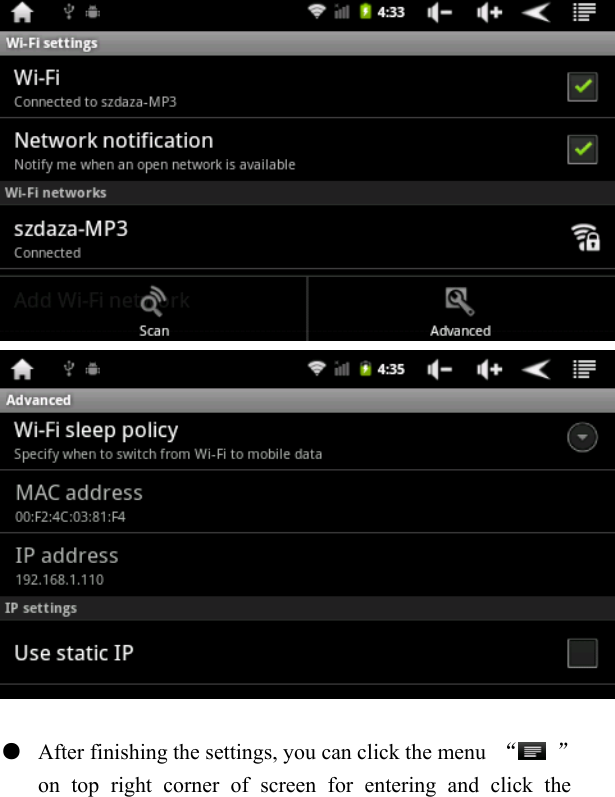
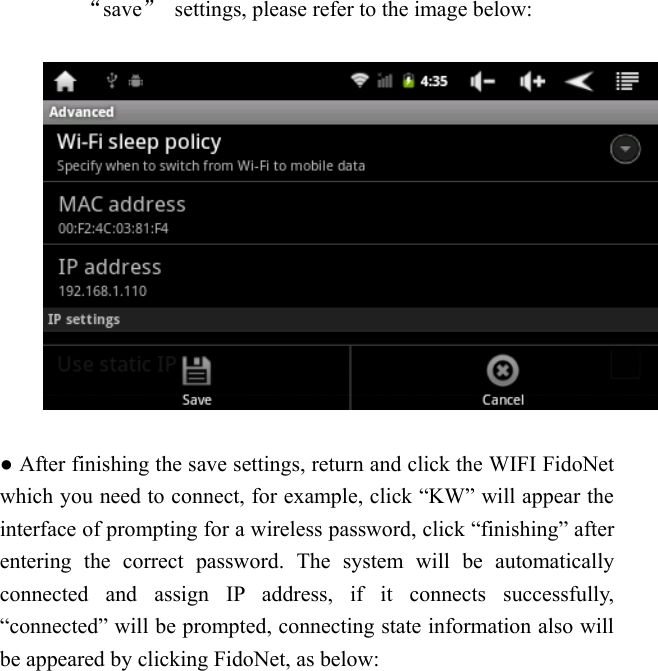
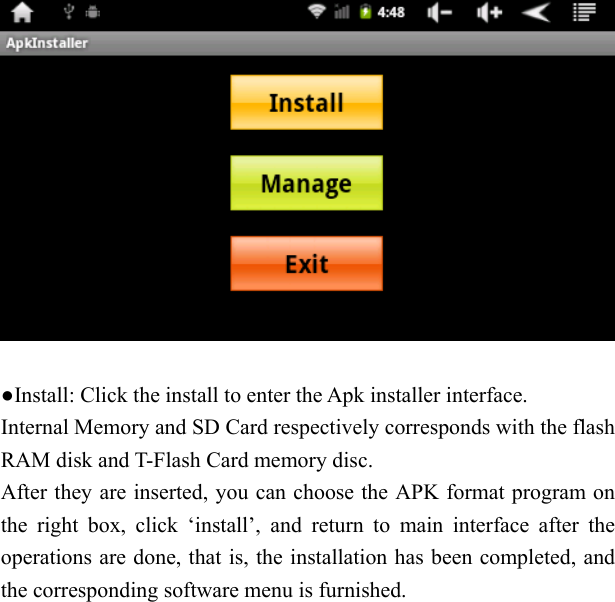
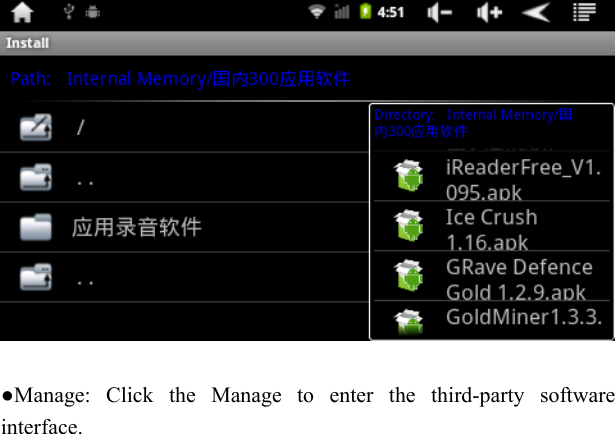
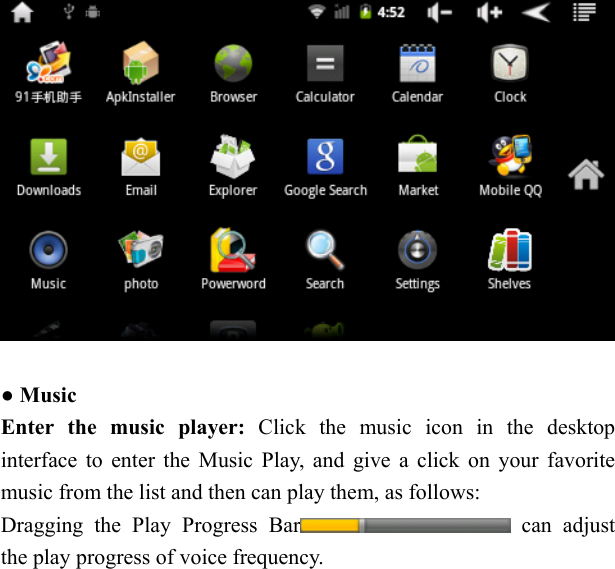
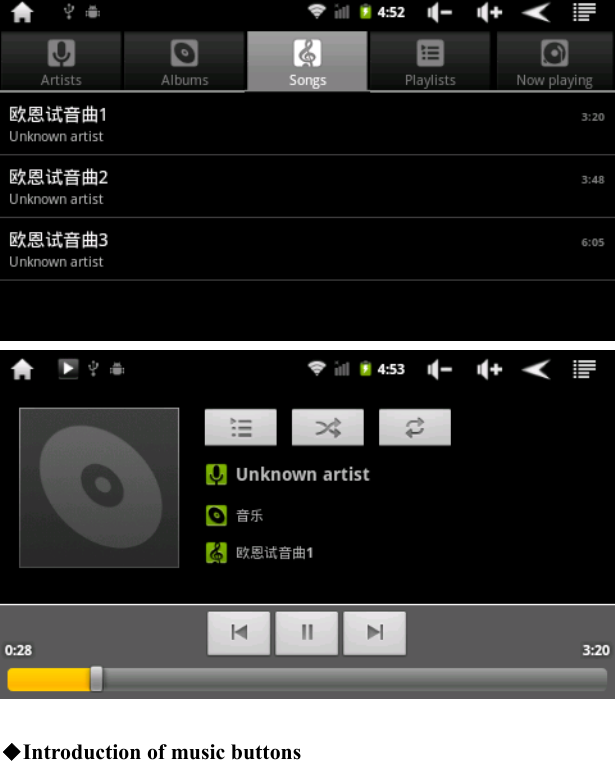
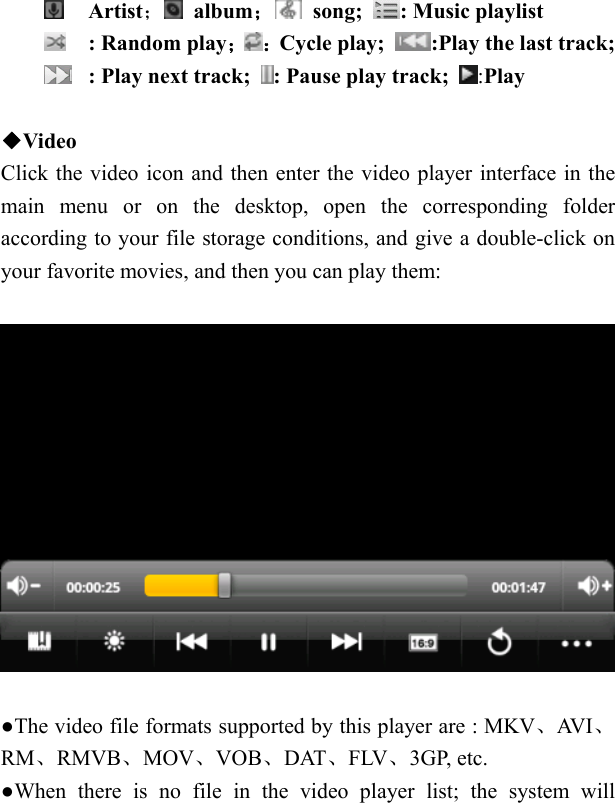
![● Turn off: When the player is turned on, press and hold the turn on-off key for three seconds, then the screen will show a closing confirmation interface, after choosing the closing option to confirm it, the system will turn off automatically. [Note] When the voltage of the battery is low, the player will continuously give alarms, the player will turn off automatically if it is not charged; if the player can’t be opened, please firstly check if the player battery works, and then try to open it under the premise of ensuring it has been charged with certain electric capacity. ● Battery management and charging A For the first use, you should charge the battery for 8 to 12 hours, and use it after ensuring that the battery is charged enough. B Insert the mini end of AC adapter into the DC socket of the player, and insert another end into the power socket. The battery icon on the desktop is shown by rolling as green strip, it means to that the player is in charging, please don’ t unplug the charger in a charging process until it is fully charged. After the battery is fully charged, the green stripe of battery icon on the desktop doesn’t roll. C. When you are charging the player that battery electricity is totally exhausted, please restart the player after waiting at least one minute. [Note] In order to keep the lithium battery in best performance, the](https://usermanual.wiki/DAZA-Electronics/MID/User-Guide-1593940-Page-7.png)

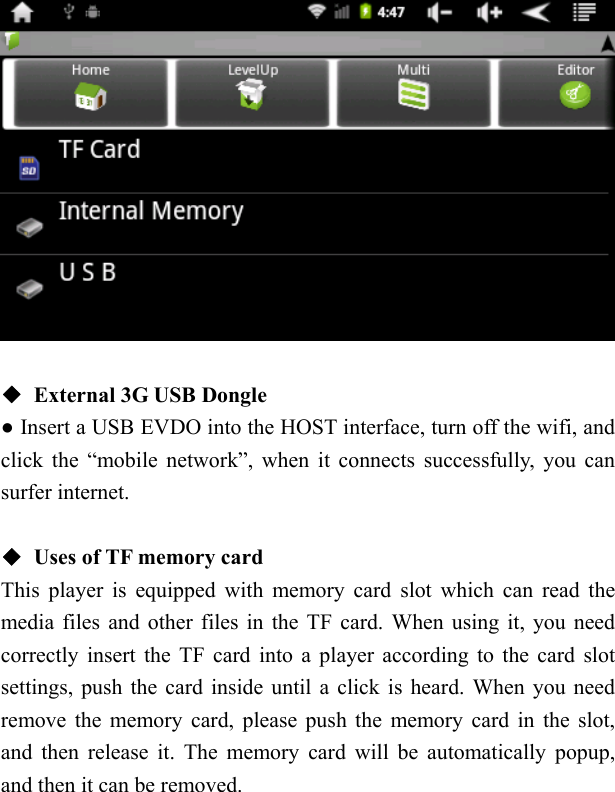

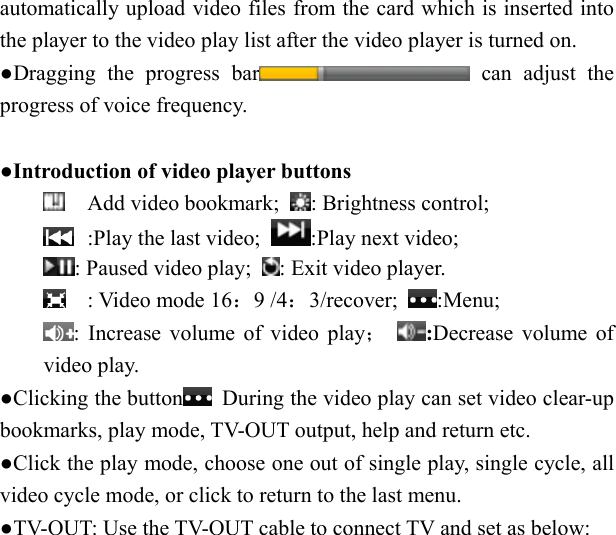
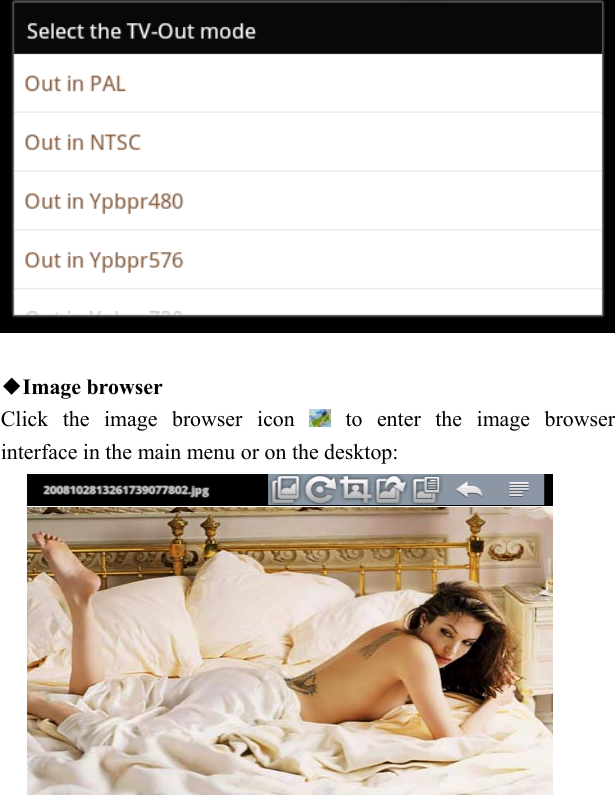
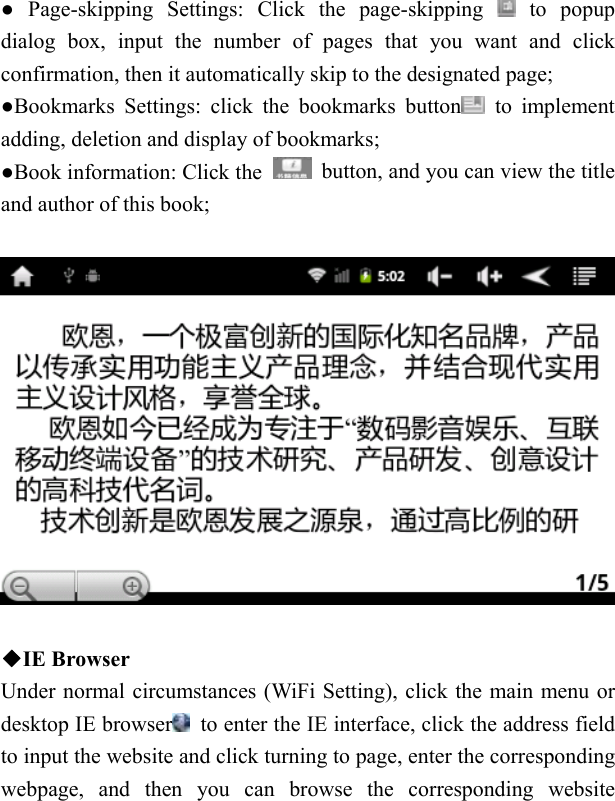
![●Introduction of image browser button :Picture rotating effect/Transparency effect/From left to right sliding effect; :Rotate right or left; :Printscreen :Set desktop background; :Review images detailed information; :Return . :Level sliding or vertical sliding ●Add images (this panel pc supports : BMP、JPG、JPEG、PNG、GIF). When there is no file in the image list, the system will automatically upload video files from the card which is inserted into the player to the video play list after the picture browser is turned on. According to your file storage conditions, you can open the corresponding folder, find the image files and proceed to add them. ●Click the image setting button to set the current imagine as the front view of desktop ◆Explorer ●In the main menu or on the desktop, click the source Explorer icon to enter the management interface, click the【TF Card】、【Internal Memory】 and [USB] to unfold drop-down folders and related documents, you can implement add, copy , paste, deletion and other operations. Press and hold a single folder or file to choose the “last”, “next” or “upper” and find the corresponding path, click the “edit” in the popup window to choose paste to the corresponding path.](https://usermanual.wiki/DAZA-Electronics/MID/User-Guide-1593940-Page-27.png)
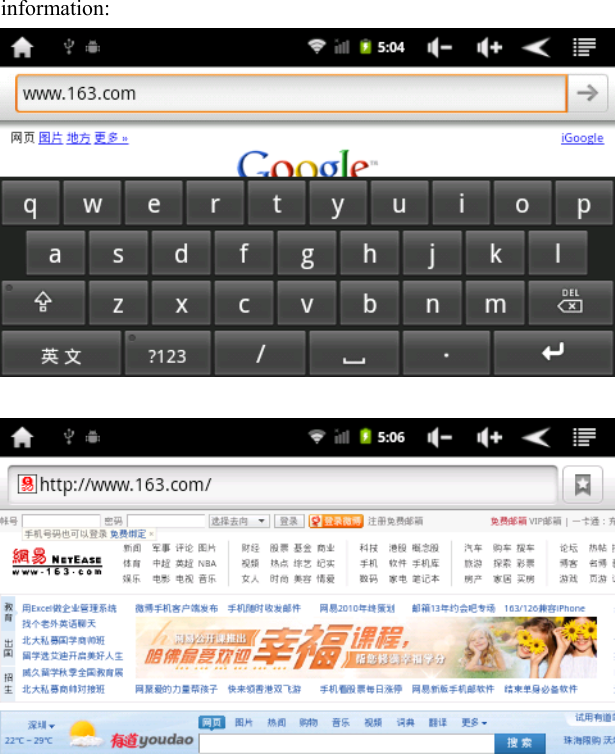
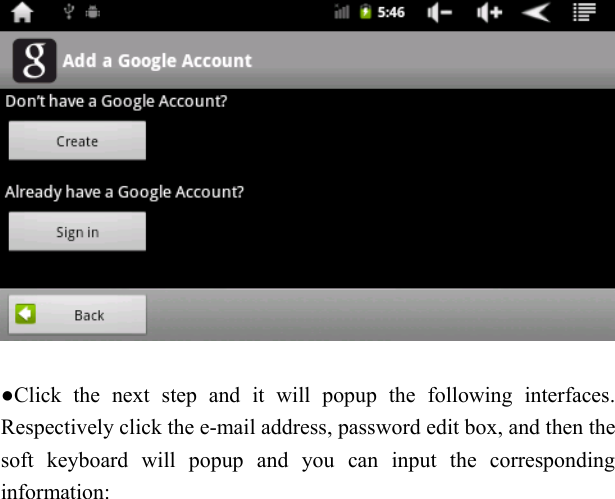
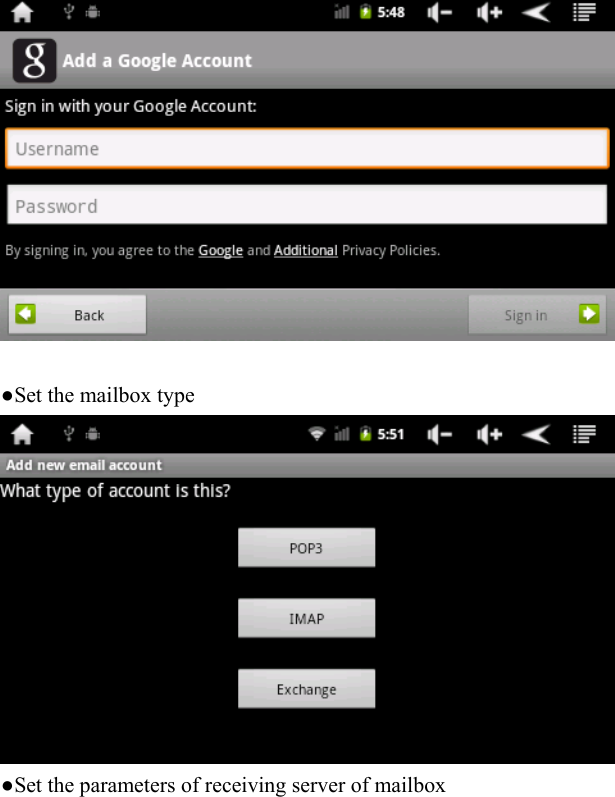
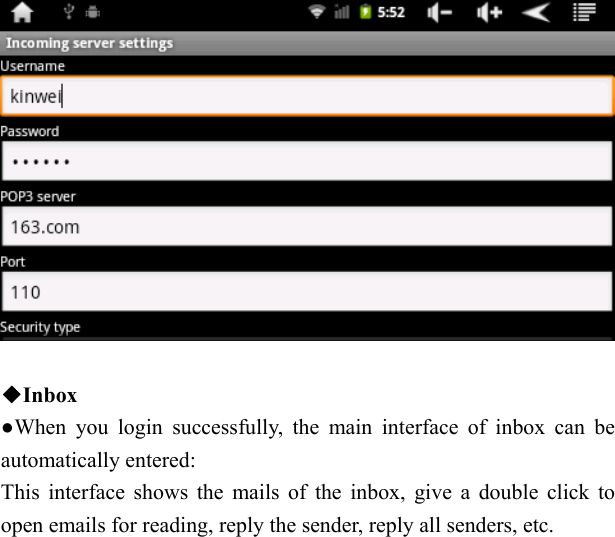
![[Note] Browser adopts the currently popular third-party IE browser software. Please follow the standard operations of IE browser. Press and hold “ " key to change input methods. ◆E-mail ●Click the main menu or Gmail icon on the desktop to enter the mailbox login interface under normal connections of WIFI (WIFI setting): ●If there is no Google mailbox account, click the to add a Google account.](https://usermanual.wiki/DAZA-Electronics/MID/User-Guide-1593940-Page-31.png)


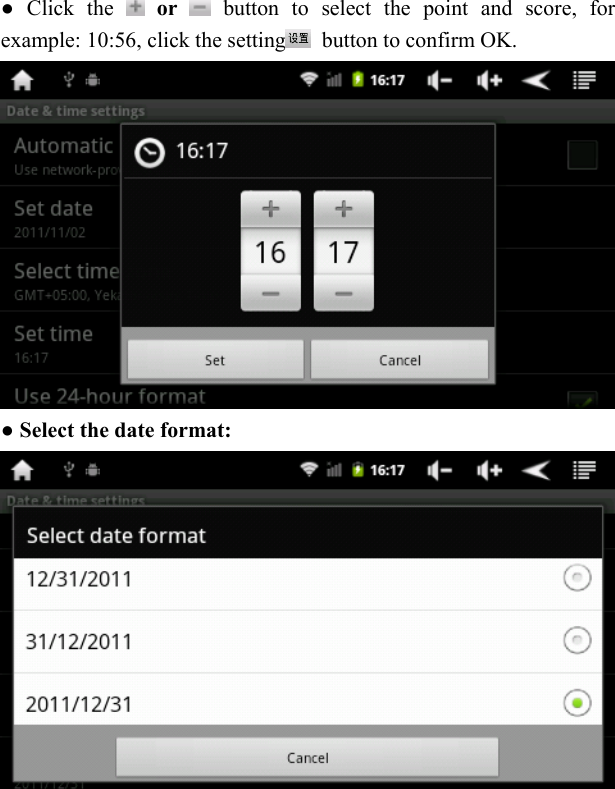
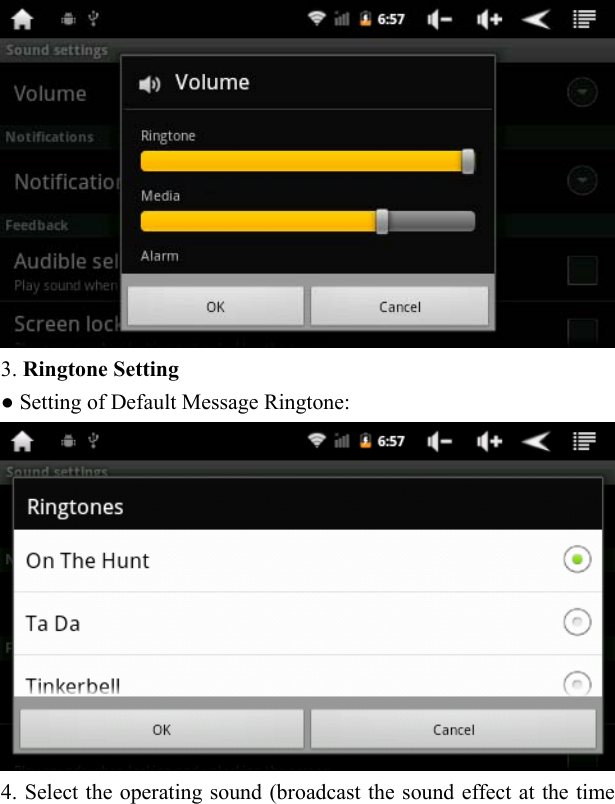
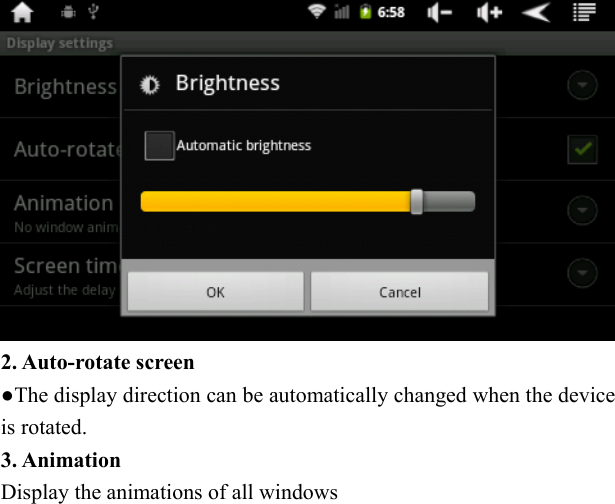
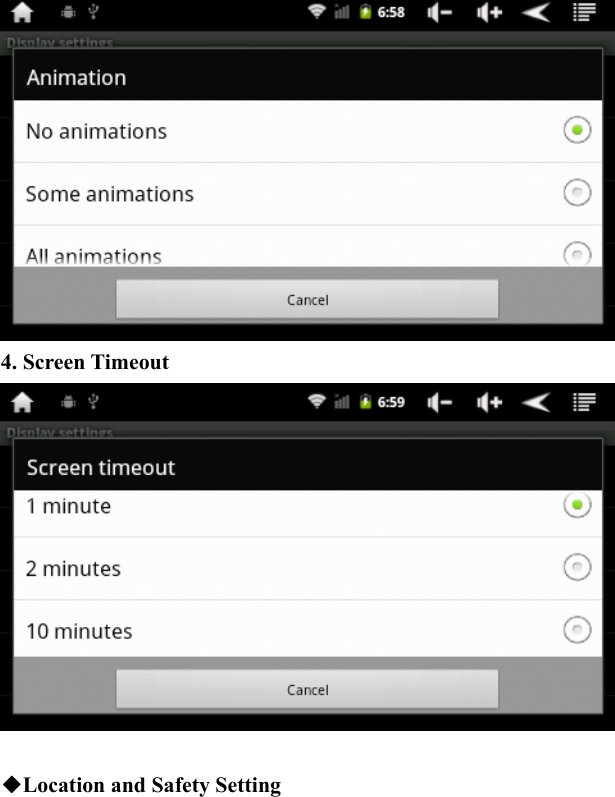
![● Sound and Display Settings ● Click the setting menu-[sound or display] to enter the setting interface: 1. Sound off Setting When choose the sound off mode, all the sound will be off except for alarm clock and media sound. 2. Volume setting In the setting interface, click the volume icon to set the volume of media, alarm clock and message.](https://usermanual.wiki/DAZA-Electronics/MID/User-Guide-1593940-Page-43.png)
![●Click the setting menu [location & safety] to enter the setting interface. ●Click the “set up screen lock” icon to set screen lock, including “None, PIN, Pattern and Password”. Note: Draw the unlock pattern, connect at least four points given, and click the next step, then it is completed. ◆ Application Procedure Setting ● Click the [application procedure] in the setting menu to enter the setting interface:](https://usermanual.wiki/DAZA-Electronics/MID/User-Guide-1593940-Page-48.png)
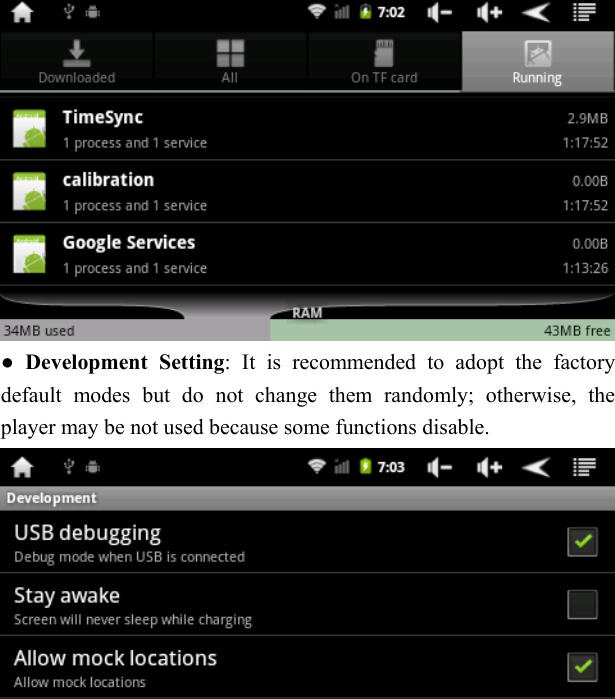
![Setting of management application procedure: ● Click the [Management application procedure] to manage and delete the application procedure. ●Setting of ongoing services: ● Click the [Setting of ongoing services] to review and control the ongoing services:](https://usermanual.wiki/DAZA-Electronics/MID/User-Guide-1593940-Page-49.png)