DDM BONITOYZ500 GSM Mobile Phone User Manual
DDM Brands LLC GSM Mobile Phone
UserManual.wiki
>
DDM
>
BONITOYZ500 User Manual
User Manual
Navigation menu
Upload a User Manual
Namespaces
Wiki Guide
HTML
PDF
Info
Views
User Manual
Discussion / Help
Navigation


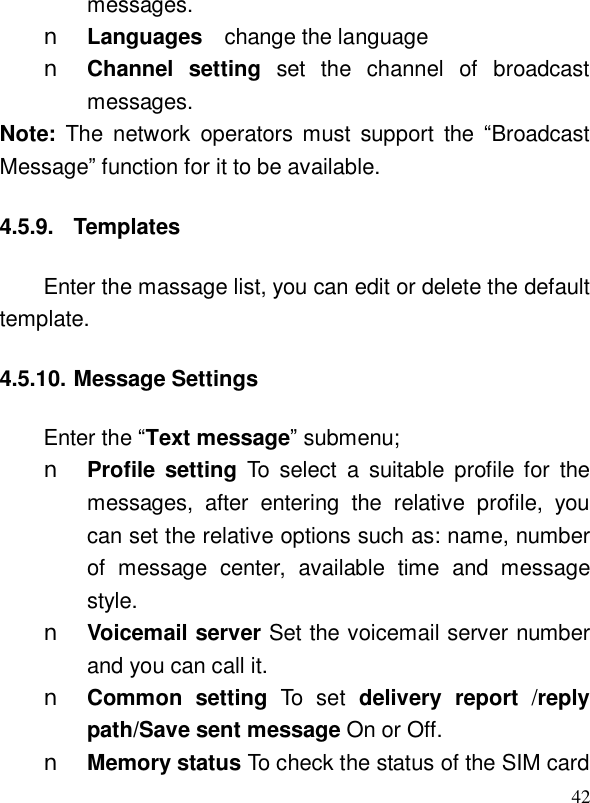
![44You can choose 5s, 10s, 30s or always. Tip: To make the TV full screen, please press “4“. 4.6.1 Camera This mobile phone is equipped with a high resolution camera which you can use to take pictures at anytime or anyplace and then save them on your mobile phone. During the view-finding mode, press the “Option”, to carry out the following operations: n Photos To display the file list. n Camera Settings To adjust Flash, Shutter Sound, EV, Contrast, Anti-flicker, Delay Timer, Cont. shot settings. Select [OK] to activate the settings. n Image settings Including Photo size and photo quality adjustment. n White balance To set the balance of light. n Scene Mode To set the profile as auto or night mode. n Effect Settings To set special shot effect. n Storage Two places to storage: Memory card and phone. n Restore default To restore default setting.](https://usermanual.wiki/DDM/BONITOYZ500/User-Guide-1608482-Page-45.png)
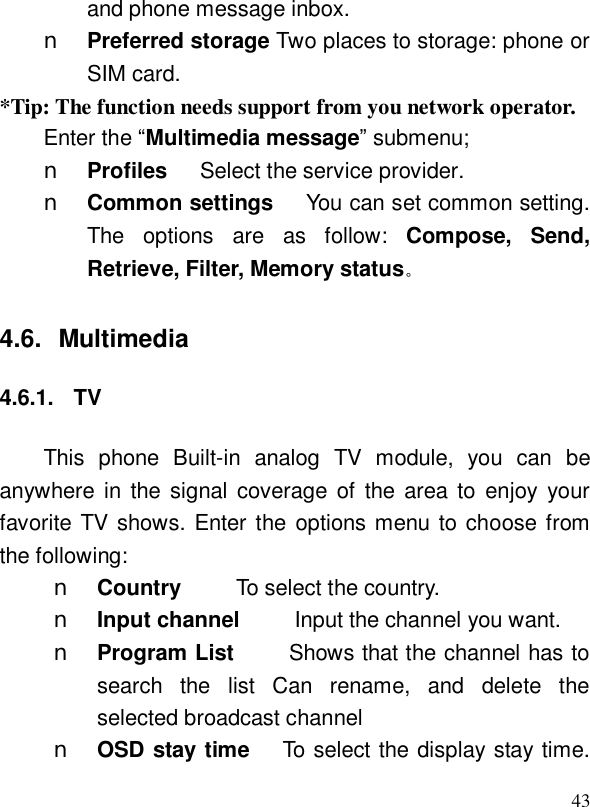
![454.6.2 Image Viewer Enter the “Image viewer” submenu. 4.6.3 Video recorder During the view-finding mode, adjust the lens to allow what is being photographed to appear in the viewfinder. Press the red button to activate the video recorder. Press the “Options”, you can perform the following operations: n Camcorder Settings To set some spec of the video recorder. n Video settings Includes Video quality adjustment. n White balance to set the balance of light. n Effect setting To set special shot effect. n Storage Phone memory or T-flash card memory. n Restore Default Press [OK] and select Yes to return to default settings. Tip: In the video finding interface, press the relative number key, you can adjust the relative spec of the video effect.](https://usermanual.wiki/DDM/BONITOYZ500/User-Guide-1608482-Page-46.png)
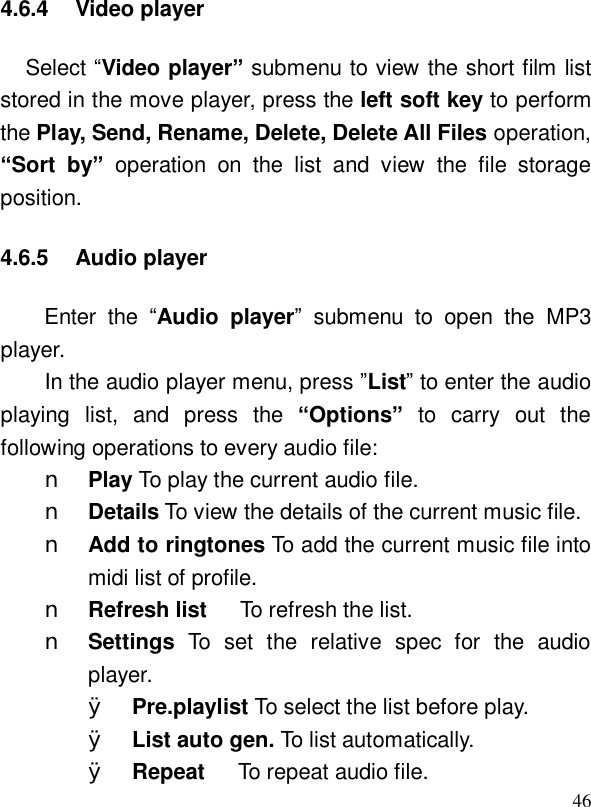
![54! Note: Password [1122] n Auto Keypad Lock To prevent unwanted key press, you can use this function to lock the keypad. If you do not carry out any operation in the pre- set time, the keypad will be locked automatically. n Change Password To reset the code including the PIN, PIN2 and the handset code. Note: Some function needs the support from your network operator. 4.8.6 Connectivity Bluetooth, WLAN, Conn. Madanement and Data account are included. Bluetooth In the Bluetooth submenu, the following options for you to carry out the relative setting of the Bluetooth service: n Power Press the left soft key to on/off the Bluetooth function. n Visibility Press the left soft key to on/off this function. n My device Press the left soft key “OK” to enter the “my device” submenu, the display will show the apparatus which have been connected with the handset. Select one apparatus and press the left soft key](https://usermanual.wiki/DDM/BONITOYZ500/User-Guide-1608482-Page-55.png)