DDM Z1 GSM MOBILE PHONE User Manual
DDM Brands LLC GSM MOBILE PHONE
UserManual.wiki
>
DDM
>
Z1 User Manual
User Manual
Navigation menu
Upload a User Manual
Namespaces
Wiki Guide
HTML
PDF
Info
Views
User Manual
Discussion / Help
Navigation
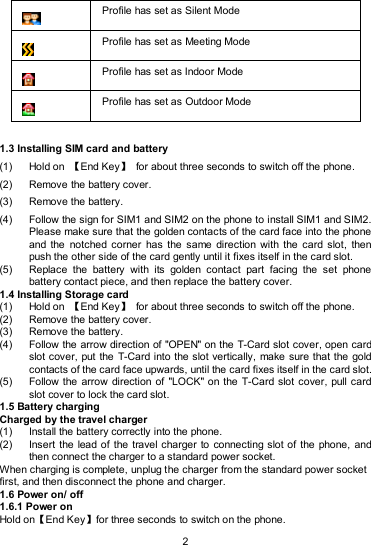
![4 SIM1: The input record will be saved to SIM1, with each name one phone number. SIM2: The input record will be saved to SIM2, with each name one phone number. 4. Call history Enter the main menu, and then select [Call history] to enter the call list. 4.1 Dialed calls Display recent calls dialed. 4.2 Received calls Display recent calls received. 4.3 Missed calls Display recent calls unpicked up. 4.4 Rejected calls Display recent calls rejected. 4.5 Delete all Delete all the call entries. 4.6 Call timers Select the desired SIM Card, and then you can view all relevant information about the SIM Card. 4.7 Call cost (need the network support) Total cost: Record total call charges for SIM1 and SIM2. Max cost: You can set the desired upper limit for call costs. Price per unit: Record the cost rate for SIM1 and SIM2. Reset cost: Reset the total call charges as zero. 4.8 GPRS counter You can view the detail about GPRS flowrate. 5. Message 5.1 Write message 5.1.1 New SMS On the Home Screen, press【Left Soft Key 】and select [Message →Write message→New SMS] to edit a new SMS directly. After writing an SMS, click <Send> to send the message. 5.1.2 New MMS On the Home Screen, press【Left Soft Key 】and select [Message →Write message→New MMS] to create a new MMS. 5.2 Inbox Store all received SMS and MMS. 5.3 Outbox Store all SMS and MMS failed to be sent. 5.4 Drafts Save edited SMS and MMS haven’t sent.](https://usermanual.wiki/DDM/Z1/User-Guide-1890586-Page-6.png)
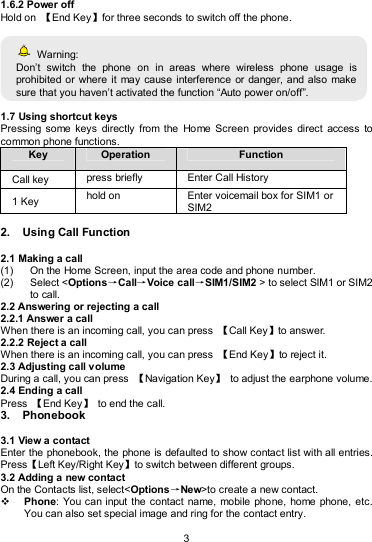
![5 5.5 Sentbox Store all the SMS and MMS successfully sent out. If you want the sent messages be saved automatically, please select [Message→Options], then select [Settings→SMS→Save sent messages→Save]. 5.6 Message setting On the Home Screen, press【Left Soft Key】to enter the main menu, then select [Message→Options] to enter the message setting menu. 5.6.1 Templates While editing messages, you can directly cite the preset common phrases. Select <Edit> to set the common phrases by yourselves. 5.6.2 Voice mail server This function works like an answering machine, which can transfer a missed call to your personal voice mail, allowing the caller to leave a voice message and notify you by an SMS. Voice Mail is a part of the bundled software provided by network operator, therefore, you need to register to active this function, and manually set the phone. Please contact with your network operator for more details. Caution: It’s workable to transfer the voice call into the voice mail (The number the call will leave a message) by setting “Divert calls”. 5.6.3 Broadcast message You can receive broadcast text messages with various contents via network service, such as news, weather or traffic information. For more details, please consult your network operator. 5.6.4 Settings SMS SIM1 msg center: While sending messages, you must set the service center number provided by network operator. Most SIM cards defaulted contain the service center number. You can also gain this number directly from the network operator. If you modify or delete the service center number, an SMS might not be sent successfully. SIM2 msg center: Please refer to [SIM1 msg center]. Message validity period: Allows you to set the length of time during which your SMS will be stored in the message center. The validity period depends on the network operator. Status report: Select [On], then the text message center will inform you when you successfully sent a message. Save sent messages: You can select whether to save the sent message or not. Preferred storage: You can select to save the SMS to the SIM card or the phone first.](https://usermanual.wiki/DDM/Z1/User-Guide-1890586-Page-7.png)
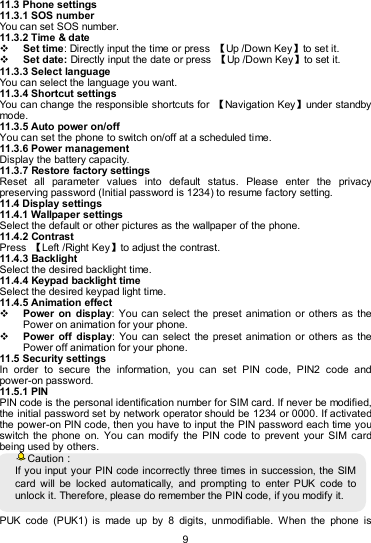
![6 MMS Broadcast message 5.6.5 Message capacity You can view memory capacity status for SMS and MMS via this function. 6. Fun&Games 6.1 MSN 6.2 Facebook 6.3 Yahoo 6.4 Twitter 6.5 Sokoban Push all the boxes to the destination , then you can go to the next game level, press 【Navigation Key】 to move the snail. 7. Profiles 7.1 Normal Activate: Activate the chosen profile. Customize: Set the options as required. Rename: Modify the name of the selected profile. 7.2 Silent For the settings, please refer to”Normal”. 7.3 Meeting For the settings, please refer to”Normal”. 7.4 Indoor For the settings, please refer to”Normal”. 7.5 Outdoor For the settings, please refer to”Normal”. 8. Multimedia 8.1 Camera Enter the main menu, and select [Multimedia→Camera] to enter the camera preview screen, press 【OK Key】to take a photo. 8.2 Audio player On Home Screen, press 【Left Soft Key】 to enter the main menu, and select [Multimedia→Audio player] to enter the Audio Player screen. Press【OK Key】to play or pause Press【Left/Right Key】to skip to last /next one Press 【Up/Down Key 】to adjust the volume 8.2.1 Background audio player While playing a song, press 【End Key】to quit the Playing screen to enter the background playing mode. 8.3 Video player Enter the Main menu, and select [Multimedia→Video player]. Press【OK Key】to play or pause Press【Left/Right Key】to skip to last /next one Press 【Up/Down Key】to adjust the volume](https://usermanual.wiki/DDM/Z1/User-Guide-1890586-Page-8.png)
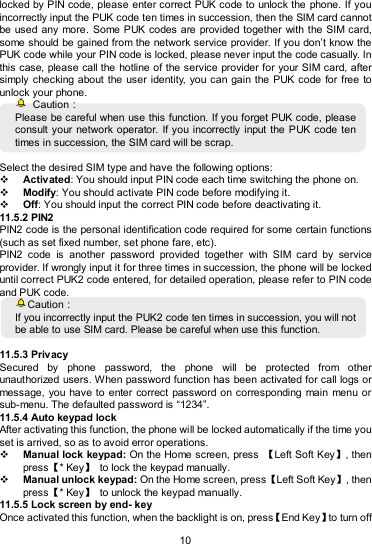
![7 8.4 Image browser The function provides a prompt access to view the photos and pictures. 8.5 Recorder On Home Screen, press 【Left Soft Key】to enter the main menu, select [Multimedia→Recorder], and choose <Options→Start recording > to start recording. Select <Pause> to have the recording pause for a while, select <Stop> to cease recording. After ceasing the recording, the recorded file will be automatically save in the folder [Audio], select <Options→Record file list> to check. 8.6 FM radio On standby mode, enter the Main menu, then select [[Multimedia→FM radio]. Press【Down Key】to activate or deactivate the radio Press【Left/Right Key】to adjust the frequency Press【*/# Key】to adjust the volume 9. Organizer 9.1 Alarm On the Home Screen, press【Left Soft Key】 to enter the main menu, and select [Tools→Alarm], then you can set the alarm name, time, ring and mode. 9.2 eBook You can view file in TXT format by Ebook and copy the TXT file to the [Ebook] folder in the memory card from your PC. On the Home Screen, press【Left Soft Key】to enter the main menu and select [Tools→eBook] to enter the Ebook screen you read last time. Select <Back> to enter the Ebook list and reselect the desired file to read. 9.3 Calendar Enter the main menu, and select [Tools→Calendar] to enter the Calendar screen. 9.4 Calculator Directly input numbers, press【Navigation Key】 to select your desired operation symbols (+, -, /, X). Press 【OK Key】 to get the answer. 9.5 World clock This function allows you to check the standard time in different areas of the world. 10. File manager This menu allows you to manage files stored in the phone or storage card. 11. Settings 11.1 Dual-SIM Standby mode: You can select the standby mode for SIM card, either to have one SIM card standby, or to have both SIM cards standby simultaneously. Reply by original SIM: You can activate the function to reply from current SIM card for call, SMS and MMS. Set SIM name: You can name the Card as you want. 11.2 Call settings 11.2.1 Network selection Auto select: The phone can automatically search and register available networks.](https://usermanual.wiki/DDM/Z1/User-Guide-1890586-Page-9.png)
![8 Manual select: Enable this function, the phone will search for the network, and list all searched networks, then you need to choose the one needed to register. 11.2.2 Call divert Based the set diverting conditions, incoming calls will be forwarded into voice mail or other numbers. 11.2.3 Call barred This function helps you to restrict the incoming and outgoing calls. Select the desired call and press <OK>, then you can select [Activated], [Off] or [Query status]. Select [Activated], the phone will need network support current setting. Caution: 1. Some network operators forbid the function. For more details, please contact your network service provider. 2. The network operator will provide you the initial network password while you apply for this service. 11.2.4 Call waiting (Need network support) Activated: If you set the function on, the network will alert you that there is an incoming call. You can keep current call and answer another one. Off: Cancel call waiting function, then the new incoming calls won’t be answered while you’re on the phone already. Query status: Select it to view current status of this function. 11.2.5 Hide ID (Need network support) Hide ID: While calling, the recipient won’t see your phone number. Display own ID: While calling, your phone number will be visible for the recipient. Display ID by network: While calling, whether your phone number will be visible or not for the receiver depends on the network presetting. 11.2.6 Select line You can choose Line 1 or Line 2 as you need. 11.2.7 Flight mode Activate: Activate flight mode, then all network service won’t be available. Select when power on: You can select whether to activate flight mode when power on. 11.2.8 Others 50 secs warning If you activate the function, an elapsed time reminder will be heard at the 50th second of every minute during your call, so that you may end the call timely to save the phone fare. Vibration when connected The phone will vibrate to prompt you when the recipient answers your phone. Answer/Reject mode Reply SMS after reject: You can select whether to reply an SMS after rejecting a call. Auto redial If you set this function on, the phone will redial the number after an unsuccessful call,](https://usermanual.wiki/DDM/Z1/User-Guide-1890586-Page-10.png)
![11 the backlight and auto lock the keypad. 11.5.6 Power-on password You should set the power on password when you use this function for the first time. After activated this function, you should input password each time you switch the phone on. Caution: Power-on password doesn’t have the limitation for wrongly inputting. Please remember carefully about the Power on PWD, otherwise, the phone won’t be switched on normally once password forgotten. 11.6 Connection management 11.6.1 Network account You can select the desired network account, and add the desired account by yourself as well. 12. Services On the Home screen, press【Left Soft Key】and select [Services]. SIM1: By selecting this option, your mobile phone will directly visit the preset or defaulted homepage. SIM2: By selecting this option, your mobile phone will directly visit the preset or defaulted homepage. Caution: 1.Your network service provider may not support some functions. In order to ensure the browser work normally, please confirm first that your SIM card supports and have the Internet function activated. 2. If you browse the web page, flowrate fee will be charged. 13. Safety Precaution 13.1 Usage environment Please remember to obey relevant rules and regulations whenever use your phone. This will prevent bad effect from you and the environment. Switch off your phone near explosive places, such as gas station, bunkers, chemical factories or blasting scene, and adhere to any safety signs and instructions there. Breaking any rules may cause explosion or injury. Phone using in plane will interfere with the flight operation and bring dangers. Therefore, please do switch off your phone before boarding, and make sure it is power off during the whole flight. Please keep the phone in its special bracket while you’re driving. Please don’t put it on a seat or in places where it could fall off when the car encounters collision or break. In order to ensure safe driving and avoid road accidents, please don’t use the phone when driving. If you must use it,](https://usermanual.wiki/DDM/Z1/User-Guide-1890586-Page-13.png)