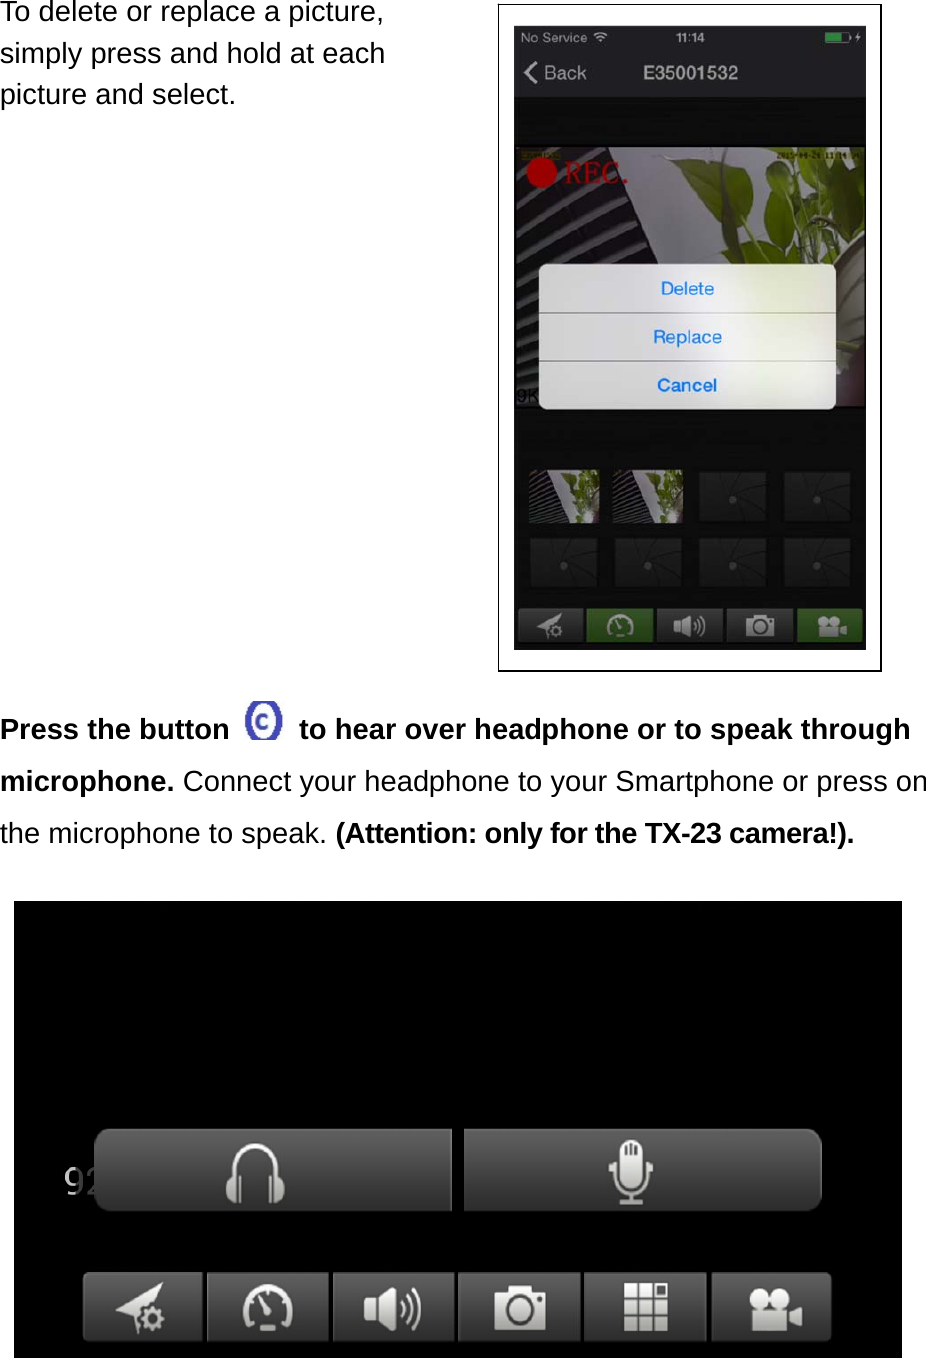
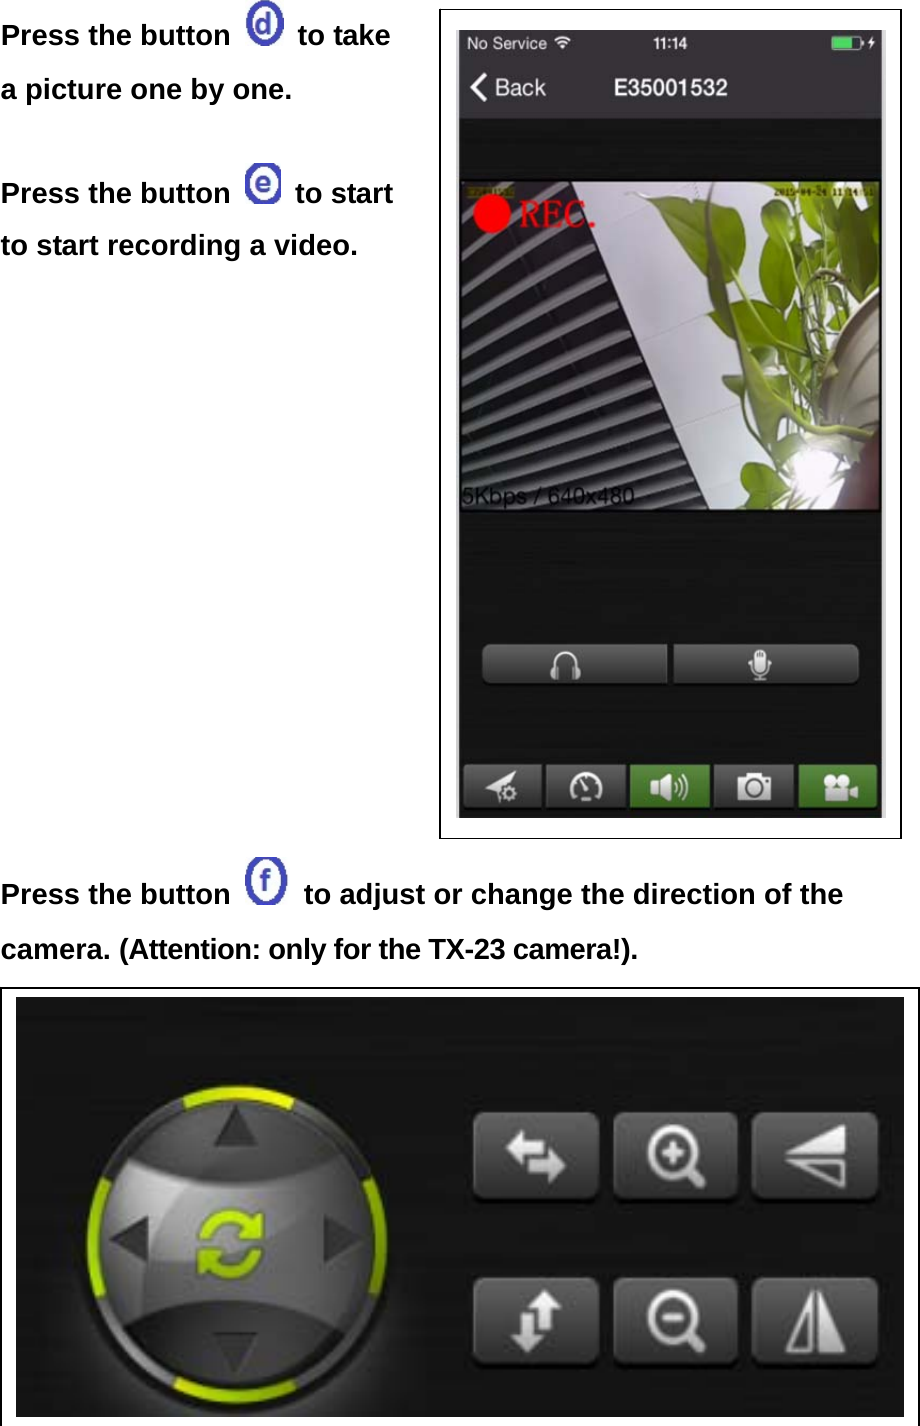
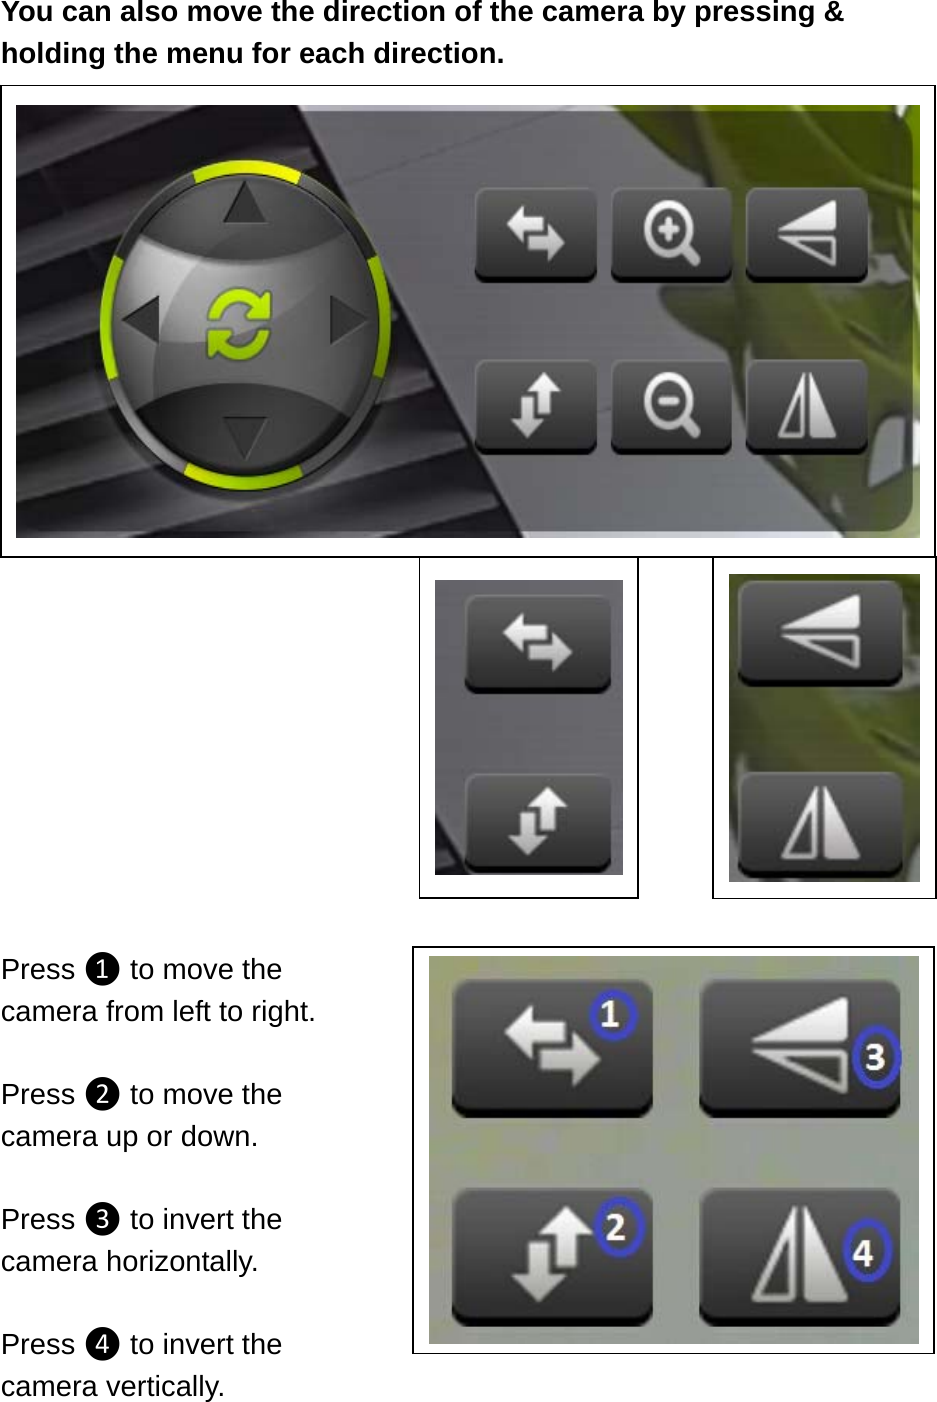
DIT SECURITY and SURVEILLANCE TECHNOLOGY DITN8152 IP CAMERA User Manual N8152HH TX 24 Manual English
SHENZHEN DIT SECURITY&SURVEILLANCE; TECHNOLOGY CO.,LTD IP CAMERA N8152HH TX 24 Manual English
UserManual.wiki
>
DIT SECURITY and SURVEILLANCE TECHNOLOGY
>
DITN8152 User Manual
User Manual
Navigation menu
Upload a User Manual
Namespaces
Wiki Guide
HTML
PDF
Info
Views
User Manual
Discussion / Help
Navigation
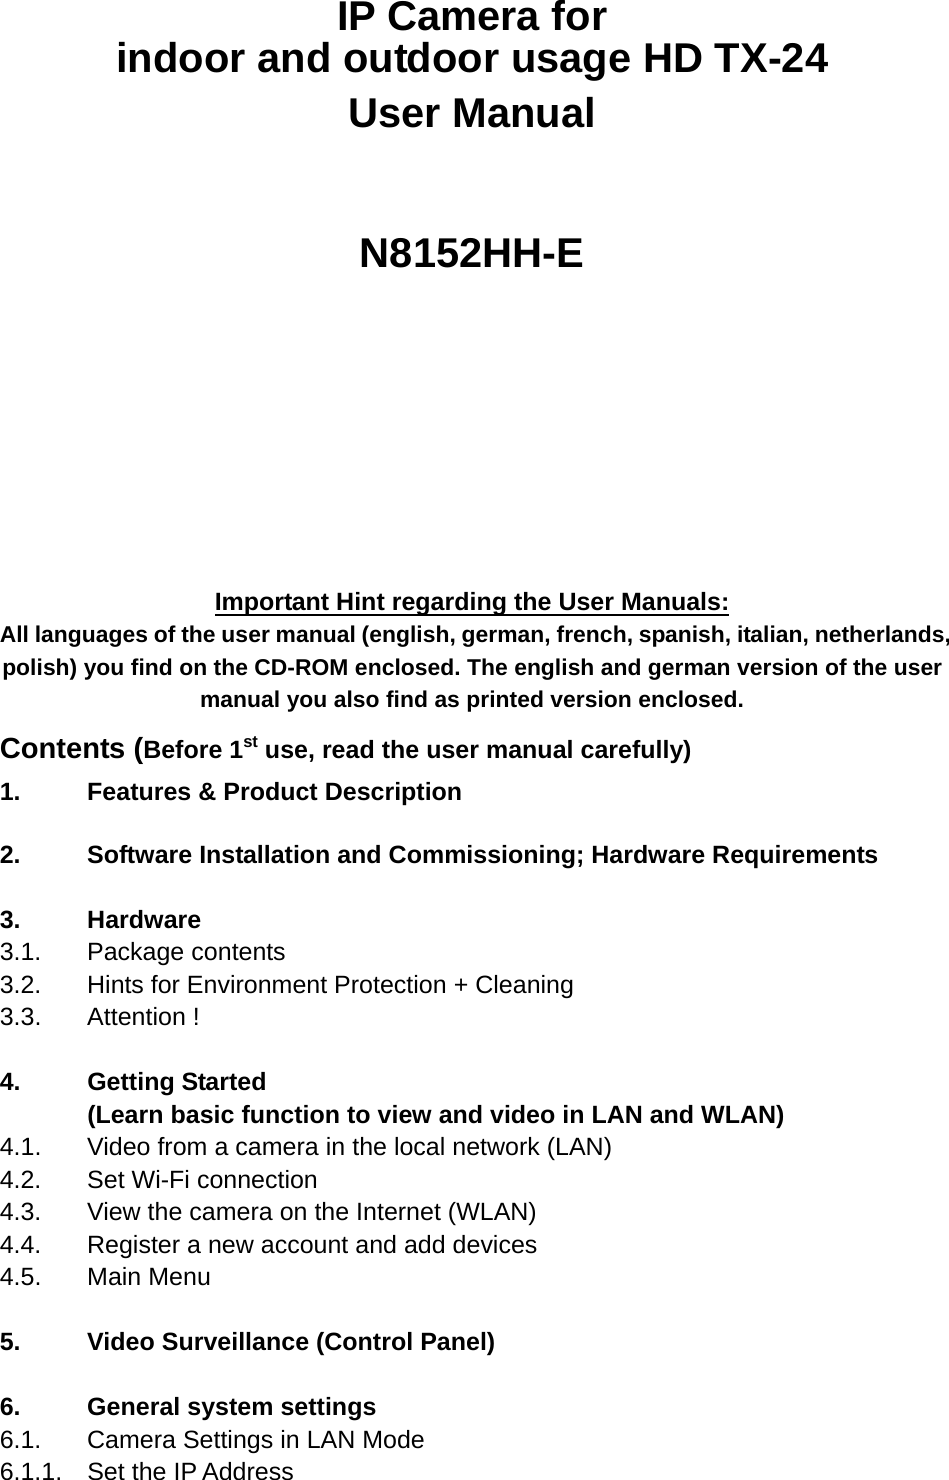

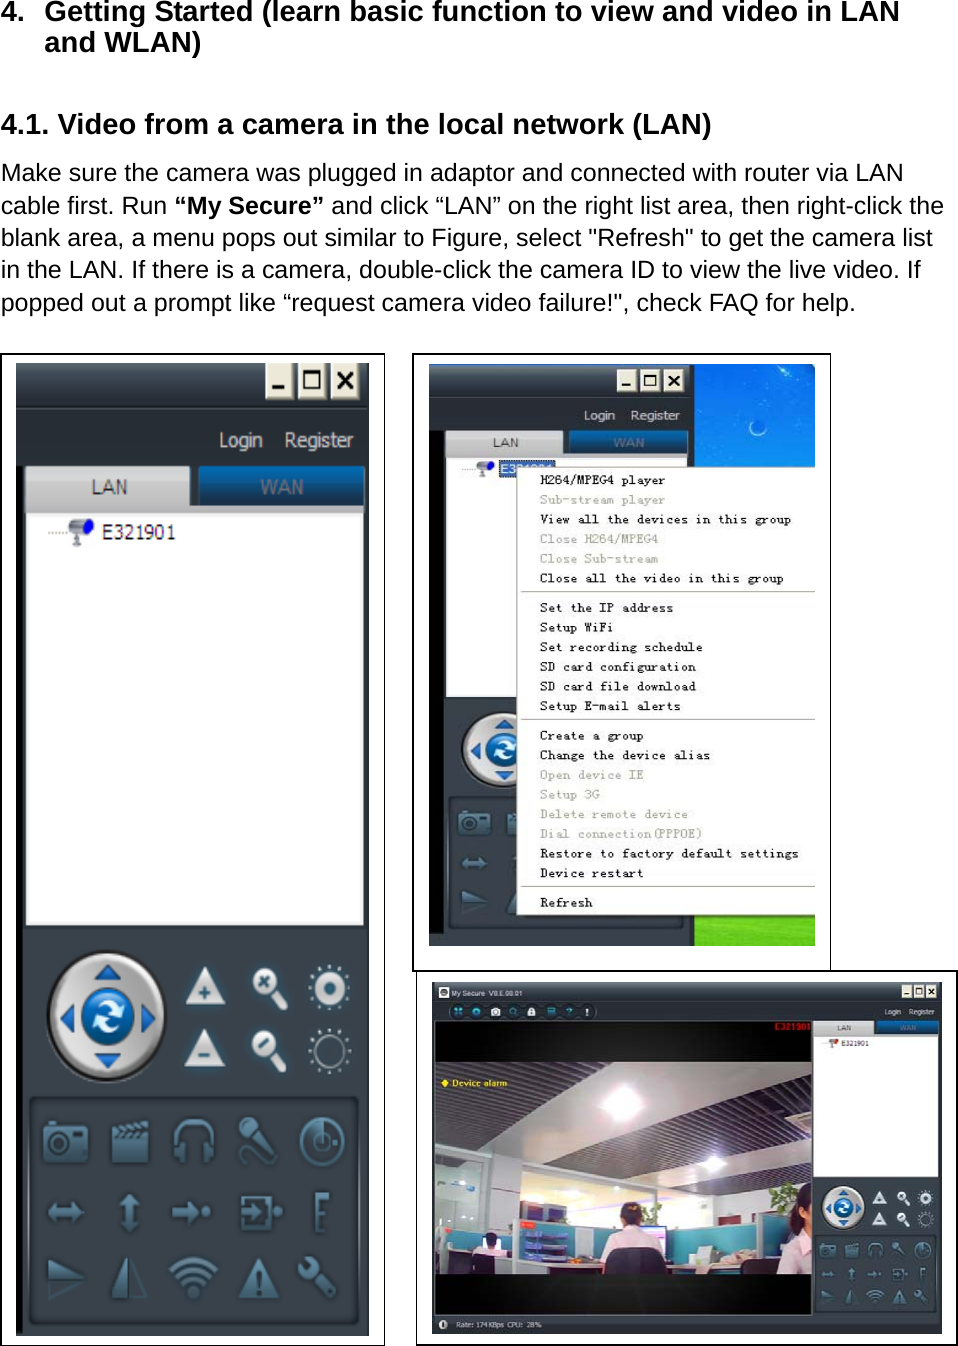
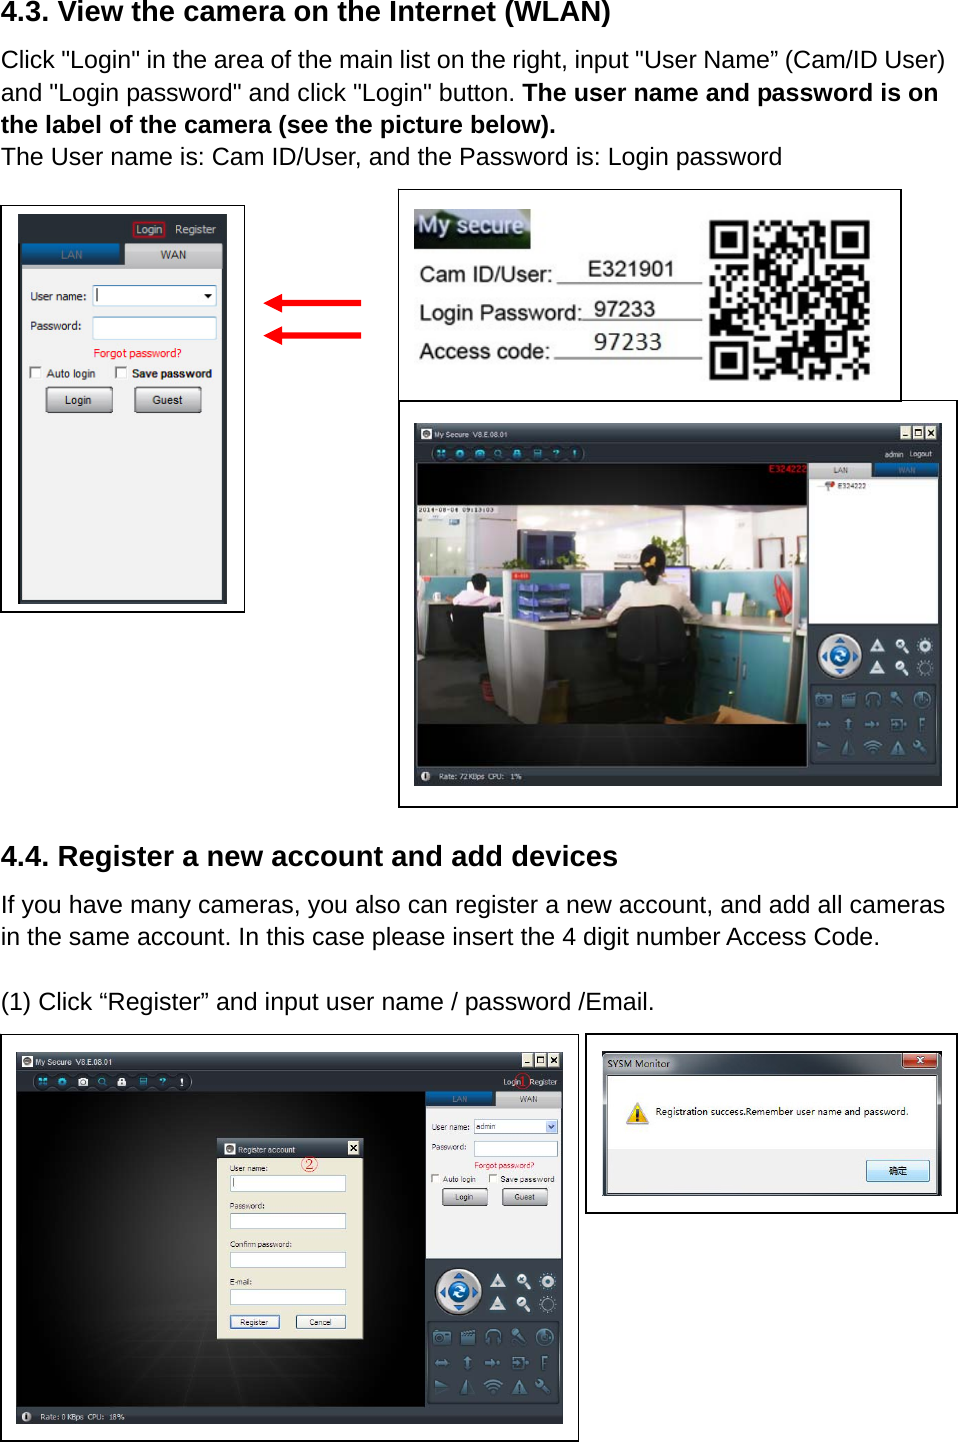
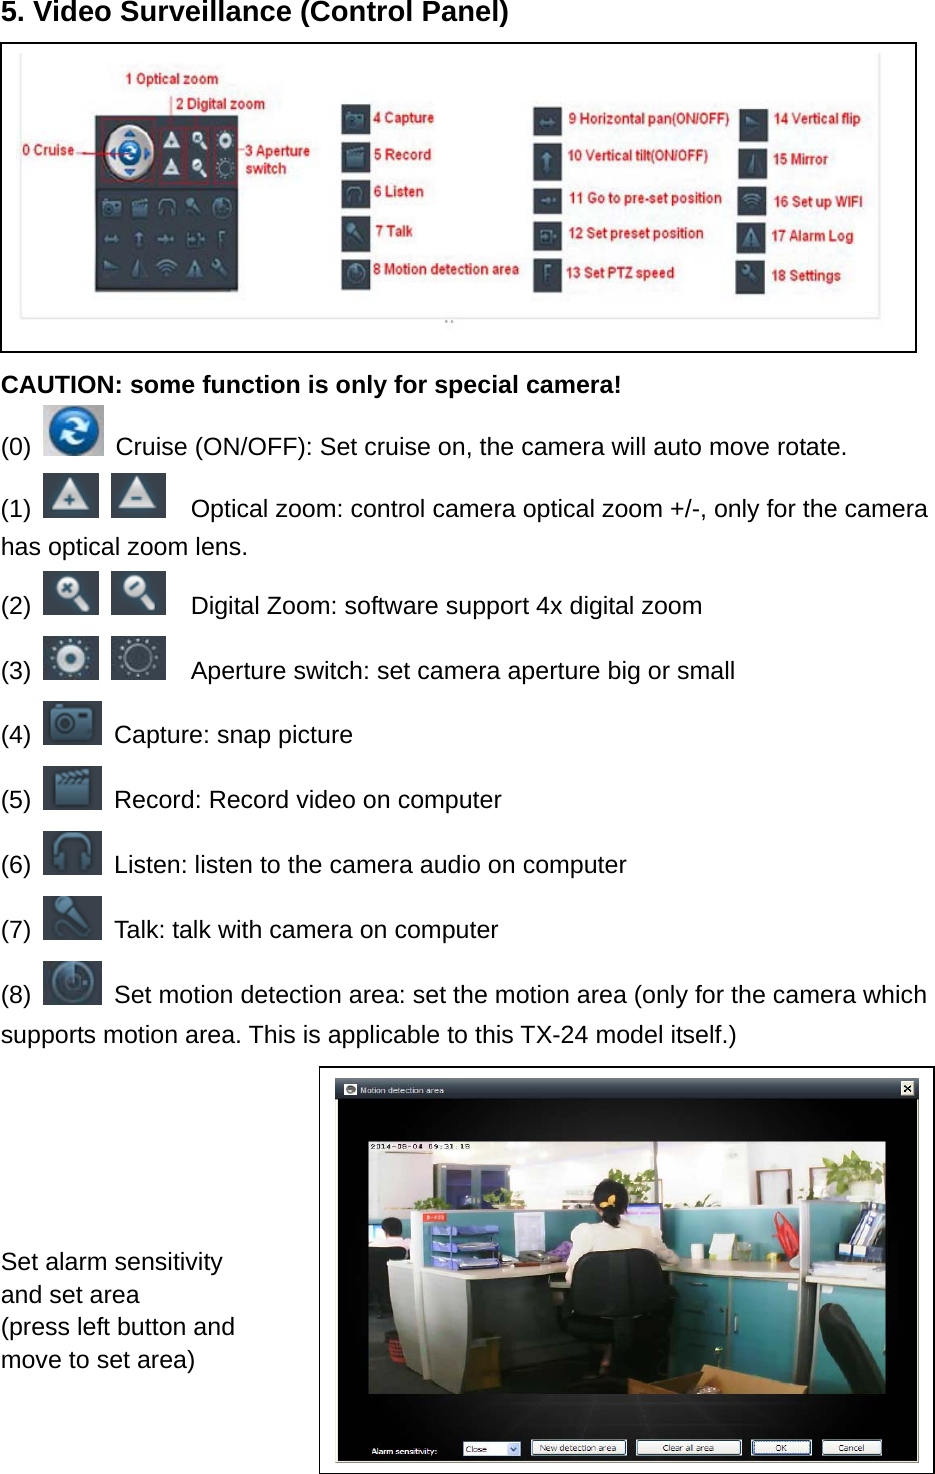
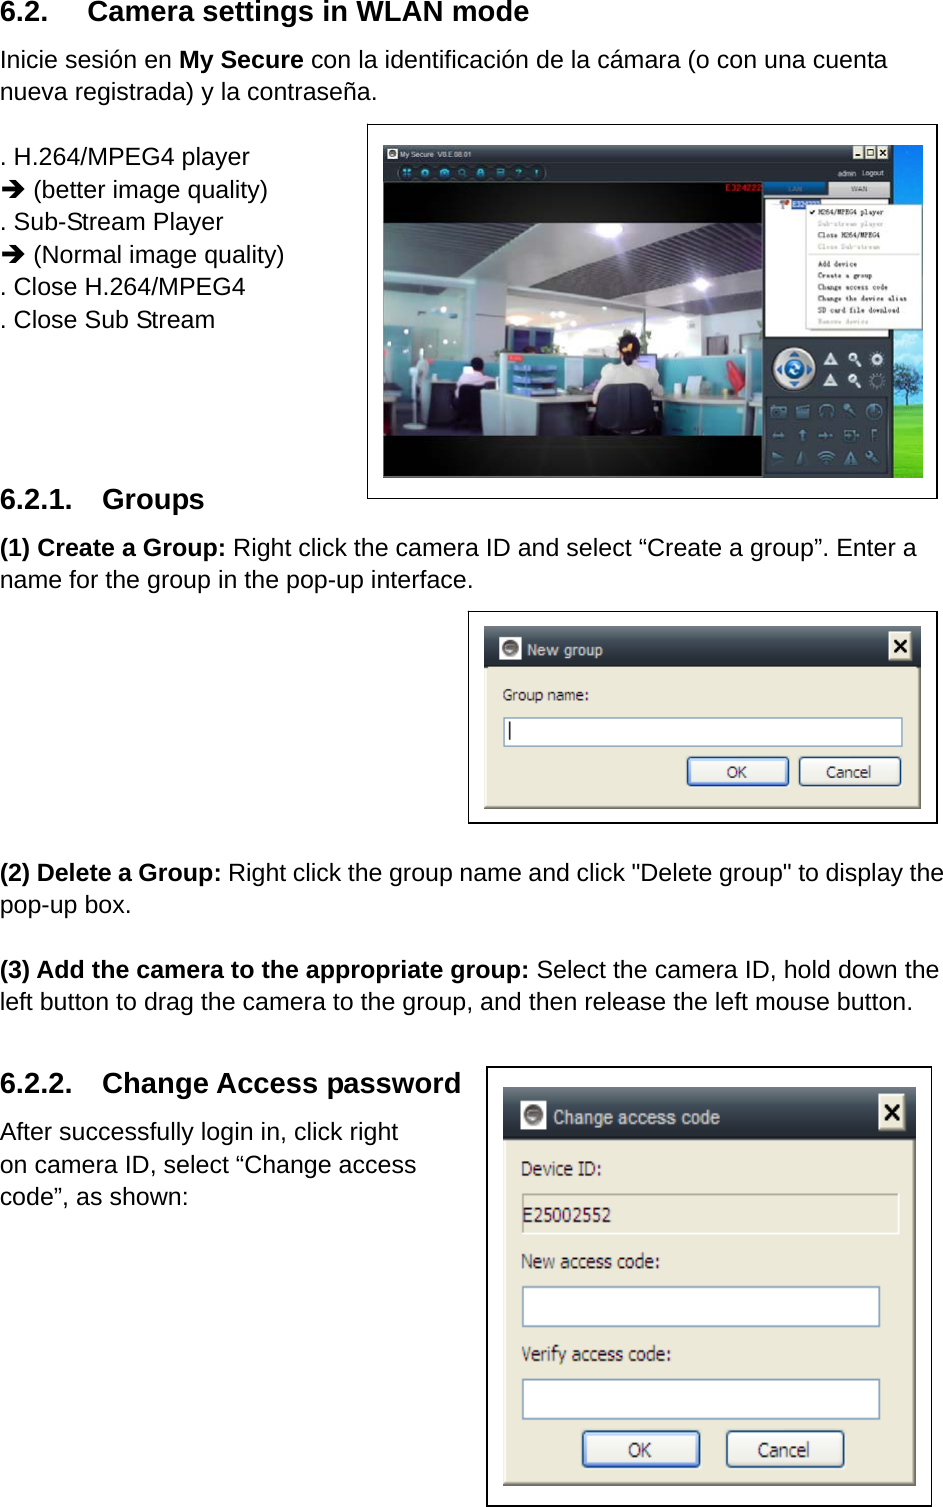
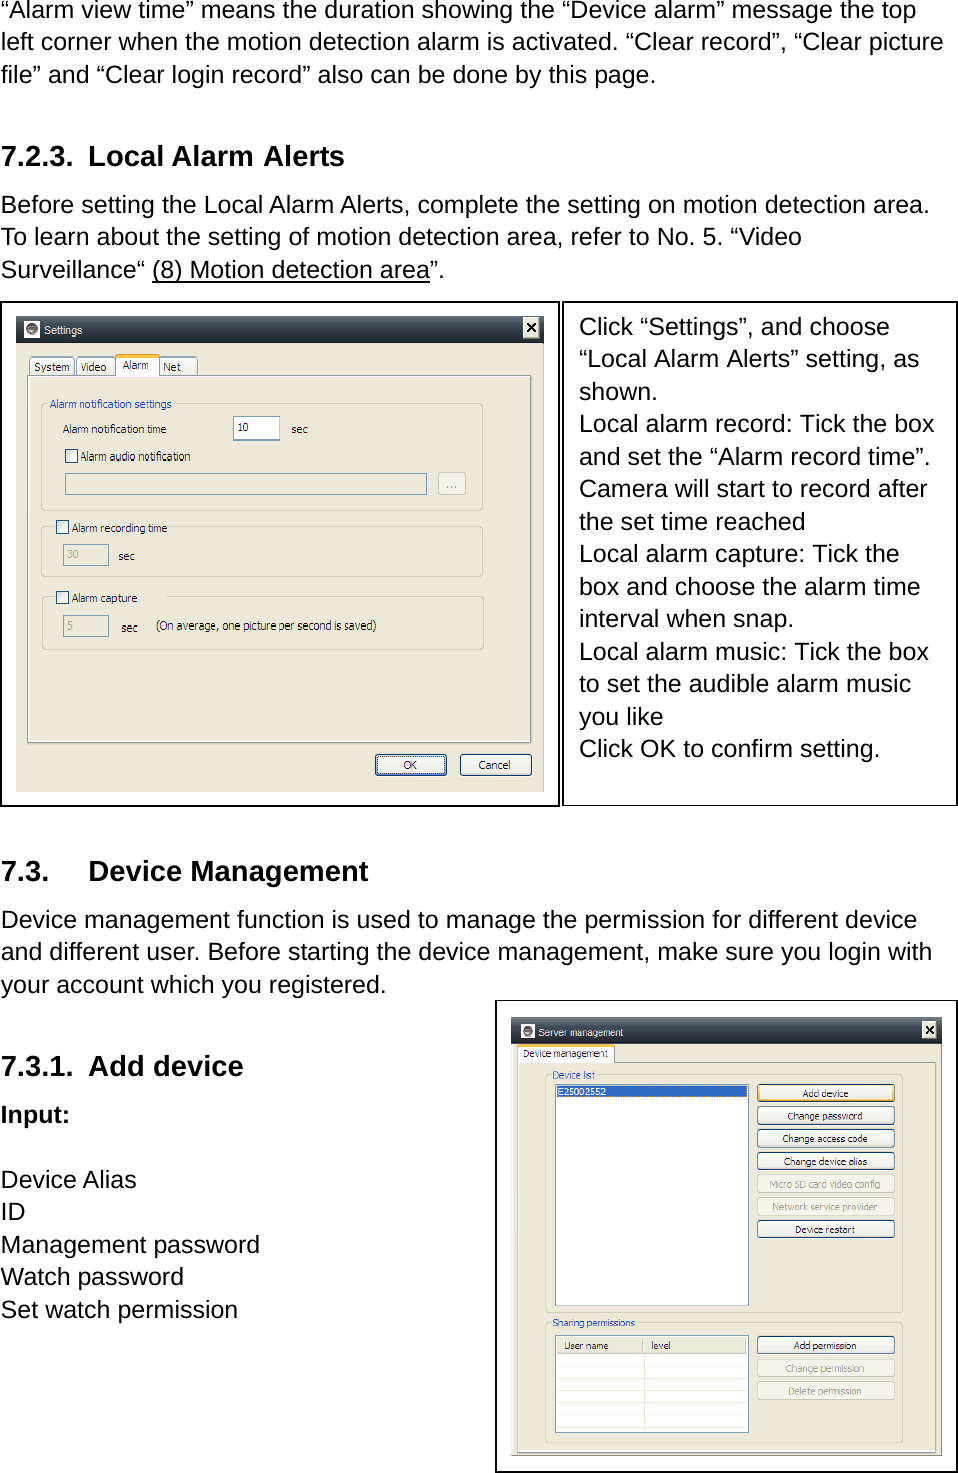
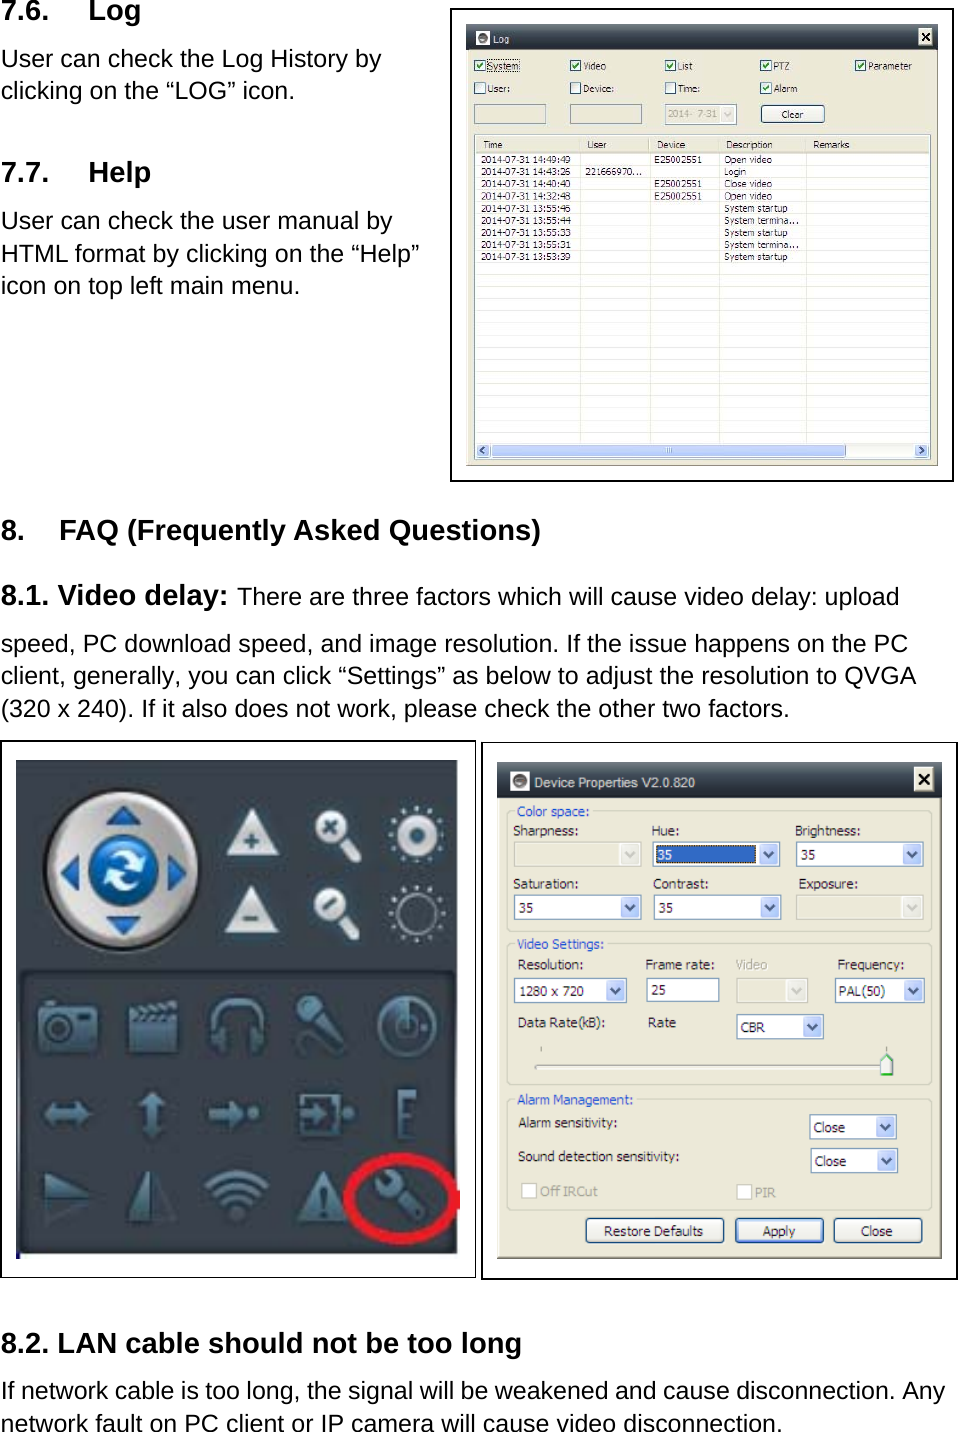
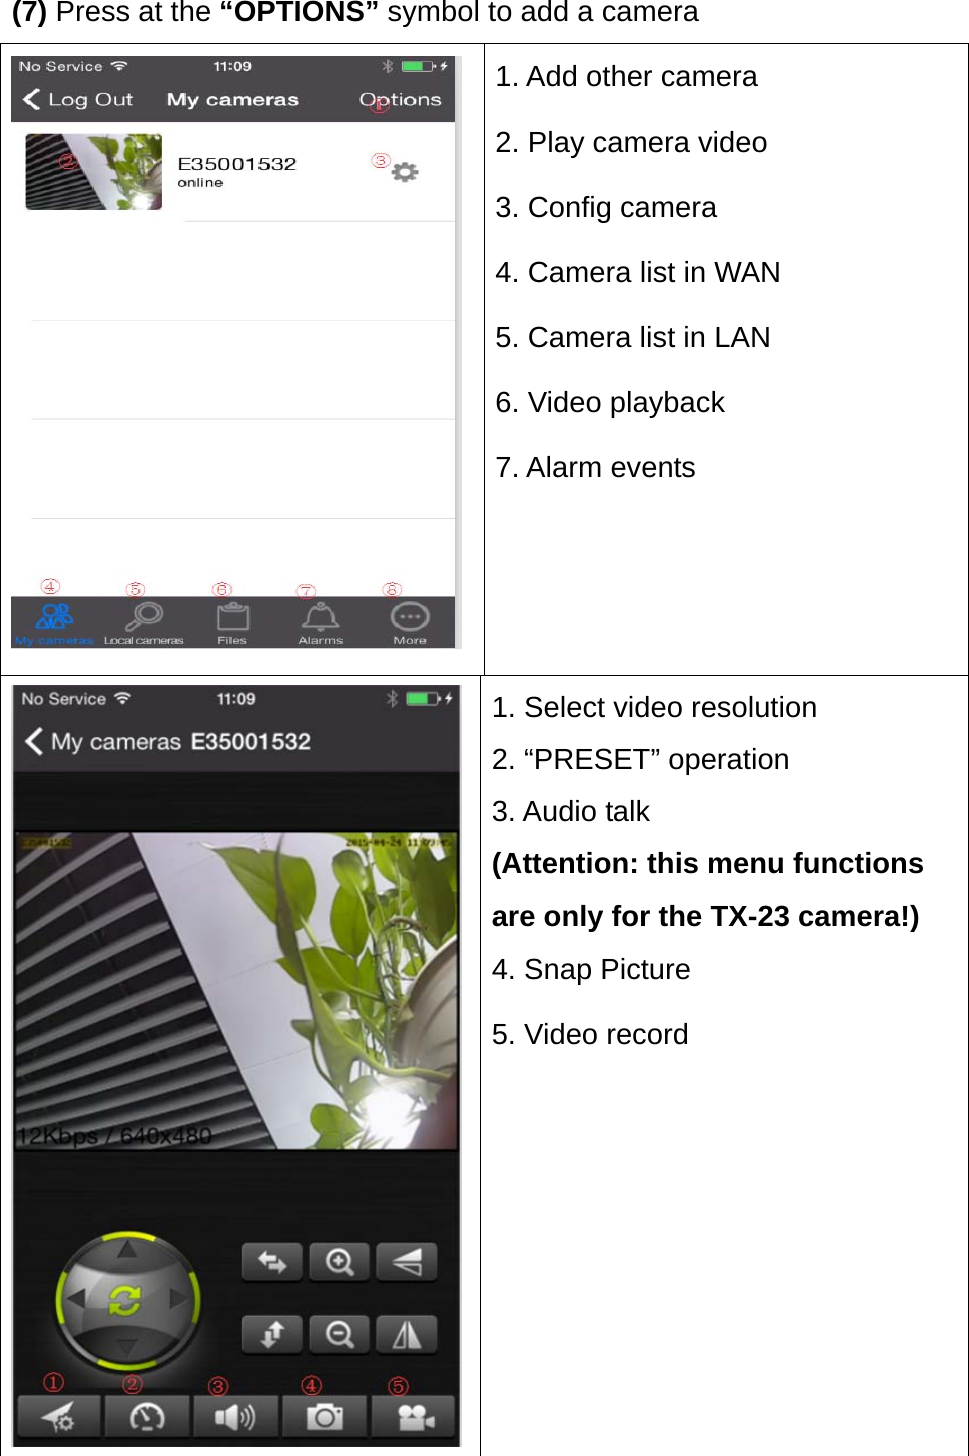
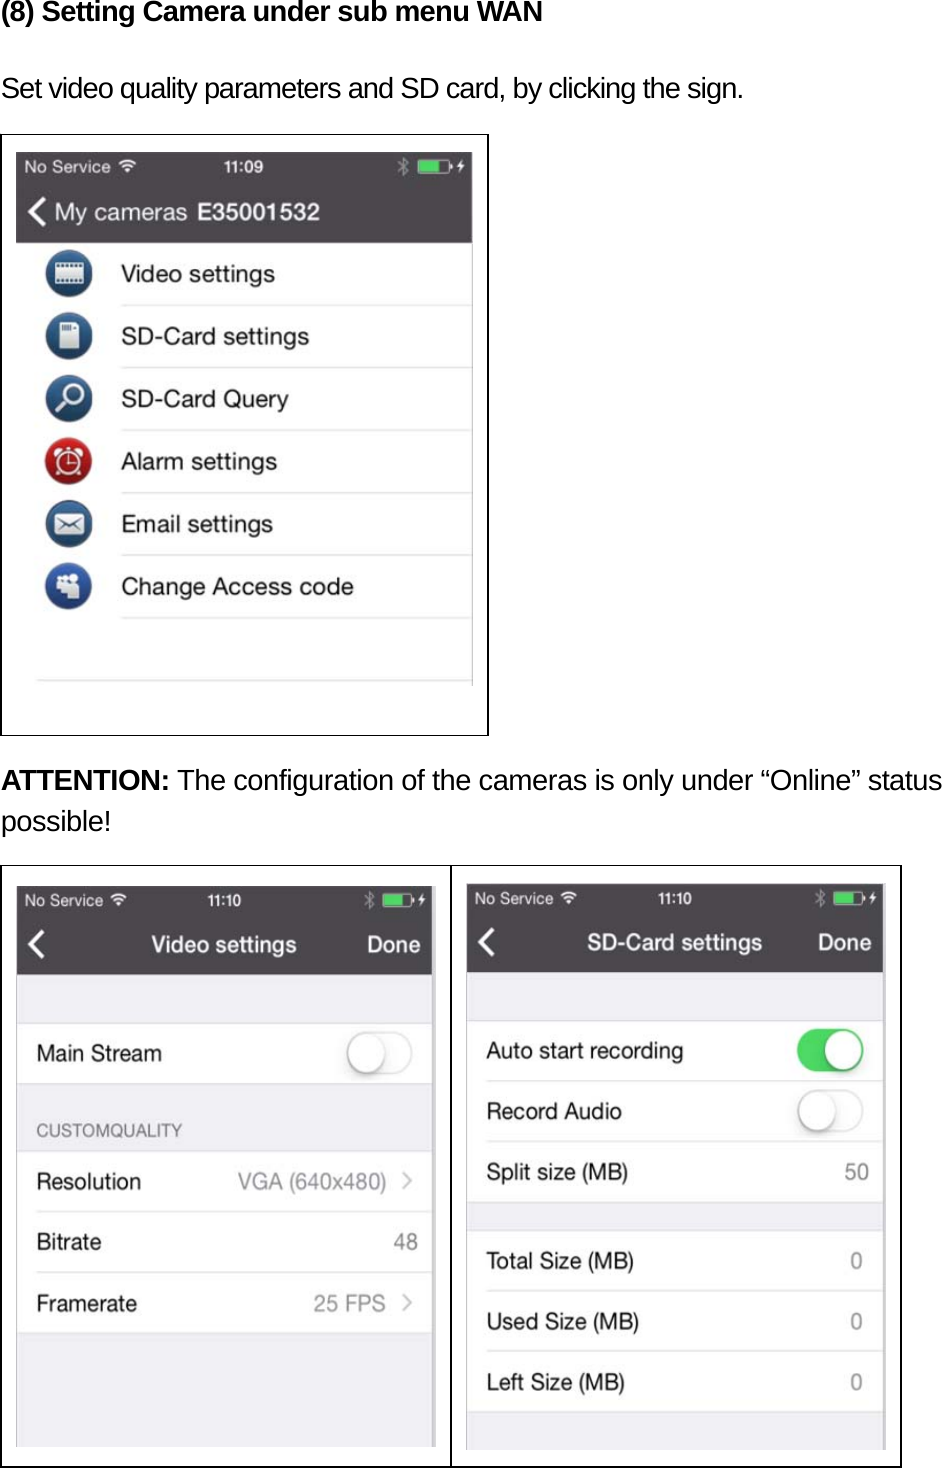
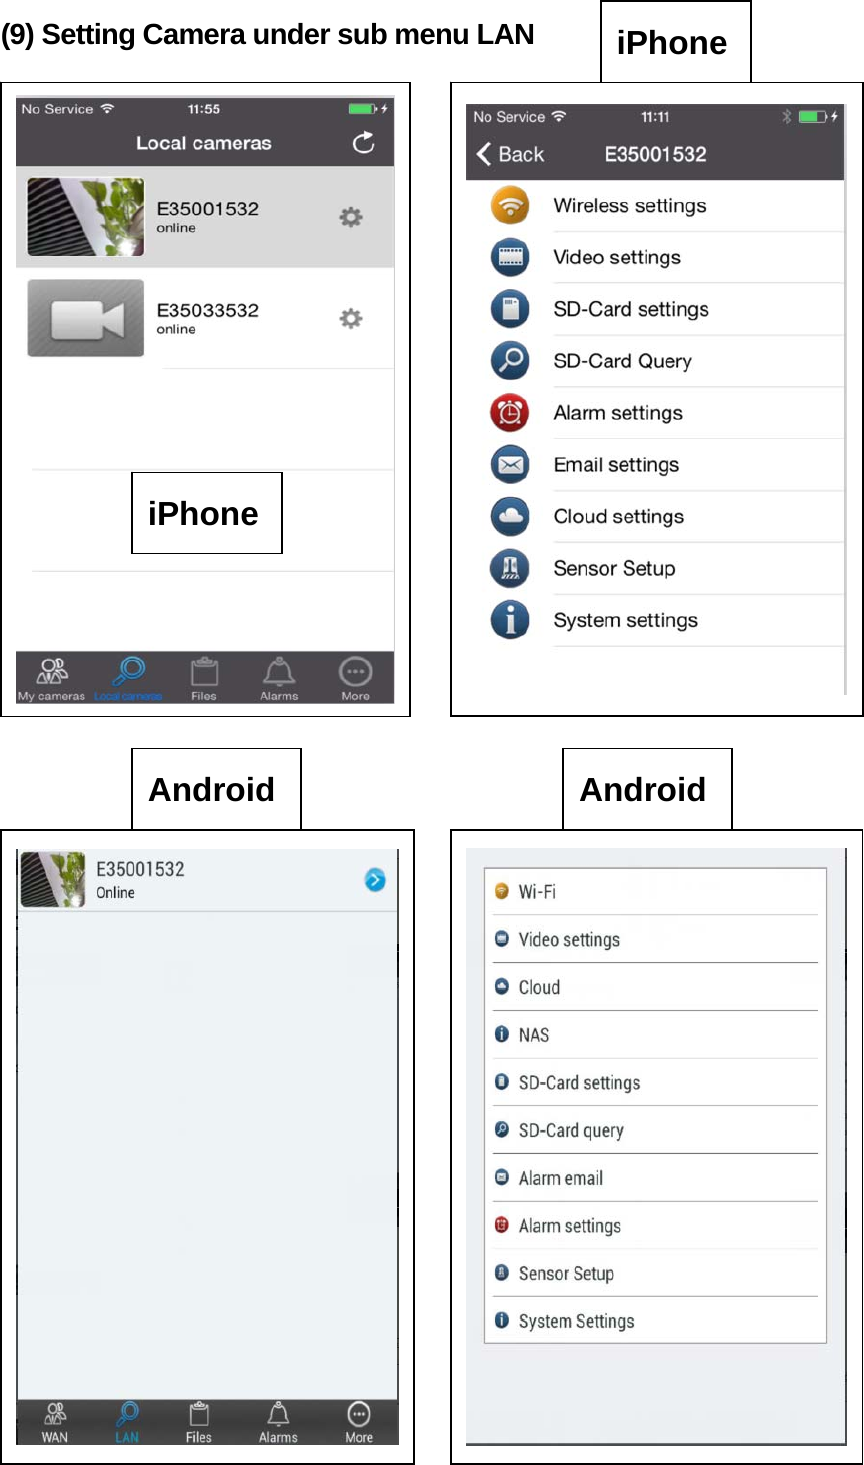
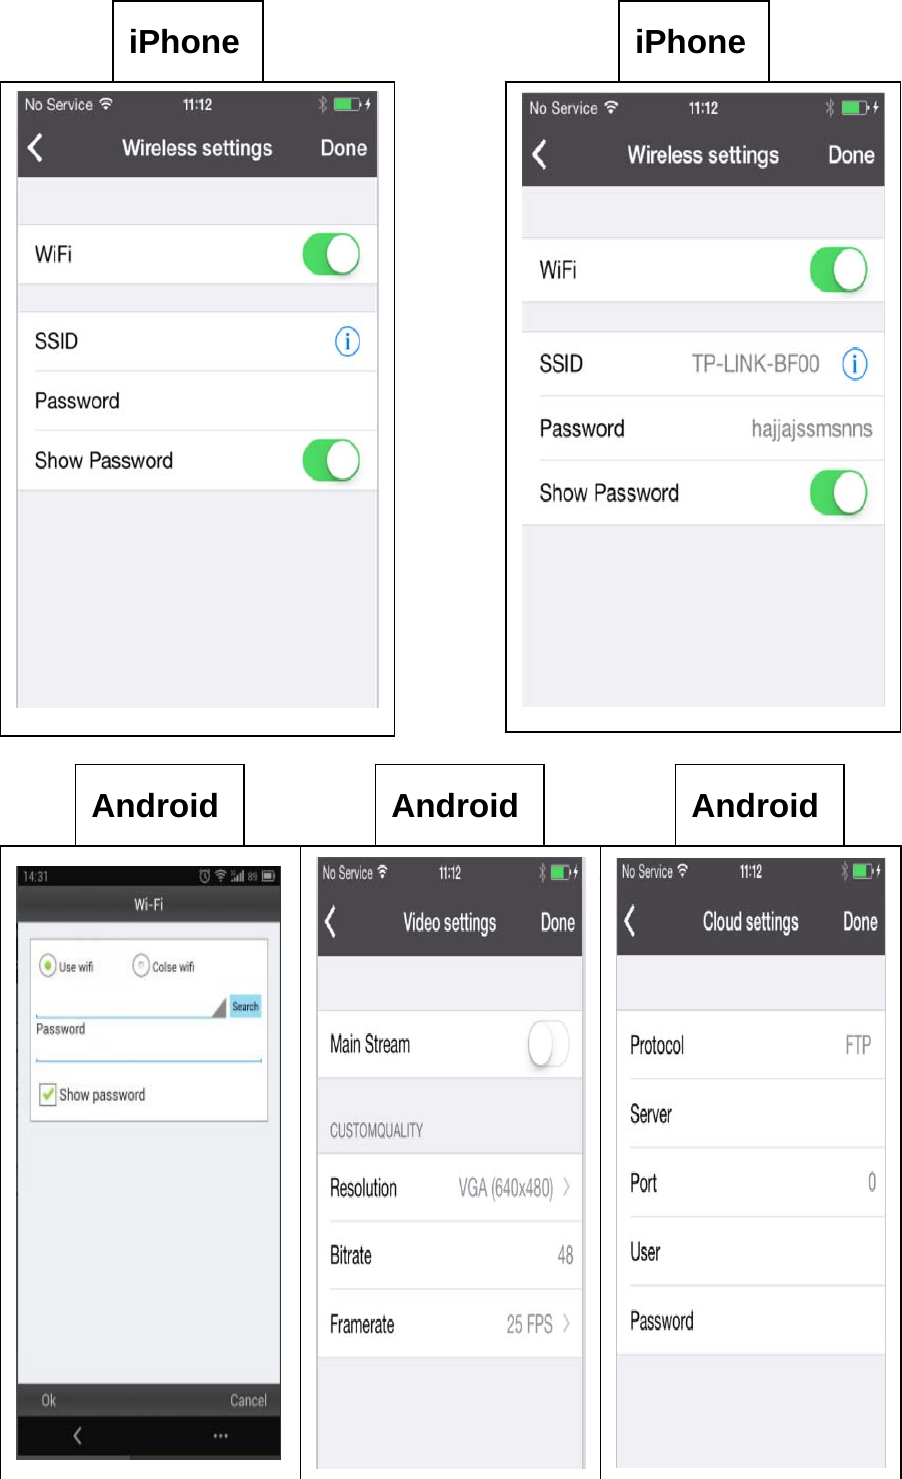
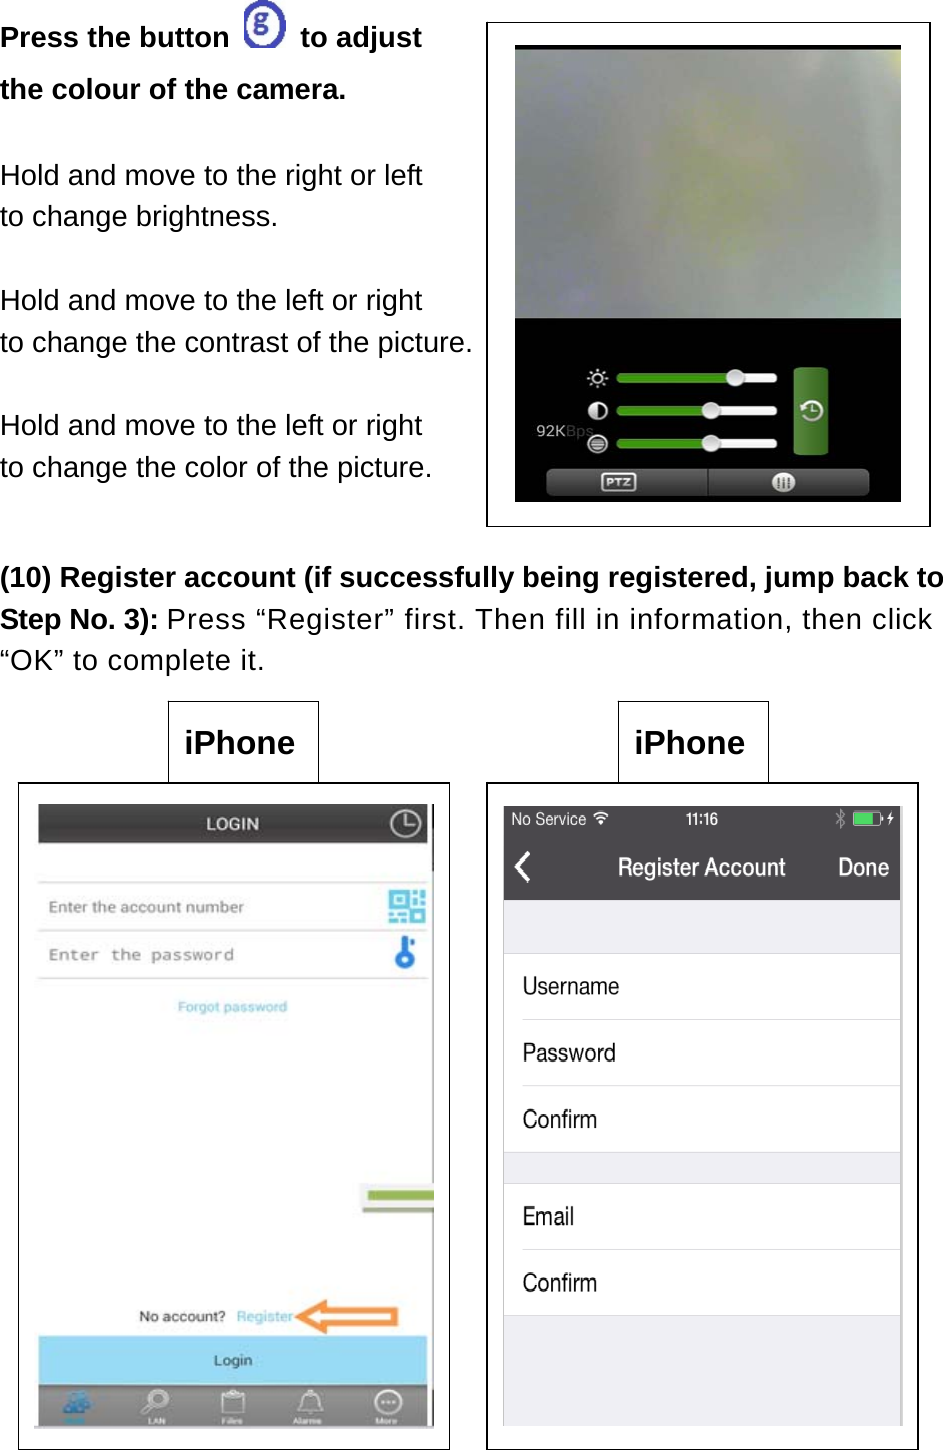
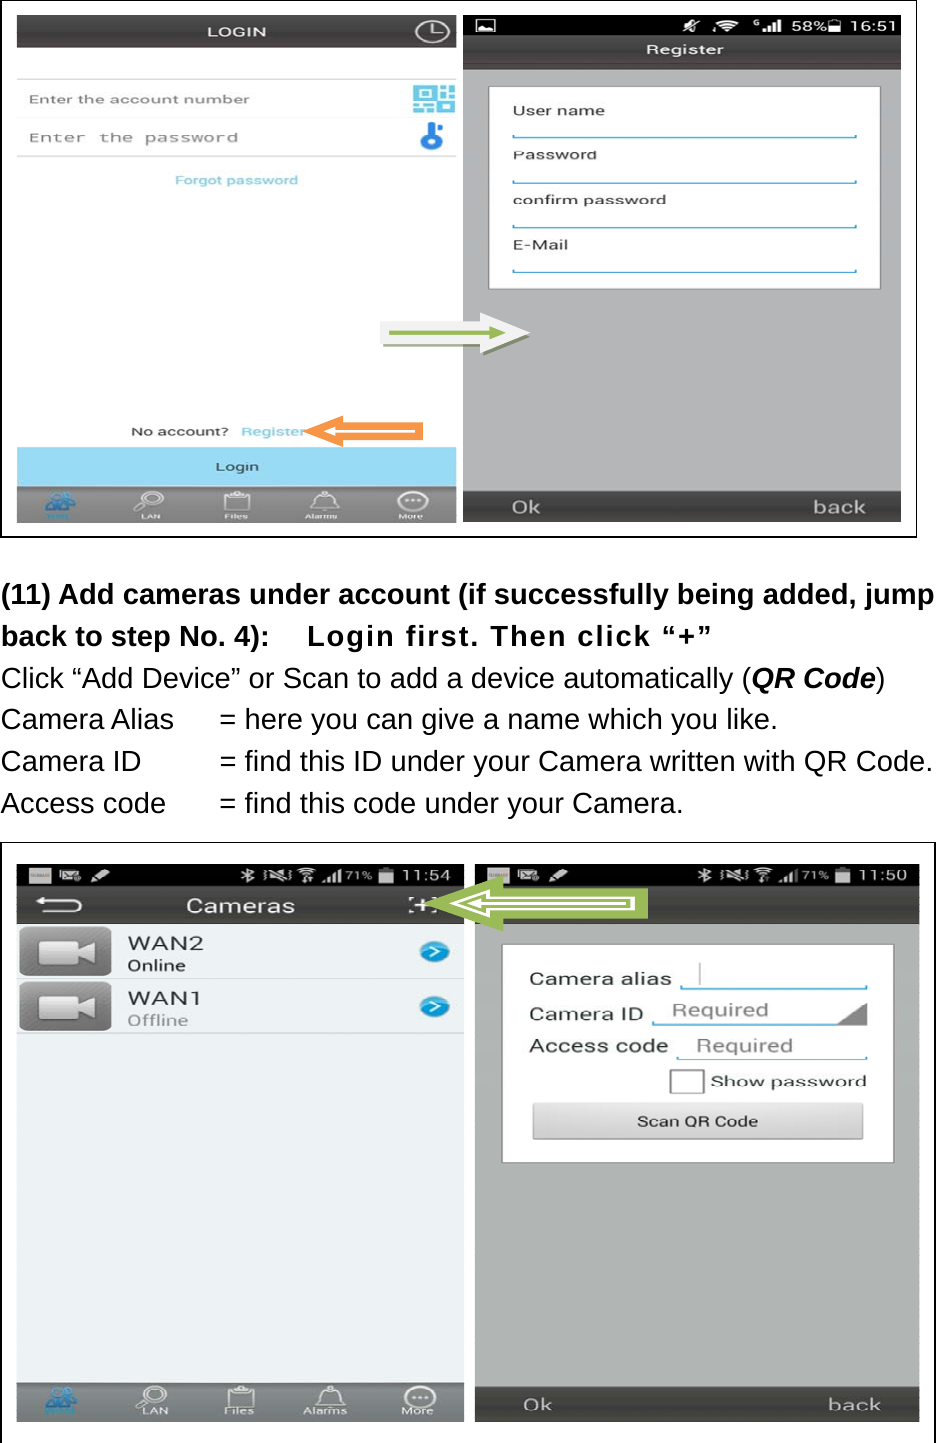
![4.2. Set WIFI connection (b) Set SSID (Wireless router name) / Password (1) Enable “Start WiFi setting”. (2) Click “Scan” to choose the WIFI connection “Network name [SSID]” (it is your Wireless router name). (3) Wireless Security Type & Data Encryption will be selected automatically after the right Network Name (SSID) is selected. Please here no manual changes! (4) Input the WIFI connection “Password” and click “OK” to save. (a) Click on the right mouse button then you see the device ID shown under LAN. Then select “Set WIFI ” on the menu popped out. NOTE: After saving WIFI settings the camera will restart automatically and then you can take off the LAN cable after the camera boots up successfully in 1–2 minutes and you see the camera ID in BLUE under LAN.](https://usermanual.wiki/DIT-SECURITY-and-SURVEILLANCE-TECHNOLOGY/DITN8152/User-Guide-2968656-Page-7.png)