DM Technology DM-AV10 DIGITAL PRESENTATION DEVICE User Manual DMTECH PORTABLE cover ENG
DM Technology Co., Ltd. DIGITAL PRESENTATION DEVICE DMTECH PORTABLE cover ENG
Contents
- 1. USERS MANUAL 1
- 2. USERS MANUAL 2
USERS MANUAL 1

POTABLE AV PLAYER
Owner’s Instructions
DM-AV10
Before using this product, please read the security instructions first and bear
them in mind when using the product.

Safety Instructions
Safety Instructions
2
Read the safety instructions below before using the player.
• Do not overload the outlet with many power cords at a time. (It may cause the generation of
abnormal heat and/or fire.)
• Do not excessively bend the power cord or be squeezed by heavy objects. (It may cause fire.)
• Do not handle the power plug with wet hands. (It may cause electric shock.)
• Plug the player properly so that it can be stable. (If it is not properly plugged, it may cause fire.)
• Never disassemble or modify the player in any way.
• Do not let chemicals, such as benzene, thinner, and etc., come in contact with the player.
• Do not use the player near a magnetic material (magnet, and etc.).
• Do not let dirt or foreign materials go in the player.
• Avoid using the player in a place where has high temperature (40°… or higher) or low tempera-
ture (5°… or lower), or has much moisture.
• Do not drop the player or give a shock.
• Keep the player away from a place where has severe vibration or a magnetic material.
• Interruption by electromagnetic wave may damage the player. Be sure to completely untie the
adaptor cable before using it.
• Avoid using the player near a direct ray of light or heat-generating device.
• Avoid using the player near a place where has much dirt or soot.
• Unplug the power cord when cleaning the adaptor.
• Do not drop the adaptor or give a severe shock.
• Do not use another adaptor (Use a supplied adaptor.)
Warning
Caution
Notes when using an earphone
Traffic safety
• Do not use the earphone while riding a bicycle or driving a car or motorcycle. It is not only danger-
ous, but also illegal depending on the region.If the earphone is used while walking on the road,
especially keeping its volume high on the crosswalk is very dangerous.
Protection for hearing ability
• Do not keep the earphone volume high. Most doctors point out that keeping the volume high for a
long time is very harmful to ears.
• If ears ring, turn down the volume or stop using the earphone.
Environmental information
• Separate packing materials, batteries, and/or old electronic products when disusing.
• Packing materials are classified into cardboard, polyethylene, and etc. Unnecessary packing mate-
rials have not been used for this player.
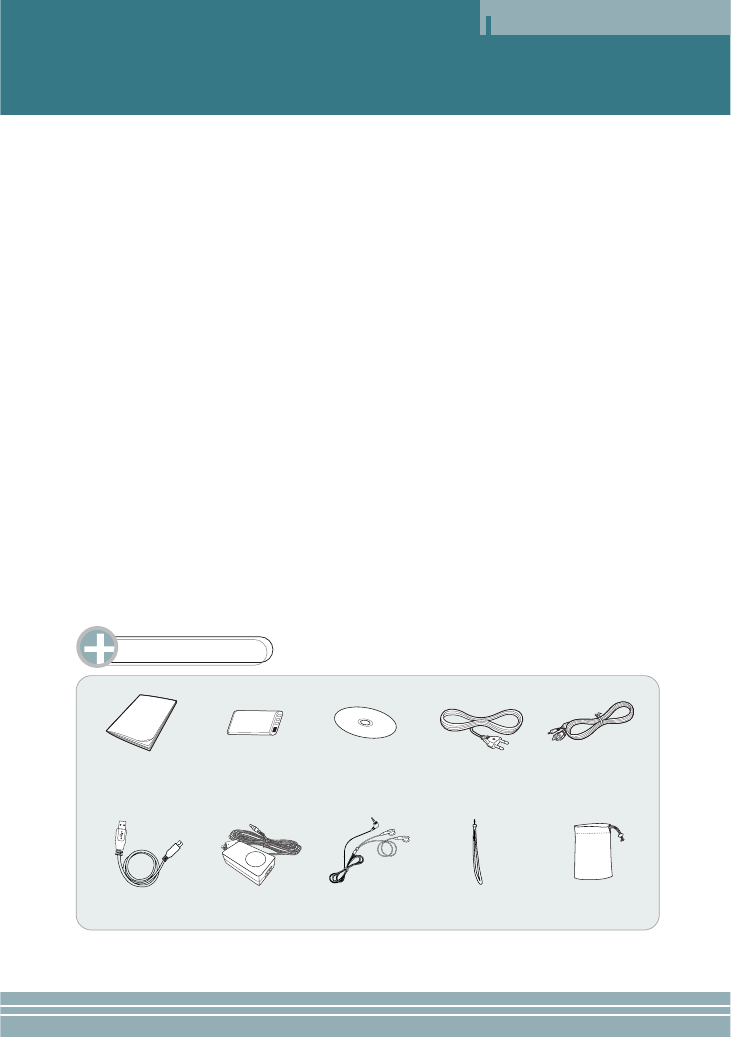
Table of Contents
Table of Contents
3
Description of each part.................................................................................................................. 4
Viewing an external source............................................................................................................. 6
Viewing video ................................................................................................................................. 7
Viewing an image ........................................................................................................................... 8
Listening to the music ..................................................................................................................... 9
Using a setup menu ..................................................................................................................... 10
Connecting an external component and USB .............................................................................. 13
Setting and using a transcode ...................................................................................................... 14
Miscellaneous .............................................................................................................................. 20
Specifications .............................................................................................................................. 22
Accessories
Owner’s Instructions Lithium ion battery
Installation CD
(Transcoder program)
Power cable
Video/Audio cables
USB cable AC adaptor Earphone Hand strap Carrying case
Overview
Overview
4
Overview
5
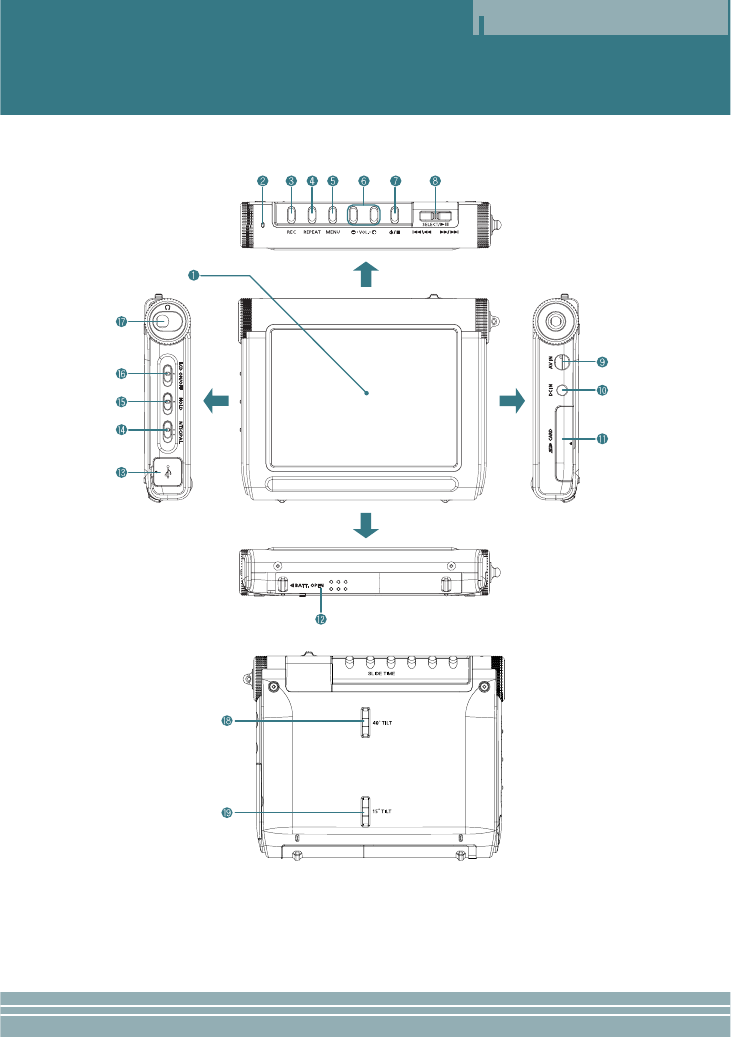
1LCD window
2Charge indication lamp: This lights on when the battery is charged by the input of DC power or
connecting a USB cable.
3REC button: Use to record an external input signal.
4REPEAT button: Use to repeat playback.
5MENU button: Use to return to the menu screen.
6VOL -,+ buttons: Use to adjust the volume.
SLIDE TIME buttons: Use to select a showing time of the slide show.
7(Power/Stop) button: Use to turn on or off the power of the main set, or use to stop play-
back.
8(JOG/Select/Play/Pause/Search/Skip) button
JOG ( ): Move it left or right to go to, search, or skip the desired position in the menu.
SELECT ( ): Use to select a menu, or play/pause the player.
9AV IN (external input) jack: Use to connect an external component.
10 DC IN (DC power input) jack: Use to input power.
11 SD CARD insertion slot
12 Charger insertion slot
13 USB Connection jack
14 NTSC/PAL switch: Use to select a display system.
15 HOLD switch: If the HOLD function is set, the player does not operate even in the entry of another
button during playback.
16 LCD ON/OFF switch: Use to turn on or off the LCD window.
17 Headphone jack: Use to connect a headphone.
18 40°TILT: Use to install a hand strap.
19 15°TILT: Use to install a hand strap.
Viewing an External Source
Operation
INPUT MODE
Recording an External Input Signal
6
This player allows you to view an external input signal. For connection of an external component, see
page 13.
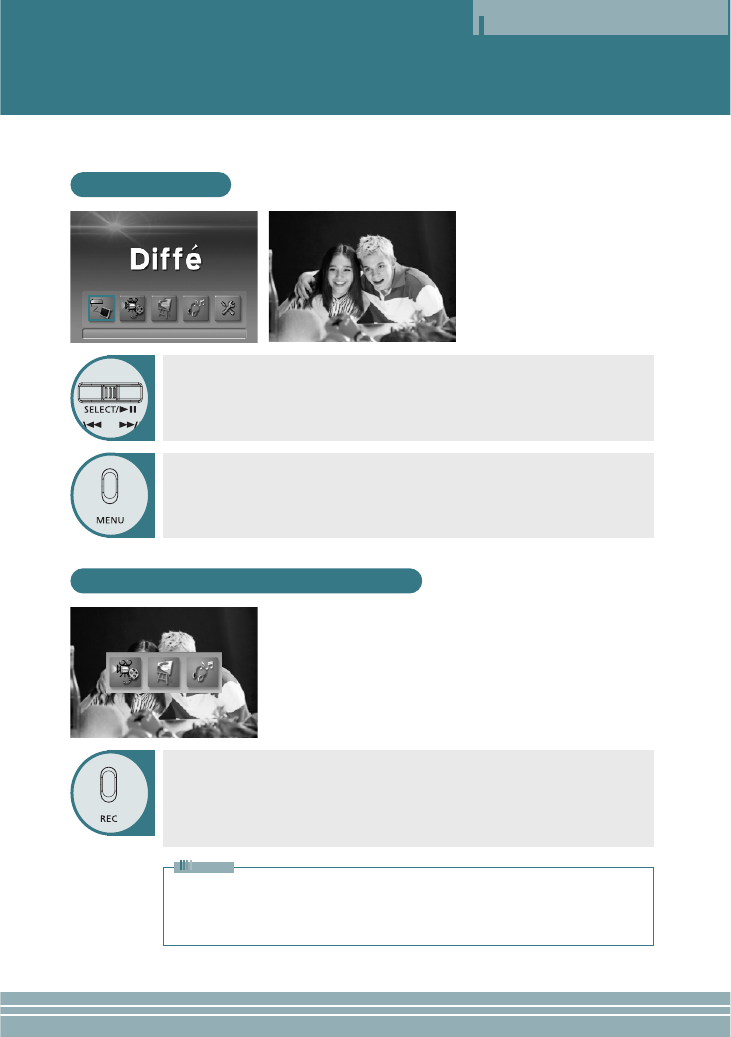
After moving to "INPUT MODE" by using the JOG key, press the JOG key.
The external component that is being currently connected will play and the playback
screen will be displayed.
Press the MENU button to exit.
The menu screen will be displayed.
ŒŒPress the REC button.
´´After moving to the file format that you want to record by using the JOG key,
press the JOG key.
The Recording screen will appear and recording will start.
To stop while recording, press the STOP button.
• If there is no external input, only the MP3 recording mode will be activated.
• If Macrovision has been set, the Recording function does not operate.
The message "Macrovision detect cannot record” will be displayed.
Note
Deleting a File
ŒŒWhen deleting a file from the list of files, select the file you want to delete by
using the JOG key and hold the key for at least two seconds. (When selecting
all the files in the folder, press and hold the REPEAT button for two seconds or
longer.)
´´When the STOP button is pressed, the selected files will be deleted.
ˇˇDeletion of the selected files can be cancelled in the same way as the selec-
tion of files.
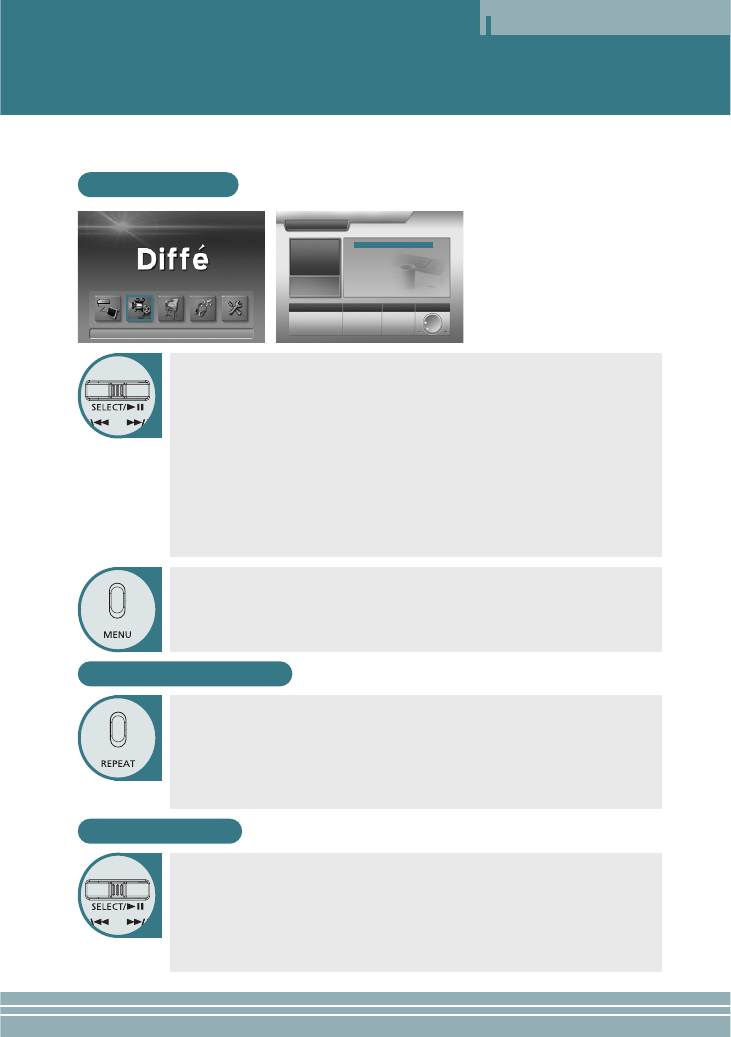
Viewing Video
Operation
VIDEO LIST
7
Press the MENU button to move to the menu screen.
The menu screen will be displayed.
ŒŒAfter moving to "VIDEO LIST" by using the JOG key, press the JOG key for
selection.
Video files in the built-in memory or SD card will appear.
´´After moving to a desired video file by using the JOG key, press the JOG key
for playback.
- The selected video file will play.
- When the STOP button is pressed, playback will top and the list of files will be
displayed.
- If the JOG key is used short during playback, the previous file or next file will
play.
- If the JOG key is used long (two seconds or longer) during playback, forward
playback or reverse playback will be available.
Repeating Playback
Press the REPEAT button.
Every entry of the REPEAT button will select the following sequence of modes: "OFF"
→"ONE" →"ALL".
OFF: After the current file is played, the next file plays automatically.
ONE: Repeats the file which is currently playing.
ALL: Repeats all the video files in the current folder.
VIDEO
FREE/TOTAL
IN: 71/124MB
EX: NO CARD HIGHT OFF
REC MODE REPEAT VOLUME
2.3 MB
00 : 30 : 30
VIDEO001.ASF
VIDEO002.ASF
VIDEO003.ASF
VIDEO004.ASF
VIDEO005.ASF
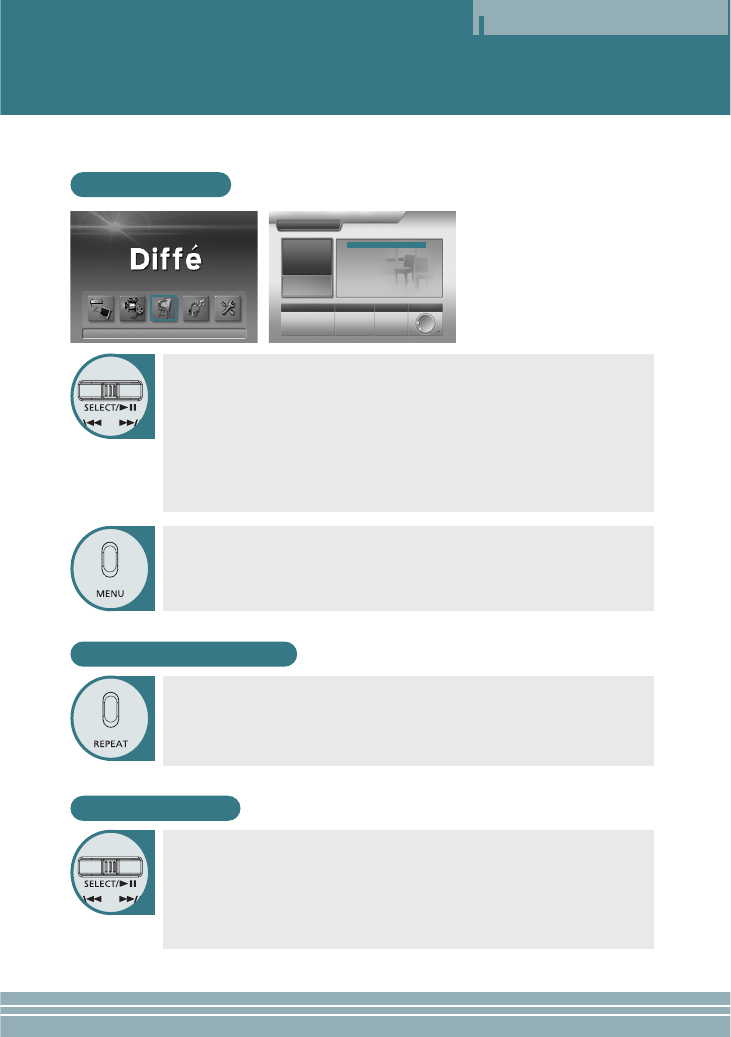
Viewing an Image
Operation
8
IMAGE LIST
ŒŒAfter moving to "IMAGE LIST" by using the JOG key, press the JOG key for
selection.
JPEG files in the built-in memory or SD card will appear.
´´After moving to a desired JPEG file by using the JOG key, press the JOG
key.
- The selected JPEG file will appear on the whole screen.
- You can view the previous file or next file by using the JOG key.
- When the STOP button is pressed, playback will stop and the list of files will
return.
Setting a Slide Show
ŒŒPress the REPEAT button to switch to the "SLIDE" mode.
´´Press the SLIDE TIME + or – button to select the showing time of the slide
show.
- You can select the time up to 30 seconds.
- The default time is 3 seconds.
Press the MENU button to exit.
The menu screen will be displayed.
JPEG
FREE/TOTAL
IN: 71/124MB
EX: NO CARD HIGE NONE
00 SEC
REC MODE REPEAT VOLUME
41 KB
1024 x 768
Image1.JPG
Image2.JPG
Image3.JPG
Image4.JPG
Image5.JPG
Deleting a File
ŒŒWhen deleting a file from the list of files, select the file you want to delete by
using the JOG key and hold the key for at least two seconds. (When selecting
all the files in the folder, press and hold the REPEAT button for two seconds or
longer.)
´´When the STOP button is pressed, the selected files will be deleted.
ˇˇDeletion of the selected files can be cancelled in the same way as the selec-
tion of files.
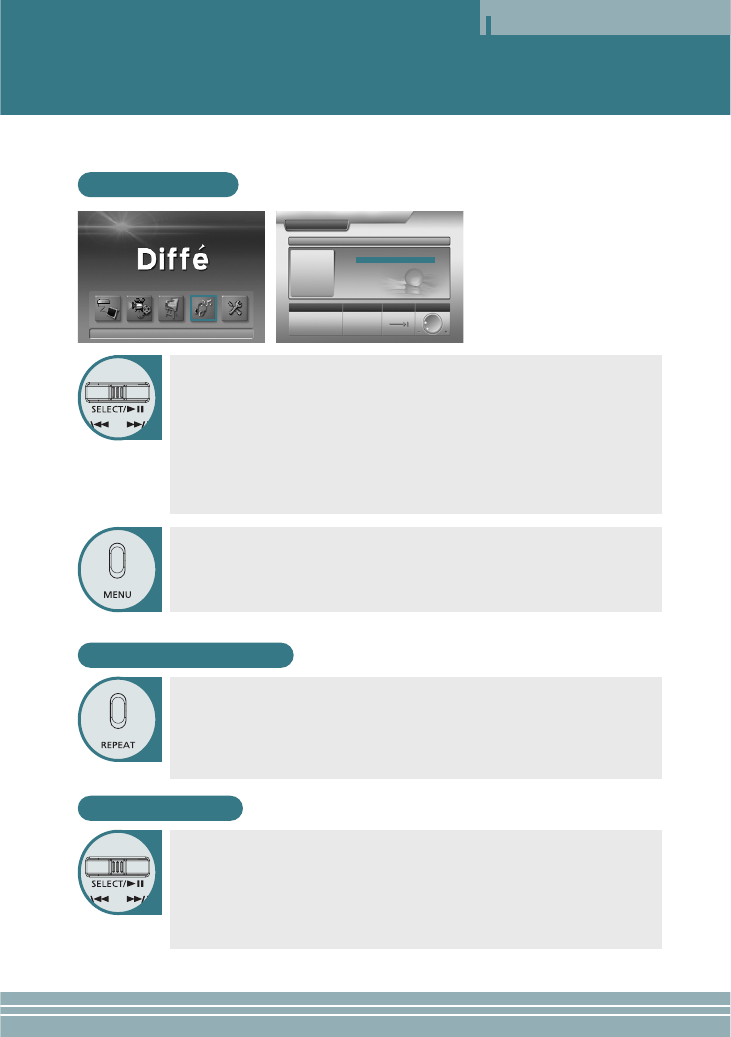
Listening to the Music
Operation
9
MP3 LIST
ŒŒAfter moving to "MP3 LIST" by using the JOG key, press the JOG key for
selection.
MP3 files in the built-in memory or SD card will appear.
´´After moving to a desired MP3 file by using the JOG key, press the JOG key.
- The selected MP3 file will play.
- When the JOG key is used during playback, the previous file or next file will
play.
- When the STOP button is pressed, playback will stop the list of files will return.
Press the MENU button to exit.
The menu screen will be displayed.
MUSIC
AUDIO001.MP3
FREE/TOTAL
IN: 71/124MB
EX: NO CARD
32KHz
96Kbps
STEREO
REC MODE REPEAT VOLUME
32.0KHz
96Kbps
4.0MB
0 : 05 : 30
0 : 00 : 00
AUDIO001.MP3
AUDIO002.MP3
AUDIO003.MP3
AUDIO004.MP3
AUDIO005.MP3
Deleting a File
ŒŒWhen deleting a file from the list of files, select the file you want to delete by
using the JOG key and hold the key for at least two seconds. (When selecting
all the files in the folder, press and hold the REPEAT button for two seconds or
longer.)
´´When the STOP button is pressed, the selected files will be deleted.
ˇˇDeletion of the selected files can be cancelled in the same way as the selec-
tion of files.
Repeating Playback
Press the REPEAT button.
Every entry of the REPEAT button will select the following sequence of modes: "OFF"
→"ONE" →"ALL".
OFF: After the current file is played, the next file plays automatically.
ONE: Repeats the file which is currently playing.
ALL: Repeats all the MP3 files in the current folder.
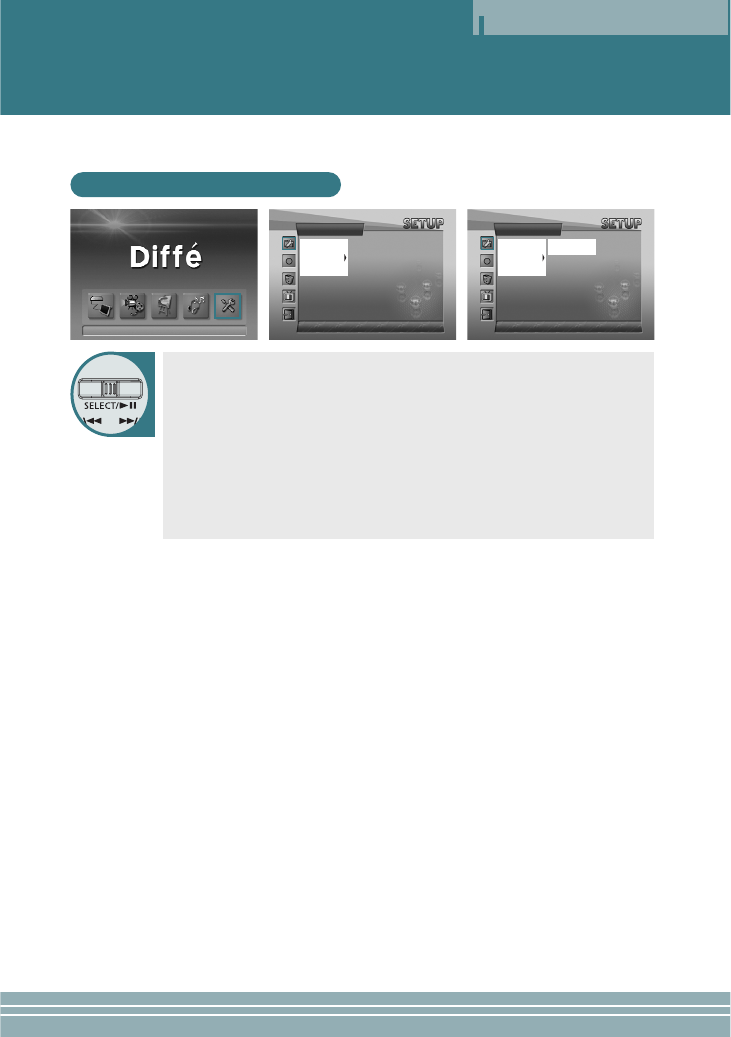
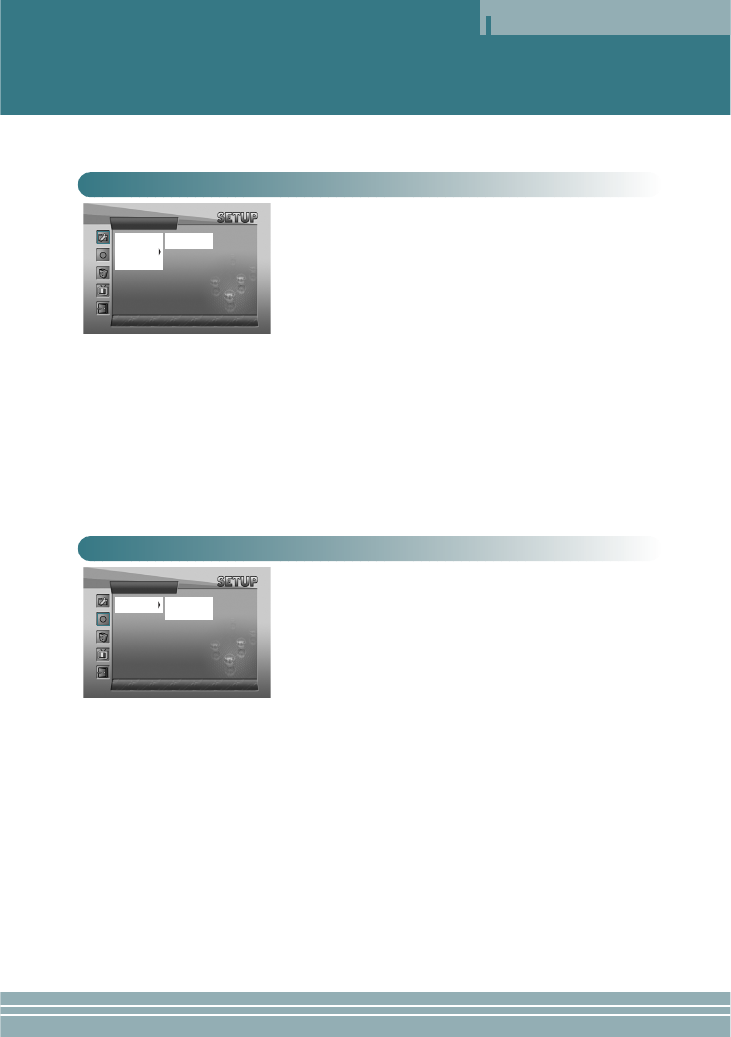
Using a Setup Menu
Operation
10
How to use a Setup Menu
ŒŒSelect the item you want to set among GENERAL, RECORD, DELETE, PIC-
TURE, SETUP, and EXIT by using the JOG key.
´´Move to a detailed setup item in the selected setup menu by using the JOG
key.
ˇˇAfter moving to a desired menu by using the JOG key, press the JOG key for
selection.
¨¨After moving to or adjusting a desired menu by using the JOG key, press
the JOG key to save the state of setup.
- Press the STOP button to move to the upper menu.
- Press the MENU button to move to the menu screen.
GENERAL
✓MEMORY
LANGUAGE
POWER SAVE
RESET
UP GRADE
GENERAL
✓MEMORY
LANGUAGE
POWER SAVE
RESET
UP GRADE
✓INTERNAL
EXTENDED
Operation
11
• MEMORY
INTERNAL: Use when playing, recording, deleting, and format-
ting the contents of the built-in memory. An SD card cannot be
used.
EXTENDED: Use when playing, recording, deleting, and format-
ting the contents of an external SD card.The built-in memory
cannot be used.
• LANGUAGE
Use to select a language.
• POWER SAVE
Use to set the power saving function. When the function is set,
power will be shut down after a certain time (five minutes) elaps-
es in the state of stop.
• RESET
Use to initialize all settings (factory default).
• UPGRADE
Use to upgrade the firmware that has been downloaded through
USB.
GENERAL SETUP
• MPEG4
Use to select the picture quality of video recording.
FINE: Top quality (30-minute recording - based on 124MB
built-in memory)
NORMAL: Normal quality (55-minute recording – based on
124MB built-in memory)
ECONOMY: Lowest quality (100-minute recording – based on
124MB built-in memory)
✽Recording time may depend on the video signal.
• MP3
SAMPLE RATE/BIT RATE: Use to select the quality of record-
ing.
CHANNEL: Use to select MONO or STEREO during recording.
RECORD SETUP
GENERAL SETUP
✓MEMORY
LANGUAGE
POWER SAVE
RESET
UP GRADE
✓INTERNAL
EXTENDED
RECORD
✓MPEG4
MP3
✓FINE
NORMAL
ECONOMY