DOD Technology RC500S Dash cam User Manual
Shenzhen DOD Technology Co.,Ltd. Dash cam
UserManual.wiki
>
DOD Technology
>
RC500S User Manual
>
User manual
Contents
1.
User Manual
2.
User manual
User manual
Navigation menu
Upload a User Manual
Namespaces
Wiki Guide
HTML
PDF
Info
Views
User Manual
Discussion / Help
Navigation
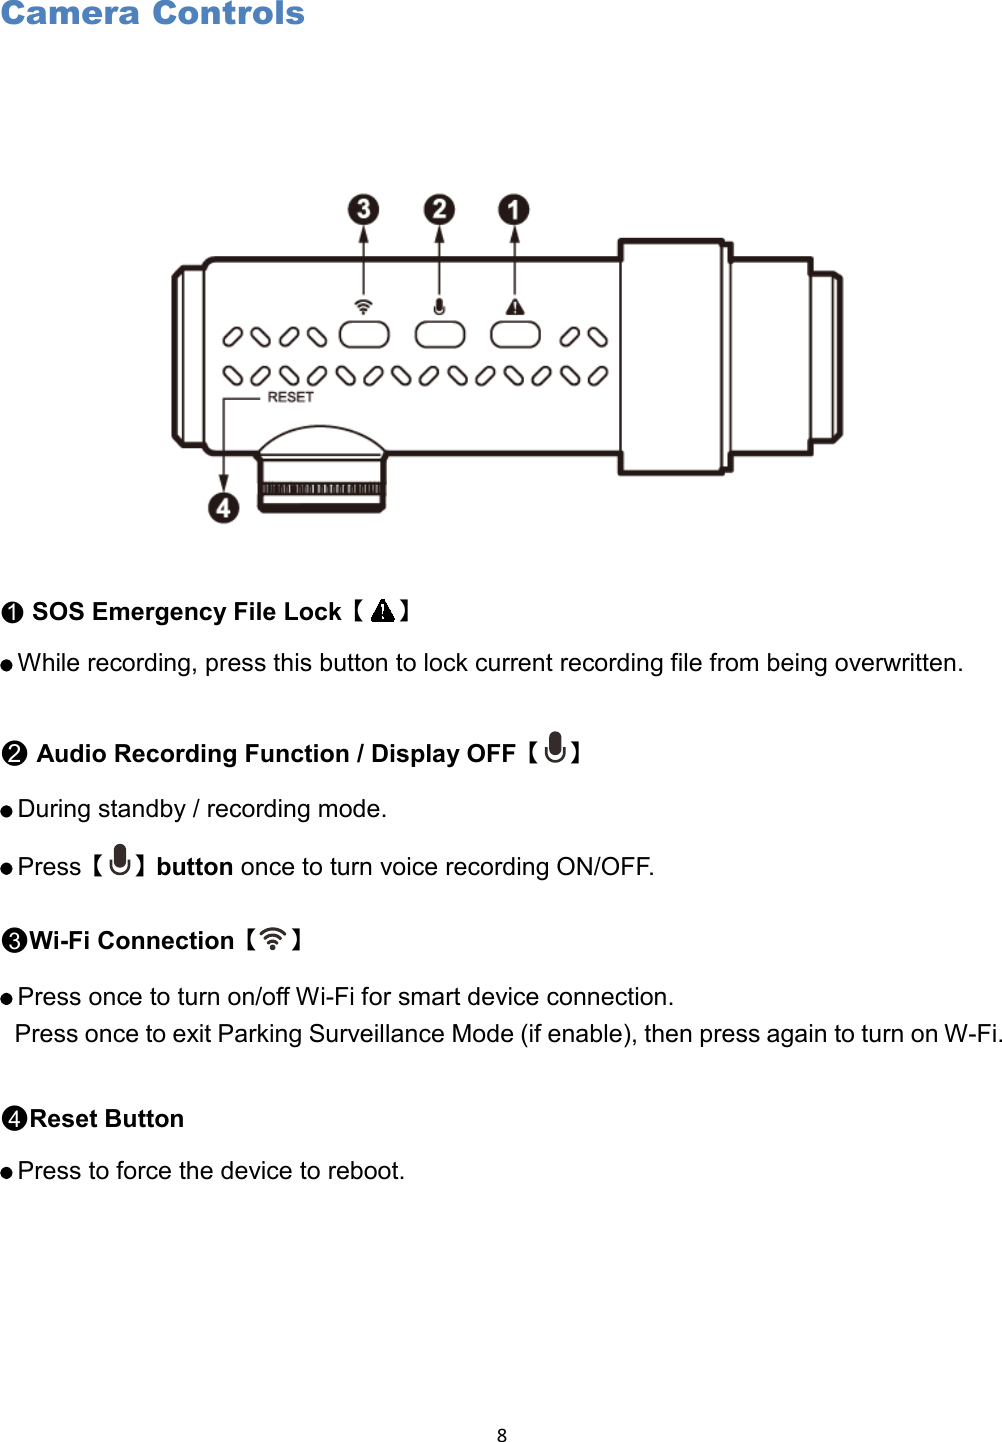

![19 ●1When dash cam is connected, please make sure to switch on then hit check mark to confirm. ●2Break camera connection. ●3Connect to switchable camera. ●4Confirm and return to previous page. ●5View connection instruction. Settings Press [ ] to enter the menu setting. Settings can only be changed when recording has stopped. Video Recording Press [ ] to start or stop the recording. Settings can only be changed when recording is stopped. ●1Microphone Record/Mute ●2Snap Shot ●3Dim Display /Wake up ●4Dash Cam Connection Control Panel ●5Speed Indicator ●6Real-Time Streaming from Dash Cam ●7Thumbnail of Last Video File / Snapshot](https://usermanual.wiki/DOD-Technology/RC500S.User-manual/User-Guide-3808726-Page-20.png)
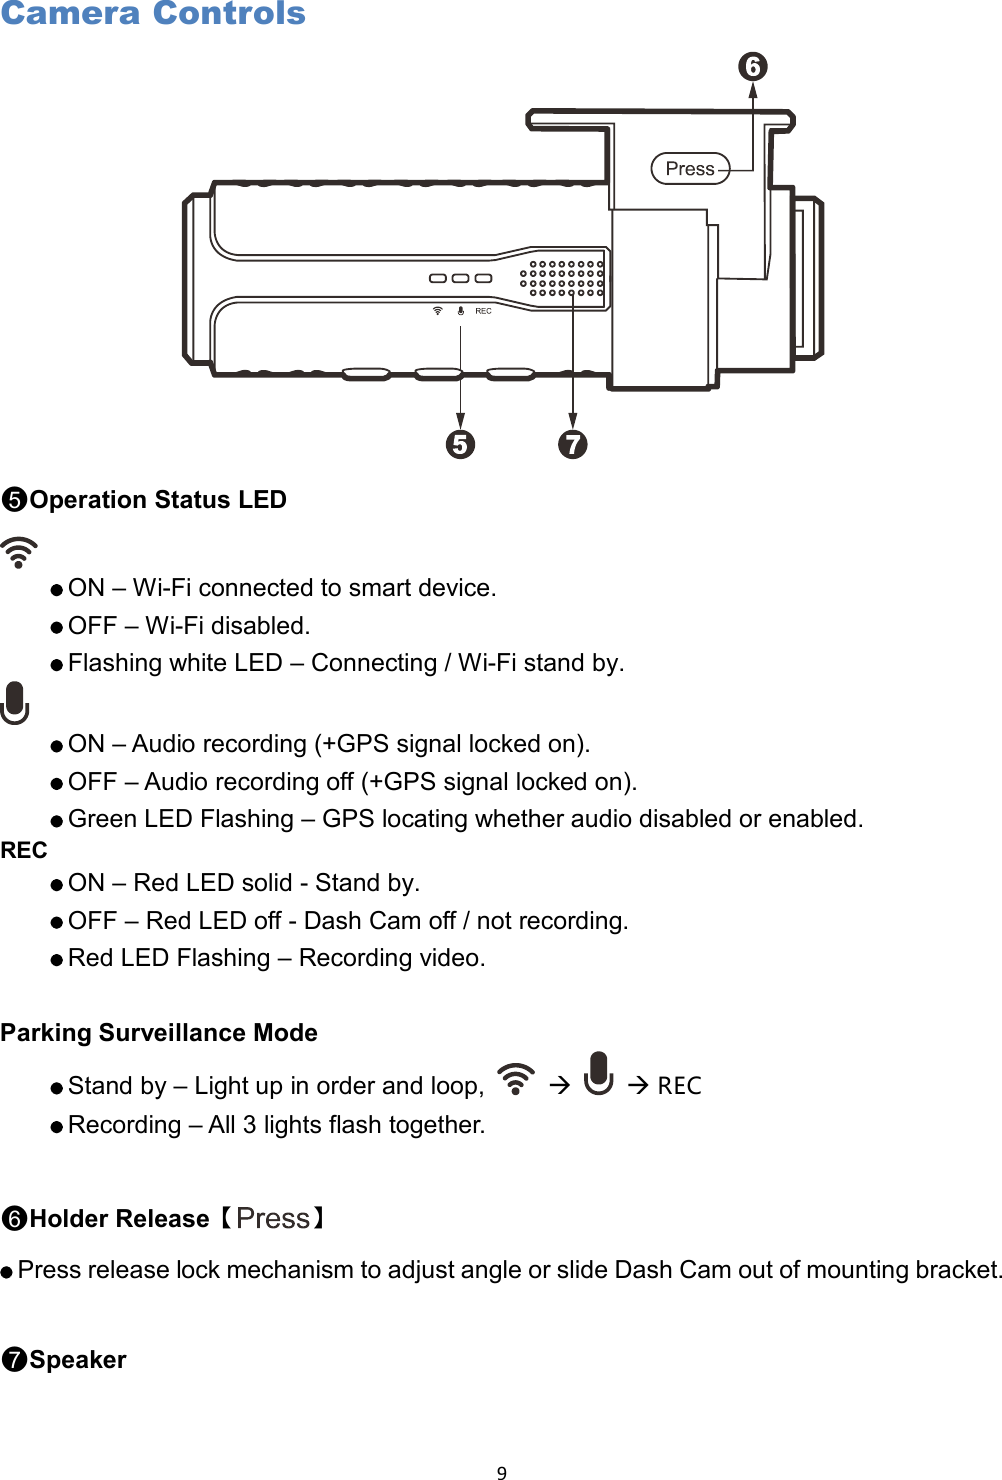
![20 Playback and Download Press [ ] to enter the files of recorded videos and photos. ●1File View Mode ●2Download File to Your Smart Device* ●3All Files ●4Display Video Files Only ●5Display Photo Files Only *NOTE: After downloaded to local storage on your smart device, [] will appear, indicating the file can be share via various social network such as Facebook, Instagram, etc.](https://usermanual.wiki/DOD-Technology/RC500S.User-manual/User-Guide-3808726-Page-21.png)
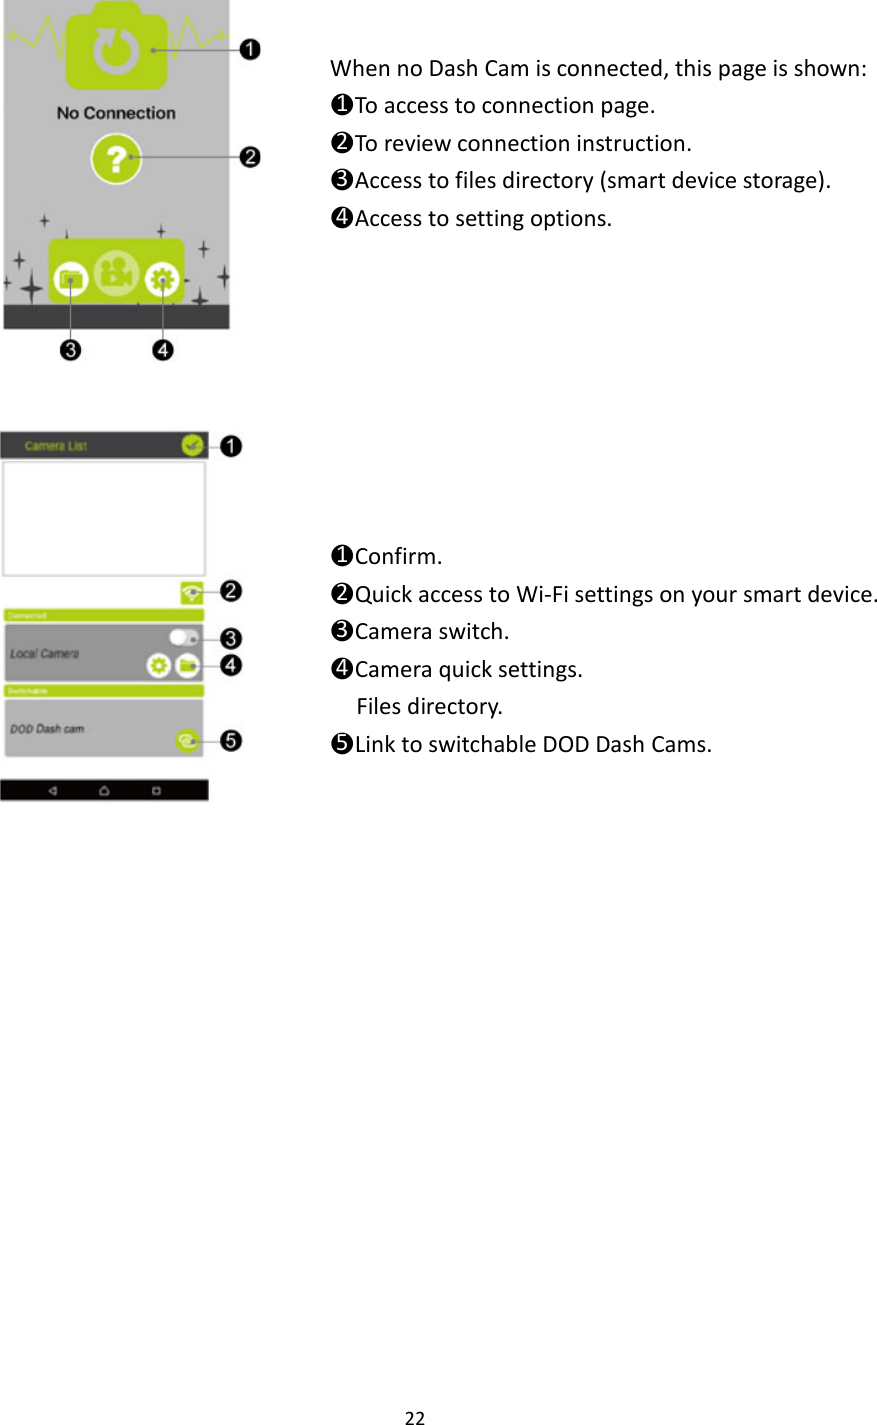
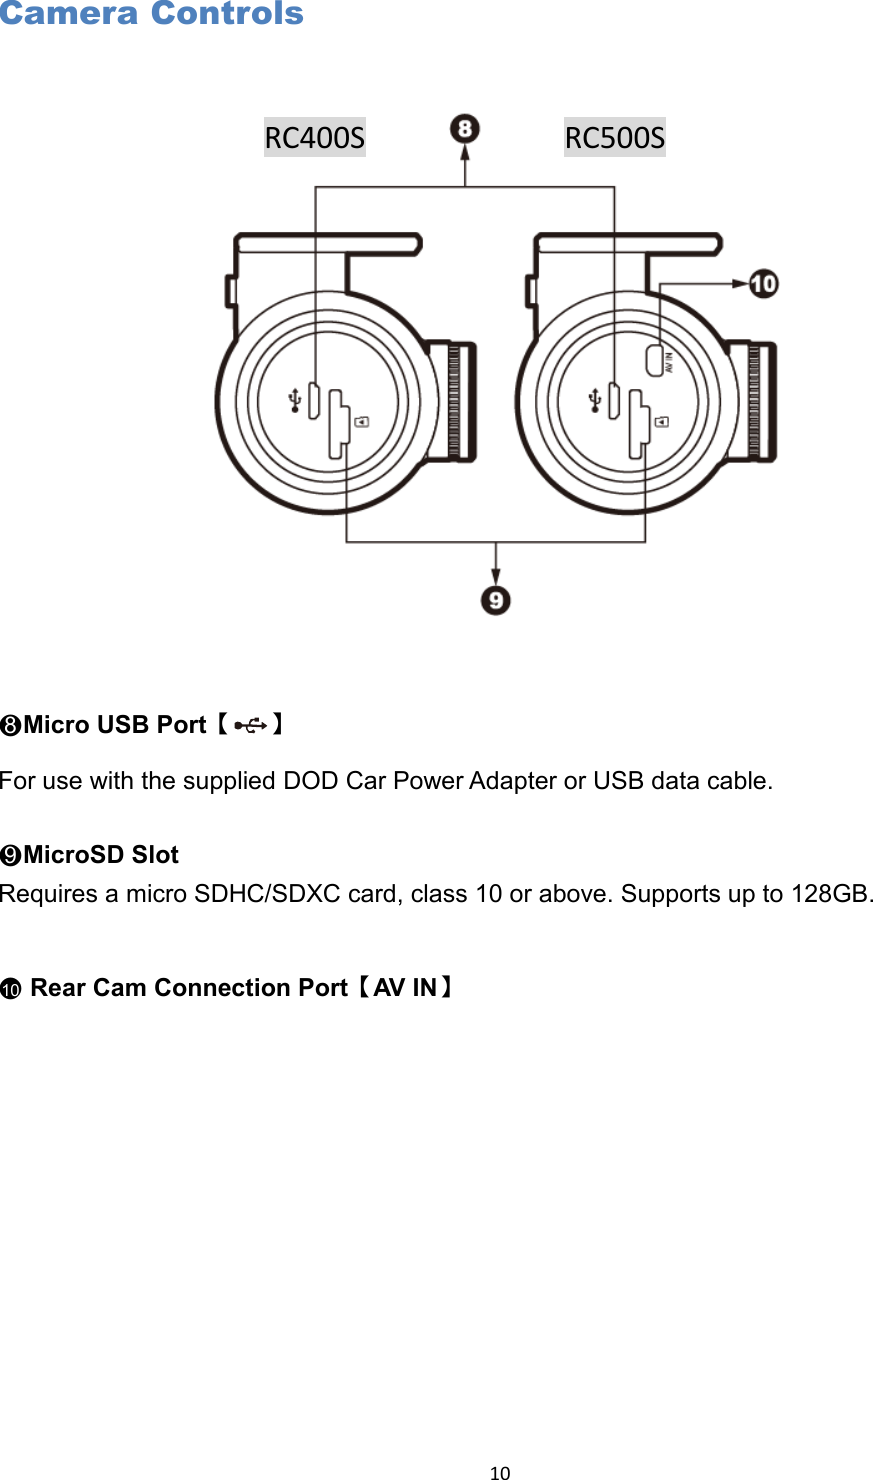
![23 ●1Confirm connection and return to previous page. ●2Quick access to Wi-Fi settings on your smart device. ●3Camera switch. ●4Camera quick settings. Files directory. ●5Disconnect from current camera. Settings Press [ ] to enter the menu setting. Settings can only be changed when recording has stopped. Video Recording Press [ ] to start or stop the recording. Settings can only be changed when recording is stopped. ●1Microphone Record / Mute ●2Snap Shot ●3Dim Display / Wake up ●4Dash Cam Connection Control Panel ●5Speed Indicator ●6Real-Time Streaming from Dash Cam ●7Thumbnail of Last Video File / Snapshot](https://usermanual.wiki/DOD-Technology/RC500S.User-manual/User-Guide-3808726-Page-24.png)
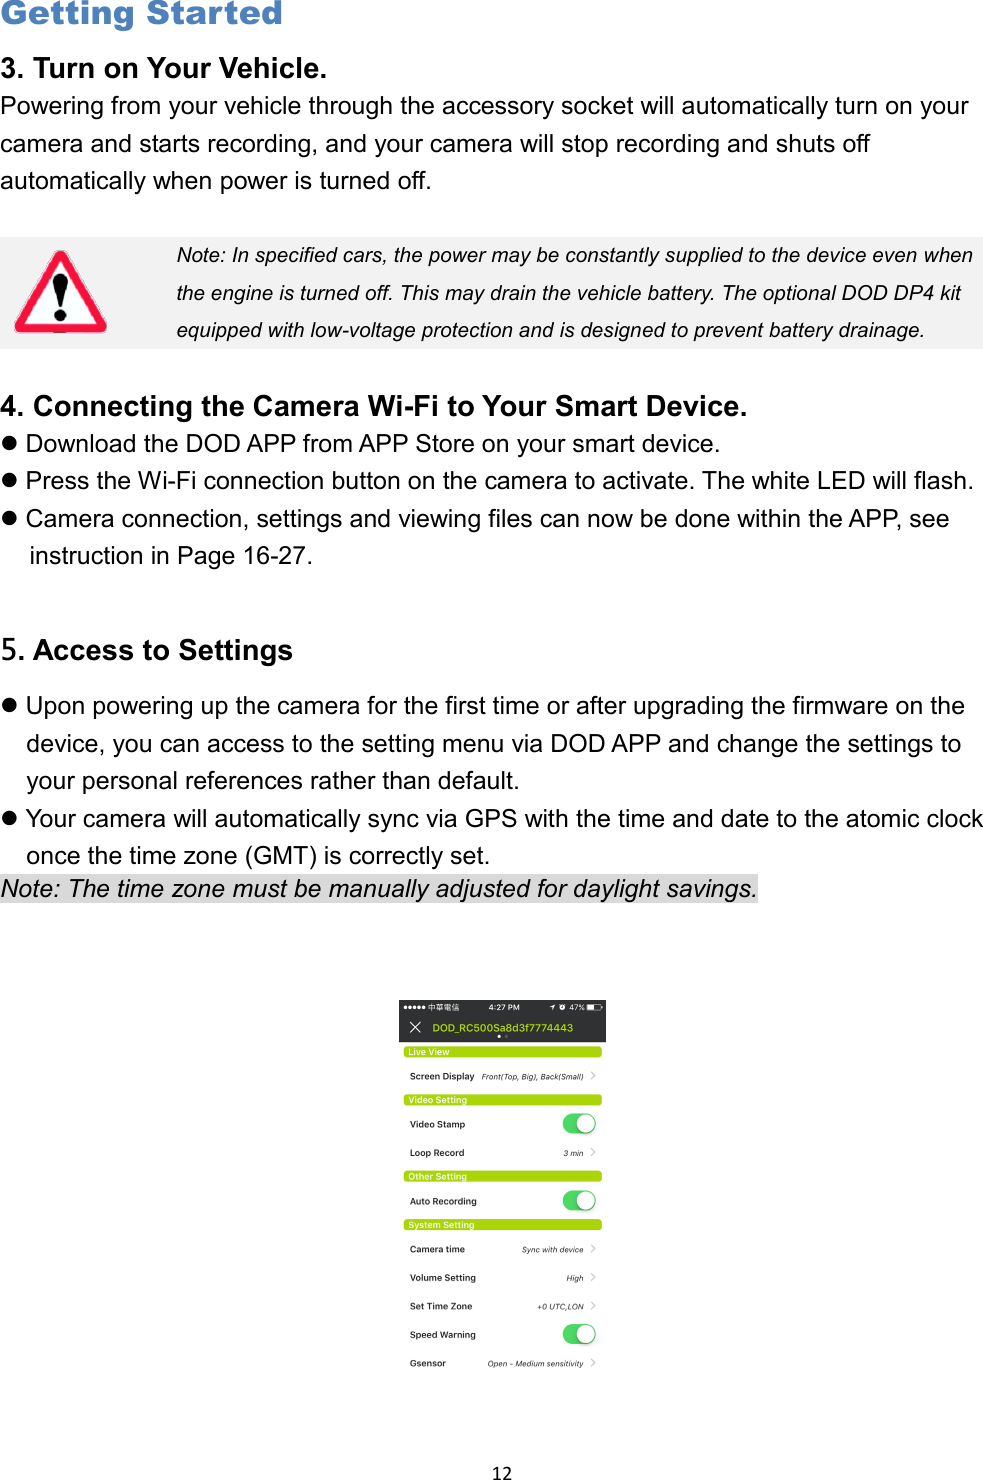
![24 Playback and Download Press [ ] to enter the files of recorded videos and photos. ●1File View Mode ●2Download File to Your Smart Device* ●3All Files ●4Display Video Files Only ●5Display Photo Files Only *NOTE: After downloaded to local storage on your smart device, [] will appear, indicating the file can be share via various social network such as Facebook, Instagram, etc.](https://usermanual.wiki/DOD-Technology/RC500S.User-manual/User-Guide-3808726-Page-25.png)