DREAMUS CS100 Bluetooth Speaker User Manual
IRIVER LIMITED Bluetooth Speaker
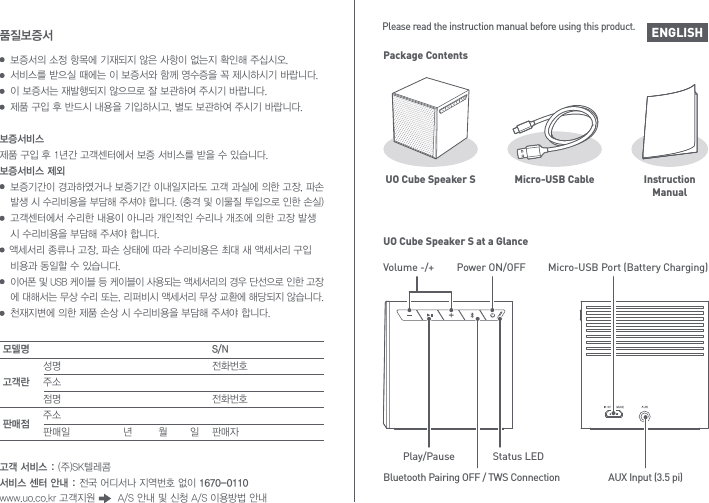
UserManual.wiki
>
DREAMUS
>
CS100 User Manual
user manual
Navigation menu
Upload a User Manual
Namespaces
Wiki Guide
HTML
PDF
Info
Views
User Manual
Discussion / Help
Navigation
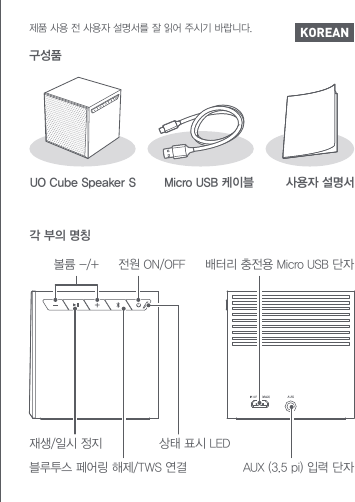
![TWS는 두개의 스피커를 연결하여 각각 왼쪽 채널과 오른쪽 채널로 분리하여 출력하는 기능입니다.1. TWS로 연결하려는 두개의 스피커 전원을 켜 페어링 대기상태로 준비합니다. 2. 왼쪽 채널로 설정하려는 스피커의 [ ]를 누르면 연결 시작음과 함께 TWS 연결이 진행되고, 다른 스피커는 자동으로 오른쪽 채널로 설정되며 파란색 LED가 켜집니다. 3. 연결이 완료되면, 왼쪽 채널 스피커는 [Left Channel] 음성과 함께 파란색 LED가 점멸합니다.4. 디바이스에서 검색을 하면 [SKT_CS100-XXXXX] 왼쪽 채널 기기만 표시됩니다.1. [ ]를 길게 누르면 TWS 및 모든 블루투스 상태가 초기화됩니다.TWS 및 블루투스 상태 초기화TWS(True Wireless Stereo) 연결하기파란색 점멸파란색 점멸왼쪽 채널파란색 켜짐오른쪽 채널TWSKOREAN1. [ ]를 길게 누르면 [Power on] 음성과 함께 LED가 파란색으로 점멸하며 전원 이 켜집니다.2. 전원이 켜져있는 상태에서, [ ]를 길게 누르면 [Power off] 음성이 출력되고 전원이 꺼집니다.전원 켜기/끄기파란색 점멸SKT_CS100-XXXXX1. 전원이 켜지면 자동으로 페어링 대기 모드로 전환됩니다. LED: 파란색 점멸 음성: Bluetooth Input Ready2. 감지된 장치가 디바이스에 [SKT _CS100-XXXXX]로 표시됩니다.3. [SKT_CS100-XXXXX]를 선택 하면 페어링이 완료됩니다. LED: 파란색 켜짐 음성: Bluetooth Connected4. 페어링 상태에서 [ ]를 길게 누르면 페어링이 해제됩니다.블루투스 페어링 하기최대 사용범위 : 10M](https://usermanual.wiki/DREAMUS/CS100/User-Guide-3069688-Page-3.png)
![[ / ]를 눌려 볼륨을 조절합니다.재생 중 [ ]를 누르면 일시 정지하고, 다시 한번 누르면 재시작 합니다.음악 듣기LED 사양블루투스 연결 상태를 표시배터리 상태를 표시배터리 상태와 블루투스 상태를 동시에 표시파 랑 색빨 간 색보 라 색제품 사양40mm X 12,000mAh20 hours (When set Mid-ranage volume)4 hours60mm x 60mm x 60mmmicroUSB maximum input current 5V 2ABluetooth 4.0 / 3.5 pi Stereo Jack1 LED (Blue, Red)Power on/off, Play/Pause, Volume UP/Down, Bluetooth/TWS PairingSystem SpecificationSpeaker UnitBattery CapacityOperation TimeCharging timeDimensionIO Port SpecificationPowerInputUI SpecificationLEDButton UI모델에 따라 제품의 외관 및 색상, 인쇄, 각인 내용이 변경될 수 있습니다.KOREAN1. 스피커 뒷면의 [배터리 충전용 Micro USB 단자]에 함께 제공된 Micro USB 케이블을 이용하여 충전기/PC와 연결하면 충전이 시작됩니다. 배터리 잔량 부족 : 적색 LED 점멸 충전 중 : 적색 LED 켜짐 충전 완료 :적색 LED 꺼짐충전하기1. 오디오 케이블(3.5mm/ 별매품)을 이용하여 [AUX 입력 단자]와 외부기기를 연결합니다.외부기기 연결하기](https://usermanual.wiki/DREAMUS/CS100/User-Guide-3069688-Page-4.png)
![ENGLISHTWS is a method of wirelessly connecting two independent speakers to output discrete stereo sound separately to the left and right channels.1. Turn on the power of two speakers you want to connect via TWS to set them in pairing standby mode.2. Press the [ ] button of the speaker you want to set as the left channel to begin the TWS connection process with the signal tone. The other speaker will automatically be set as the right channel, and the LED light will be solid blue.3. When the connection is complete, the left- channel speaker will play the [Left Channel] sound, and the LED light will flash blue.4. When you search for the speakers from a compatible device, only the [SKT_CS100- XXXXX] left-channel speaker will be displayed.1. Press and hold the [ ] button to reset all TWS and Bluetooth settings.Reset TWS and BluetoothTWS (True Wireless Stereo) ConnectionFlashing BlueFlashing BlueLeft ChannelFlashing BlueRight ChannelTWS1. Press and hold the [ ] button to turn on the device. The [Power On] sound will play indicating that the device is on, and the status LED will flash blue.2. While the device is on, press and hold the [ ] button to turn off the device. The [Power Off] sound will play indicating that the device is off.Power ON/OFFFlashingBlueSKT_CS100-XXXXX1. When the power is turned on, the device will automatically switch to pairing standby mode. LED: Flashing Blue Sound: Bluetooth Input Ready2. When detected, the speaker will appear as [SKT_CS100-XXXXX] on a Bluetooth-enabled device.3. Select [SKT_CS100-XXXXXX] on your device to complete the pairing. LED: Solid Blue Sound: Bluetooth Connected4. When paired, press and hold the [ ] button to disconnect from a Bluetooth -enabled device.Bluetooth PairingMaximum Range: 10 m (32.8 ft.)](https://usermanual.wiki/DREAMUS/CS100/User-Guide-3069688-Page-6.png)
![ENGLISHPress the [ / ] buttons to adjust the volume.Press the [ ] during playback to pause and press again to resume.Listening to MusicLED specification Displays Bluetooth connection status Displays the battery status Displays status of Bluetooth and battery at the same time. Blue Red Violet Product Specifications40mm X 12,000mAh20 hours [Wen set Mid-ranage volume4 hours60mm x 60mm x 60mmmicro USB maximum input current 5V 2ABluetooth 4.0 / 3.5pi Stereo Jack1 LED [Blue, Red]Power on/off, Play/Pause, Volume UP/Down, Bluetooth/TWS PairingSystem SpecificationSpeaker UnitBater CapacityCharging TimeOperation TimeDimensionIO Port SpecificationPowerInputUI SpecificationLEDButton UIThe appearance of the product as well as the printed and engraved information may vary depending on the model.1. Connect one end (Micro-B) of the included Micro-USB cable to the [Micro-USB] port on the back of the speaker, and then connect the other end (type-A) to a charger/computer using to charge the device. Low Battery: Flashing Red LED Charging: Solid Red LED Charged: Red LED OffCharging1. Use an audio cable (3.5 mm / sold separately) to connect an external device to the [AUX Input Port].Auxiliary Input Connection](https://usermanual.wiki/DREAMUS/CS100/User-Guide-3069688-Page-7.png)