DREAMUS DSF11 Wireless Speaker User Manual DSF11 rev01
IRIVER LIMITED Wireless Speaker DSF11 rev01
UserManual.wiki
>
DREAMUS
>
DSF11 User Manual
User Manual
Navigation menu
Upload a User Manual
Namespaces
Wiki Guide
HTML
PDF
Info
Views
User Manual
Discussion / Help
Navigation
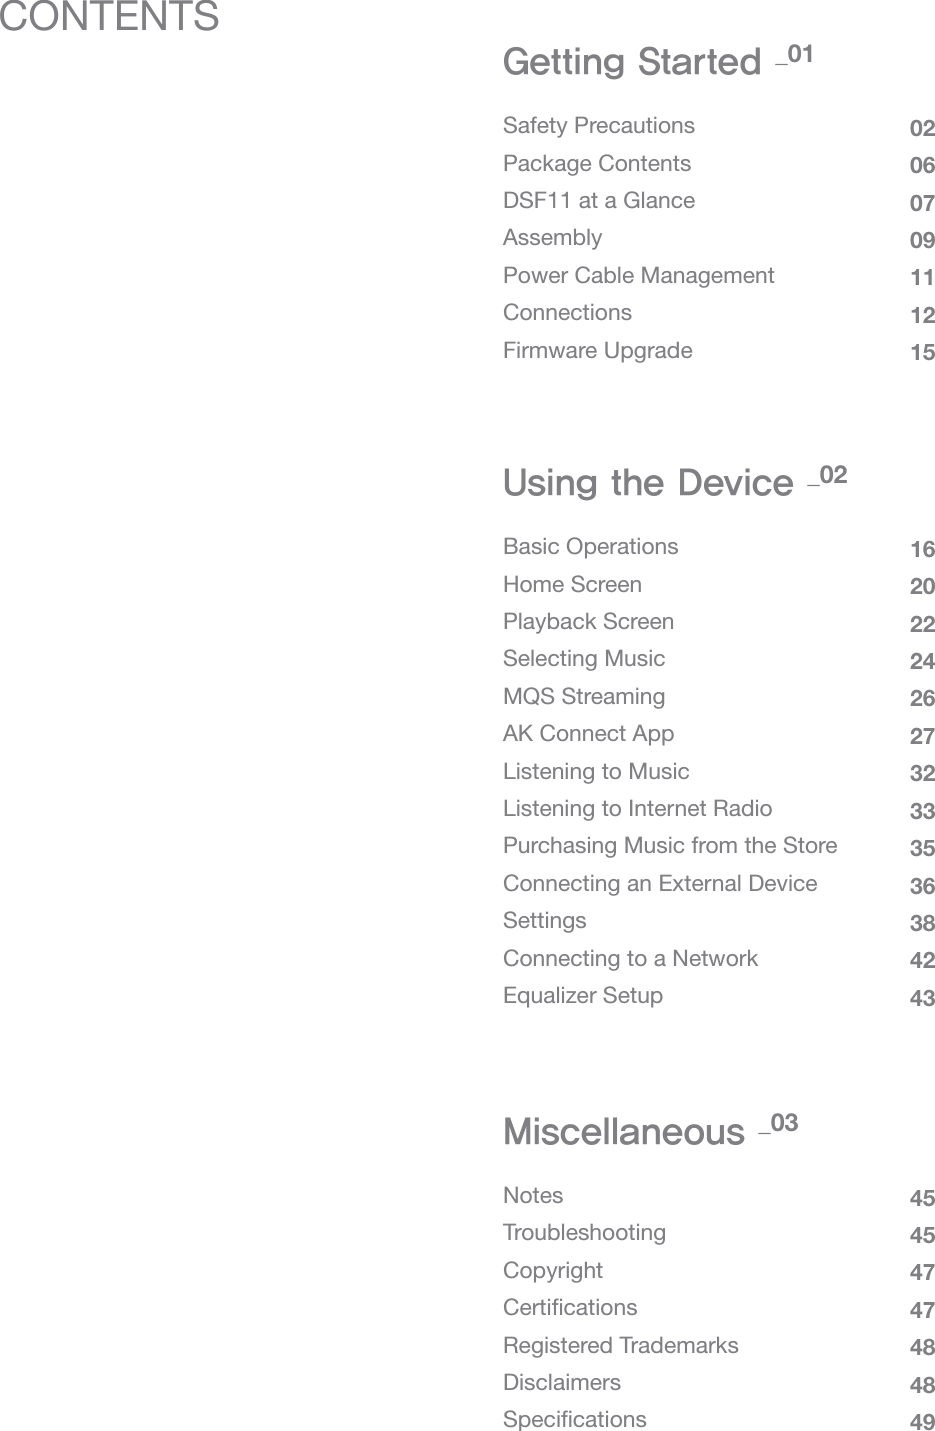
![User GuideGetting Started 02Safety PrecautionsDevice Discontinue use of this product immediately if it does not operate normally or a failure occurs. When a plug is inserted into the AUX, Optical, or USB port or a card is inserted into the microSD slot, do not apply any force or shock to the plug or card. Do not insert any metal objects (coins, hairpins, etc.) or flammable debris into the device. Do not place heavy objects on the device. If water or other liquids enter the device, immediately disconnect the power cord from the outlet, wipe the surface with a dry cloth, and contact the nearest 'iRiver Zone' for customer support. Water-damaged devices will be repaired for a fee regardless of warranty status, but the device may not be repairable. Do not attempt to disassemble, repair, or modify the product. iRiver is not liable for any damage incurred due to unauthorized disassembly, repair, or modification of the product. Never use chemicals or cleaning products on the device since they can damage the paint and surface coating. Avoid dropping or subjecting the device to a strong impact (excessive vibration, etc.). When inserting a cable into any audio connection port, do not apply force or shock to the plug. This may cause damage to the audio ports. The use of defective USB plugs or microSD cards may cause the product to malfunction.To ensure safe product usage, check the [Safety Precautions] before you begin using the product.](https://usermanual.wiki/DREAMUS/DSF11/User-Guide-2731047-Page-3.png)
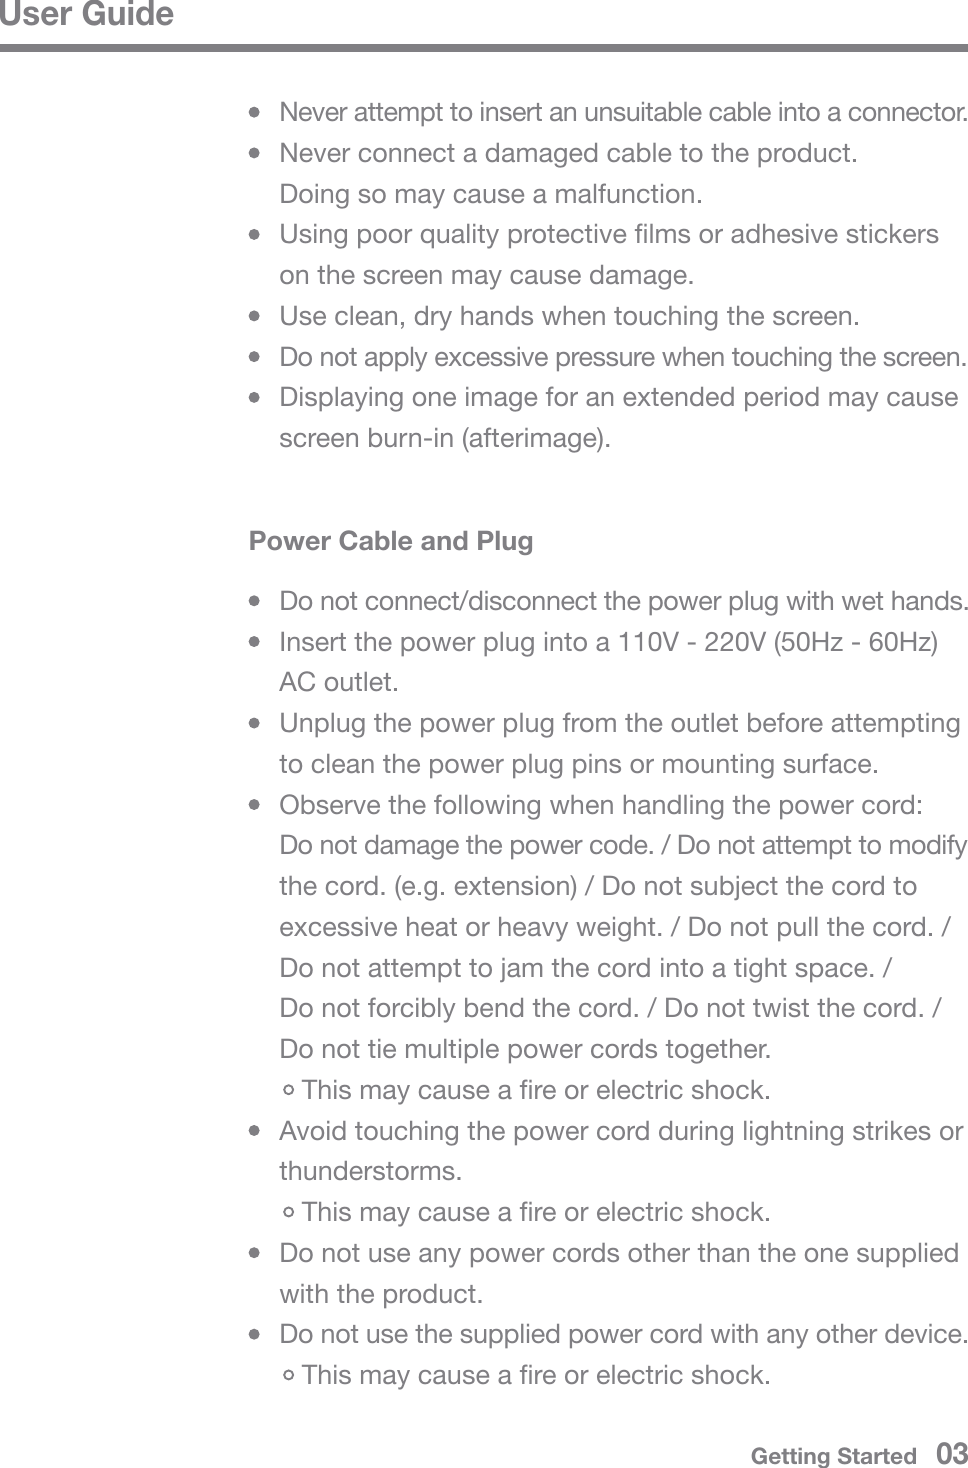
![User GuideBase: Connects to the bottom of the DSF11.Power Cord & Adapter: Connects to the device to supply power.T-wrench: Used to fasten/loosen bolts.Bolts: Used to fasten/loosen the base and support.Quick Start Guide: Basic overview of device functionality.Warranty Card: The Warranty Card is required for customer and technical support. Do not misplace the card.User Guide: The User Guide can be downloaded from the Astell&Kern website. [http://www.astellnkern.com > Support > Download]Components may be changed without prior notice to improve the performance or quality of the product.Package ContentsDSF11 BasePower CordT-wrench Quick Start Guide & Product WarrantyBoltsAdapterGetting Started 06](https://usermanual.wiki/DREAMUS/DSF11/User-Guide-2731047-Page-7.png)
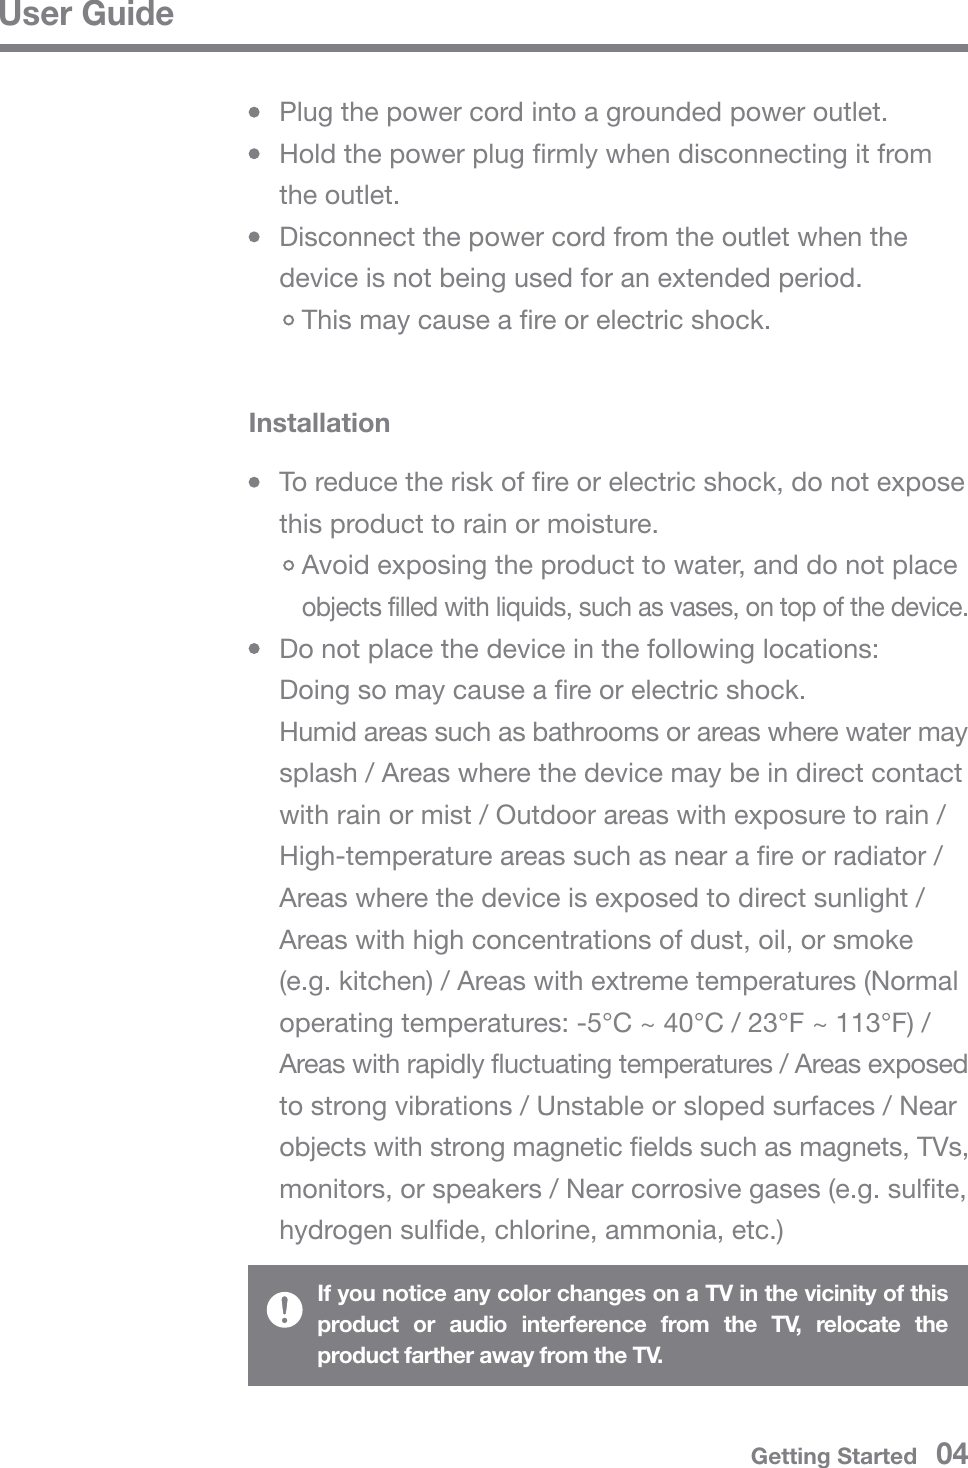
![User GuideThe appearance of the product as well as printed and engraved information may vary depending on the model.DSF11 at a GlanceMain UnitTweeter/Mid-rangemicroSD Card SlotWoofer PortWooferAUX PortUSB-HOST PortOPTICAL IN PortPower/Volume KeyBack ButtonHome ButtonLCD TouchscreenPower InputLAN PortGetting Started 07The DSF11 requires assembly of the top, main unit, base, and support by the user.Refer to [Assembly] on page 9~10 or assembly guide printed on the packaging above the stand for detailed assembly instructions.](https://usermanual.wiki/DREAMUS/DSF11/User-Guide-2731047-Page-8.png)
![User GuidePower/Volume Key: When the wheel key is pressed, the product will power on, and the [ ] logo will appear on the screen.LCD Touchscreen: Display with touch control.Back Button: Pressure-sensitive metal capacitive touch interface.A light touch will return the user to the previous screen.Home Button: Pressure-sensitive metal capacitive touch interface.A light touch will redirect the user to the main menu.microSD Card Slot: A microSD card can be inserted, and music files can be selected for playback.USB-HOST Port: A USB storage device can be connected and music files selected for playback.AUX Port: An external device can be connected for music playback.OPTICAL IN Port: An external device can be connected for music playback.LAN Port: Connect a LAN cable for a wired connection.Power Input: Connect the power cable. The power input is located at the base of the product.(Refer to [Connecting the Power Supply] on page 11 for detailed instructions.)Getting Started 08](https://usermanual.wiki/DREAMUS/DSF11/User-Guide-2731047-Page-9.png)
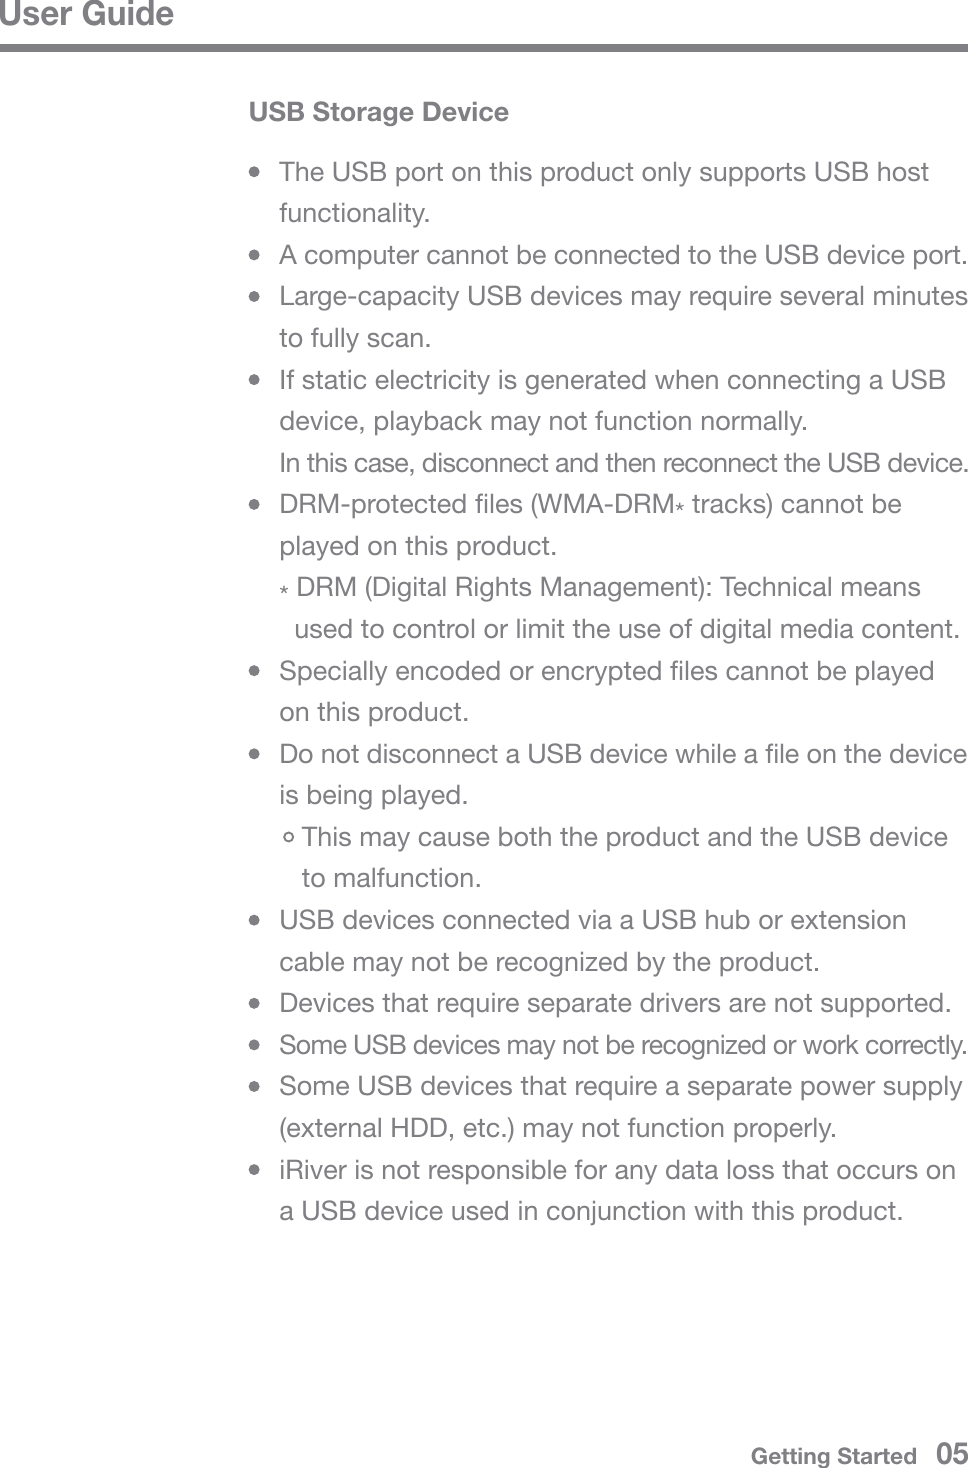
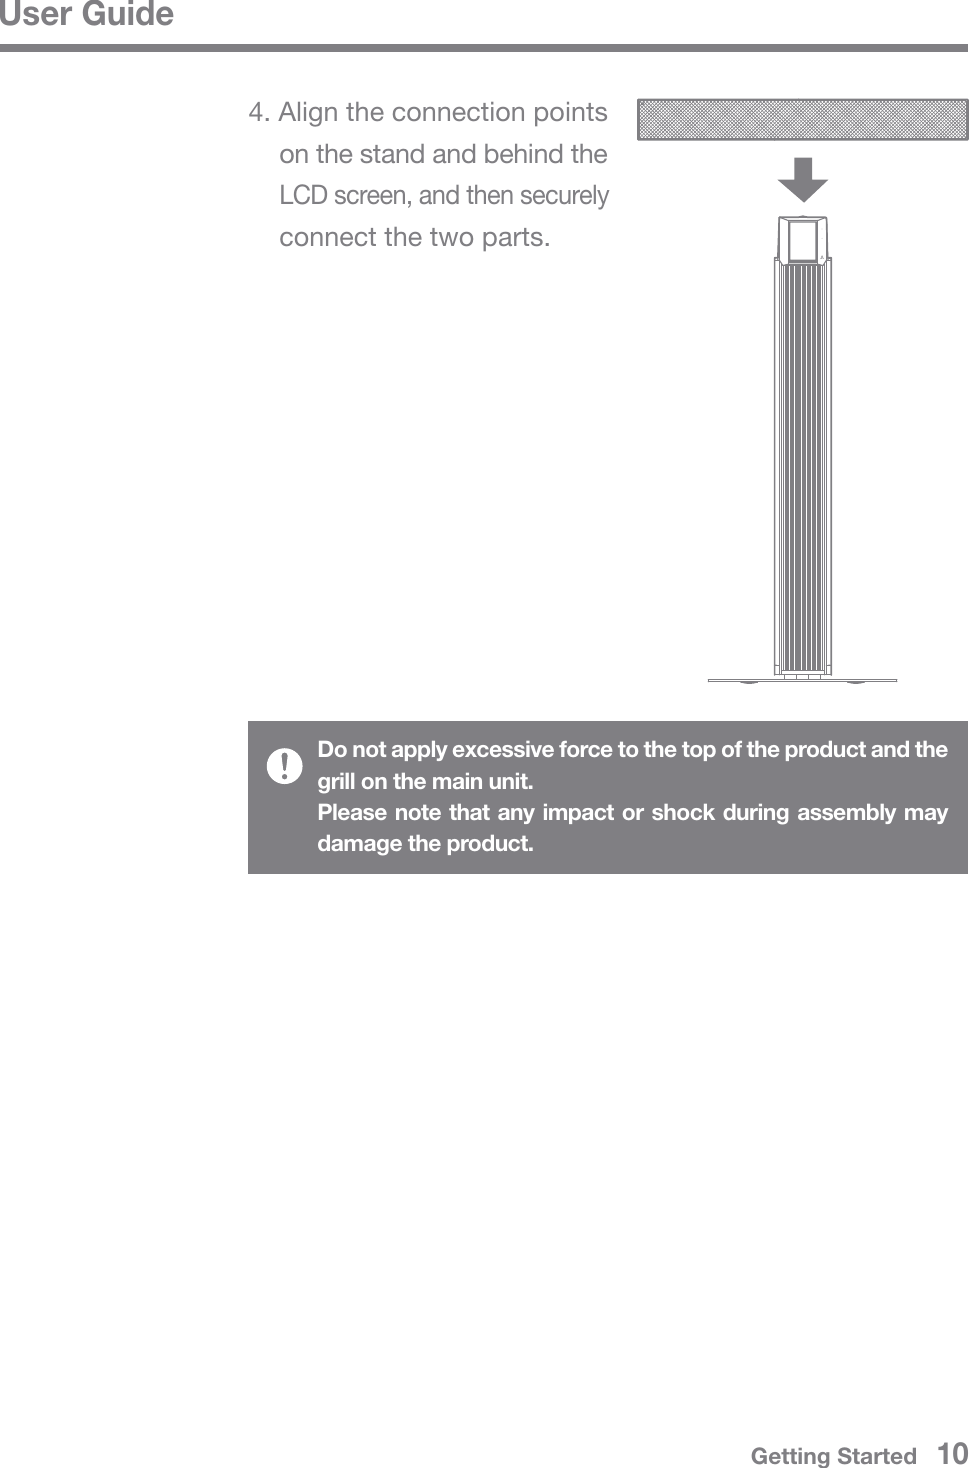
![User GuideAssembly 1. Please refer to the assembly guide printed on the packaging above the stand.2. Align the bolt holes on the main unit and base, and secure the base to the main unit using the supplied T-wrench and bolts.3. Connect the power cord to the adapter, and then connect the adapter to the [Power Input] port on at the base of the main unit.Getting Started 09](https://usermanual.wiki/DREAMUS/DSF11/User-Guide-2731047-Page-10.png)
![User GuideConnecting the Power Supply1. Connect the power cord to the [Power Input] located at the base of the unit.2. Connect the power cord to the outlet and press the [Power Wheel] located above the LCD screen for 2 to 3 seconds. The product will power on, and the [ ] logo will appear on the screen.Power Cable ManagementAfter connecting the power cord to the product, insert the power plug into an available outlet.To avoid malfunction or damage to the device, only use the power cord supplied with the product.Unplug the power supply from the outlet when the device is not in use for an extended period.The product packaging includes the appropriate power cable for the U.S., Japan, Europe, and U.K. regions.Please check the respective certification mark on the power plug, and use the correct power cable for the appropriate region.Getting Started 11](https://usermanual.wiki/DREAMUS/DSF11/User-Guide-2731047-Page-12.png)
![User GuideConnec-tionsInserting/Removing a microSD Card1. Refer to the diagram and gently insert a microSD card into the [microSD Card Slot].2. Gently press the microSD card to release it from the slot.Recommended microSD CardsBrand : SanDisk, Transcend64GB microSD card is recommended.Notes on inserting a microSD card Do not force the microSD card into the slot. Doing so may cause damage to the device and/or the microSD card. Do not repeatedly insert/remove the microSD card. Inserting the microSD card improperly may damage the device or prevent it from being removed.Notes on removing a microSD card Be sure to safely unmount and remove the microSD card from the device. Not following the proper procedure may corrupt data and cause serious damage to the system. Do not remove the microSD card while it's in use. Doing so may damage the microSD card, corrupt or delete data and cause the device to malfunction.Miscellaneous If the device fails to recognize the microSD card and/or malfunctions, format the memory card in the FAT32 format before use. Using microSD cards other than the recommended brands may cause the device to malfunction. A microSD card is not included with this device. Please purchase separately.Getting Started 12](https://usermanual.wiki/DREAMUS/DSF11/User-Guide-2731047-Page-13.png)
![User GuideConnecting a USB Storage Device1. Connect a USB storage device to the [USB Port] on the product.Devices that require separate drivers or the creation of multiple drives (multi-card readers, etc.) may not be supported.Some USB devices that require a separate power supply (external HDD, etc.) may not function properly.Connecting an External Device to the AUX Port1. Connect an external device to the [AUX Port] using an AUX cable.Getting Started 13](https://usermanual.wiki/DREAMUS/DSF11/User-Guide-2731047-Page-14.png)
![User GuideConnecting an External Device to the OPTICAL Port1. Connect an external device to the [OPTICAL IN Port] using an optical cable.Gently insert the cable into the port. Avoid using excessive force.Do not move the product while a cable is connected.Connecting to a Network1. Connect the appropriate Internet-ready network cable (ADSL, VDSL, cable modem, wired/wireless router, etc.) to the [LAN Port] on the back of the product, or connect wirelessly to an access point (AP) that provides Wi-Fi access.2. When connected to a network, the Connect Library menu is activated on the Home screen. You may check the network connection status from the Settings menu.Getting Started 14](https://usermanual.wiki/DREAMUS/DSF11/User-Guide-2731047-Page-15.png)
![User GuideRefer to page 42 for more information on connecting to a network.Moving to another screen during a file download will cancel the download.Do not disconnect from the wireless network during a Firmware Upgrade. Doing so may cause data corruption and/or damage to the system.Do not turn off or disconnect the product from the power code while the firmware update file is being upgraded.If an error occurs or the notice in the Notification Bar disappears during an upgrade, you can download the Firmware Upgrade again through [Settings - Update].Firmware UpgradeFirmware Upgrade1. Connect the product to a wired or wireless network.2. When a new firmware version is available, the screen displays a Firmware Update Guide window.3. Select [Update] and choose the items for update.4. Follow the on-screen instructions and proceed with the Firmware Upgrade.Getting Started 15](https://usermanual.wiki/DREAMUS/DSF11/User-Guide-2731047-Page-16.png)
![User GuideA welcome screen is displayed when the product is turned on for the first time. The basic setup process will begin.1. Select the desired language from the list of displayed languages and press [ ] on the screen.2. Select the appropriate time zone from the world time settings screen, and then press [ ].Basic OperationsUsing the LCD Touchscreen1. This device features an LCD touchscreen that allows you to perform operations by touching the screen. Touch the desired item from the on-screen menu (icon) to run the selected function.Basic SettingsTo prevent damage to the screen, do not use a sharp object or excessive force.Using the Device 16](https://usermanual.wiki/DREAMUS/DSF11/User-Guide-2731047-Page-17.png)
![User Guide3. Enter a name for the device in the name settings screen, and then press [ ]. 4. Connect to a network from the network settings screen. Wired network: The device will automatically connect to your network when a LAN cable is connected. Wireless network: To connect to a wireless network, select your network from the list of available access points (AP).Using the Device 17](https://usermanual.wiki/DREAMUS/DSF11/User-Guide-2731047-Page-18.png)
![User GuideRefer to page 42 for more information on connecting to a network.5. Press [Start] after completing the network setup to begin using the DSF11.Using the Device 18](https://usermanual.wiki/DREAMUS/DSF11/User-Guide-2731047-Page-19.png)
![User Guide1. Scroll through a list by dragging [Down Up] / [Up Down] on the screen.Moving up/down in the list1. Press [ ] to return to the previous screen.Previous ScreenUsing the Device 19](https://usermanual.wiki/DREAMUS/DSF11/User-Guide-2731047-Page-20.png)
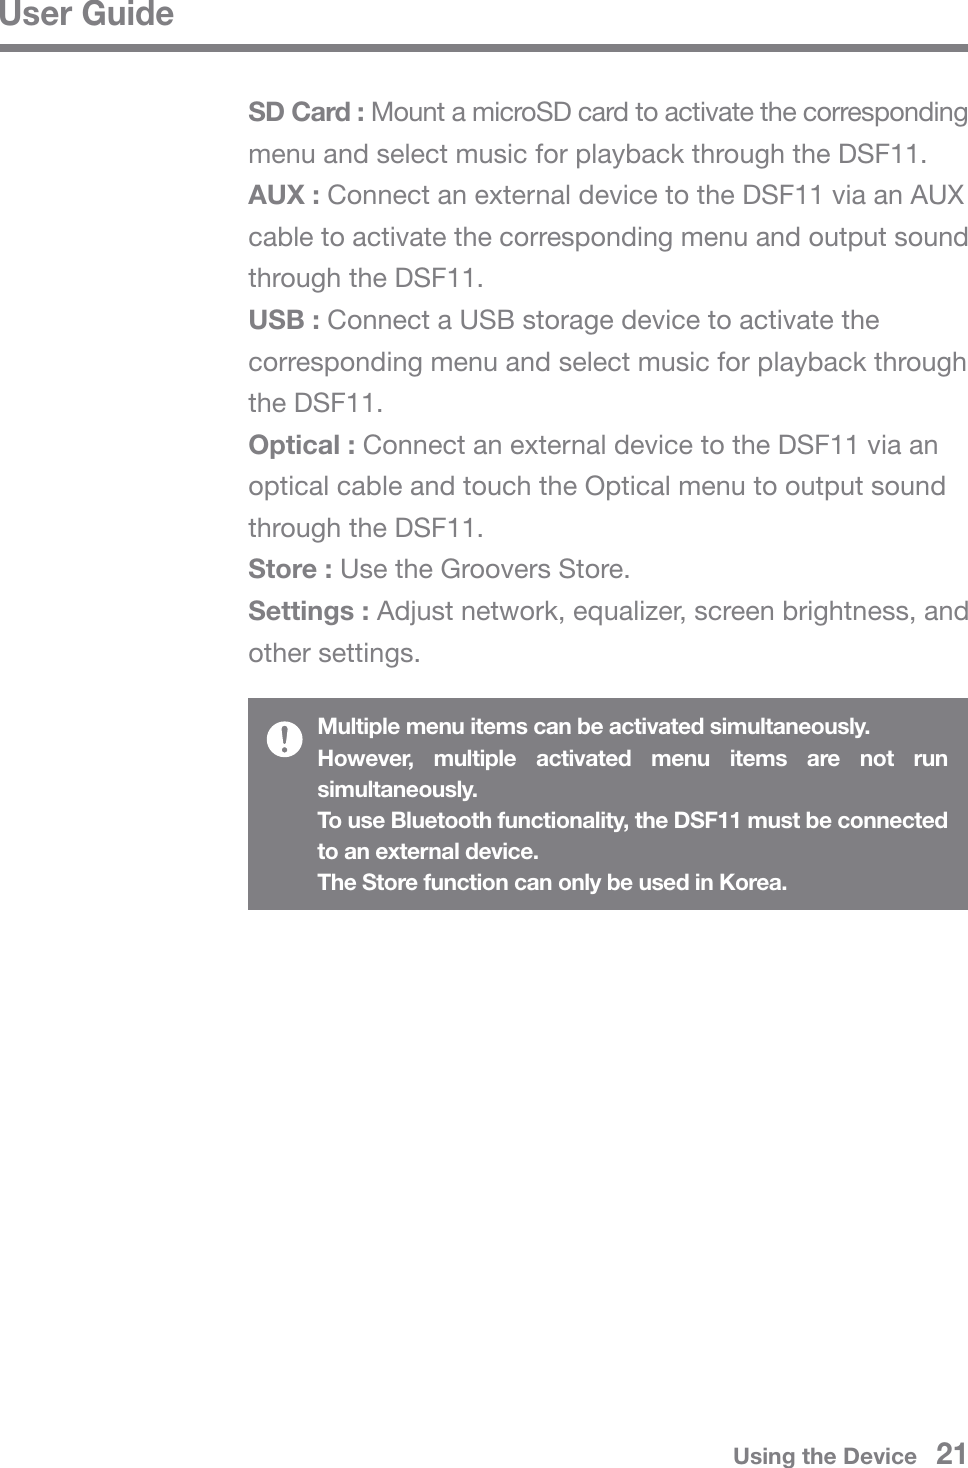
![User GuideHome Screen Drag the Home screen [Up Down] to move through the menus. After entering a menu, press [ ] at the top of the screen or the [ ] key on the right to return to the previous screen. Press [ ] on the right of the screen to be redirected to the Home screen.Navigating on the Home ScreenConnect Library : You can select other storage devices on the same network as the DSF11 including a PC, NAS, AK500N, and AK380.Connect Speaker : Set the sound output to the DSF11 on a product such as the AK500N or AK380 to activate the corresponding menu.vTuner : Use vTuner, an Internet radio service.Bluetooth : Connect to the DSF11 from an external device via Bluetooth to activate the corresponding menu.DSF11 supports the high-quality aptX audio codec.Using the Device 20](https://usermanual.wiki/DREAMUS/DSF11/User-Guide-2731047-Page-21.png)
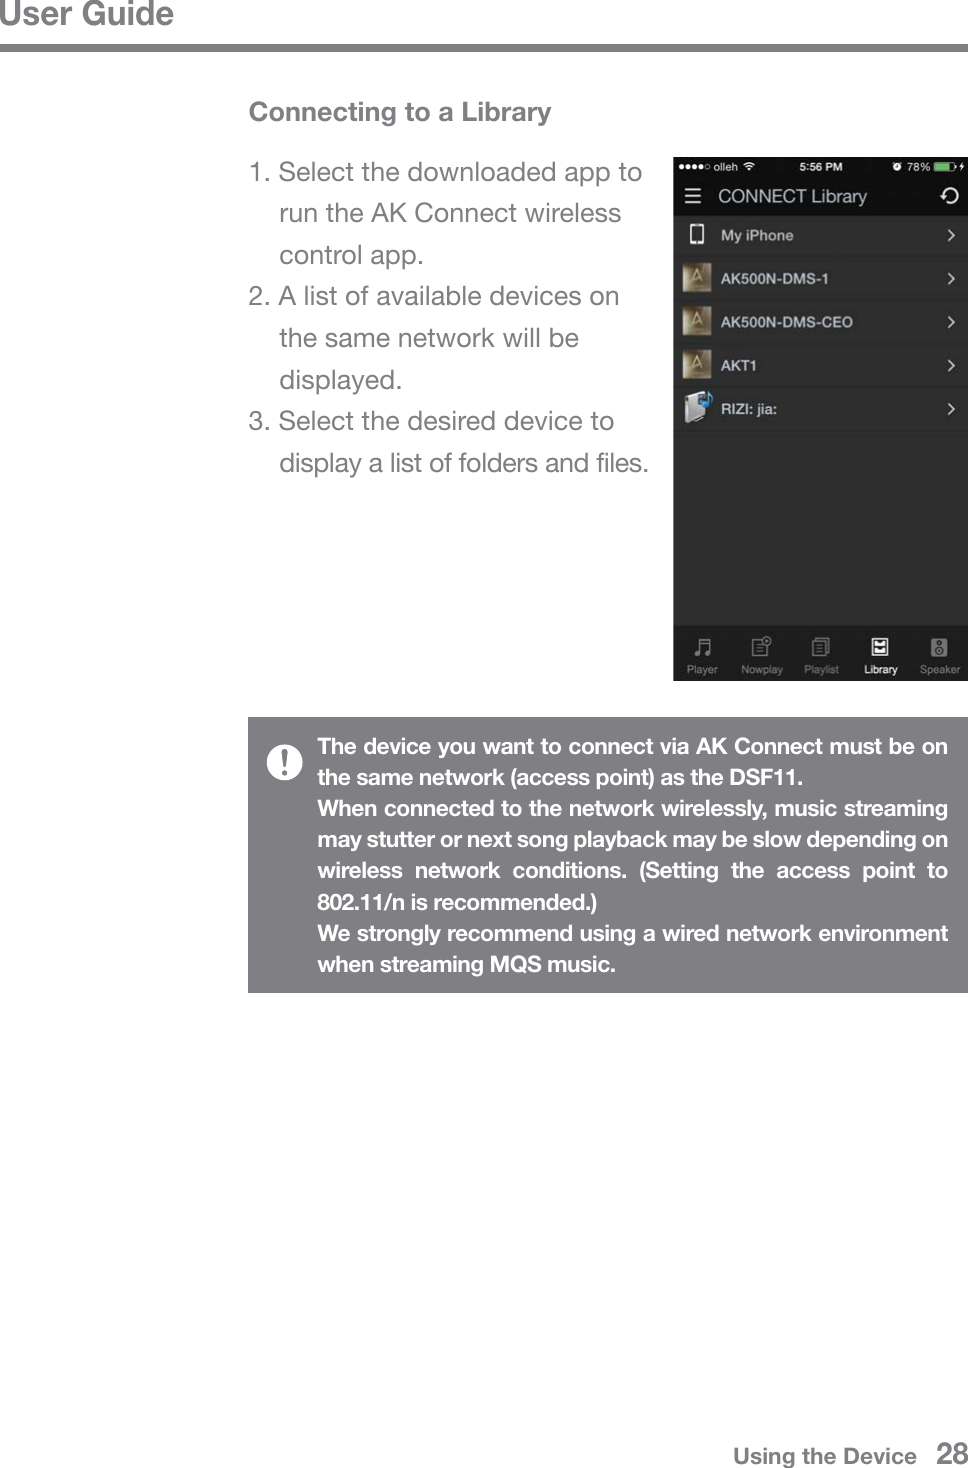
![User GuideSelecting MusicSelecting Music on a ServerMusic on a server on the same network as the DSF11 can be played back in real-time.1. Select [Connect Library] from the Home screen to display a list of devices available for connection.2. Select a device to be used as a library to display its database contents.If the device connected to Connect Library supports the AK database, the contents will be automatically sorted according to Songs, Artists, Albums, Genres, and Folders.Press [ ] at the top of the screen to display the current playback screen.Press [ ] at the top of the screen to refresh the list.The device you want to use via Connect Library must be on the same network as the DSF11.Refer to page 42 for more information on connecting to a network. Using the Device 24](https://usermanual.wiki/DREAMUS/DSF11/User-Guide-2731047-Page-25.png)
![User GuideSelecting Music on a microSD Card1. Mount a microSD card to activate the microSD card menu.2. Select the activated microSD Card menu to display a list of music files on the microSD card.Refer to page 12 for more information on connecting a microSD card. Press [ ] at the top of the screen to display the current playback screen.Selecting Music on a USB Storage Device1. Connect a USB storage device to the USB-HOST port to activate the USB menu.2. Select the activated USB menu to display a list of music files on the USB storage device.Using the Device 25](https://usermanual.wiki/DREAMUS/DSF11/User-Guide-2731047-Page-26.png)
![User GuideRefer to page 13 for more information on connecting a USB storage device. Press [ ] at the top of the screen to display the current playback screen.Devices that require separate drivers or the creation of multiple drives (multi-card readers, etc.) may not be supported.Some USB devices that require a separate power supply (external HDD, etc.) may not function properly.MQS Streaming Server Installation1. Visit the Astell&Kern website and download the MQS Streaming Server installer that corresponds to your operating system. [http://www.astellnkern.com > Support > Download]2. Run the downloaded installer and follow the on-screen instructions.3. Check the User Guide within the program for detailed information on using the Music Streaming Server.Music on a PC on the same network as the DSF11 can be played back in real-time.MQS StreamingPlease refer to the following PC/Mac minimum system requirements:PC Minimum System Requirements OS : Windows XP, Windows 7/8 (32 & 64-bit)Mac Minimum System Requirements Mac OS X Lion (10.7) or laterUsing the Device 26](https://usermanual.wiki/DREAMUS/DSF11/User-Guide-2731047-Page-27.png)
![User GuideSelecting an MQS Streaming Server1. Complete the installation and run the MQS Streaming Server from the computer. Refer to [MQS Streaming Server Help] on the Astell&Kern website for installation help. [http://www.astellnkern.com > Support > Download]2. When the DSF11 and your PC are connected to the same network, your PC will be displayed in a list when Connect Library is selected on the DSF11.3. Music contained in the shared folder set in the MQS Streaming Server can be played in real-time on the DSF11.Installing the AK Connect App1. Enter "akconnect" in the search field of the Google Play Store or Apple App Store depending on your smartphone or tablet model to download and install the appropriate application.Please download the HD version of the app for tablets.Alternatively, you can also search for “astell” to find and download the app.The DSF11 can be operated wirelessly from a smartphone or tablet via the AK Connect app.AK Connect AppUsing the Device 27](https://usermanual.wiki/DREAMUS/DSF11/User-Guide-2731047-Page-28.png)
![User GuideCreating a Playlist1. Press [ ] at the top-right corner of the Library screen, and then select a playlist for adding songs. Existing Playlist: Add the selected file to an existing playlist. New Playlist: Add the selected file to a new playlist. NowPlaying List : Add the selected file to the current playlist.2. Select the song you want to add, and then press [+ ADD TO] to add the song to the playlist.Editing a PlaylistPress the appropriate icon at the top-right corner of the playlist screen to edit playlists. : Delete playlist. : Add playlist.Using the Device 30](https://usermanual.wiki/DREAMUS/DSF11/User-Guide-2731047-Page-31.png)
![User GuideConnecting SpeakersSmartphone/TabletDSF11NAS1. Select [Speaker] at the bottom of the Library screen to display a list of speakers on the same network.2. Select the desired speaker to output sound through the speaker.App Usage ExampleSelect the DSF11 from the AK Connect app's [Speaker] menu. Specify [NAS] in the Library menu, and then select the desired song to play back music through the DSF11.The AK Connect app, DSF11, and NAS must all be connected to the same network.A product that does not support the DLNA standard like NAS may not be connected.Using the Device 31](https://usermanual.wiki/DREAMUS/DSF11/User-Guide-2731047-Page-32.png)
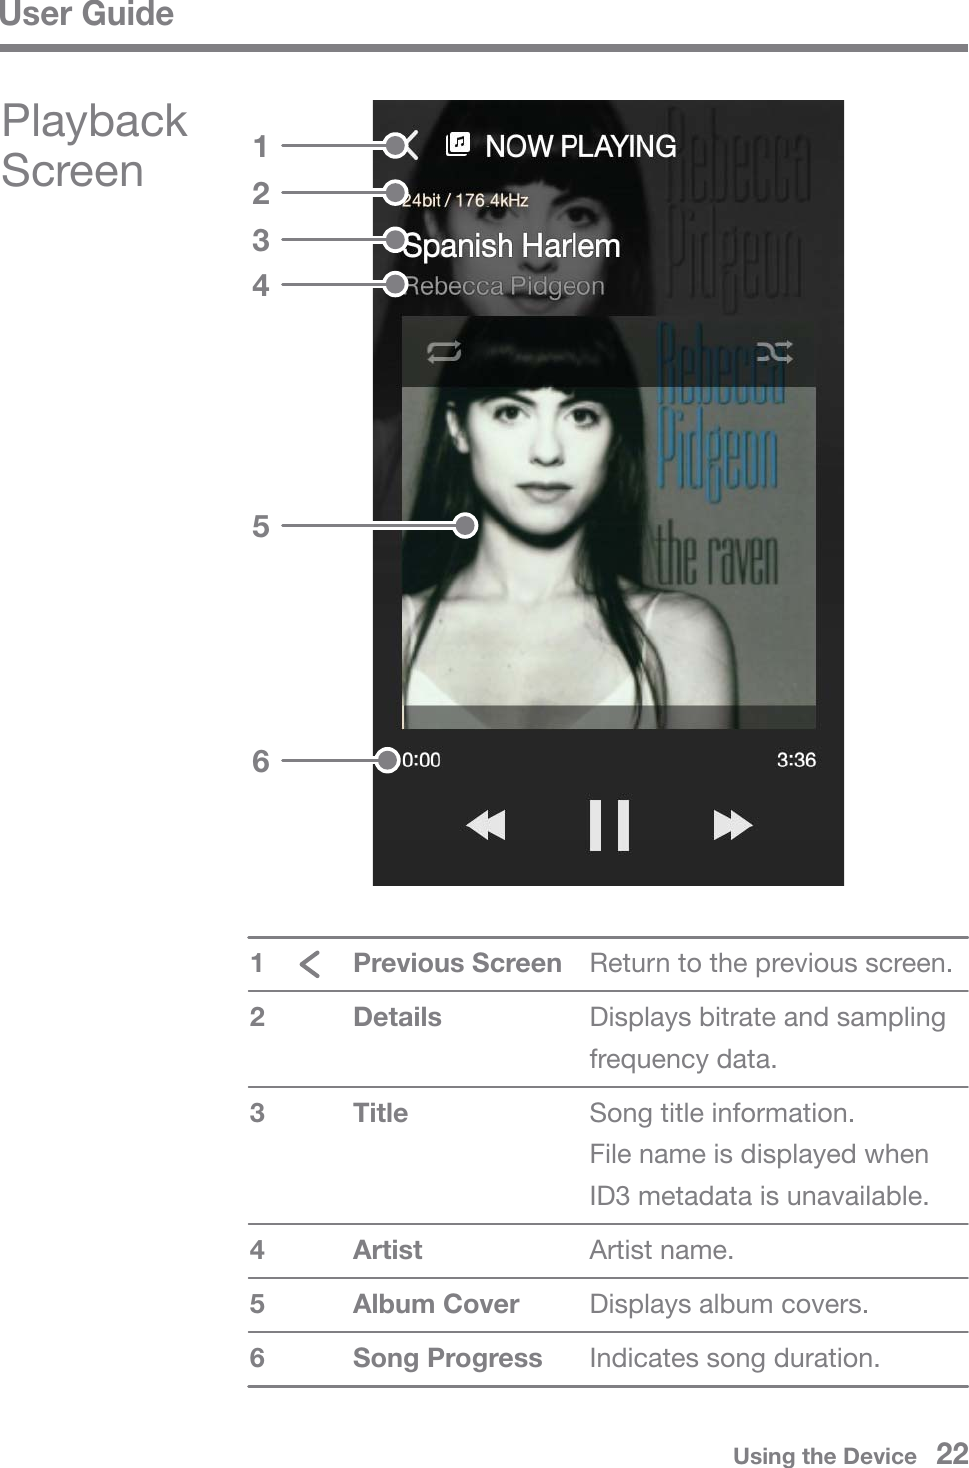
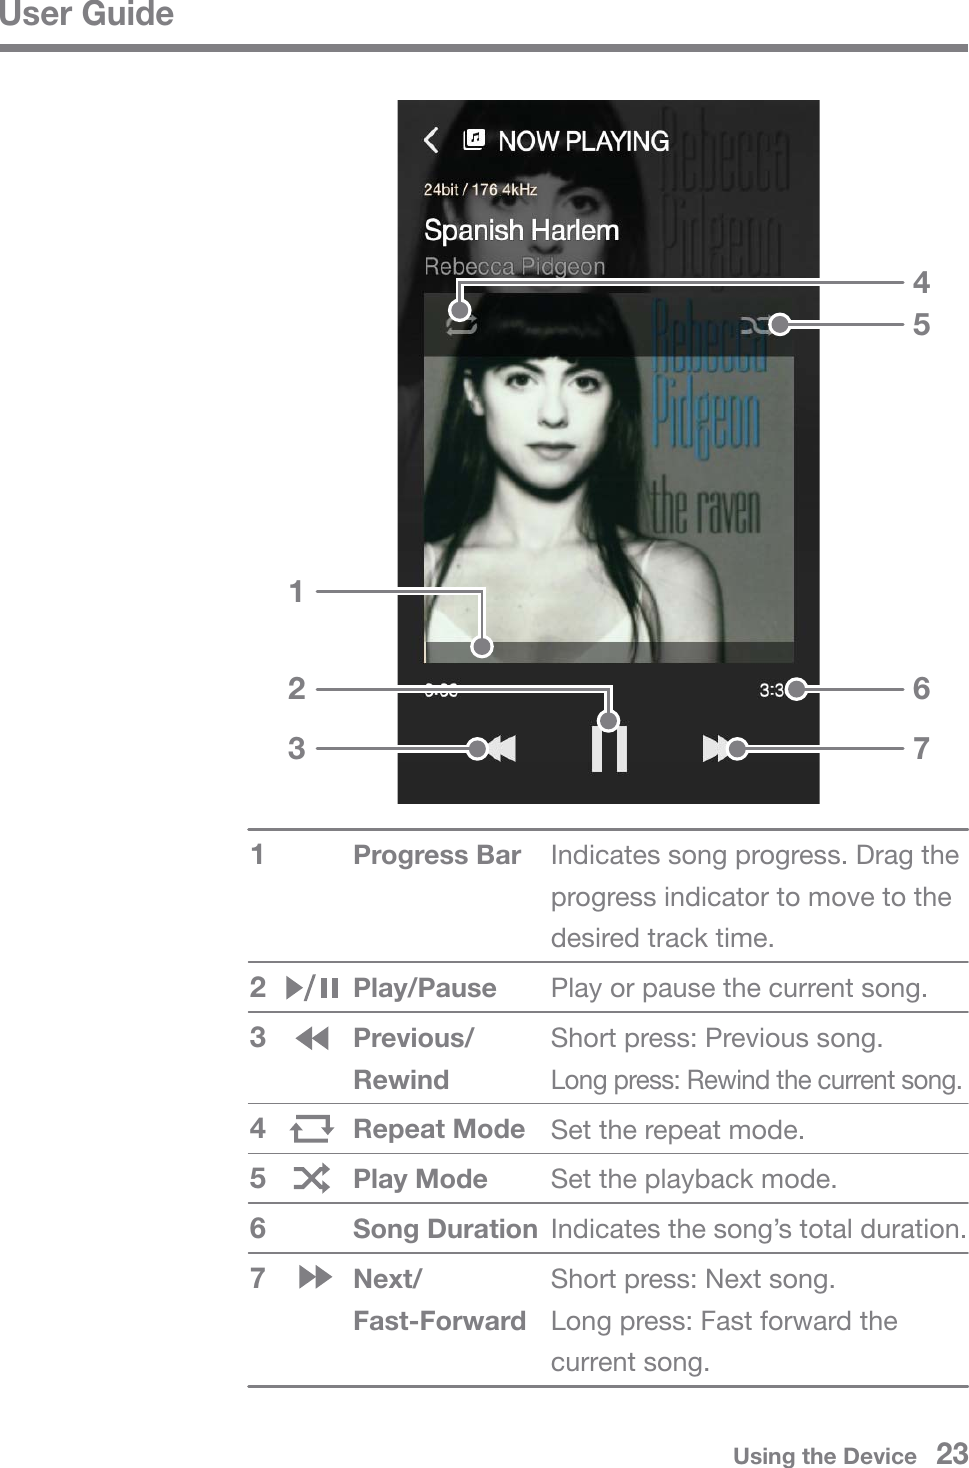
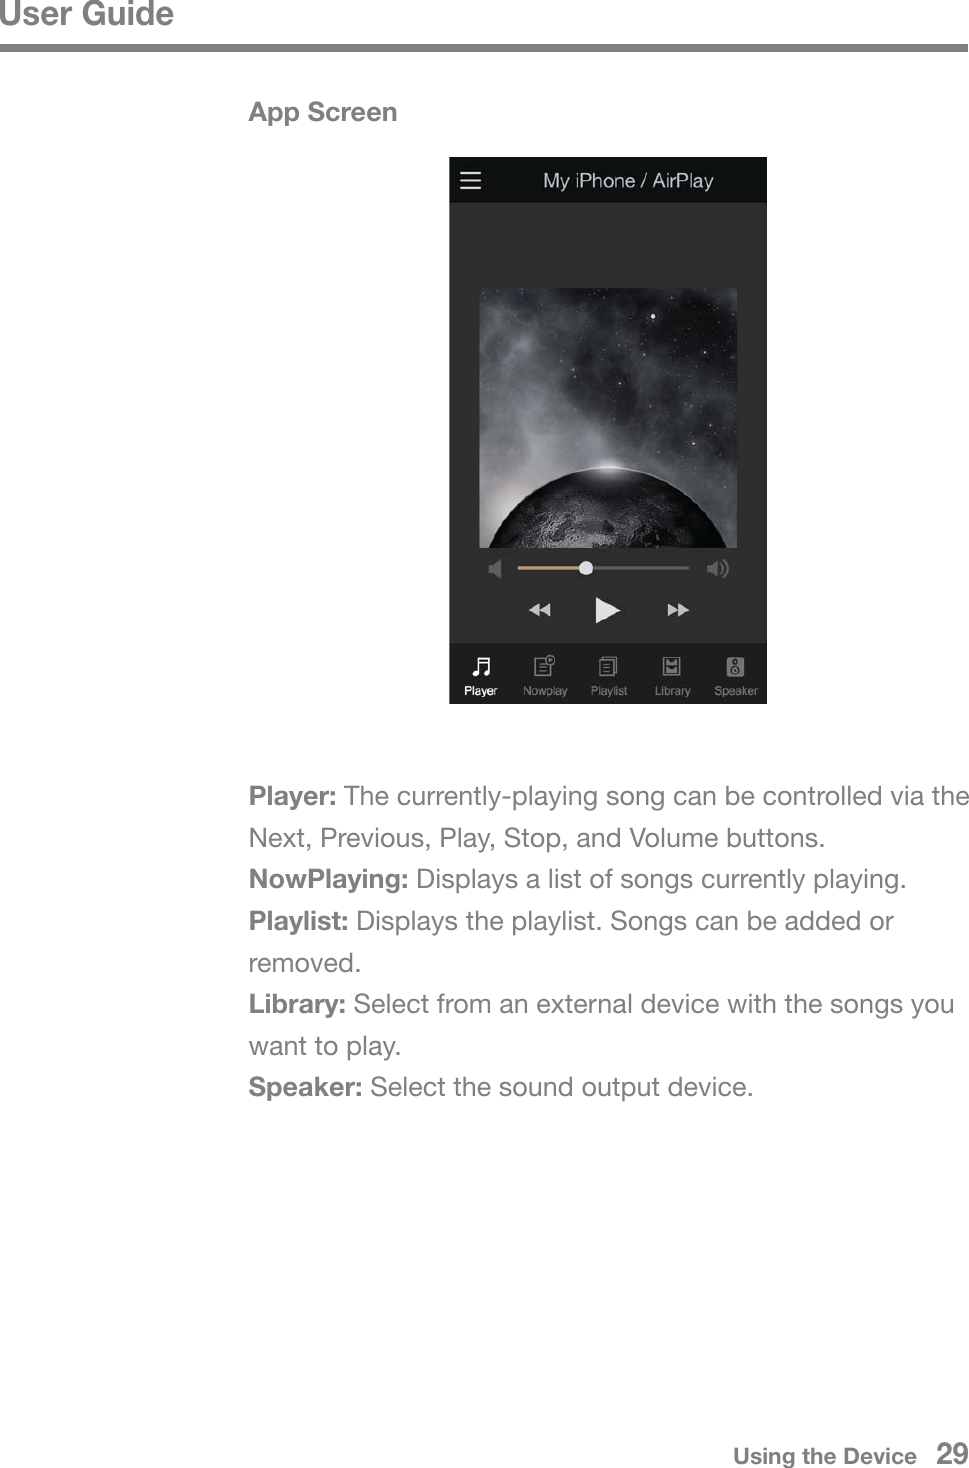
![User Guide Adjust the volume by turning the [Power/Volume Wheel Key] above the LCD touchscreen. When the volume is displayed on the screen, adjust the sound level by dragging the screen [Up Down]. Press [ ] during playback to pause and press [ ] to resume playback. Press [ / ] during playback for the previous/next song. You can also drag the album cover image [Up Down] or [Down Up] from the playback screen to play the previous/next song. Long-press [ / ] during playback to rewind/fast forward. Drag the progress bar to the desired location during playback. Press [ ] during playback to cycle through different repeat modes. : Repeat the entire playlist. : Repeat the current song. : Disable repeat mode. Press [ ] during playback to cycle through different play modes. : Sequential playback. : Shuffle playback. Press [ ] to return to the previous screen. Press [ ] from the playlist screen to display the current music playback screen.Listening to MusicMusic Playback1. Select a song from the list to begin playback.Listening to MusicSelect [Folder] to search music by folder.Supported file formats: FLAC, WAV (8-192 kHz, 8/16/24-bit), WMA (8-320 kbps), MP3 (8-320 kbps), OGG, APE (Normal, Fast, High), AAC, AIFF, ALAC, DFF, DSFUsing the Device 32](https://usermanual.wiki/DREAMUS/DSF11/User-Guide-2731047-Page-33.png)
![User GuideListening to Internet RadioYou can listen to a variety of Internet radio stations provided by vTuner.1. Select [vTuner] from the Home screen to display the Internet Radio home screen.2. Select the desired item from the Internet Radio home screen to display a list of available stations.3. Select the desired station for Internet radio playback.Internet Radio PlaybackUsing the Device 33](https://usermanual.wiki/DREAMUS/DSF11/User-Guide-2731047-Page-34.png)
![User GuideYou must be connected to the Internet to listen to Internet radio stations.Internet radio playback may stutter or be delayed depending on network conditions.Available Internet radio stations may vary by region. Press [ ] during playback to pause and [ ] to resume playback. Press [ - ] from the station list or radio playback screen to display the Internet Radio home screen. Press [ - ] at the top-right corner of the screen to display the search field. Enter search terms and press [ ] to search for and display a list of Internet radio stations that contain the keyword(s). Press [ - ] to refresh the list of stations. Press [ ] from the station list or the right side of the radio playback screen to store the selected station in the favorites list. Press the button once more to remove the station from the favorites list.Listening to Internet RadioUsing the Device 34](https://usermanual.wiki/DREAMUS/DSF11/User-Guide-2731047-Page-35.png)
![User GuideUsing the Device 35Purchasing Music from the StoreShow MenuUser GuidePurchasing Music1. Press [STORE] from the Home screen to display the Store.2. Check the user guide or help menu within each store for detailed information. For Groovers, select [Menu > User Guide] within the store for detailed instructions.3. Purchased music is downloaded to a connected USB storage device or microSD card. You cannot download music unless a USB storage device or microSD card is connected.You must be connected to the Internet to access the Store.Refer to page 42 for more information on connecting to a network.Currently, is available within the Store.The Store function can only be used in Korea.You can conveniently purchase music from the Store](https://usermanual.wiki/DREAMUS/DSF11/User-Guide-2731047-Page-36.png)
![User GuideUsing the Device 36Connecting an External Device Connecting via Bluetooth1. Select [Bluetooth] from the external device’s settings, and set it to ON.2. Select the DSF11 from the list of available Bluetooth devices to begin pairing.3. The [Bluetooth] menu item will be activated on the Home screen. Select a song from the external device to begin playback through the DSF11’s speakers.Bluetooth Support Specifications Profile: A2DP Device performance may be affected during Hi-Fi playback. (48 kHz or lower is recommended)DSD playback is unavailable via Bluetooth.Do not turn off the device while connected to Bluetooth.Pairing methods may be different for each individual Bluetooth device. Always refer to the respective instruction manual for details.Maintain a distance of 20 cm (8 in) between the DSF11 and the paired Bluetooth device.Audio quality will degrade with longer distances, and the pairing may disconnect at a distance of 2 m (6.5 ft). (Distances may vary depending on device and environment.)Crosstalk may be heard while using Bluetooth.For multi-point devices, make the necessary connections prior to use.Malfunction, noise, and other undesirable effects may occur due to environmental factors. Instances in which signal interference affects data transmission. (Holding the external device while wearing another Bluetooth device, holding the external device while holding another electronic device, etc.)You can listen to music through the DSF11 by connecting an external device.](https://usermanual.wiki/DREAMUS/DSF11/User-Guide-2731047-Page-37.png)
![User GuideUsing the Device 37 Instances in which the device or Bluetooth headset's radio transmitters are touching parts of the body. Instances in which the transmission strength is affected by walls, corners, partitions, etc. Devices using the same frequencies may cause interference. (e.g. medical devices, microwave ovens, Wi-Fi, etc.) Areas with an excessive amount of interference or weak signals (e.g. elevators, underground, etc.) affect performance.Connecting via AUX Port1. Connect an external device to the DSF11’s [AUX Port] using an AUX cable.2. Select the [AUX] menu item from the Home screen and set to [ON].3. Music from the external device can now be output through the DSF11’s speakers.Connecting via Optical In1. Connect an external device to the DSF11’s [OPT IN] using an optical cable.2. Select the [Optical] menu item from the Home screen and set to [ON].3. Music from the external device can now be output through the DSF11’s speakers.Refer to page 13~14 for detailed instructions on how to connect an external device.](https://usermanual.wiki/DREAMUS/DSF11/User-Guide-2731047-Page-38.png)
![User GuideUsing the Device 38Select the [Network] icon to set up a wired or wireless network. : Change wireless network settings and turn Wi-Fi on or off. : Change wired network settings.After selecting the desired icon, select the network menu to adjust the settings.The device will automatically connect to your network when a LAN cable is connected. To connect wirelessly, disconnect the LAN cable and set up the network again.Refer to page 42 for more information on connecting to a wireless network.SettingsSetup1. Select [Settings] from the Home screen.2. Select the desired item for setup.NetworkSet up the device according to the user's needs. The settings menu may vary depending on the firmware version.](https://usermanual.wiki/DREAMUS/DSF11/User-Guide-2731047-Page-39.png)

![User GuideUsing the Device 42Connecting to a NetworkConnecting to a Wireless Network1. Select [Settings - Network - ] to display a list of available access points (AP).2. Select the desired AP to connect to the wireless network. Additional information (encryption key, index, etc.) may be required depending on the network settings.The device will automatically connect to your wired network when a LAN cable is connected. To connect wirelessly, disconnect the LAN cable.You will not be able to wirelessly connect to the your network if additional authentication is required (e.g. web browser authentication, etc.)Channels 1 through 11 are supported.Connecting to a Wired Network1. Connect the appropriate Internet-ready network cable (ADSL, VDSL, cable modem, wired/wireless router, etc.) to the [LAN Port] on the back of the product, or connect wirelessly to an access point (AP) that provides Wi-Fi access.2. You can access the network when IP information is confirmed in the IP Address field.We recommend using a wired network for the best network performance.](https://usermanual.wiki/DREAMUS/DSF11/User-Guide-2731047-Page-43.png)
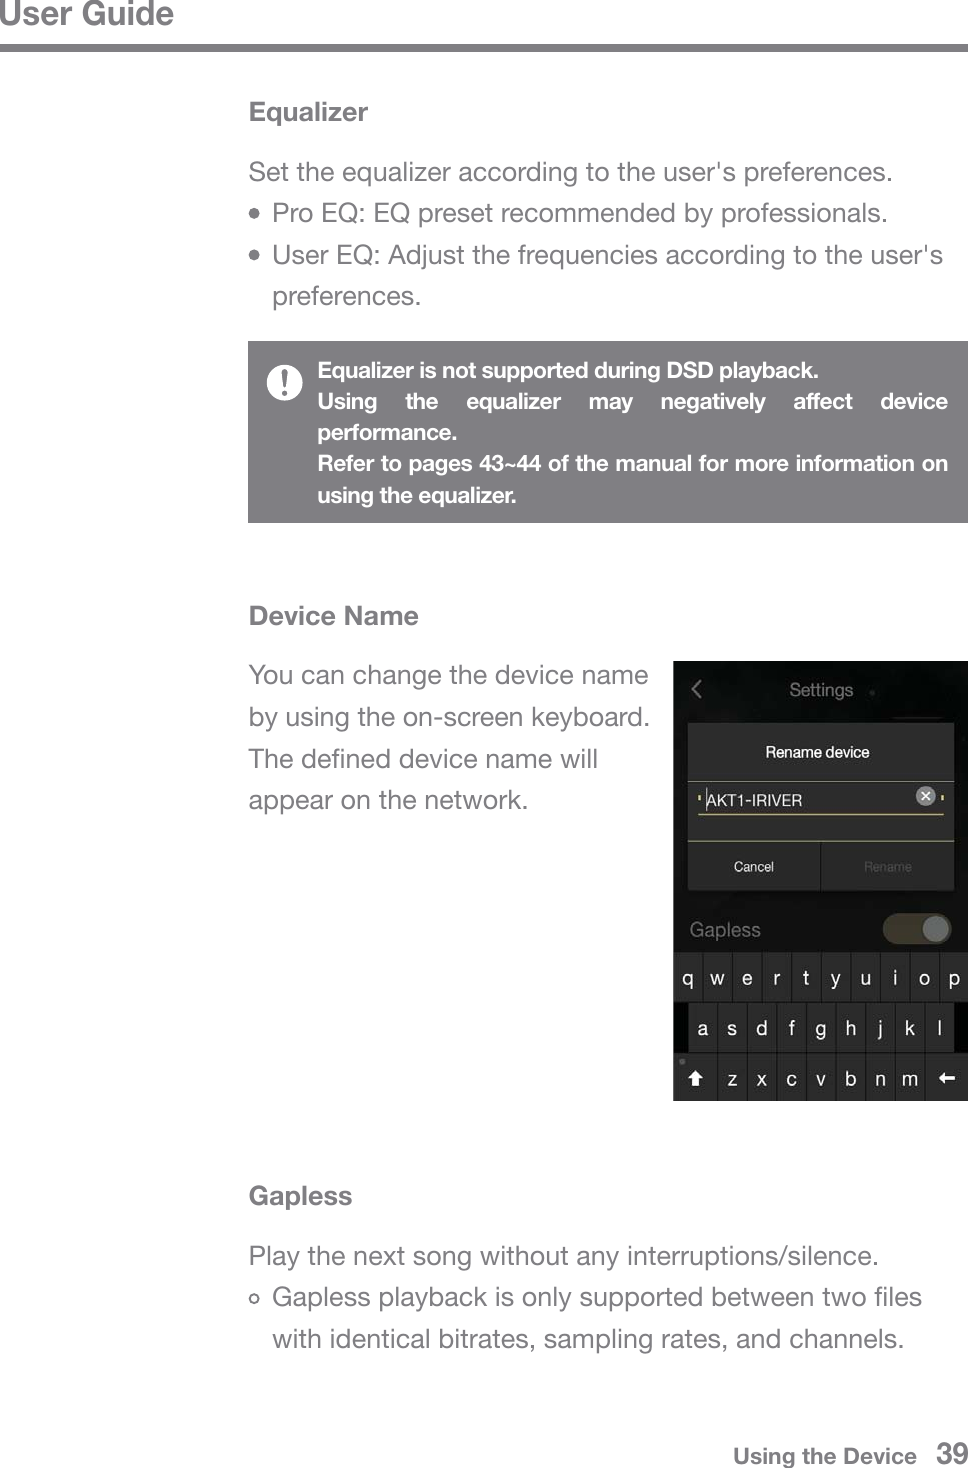
![User GuideUsing the Device 431. Select the desired EQ setting and press [ ] to revert the EQ to its default settings.Equalizer SetupEqualizer Setup1. Enable the equalizer menu from [Settings - Equalizer].2. Press [USER EQ] at the top of the screen and select [ADD].3. Enter a name for the equalizer, and then select [OK].4. Set the equalizer according to the user's preferences.Resetting the Equalizer](https://usermanual.wiki/DREAMUS/DSF11/User-Guide-2731047-Page-44.png)
![User GuideUsing the Device 44Deleting an Equalizer1. Press [ ] next to the desired EQ setting. Press [YES] to complete process.Renaming an Equalizer1. Select [ ] next to the desired EQ setting, and then enter a new name.2. Press [OK] to complete the process.](https://usermanual.wiki/DREAMUS/DSF11/User-Guide-2731047-Page-45.png)
![User GuideMiscellaneous 45Cleaning the DeviceKeep the device clean to ensure the best possible performance from this unit. Disconnect the power cord before cleaning. Wipe off any stains with a soft cloth. For heavy stains, wipe with a damp cloth, and then finish with a dry cloth. Please keep the following in mind to avoid reduced performance and damage to the device/paint: Do not clean with an abrasive cloth. / Do not use excessive force when cleaning. / Do not clean with paint thinner or benzene. / Avoid extended contact with rubber and plastics. / Do not spray the surface with volatile substances such as insecticides.NotesCheck for solutions to common problems.1. The device won't turn on. Make sure that the power supply is properly connected.2. The operation of the product is unstable. Press the power button for 10 seconds or more to turn off the device. Turn on the product again and check the operation.3. The screen turns off repeatedly. The screen turns off automatically after a defined period of time to reduce battery consumption. Set the time in [Settings - Screen Timeout]. 4. The screen does not display images properly. Check the screen for debris.Trouble-shooting](https://usermanual.wiki/DREAMUS/DSF11/User-Guide-2731047-Page-46.png)
![User GuideMiscellaneous 465. There is no sound, or there is static/interference. Verify that the volume is not set to [0]. Check that the appropriate cables are plugged in properly. Make sure that no obstructions such as debris are on the audio ports or plugs. Verify that the audio settings have been properly set. Verify that the music file is not corrupted.6. File will not play back, or a specific file causes instability. The following may occur due to the condition of a file: Playback is unstable or difficult. The device may not function properly. The file may sound different from a computer. There may be a difference in the performance of playback or other functions. The file may not be compatible with playback specifications. A file conversion or use of a different file is recommended.7. A LAN cable is connected, but a network connection cannot be established. Select [Settings – Network - ], select [Change] to refresh the list, and then select the network again.](https://usermanual.wiki/DREAMUS/DSF11/User-Guide-2731047-Page-47.png)