users manual
1
1. General
The external HDD follows interface(SBP-2 Controller) of IEEE1394 standard to allow general IDE HDD
to be used as External HDD. There are BX1 which is 1 Bay type for office purpose, BX4 with 4 bay,
and the Bay Module is compatible in each model.
A. Features.
1) Maximum of 400Mbps of high speed Data transmission (Bandwidth)
The interface is faster than 320Mps of UltraWide SCSI, and it maintains the same transmission rate
as the internal HDD.
2) Supports Hot Swap
Since the interface of Bay Module follows IEEE1394I/F standard, which supports Hot Swap, the
HDD can be taken out without turning the power off.
3) Power related safety device (patent pending)
There is internal Power Control device along with the Safety Key to minimize the damage to the
HDD Data in case of misuse.
4) Supports Plug & Play
IEEE1394 I/F standard supports Plug & Play which is equivalent to USB standard. Therefore
additional setting is unnecessary. All that needs to be done is connect the device to the PC, and the
PC will automatically detect the MOMOBay and indicate the new drive.
5) OS compatibility
It operates in Windows 98SE, Windows ME, Windows 2000(except for Windows NT) and MAC OS
above 8.5.
6) Simple Bay structure for easy HDD exchange
The Bay Module can be easily exchanged, since the bay is fixed and the bay module is detachable.
Also the bay module is designed to exchange HDD in One touch system.
B. Attention!
The file system between Windows and MAC is not compatible. If you connect HDD operating under
Windows system to MAC system, the data can be erased.
2
C. Caution
1) Water and alien device can set the fire.
2) Use selected adapter for MOMOBay BX1 and do not mix it with other company's adapter.
3) Since the HDD is very fragile, severe shock can cause damages.
2. Descriptions
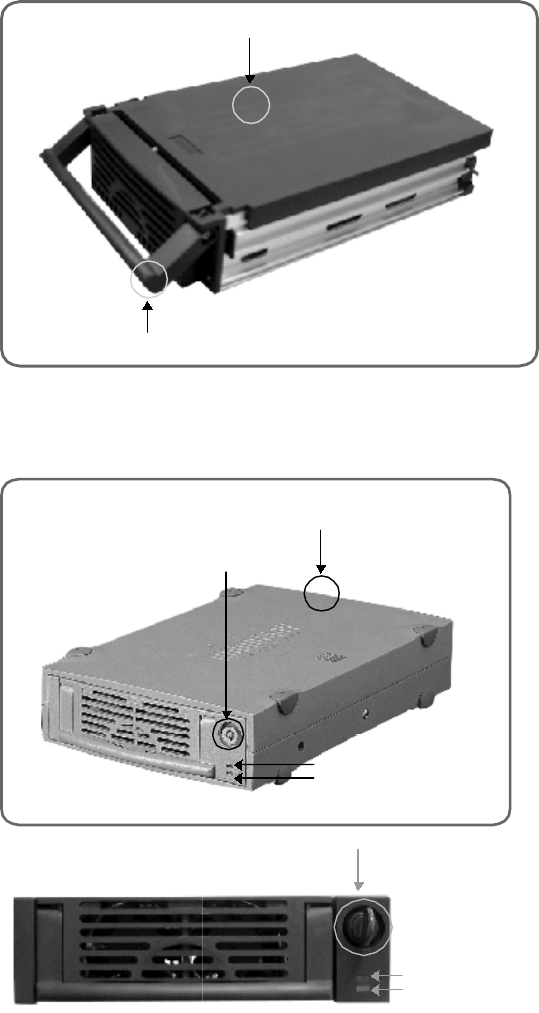
A. Bay Module
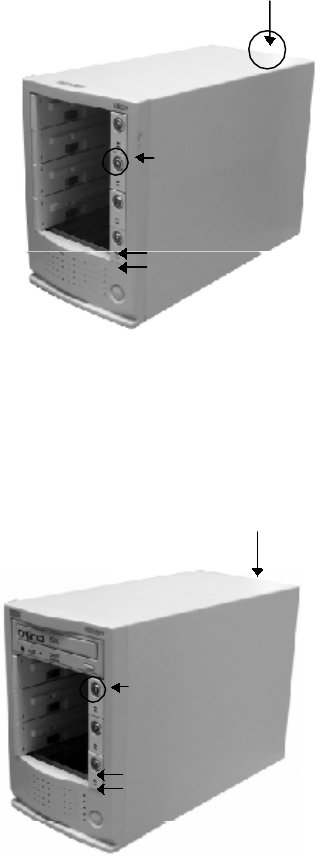
B. MOMOBay BX1(external case)
3
C. MOMOBay BX-4R
1. Power indicator LED (green light)
2. HDD Busy LED (Yellow light)
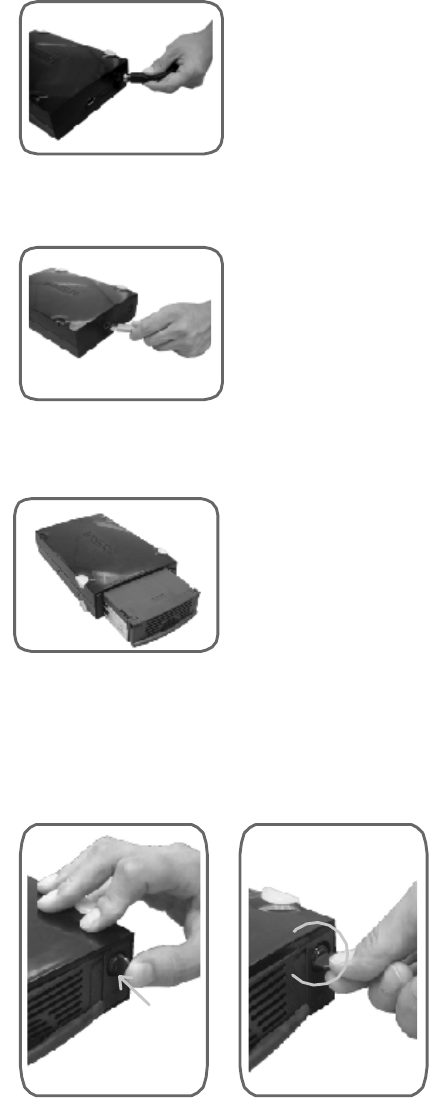
D. MOMO Bay BX-4F
1. Power indicator LED (green light)
2. HDD Busy LED (Yellow light)
3. Hardware set up
A. Connecting to the MOMOBay
1) BX1
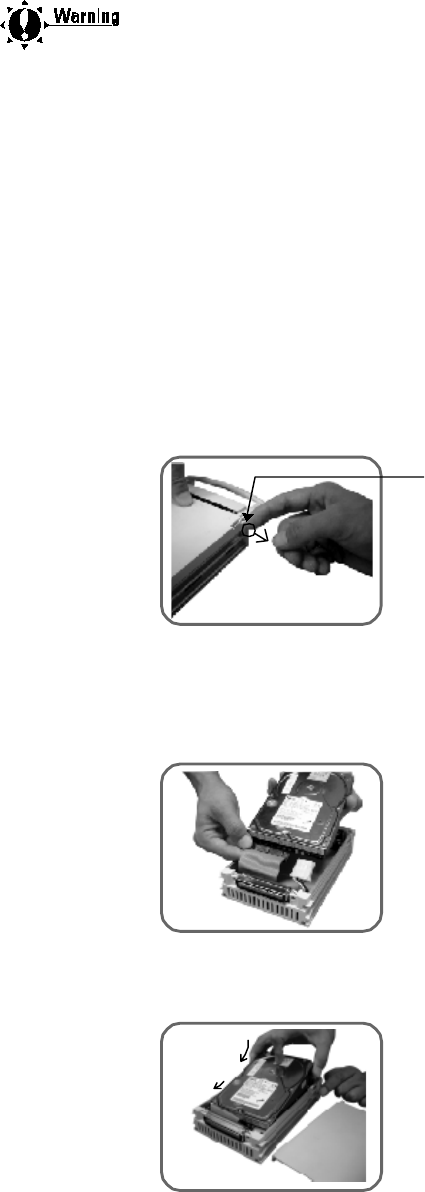
a. Connect DC Adapter. The adapter is for both 110V/220V.
4
b. Connect 1394 Cable to PC and 1394 port of the MOMOBay.
c. Insert the Bay Module.
d. The buzzer will go off when it is normal. At this point, switch the key and the power will be
supplied to the Bay module.
2) BX4
a. Connect the Power Cord.
b. Connect 1394 Cable to 1394 port.
c. Insert the Bay Module.
5
d. The buzzer will go off when it is normal. At this point, switch the key and the power will be
supplied to the Bay module.
Warning
The BX4 model is selected with 220V. If you are using it under 110V, check the power switch
before the set up.
B. Exchanging the HDD in Bay Module
1) Bay Module (both BX1, BX4)
a. Lift the handle of the Bay Module up as shown below, pull the switch gently and the cover of
the Bay Module will be opened.
b. Connect the Flat Cable and the power cord to the HDD as shown below. The jumper must be
selected on master. (refer to the proper HDD manual for selecting the jumper.)
c. Connect the HDD cable and the HDD power. Insert from the back of the HDD.
6
C. Inserting/extracting the Bay Moduel to the MOMOBay
1) Insert the Bay Module to the Bay.
2) When the Bay Module is properly inserted, the buzzer will go off and the power indicator LED
will be flashing.
3) Turn the Safety Key on and the power will be supplied to the Bay Module. The buzzer will go off
for about 1 second.
4) If there is a problem to the power supply, the power will be cut off and the buzzer will go off. In
this case, turn the Safety key off and the Bay Module can be safely extracted. Contact the
purchasing dealer or our A/S center.
5) It will take about 6 to 12 seconds(spin up time) for the OS to detect HDD and indicate the new
drive after turning the Safety Key on.
6) When extracting the Bay Module, turn the Safety Key off, shut the power off and extract the Bay
Module. In normal case, the buzzer will go off for 1 second. Wait until the buzzer stops, then
extract the Module.
7) When the PC is accessing to the Bay Module, the Bay Module will be shut off but the error
sound will go off. In this case, turn the Safety Key on and wait until the data has been fully
transmitted before turning it off again.
8) The Bay Module can be extracted without turning the power of the MOMOBay or the PC off.
(Hot Swap function)
4. Installing the S/W
A. Windows98SE
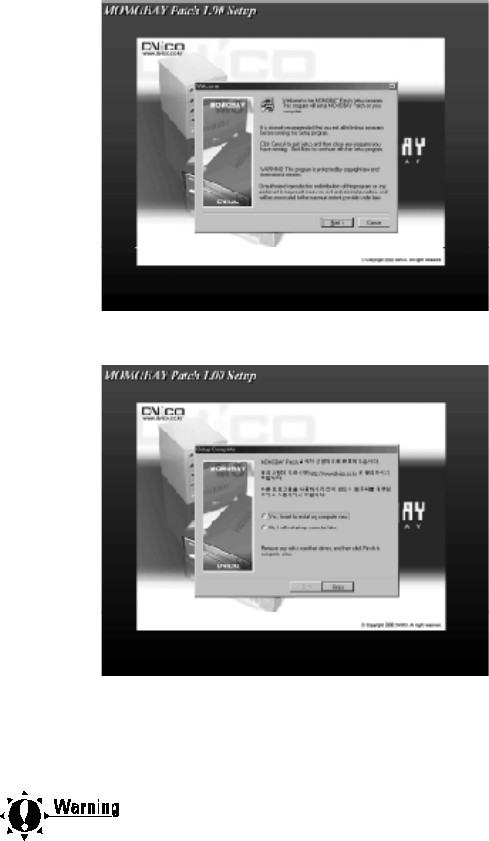
In Windows98SE, execute the Set Up Program of the Set Up CD provided by our company under
the Windows directory and reboot the system.
7
Warning
The Momo bay patch 1.30 Setup bundle is dedicated host adaptor for 1EEE1394
PCI/PCMCIA. Our company will not be responsible for problems caused by using other
company's card.
B. Windows Me and above Win2000
Since the OS supports drive itself, other setup is unnecessary.
C. MAC(above OS 8.5)
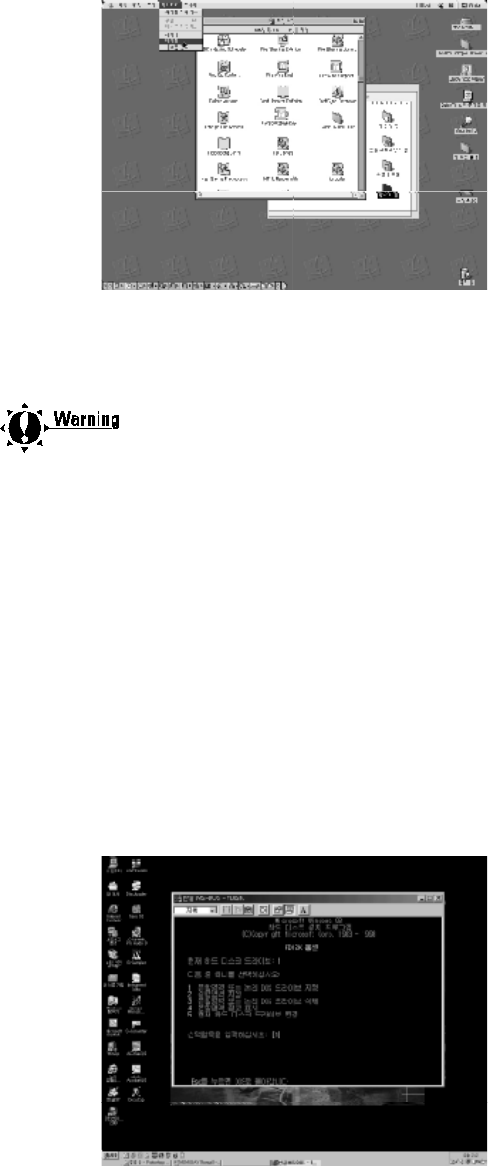
1) Execute DViCO_Sample_Driver.sit file under Mac directory using the Set up CD.
2) Copy "Firewire support, Firewire enabler, FWSBP2 DISK driver"file under DViCO_Sample_Driver
folder to expansion file in Hangul system and reboot the system.
8
Warning
If there are same files in the expansion file, copy the ones that are not in the expansion file.
When you copy all the files, the System OS will not reboot.
D. HDD Format
1) Win98SE
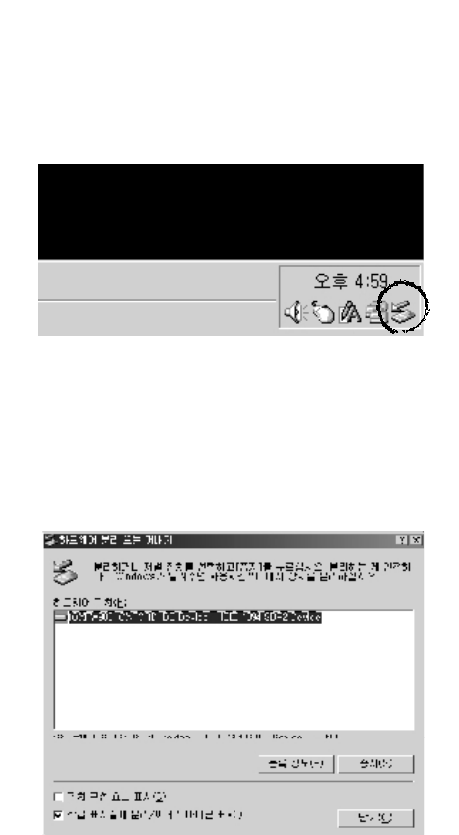
a. After the OS has been rebooted, execute Fdisk in Dos Mode and select the Partition of the
HDD.
b. As to selecting the partition, refer to the OS manual.
c. After selecting the new drive, select Format in the property tool to format the HDD.

9
2) Win2000
You can select Format and Partition in Disk management in Win2000
3) MAC
When the HDD, which has not been formated, is inserted, the icon will indicate whether the disk
will be formated or not. Select OK at this point.
10
E. Unplug/Eject Utility
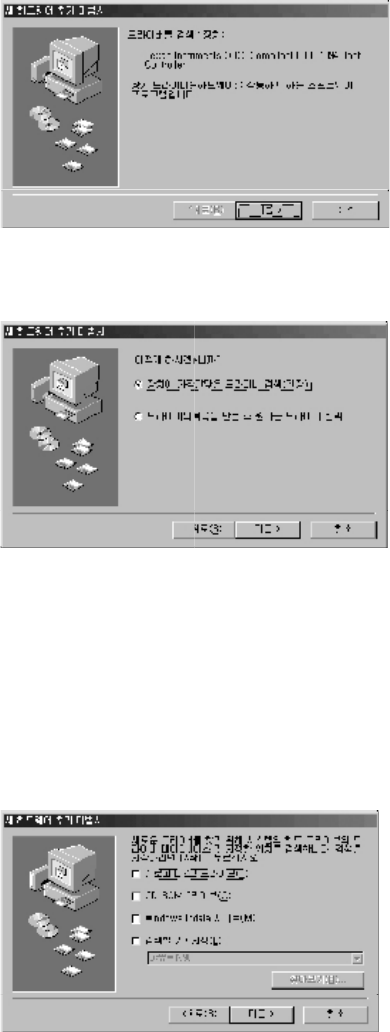
1) When the Momobay is connected to the PC the icon will be indicated as below.
2) The icon is for Unplug/Eject Utility. It is used to safely Unplug the Monoseires out of the system.
The device name of the H/W can differ according to the OS/HDD, but it has no problem for normal
operations.
F. Setup IEEE1394 Host Adaptor in Windows98SE(optional)
1) Turn the power of the PC off and open up the case and set up IEEE1394 Host Adaptor.
2) Turn the power on and start Windows98. The new H/W setup talk box will show up. Select the
"Next" button. (When you are installing Windows98 after setting up the 1394 Host Adaptor, the
talk box will not show up, due to the fact that Windows98 driver will be setup when the
Windows98 is installing.
11
3) Select the 'search for the proper drive for the system(suggested)' then select the "Next" button.
4) Talk box will show up indicating that driver data base and select location of system H/W to
search the driver. Check nothing and select the "Next" button.
5) Talk box will appear showing that other driver has been searched compatible for updated driver
and the device. Select the "Next" button.

12
6) The selected driver is ready for setup. Select the "Next" button.
7) The talk box will appear indicating insert Windows98 disk.
8) Insert Windows98 CD into the CD-ROM drive.
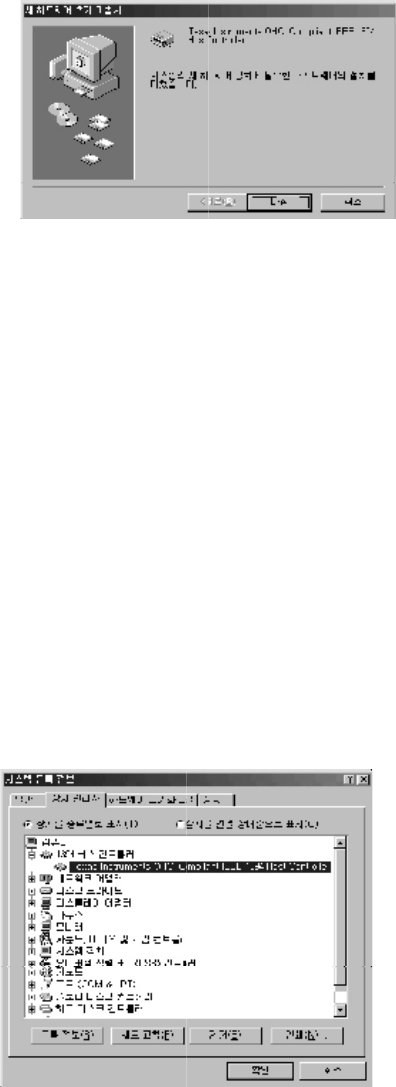
9) When the driver setup talk box disappears, the setup completion talk box will appear.
13
10) When the driver setup is complete, reboot the system.
11) Check to see if the Windows98 driver is properly setup according to the next page.
G. Check to see if the Windows98 driver is properly setup as below.
1) Go to Start - Select(S) - Controls(C). (Press Break key with the Windows key on the keyboard on
Windows98 screen.)
2) Double click the system icon.
3) Select the "Device controller" tab when system properties talk box shows up. Check if the 'Texas
Instrument OHCI Compliant IEEE1394 Host Controller' is normally appearing under '1394 bus
controller'.