Darfon Electronics G951 BLUETOOTH FOLDABLE KEYBOARD User Manual
Darfon Electronics Corp BLUETOOTH FOLDABLE KEYBOARD Users Manual
UserManual.wiki
>
Darfon Electronics
>
G951 User Manual
Users Manual
Navigation menu
Upload a User Manual
Namespaces
Wiki Guide
HTML
PDF
Info
Views
User Manual
Discussion / Help
Navigation
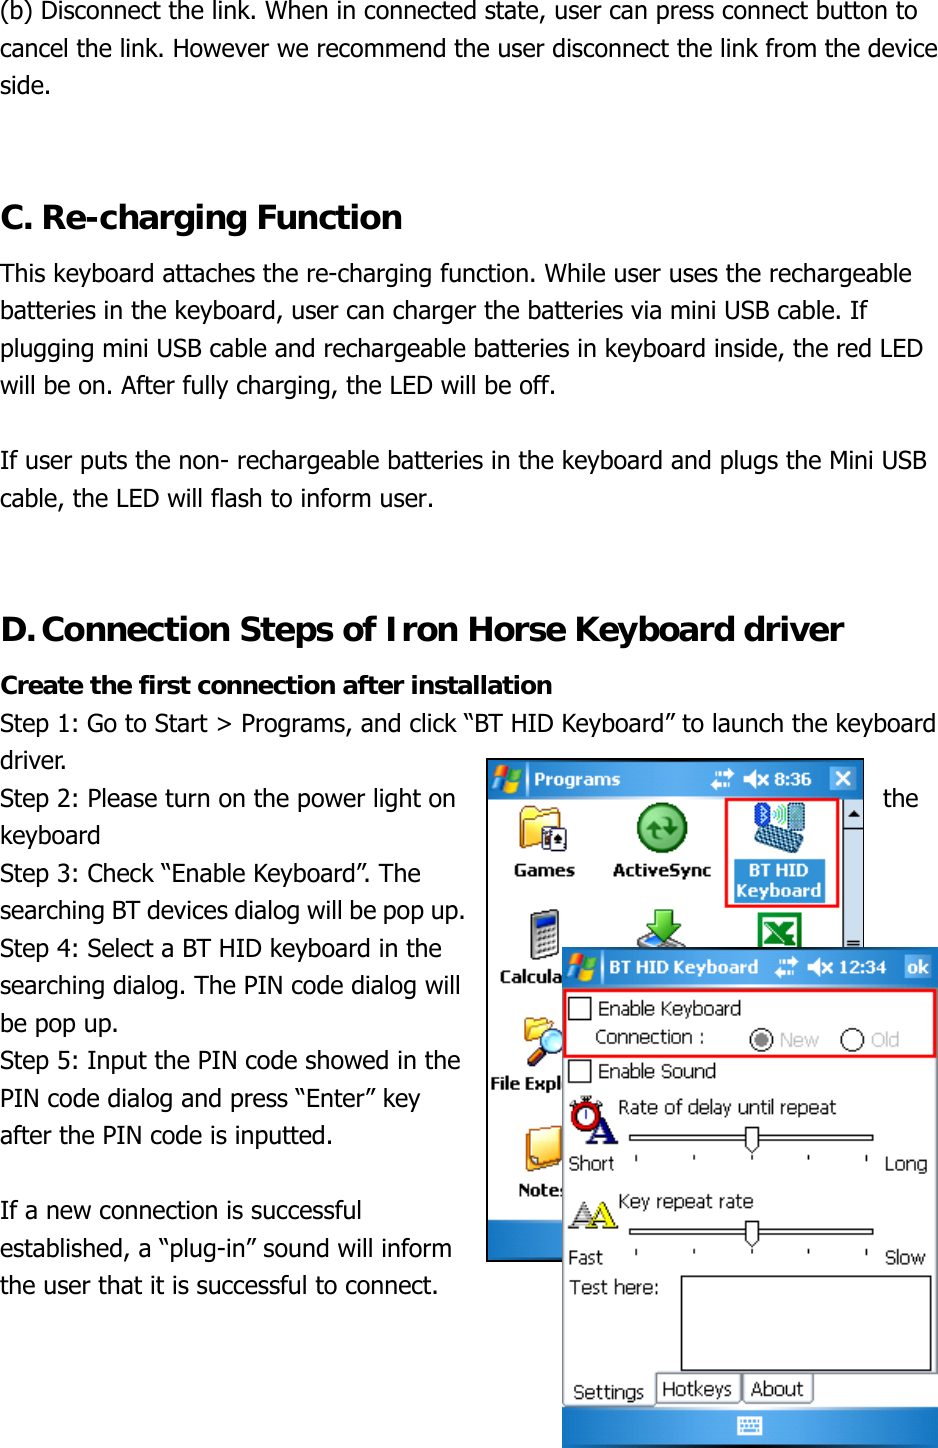
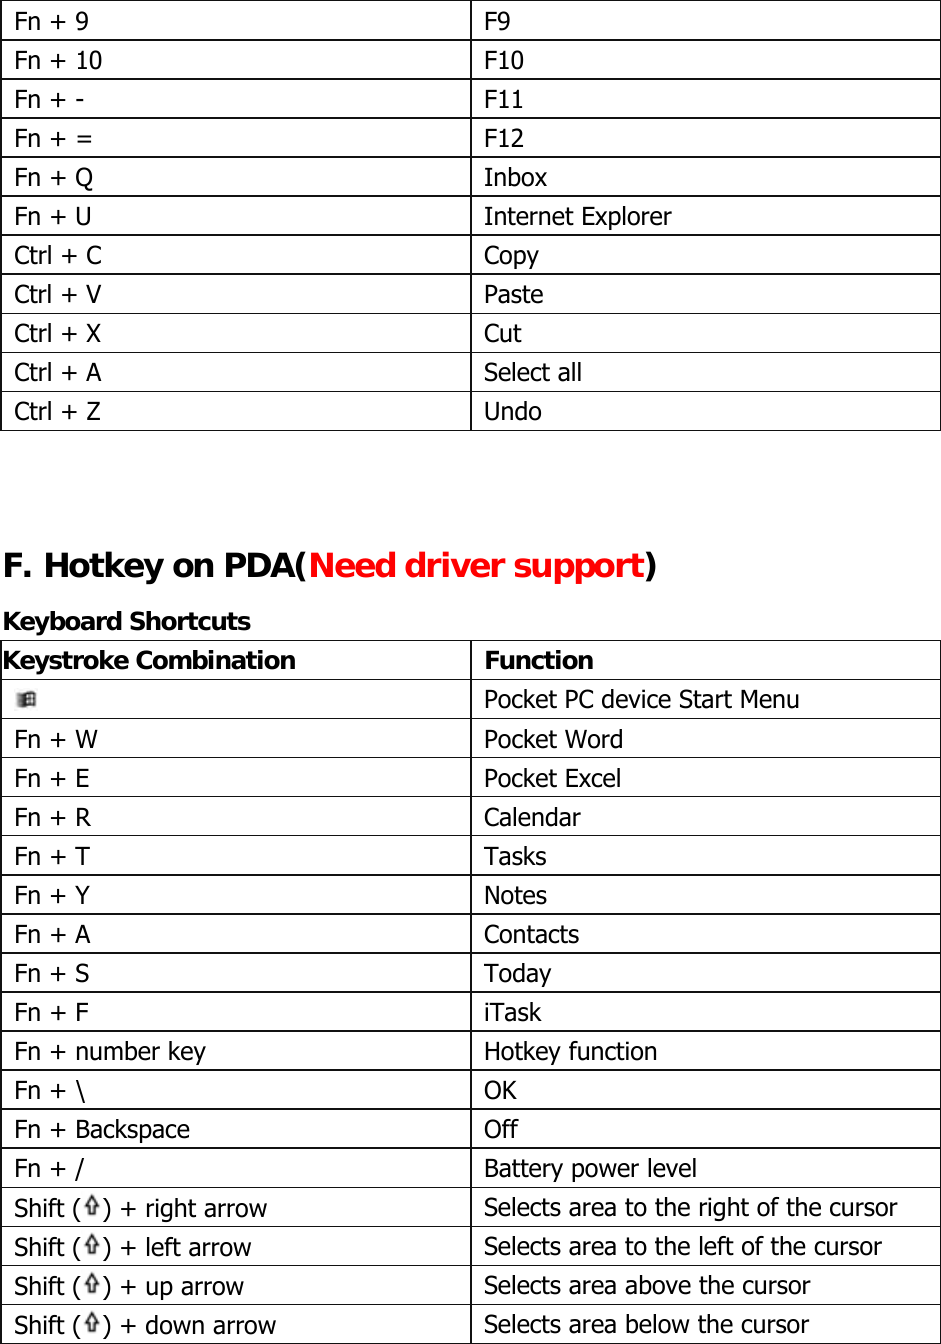
![E. Key function for typing on PC (Without driver support) Basic key function -- All key printed by white color. ` ~ Tab Caps Lock R-Shift Ctrl 1 ! Q A Z 2 @ W S X alt 3 # E D C Space 4 $ R F V alt gr 5 % T G B ←(Left) 6 ^ Y H N ↓(Down) 7 & U J M →(Right) 8 * I K , < 9 ( O L . > 0 ) P ; : ↑(Up) - _ [ { ‘ “ L-Shift = + ] } Enter / ? ← backspace \ | Combination key Keystroke Combination Function Shift ( ) + letter key Capital letter Shift ( ) + number key Upper-left character on key Fn + left arrow Home Fn + right arrow End Fn + up arrow Page up Fn + down arrow Page down Fn + 1 F1 Fn + 2 F2 Fn + 3 F3 Fn + 4 F4 Fn + 5 F5 Fn + 6 F6 Fn + 7 F7 Fn + 8 F8](https://usermanual.wiki/Darfon-Electronics/G951/User-Guide-1431535-Page-4.png)