Datto OM2PV4 Wireless 802.11b/g/n Mesh Router User Manual OM2Pv4 User Guide
Open Mesh, Inc. Wireless 802.11b/g/n Mesh Router OM2Pv4 User Guide
Datto >
Users Manual_rev.pdf
!
1!
!
!
!
!
!
!
!
!
!
!
!
User!Guide:!
Open!Mesh!OM2PV4!
!
!
Version!1.0!
Table of Contents
!
1. Creating!a!CloudTrax!Network!..................................................................................................!3!
2. Configuring!a!CloudTrax!network!............................................................................................!10!
3. Monitoring,!Management!and!Troubleshooting!.....................................................................!16!
4. Additional!Resources!...............................................................................................................!18!
5. Product!Specifications!.............................................................................................................!19!
6. Appendix!A:!FCC!Statement!....................................................................................................!20!
7. Appendix!B:!IC!Statement!.......................................................................................................!21!
8. Appendix!C:!CE!Statements!.....................................................................................................!22!
!
!
3!
Creating a CloudTrax network
Overview: what we’re doing
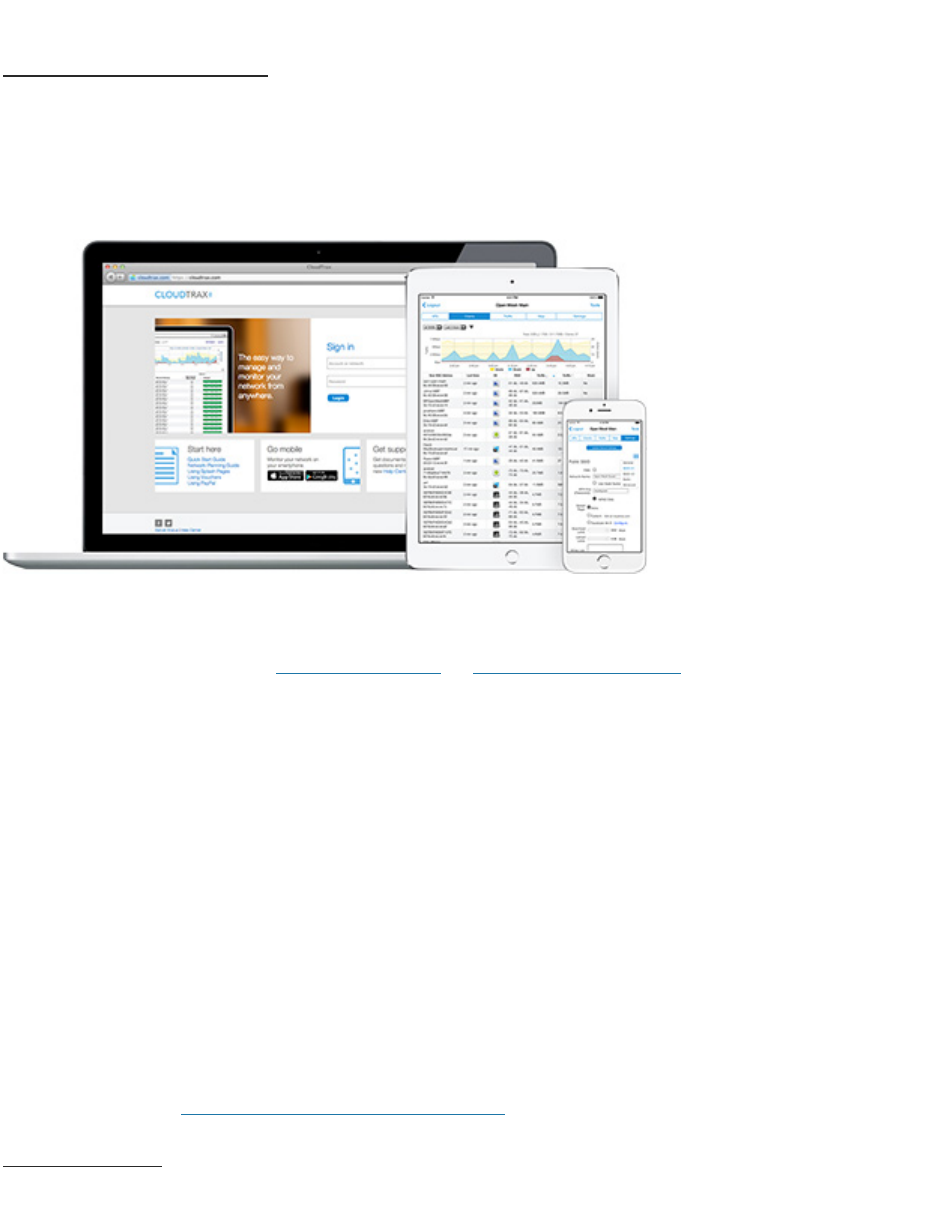
This guide is intended to help you set up your first cloud-managed wireless mesh network
with CloudTrax. CloudTrax is a free cloud-based network controller that makes it easy for anyone
to build, manage, and monitor wireless networks from anywhere in the world.
This guide will assist you in setting up a new network on the CloudTrax web application. For
easier, faster setup, use the CloudTrax for iOS or CloudTrax for Android apps. No matter which
version you start with, you can switch between the web and mobile apps seamlessly.
Here’s what’s about to happen:
1. We’ll create a master login on CloudTrax.com that will allow you to build, manage and
monitor multiple networks in one place.
2. We’ll create a new network on CloudTrax.
3. We’ll add access points to the network.
4. We’ll physically install the access points.
5. We’ll do some basic network configuration.
This guide is not intended to cover every aspect of CloudTrax. To learn more about planning your
network, view the Cloudtrax Network Planning Guide.
What you’ll need
To set up your network, you’ll need the following:

!
4!
1. One or more CloudTrax-compatible wireless devices, such as the OM2P or MR1750.
2. An Internet connection with at least one Ethernet port available on your modem or router,
and one Ethernet cable.
3. A computer with a browser pointed to www.cloudtrax.com, or an iOS or Android device
running the CloudTrax app.
Terminology
We’ll make this process as easy and nontechnical as possible. Here are a few key words that will
help.
Network: A group of computers or devices that can talk to each other (in our case, wirelessly).
Gateway: A CloudTrax-compatible router that is connected to the Internet (usually through a DSL,
cable, or LAN connection).
Repeater: A CloudTrax-compatible router that is not connected to the Internet that repeats the
signals from local computers and other access points to the gateway.
Access point: A generic name for an CloudTrax-compatible router/access point which can be
either a Gateway or a Repeater. You may also see these called "Nodes."
All CloudTrax devices configure themselves: they become gateways or repeaters depending on if
they are connected to the Internet or not.
Step 1: Create a Master Login
The first time you use CloudTrax, you need to create a Master Login. This account will be your
login for all networks you create.
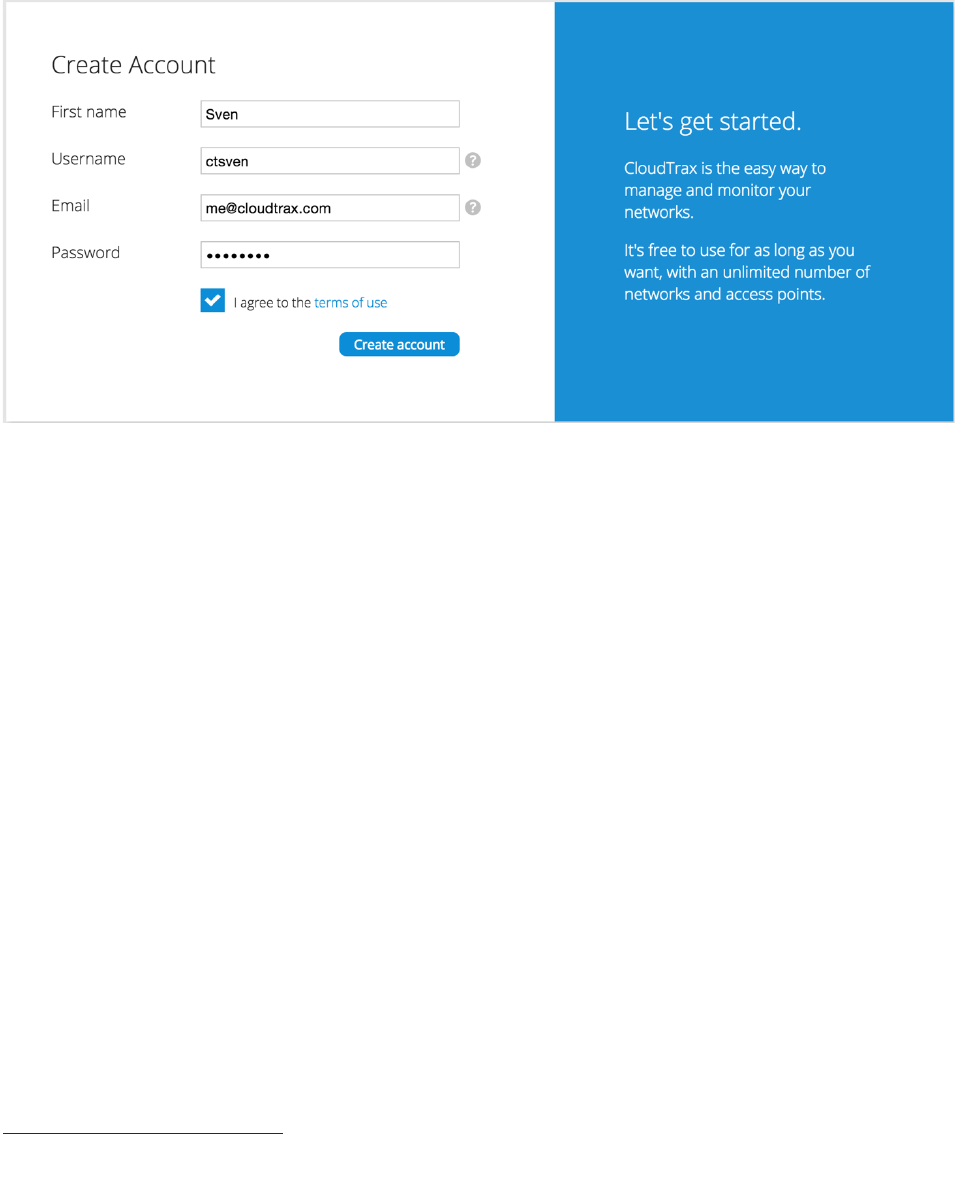
From CloudTrax.com, click the “Create account” link just below the login fields. You’ll see a page
similar to the one below.
!
5!
Fill in the following information:
First Name: We’ll use this to address you in email correspondence.
Username: This is your master login you will use to access ALL networks you create. It allows you
to login once and edit/view all your networks. It MUST be different from your network name(s)
which you will create in a second step. You may want to use your company name here.
Email: You’ll receive an email at this address asking you to verify this master login to continue.
Password: This is your master administrator password. It can be used with the above login name
to access all of your networks. Make this password different from the individual network
passwords you’ll create later.
When finished, click “Create/Edit” to save your account settings. In a few moments, you’ll
receive an email asking you to confirm the account you just created. Just click on the “Verify
Account” link to create your new CloudTrax Master Login.
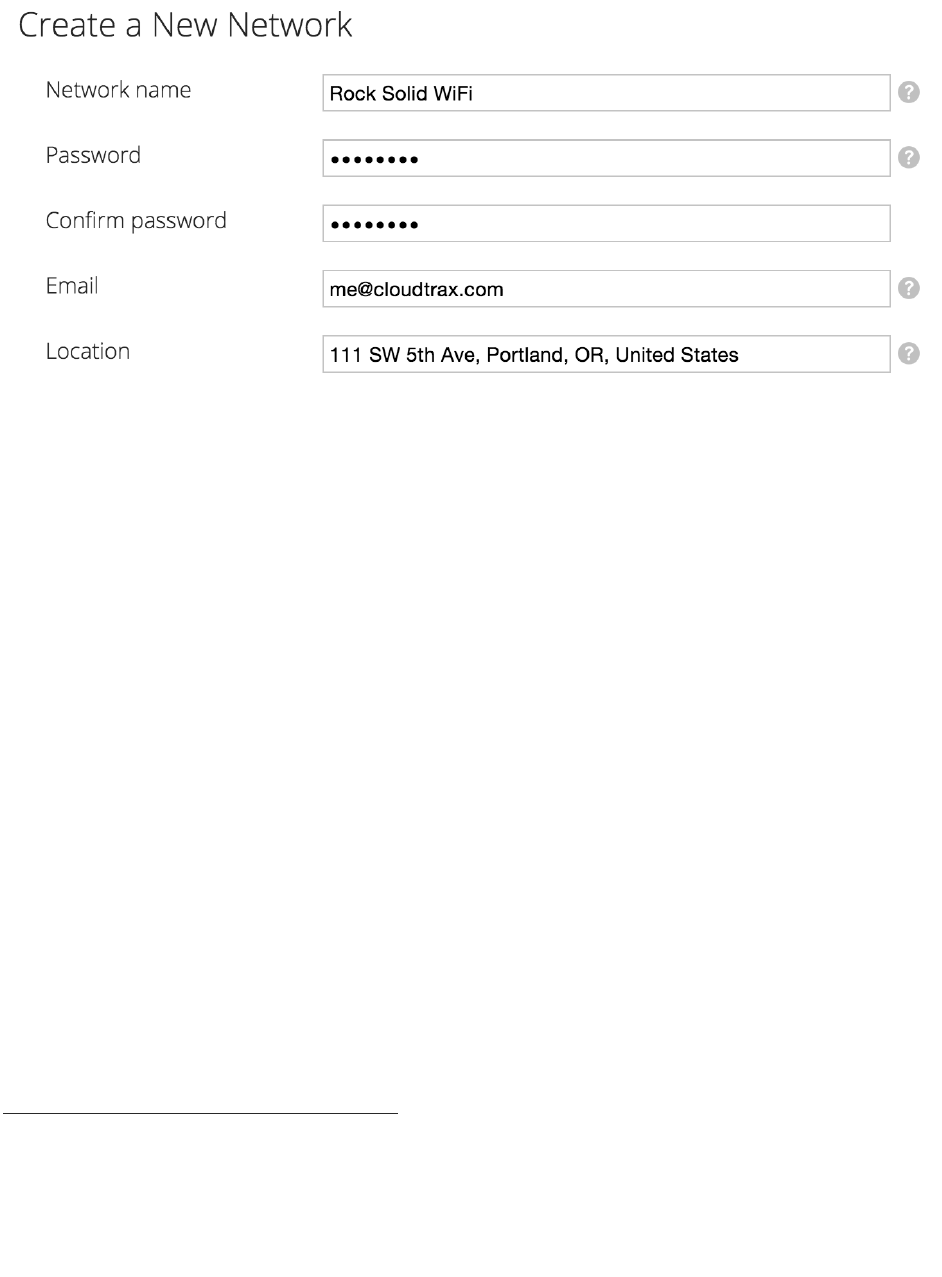
Step 2: Create a new network
You’ll automatically be taken to a page, similar to the one below, to create your first network.
!
6!
Fill in the following information:
Network name: This is the name you want to give this specific network. You will use this name to
make changes to the network, display reports, etc.
Password: This is the password for local administrators and should be different from your master
account login. This limits access and prevents users from making changes to your network.
Email: Enter your email address or the address of a local administrator to contact. We will never
share this with others.
Network Location: Enter a street address for the first access point. To add access points, you will
be shown a map that you click on to place access points. By entering an address here, you will be
centered on the correct location for your network.
Email for Notifications: Enter the email addresses, separated by spaces, for all people you’d like
to receive “outage” notifications. These are sent hourly.
When finished, click “Create” to save your new network settings.
Step 3: Add access points to your network
It’s time to let CloudTrax know which access points you want to include in the network. Adding
them to CloudTrax will allow you to manage and monitor the access points from anywhere.
Navigate to the Manage > Access Points screen.
!
7!
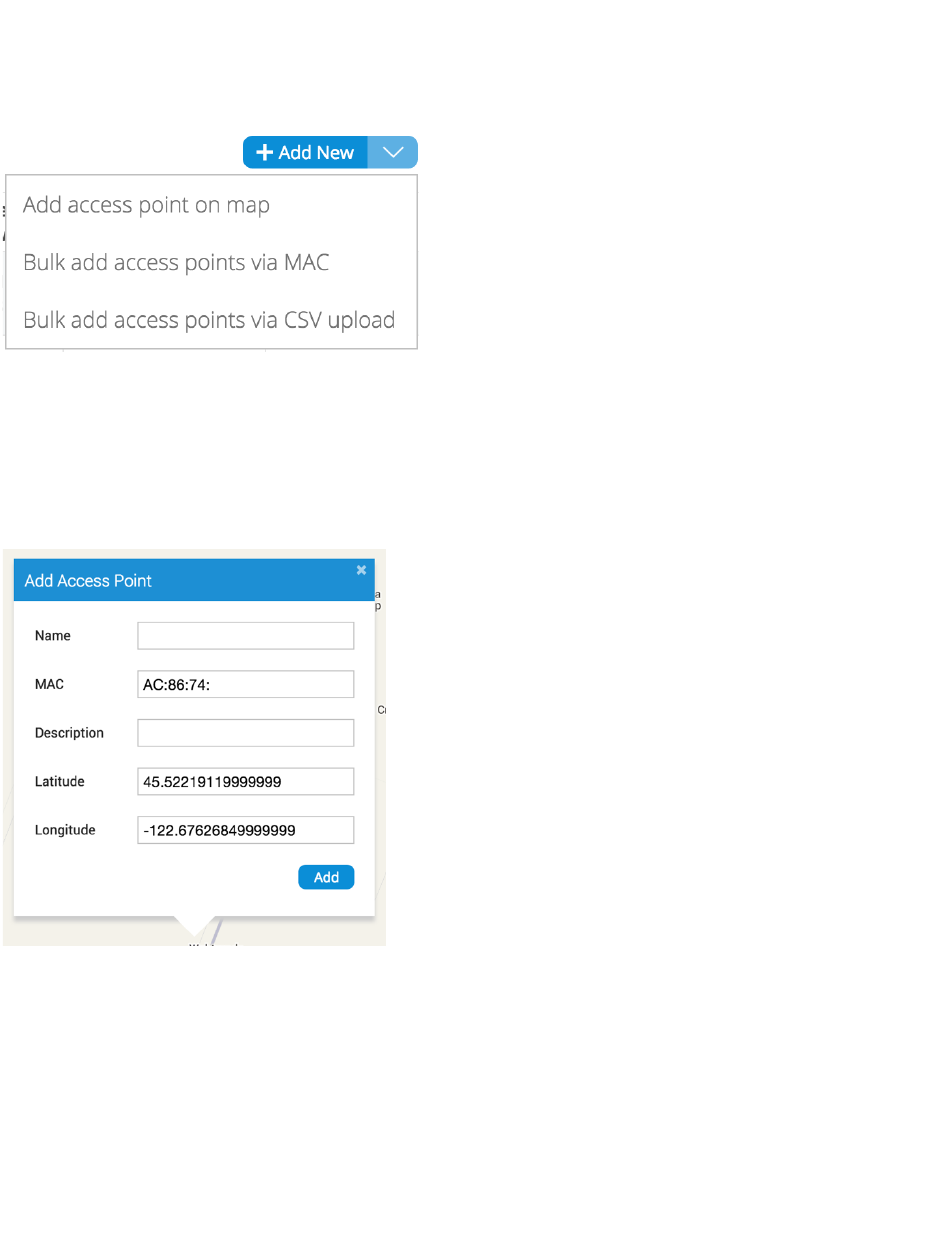
There are three options to add access points to your network: click the "Add New" button to add
access points one at a time by clicking on a map, or use the down arrow to the right of that to add
access points in bulk.
If you add access points the default way, you’ll be taken to the Map tab of the Access Points page.
A Google map, centered on the address you entered when you created the network, will show a
popup to enter your first access point. You can often (depending on location) click the “Satellite”
view button and zoom in for a closer look.
Fill in the following information:
Name: Enter a name for this access point. This name is used to reference its location and will be
displayed in reports. It does not affect users.
MAC address: A MAC address is a sequence of 12 numbers and the letters A-F often separated by
colons (Eg: 00:02:6F:8A:B2:6E). This can be found on a label on the bottom of the router and on
the side of the product box.
!
8!
Description: You can enter optional descriptive text that will be shown on the reports. This is
typically used to keep notes on where the access point is installed, etc.
Click “Add” and repeat the process for each additional access point.
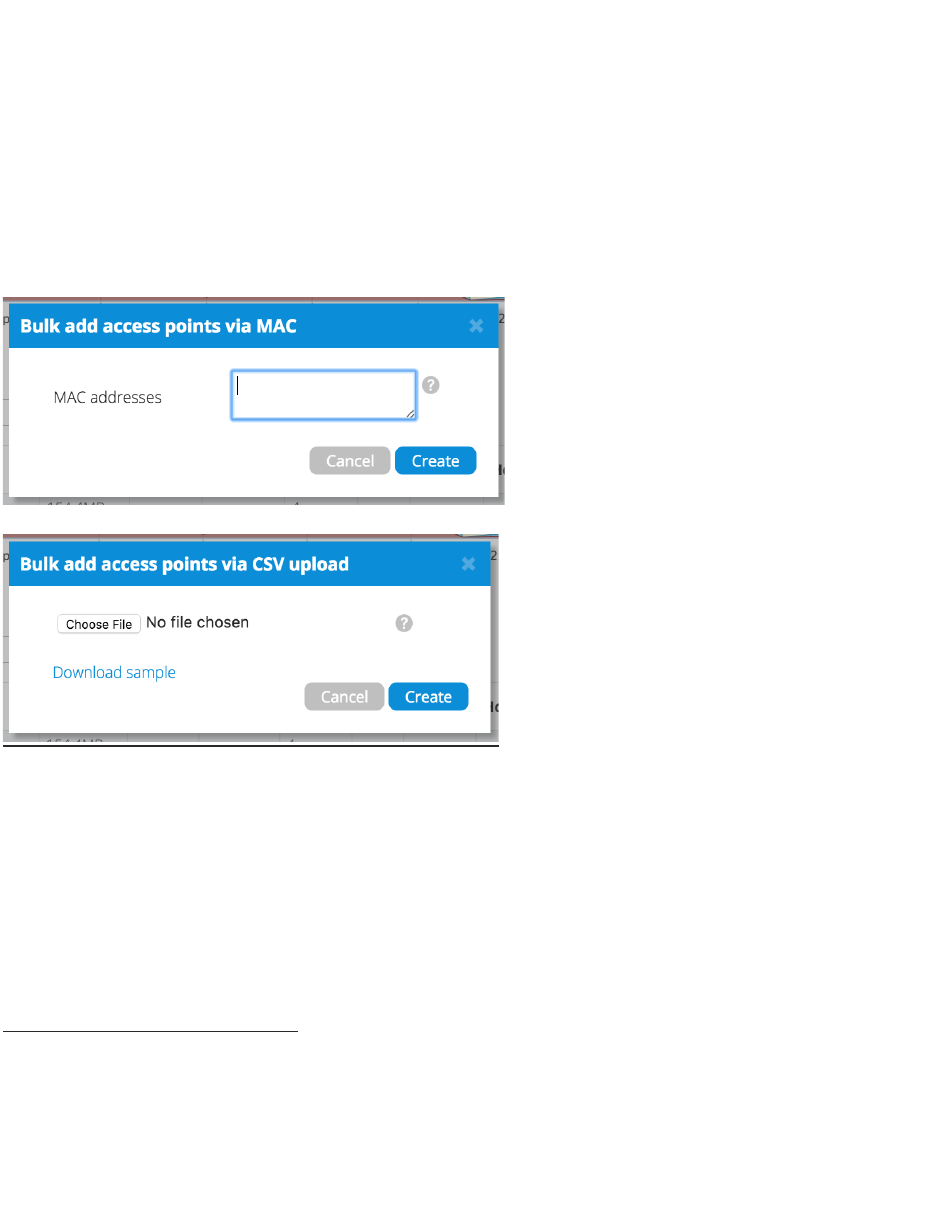
If you need to add a large number of access points, you may want to add them in bulk. You can do
so two ways: by entering the MAC addresses in a text field (one per line), or by uploading a list of
access points (along with optional name, location, channel overrides, etc.) in a CSV file.
For both of these options, your access points will be added to the map based on your network
location (similar to how the CloudTrax iOS and Android apps add access points). You can reposition
these access points on the map after adding them.
When adding by CSV, the CSV file must be in a specific format. You can download a sample CSV
file here.
Step 4: Install the access points
Once your access points are added to CloudTrax, it’s time to install them. If you're using an
enclosure, video installation guides are available here.
First, connect your Gateway unit to the Internet with an Ethernet cable. This can be plugged in
directly to your high-speed modem (if it has a single Ethernet port, power cycle it first), or it can

!
9!
be fed from a router or switch. If it can get an Internet connection through the cable, it’ll connect
to CloudTrax. Once the Ethernet cable is plugged in, connect power.
The Ethernet cable (PoE device) must be connected only to PoE networks that is SELV circuit and
without routing to the outside plant.
Next, plug in additional access points as either gateways (connected to Ethernet) or repeaters,
connected only to power.
When mounting Open Mesh access points directly onto a wall, use a minimum 30 mm screw length.
To ensure strong, consistent signal coverage, follow these guidelines:
1. Place your gateway in the center of the network. For most devices, every time data is
transmitted over one repeater hop, it loses half its speed. A central gateway minimizes the
number of hops required.
2. Never go through more than three to four walls or floors.
3. Never go more than 50-150 feet (depending on building materials) between access points.
4. Install no more than about five repeaters to every one gateway.
Once all access points are plugged in, you should see them turn green on the CloudTrax Network
Status page in about 5 to 15 minutes. For more detailed information on planning and optimizing
your network, see the Network Planning Guide.

!
10!
Configuring a CloudTrax Network
Your network should now be up and running, but there’s a lot we can do to customize it to meet
your specific needs. We’ll walk you through the most common settings here.
Configure > General Settings
The General Settings tab controls network-wide settings. This will be partially filled in with the
information you used to create the network.
Location: This defaults to the first address you entered when setting up the network. You can
change it at any time. Note that the location only determines where your access point appears on
the map; radio settings will be based on the IP address of the access point.
Network name: The login name for this network on the dashboard, and also the login ID to access
this network individually by a site administrator. This is NOT your master login. This allows you to
give access to only the network settings for that network without allowing access to your master
account.
Time Zone: Used in displaying the local time on reports.
AM/PM time: Used in displaying the local time on reports.
Display Name: Used to display a more descriptive name (other than the login ID) on reports.
Password: The administrator password for this network. Again, this is only for this network and is
not your master login password. It is also not the password your users will use to connect to the
network.
Lobby Password: The Lobby Assistant (lobby.cloudtrax.com) password for this network. Logging in
with this password will display the create voucher page. All other edit access will be denied.
Disable Limited View: If unchecked, users will be able to see a limited view of the network
status. The password will still be required to change any network settings.
Email: Your email in case we need to contact you. We will not share this with others.
Notification Email: The email address notifications will be sent to if enabled. You can list multiple
email addresses, separated by spaces.

!
11!
Email Alerts: Select this box to send notifications of network outages each hour to the email
addresses you entered above.
Network notes: Enter any unique notes for this installation you’d like to be able to refer to later.
Configure > SSID 1, 2, 3...
Each CloudTrax device can broadcast four unique SSIDs that users can connect to. Each of these
SSIDs are controlled independently in CloudTrax. Typically users have a mix of public SSIDs - with
splash pages, bandwidth throttling, DNS filtering and client isolation - and private SSIDs, with WPA
Enterprise authentication and access to LAN resources and other clients. When we created your
network, we set the first SSID to be public and the second SSID to be private, but you can adjust
these any way you wish.
We’ll go through most of the features you may want to enable or change. You can also learn more
about voucher access, pay networks and more by following the links at the end of this document.
Common Settings
SSID name: The name you’d like users to see and connect to with their device. You can also check
the box below to use each access point’s name for its SSID instead.
Enable: When selected, this SSID will broadcast on all access points in this network. When
deselected, it won't broadcast but your settings will be saved.
Visible: When enabled, this SSID will advertise itself publicly so users can select it from their list
of available networks. When disabled, users must enter the SSID name manually.
Authentication: Enable this to authenticate users with WPA-PSK or WPA-Enterprise at the time
they connect to the SSID. This isn't required if you wish to authenticate users on a splash page.
Pre-shared key (Password): If you would like to secure your network with a password, enter it
here. It must be eight characters or longer and contain no spaces.
WPA Enterprise: Uses 802.1x authentication that requires a unique username and password for
each user.
Captive Portal Settings

!
12!
Bandwidth Throttling: Enable and set download/upload limits to set the maximum speeds users
will get when connected to your network. You may want to set these to between 10 and 25 per
cent of the speed of your Internet connection, ensuring that one or two users can’t consume the
entire available bandwidth.
Splash Page/Splash Page Type: Enable or disable a page users will see before connecting to your
network. You can set this to Custom (hosted by CloudTrax), Facebook WiFi, or a hosted remotely
version for advanced users.
Splash Page Authentication: Choose CloudTrax, RADIUS or HTTP Authentication. Read more here.
Client Force Timeout: Minutes client is idle (Idle Timeout) before showing splash page, or
minutes between showing splash page regardless of activity (Force Timeout) for non-voucher
access. 1 day=1440.
Require voucher: Require a valid voucher on splash pages. If unchecked, allows you to provide a
basic tier of service at the rates and durations above and (optionally) faster service using vouchers
or PayPal.
Redirect URL: The page to display after the splash page. Leave blank to display the user’s
requested page.
Include user data in redirect URL: If set, additional information specific to the request is added
as URL parameters when the final redirect occurs. The parameters node mac, client_mac, and
client_url will be set to the MAC addresses of the Access Point and Client, and the original request
URL, respectively.
Block Unauthenticated Users: Block all ports until a client device has been authenticated. If
unchecked, only browsing is blocked. When selected, unauthenticated users trying to access https
websites will not be redirected to the splash page.
White List: MAC addresses, one per line that will NOT see the splash page, if enabled. Useful for
game consoles that do not have a browser.
Walled Garden: Sites and resources (images and files for the splash page, etc.) users can visit
prior to authentication.
Advanced Settings

!
13!
Block LAN Access: Prevents users on this wireless network from accessing your wired LAN.
Client isolation: Prevents your wireless users from being able to access each other's computers
and common for public networks. Unchecking this box will allow you to do things like share a
printer attached to the network, but will also allow malicious users access to other users on the
network. Uncheck this ONLY if you know all users have a firewall enabled on their computers.
SMTP Redirect: Alternate SMTP server IP address for your network. This allows users to send SMTP
email by using your ISP's SMTP server.
Alternate DNS: Alternate DNS server IP addresses, one per line, for this SSID. This setting will
override your network-wide Alternate DNS settings on this SSID. This allows you to use services
such as OpenDNS for content filtering, client tracking and more.
Access Control List: MAC addresses allowed to use this Access Point, one per line. All other users
(MAC addresses) will not be able to browse on this access point. Leave blank to allow all MAC
addresses (recommended).
Bridge to VLAN: Each SSID can be tagged with a number from 2-4094 so you can control traffic
flow within your LAN. Using a VLAN automatically bridges the SSID to the LAN.
PayPal Item ID: You can require guests to pay for all service or enhanced service through PayPal.
See the guides at the end of this document.
Configure > Radio
The Radio settings controls network-wide access point settings. The main items you'll want to set
are Channels and Internet Check.
Channels: Auto Channel will let CloudTrax optimize channel settings daily for your network,
taking into consideration mesh repeaters, nearby access points, and sources of interference. Auto
Channel respects the Maintenance Window setting in Configure > Maintenance to avoid disruptions
during critical times. If Auto is selected then the ability to specify channels, on either a per-
network or per-access point basis, is disabled.

!
14!
Manual lets you specify a single channel per band to use for all access points. You can override
individual access points in Manage > Access Points.
Internet Check: When selected, the wireless network will only be available when there is an
active Internet connection. This allows access points to recover quickly when they lose a
connection and is the recommended setting. When deselected, the wireless network will stay up
even when there is no Internet connection. This allows local resources such as printers and shared
drives to continue to function, but access points may take longer to recover when they lose a
connection.
Configure > Maintenance
Automatic Upgrades: When enabled, your network will automatically upgrade to the latest
firmware version as new stable upgrades become available.
Maintenance window: Select the period of time each day when CloudTrax can perform
maintenance on your network. This maintenance includes firmware upgrades and Auto Channel
scanning and configuration.
Configure > Display
The Display section allows you to customize the look and feel of CloudTrax, and enable external
embeds.
Display Name: Used to display a more descriptive name on reports. When none is entered, the
network name will be used.
Update Logo: Load your own logo to replace the CloudTrax logo in the top left corner of the
application.
Allow Read-Only: Click to enable the password-free read-only view of the network status. When
enabled, read-only view can be accessed by entering just the network name in CloudTrax without
a password. The password will still be required to change any network settings.
Enable 12 Hour Display: Check to display time in 12 hour (am/pm) format.
External embeds: Use the HTML snippet to embed CloudTrax reporting pages on an external site
like a client portal.

!
15!
Configure > Advanced
The Advanced Settings page has a variety of settings that most users won't change. This section
will touch on the more common settings.
Mesh Encryption: Encrypts all mesh traffic with WPA2 protection. Access points not belonging to
this network won't be able to join the mesh due to the encryption.
Alternate DNS: Alternate DNS server IP address for your network, such as OpenDNS. OpenDNS
provides several additional features such as content filtering that you may find helpful. This
setting applies to all SSIDs and can be overridden by setting an Alternate DNS for each individual
SSID.
Share Vouchers: When enabled, vouchers created on this network will be usable on all other
networks under this account.
Bridge wired clients: When a wired client is connected to an access point, it will use settings
from this SSID.
Bridge SSID: Select an SSID to bridge to the LAN. This gives clients access to LAN resources such as
file servers and printers, disables NAT and lets your LAN assign all client DHCP addresses. You can
bridge additional SSIDs by using a VLAN tag on each SSID settings page.
Delete Network: Select to delete this network from CloudTrax.

!
16!
Monitoring, Management and Troubleshooting
With your network running and customized, you can now monitor its usage and status by selecting
the Network Status link. Here’s an overview of the tools available:
Network Usage graph at the top of the page shows the number of users on SSID#1 and the amount
of upload and download traffic.
Node Map shows the nodes relationship to each other on a map.
Node List gives details on each individual node.
Node Outages Chart shows the check-in status of a node using colors.
Users List shows all users connected to the network.
Network Diagram shows how all nodes relate to each other.
You can use each of these tools to see how your network is doing and troubleshoot issues.
Troubleshooting in CloudTrax
Have you have created a strong, healthy network? While there are plenty of diagnostic tools
available, the following two are most telling:
On the Node Outages Chart: dark/light green indicate a gateway/repeater is online and hasn't
missed a check-in, yellow indicates a node has lost contact with the mesh and is in lonely/orphan
mode, pink is when a node needs re-pairing (update of network settings), and gray indicates it's
down, offline or has missed check-ins.
On the Node Map: (click on a node, then select Neighbors) all nodes will have at least one
(preferably two) connections with an RSSI of 17 or more. If not, you need to reposition your node
closer to the others or in a better line through fewer walls. You may need to add new nodes.
On the Node List: the number of Hops should be three or less (fewer is better). If not, you need
to add additional gateways or reposition nodes.

!
17!
Troubleshooting with your device with lights
The lights on your Cloudtrax-compatible device can tell you a lot about how that device is
functioning. For example, when you are looking at the front of an OM2P, you will see (from right
to left):
1. Power light
2. Ethernet port 1 link light
3. Ethernet port 2 link light
4. Mesh quality light (signal bars)
The mesh quality light will show three colors: red, yellow and green. Gateways act differently
than repeaters, as shown below:
Gateway:
• No color until DHCP address received
• Red solid if Internet check fails,
• Green blink if Internet works
Repeater:
• No color until speed test
• Red solid if speed is less than 1 Mbps
• Yellow solid if speed is between 1 Mbps and 2.5 Mbps
• Green blink if speed is greater than 2.5 Mbps

!
18!
Additional resources
To learn more about planning and optimizing your network, download the Cloudtrax Network
Planning Guide.
To learn more about CloudTrax’s splash page feature, download the Using the Splash Page Editor
Guide.
To learn more about CloudTrax’s vouchers feature, download the Using Vouchers in CloudTrax
Guide.
To learn more about integrating vouchers with PayPal, download the Using PayPal in CloudTrax
Guide.

!
19!
Product specifications
!
Data rate (aggregate)
150 Mbps
Radio
1 802.11b/g/n 2.4 GHz
Antenna
One external
Power
23 dBm (200 mw) flat power
Max users (recommended)
20-50 per AP
WLAN standard
802.11b/g/n
Memory
64MB DRAM
Zero config plug and play
Yes
Self-forming, self-healing mesh
Yes
Seamless roaming
Yes
Hardware watchdog CPU
Yes
Free cloud management
Yes
Free iOS/Android apps
Yes
Captive portal w/ bandwidth throttling, splash pages and
user controls
Yes
SSIDs
4
SSID to VLAN tagging
Yes
Ethernet (WAN and LAN)
2 x 100 Mbps
PoE
12-24v Passive
LEDs
Power, Ethernet (2), WiFi
Temperature
0 - 50 C
Compatible enclosures
Wall Plug
Size
3.75” x 2.75” x 1”
Certifications
FCC, IC, CE, RCM
Warranty
1 year

!
20!
Appendix(A:((
FCC(/(IC(Interference(Statement(
This!device!complies!with!Part!15!of!the!FCC!Rules.!Operation!is!subject!to!the!following!two!conditions:!
(1)!This!device!may!not!cause!harmful!interference,!and!(2)!this!device!must!accept!any!interference!
received,!including!interference!that!may!cause!undesired!operation.!
This!equipment!has!been!tested!and!found!to!comply!with!the!limits!for!a!Class!B!digital!device,!
pursuant!to!Part!15!of!the!FCC!Rules.!!These!limits!are!designed!to!provide!reasonable!protection!against!
harmful!interference!in!a!residential!installation.!This!equipment!generates,!uses!and!can!radiate!radio!
frequency!energy!and,!if!not!installed!and!used!in!accordance!with!the!instructions,!may!cause!harmful!
interference!to!radio!communications.!!However,!there!is!no!guarantee!that!interference!will!not!occur!
in!a!particular!installation.!!If!this!equipment!does!cause!harmful!interference!to!radio!or!television!
reception,!which!can!be!determined!by!turning!the!equipment!off!and!on,!the!user!is!encouraged!to!try!
to!correct!the!interference!by!one!of!the!following!measures:!
- Reorient!or!relocate!the!receiving!antenna.!
- Increase!the!separation!between!the!equipment!and!receiver.!
- Connect!the!equipment!into!an!outlet!on!a!circuit!different!from!that!to!which!the!receiver!is!
connected.!
- Consult!the!dealer!or!an!experienced!radio/TV!technician!for!help.!
FCC!Caution:!Any!changes!or!modifications!not!expressly!approved!by!the!party!responsible!for!
compliance!could!void!the!user's!authority!to!operate!this!equipment.!
This!transmitter!must!not!be!co-located!or!operating!in!conjunction!with!any!other!antenna!or!
transmitter.!
Radiation(Exposure(Statement(
This!equipment!complies!with!FCC!radiation!exposure!limits!set!forth!for!an!uncontrolled!environment.!
This!equipment!should!be!installed!and!operated!with!minimum!distance!20cm!between!the!radiator!&!
your!body.!
!
!

!
21!
Appendix(B:(
Industry(Canada(statement(
This!device!complies!with!RSS-247!of!the!Industry!Canada!Rules.!Operation!is!subject!to!the!
following!two!conditions:!(1)!This!device!may!not!cause!harmful!interference,!and!(2)!this!device!
must!accept!any!interference!received,!including!interference!that!may!cause!undesired!operation.!
Ce!dispositif!est!conforme!à!la!norme!CNR-247!d'Industrie!Canada!applicable!aux!appareils!radio!
exempts!de!licence.!Son!fonctionnement!est!sujet!aux!deux!conditions!suivantes:!(1)!le!dispositif!ne!
doit!pas!produire!de!brouillage!préjudiciable,!et!(2)!ce!dispositif!doit!accepter!tout!brouillage!reçu,!y!
compris!un!brouillage!susceptible!de!provoquer!un!fonctionnement!indésirable.!!
Radiation(Exposure(Statement:!
This!equipment!complies!with!IC!radiation!exposure!limits!set!forth!for!an!uncontrolled!environment.!
This!equipment!should!be!installed!and!operated!with!minimum!distance!20cm!between!the!radiator!
&!your!body.!
!
Déclaration(d'exposition(aux(radiations:!
Cet!équipement!est!conforme!aux!limites!d'exposition!aux!rayonnements!IC!établies!pour!un!
environnement!non!contrôlé.!Cet!équipement!doit!être!installé!et!utilisé!avec!un!minimum!de!20cm!
de!distance!entre!la!source!de!rayonnement!et!votre!corp.(
(
Detachable(Antenna(Usage(
(
This!radio!transmitter!(IC:!10103A-OM2PV4/!Model:!OM2Pv4)!has!been!approved!by!ISED!to!operate!
with!the!antenna!type!listed!below!with!maximum!permissible!gain!indicated.!Antenna!types!not!
included!in!this!list,!having!a!gain!greater!than!the!maximum!gain!indicated!for!that!type,!are!strictly!
prohibited!for!use!with!this!device.!
!
Le!présent!émetteur!radio!(IC:!10103A-OM2PV4/!Model:!OM2Pv4)!a!été!approuvé!par!ISED!pour!
fonctionner!avec!les!types!d'antenne!énumérés!ci-dessous!et!ayant!un!gain!admissible!maximal.!Les!
types!d'antenne!non!inclus!dans!cette!liste,!et!dont!le!gain!est!supérieur!au!gain!maximal!indiqué,!
sont!strictement!interdits!pour!l'exploitation!de!l'émetteur.!!
!
Approved!antenna(s)!list!!!
!
Type(
Gain((
Brand(
Manufacturer(
Dipole!
2dBi!
LiTE!
Liteconn!Co.!,!Ltd!
(
(
( (
!
22!
Appendix(C:(
EU(Declaration(of(Conformity(
!
This!device!complies!with!the!essential!requirements!of!the!R&TTE!Directive!1999/5/EC.!The!
following!test!methods!have!been!applied!in!order!to!prove!presumption!of!conformity!with!the!
essential!requirements!of!the!R&TTE!Directive!1999/5/EC:!
!
Safety!
- EN!60950-1:!2006!
- EN!60950-1/A1:!2010!
- EN!60950-1/A11:!2009!
- EN!60950-1/A12:!2011!!
- EN60950-1/A2:2013!
!
MPE!
!
- EN!50385:2002!!
Product!standard!to!demonstrate!the!compliance!of!radio!base!stations!and!fixed!terminal!
stations!for!wireless!telecommunication!systems!with!the!basic!restrictions!or!the!reference!
levels!related!to!human!exposure!to!radio!frequency!electromagnetic!fields!(110MHz!-!40!GHz)!-!
General!public!
!
Radio!
!
- EN!300!328!V1.9.1:2015!!
Electromagnetic!compatibility!and!Radio!spectrum!Matters!(ERM);!Wideband!transmission!
systems;!Data!transmission!equipment!operating!in!the!2.4GHz!ISM!band!andusing!wide!band!
modulation!techniques;!Harmonized!EN!covering!the!essential!requirements!of!article!3.2!of!the!
R&TTE!Directive!
!
EMC!
!
- EN!301!489-1!V1.9.2:2011!
Electromagnetic!compatibility!and!Radio!spectrum!Matters!(ERM);!ElectroMagnetic!
Compatibility!(EMC)!standard!for!radio!equipment!and!services;!Part!1:!Common!technical!
requirements!
!
- EN!301!489-17!V2.2.1:2012!!
Electromagnetic!compatibility!and!Radio!spectrum!Matters!(ERM);!ElectroMagnetic!
Compatibility!(EMC)!standard!for!radio!equipment;!Part!17:!Specific!conditions!for!Broadband!
Data!Transmission!Systems!
!
!
! !

!
23!
(
!
Česky![Czech]!
Open%Mesh!tímto!prohlašuje,!že!tento![typ%zařízení]!je!ve!shodě!se!základními!požadavky!a!dalšími!
příslušnými!ustanoveními!směrnice!1999/5/ES.!
Dansk!
[Danish]!
Undertegnede!Open%Mesh!erklærer!herved,!at!følgende!udstyr![udstyrets%typebetegnelse]!
overholder!de!væsentlige!krav!og!øvrige!relevante!krav!i!direktiv!1999/5/EF.!
Deutsch!
[German]!
Hiermit!erklärt!Open%Mesh,!dass!sich!das!Gerät![Gerätetyp]!in!Übereinstimmung!mit!den!
grundlegenden!Anforderungen!und!den!übrigen!einschlägigen!Bestimmungen!der!Richtlinie!
1999/5/EG!befindet.!
Eesti!
[Estonian]!
Käesolevaga!kinnitab!Open%Mesh!seadme![seadme%tüüp%=%type%of%equipment]!vastavust!direktiivi!
1999/5/EÜ!põhinõuetele!ja!nimetatud!direktiivist!tulenevatele!teistele!asjakohastele!sätetele.!
English!
Hereby,!Open%Mesh,!declares!that!this!wireless%router%is!in!compliance!with!the!essential!
requirements!and!other!relevant!provisions!of!Directive!1999/5/EC.!
Español!
[Spanish]!
Por!medio!de!la!presente!Open%Mesh!declara!que!el![clase%de%equipo]!cumple!con!los!requisitos!
esenciales!y!cualesquiera!otras!disposiciones!aplicables!o!exigibles!de!la!Directiva!1999/5/CE.!
Ελληνική!
[Greek]!
ΜΕ!ΤΗΝ!ΠΑΡΟΥΣΑ%Open%Mesh%ΔΗΛΩΝΕΙ!ΟΤΙ%[type%of%equipment]%ΣΥΜΜΟΡΦΩΝΕΤΑΙ!ΠΡΟΣ!ΤΙΣ!
ΟΥΣΙΩΔΕΙΣ!ΑΠΑΙΤΗΣΕΙΣ!ΚΑΙ!ΤΙΣ!ΛΟΙΠΕΣ!ΣΧΕΤΙΚΕΣ!ΔΙΑΤΑΞΕΙΣ!ΤΗΣ!ΟΔΗΓΙΑΣ!1999/5/ΕΚ.!
Français!
[French]!
Par!la!présente!Open%Mesh%déclare!que!l'appareil![type%d'appareil]!est!conforme!aux!exigences!
essentielles!et!aux!autres!dispositions!pertinentes!de!la!directive!1999/5/CE.!
Italiano!
[Italian]!
Con!la!presente!Open%Mesh!dichiara!che!questo![tipo%di%apparecchio]!è!conforme!ai!requisiti!
essenziali!ed!alle!altre!disposizioni!pertinenti!stabilite!dalla!direttiva!1999/5/CE.!
Latviski!
[Latvian]!
Ar!šo!Open%Mesh%deklarē,!ka![type%of%equipment%/%iekārtas%tips]!atbilst!Direktīvas!1999/5/EK!
būtiskajām!prasībām!un!citiem!ar!to!saistītajiem!noteikumiem.!
Lietuvių!
[Lithuanian]!!
Šiuo!Open%Mesh%deklaruoja,!kad!šis![equipment%type]!atitinka!esminius!reikalavimus!ir!kitas!
1999/5/EB!Direktyvos!nuostatas.!
Nederlands!
[Dutch]!
Hierbij!verklaart!Open%Mesh%dat!het!toestel![type%van%toestel]!in!overeenstemming!is!met!de!
essentiële!eisen!en!de!andere!relevante!bepalingen!van!richtlijn!1999/5/EG.!
Malti!
[Maltese]!
Hawnhekk,!Open%Mesh%!jiddikjara!li!dan![il-mudel%tal-prodott]!jikkonforma!mal-ħtiġijiet!essenzjali!
u!ma!provvedimenti!oħrajn!relevanti!li!hemm!fid-Dirrettiva!1999/5/EC.!
Magyar!
[Hungarian]!
Alulírott,!Open%Mesh%nyilatkozom,!hogy!a![...%típus]%megfelel!a!vonatkozó!alapvetõ!
követelményeknek!és!az!1999/5/EC!irányelv!egyéb!elõírásainak.!
Polski![Polish]!
Niniejszym!Open%Mesh%oświadcza,!że![nazwa%wyrobu]!jest!zgodny!z!zasadniczymi!wymogami!oraz!
pozostałymi!stosownymi!postanowieniami!Dyrektywy!1999/5/EC.!
Português!
[Portuguese]!
Open%Mesh%declara!que!este![tipo%de%equipamento]!está!conforme!com!os!requisitos!essenciais!e!
outras!disposições!da!Directiva!1999/5/CE.!
Slovensko!
[Slovenian]!
Open%Mesh%izjavlja,!da!je!ta![tip%opreme]!v!skladu!z!bistvenimi!zahtevami!in!ostalimi!relevantnimi!
določili!direktive!1999/5/ES.!
Slovensky!
[Slovak]!
Open%Mesh!týmto!vyhlasuje,!že![typ%zariadenia]!spĺňa!základné!požiadavky!a!všetky!príslušné!
ustanovenia!Smernice!1999/5/ES.!
Suomi!
[Finnish]!
Open%Mesh%vakuuttaa!täten!että![type%of%equipment%=%laitteen%tyyppimerkintä]!tyyppinen!laite!on!
direktiivin!1999/5/EY!oleellisten!vaatimusten!ja!sitä!koskevien!direktiivin!muiden!ehtojen!
mukainen.!
Svenska!
[Swedish]!
Härmed!intygar!Open%Mesh%att!denna![utrustningstyp]!står!I!överensstämmelse!med!de!
väsentliga!egenskapskrav!och!övriga!relevanta!bestämmelser!som!framgår!av!direktiv!1999/5/EG.!
!