Dayton IPDEK iPhone Dongle EK41800 User Manual Quick Start Guide
Dayton Industrial Co., Ltd. iPhone Dongle EK41800 Quick Start Guide
Dayton >
User Manual

Quick Start Guide
Introduction
The Enki-Cycle system allows you to monitor your cycling workouts on your iPhone. The system is made up of three
components. The first component is the two sensors which collect data. The first is a heart rate sensor and strap which
measure your heart rate as you ride. The second is a combined speed and cadence sensor which measures how fast you are
riding and the frequency or cadence you are pedaling at. The second component is the ANT+ accessory for your iPhone.
This device allows the iPhone application to communicate with the sensor mentioned above. The third component is the
Enki-Train iPhone application which is how you collect and view the information from the sensors on your iPhone.
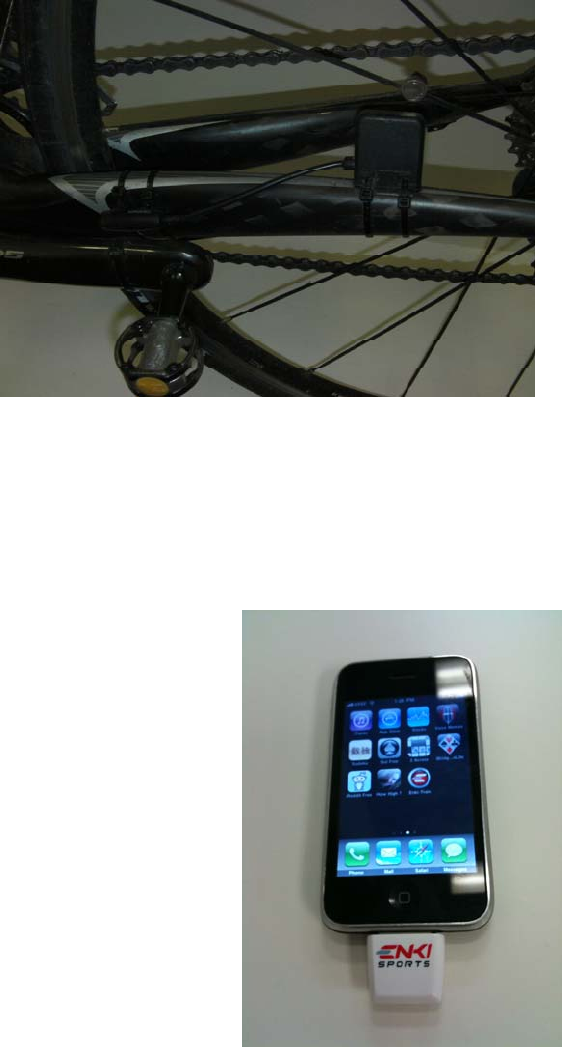
Step 1: Mount the Enki Sports Combined Speed and Cadence sensor to your bicycle
1. The best place to mount the sensor is the non-
drive side chain stay.
2. Attach the supplied cadence magnet to the
crank loosely with one of the supplied cable
ties. Do not tighten the cable tie as you may
need to adjust the position of the magnet.
3. Position the cadence sensor between the crank
arm and the frame of the bicycle to ensure the
magnet will passes closer than 0.5cm (¼ inch)
of the cadence sensor. Ensure the magnet will
not foul on the sensor in normal operation.
4. Tighten then trim both the magnet and sensor
cable ties. It may be necessary to add some
form of adhesive to the cadence magnet to
ensure the magnet does not move in normal
operation. This movement may be caused by
shape of your crank or by excessive vibration.
5. Place the supplied rubber mount into the main
part of the sensor. Loosely attach the main part
of the sensor to your frame as shown. Do not tighten the cable ties fully at this time.
6. Attach the supplied speed magnet to your wheel as shown. Position the magnet to pass over the line marked on the
sensor. Tighten the screw to ensure it will not move in normal operation. Do not over-tighten the screw as this may
damage the threads on the magnet, your spoke or both.
7. Position the main sensor so magnet will pass the sensor at a distance of around 0.5cm (¼ inch). Take care to ensure
the sensor will not foul on the magnet or other parts of the wheel. Tighten the cable ties as tight as possible. If these
cable ties are loose the sensor may move and damage your wheel.
Step 2:
Plug your Enki Sports iPhone Accessory into your iPhone as shown
• Take care not to apply excessive force to the accessory connector while
connected to the iPhone as this could cause damage to the Enki Sports
accessory, your iPhone or both devices
• While intended to fit many different cases there will be a number of cases that
do not allow the Enki Sports iPhone accessory to attach to the iPhone
• Take care to protect the iPhone and Enki Sports accessory from water damage.
Water damage will void the Enki Sports warranty and may effect other
warranties.

Step 3:
Download the Enki Sports iPhone application:
Unless you have already download the Enki Sports application from the App Store you will receive the following message:
(replace with image of actual iPhone screen)
Application Not Installed
This accessory requires an application you do not have installed. Would you like to install it from the App Store?
Click yes to this and you automatically be taken to the App Store page to download the Enki Sports iPhone application.
Install the application.
Step 4:
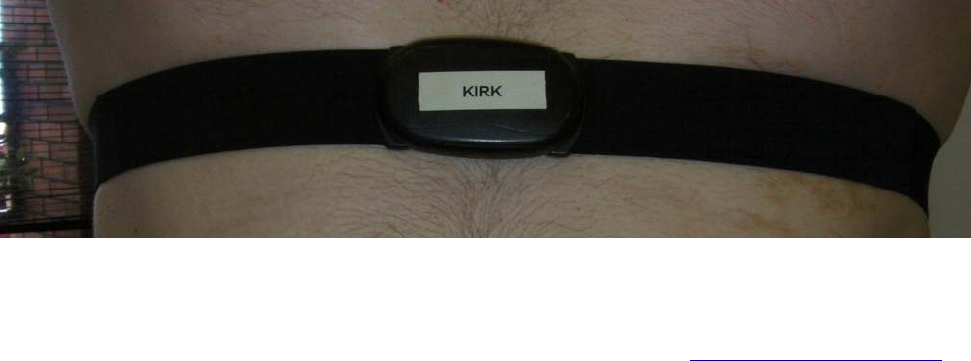
Put on the heart rate sensor as shown
Some users may need to apply a little moisture to the electrodes of the heart rate sensor strap to ensure a good connection.
In normal operation perspiration will ensure an excellent connection is maintained.
Enki Sports heart rate sensors are compatible with NuMetrex heart monitoring clothing (http://www.numetrex.com/)
Step 5:
Launch application
Step 6:
Pair Sensors
Open the Settings tab in the application
Select the Sport Settings button
Add a new sport mode by clicking the plus button in the top right of the screen
Select cycling from the selector wheel
Name the mode (after the bike type for example)
Add a new sensor by clicking the plus button in the top right of the screen
Select Heart Rate from the selector wheel
Elements on the screen will go grey while the application searches for the sensor.
After the sensor is found it will be added to the table of sensors.
Activate the Combined Speed and Cadence Sensor by ensuring the magnets pass the sensors a number of times. A good way
to do this is lifting the rear wheel of the bicycle and rotating the cranks a few times by hand. The sensor automatically goes
to sleep after a period of time with the wheel and crank not rotating to save battery life.
Add a new sensor by clicking the plus button in the top right of the screen
Select Combined Speed and Cadence from the selector wheel
Elements on the screen will go grey while the application searches for the sensor.
After the sensor is found it will be added to the table of sensors.
If you have a power meter activate your power meter

Add a new sensor by clicking the plus button in the top right of the screen
Select Power from the selector wheel
Elements on the screen will go grey while the application searches for the sensor.
After the sensor is found it will be added to the table of sensors.
FCC ID: O4GIPDEK
IC: 7666A-IPDEK
FCC Statement
This equipment has been tested and found to comply with the limits for a Class B digital device, pursuant to part 15 of the
FCC rules. These limits are designed to provide reasonable protection against harmful interference in a residential
installation. This equipment generates, uses and can radiate radio frequency energy and, if not installed and used in
accordance with the instructions, may cause harmful interference to radio communications. However, there is no guarantee
that interference will not occur in a particular installation. If this equipment does cause harmful interference
to radio or television reception, which can be determined by turning the equipment off and on, the user is encouraged to try
to correct the interference by one or more of the following measures:
-Reorient or relocate the receiving antenna.
-Increase the separation between the equipment and receiver.
-Connect the equipment into an outlet on a circuit different from that to which the receiver is connected.
-Consult the dealer or an experienced radio/TV technician for help.
To assure continued compliance, any changes or modifications not expressly approved by the party responsible for
compliance could void the user’s authority to operate this equipment. (Example- use only shielded interface cables when
connecting to computer or peripheral devices).
Radiation Exposure Statement
This equipment complies with FCC radiation exposure limits set forth for an uncontrolled environment and it also complies
with Part 15 of FCC RF Rules. Operation is subject to the following two conditions:
1) This device may not cause interference and
2) This device must accept any interference, including interference that may cause undesired operation of the device.
Caution!
The manufacturer is not responsible for any radio or TV interference caused by unauthorized modifications to this
equipment. Such modifications could void the user authority to operate the equipment.
Canada Statement
This Device complies with RSS-210 of the IC Rules; Operation is subject to the following two conditions:
(1).This device may not cause interference and
(2).This device must accept any interference received, including interference that may cause undesired operation.
The device meets the exemption from the routine evaluation limits in section 2.5 of RSS 102 and users can obtain Canadian
information on RF exposure and compliance from the Canadian Representative as seen below:
Dynastream Innovations Inc.
228 River Avenue
Cochrane, Alberta, Canada
T4C 2C1
Phone: 403-932-9292
Fax: 403-932-6521
E-Mail: dynastream@dynastream.com