Dell 5880-30 Notebook PC User Manual book
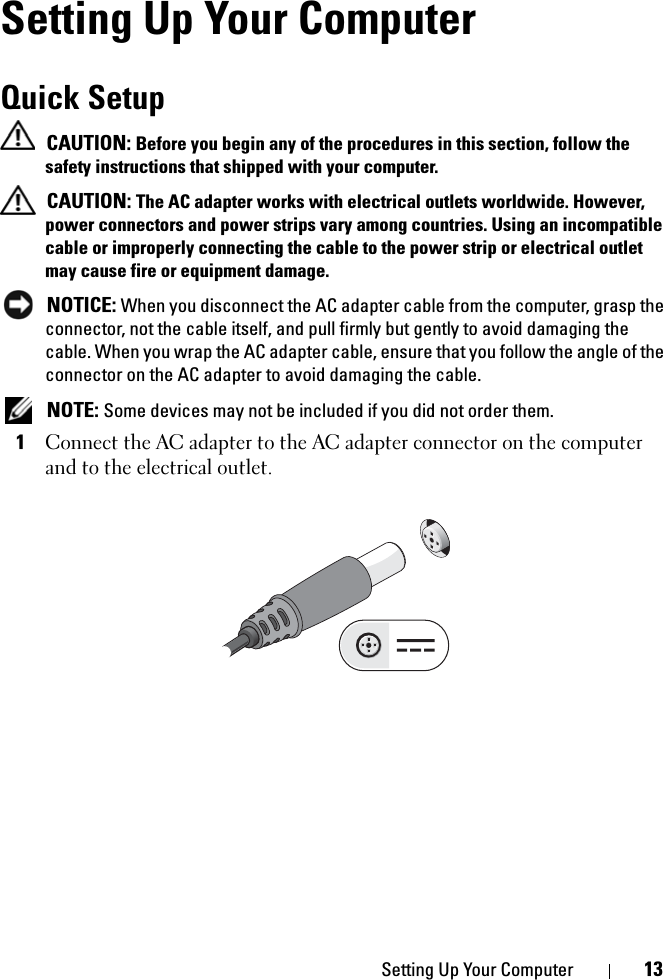
Dell Inc. Notebook PC book
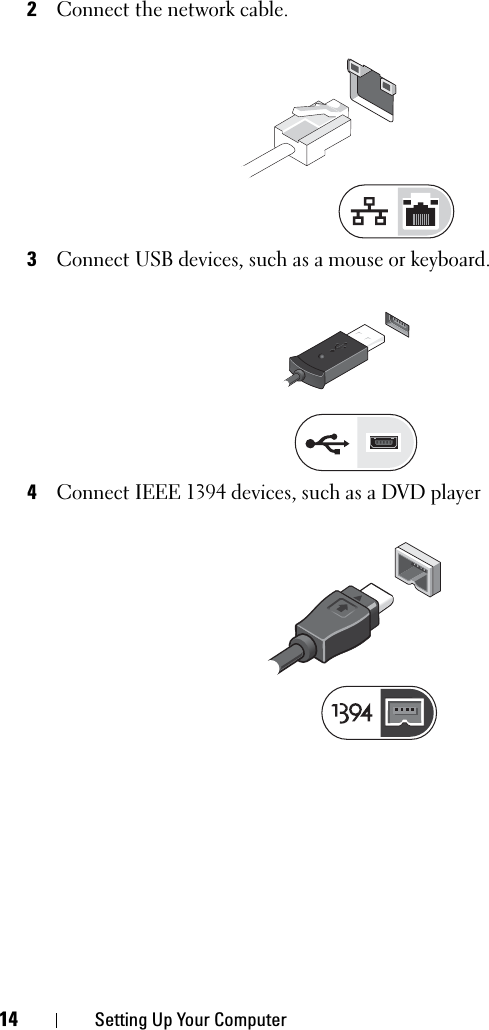
UserManual.wiki
>
Dell
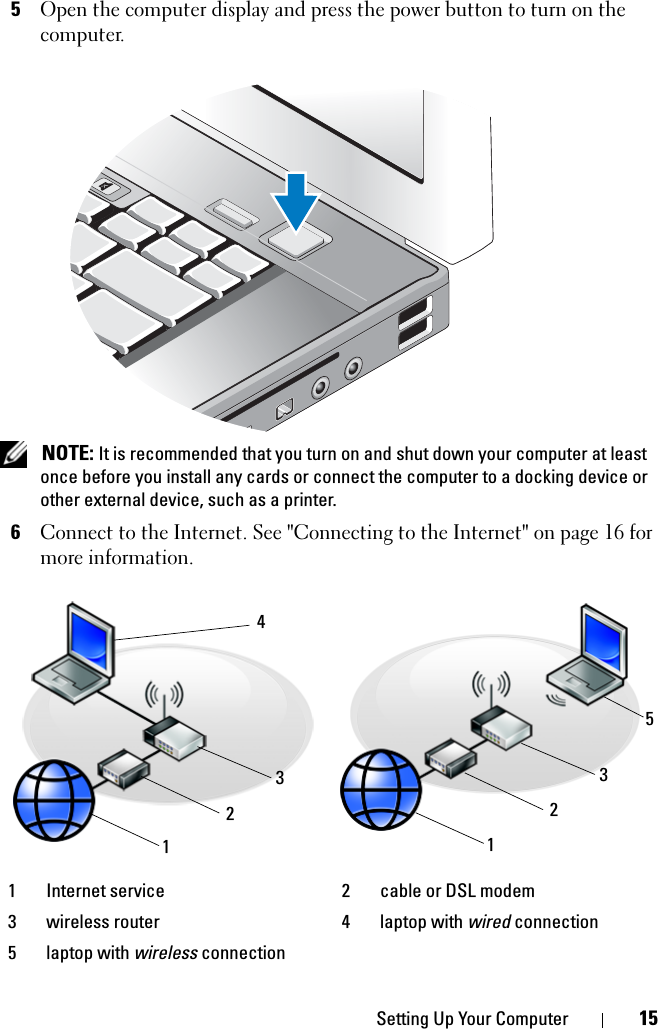
>
5880-30 User Manual
>
User manual
Contents
1.
User manual
2.
User manual regulatory statement
User manual
Navigation menu
Upload a User Manual
Namespaces
Wiki Guide
HTML
PDF
Info
Views
User Manual
Discussion / Help
Navigation

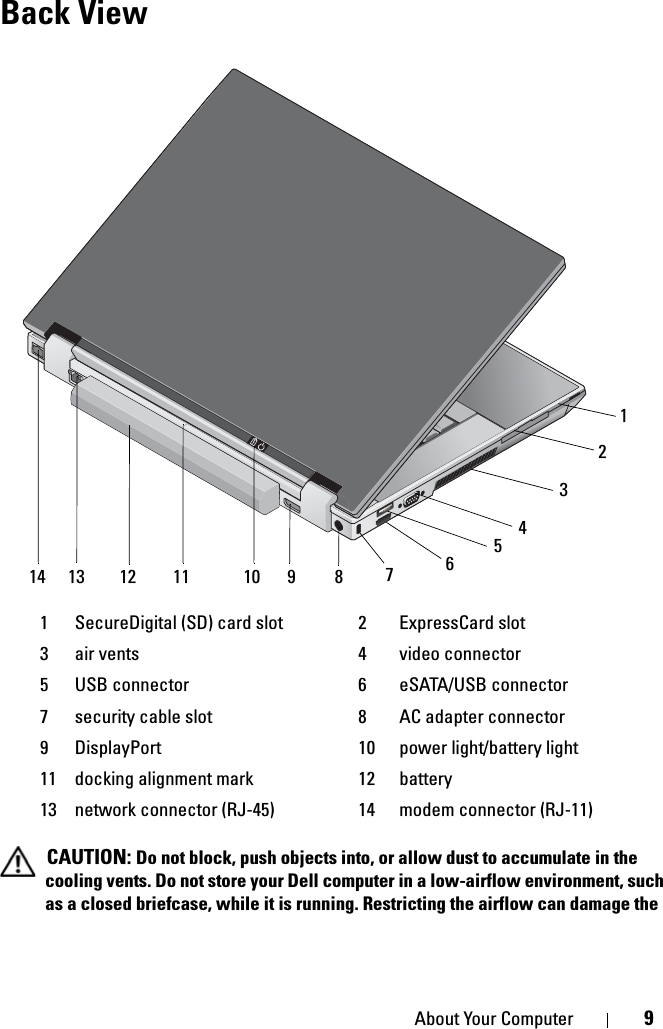

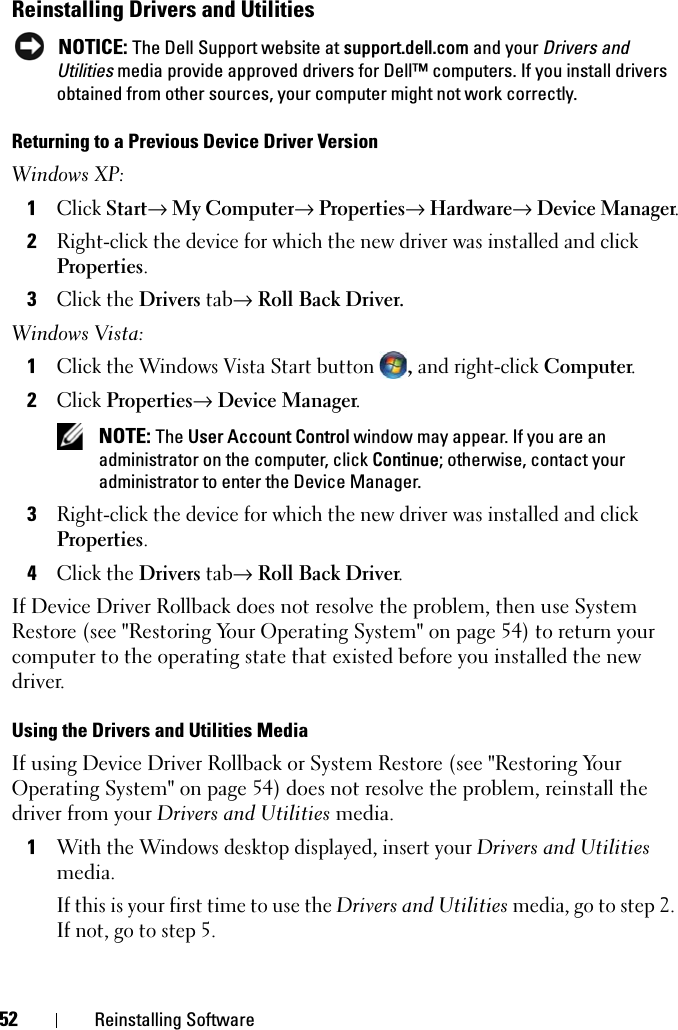
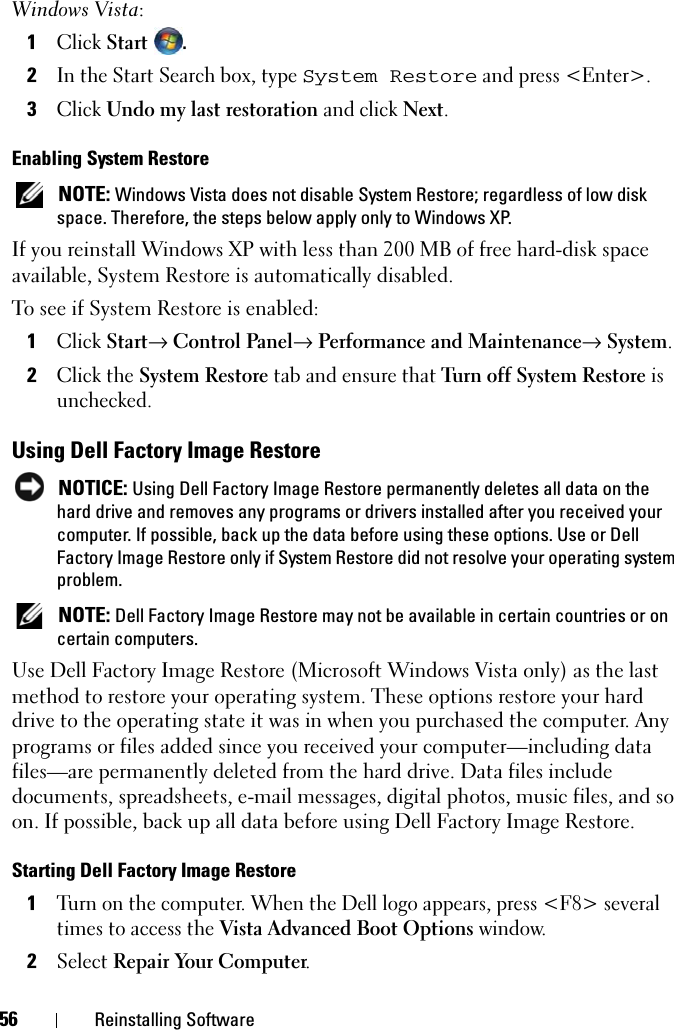
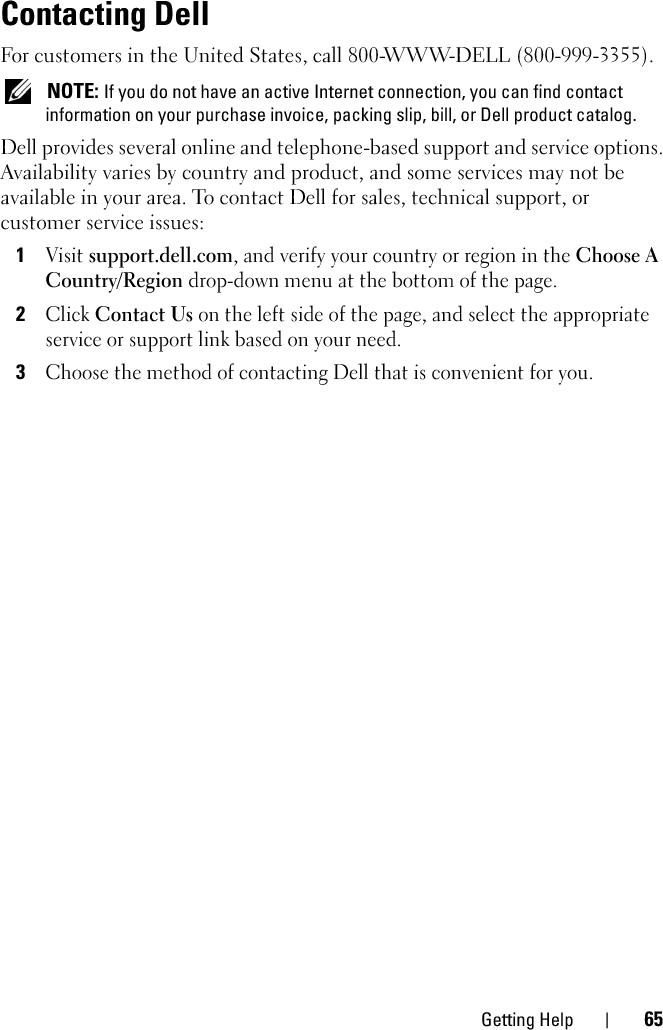
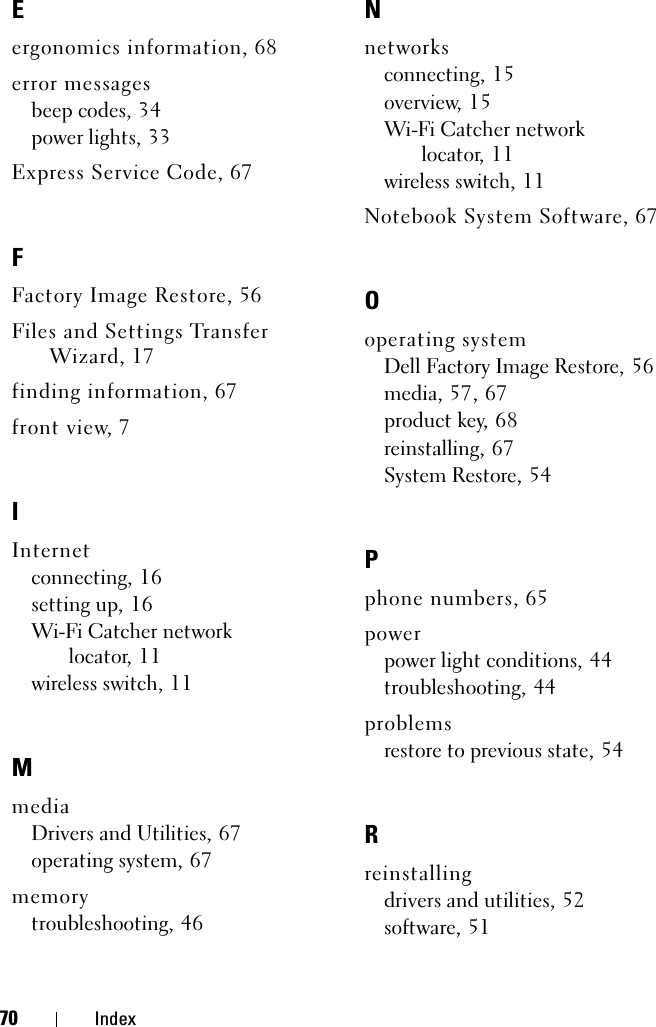
![Specifications 25Minimum memory 512 MB (1 DIMM)Maximum memory 8 GB (Windows Vista only)NOTE: Dual-channel bandwidth operation requires both memory slots to be populated and match in size.NOTE: The available memory displayed does not reflect the complete maximum memory installed because some memory is reserved for system files.Ports and Connectors Audio microphone connector, stereo headphones/speakers connectorIEEE 1394a 4-pin connectorI/O slots SD multi-card reader supports SD, SDIO, SD-HC, Mini-SD (with adapter) MMC, MMC+, Mini-MMC (with adapter)ExpressCard slot for one 54mm or 34mm card one CardBus/PCMCIA slotintegrated smart-card readerMini-Card support (internal expansion slots) one dedicated Half-Mini-Card slot for wireless local area network (WLAN)one dedicated Full-Mini-Card slot for wireless wide area network (WWAN, Mobile Broadband)one dedicated Full-Mini-Card slot for a wireless personal area network (WPAN, Bluetooth® wireless technology, or ultra wideband [UWB])WWAN or WPAN Full-Mini-Card slot can also be used for the Intel Flash CacheMedia bay supports E-Family and E-Module componentsModem RJ-11 portNetwork adapter RJ-45 portMemory (continued)](https://usermanual.wiki/Dell/5880-30.User-manual/User-Guide-966944-Page-25.png)


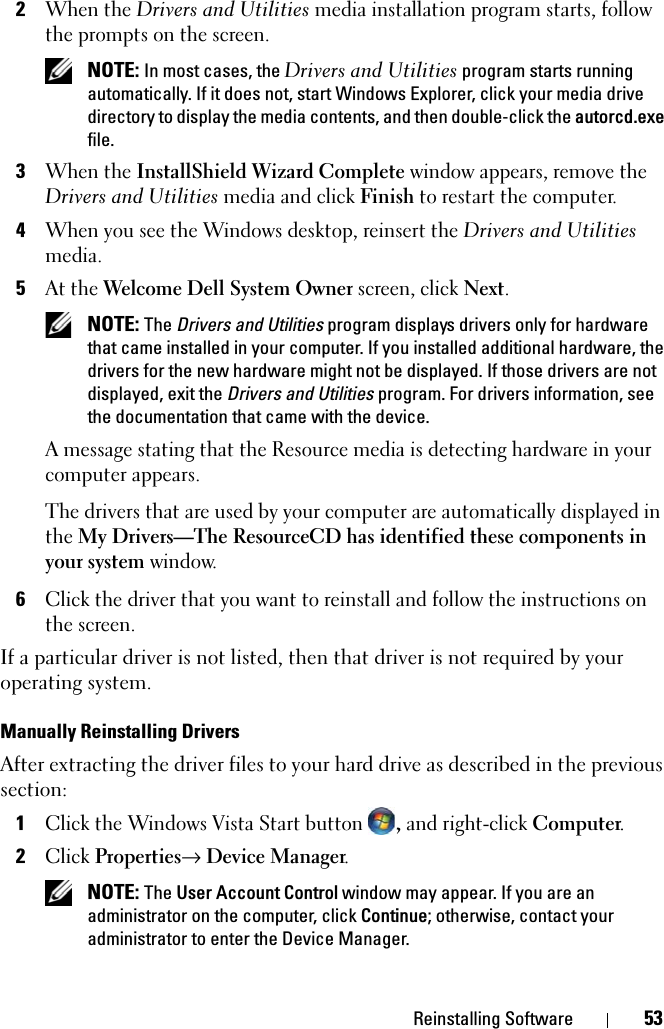
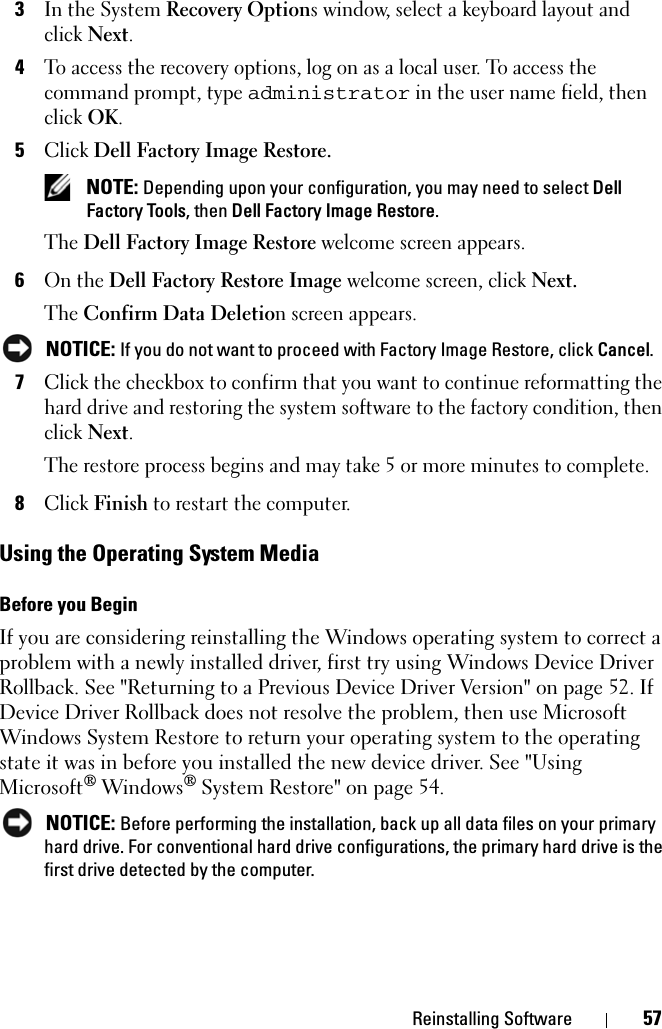
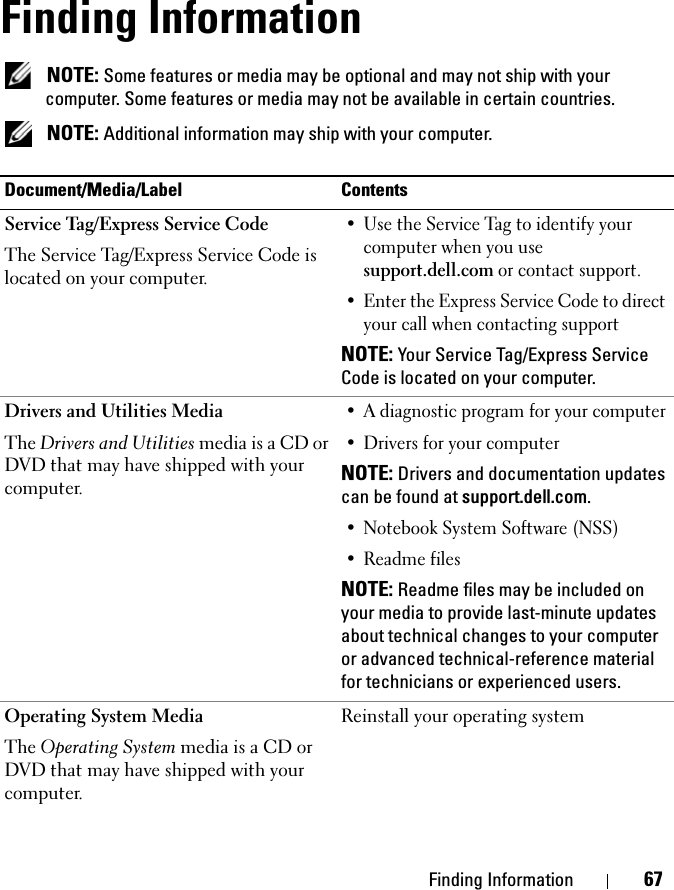
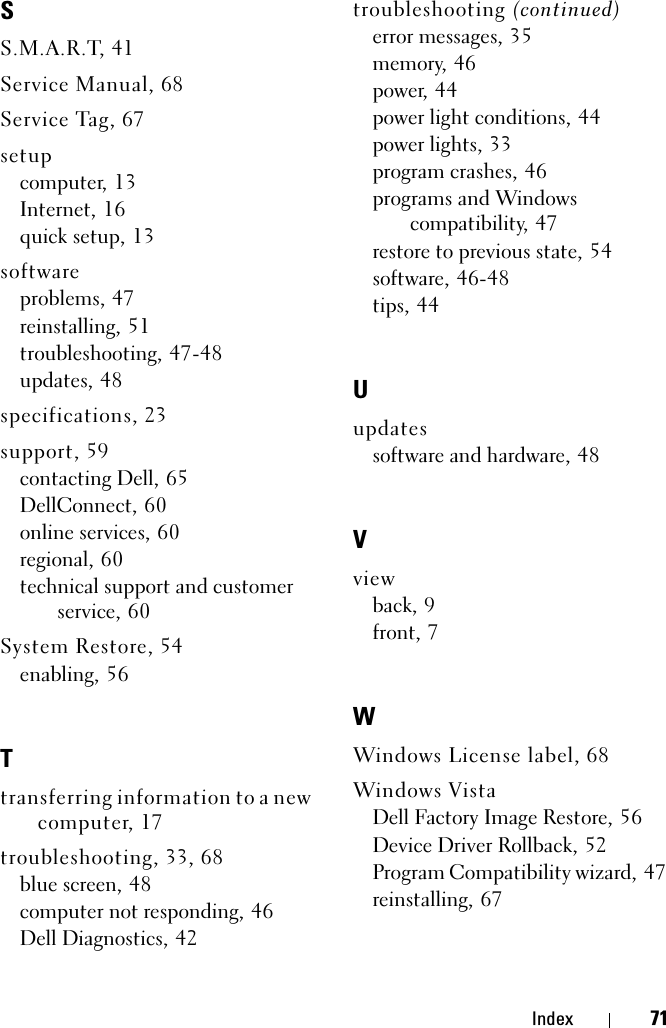
![Troubleshooting 41ALERT! PREVIOUS ATTEMPTS AT BOOTING THIS SYSTEM HAVE FAILED AT CHECKPOINT [NNNN]. FOR HELP IN RESOLVING THIS PROBLEM, PLEASE NOTE THIS CHECKPOINT AND CONTACT DELL TECHNICAL SUPPORT — The computer failed to complete the start routine three consecutive times for the same error (see "Contacting Dell" on page 65 for assistance).CMOS CHECKSUM ERROR — Possible motherboard failure or RTC battery low. Replace battery. See your Service Manual at support.dell.com or see "Contacting Dell" on page 65 for assistance.CPU FAN FAILURE — Processor fan failure. Replace processor fan. See your Service Manual at support.dell.com.HARD-DISK DRIVE FAILURE — Possible hard drive failure during hard drive POST. Check cables, swap hard disks, or see "Contacting Dell" on page 65 for assistance.HARD-DISK DRIVE READ FAILURE — Possible hard drive failure during hard-drive start test (see "Contacting Dell" on page 65 for assistance).KEYBOARD FAILURE — Keyboard failure or keyboard cable loose.NO BOOT DEVICE AVAILABLE — No bootable partition on hard drive, or the hard drive cable is loose, or no bootable device exists. • If the hard drive is your boot device, ensure that the cables are connected and that the drive is installed properly and partitioned as a boot device.• Enter system setup and ensure that the boot sequence information is correct see your Service Manual at support.dell.com).NO TIMER TICK INTERRUPT — A chip on the system board might be malfunctioning or motherboard failure (see "Contacting Dell" on page 65 for assistance).USB OVER CURRENT ERROR — Disconnect the USB device. Use external power source for the USB device.NOTICE - HARD DRIVE SELF MONITORING SYSTEM HAS REPORTED THAT A PARAMETER HAS EXCEEDED ITS NORMAL OPERATING RANGE. DELL RECOMMENDS THAT YOU BACK UP YOUR DATA REGULARLY. A PARAMETER OUT OF RANGE MAY OR MAY NOT INDICATE A POTENTIAL HARD DRIVE PROBLEM — S.M.A.R.T error, possible hard drive failure. This feature can be enabled or disabled in BIOS setup.](https://usermanual.wiki/Dell/5880-30.User-manual/User-Guide-966944-Page-41.png)
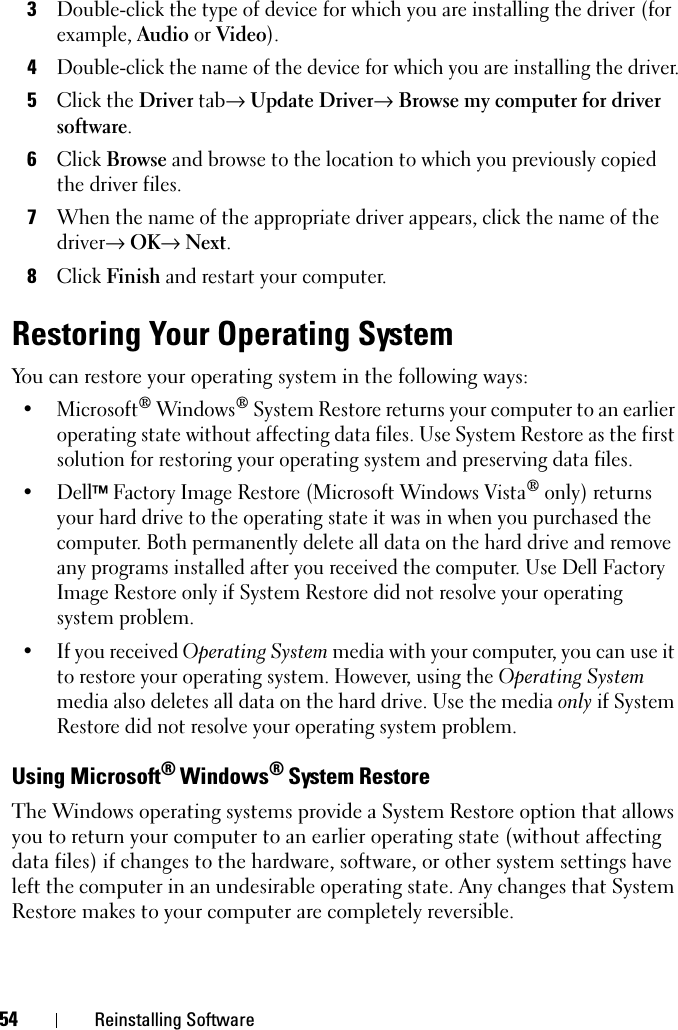
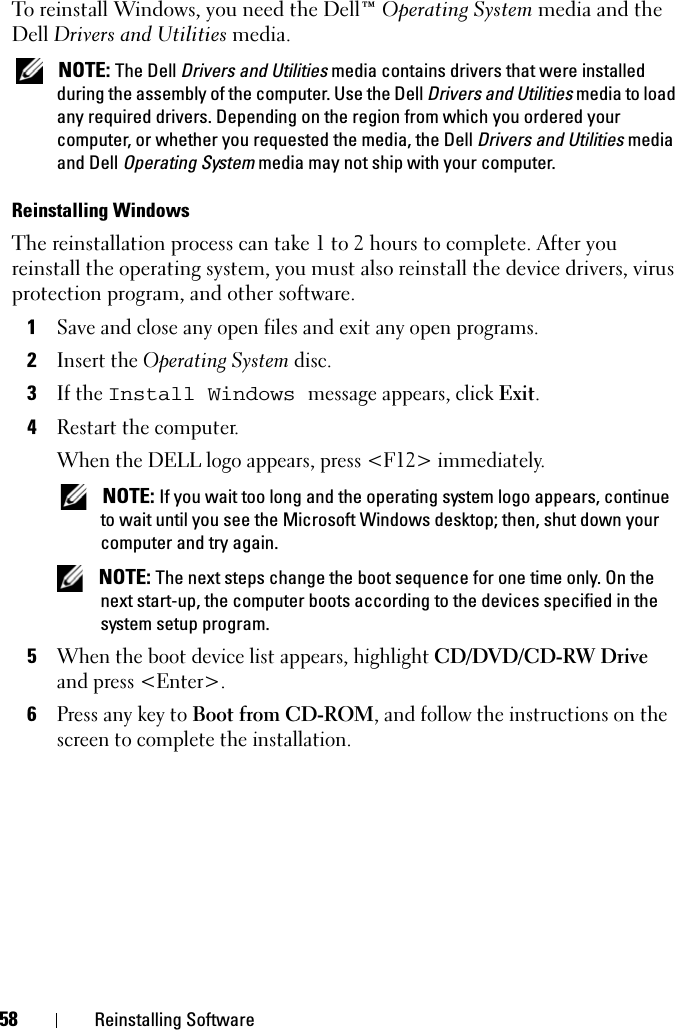
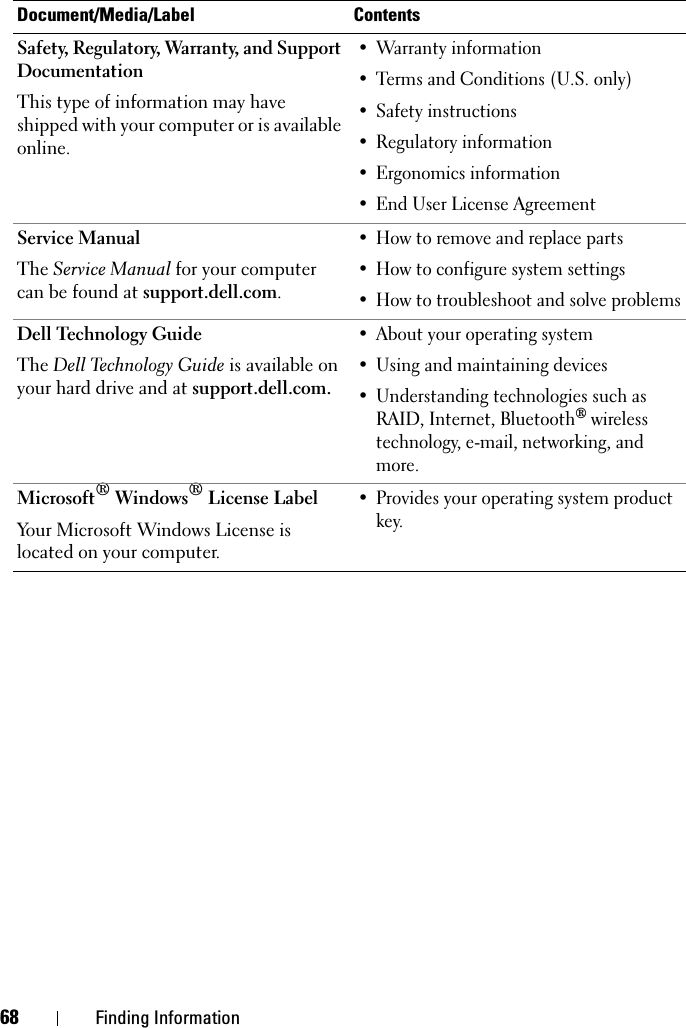
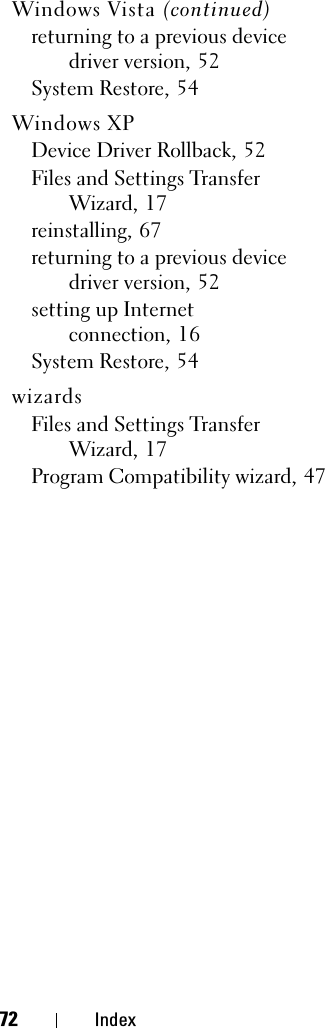
![Reinstalling Software 51Reinstalling SoftwareDriversIdentifying DriversIf you experience a problem with any device, identify whether the driver is the source of your problem and, if necessary, update the driver.Windows XP:1Click Start→ Control Panel.2Under Pick a Category, click Performance and Maintenance, and click System.3In the System Properties window, click the Hardware tab, and click Device Manager. Windows Vista:1Click the Windows Vista Start button , and right-click Computer.2Click Properties→ Device Manager. NOTE: The User Account Control window may appear. If you are an administrator on the computer, click Continue; otherwise, contact your administrator to continue.Scroll down the list to see if any device has an exclamation point (a yellow circle with a [!]) on the device icon.If an exclamation point is next to the device name, you may need to reinstall the driver or install a new driver (see "Reinstalling Drivers and Utilities" on page 52).](https://usermanual.wiki/Dell/5880-30.User-manual/User-Guide-966944-Page-51.png)