Dell Mini 3T1 Users Manual Torch_UM_EN 20100514
1507963999000793568 DELL MINI 3T1 pdf | FreeUserManuals.com
MINI 3T1 to the manual 63f0cd82-d86e-4166-88be-c7f87472e17a
2015-02-09
: Dell Dell-Mini-3T1-Users-Manual-542997 dell-mini-3t1-users-manual-542997 dell pdf
Open the PDF directly: View PDF ![]() .
.
Page Count: 99
DELLTM Mini 3T1
User’s Guide
Statement
Copyright © Dell 2010. All Rights Reserved.
Without the written permission of this company, no company
or individual may make excerpts or copies of the content of this
document in whole or in part, nor may it be distributed in any form.
Trademark Statement
Dell is a trademark of Dell Inc.
All other trademarks or registered trademarks in this document are
held by their respective owners.
Notes
To ensure accuracy during product version upgrades or for other
reasons, the contents of this document may be updated on occasion.
Unless otherwise agreed, this document is provided to offer
directions of use only. No descriptions, information, or suggestions
in this document constitute any kind of express or implied warranty.
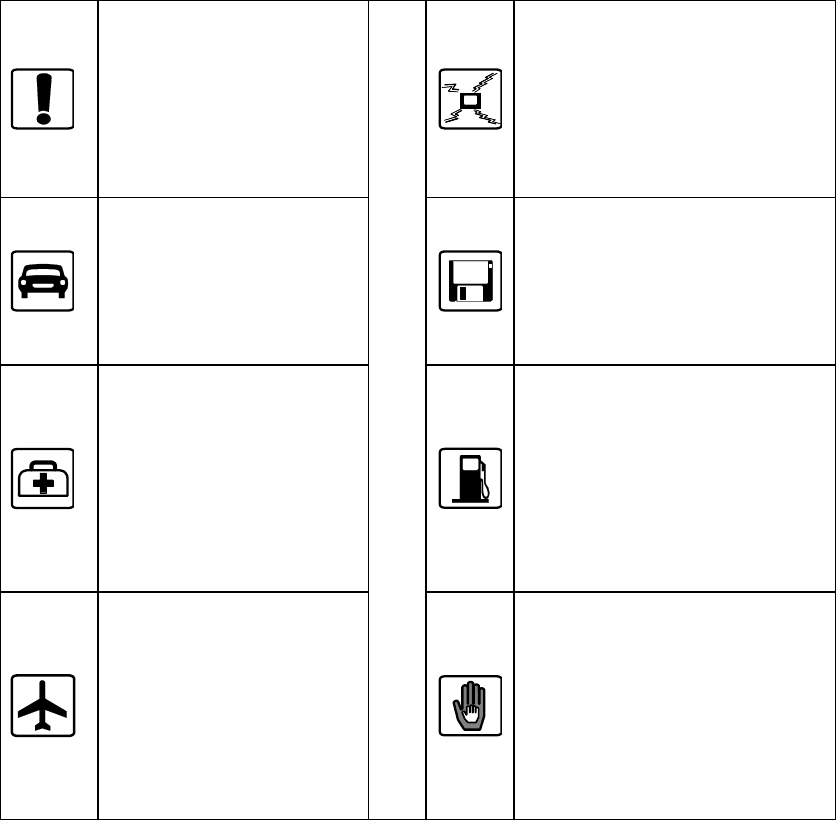
Safety Notice
Before using this cell phone, please read this section carefully.
Please also ensure that any children understand this section's
contents to ensure the correct and safe usage of this cell phone.
For more detailed information, please refer to the information
under the "Safety Warnings and Notes" section of this document.
Switch off your cell
phone in areas where
the use of cell phone is
prohibited or could
cause
interference/danger.
Do not place your cell
phone or its accessories in
appliances that have strong
electromagnetic fields.
Do not place your cell
phone or its accessories
in appliances that have
strong electromagnetic
fields.
Keep your cell phone away
from magnetic equipment,
as the phone's emissions
may erase data stored in the
equipment.
Adhere to the relevant
rules and regulations
for use of cell phone in
hospitals. Do not use
your cell phone when
you are near or around
medical equipment.
Do not use your cell phone
near areas of high
temperature, or near areas
containing flammable gas
(such as petrol stations).
Switch off your cell
phone when boarding
an airplane to prevent
the wireless signal
from interfering with
the airplane control
signal.
Keep your cell phone and
its accessories out of the
reach of children. Do not
allow children to use the
cell phone without
supervision.
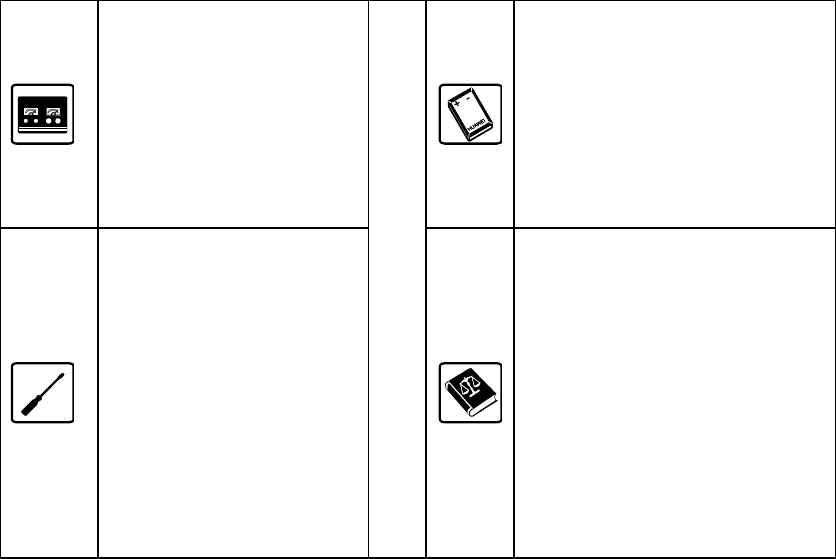
Switch off your cell
phone near areas where
high-precision electronic
equipment is used.
Otherwise, the cell
phone may damage the
equipment.
Use the batteries and battery
chargers specified for this
cell phone. Use of
unapproved battery chargers
may cause explosion.
Do not disassemble
your cell phone or its
accessories. Only
authorized service
personnel should repair
this phone.
Obey all local laws and
regulations for using a cell
phone. Respect the privacy
and legal rights of other
individuals.
i
Contents
1 Understanding Your Cell Phone............................... 6
Introduction............................................................................... 6
About Your Mini 3T1 Cell Phone ............................................. 7
2 Getting Started with Phone Use ............................. 13
Installing and Removing Batteries .......................................... 13
Installing and Removing the SIM Card................................... 19
Installing a microSD Card....................................................... 21
Removing a MicroSD card...................................................... 21
Turning the Phone On or Off................................................... 22
Making a Voice Call................................................................ 23
Making a Video Call ............................................................... 25
Answering a Voice or Video Call ............................................ 25
During a Voice Call ................................................................. 25
Emergency Call....................................................................... 28
During a Video Call................................................................. 28
3 Menu Operations..................................................... 29
Main Menu Structure .............................................................. 29
Main Menu Selections............................................................. 29
4 Settings ..................................................................... 31
Phone setup ............................................................................. 31
Display setup........................................................................... 32
Date and Time ......................................................................... 32
Call setup ................................................................................ 33
Network Settings..................................................................... 36
ii
Connection Profile .................................................................. 37
Security Management.............................................................. 37
Reset Settings.......................................................................... 40
5 Profiles...................................................................... 41
Activating Profiles .................................................................. 41
Personalization Setup .............................................................. 41
6 Call History.............................................................. 43
Outgoing Calls ........................................................................ 43
Answered Calls ....................................................................... 43
Missed Calls............................................................................ 44
7 China Mobile Service .............................................. 45
Mobile Music .......................................................................... 45
Games ..................................................................................... 45
Fetion ...................................................................................... 45
Mobile Video........................................................................... 46
Mobile Map............................................................................. 46
Mobile Stock........................................................................... 46
CM Reader.............................................................................. 46
139 Mail.................................................................................. 47
DCD ........................................................................................ 47
SIM Card Applications............................................................ 47
8 Customer Service..................................................... 48
Service Guide.......................................................................... 48
Business Hall........................................................................... 48
Customer Manager.................................................................. 48
My Monternet ......................................................................... 49
Software Update Service......................................................... 49
Settings.................................................................................... 49
iii
9 Monternet................................................................. 51
Off Line Browser Menu .......................................................... 51
On Line Browser Menu........................................................... 53
10 My Favorites .......................................................... 54
Magic Box............................................................................... 54
Preset....................................................................................... 54
Phone ...................................................................................... 55
Storage Card............................................................................ 55
MMS Cards............................................................................. 56
MSG search............................................................................. 56
Storage Status.......................................................................... 56
Format..................................................................................... 56
11 Messages ................................................................. 57
Setup ....................................................................................... 59
New and Sent Messages.......................................................... 61
Inbox ....................................................................................... 63
Outbox .................................................................................... 64
Sent ......................................................................................... 64
Draft ........................................................................................ 64
My Favorites ........................................................................... 64
Junk Mailbox........................................................................... 64
Voice Mail Box ....................................................................... 65
Local Broadcasts ..................................................................... 65
12 Phonebook.............................................................. 66
Phonebook............................................................................... 66
Group ...................................................................................... 69
13 Multimedia............................................................. 70
iv
Camera .................................................................................... 70
DV........................................................................................... 73
Music Player ........................................................................... 73
Video Player............................................................................ 76
Recorder.................................................................................. 77
14 Tools ........................................................................ 78
Memo ...................................................................................... 78
Time ........................................................................................ 78
Calculator................................................................................ 78
Exchange Rate......................................................................... 78
Unit Conversion ...................................................................... 79
Incoming Call Location........................................................... 79
15 Connections............................................................ 80
Bluetooth................................................................................. 80
USB Mode .............................................................................. 80
PC Tools.................................................................................. 80
GPRS Wizard .......................................................................... 81
16 Other Applications ................................................ 82
English Chinese Dictionary..................................................... 82
Calendar .................................................................................. 82
Electronic books...................................................................... 83
Games ..................................................................................... 83
17 Safety Warnings and Notes................................... 84
Electronic Equipment.............................................................. 84
Medical Care Centers.............................................................. 84
Combustible and Explosive Areas........................................... 85
Traffic Safety........................................................................... 85
Storage Environment............................................................... 86
v
Child Health ............................................................................ 87
Operation Environment........................................................... 87
Cleaning and Maintenance ...................................................... 88
Emergency Call....................................................................... 89
Using the Battery .................................................................... 89
Using the Charger ................................................................... 90
Using the USB Data Cable...................................................... 91
Protecting the Environment..................................................... 92
Electronic Message Products Toxins and Harmful Substance
Declaration.............................................................................. 92
18 SAR Description .................................................... 94

6
1 Understanding Your Cell Phone
Introduction
Upon opening the phone gift box, check to ensure that all the
items listed below are included. If any of the items are missing, or
if you you have problems with documentation such as missing
pages, contact your local retailer.
The following items are included in the gift box:
One Mini 3T1 cell phone
One travel charger
One regional plug
One USB data/charging cable
One battery
One stylus
One microSD with the User’s Guide and PC Sync Tool

7
About Your Mini 3T1 Cell Phone
Dell Mini 3T1 Cell Phone Features
手写笔 耳机插孔 USB 充电器接口
开机键
扬声器
後攝像頭
拍照键
听筒
返回键 主页键
麦克风
前摄像头
音量键
方向键

8
Key Assignments
Key Functions
Vo l u m e
Button
During a call: Press up to increase the speaker
volume. Press down to decrease the speaker
volume.
Ringer mute: a short press when receiving a call
mutes the ringer.
Ringer volume: in the Idle screen, a short press
opens the ringer volume window.
Menu navigation: in the Main menu screen, press
the up/down keys to highlight the next icon in the
vertical direction.
OK Button
Use to select an item on the screen and to activate
an application. Press to go to the Main Menu
screen.
Home
Button
While in any application, press the Home key to
end the application and go back to the Main Menu
screen. While in the Main Menu screen, press
again to go to the Idle screen.
Navigation
Disc
Press the disc in the appropriate direction to
navigate through menus.
Back Button Press to go back to the previous screen.
Power
Button
Press and hold to turn on or off the phone. Press
once to lock/unlock the screen when the phone is
active.
Touch
Screen
Display
Swipe left or right to navigate between menu
panels.
9
Connectors and Memory Card Slot
Ports Functions
Headset
Connector
Located at the bottom of the phone. Used to
connect stereo headsets
MiniUSB
Connector
Located at the bottom of the phone. Used to
charge the phone and for connecting to a
computer
microSD card
slot
Located under the battery beside the SIM card
holder
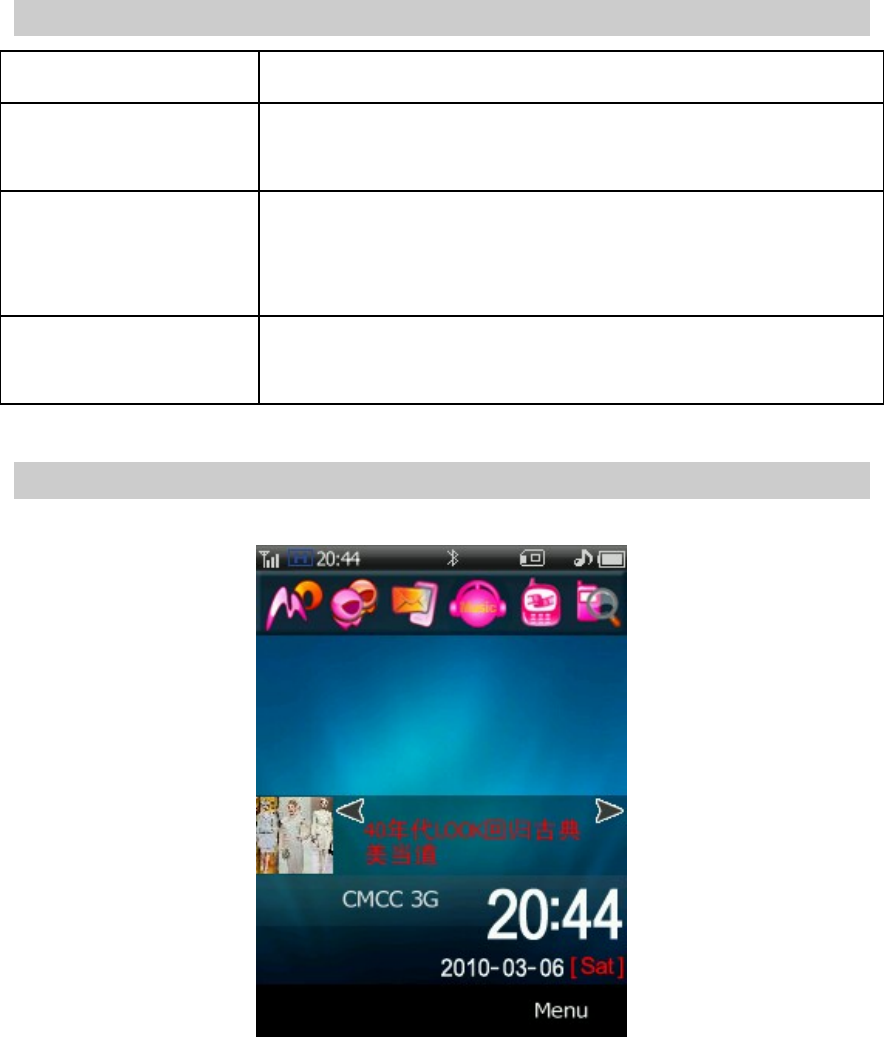
Cell Phone Screen
Idle Screen
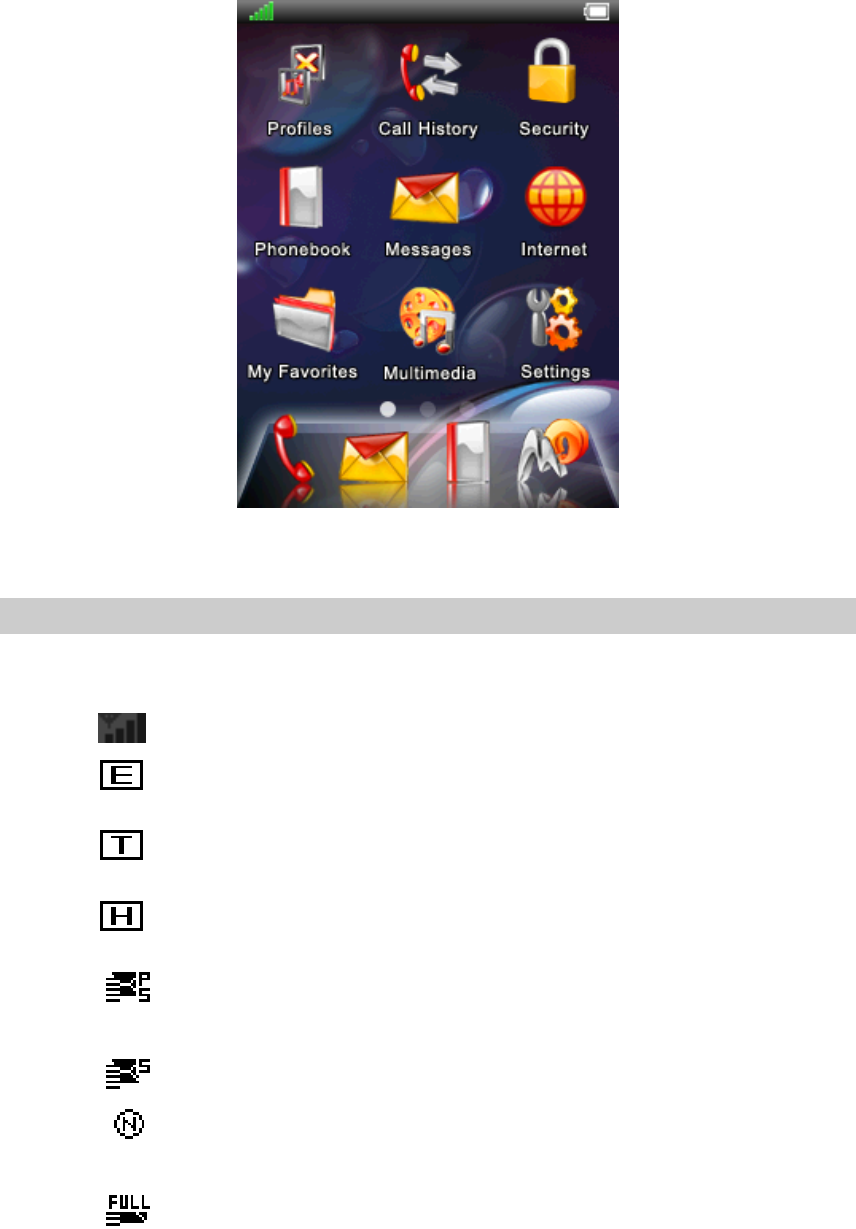
10
Main Menu Screen
Screen Icons
Displayed icon Description
Network signal strength indicator
EDGE network availability indicator
TD-SCDMA network availability indicator
HSPDA network availability indicator
Indicates that the SIM card and phone
message inbox are full
Indicates that the SIM card call record is full
Indicates that the WAP push message
mailbox is full
Indicates that the multimedia message

11
mailbox is full
The current profile is set to "meeting"
The current profile is set to "car"
The current profile is set to "outdoor"
The current profile is set to "private"
The current profile is set to "silent"
Indicates that call transfer is active
Indicates that the memory card is inserted
Indicates that UDisk is active
Indicates that the alarm clock is set
New message indicator
Unread WAP push message indicator
Battery life indicator
Missed call indicator
Unread message indicator
10:23 Shows the current time (this can be in either
24 or 12 hour format)
2010 Shows the current year
08-10 [Wed] Shows the current date and day of week
China Mobile Shows the current network provider
Accessing the Dial Pad
You can access the dial pad in one of the following ways:
+ In the Idle screen, tap the display.
+ In the Main screen, tap the handset icon that appears at
the bottom of the screen.
12
Setting the Data and Time
You can set the date and time in one of the following ways:
+ In the Idle screen, tap the clock to open the Data and
Time settings menu.
+ In the Main Menu screen, tap Settings to access the
Data an Time settings menu.
13
2 Getting Started with Phone Use
Installing and Removing Batteries
Your Dell Mini 3T1 cell phone is powered by rechargeable lithium
battery. Ensure that you install the battery properly before using
the phone.
NOTE: The battery may have been slightly discharged prior to
purchase, but should have enough power to turn on the phone.
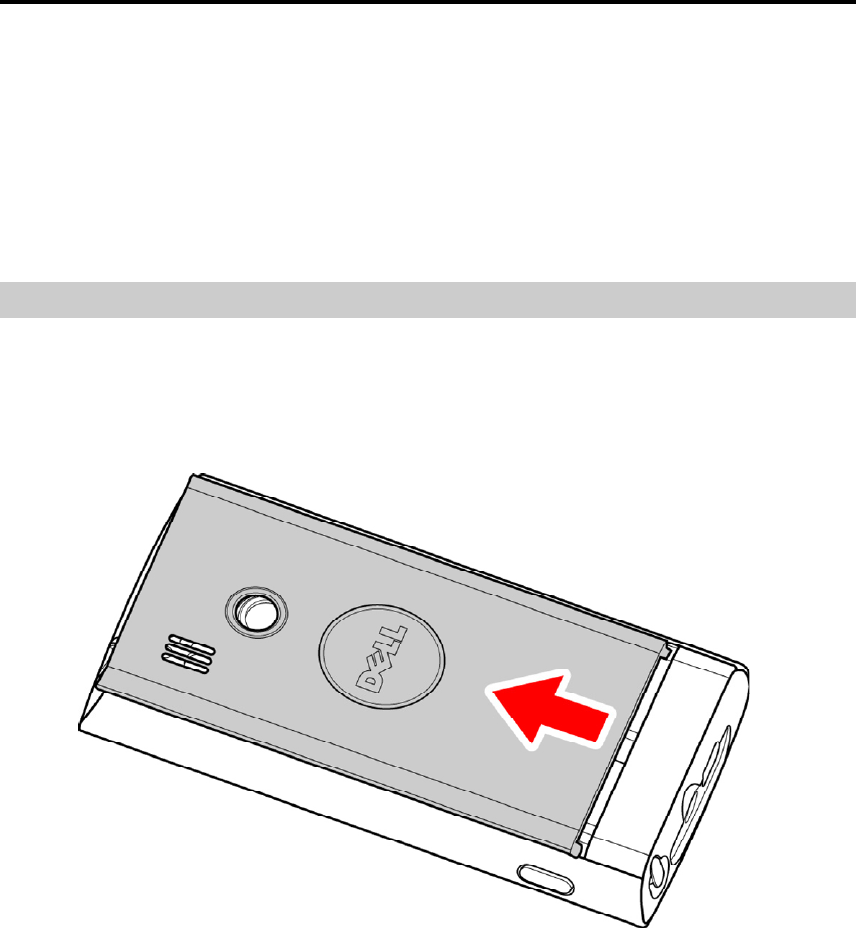
Installing the Battery
To install the battery:
1. Press and slide the back cover towards the top of the cell phone,
and then lift the back cover up.
14
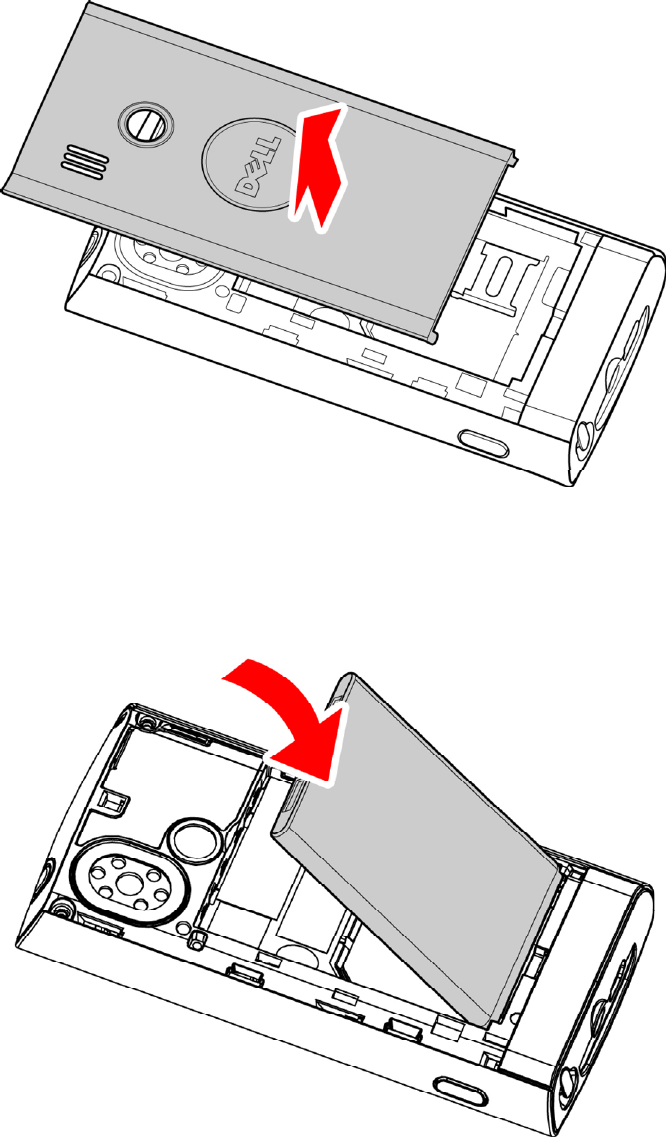
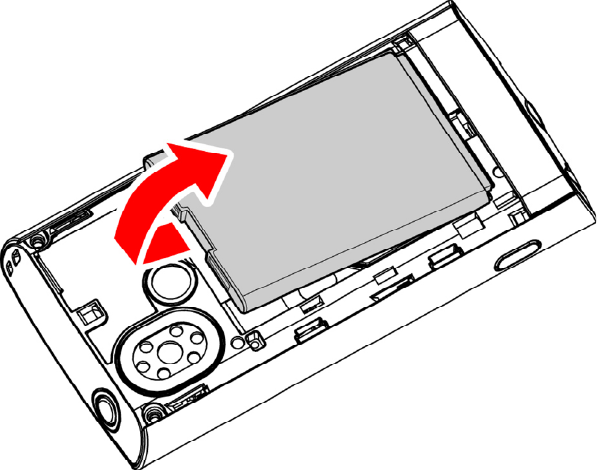
2. With the metal connectors of the battery facing down, align the
bottom of the battery with the corner grooves for proper
alignment and slide the battery into the battery compartment.
15
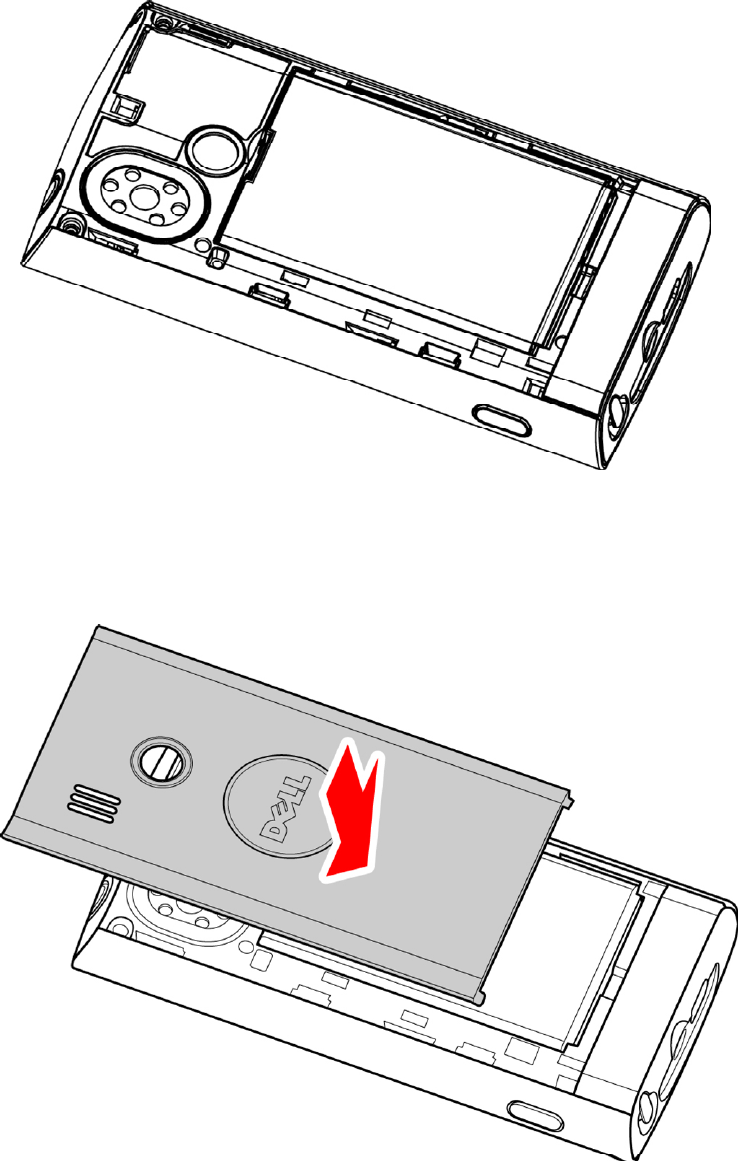
3. Align the back cover with the tabs on the back of the phone, and
press while sliding the back cover into place.
16
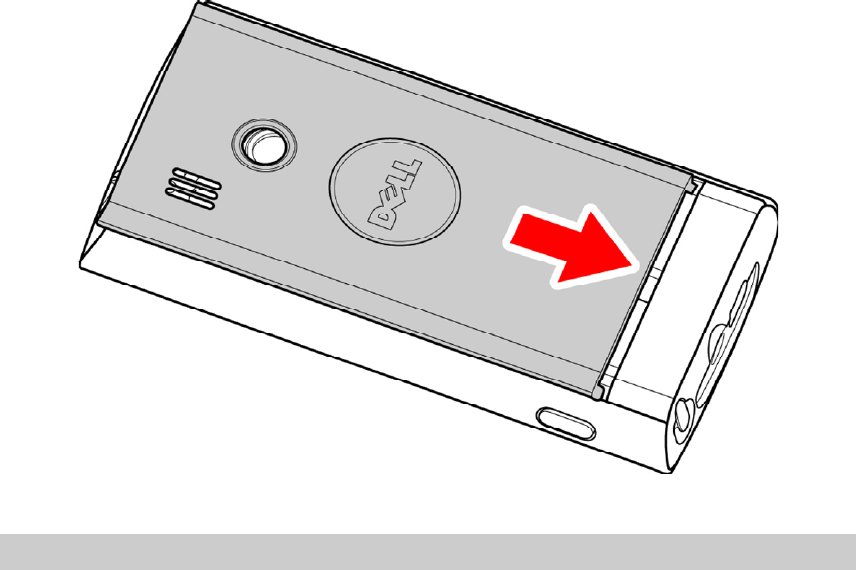
Removing the Battery
To remove the battery:
1. Turn off the phone.
2. With the back of the phone facing up, remove the back cover.
3. Lift the battery from the compartment along the tab on the top end
of the battery as shown below, and pull out to remove the battery.
17

18
Battery Charge Status
The battery charge status icon is displayed on the top-right
corner of the phone's status bar. When battery charge is low, the
battery charge status icon flashes and an audible warning alarm is
produced. When the battery charge level becomes very low, the
phone automatically turns off to protect the phone and allow some
operation at a later time.
Important Information About Battery Use
Charge the battery for at least 3 hours before first-time
use.
If the battery is not used for a prolonged duration, it will
discharge automatically.
The battery can be charged repeatedly. However, the
battery will degrade with repeated use and will
eventually have to be replaced.
Do not damage, disassemble, or throw the battery in the
trash. Doing so could cause a battery leak that can lead
to excessive heat, an explosion or fire.
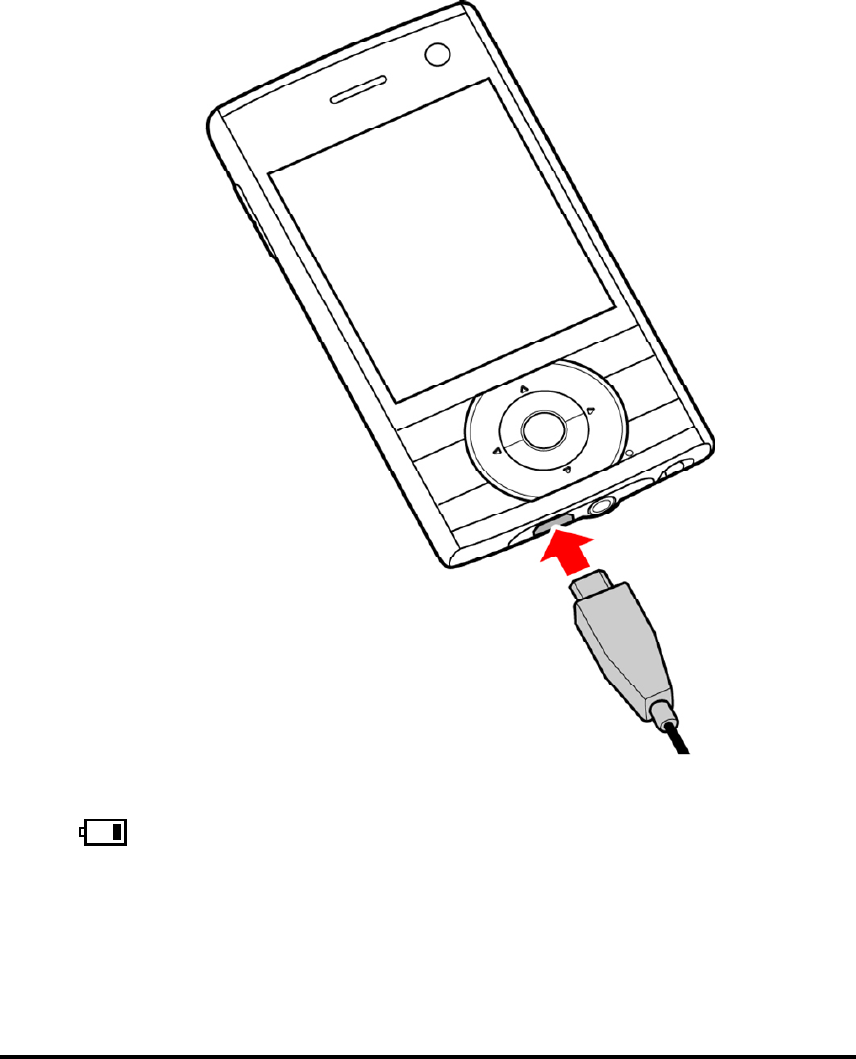
Charging the Battery
The Mini 3T1 comes with a travel charger. This phone should only
be used with authentic Dell batteries and battery chargers.
Before using the travel charger, ensure that the battery is correctly
installed.
To charge the battery:
1. Plug the charger power plug into an electrical outlet.
2. Connect the other end of the charger to the mini-USB connector
on your phone.
19
When the battery is charging, the battery charge status icon
animates until the battery is fully charged.
3. After the battery is fully charged, disconnect the charger from
the phone and the electrical outlet.
Installing and Removing the SIM Card
The SIM card must be installed before you being using your
phone.
NOTE: Keep the SIM card out of reach of children.
20
CAUTION: The SIM card and its electrical circuits may be
easily damaged by rubbing or bending. Ensure that you
handle the SIM card carefully when installing and removing
it.
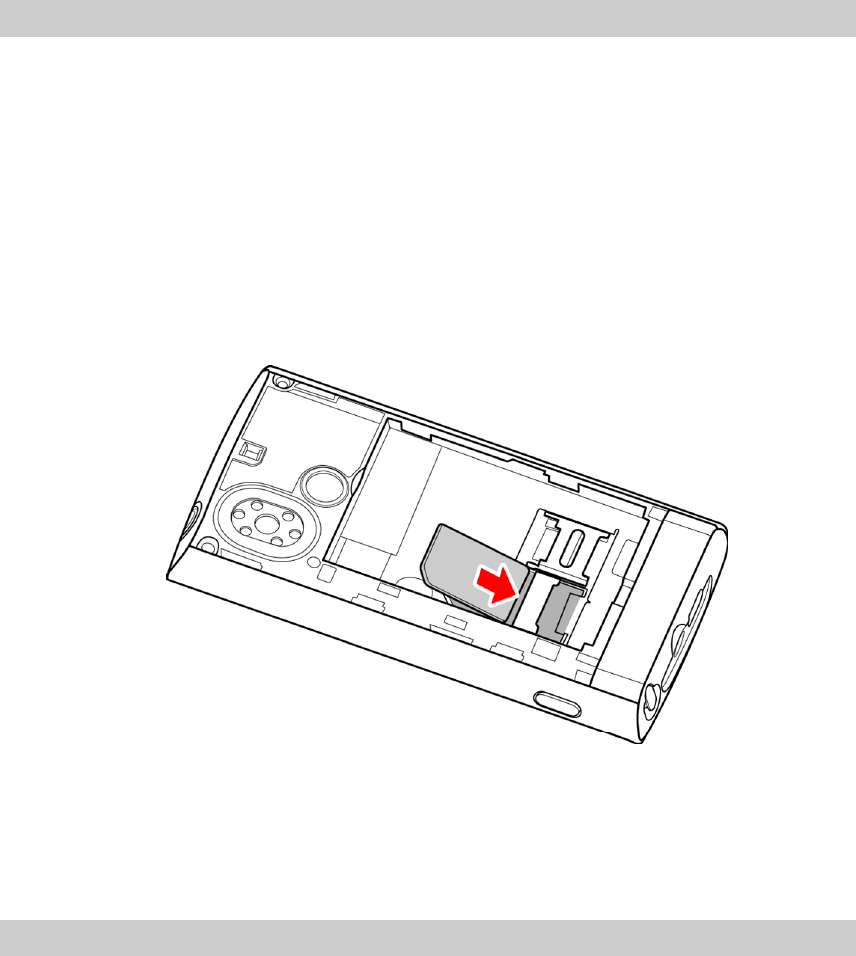
Installing the SIM Card
To install the SIM card:
1. Press and hold the power button to turn off the phone.
2. Remove the battery (see "Removing the battery" on page 16).
3. Slide the SIM card into the SIM card slot. Ensure that the SIM
card’s metal contacts are facing down and the bevelled corner
on the SIM card is facing the top of the phone.
4. Replace the battery
5. Close the back cover
Removing the SIM Card
To remove the SIM card, follow the instructions in Installing the
SIM card in the reverse order.

21
Installing a microSD Card
This phone supports microSD cards with a maximum capacity of
32GB.
To install the memory card:
1. Turn off the phone.
2. Remove the battery (see "Removing the battery" on page 16).
3. Lift the microSD card retainer upwards to unlock it. Slide the
microSD card into the microSD card slot and press the microSD
card retainer down until it locks into place.
4. Replace the battery.
5. Replace the back cover.
Removing a MicroSD card
To remove the microSD card, follow the instructions in installing
the microSD card in reverse order.

22
Turning the Phone On or Off
Turning the Phone On
Ensure that the USIM/SIM card is installed in the phone, and that
the battery is charged. When the phone is off, press and hold the
On/Off Switch to turn on the phone.
Turning the Phone Off
When the phone is on, press and hold the Power Key to switch off the
phone.
Password Locking
If you have setup the phone password or PIN number locking
function, the password will need to be entered to unlock the phone
each time it is turned on. For more information about the setup
and editing functions for the phone lock password, see the
"Security Management” on page 37.
Phone Password
The phone password feature allows you to secure your phone from
unauthorized use. The predefined password for your Dell Mini3T1
phone is set to 1234.
PIN1 Code
The PIN1 (Personal Identification Number) on your SIM card
helps to prevent other users from accessing information on your
SIM card. The PIN1 code is usually supplied with the SIM card. If
you were not provided with a PIN1 code when you purchased the
SIM card or if you have lost the PIN1 code, contact your service
provider.
PIN2 Code
The PIN1 code is usually supplied with the SIM card. If you were

23
not provided with a PIN1 code when you purchased the SIM card
or if you have lost the PIN1 code, contact your service provider.
If you were not provided with a PIN2 code when you purchased
the SIM card or if you have lost the PIN2 code, contact your
service provider.
PUK Key
If the SIM card on your phone is locked, you must enter a PUK
(PIN Unblocking Key). The PUK is usually provided with the
SIM card. If you were not provided with a PUK key when you
purchased the SIM card or if you have lost the PUK key, contact
your service provider.
PUK2 Key
Some SIM cards have a PUK2 key that is required for unlocking a
locked PIN2 key. If you were not provided with a PUK2 key when
you purchased the SIM card or if you have lost the PUK2 key,
contact your service provider.
Making a Voice Call
You can make a voice call using one of the following methods:
Direct dial: Tap the screen when the phone displays the Idle
Screen to open the on-screen dialpad and select Voice Call to dial
the number.
Directory dialing: From the Main Menu enter the phonebook.
Select a contact and press Voice call.
Quick dial: Tap the screen when the phone displays the Idle
Screen to open the on-screen dial pad. Tap and hold one of the
digits from 2 to 9 to quickly dial an pre-assigned number.
NOTE: You can assign quick dial numbers in from
Settings> Call Setup. For more information, see "Quick

24
Dial" on page 33.
SIM card location dialing: On the on-screen dial pad interface,
tap the number pad and then the # key. The number stored in the
corresponding location on the SIM card will then appear and can
be dialed.
Calling National Numbers
To call a national number:
1. Enter the number to call using the on-screen dial pad.
2. Tap the dial key, or press the Voice Call icon to make a voice
call.
To end the call, tap Hang up.
Dial an Extension
You can dial a telephone extension directly without having to
enter it after connecting to a primary number.
To dial an extension:
1. Enter the primary telephone number using the on-screen dial
pad.
2. Tap and hold the # key until a "P" key appears on the screen.
3. Enter the extension number using the on-screen dial pad.
4. Tap the dial key, or press the Voice Call icon to make a voice
call.

25
NOTE: You can also enter multiple "P" keys.
Calling International Numbers
To call an international number:
1. On the on-screen dial pad, tap and hold the 0 key until the "+"
symbol appears on the screen.
2. Enter the international calling code for the country you want to
call.
3. Enter the phone number you want to call.
4. Tap the dial key, or press the Voice Call icon to make a voice
call.
Making a Video Call
To make a video call:
1. Enter the number to call using the on-screen dial pad.
2. Tap the Video Call icon to make a video call.
.
Note: You can make video calls only when T or H networks are
displayed on the screen.
Answering a Voice or Video Call
Tap Answer to answer a call.
To end the call, tap Hang up.
During a Voice Call
During a voice call, tapping the quick icon on the screen,

26
or tapping more, allows you to do the following:
Mute: Temporarily mutes the call. When the phone is mute, you
will be able to hear the other person, but they will not be able to
hear you.
Soft keyboard: Enters the dialing keypad interface.
Hands-free: Switches to hands-free mode. When using the
hands-free mode, the audio is routed to the headset or speakers.
New Call: Allows you to dial a second number while you are on a
call. After entering the number, tap the Dial key to make the
second call.
Hold: Holds the current call, at this time neither user will be
able to hear each other.
Record: Records the conversation. At this time, the menu will
show the stop recording screen.
Message Record: Enters the message record window.
New Message: Enters the message editing window.
Adjust Volume
During calls, tapping the Volume key will changes the volume
level. Press up to increase or down to decrease the volume.
New Message
During a call, when there is a new message a tone alert will be
heard.
Answer New Call
If call waiting is activated and a new call comes in during another
call, the phone will display the incoming call menu. You can press
the Answer key to receive the new call. The first call will
automatically be placed on hold. if you do not wish to answer the
new call, you can press the Reject key to hang up.

27
Answering Two Calls Simultaneously
When you are on two calls simultaneously, tapping the quick
button on the screen or tapping more will perform the following:
Switch: Activates/holds the current call, when the call is held
neither user will be able to hear the other.
Hang up: Hangs up one of the calls.
Record: Records the conversation.
Mute: Temporarily mutes the current call.
Phone Meeting: Allows multiple people to start a shared
conversation, and can also allow individual conversations with
specific attendees.
Phonebook: Enters the phonebook window.
New Message: Enters the message editing window.
Phone Meeting
During a phone meeting, tapping the quick button on the screen or
tapping more will perform the following:
Hold conversation: Holds the current phone meeting. at this time
no meeting attendee will be able to hear any other party:
Record: Records the conversation.
Mute: Temporarily mutes the current call.
New Call: Allows the user to make a new call or call a new extension.
Meeting Attendees List: Allows the user to see a list of the
meeting attendees.
Phonebook: Enter the phonebook window.
New Message: Enters the message editing window.

28
Emergency Call
In countries which use the digital GSM network or TD-SCDMA
networks, if you are located in an area covered by the network,
you should be able to call the emergency services. Even if a SIM
or USIM card is not installed, you should still be able to make
emergency calls. Sometimes, due to the network, the environment,
or interference issues, emergency calls cannot be made.
During a Video Call
During a video call, tapping the quick button on the screen or
tapping more will allow you to perform the following:
Record: Records the conversation.
Rear or Front camera: Switches between the two built in cameras.
Mute: Temporarily mutes the call.
New Message: Enters the message editing window.
Turn off the camera: Turns off the camera.
Zoom: Adjusts the focal distance of your camera.
Brightness: Adjusts the brightness of your camera.
Screen Mode: Sets the screen mode.

29
3 Menu Operations
This section provides information about the functions and options
available on your phone's Menu.
Main Menu Structure
The phone's function menu consists of Profiles, Call History,
Security, Phonebook, Messages, Internet, My Favorites,
Multimedia, Settings, China Mobile Services (139 Mail, DCD,
Mobile Stock, Online Music, Fetion, Monternet, Mobile Map,
Mobile Video, CM Reader, MyPIM , STK and Customer
Services), English to Chinese dictionary, Tools, Calendar ,
Games, Connections and Timers
Main Menu Selections
To switch between the menu panels, swipe your finger across the
screen from left to right. To open a menu tap the menu item.
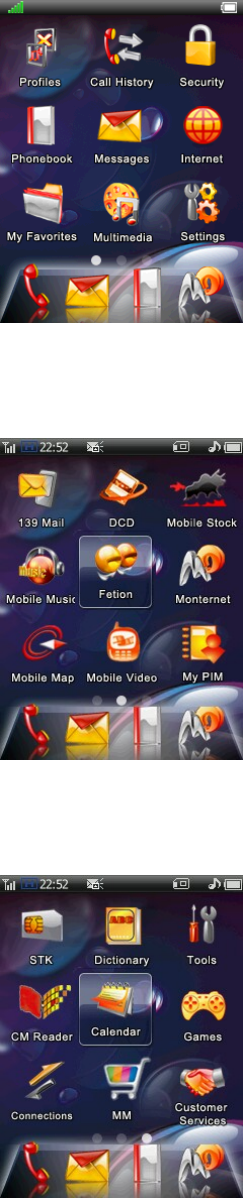
30
Panel 1
Panel 2
Panel 3

31
4 Settings
The following are the options available in the Settings menu:
phone setup, display setup, date and time setup, call/video
sharing setup, network setup, connection setup, security setup
and reset to factory settings.
Phone setup
The phone setup allows you to change the following settings:
language, font size, calibration, auto power on, auto power off.
Language
Allows you to select a language - Simplified Chinese or English.
Font Size
Allows you to set the font size for the display; there are three
options - large, medium, and small.
Calibration
Allows you to calibrate the touch screen. Using the styus, touch
the mid point of the X that appears on the screen three times. A
message is displayed on the screen when the calibration is
complete.
Auto Power On or Off
Allows you to enable or disable the phone auto power on or off
feature. To activate this feature, set the time and duration for the
phone to turn on or off. The available settings are: once, every day,
weekdays, weekends.

32
Display setup
The display setup allows you to change the following settings:
wallpaper, backlight time, keypad backlight and brightness.
Wallpaper
Allows you to set a background picture for the phone's standby
mode.In the picture browser window, tapping the return icon
above the picture will return to the normal browser interface. Click
the setup icon to set the current picture as the wallpaper.
Backlight Time
Allows you to set the wait time until the backlight turns off. The
available options are: 10 seconds, 15 seconds, 30 seconds or 60
seconds.
Keypad Backlight
Allows you to set the keypad light to On or Off.
Brightness
Allows you to set the backlight brightness. The available options
are: bright, standard, and power saver.
Date and Time
Time: Open the time setup screen and allows you to set the time.
24 hours: Sets the time display format to be 24 hour.
Date: Opens the date setup screen and allows you to set the date.
Date format: Opens the date format screen and allows you to
select the date display format.
Time zone: Opens the world clock screen and allows you to select
a time zone.

33
Call setup
The call setup allows you to change the following settings: call
waiting, bar calls, call diversion, video call setup, fixed dial,
headset automatic response, IP number, automatic redial,
quick dial, minute display and connection alert tone.
Call Waiting
Activates the call waiting feature. If this feature is activated, an
engaged tone is heard by a third caller when the phone is busy.
NOTE: Call waiting services can only be used by requesting the
service provider.
Bar Calls
Bar Calls feature allows you to restrict the incoming or outgoing
calls. Your internet service provider can provide a password to
help you activate call restriction.
Incoming calls: Allows you to set call barring for all incoming
calls or only for incoming calls while in roaming mode.
Outgoing Calls: Allows you to restrict outgoing calls to
international long distance, only local numbers or all dialed
numbers.
Cancel all restrictions: Allows you to cancel voice call
restrictions. You must enter a password to cancel call restrictions.
The standard factory password is 0000.
Modify Password: Allows you to modify the network provided
password for your restrictions.
Call Diversion
Call diversion feature forwards all incoming calls to a specified

34
phone number based on your preference.
Voice call: Allows you to set voice call diversion based on the
following options: unconditional transfer, transfer when busy,
transfer on no reply, and transfer when unreachable.
Video calls: The options available in video call diversions are the
same as those for voice calls.
Cancel all transfers: Allows you to cancel all call transfers.
Status check: Allows you to verify the current call diversion
status.
Note:
The ability to successfully set up call transfer is related
to the network and SIM card. The system will give
appropriate prompts.
When setting up your incoming call transfers, you need to
enter a correct telephone number. The incoming call can
be transferred to the assigned telephone number.
If call diversion does not work as expected, verify the
phone number you have assigned for the transfer.
Video Call Settings
The options available in the video call settings are: send picture
and switch to voice call. The send picture option allows you to
set a picture as a substitute for camera image during video calls.
Fixed dial
Users with the fixed number setup can only call certain telephone
numbers. Telephone numbers not set cannot be dialed. Enter into
the fixed number menu, select activate, the phone will require
you to input the PIN2 number (provided by your internet service
provider), then you will be able to activate the fixed call functionality.

35
(If it is currently activated, select terminate and you can stop the
fixed number function). In the fixed number list the fixed number
contacts are listed. In the fixed number list, by tapping the select
item key you can create, delete, delete all and see the internal
memory status.
Note:
The number of telephone numbers which can be stored in the
fixed dial depends on the service provider.
Earphone Auto Answer
Allows you to set your phone to automatically answer incoming
calls when connected to a headset. When this feature is activated
and the headset is connected, the phone automatically answers a call
if no activity happens for 10 seconds.
IP Code
Allows you to set a IP number for your phone.
Auto Redial
Allows you to activate the automatic redial feature. After activating
this function, when a dialled number is unanswered, the phone
automatically redials the number again.
Quick Dial
Allows you to set the quick dial feature.The 2 to 9 keys can be
assigned quick dial numbers. If these digits already have numbers
assigned, on the keypad tapping and holding a key will call the
corresponding number. If these digits do not have numbers
assigned, a prompt "number is empty" will appear.
Minute tone
Turn the minute prompt on or off. If this function is activated, during

36
a call, on the 50th second of every minute an audio prompt will
be played.
Connection tone
Allows you to activate the audio prompt when calls are connected. If
the connection prompts are active, when calls are connected, an audio
prompt is heard.
Network Settings
Automatic selection: Your phone will first search for the original
network, then it will search through the network table on the stored
SIM card. If If all of these fail, any network that has roaming
agreement with your original network can be connected.
.
Manual select: The system will automatically search the network,
and then provide a list of networks to which you can be connected.
You can select the network you want. When performing operations
on the network, the phone will provide the related prompts such as
success or failure messages.
Preferred network: When searching for a network, the system
chooses the connection network based on your setup network
information.
Network modes: Select the system connection network mode.
The following are the available options: only 3G networks, only 2G
networks, and 3G networks having priority. If you select the 3G
networks having priority option, the phone searches initially for a 3G
network. If no 3G network is detected, it then searches for 2G
networks.

37
Connection Profile
The Connection Profile menu allows you to setup the connection
method for accessing the network. There are preinstalled profiles
(CMWAP, CMNET, DCD and DCD Test) set according to
China Mobile Network connection setup requirements. If you
would like to create a new connection setup, you can do so in the
custom list.
Touch Select to perform the following operations:
Save as: Allows you to save another network connection setup the
system setup cannot be replaced.
Application: Allows you to select the connection method for
accessing the network. Possible selections are WAP connection, Java
connection, Streaming media connection, MMS connection.
View Setup: Allows you to view information about the current
connection such as the name, homepage, multimedia message
centre and bearer type.
Gateway: Allows you to set the gateway as open or closed.
Security Management
The Security Management menu allows you to change the
following settings: phone lock, PIN, guard wall and password.
.
Phone Lock
This function locks the phone, and prevents others from using
your phone without permission. To unlock, you need to enter
a password (factory set password is 0000).

38
At Once: When this function is activated, entering the correct
password will immediately lock the phone and return to the
standby interface.
Automatic lock: With this function activated, when the correct
lock password has been entered, if the user does not carry out any
actions on the phone for a specified period of time, it will lock.
Off: The phone has no lock function. If you have already set
phone locks, you need to enter the correct lock password to be
able to unlock it.
PIN
PIN1
Activate: select active or turn off PIN1. Use the SIM card PIN
number. the PIN number is required to turn on the phone (factory set
password is 1234), otherwise you can only make emergency calls
such as to 112. after turning off the PIN1 number, you do not need
to enter the PIN number when turning on the phone.
Change PIN: Allows you to change the PIN based on your
preference.
PIN2
Change PIN2: Allows you to change the PIN2 number based on
your preference.
NOTE: Ensure that you note down your changed PIN, as
you will not be able to see important personal information
without entering the PIN. If assistance is required, contact
the service center.
.
Guard wall
Incoming call guard:
Do not answer list: Allows you to add or delete telephone numbers
39
to the do not answer list
Only answer list: Allows you to add or delete telephone numbers
to the only answer list
Setup: Allows you to setup the incoming calls firewall protection
Privacy information
This function is used to protect your personal documents. It will
password protects all protected content. To unlock, you must enter
a password (factory set password is 0000).
On/Off: Allows you to setup your private firewall. this requires
password entry verification.
Protected items: Allows you to set up and specify the specific
phone content areas to secure with the guard wall.
After activating the privacy guard wall, to access the protected
content, you must enter the private guard wall password.
SMS guard
Rubbish numbers: Create or delete junk numbers. When
messages are received from junk numbers, the messages are
automatically placed in the junk mail.
Prompt mode:
Trash SMS prompt: When you receive junk messages, a prompt
window will appear on the Idle screen; No audio alert will be
heard.
Normal SMS prompts: When you receive junk messages, the
prompt will be the same as when you receive regular messages.
Settings:
Junk number refusal: When you receive messages from the junk
numbers, they will be automatically put in the junk messages box.
Only cell phone messages: When you receive messages not sent from
cell phones, they will be automatically put in the junk messages box.
Turn off: Allows you to turn off the short messages firewall
function.

40
Change the Password
Allows you to change the lock password (factory setting is 0000).
When changing the password you need to enter the old password
first, and then you need to enter the new password twice before it
becomes effective.
Reset Settings
Before resetting the phone to restore it to its factory settings, you must
enter the protection password. after confirmation you can enter the
restore to factory settings menu selection window.
Restore Factory Settings
This option can restores the settings to its original factory values.
Using this option does not delete your saved information such as
phone book entries or messages. It only repairs the phone's working
settings. Settings that are reverted include features such as ringtone
and profile.
Restore Settings and Data
This option restores the settings to its original factory values.
Using this options deletes personal information such as the phone
book and messages (not including information stored on the SIM
card). After restoring the settings, the phone turns off
automatically. Turn on the phone to make calls of perform other
functions

41
5 Profiles
Profiles are a group of preset special definitions which you can
activate quickly. The phone provides a group of default profiles
including: standard profile, meeting profile, car profile, outdoors
profile, silence profile and flight mode profile. Each profile has
default factory settings. The users can modify and store the profiles
to meet their personal preferences (apart from silence and flight
profiles).
Activating Profiles
To start using a profile, tap the appropriate profile in the Profiles
menu.
Personalization Setup
Touch Option Edit to enter the personalization setup window.
You can personalize any of the variables of the phone profiles.
Personalization setup includes the following:
Voice call: Allows you to select the incoming voice call ringtone.
To set, open the ringtone select window and touch to play the
currently selected ringtone. Touch the screen again to stop playing
the ringtone. Touch set up to set the selected ringtone as the
ringtone for voice calls.
Video call: Allows you to setup the incoming video call alert tone.
Ring volume: To adjust the ring volume, increase the ring volume
control window. Press the volume up button on the side of the
42
phone to increase the ring volume. Press the volume down button
on the side of the phone to reduce the ring volume. Touch hang
up or wait for 3 seconds to confirm the settings. A message
appears on the screen to indicate that the volume has been
adjusted.
Ring type: Allows you to set the ringtone type. The available
options are: continuous or incremental.
Message tone: Allows you to set a tone to indicate if a message is
received.
Email tone: Allows you to set a tone to indicate if an E-mail or
multimedia message is received.
Key tone: Allows you to set a tone to indicate touch or tap on the
keys.
Alarm volume: Allows you to set the tone for the alarm and
calendar reminders.
Phone on/off tone: Allows you to set a tone that is heard when the
phone is either turned on or off.
Vibrator: Allows you to enable or disable the phone vibrate
mode.
Receiver volume: Allows you to set the speaker volume.

43
6 Call History
The Call History menu stores the recently dialed numbers, received
calls, missed calls, and the call time.To view the recent call record, tap
a key on the standby screen when the phone is not locked.
Outgoing Calls
In the call record window, select dialed numbers to enter the dialed
number window. Press option to perform the following operations:
Store: You can store the numbers you want to store in your phone book.
Voice Call: You can enter into a voice call with the stored number.
Video Call: You can enter into a video call with the stored number.
IP call: In front of the phone number an IP number is automatically
added, and then the number is called.
Send message: You can send a message or multimedia message
to this number.
Send data: You can send this number as the content of either
a message or multimedia message.
Edit: You can go to the keypad and edit this phone number, and
then call it.
Delete: You can remove unwanted records.
Answered Calls
Operations on received numbers are the same as those on dialed
numbers.

44
Missed Calls
Operations on missed calls are the same as those on received numbers.

45
7 China Mobile Service
The China Mobile Services are value added mobile services from
China Mobile. It provides users with convenience and up to date
information services. The user can subscribe to receive mobile
information services such as wireless music, Games, Neww,
Weather, Fetion IM, Cell Phone Videos, Phone Book Management,
Information, Online Finance, New Service Recommendations and
Monternet.
Mobile Music
Mobile Music is a mobile entertainment data service from China
Mobile. Using your cell phone's wireless internet you can listen to
music and as well as other music services such as music downloads,
music sharing, music playing, and music exchange.
Games
Games is a mobile entertainment data service from China Mobile
that allows you to enjoy all kinds of multimedia games preloaded
on the device or via wireless data network.
Fetion
Fetion is a instant messaging service from China Mobile that

46
provides communication entertainment as well as a business utility .
Using Fetion you can chat, exchange documents, or make voice
calls in real-time with other subscribed users.
Mobile Video
Mobile Video is a brand new additional mobile data service by
China Mobile. Using your phone's wireless network you can watch
all kinds of brilliant video content.
Mobile Map
A mobile data service from China Mobile, that helps you find
numerous points of interest on a map around your current location.
Mobile Stock
A mobile data service from China Mobile that can help you receive
financial information, check the stock market and perform online
trades.
CM Reader
CM Reader is an electronic reader service from China Mobile.
Using your phone's wireless network you can download from a
library of literary selections for you to read on your mobile device.

47
139 Mail
China Mobile’s email service that can be access on the web or any
enabled mobile devices.
DCD
DCD is a China Mobile subscription service that provides you
with customizable up to date news and weather on your mobile
device.
SIM Card Applications
SIM card applications include content such as newspapers, Feition,
airline enquiries and SIM card zone introductions.

48
8 Customer Service
Service Guide
The Mini 3T1 after sales service telephone number is:
Business Hall
10086 hotline
Click on the menu to directly dial 10086
SMS Hall
Press the menu to directly send a message containing the contents
"10086" to 10086
About e100
e100 is a one stop electronic self-help service provided by China
Mobile for its customers. it mainly includes an online business
platform, 10086 hotline, message business platform, palmtop
business platform and self-service terminal service channel.
Customer Manager
Setup a customer manager contact telephone. as soon as the setup
is complete, you can directly call the setup number.

49
My Monternet
This Monternet service provides the opportunity to check, and
return purchased goods.
Monternet
Open the browser, open the China Mobile Monternet main page
wap connection.
Monternet Messages
1. Check or return purchased SP message services, please send
0000 to the service provider number.
2. Return all purchased SP short message services, please send
00000 to the service provider number.
Monternet Multimedia Messages
Check or return purchased SP message services, please send
CX0000 to the SP service provider number.
Software Update Service
Provides information of the phone’s current software
version, and any new available version from CMCC’s
service department.
Settings
Select customer service settings and you can perform the following
operations:
Service hotline: The preset number is set to 10086, and it can not
be set as blank. after entering this menu unless you do not change
50
any parameters, you will have to setup and store a number.
Customer manager number: You can setup the customer
manager name and number.

51
9 Monternet
This phone has wireless internet functionality meaning you can
constantly keep close contact with the whole world. It provides
even more convenience for visiting the internet.
If you wish to use WAP to visit web pages, you must:
1. Please enquire whether your internet service provider and
the service provider who offer the necessary service can
provide this type of service, along with information about
the prices. The internet service provider will also provide
you with information on using their services.
2. You can perform the correct browser setup from your telephone.
3. Use the WAP browser to visit the internet and perform the
related tasks.
Note:
Use GPRS/EDGE or TD-SCDMA to connect to web pages.
and confirm whether the ISP offers this function, and whether
they can provide it for you.
Off Line Browser Menu
Homepage
The homepage allows you to simply and directly connect to the
China Mobile Monternet homepage.
Bookmarks
You can store network addresses in your browser.
In the bookmarks listing window touch the select or OK key to

52
carry out page operations such as Go To URL, Read, Edit, and
Refresh.
Quick Save Web page
In your browser you can store the web pages you need in the quick
save list. After storing them you can read the web pages while off line.
In the quick save web page interface, press option to carry out
browse and delete.
History
To see the addresses of web pages you have visited, touch the
select or OK key and perform either browse and delete
operations.
Go To URL
Go into the input web page address window, after confirmation
you can directly connect.
Go To Last Page
After selecting this item, you can directly connect to the last
browser page.
Browser Setup
Go into the browser setup window, you can perform tasks such as
connection setup, delete Cache, picture download, background
music and download location.
53
On Line Browser Menu
When browsing a web page, by tapping the select or OK key, you
can add to bookmarks, go to home page, bookmark, go to URL,
refresh, select, quick save web page, record history, and perform
browser and application setup.
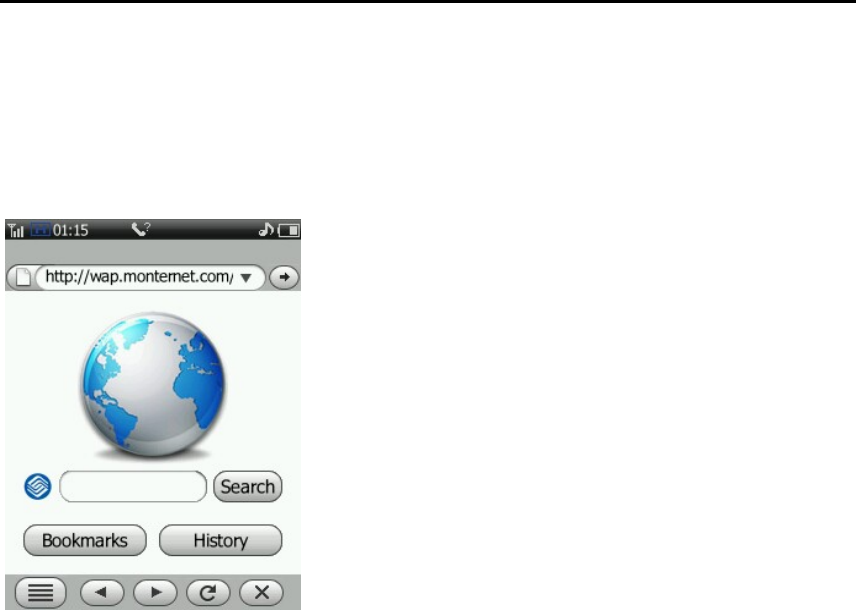
Browser Screen

54
10 My Favorites
Magic Box
Wireless Java is an application that you can carry with you in your
cell phone. Here, at the time and place of your choosing you can
find all kinds of Java software. After downloading it you can
conveniently enjoy many internet services.
Applications
Store Java internet downloads here.
Download
10 bookmarks can be stored, and URL records are remembered
to facilitate your internet browsing.
Storage Status
You can see the system memory and save user content on your phone.
Profile
Set the connection method for accessing the network.
Connection setup operations can be seen on the setup menu's
connection setup.
Preset
Shortcut to all preloaded audio files and preloaded images that can be
used as a ringstone and wallpapers for your phone.

55
Phone
You can access all storage folders you have in the phone memory
or in the memory card. All the preset folders such as: My recorder,
My movies, My photos, ebook and Java; are accessible from here.
Storage Card
With this cell phone, you can connect the memory card with a PC
via a digital cable, just like a U-card. Its operation is the same as
a standard U card. The capacity of the memory card depends on
the capacity of the purchased card.
Recordings, videos, or files like MP3s downloaded from the internet
can be saved on the memory card. you can also save pictures (including
photographs), electronic books, and downloaded ring tones.
When disconnecting the U card, please first remove from the
PC: select the icon, click the right mouse button, and select
"remove or eject hardware". When you see the following prompt,
select "stop". When the system displays "USB device can be
safely removed", click confirm to confirm the removal. Now
you can remove the USB connection cable.
When it has not been disconnected, removing the USB connection cable
could cause abnormalities and data loss in the memory card. Please
remember to back up your documents to prevent data loss. If there are
abnormalities with your memory card, please format the card.
It is forbidden when it is not disconnected to remove the USB data
connection cable.
When not in standby, removing the USB connection cable will
cause the phone to return to the standby screen.

56
MMS Cards
Enter the multimedia celebration cards list window. it includes birthday
cards, anniversary cards, romantic cards, scenic paintings, and
humorous cards. select the card you wish to browse. in the window
you can add the card to the multimedia message and send it.
MSG search
Search for any information stored in the phone by entering a key word
to search for in any messages, files, phonebook or call history.
Storage Status
Check the internal memory of the phone system, as well as the user
memory and the usable and remaining space of the memory card.
Format
Format the phone and memory card. After formatting, all the files
on your memory card and phone will be lost.
Phone User Storage: Format the phone user storage.
Memory Card: Format the memory card. You can use the PC port
to format the memory card. When using the PC port to format the
card, you can only choose FAT16 format. If other format memory
cards are used it could cause abnormalities.
Note:
When there is no FTA16 format PC port, please do not use
the PC to format the memory.
57
11 Messages
The Mini 3T1 supports the sending of short messages of at most
1530 English letters or 670 Chinese characters.
Multimedia messages include text, picture and sound content. Using
the multimedia message service, not only can you send and receive
images and text, you can also receive the sound files attached to
messages, allowing you to fully enjoy the content. Multimedia
messages use the color screen to bring you a fresh and realistic
audiovisual experience.
Note:
The Multimedia message service requires the support
your network operator or service provider.
The maximum size of a multimedia message this phone can receive
is 300KB. If the size of a multimedia message exceeds this, the
phone cannot receive it. The phone allows the sending of at most
300KB multimedia messages.
Note:
You may need to pay a charge to your network operator
or internet service provider for each multimedia message
you send.
The multimedia message service supports the following formats:
Pictures: JPEG, GIF, WBMP, PNG, BMP.
Sounds: MID, AMR, MP3, AAC and WAV.
Video: MPEG4, 3GP.
58
If you receive a message containing content in an unsupported
format, this content will not display or be played.
Note:
There are many reasons which may lead to a multimedia
message sending failure, so please try not to use multimedia
messaging to send essential content.
In the message application, you can write, send, receive, read, and
edit messages. When receiving a new message, the phone will:
1. Display the unread message icon and number of unread
messages on the main interface. The title bar will display
the unread message icon.
2. Display the unread message icon continually on the screen
until the user has read all unread messages.
3. When the mailboxes of both the SIM card and phone are full,
every time a new message is received a prompt will appear,
until the user has deleted some messages. The phone can hold
1200 short messages, from which 200 can be long short
messages. The number of multimedia messages that can be
stored depends on the phone storage space. The SIM card
storage will be different for different SIM cards.

59
Setup
From the main Messages screen, press Option to see the following
selections:
SMS settings
Setup the parameters for short message operations as follows:
SMS Center: The SMS services centre number is provided by your
network operator. Message Sent.
Auto sign: If this function is activated, every sent short message
will automatically have a signature added to it.
Edit Sign: Compose or edit your auto signature information.
Arrive report: This is used to confirm that a short message
you have sent has been received.
Store in SIM: Setup the storage location for messages.
Valid period: Setup the period of time for which a sent short
message is stored in the message center.
Save sent: Decide whether or not to automatically
keep sent messages.
MMS settings
Setup the parameters for multimedia message operations as follows:
Connection profile: Setup the multimedia message connection
network.
Sending settings: Set the parameters relating to the multimedia
message sending operations, including Validity period, Priority,
Read report, Delivery report and Save sent.

60
Receiving settings: Setup the parameters for multimedia message
receiving operations, as shown below:
Receive now: Setup multimedia message receiving:
automatic or manual receiving.
Reply: When someone sends a multimedia message,
requesting that the user sends a confirmation after reading it,
the user can decide whether or not to permit the system to
automatically send the response.
Auto Signature: If this function is activated, every sent short
message will automatically have a signature added to it.
Filter: The user can setup a filter list and store the addresses of
senders from whom they do not wish to receive messages. The
filter list can hold at most 20 addresses. When there are more than
20 the system will provide a prompt.
Delete all mms
Deletes all sent and received MMS messages.
Reset Settings
Return the message settings to the defaults. follow the prompts
provided by the system.
T-Backup
Backup/Restore short messages on the phone to the microSD card.
Quick text
View, delete, and modify templates.
Storage status
See the current message storage status on the phone and SIM card
including SMS, MMS, and WapPush.

61
New and Sent Messages
New and Sent Short Messages
From the main menu click the message icon to enter the message
window. Select New Message to enter the new message window:
1. You can select the right hand side "to" edit box. You will then
enter the number entry screen, directly enter the recipient number
on the on-screen keypad, press option to perform the following
operations:
Send (When the recipient is not blank this item will appear):
send this short message.
Message record: Can enter the message record menu.
Newest Contacts: Enter the newest contact list window.
Group: Enter the group select window.
Note:
If there are more than 20 recipients, the phone will
automatically warn that there are an excess number
of recipients.
2. You can enter contact people or common expressions into your
short message. In the message edit window, click option to perform
the following operations:
Insert Contact: Enter the telephone book and select the contact
you wish to insert into the message.
Insert a Template: Enter the commonly used phrase list and
selected the required phrase.
Save as a Template: Take the currently edited short message
and save it as a template.
Save as Draft: Take the currently edited message and store
in drafts.

62
3. When the recipient is not blank, tapping the send key will send
the short message.
Notes:
This phone supports long short messages.
When messages are sent via the message network service,
the phone will send a message successful message. This
means the phone has sent the message to the message center.
However, this does not mean the message has already been
sent to the required address. If the message was sent
successfully, the message will be saved in the sent message
mailbox. If the sending failed, the message will be saved
in the outbox.
New and Sent Multimedia Messages
From the main menu press the "message" icon to enter the message
window. select New Multimedia Message, to enter the new
multimedia message window:
1. Edit recipient: Click the edit box "to" on the right hand side,
enter the recipient edit interface. Enter the recipient's contact
details, and press option to perform the following operations:
Message record: Enter the message record menu and select
the recipient.
Group: Enter the group select window.
Preview Message: Preview the multimedia message content.
Message Details: View detailed information about the
multimedia message.
Save as Draft: Take the currently edited multimedia message
and store in drafts. This item will only appear if the recipient,
title, or information content has been edited.
Note:
If there are more than 20 recipient numbers, the phone
will automatically warn that there are an excess number

63
of recipients.
2. Edit title: Click "title" to enter the document edit screen. Enter
the title of the multimedia message. Press option to perform the
following operations:
Preview Message: Preview the multimedia message content.
Message Details: View detailed information about the
multimedia message.
Save as Draft: Take the currently edited multimedia message
and store in drafts. This item will only appear if the recipient,
title, or information content has been edited.
3. Edit message content: click "message content" to enter the content
edit screen. When editing, press option to active the items.
Edit Text: Edit the multimedia message text content.
Insert: Insert the required multimedia message content.
Preview Message: preview the edited multimedia message content.
Arrange: Set the location of the picture and text.
Delete: Here you can delete the pictures, video, sounds, and
text on the page.
New Page: Create blank page.
Clear Page: Clear all the content from this page.
Delete Page: Delete the page.
Inbox
Select "inbox" to enter the message list window. Press option to
reply, forward, save sender number, move to My Favorites
folder, move to junk mail, delete or sort the message.
While reading, press option to perform the following operations,

64
such as reply, forward, extract information, delete and copy.
Outbox
Messages which have not been successfully sent are saved in the
outbox. Press option to perform the following operations, such as
resend, delete, sort, resend, edit and delete.
Sent
In the sent list window, click this option to perform the following
operations, such as forward, delete, move to My Favorites and sort.
Draft
In the draft message list interface, press option to perform the
following operations, such as edit, delete and sort.
My Favorites
My Favorites folder is used to store your messages from the inbox
and sent message boxes. In the message list interface, press option
to perform the following operations: forward, extract information,
delete and sort.
In the message read interface, press option to perform the following
operations: edit, forward, extract information and delete.
Junk Mailbox
When the short message firewall is activated, the numbers listed
in the short message firewall will be directly saved in the junk
mail box. In the message list interface, press option to perform
the following operations: forward, delete, move to inbox, set as

65
regular number, arrange.
In the message read interface, press option to perform the following
operations: forward, extract information and delete.
Voice Mail Box
The voice mail box is a network service. You can apply to activate
this service. Before using this service, save the voice message number
provided by the service provider. Enter the voice mail box window
and the following items will be displayed:
Answer: Enter the number dial window, dial the voice mail number,
and listen to the message.
Edit: Setup the voice mail box number (please see your service
provider to apply for this number).
Local Broadcasts
Local broadcasts are an internet service. They allow you to receive
things like weather forecasts and traffic update messages from your
service provider. Before using this service, setup the channel
number provided by your service provider. Enter the local broadcasts
window and the following items will be displayed:
Receive: Enter the receive message window. you can select message
receiving to be on or off.
Channel: The assigned channel for receiving the local broadcasts.
Enter the channel list window, this activates the select option, you
can add, edit, or delete the selected channel.
66
12 Phonebook
This section gives detailed descriptions of the phonebook function.
On the main menu, click the phonebook icon to enter the phonebook.
Phonebook
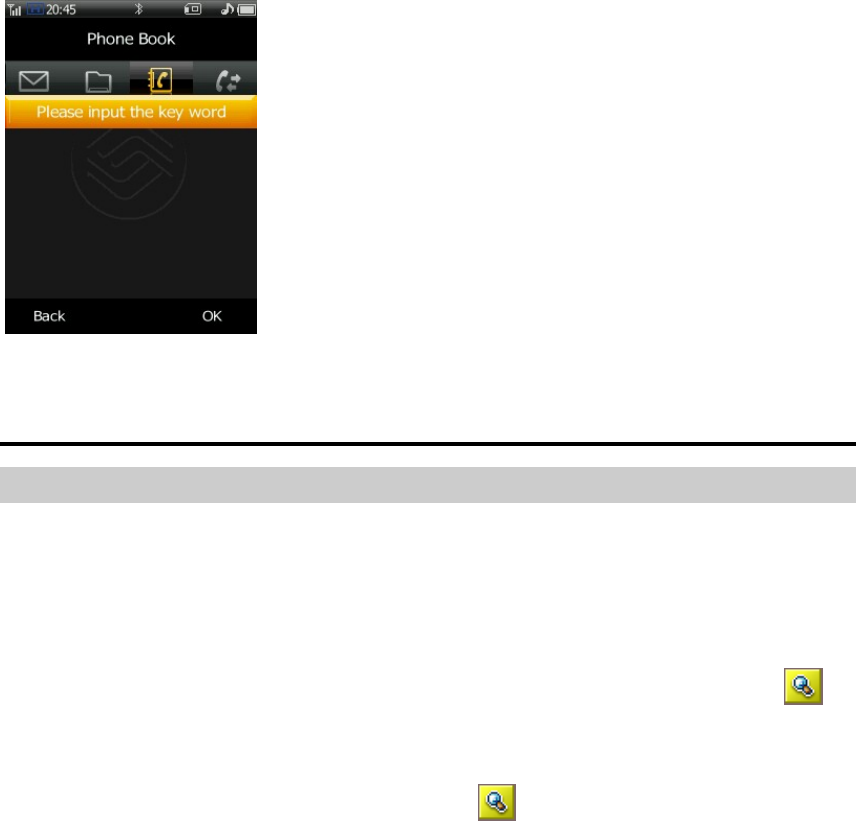
Search
After entering the phone book, clicking select will select the search
menu. Here you can search your phone book record based on name,
number, and storage location.
The system provides a quick search function where you enter the
first letter of a name. In the phonebook window, clicking the
on the top right of the list, will cause the quick search window to
appear. Entering the first letter of the name will allow the user to
search the telephone record. Clicking again will hide the quick
search window.

67
Add New
After entering the phonebook, press option, and then select add
new item on the menu. Firstly choose the save location type: SIM
card or phone.
If you set the save location type as "phone", in the add new record
window you can enter the group name, mobile phone 1, mobile
phone 2, landline, office phone, company, department, occupation,
fax, address, birthday, electronic mail, notes, ring tone and portrait.
If you set the save location type as SIM card, you can save the
name and number.
Call
In the contacts list, hover the cursor over the contact you wish to
call, press option, select call and you can enter into a voice call,
video call or IP call.
Send
In the contact list, hover the cursor over the contact you wish to
send the message to, click "select". Click "send", and you can
choose "send a message", "send a multimedia message", or "send
a name card" to send this contact as a name card.
Multiple Copy
Multiple copy allows you to copy phonebook records between the
SIM card and phone. Company, department, occupation, fax, address,
birthday, electronic mail, notes, ring tone and portrait cannot be copied.
Select the direction. possible directions are from the phone and
from the SIM card.
From the phone: Copy the phone records to the SIM card.
From the SIM card: Copy records from the SIM card to the phone.
If there is not enough space during the copy process, the system
will point this out.
Multiple Move
The multiple record move function allows you to move records

68
between the SIM card and phonebook. Company, department,
occupation, fax, address, birthday, electronic mail, notes, ring
tone and portrait cannot be moved.
Select the direction of movement, you can choose from the phone
and from the SIM card.
From the phone: Move many records to the SIM card.
From the SIMcard: Move many records from the SIM card to
the phone.
If there is not enough space during the move process, the system
will point this out.
Multiple Delete
Selectively delete multiple records. Select Multiple Delete.
When "all contacts" is chosen, all contacts can be deleted.
When "phone contacts" is chosen, all contacts on the phone can
be deleted.
When "SIM card contacts" is chosen, all contacts on the SIM card
can be deleted.
Save Location
Choose the save type: the following options appear on the menu:
Manual Selection: When adding new contacts, you need to choose
whether to save to the phone or the SIM card.
Phone: When adding a new contact, confirms that it a new contact
for the phone.
SIM Card: When adding a new contact, confirms that it is a new
contact for the SIM card.
Memory Card Backup
Send to T card: Backup the selected contact to the T card.
Send to the phone: Add a backup contact on the T card to the phone.

69
Own Number
View and edit your own number.
Internal Memory
View the memory used by the saved contacts and total memory on
the phone and SMS card.
Group
Select the fourth icon on your selected card, you will enter the group
list. Hover the cursor over the group you wish to setup click setup
and the setup menu will appear.
For the Confirmation Group you can only setup the group icon.
For other groups, you will see the following menu options: change
the group name, group icon, set up the group incoming ring tone,
add contact to the group or delete a group member. If you delete
a contact from a group they will return to the Confirmation Group.
Group Name: Change the name of the group.
Group Icon: Change the icon of a group. after changing it, the contacts
of the group members will show this icon in the contacts table.
Ring Tone: Set the incoming ring tone for contacts in this group.
Add Contact: Add a new contact to this group.
Remove From Group: Remove contact from the group. the removed
contact will return to the confirmation group.
Select the specified group. The contacts in this group will appear
in the list window. it if has not been setup this will display as
blank. Press option to activate the menu, from there it is possible
to search, call, IP call, video call, send a message, or send
a multimedia message to the contact.

70
13 Multimedia
Camera
Using the "camera" application, you can take photos of people and
events around you anytime and anywhere. The photos are saved in
the "My Photos" application. The camera takes photos in JPEG
format. Using the digital video recorder (DV), the file format is
3gp. If the memory space in the phone is not sufficient to save
new photos, you have to delete some old photos to create some
new space. In the memory lookup, you can view the memory
status.
Note:
In areas where there is insufficient light, the image
quality of previews and photos could decrease. If this
happens, check that the camera is a single shot mode.
From the camera photography window, the picture you want to
take will appear on the phone screen, click the take photo key
to take the photograph.
On the screen, there are 6 icons. These are the photography mode,
photography environment, photo size, zoom, and return, and settings.
Select Photography Mode: To setup the photography
mode, possible choices are the single shot mode, continuous shot
mode, and recording mode.
Select Camera Environment: To setup the camera
environment, the three possible environments are regular,
indoor, outdoor.

71
Select Photo Size: To setup the photo size, possible sizes
are 64×64, 320×240, 400×240, 640×480, 1280×960 (only for the
rear camera), 1600×1200 (only for the rear camera). photo size
can only be selected for single shot mode.
Select Zoom: To decide the photo zoom, possible
choices are x1, ×2, ×3, ×4.
Select return: Leave the camera, and return to the
previous interface.
Select Setup: Enter the camera setup interface. the items
which can be set are: change camera, photo mode, photo size
(only appears for single shot mode), number of continuous photos
(only appears for continuous mode), photo environment, photo
effects, photo quality, brightness, zoom (does not appear for
continuous mode), self time, camera tone, save location. The
information about these is as follows:
Change Camera: Switch between the front and rear camera.
Photo Mode: Setup the camera mode. Possible selections are
single shot, continuous shot and recording mode.
Photo Size: Setup the photo size. Possible sizes are 64×64, 320×240,
400×240, 640×480, 1280×960 (only for the rear camera), 1600×1200
(only for the rear camera). photo size can only be selected for
single shot mode.
Number of Continuous Shots: Setup the number of shots to be taken
in continuous mode. possible selections are 9, or 18 photos. the
number of continuous shots can only be changed in continuous mode.
Camera Environment: Setup the camera environment, the three
possible environments are regular, indoor, and outdoor.
Photo Effects: Setup the photo effects. The three possible effects
are normal, retro, or black and white.
Photo Quality: Possible choices are very detailed, detailed,
and regular.
72
Brightness: Setup the photo brightness. Possible choices are -2, -1,
0, +1, +2.
Zoom: Setup the photo zoom. Possible choices are ×1, ×2, ×3, and
x4. In continuous mode the zoom cannot be adjusted.
Self Time: Setup the photo self time. Possible choices are 5 seconds,
10 seconds, 15 seconds, 20 seconds or close.
Camera Tone: There are three possible camera tones to select.
Click OK to confirm the choice.
Save Location: Setup the save location. Possible choices are the
phone or the memory card.
While taking photos, clicking the upper or lower side keys, the
zoom can be changed. By changing the zoom, it is possible to
view part of the photo in more detail.
If the photo mode is single shot, after taking the photo, click
the take photo key or save to save the photo. click return and
a prompt will confirm if you wish to abandon the photo, click
confirm to return to the photo interface without saving. press
option to perform the following operations:
Save: Save the photograph.
Send as Multimedia Message: The picture is first saved, and then
entered into the new multimedia message interface. the photo
can be sent in the form of a multimedia message.
Set as Wallpaper: The photo is first saved, and then set as the
wallpaper.
If the photo mode is set to continuous, after taking the photo, click
take photo to switch from one photo mode to thumbnails. click
return the system will confirm you wish to abandon the photo,
then click confirm to return to the photo interface without saving.
click the select or OK key to perform the following operations:
Save: Save the photo in the browser.

73
Save All: Save all the photos in the camera.
Automatic Browsing: Automatically browse through all the
captured photos.
Single sheet: Enter a single photo browser window.
Thumbnails: Enter the thumbnail browser interface.
Set the photo mode to recording. while filming the camera will
also records sounds. During the photography, clicking the
key will abandon the photos. click the key to stop photography.
After taking the photos, click take photo to save the recording.
press the right function key you will be asked to confirm if you
wish to abandon changes, click confirm to return to the photo
interface without saving the photo. click the select or OK key to
perform the following functions:
Play: Play the captured recording.
Save: Save the captured recording.
DV
This is the digital video recorder option of the camera feature.
Music Player
After entering the media player, the phone will search for all the
MP3 files on the phone, and these will be analyzed. In the media
player window, there are the following 5 selections:
Song List: Shows all the MP3 files on the phone
Record Collection: Shows all MP3 files sorted by genre
Artist Listing: Shows all the MP3 files on the phone by artist
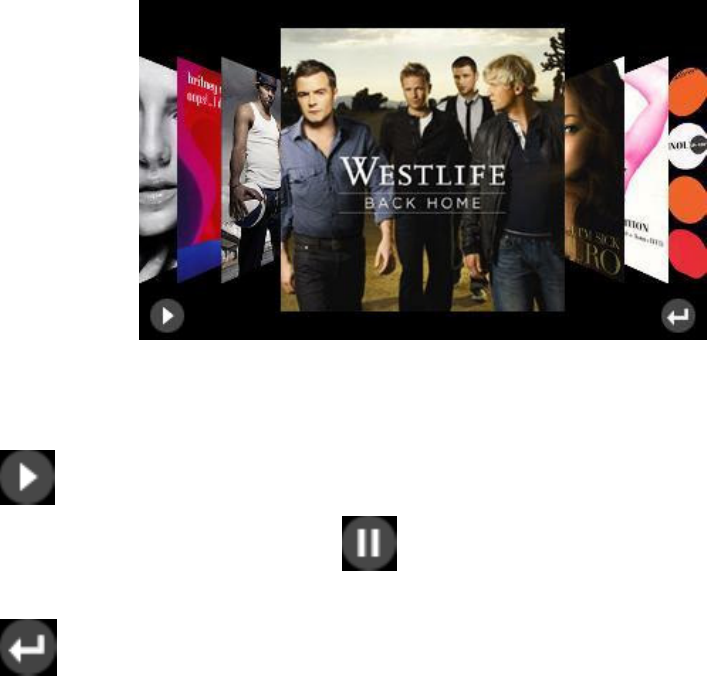
74
Update Playlist: When the MP3 files in the phone's memory are
changed, this option will update the playlist
Player Mode: You can select play modes such as one song play,
one song repeat, and play in order, continuous play, and quick play
Record collection display interface:
Shown in the figure are the pictures of the MP3 collection. you
can drag to the left and right so different collections are shown.
key: press this key to play the MP3 file. At the same time,
the icon will change into a , clicking again will pause the
playback of the MP3.
key: press this key to exit the record collection, and return
to the previous interface. If there is an MP3 playing at the time,
it will continue to play in background mode.
Clicking the picture in the middle of the screen, it will change to
show the MP3 files in the collection as below:
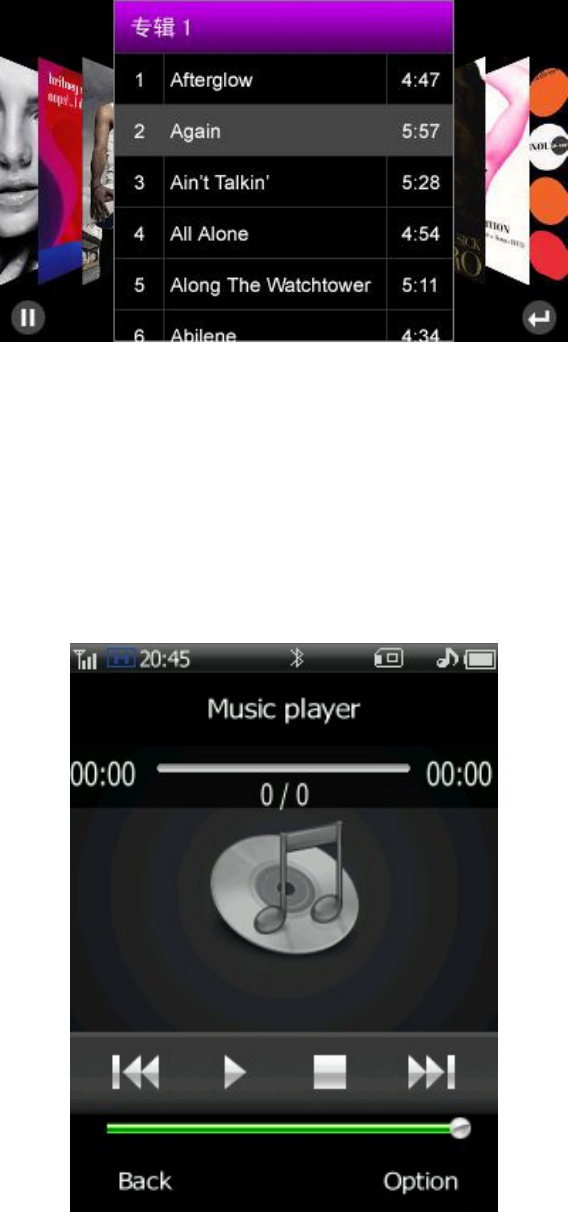
75
You can drag through the documents in the browser. Clicking
outside the collection or anything other than the two buttons, the
list will change and pictures of the MP3 collection will show.
In the song list, record collection, and artist list, clicking a specific
MP3 file will enter the music player interface, as shown:
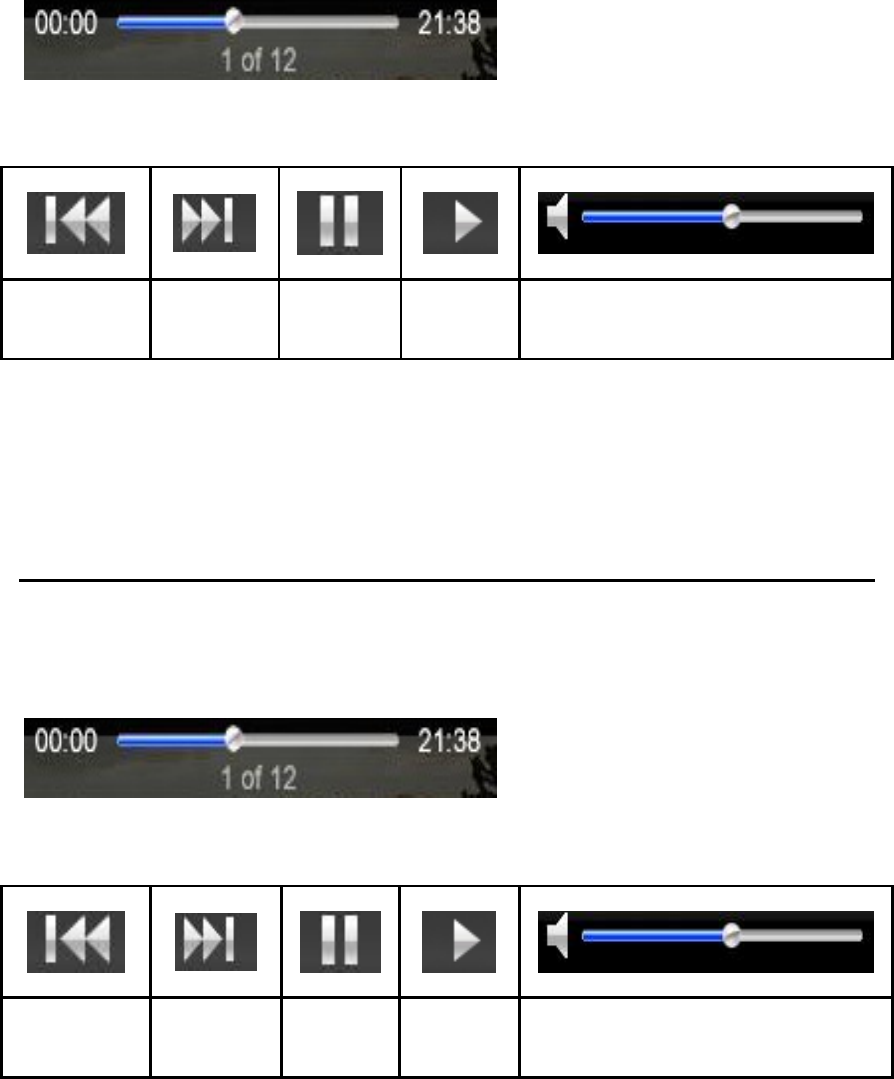
76
The picture in the middle shows the currently selected MP3 collection
: Shows the total MP3 duration
and playback time. A single click on the progress bar can speed up
or slow down the playback.
Previous
song
Next
song
Pause Play Current playback volume
Note:
The audiovisual player supports the MP3 format.
Video Player
In the video player window, clicking the upper side key will increase
the volume. clicking the lower side key will reduce the volume.
The touch keyboard appears as follows:
: Shows the total MP3 and
playback time. A single click on the progress bar can speed up or
slow down the playback.
Previous
video
Next
video
Pause Play Current playback volume
Clicking in the playback area will switch to full screen or non full
screen mode.

77
Click option to perform the following operations:
Video Collection: Enter the video collection. displays the audiovisual
files on the phone and memory card.
Mode: Can choose playback formats: no repeat, repeat current, repeat
list, quick play.
Go to URL: Directly input and play an internet address.
Web Page List: Shows multimedia playback web pages.
Note:
The video player can support 3gp and mp4 format.
Recorder
When using the recorder function, you can record the content of
your conversations, and can also record your environment. The
record file are saved in amr format. you can set the recording file
as your ring tone.
Enter the recorder window. Directly press the button to start
recording. at this time the right side of the screen will display the
currently recording time. Click the select or OK key to execute the
following functions:
Record: Start recording. At this time tapping the button will
stop the recording. Tapping the key again will continue the
recording. clicking the save key will save the recorded file. clicking
the return key will return to the menu. You can, in My Collection-
Sound-Recordings, listen to your saved recordings.
Recording List: Enter the recording list window, you can play the
recordings.
Save Location: Select the location for saving your recordings.
Possible selections are your phone or memory card.

78
14 Tools
Memo
The Memo can be used to record any simple notes. You can enter
1024 symbols (512 Chinese characters) into the memo table. Click
memo to edit. this will activate the Option Key. you can then
send messages, edit items, and clear.
Time
Time provides additional time related functions such as: world
clock, countdown, stopwatch and alarm.
Calculator
The calculator can be used for performing addition, subtraction,
multiplication and division calculations. After entering the calculator
interface, the user can directly enter numbers and begin calculations.
The numbers and symbols you enter will appear in the edit window.
Exchange Rate
You can use this function to find out how much a sum of money
would be worth in another country's money.

79
Unit Conversion
Unit convert mainly helps you convert units. Enter the unit conversion
window, roll the selection bar to select the content you wish to set.
Press the select or OK key or touch the screen to select, you will
enter the edit window. the system will automatically give the
results.
Incoming Call Location
Check a phone number's location. This supports the checking of
the location of fixed phones as well as cell phones.
Note:
The number location check could be inaccurate. the
incoming call locations results are provided only for
reference.

80
15 Connections
Bluetooth
Activating the Bluetooth feature will allow your phone to be
discovered, connect and or bond with other Bluetooth devices.
USB Mode
Udisk mode: If using USB mode, the phone can serve as a U disk.
After U disk mode is activated, data synchronization and
modulator-demodulator functionality does not work.
Modem mode: Activate modem mode, the system can be used for
data synchronization, modem.
Note:
Using the Modem Mode requires the installation of drivers.
If the drivers are not installed to the PC. You can only use
the USB mode functions and the modem cannot work.
PC Tools
This phone can connect with a PC via a USB digital cable, providing
the customer with a method for transmitting the phonebook and
short messages. Before using the document transmission function,
you have to install synchronization software on the PC. the software
is on the memory card that comes with the phone. This phone
supports the Windows XP and Windows 2000 operating systems.
When using PC tools, you should set the USB mode to Modem
Mode. Select PC tools, insert the data cable and connect with the

81
PC. After successfully connecting, you can work on the
phonebook and short messages. For the detailed operating system
usage, please consult the PC tools help file.
GPRS Wizard
Using GPRS technology, the user can use their cell phone to send
and receive data via the mobile network. GPRS is a way to transmit
data. It allows the user to connect wirelessly to the internet data
network. The applications of the data transmission include WAP
services, multimedia message service, short message service, JAVA
application downloads and GPRS dialing programs (such as the
internet and electronic mail).
Before using GPRS technology you must note the following points
1. Please enquire whether your network and service provider
offer GPRS service and how to start the service.
2. Please save the necessary GPRS settings for every application
with GPRS as its means of data transmission.
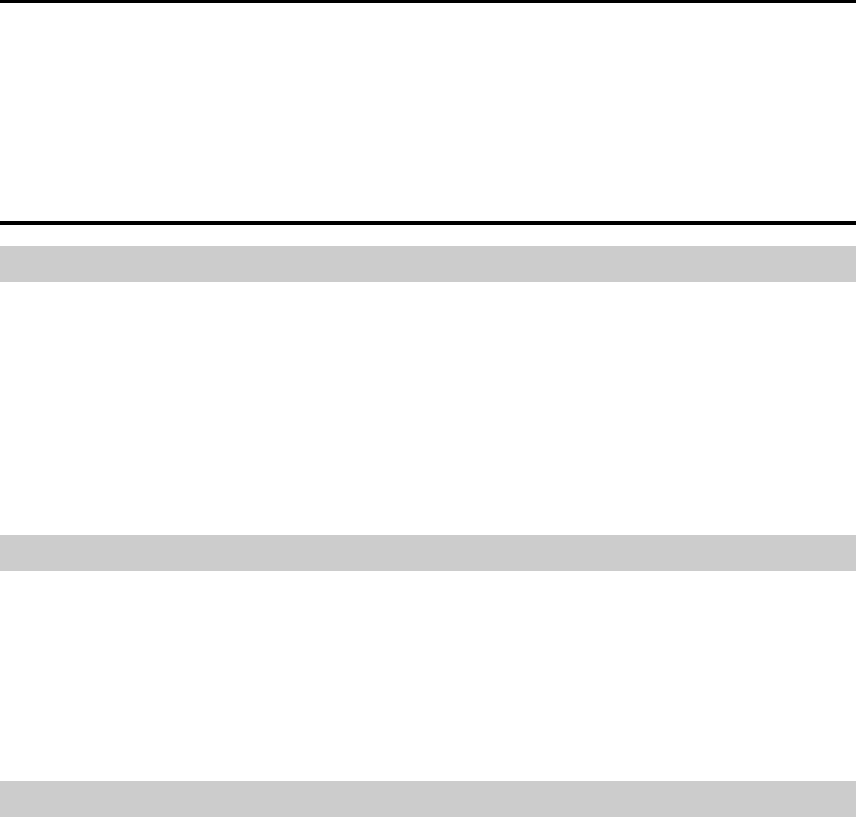
82
16 Other Applications
English Chinese Dictionary
The dictionary that comes with this phone can support translation
between Chinese and English. You can translate English input into
Chinese, as well as translating Chinese into English.
Calendar
Function Introduction
In the calendar, there are mainly four functions: schedule, solar
calendar inquiries, solar period inquiries, and anniversary inquiries.
In the calendar, you can see the current month and schedule messages.
Those dates with arrangements will have orange undertone reminders.
Clicking on the date allows you to check that days scheduled messages.
You can edit or send schedule messages as multimedia messages.
Calendar
Entering the calendar, it will show the current monthly calendar,
on the screen the currently displayed calendar year and month of
the calendar will be indicated. Under the screen solar calendar
information will be shown. If a schedule item has been created,
the date will be have an orange undertone.
Schedule
In the calendar interface, click option, select the Schedule, menu
content includes: enter date, add, schedule and content lookup.
Enter date: You can use this function to enter any day (in the
effective period), click the confirm key, the focus will move
directly to the selected date.
83
Add: When adding a schedule item, it is necessary to enter information
relating to the event. then setup the reminder date and reminder
time. Click Save to save the setup.
Schedule list: View all items in the schedule. Click the option key
to active the menu, you can then perform operations: add and delete.
Content lookup: View the number of schedule items and the available
number. The most schedule record that can be saved is 60. After
clicking return you can return to the calendar table window.
Solar Calendar Search
Search the assigned date's solar calendar information.
Solar period search
See the 24 solar period's of China.
Solar period search
See information about Chinese festivals like the new year, and
spring festival.
Electronic books
With this function, you can view txt document files stored on the
phone's user memory or on the memory card.
Games
Three JAVA games come preinstalled. These are Landlord, Jewel
Princess, and Sudoku King.

84
17 Safety Warnings and Notes
Electronic Equipment
Please switch off your phone near areas where high-precision
electronic equipment is used. Otherwise, the phone may damage
the equipment.
Equipment which may be affected by the phone includes: hearing
aids, pacemakers, fire alarms, automatic doors, and other automatic
control equipment. Users who also use mechanical medical aids
should contact the manufacturer's service center for these devices
and enquire whether they are influenced by wireless electric waves.
Medical Care Centers
In medical care centers please observe the following notes:
Please do not take your mobile into operating rooms, Intensive
Care Units (ICU), or Coronary Care Units (CCU).
In areas near medical equipment, please turn off your phone.
In areas where cells phones are not permitted, please abide by
the warnings and regulations in the area.
Please pay attention to the ring tone, volume, and vibrate settings
of your phone, in order to avoid affecting patients such as heart
disease sufferers.

85
Combustible and Explosive Areas
In areas containing combustibles or explosives, please switch the
phone off. To avoid causing fire or explosions, in these areas,
please do not remove or install batteries, charge batteries, or use
the cell phone. The following are combustible and explosive areas:
Gas stations.
Areas containing fuels (for example, in the hull under the deck
of a ship).
Fuel or chemical products transportation and storage facilities.
Areas where the air contains chemical substances or particles
(for example: grain, dust, metal powder).
Areas signed as containing the danger of explosions.
Areas signed "switch off wireless two directional electronic
equipment".
It is usually suggested that you switch the phone off in areas
containing car motors.
Traffic Safety
When driving, please abide by the relevant regulations of the area
or country. In order to avoid the impairment of your driving causing
a traffic accident, please do not use the phone when driving. When
driving please place the phone in its holder, do not put it on a seat
or other place where it may move during a collision or under sudden
braking. After the car has stopped safely, you can use the phone.
Please do not place the phone in areas in front of emergency
airbags or in places the airbag may reach. Otherwise, when the
airbag inflates or deploys, the phone may be subject to strong
forces, which could cause serious harm to the driver.

86
When flying in airplanes, please abide by the related rules and
regulations of the airline. When on or near an airplane, please turn
off the phone and remove its batteries. In areas of an airport where
the use of phones is prohibited, please turn of the phone. This will
prevent the phone's wireless signal interfering with the airplane
control signals.
Storage Environment
Please keep your phone away from magnetic equipment such as
magnetic cards or soft disks, as the phone's emissions may delete
the data stored on it.
Please do not place the phone, batteries, or charger in areas
containing machines which have strong electromagnetic fields
such as induction cooker pans or microwaves, otherwise the fields
could cause damage to the electric circuits, and cause fire or explosions.
Please do not store the phone, battery, or charger in areas with
high temperature, or very low temperatures. Otherwise the phone,
battery, or charger could be damaged, causing fire or an explosion.
Please do not let the phone, battery, or charger receive strong
strikes or vibration. This is to avoid battery fluid leaking, the phone
being broken, overheating, fire or explosions.
Please do not store sharp metal products such as nails near the
headset of the phone, as the magnetic earpiece could attract these
materials, and they could cause harm when using the phone.
Please do not place the phone in the back pocket of pants or
skirts. This is to avoid causing damage by sitting on the phone.

87
Child Health
Please keep the phone, batteries, or charger in an area where
children cannot reach it. please do not allow children to use the
phone, battery or charger without supervision.
Please do not allow children to put the phone battery in their
mouth, as battery fluid could cause poisoning.
Please do not let children come into contact with the small
phone parts, otherwise they may swallow them leading to
problems such as suffocation or choking.
Operation Environment
Your phone, batteries, and charger are not water proof, when
using them please keep them dry. In order to prevent the equipment
from short circuiting, corrosion damage, or electrification of users,
please do not allow the phone, batteries, or charger to come into
contact with water or vapor, or operate the phone with wet hands.
To avoid damage to the phone's electric circuits, please do not
use it in dusty, damp, or dirty areas or areas close to magnetic fields.
To avoid affecting people's health, when the headphones are
attached, please do not switch the phone on or off.
In order to conform to RF leakage regulations, when carrying or
using the phone's data functions, please keep a distance of at least
1 inch (2.5 cm) from the antenna.
If you play games on the phone for a long time and this causes
discomfort (such as epilepsy, or dizziness), please immediately
seek a doctor for assistance.
When you are using your phone's hands free function, please do
not put the phone close to your ear. This is to avoid the loud sounds
damaging your hearing.

88
If your phone has an infrared connection, please do not use
optical amplifiers to view the connection.
If your phone has photography functionality, please do not use
the flash too close to your or other people's eyes.
If you phone comes with a touch screen pen, please use it carefully
to avoid scratching the surface or screen of the phone.
During lightning storms, please do not use the phone while it
is charging, also do not use the phone outdoors. This is to avoid
being struck by lightening and harmed.
During calls please do not touch the antenna, as tapping the
antenna will affect the quality of the call and cause the phone
power to exceed the normally required power. This will shorten
the call and standby time.
Your phone's signal interference may influence nearby televisions,
radios or computers.
Please respect the international emission regulations, and use
accessories designated by this company.
Cleaning and Maintenance
Before cleaning and maintaining your phone, please switch it
off. If it is being charged, it is necessary to unplug the charger from
the power source while also disconnecting the charger from the phone.
This is to avoid electric shocks, battery or charger short circuits.
Please do not use chemical substances (such as alcohol, or benzene),
or chemical reagents, or granular cleaning agents to wipe the phone or
charger, otherwise components could be damaged and this could cause
a fire. You can use a damp, static proof soft cloth to wipe the phone.
Please do not scrape or alter the casing of the phone. Otherwise,
traces of the material could cause an allergic reaction. If allergic
reactions occur, you must stop using the phone immediately and
seek medical assistance.

89
To avoid fire, clean the dust from the electric source plug, and
keep it dry.
If the phone and its components and accessories do not work
correctly. Please contact your local authorized service organization,
service center personal will provide assistance.
Emergency Call
In emergency situations, if the phone is switched on, and in a service
area it can be used to make an emergency call. However, because
we cannot guarantee that the network will connect under all
circumstances, the phone should not be the only contact method.
Using the Battery
Only batteries recognized by the phone manufacturer can be
used, please do not use batteries designed for different models.
Otherwise, it could lead to fires.
Please do not put batteries into fire. Otherwise, the batteries
could ignite or explode.
Please do not put conductors such as metal objects, keys, or
jewelry across the two poles of the battery, or in contact with the
battery poles. This is to avoid causing a battery short circuit and
overheating causing bodily harm (such as burns).
Please do not take apart the batteries or weld the batteries two
poles together, this is to avoid battery leakage, overheating, fire
and bursting.
If the battery fluid leaks, smokes, or emits an odor, immediately
stop use and move the phone away from fire or people, to avoid
fire or bursts causing harm. To ensure safety, give the phone to
a qualified repair point to handle.

90
If the battery liquid touches skin or agricultural products, please
immediately wash with clean water to avoid damage to the skin.
If battery liquid squirts into the eyes, do not rub the eyes, otherwise
it could cause damage to the eyesight, instead immediately wash
in clean water, and go to a hospital for medical treatment.
If during charging the batteries change shape, color, or get
unusually hot, immediately remove the battery and do not
continue use, otherwise it could cause battery fluid to leak,
overheating, bursting or catching fire.
When the battery cannot be installed normally into the phone,
please do not try to push the battery in forcefully. This is to avoid
the battery leaking or bursting.
Please do not remove the battery when the phone is switched on.
If the battery is not used for a long time, after charging, please
store at room temperature.
Using the Charger
Only chargers recognized by the phone manufacturer can be
used, please do not use chargers designed for different models
otherwise it could lead to fires.
Please do not short circuit the charger to avoid equipment
malfunctions, smoking or fire.
To avoid electric shocks, charger short circuits, or fires, if the
power cable is broken (for example: the wire shows through the
insulator or it is cracked) or the connection is loose, please do not
continue to use it.
Please do not installed water or other liquid containers next to
the charger. liquids such as water entering the charger can cause
electrical leaks or other breakages.
Please do not charge in a dusty or moist environment, also the
power cable should not be kept close to heaters.

91
Before charging, please confirm that the electrical plug is
correctly plugged into the power socket. If the electrical socket is
not correctly plugged in, it could lead to electric shocks, or fire or
explosions of the phone or battery. When charging is complete and
power is turned off, pull out the plug rather than pulling out the cable.
The charger must use the standard required current and voltage,
if other voltages are used it could lead to fire or breakages.
The power cable of the charger should not have heavy objects
placed on it. It should not be damaged, modified, or pulled, otherwise
it could cause electric shocks or fires.
Please do not touch the plug, cable, charger with wet hands when
it the phone is charging. Otherwise it could lead to an electric shock.
To avoid overheating, fire or other breakages, if objects like
water get into the charger, please immediately remove the charger
cable plug from power socket.
Using the USB Data Cable
When using the USB data cable, please operate strictly following
the instructions as below. Otherwise, it could damage or phone or
personal computer:
When using the USB data cable to connect the phone with the
personal computer, please first connect the phone end, and then
connect the personal computer end.
When the phone and computer are communicating, it is strictly
forbidden to disconnect the USB cable. Otherwise, it could cause
the phone and computer equipment to be damaged.
When disconnecting the phone and computer's USB connection,
please first disconnect the computer end, and then disconnect the
phone end connection.
92
Protecting the Environment
Please abide by the related local laws regarding phone packaging,
expired batteries, and old phone processing, also try to recycle
where possible. Please do not throw phones or chargers into the
garbage or a source of fire, to avoid explosions.
Electronic Message Products Toxins and
Harmful Substance Declaration
Product name Mini 3T1 TD-SCDMA/GSM Dual Mode
Digital Cell Phone
Model number Mini 3T1
Manufacturer Dell
Manufacturing
address
Toxic or harmful substances or elements
Component
name Lead
(Pb)
Mercury
(Hg)
Cadmiun
(Cd)
Hexavalent
chromium
(Cr6+)
Firemaster
BP-6
(PBB)
polybrominated
diphenyl ethers
(PBDE)
Casing ○ ○ ○ ○ ○ ○
PCB ○○ ○ ○ ○ ○
Batteries ○ ○ ○ ○ ○ ○
Data cable ○ ○ ○ ○ ○ ○
Headphones ○ ○ ○ ○ ○ ○
Charger ○ ○ ○ ○ ○ ○

93
Toxic or harmful substances or elements
Component
name Lead
(Pb)
Mercury
(Hg)
Cadmiun
(Cd)
Hexavalent
chromium
(Cr6+)
Firemaster
BP-6
(PBB)
polybrominated
diphenyl ethers
(PBDE)
Antenna ○ ○ ○ ○ ○ ○
Display screen ○ ○ ○ ○ ○ ○
Keys ○ ○ ○ ○ ○ ○
Key connector ○ ○ ○ ○ ○ ○
LCM
p
rotective film
and all labels
○ ○ ○ ○ ○ ○
Camera
module/camera
module
○ ○ ○ ○ ○ ○
band
components/
shielding gasket
○ ○ ○ ○ ○ ○
Plating ○ ○ ○ ○ ○ ○
Anti-dust net ○ ○ ○ ○ ○ ○
Vibration
motor ○ ○ ○ ○ ○ ○
Screws and
nails ○ ○ ○ ○ ○ ○
handwriting
pen ○ ○ ○ ○ ○ ○
○: Indicates that this toxic or hazardous substance contained in all homogeneous
materials of this part is below the limit requirement in SJ/T 11363-2006.
×: Indicates that this toxic or hazardous substance contained in one of the homogeneous
materials of this part is above the limit requirement in SJ/T 11363- 2006.
94
18 SAR Description
Specific Absorption Rate (SAR)
This cell phone conforms to International SAR standards.
Your cell phone is a low power wireless receiver and transmitter.
It is designed and manufactured not to exceed the recommended
upper SAR International standard values. These upper values are
within the scope of the national standard. This standard stipulates
the permitted SAR values for the general public. The standard
was formulated after careful research by international independent
scientific organizations. These organizations also carry out regular
reviews of the standards to ensure their effectiveness. The standards
include a large number of safety parameters to ensure the personal
health and safety of users of any age.
The phone's emissions are measured and evaluated according to their
SAR (Specific Absorption Rate). Based on the standard, the upper
recommended SAR value for this cell phone is 2.0W/kg per 10g*.
The testing of the SAR values of this cell phone is carried out using
a standardized testing program. This tests the highest power output
for all frequency bands during regular usage.
Although the SAR is tested at maximum power, in reality the
SAR values are considerably lower than the maximum values
during regular use. This is because the cell phone is designed with
a number of output powers. During regular operation, the power
rating required need only be enough to allow the phone to connect
to the network. Usually the closer the phone is to the base station,
the lower the output power needs to be.
95
When held to the ear, the SAR value of the phone does not exceed
2.0W/kg per 10g. Although different phones have different SAR
values at different locations, they always meet the requirements of
this standard.
Please note: If this phone has design modifications, the SAR values
may change. However, under all conditions the phone is designed
to conform to the requirements of the standard.
* The International Commission on Non-Ionizing Radiation
Protection recommends that for phones for the general public, the
SAR standard upper value for each 10g of body tissue should not
exceed 2.0W/kg. This standard includes an extremely large safety
factor to further improve public safety. It also takes differences
caused by testing errors into account. Under different testing
requirements and frequency bands, the SAR values will be different.
