Dell Supportassist Version 1 0 For Microsoft System Center Operations Manager Owners Manual 1.0 Quick Start Guide
2014-11-13
: Dell Dell-Supportassist-Version-1-0-For-Microsoft-System-Center-Operations-Manager-Owners-Manual-117195 dell-supportassist-version-1-0-for-microsoft-system-center-operations-manager-owners-manual-117195 dell pdf
Open the PDF directly: View PDF ![]() .
.
Page Count: 8

Dell SupportAssist Version 1.0 For Microsoft System
Center Operations Manager
Quick Start Guide

Notes, Cautions, and Warnings
NOTE: A NOTE indicates important information that helps you make better use of your computer.
CAUTION: A CAUTION indicates either potential damage to hardware or loss of data and tells you how to avoid the
problem.
WARNING: A WARNING indicates a potential for property damage, personal injury, or death.
© 2013 Dell Inc. All Rights Reserved.
Trademarks used in this text: Dell™, the Dell logo, Dell Boomi™, Dell Precision™ , OptiPlex™, Latitude™, PowerEdge™, PowerVault™,
PowerConnect™, OpenManage™, EqualLogic™, Compellent™, KACE™, FlexAddress™, Force10™, Venue™ and Vostro™ are trademarks
of Dell Inc. Intel®, Pentium®, Xeon®, Core® and Celeron® are registered trademarks of Intel Corporation in the U.S. and other countries.
AMD® is a registered trademark and AMD Opteron™, AMD Phenom™ and AMD Sempron™ are trademarks of Advanced Micro
Devices, Inc. Microsoft®, Windows®, Windows Server®, Internet Explorer®, MS-DOS®, Windows Vista® and Active Directory® are
either trademarks or registered trademarks of Microsoft Corporation in the United States and/or other countries. Red Hat® and
Red Hat® Enterprise Linux® are registered trademarks of Red Hat, Inc. in the United States and/or other countries. Novell® and SUSE®
are registered trademarks of Novell Inc. in the United States and other countries. Oracle® is a registered trademark of Oracle
Corporation and/or its affiliates. Citrix®, Xen®, XenServer® and XenMotion® are either registered trademarks or trademarks of Citrix
Systems, Inc. in the United States and/or other countries. VMware®, vMotion®, vCenter®, vCenter SRM™ and vSphere® are registered
trademarks or trademarks of VMware, Inc. in the United States or other countries. IBM® is a registered trademark of International
Business Machines Corporation.
2013 - 09
Rev. A00

Introduction
The Dell SupportAssist plugin for Microsoft System Center Operations Manager provides proactive support capabilities
for supported Dell servers. Operations Manager interacts with supported devices that are to be monitored and receives
SNMP traps and Windows event logs, which are periodically retrieved as alerts by the SupportAssist client. The alerts
are filtered using various policies to decide if the alerts qualify for creating a new support case or updating an existing
support case.
All qualifying alerts are securely sent to the SupportAssist server hosted by Dell, for creating a new support case or
updating an existing support case. After the support case is created or updated, the SupportAssist client runs the
appropriate collection tools on the devices that generated the alerts, and uploads the log collection to Dell. The
information in the log collection is used by Dell technical support to troubleshoot the issue and provide an appropriate
solution.
This document provides information you require for SupportAssist to work as expected in your environment.
Getting Started With SupportAssist
To quickly get started with SupportAssist:
1. Ensure that Microsoft System Center Operations Manager 2007 R2 or Microsoft System Center Operations
Manager 2012 SP1 is installed on the management server.
2. Install Dell Server Management Pack Suite Version 5.0.1 For Microsoft System Center Operations Manager And
System Center Essentials on the management server, and set up Operations Manager for discovery and monitoring
of supported Dell devices.
For information on installing the management pack suite, discovering and monitoring of supported Dell devices
using Operations Manager 2007 R2 or Operations Manager 2012 SP1, see the following documents at dell.com/
OpenManageManuals (under Server Management Pack Versions for Microsoft System Center Operations
Manager):
–
Dell Server Management Pack Suite Version 5.0.1 For Microsoft System Center Operations Manager And
System Center Essentials Installation Guide
–
Dell Server Management Pack Suite Version 5.0.1 For Microsoft System Center Operations Manager And
System Center Essentials User's Guide
3. Install SupportAssist on the management server running Operations Manager.
For information on installing SupportAssist, including the prerequisites, see the
Dell SupportAssist Version 1.0 For
Microsoft System Center Operations Manager User's Guide
at dell.com/ServiceabilityTools.
4. If the management server connects to the Internet through a proxy server, you must configure Proxy Settings in
SupportAssist. To configure the proxy server settings, click Settings → Proxy Settings , and follow the instructions
on the screen.
5. Configure the administrator credentials of each supported device type in your environment in SupportAssist.
For more information, see Configuring The Default Device Type Credentials.
6. If SupportAssist is installed on either a non-host system (Operations Manager 2012 SP1) or non-RMS system
(Operations Manager 2007 R2), you must configure SupportAssist to establish a remote connection with the
management groups.
For more information, see Configuring A Remote Connection.
7. Verify that the SupportAssist client is able to communicate with the SupportAssist server hosted by Dell by
performing the email connectivity test.
For more information, see Email Connectivity Test.
3

8. If there is an SSL connection failure, you must install the required root certificates. To identify and resolve an SSL
connection failure, see Identifying SSL Connection Failure and Installing Root Certificates.
9. If your devices are covered under the Dell ProSupport Plus service contract, you must configure SupportAssist to
collect the system logs periodically.
For more information, see Configuring Periodic Collection Of System Logs (ProSupport Plus Only).
10. Verify that SupportAssist is able to generate the system log collection and upload it to Dell successfully. See
Verifying the System Log Collection/Upload Configuration.
11. Verify if the management server is able to connect to the following destinations:
–https://api.dell.com/support/case/v2/WebCase — end point for the SupportAssist server.
–https://ddldropbox.us.dell.com/upload.ashx/ — the file upload server where the diagnostic test results are
uploaded.
–http://ftp.dell.com/ — for getting new SupportAssist release information.
Configuring The Default Device Type Credentials
SupportAssist runs the appropriate collection tools and gathers the system logs when a hardware issue is detected in
your environment. To run the collection tools on your supported devices, you must configure SupportAssist with the
administrator credentials for each managed device type.
NOTE: The Settings tab is accessible only if you are logged on as a member of either the Administrators or Domain
Admins group.
1. Click the Settings tab.
2. Under Edit Device Type Credentials, select the Device Type and Credential Type.
3. Type the administrator credentials (Username and Password) of the selected Device Type and Credential Type in
the corresponding fields.
NOTE: Windows user names must be in the [Domain\Username] format. You can also use a period [ . ] to
indicate the local domain. Examples of Windows user names: .\Administrator; MyDomain
\MyUsername.
4. Click Save Changes.
NOTE: If the credentials for a device differ from the Default Device Type Credentials you provided, you can
edit the credentials for that particular device using the Edit Device Credentials link in the Devices tab.
Configuring A Remote Connection
Establishing a remote connection to the management groups allows SupportAssist to retrieve monitoring data such as
alerts and discovery information from Operations Manager. The Management Groups Connection page allows you to
provide the credentials required for SupportAssist to establish a remote connection with the management groups.
NOTE: Whenever the Operations Manager is configured to connect to either a new host (Operations Manager 2012
SP1) or RMS (Operations Manager 2007 R2), SupportAssist must also be configured with the new management
group credentials.
To configure a remote connection:
NOTE: The Settings tab is accessible only if you are logged on as a member of either the Administrators or Domain
Admins group.
1. Click the Settings tab.
4

The System Logs page is displayed.
2. Click Remote Connection.
The Management Groups Connection page is displayed.
3. Select Establish a remote connection with the management group.
4. Provide the IP Address or Name, Domain\Username, Password, and Confirm Password of the host (Operations
Manager 2012 SP1) or RMS (Operations Manager 2007 R2) in the appropriate fields.
NOTE: The username must be provided in the domain\username format. You can use a period [.] to indicate
the local domain.
5. Click Apply.
SupportAssist validates the management group credentials by attempting to establish a remote connection. If the
remote connection is successful, the management group credentials are saved.
Email Connectivity Test
NOTE: The Connectivity Test link is enabled only if you are logged on as a member of either the Administrators or
Domain Admins group.
1. In SupportAssist, move the mouse pointer over the <user name> link that is displayed beside the Help link, and then
click Connectivity Test.
2. In the Connectivity Test page, click Send.
The SupportAssist server receives the connectivity test, and sends a sample email with the connectivity status to
the primary and secondary (optional) contact. If the connectivity status email is not received, see the
Troubleshooting section.
Configuring Periodic Collection Of System Logs (ProSupport Plus
Only)
To receive the full benefits of the support, reporting, and maintenance offering of your ProSupport Plus service contract,
you must configure SupportAssist to collect the system logs at periodic intervals for each supported device type.
NOTE: The Settings tab is accessible only if you are logged on as a member of either the Administrators or Domain
Admins group.
1. Click the Settings tab.
The System Logs page is displayed.
2. Click Preferences.
The Preferences page is displayed.
3. Under Support Collection, select Enable system log collection scheduling.
4. Click System Logs.
The System Logs page is displayed.
5. Under Edit Device Credentials, select the Device Type and Credential Type.
6. Under System Log Collection Schedule, set the Frequency, and select the appropriate fields in Specify day and
time.
7. Repeat step 5 and step 6 until you have scheduled the collection of system logs for all supported device types in
your environment.
8. Click Save Changes.
5

Verifying The System Log Collection/Upload Configuration
To verify that SupportAssist is configured correctly to upload system logs to Dell:
1. Click the Devices tab.
The Device Inventory page is displayed.
2. Select the first device in the Device Inventory .
NOTE: You can only select a device that has a valid Service Tag. If a device does not have a valid Service Tag,
the check box for that device is disabled.
The Send System Logs link is enabled.
3. Click Send System Logs.
The status of the system log collection is displayed in the Collection Status column.
4. To add other devices to the system log collection queue, select each device in the Device Inventory, and then click
Send System Logs.
When SupportAssist is able to successfully generate the system log collection and upload it to Dell, the Collection
Status column displays Collection Uploaded. For information on troubleshooting problems with the generation and
upload of the system log collection, see Troubleshooting System Log Collection/Upload Failure.
Troubleshooting
This section provides information about the following:
•Troubleshooting Email Connectivity Test Failure
•Troubleshooting System Log Collection/Upload Failure
Troubleshooting Email Connectivity Test Failure
The email connectivity test may fail due to:
• Proxy settings — If your network requires passing the web browser traffic through a proxy server, ensure that
the proxy is enabled and configured in SupportAssist.
• SSL connection failure — If the proxy settings are configured properly, but the email connectivity test fails,
there may be a SSL connection failure.
If there is a SSL connection failure, you must install the required root certificates. To identify and resolve SSL
connection failure, see Identifying SSL Connection Failure and Installing Root Certificates.
Identifying SSL Connection Failure
SSL connection failure may occur if your system does not have the required certificate installed from the issuing root
certificate authority, GTE CyberTrust Global Root. All Dell certificates are issued from this certificate authority.
To verify if the certificate is installed in Internet Explorer:
1. Click Tools → Internet Options.
The Internet Options dialog box is displayed.
2. Click the Content tab, and then click Certificates.
The Certificates dialog box is displayed.
3. Click the Trusted Root Certification Authorities tab.
6
4. Scroll to verify if GTE CyberTrust Global Root is listed in the Issued To and Issued By columns.
If GTE CyberTrust Global Root is not listed, you must install the required certificates. To install the certificates, see
Installing Root Certificates.
Installing Root Certificates
Before you begin, ensure that:
• You are logged in to the user account with which SupportAssist was installed.
• You have administrator privileges.
• The SupportAssist service is running.
To resolve SSL connection issues, you must install the following root certificates in the appropriate folders of the current
user and local computer.
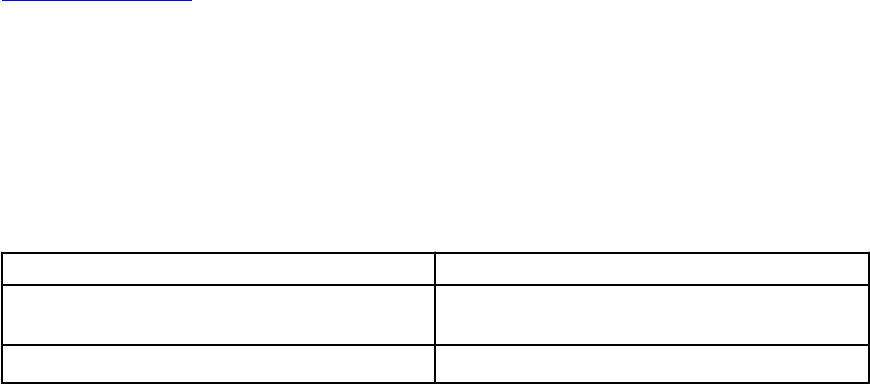
Certificate Files Installation Folder
Dell_Inc_Enterprise_Issuing_CA1.cer
Dell_Inc_Enterprise_CA.cer
Intermediate Certification Authorities
GTE_CyberTrust Global Root.cer Trusted Root Certification Authorities
To install root certificates:
1. Click Start → Run.
The Run dialog box is displayed.
2. In the Open box, type mmc, and click OK.
The Console1 – [Console Root] window is displayed.
3. Click File → Add/Remove Snap-in.
The Add or Remove Snap-ins dialog box is displayed.
4. Under Available snap-ins, select Certificates, and click Add >.
The Certificates snap-in dialog box is displayed.
5. Ensure that My user account is selected, and then click Finish.
6. In the Add or Remove snap-ins dialog box, click Add >.
The Certificates snap-in dialog box is displayed.
7. Select Computer account and click Next.
The Select Computer dialog box is displayed.
8. Ensure that Local computer: (the computer this console is running on) is selected, and click Finish.
9. In the Add or Remove snap-ins dialog box, click OK.
10. Under the Console Root, click Certificates – Current User.
11. Right-click Trusted Root Certification Authorities → All Tasks → Import.
The Certificate Import Wizard is displayed.
12. Click Next.
The File to Import dialog box is displayed.
13. Browse to select the AuthoritiesGTE_CyberTrust Global Root.cer certificate file, and click Next.
The Certificate Store information is displayed.
14. Click Next.
15. Click Finish.
7
16. Right-click Intermediate Certification Authorities → All Tasks → Import.
The Certificate Import Wizard is displayed.
17. Browse to select the Dell_Inc_Enterprise_Issuing_CA1.cer certificate file, and click Next.
The Certificate Store information is displayed.
18. Click Next.
19. Click Finish.
20. Right-click Intermediate Certification Authorities → All Tasks → Import.
The Certificate Import Wizard is displayed.
21. Browse to select the Dell_Inc_Enterprise_CA1.cer certificate file, and click Next.
The Certificate Store information is displayed.
22. Click Next.
23. Click Finish.
24. Under the Console Root, click Certificates (Local Computer).
25. Perform step 11 to step 23 to import the three certificate files.
Troubleshooting System Log Collection/Upload Failure
• If the generation of the system log collection fails for a device (Collection Status displays Failed to Run):
– Make sure that the default credentials for the device are configured correctly in the Settings → System
Logs tab. To edit the credentials for the device, select the device in the Device Inventory, and click Edit
Device Credentials
• If the upload of the system log collection fails for a device (Collection Status displays Collection Failed to
Upload):
– Make sure that the proxy server credentials are configured correctly in the web browser, and confirm if
you can access the internet using the browser.
To verify if the issue is resolved, select the device in the Device Inventory and click Send System Logs. The status of the
system log collection is displayed in the Collection Status column.
8
