Dell V02S001 Smart Phone User Manual bk0
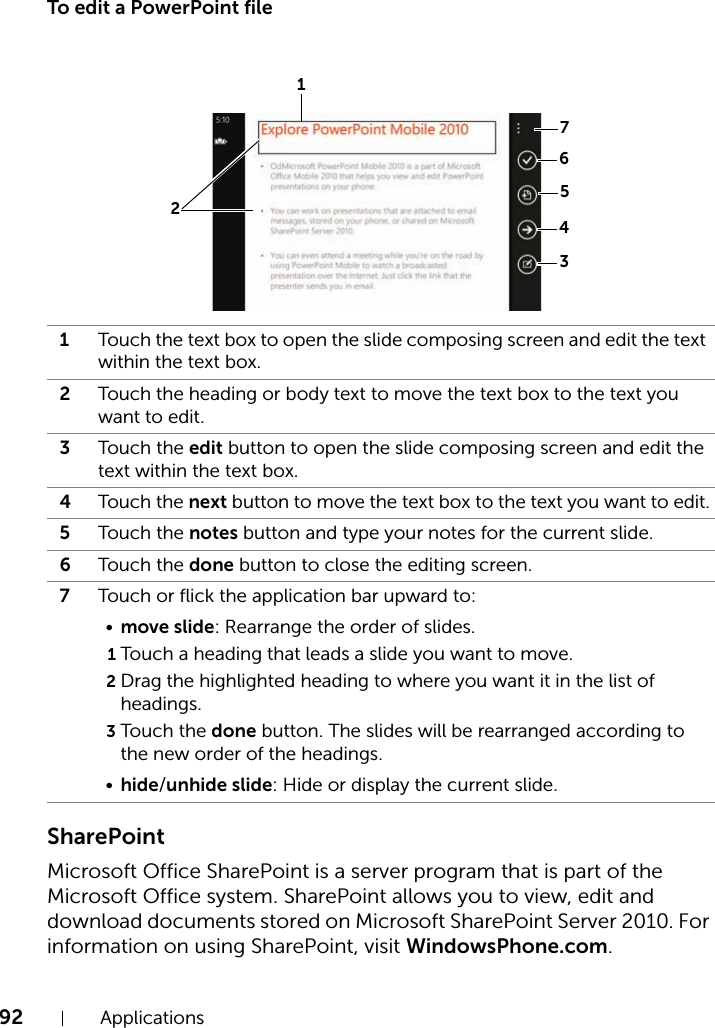
Dell Inc. Smart Phone bk0
UserManual.wiki
>
Dell
>
V02S001 User Manual
>
User manual-1
Contents
1.
User manual-1
2.
User manual-2
User manual-1
Navigation menu
Upload a User Manual
Namespaces
Wiki Guide
HTML
PDF
Info
Views
User Manual
Discussion / Help
Navigation


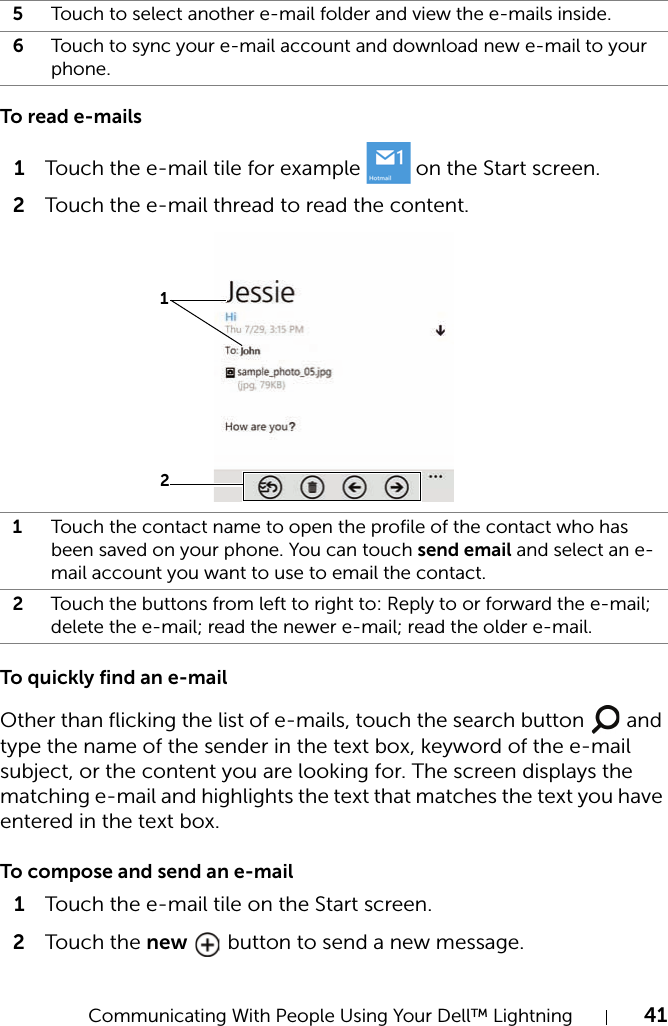
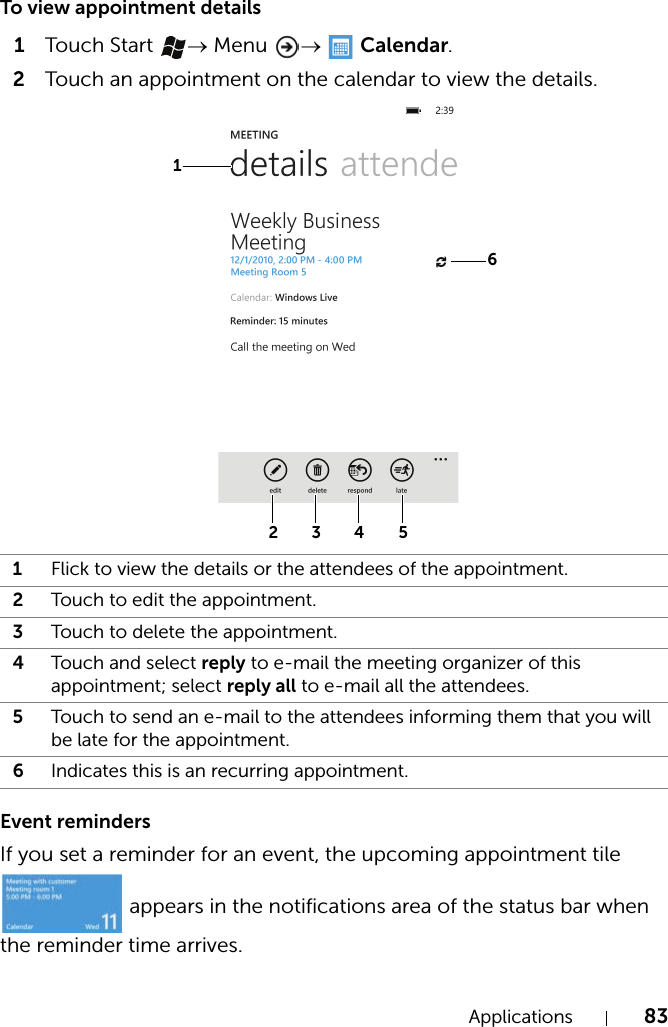
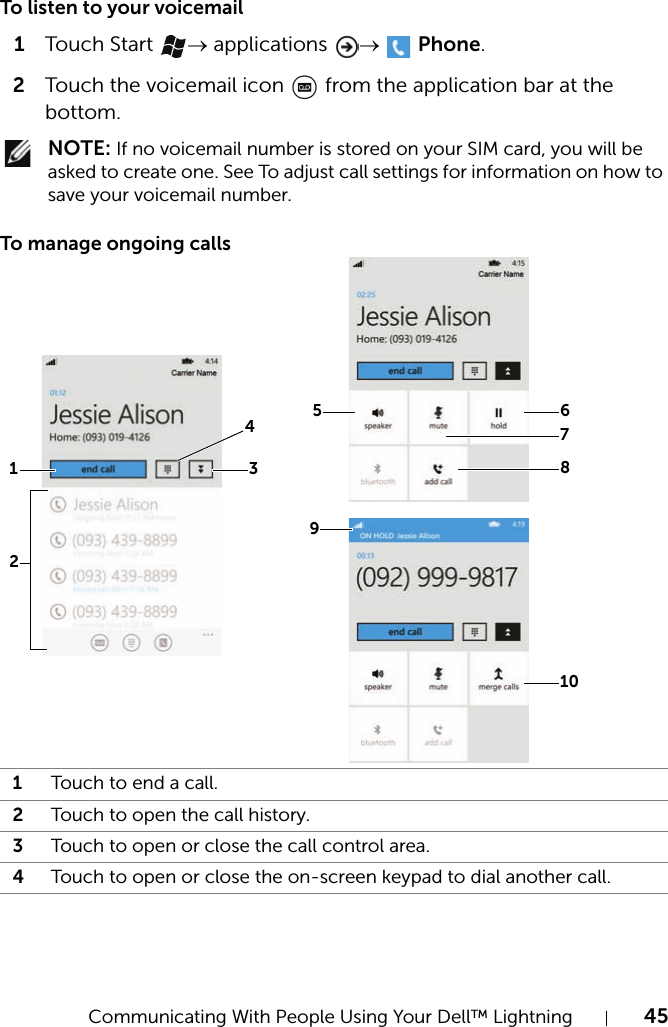
![Communicating With People Using Your Dell™ Lightning 43CallingTo call by dialing1Touch Start → applications → Phone.2Touch from the application bar at the bottom to access the on-screen keypad.3Type the phone number to call using the on-screen dialpad.4Touch the call push button to call the typed number.To call a contact1Touch Start → People to open the People application.2Flick to the all section to view all the contacts saved on your phone. Flick the list of contacts and touch the name of contact you would like to call. NOTE: To quickly locate a contact without flicking the list, touch an alphabet tile along the left side of the contacts list, then from the alphabet board that opens, touch the alphabet that the contact name starts with. NOTE: To select a contact from previous calls, flick to the recent section and touch a contact tile.3From the profile screen of the contact, touch the call [number, mobile, work, home, etc.] to call the contact.5Touch the close task button to:•Save: save the e-mail to your drafts folder.•Discard: Delete the e-mail.•Cancel: Return to the e-mail composing screen to continue editing.Touch or drag the application bar upward to choose from these options:6priority: Set e-mail priority.7 show cc & bcc: Send the e-mail to others as a carbon copy (Cc) or blind carbon copy (Bcc).](https://usermanual.wiki/Dell/V02S001.User-manual-1/User-Guide-1391623-Page-43.png)
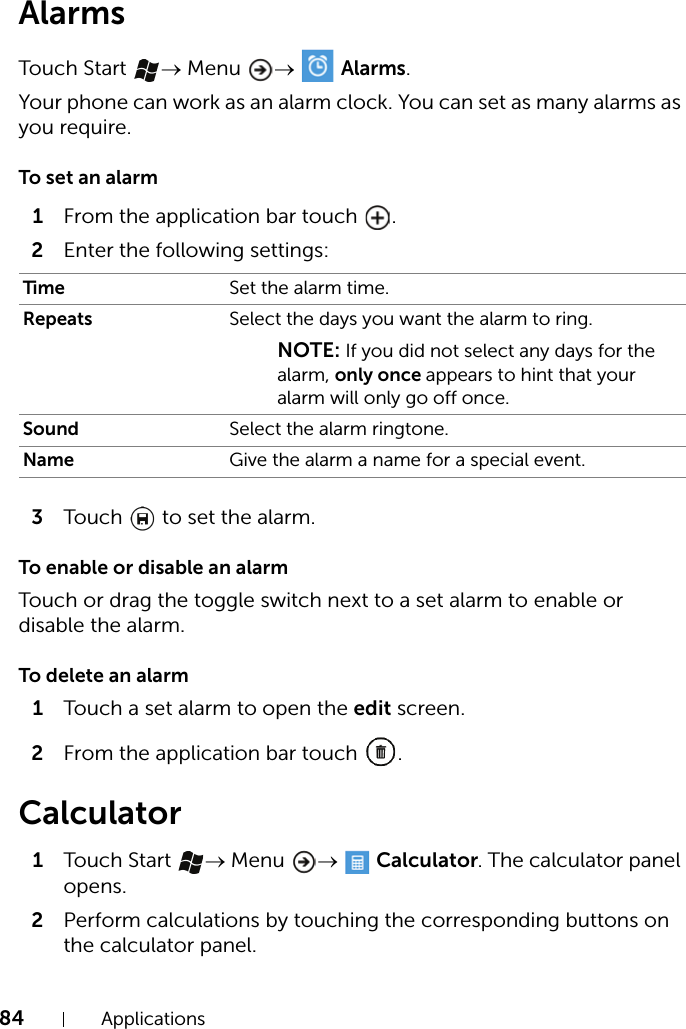
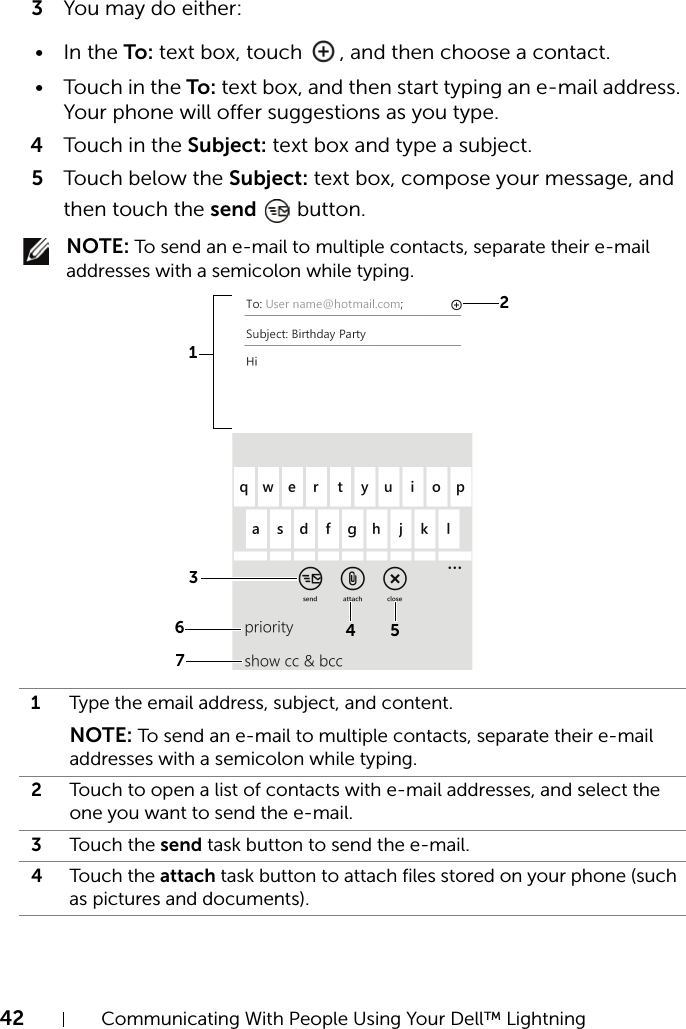
![44 Communicating With People Using Your Dell™ LightningTo manage missed, outgoing, and received calls1Touch Start → applications → Phone.2Flick the call history to locate a call displayed either with a phone number or with a contact’s name.3You can choose to do the following:• Touch to call back the contact or phone number.• Touch and hold a contact name or phone number, then touch delete item to erase the call from the call history.• Touch the contact or phone number to open the profile screen, then:aTouch the call [number, mobile, work, home, etc.] to call back.bTouch text number [mobile] to send a text or multimedia message to the caller.cTouch send email to e-mail the caller.dTouch from the application bar to add the phone number as a new contact or as an existing contact’s new number; touch to edit the caller’s contact information if the caller is already a contact saved in the People application.• To erase all calls from the call history, touch or drag the application bar upwards→ delete all.To answer a callTouch the answer button to answer an incoming call.To cancel dialing or end an active callTouch the end call push button.To reject an incoming callTouch the ignore button.](https://usermanual.wiki/Dell/V02S001.User-manual-1/User-Guide-1391623-Page-44.png)
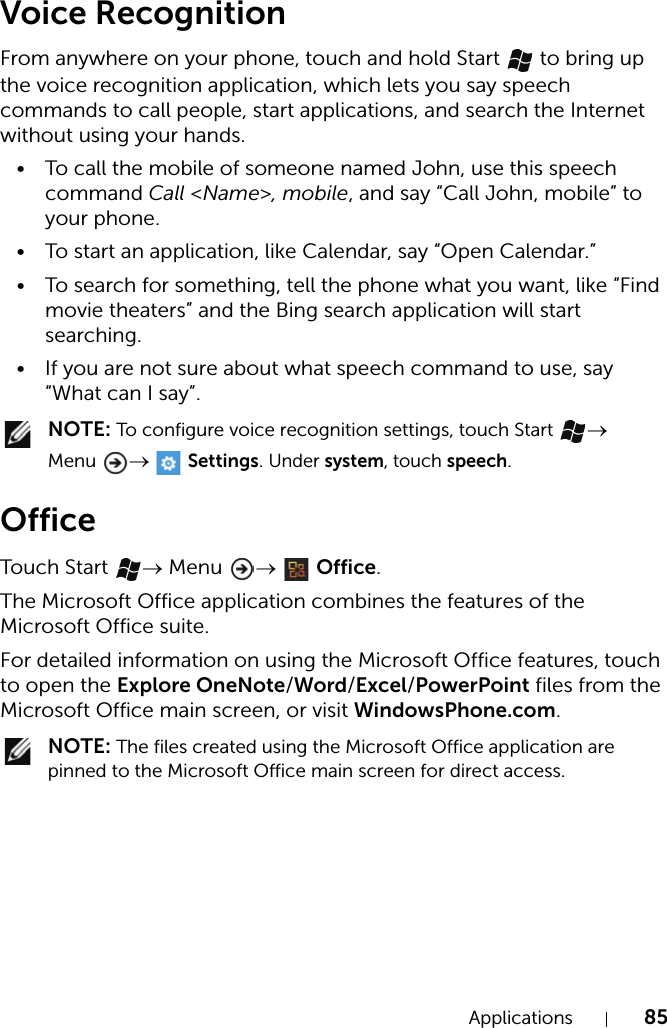
![Communicating With People Using Your Dell™ Lightning 49To quickly locate a contact1Touch Start → Menu → People.2Do either of the following:• Touch an alphabet tile along the left side of the all contacts list. From the quick jump grid that opens as an alphabetical board, touch the alphabet that the contact name starts with. The screen displays the contacts whose names start with the selected alphabet.• Touch the search button and type into the text box the name of the contact you are looking for. The screen displays the matching contact names and highlights the letters that match your typing.To call, e-mail, or send a message to a contact1Touch Start → Menu → People.2Locate the contact that you want to call, mail, or send a message (for more information, see To quickly locate a contact).3Touch the name or number of the desired contact.4You could either:•Touch the call [number, mobile, work, home, etc.] to call the contact.•Touch text number [mobile] to send a text or multimedia message to the contact.•Touch send email to send an e-mail to the contact.To pin a contact to the Start screen1Touch Start → Menu → People.2Do either of the following:•From the recent or all section, touch and hold a contact to view the context menu, then touch pin to start.•From the recent or all section, touch a contact to open the contact profile, then touch the pin icon in the application bar.](https://usermanual.wiki/Dell/V02S001.User-manual-1/User-Guide-1391623-Page-49.png)