Dell Data Protection Security Tools Update ControlVault Drivers And Firmware User Manual Technical Advisories V1.12 User's Guide17 En Us
User Manual: Dell dell-data-protection-security-tools Security Tools Technical Advisories v1.12
Open the PDF directly: View PDF ![]() .
.
Page Count: 18
1
Contents
Update Dell ControlVault Drivers and Firmware . . . . 1
Download Latest Drivers . . . . . . . . . . . . . . . . . . . . . . . . . . . . . . . . . . . . . 2
Install Dell ControlVault Driver . . . . . . . . . . . . . . . . . . . . . . . . . . . . . . . . 6
Verify Driver Installation . . . . . . . . . . . . . . . . . . . . . . . . . . . . . . . . . . . . 11
Install Dell ControlVault Firmware . . . . . . . . . . . . . . . . . . . . . . . . . . . . 11
Update Dell ControlVault Drivers and Firmware
• Dell ControlVault drivers and firmware that are installed on Dell computers at the factory are outdated and should be
updated by following this procedure, in this order.
• If an error message is received during DDP|EE or DDP|ESS installation prompting you to exit the installer to update
Dell ControlVault drivers, the message may be safely dismissed to continue with the installation of DDP|EE or
DDP|ESS. The Dell ControlVault drivers (and firmware) can be updated after DDP|EE or DDP|ESS installation is
complete.
2
Download Latest Drivers
1
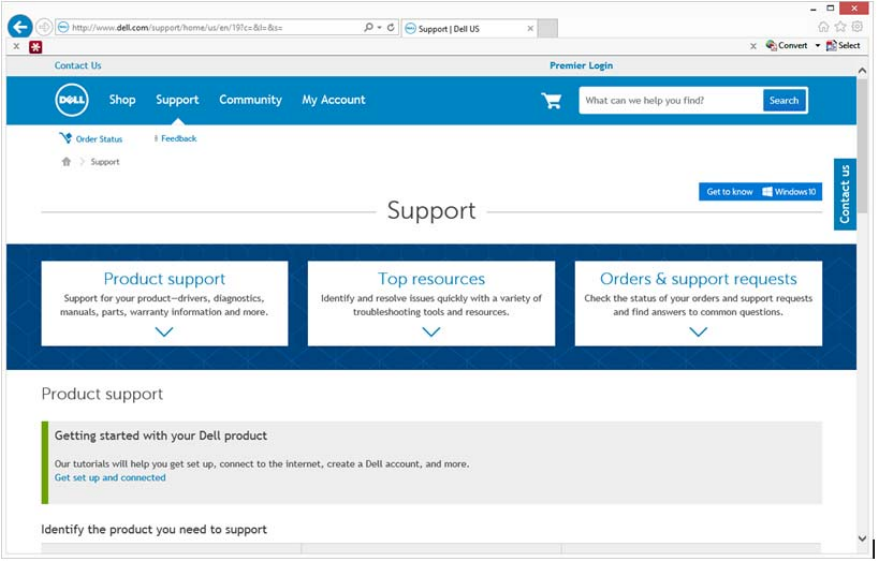
Go to www.support.dell.com.
3
2
Select your computer model.
4
3
Select
Drivers & Downloads
.
4
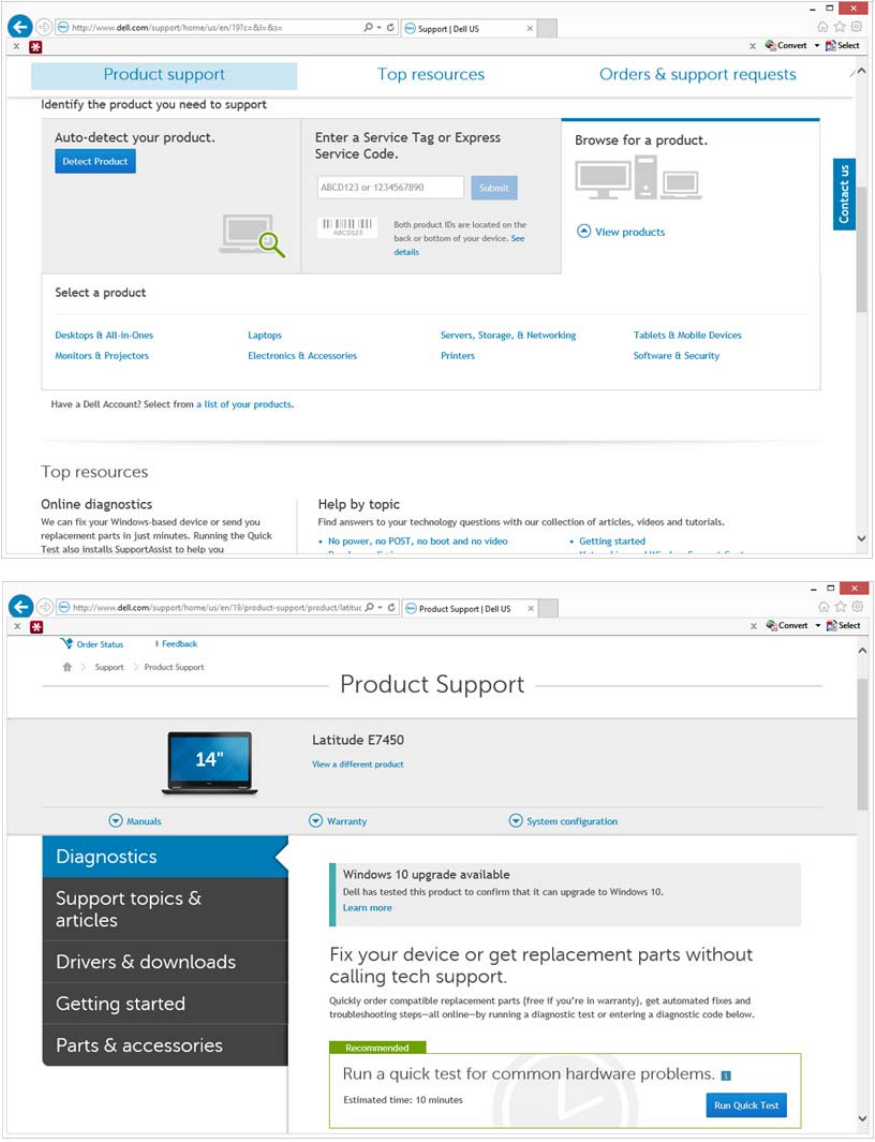
Select the
Operating System
of the target computer.

5
5
Expand the
Security
category.
6
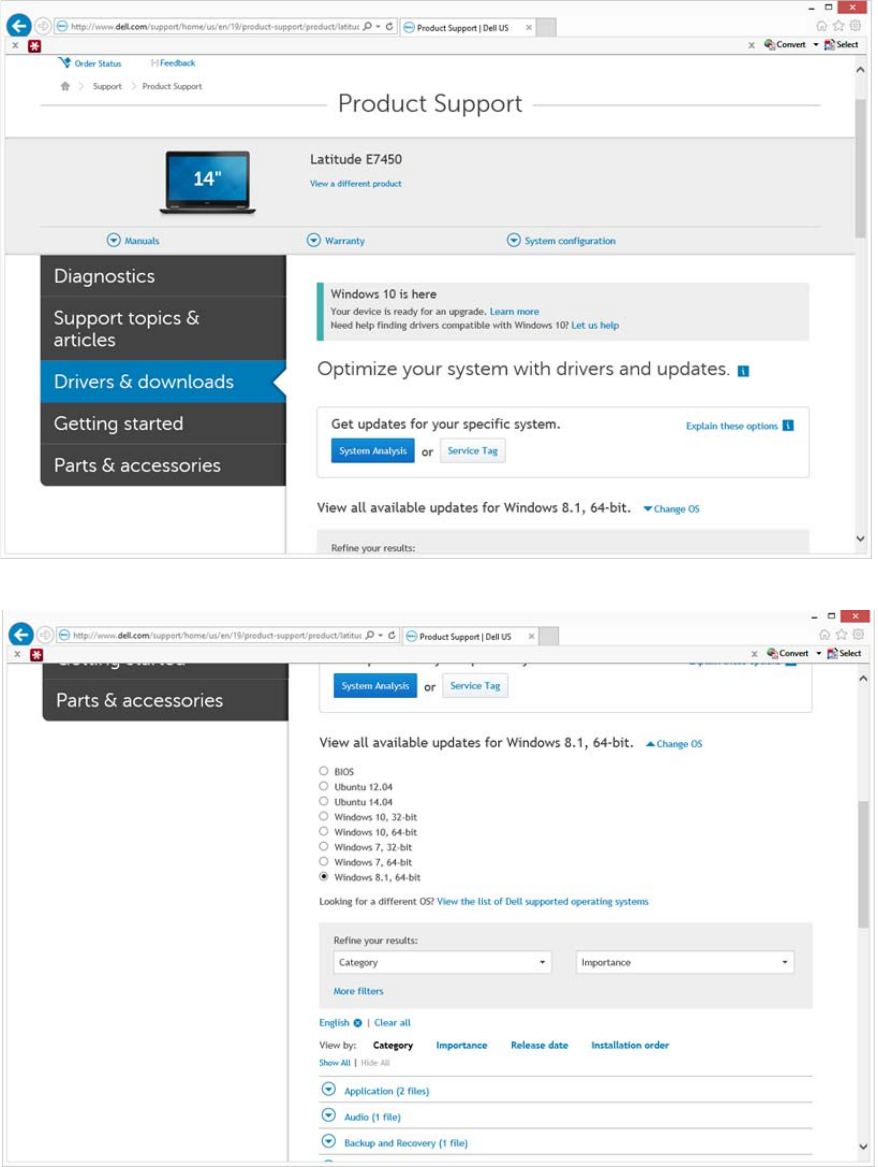
Download and save the Dell ControlVault Drivers.
6
7
Download and save the Dell ControlVault Firmware.
8
Copy the drivers and firmware to the target computers, if needed.
Install Dell ControlVault Driver
1
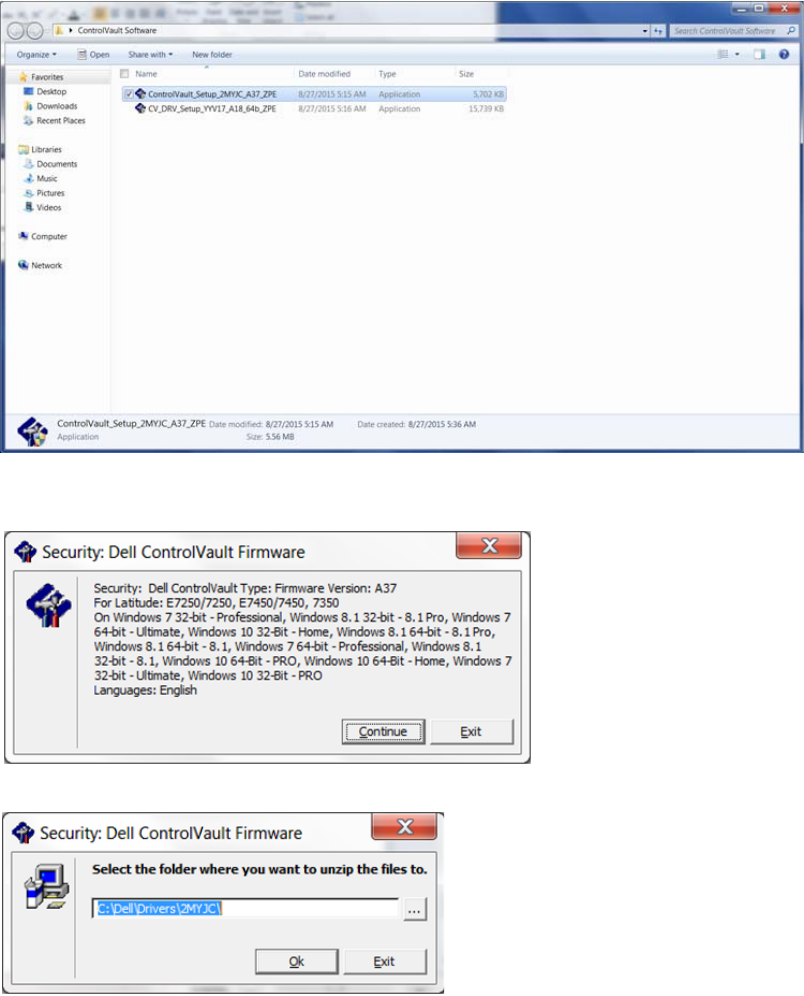
Navigate to the folder which you downloaded the driver installation file.
7
2
Double-click the Dell ControlVault driver to launch the self-extracting executable file.
TIP: Be sure to install the driver first. The filename of the driver
at the time of this document creation
is
ControlVault_Setup_2MYJC_A37_ZPE.exe.
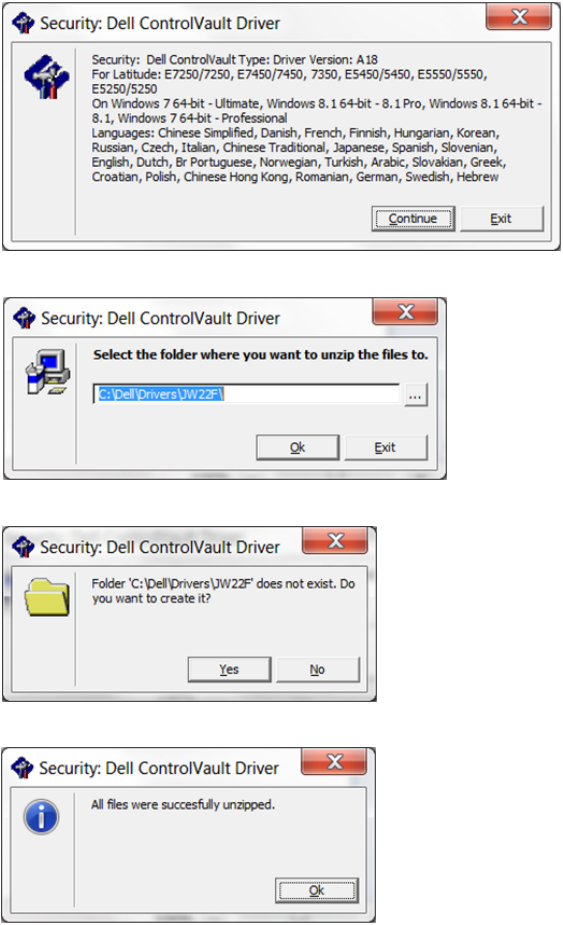
3
Click
Continue
to begin.
4
Click
Ok
to unzip the driver files in the default location of C:\Dell\Drivers\<New Folder>.
5
Click
Yes
to allow the creation of a new folder.
6
Click
Ok
when the successfully unzipped message displays.
8
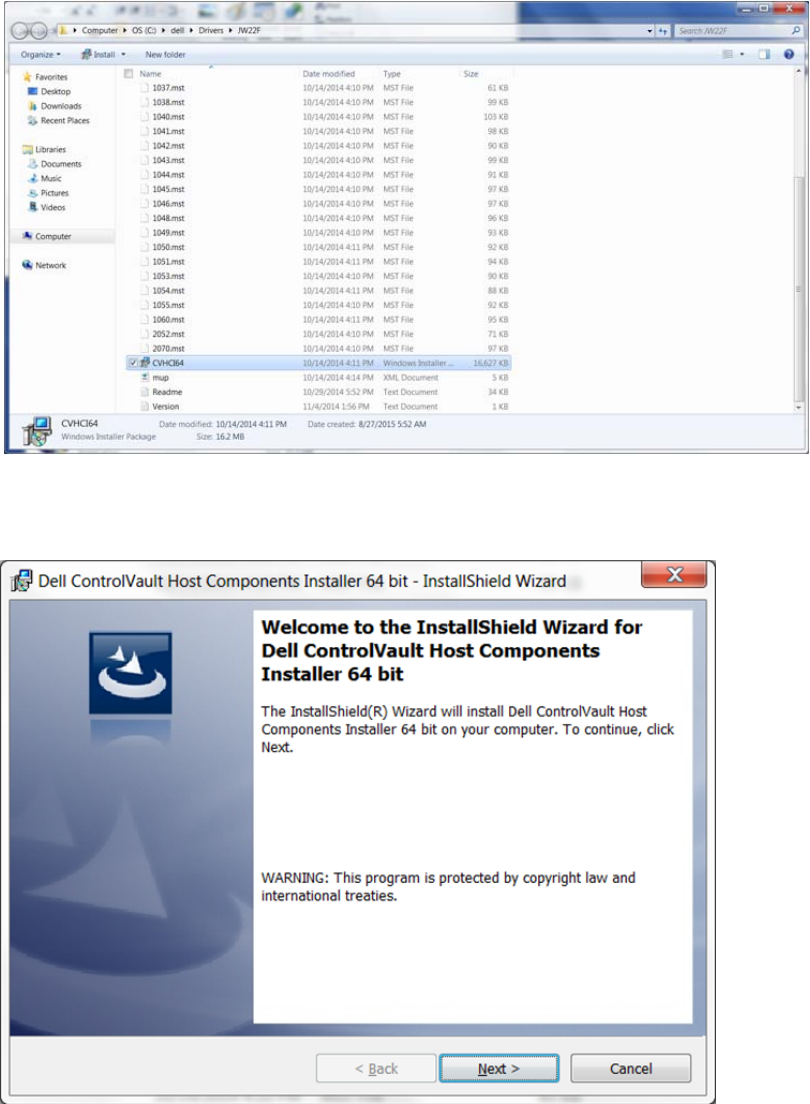
7
The folder which contains the files should display after extraction. If not, navigate to the folder to which you extracted
the files. In this case, the folder is
JW22F
.
8
Double-click
CVHCI64.MSI
to launch the driver installer. [this example is
CVHCI64.MSI
in this example (CVHCI for a
32-bit computer)].
9
Click
Next
at the Welcome screen.
9
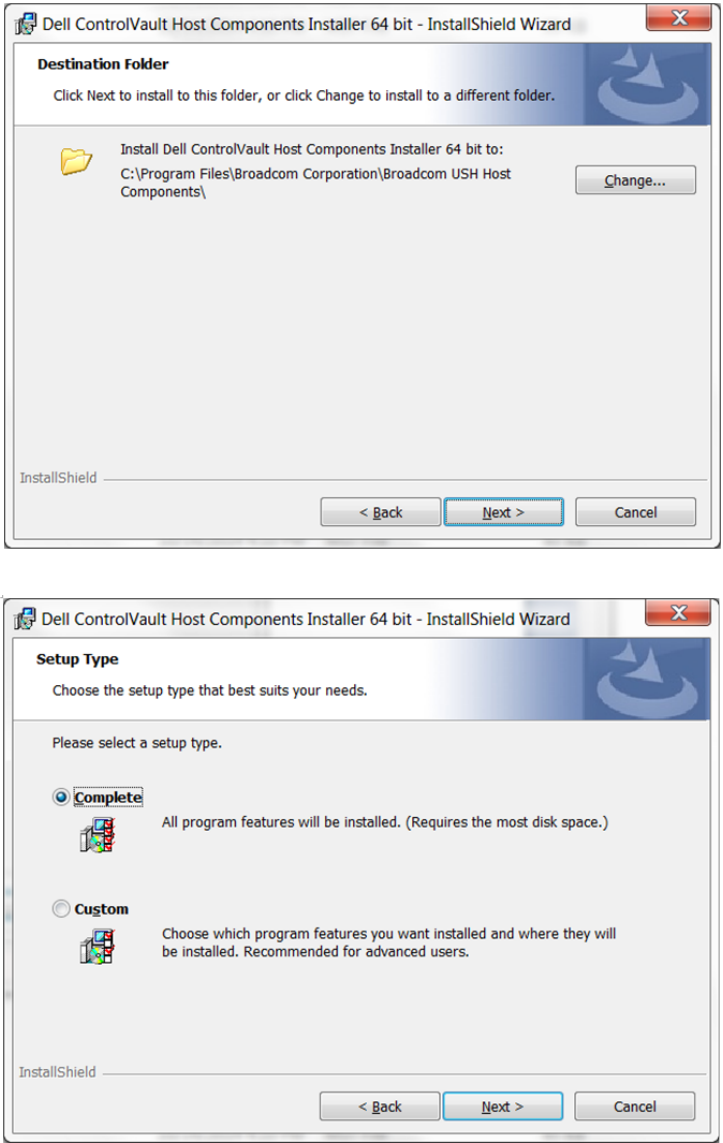
10
Click
Next
to install the drivers in the default location of C:\Program Files\Broadcom Corporation\Broadcom USH Host
Components\.
11
Select the
Complete
option and click
Next
.
10
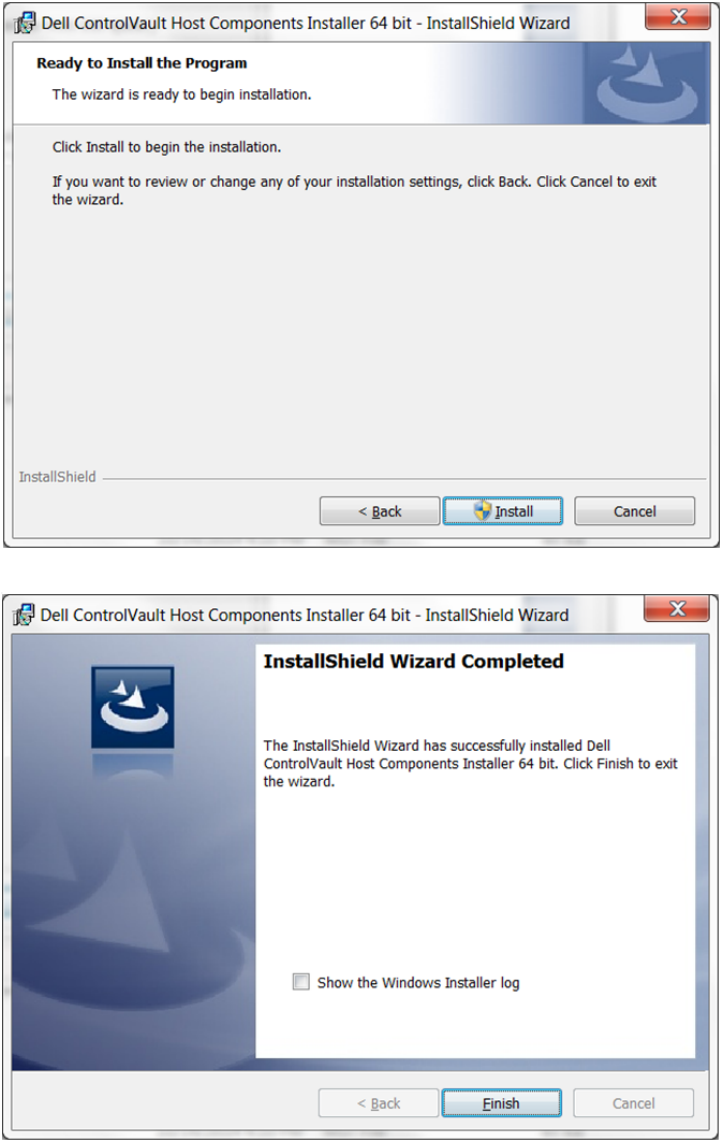
12
Click
Install
to begin the installation of the drivers.
13
Optionally check the box to display the installer log file. Click
Finish
to exit the wizard.
11
Verify Driver Installation
• The Device Manager will have a Dell ControlVault device (and other devices) depending on the operating system and
hardware configuration.
Install Dell ControlVault Firmware
1
Navigate to the folder which you downloaded the firmware installation file.
2
Double-click the Dell ControlVault firmware to launch the self-extracting executable file.
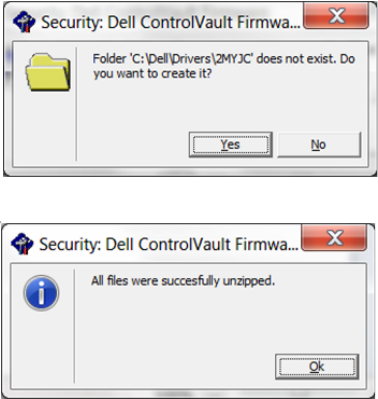
3
Click
Continue
to begin.
4
Click
Ok
to unzip the driver files in the default location of C:\Dell\Drivers\<New Folder>.
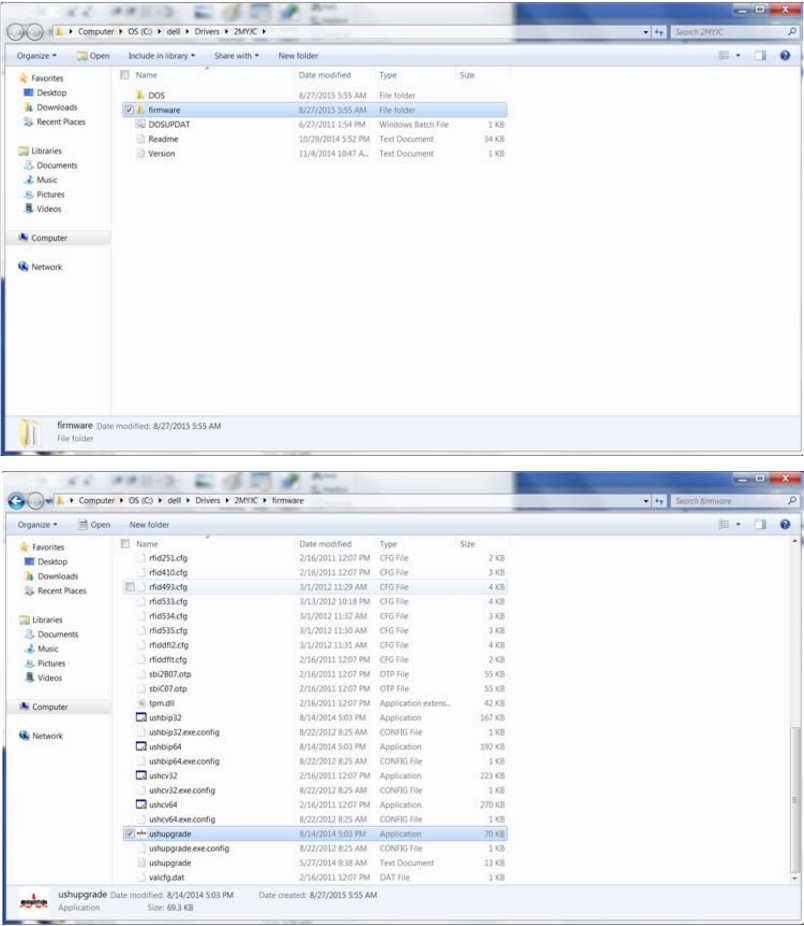
12
5
Click
Yes
to allow the creation of a new folder.
6
Click
Ok
when the successfully unzipped message displays.
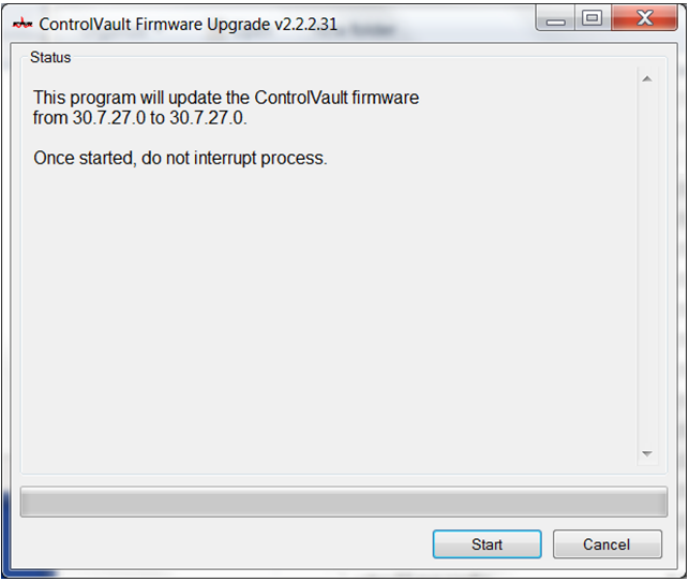
13
7
The folder which contains the files should display after extraction. If not, navigate to the folder to which you extracted
the files. Select the
firmware
folder.
8
Double-click
ushupgrade.exe
to launch the firmware installer.
14
9
Click
Start
to begin the firmware upgrade.
IMPORTANT: You may be asked to enter the admin password if upgrading from an older version of firmware. Enter Broadcom as the
password and click Enter if presented with this dialog.
15
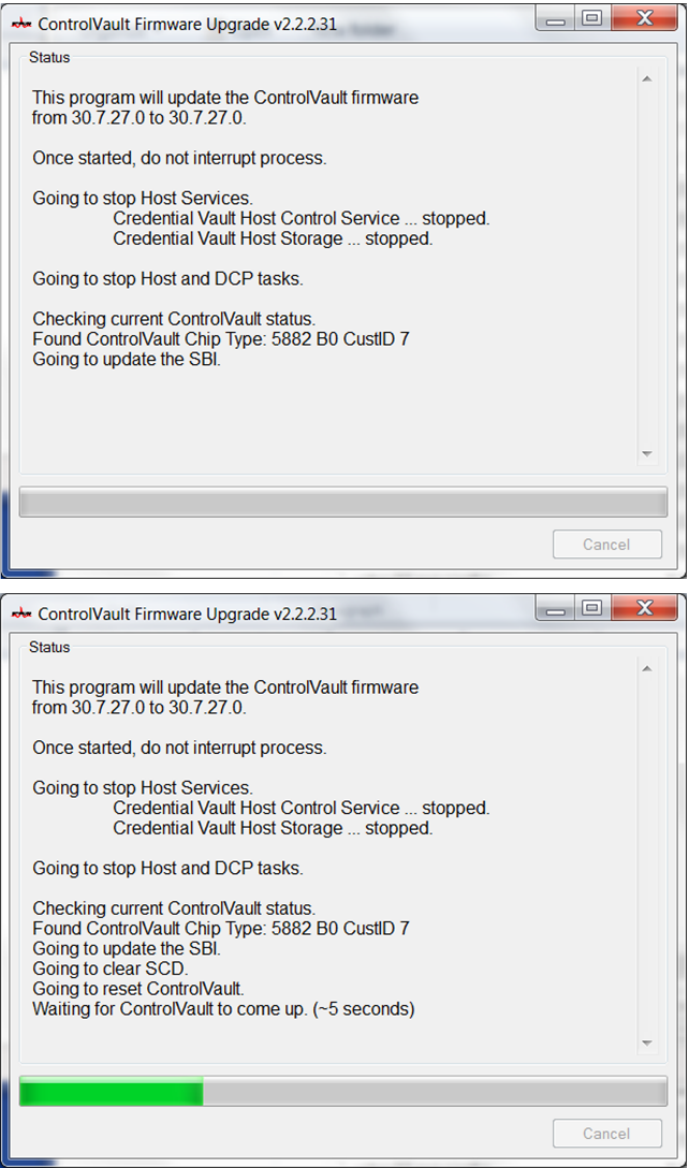
Several status messages display.
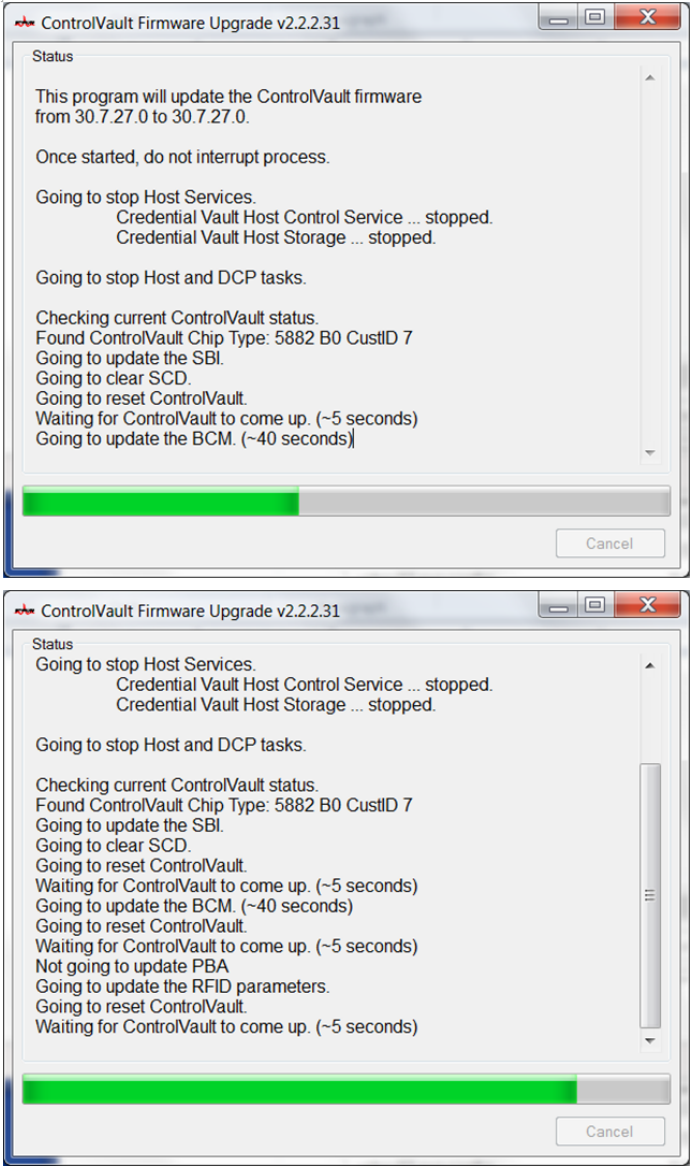
16
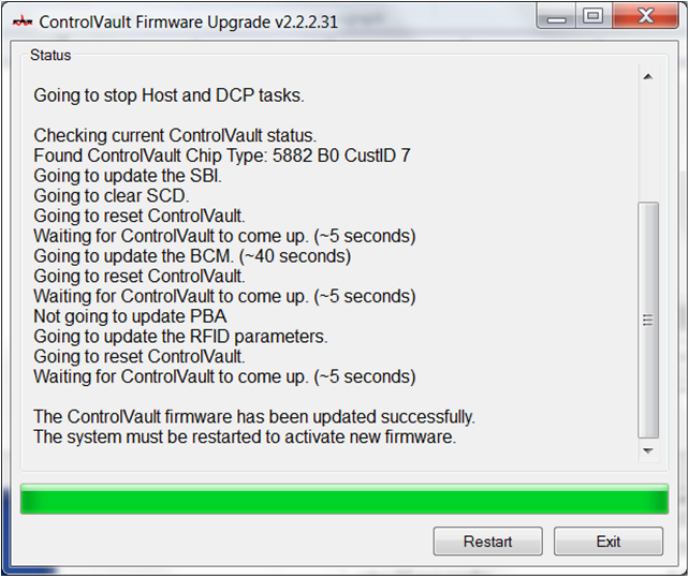
17
10
Click
Restart
to complete the firmware upgrade.
The update of the Dell ControlVault drivers and firmware is complete.
18
