Delta Electronics orporated D85YYYYYY DLP Projector User Manual
Delta Electronics Incorporated DLP Projector
UserManual.wiki
>
Delta Electronics orporated
>
D85YYYYYY User Manual
user manual
Navigation menu
Upload a User Manual
Namespaces
Wiki Guide
HTML
PDF
Info
Views
User Manual
Discussion / Help
Navigation


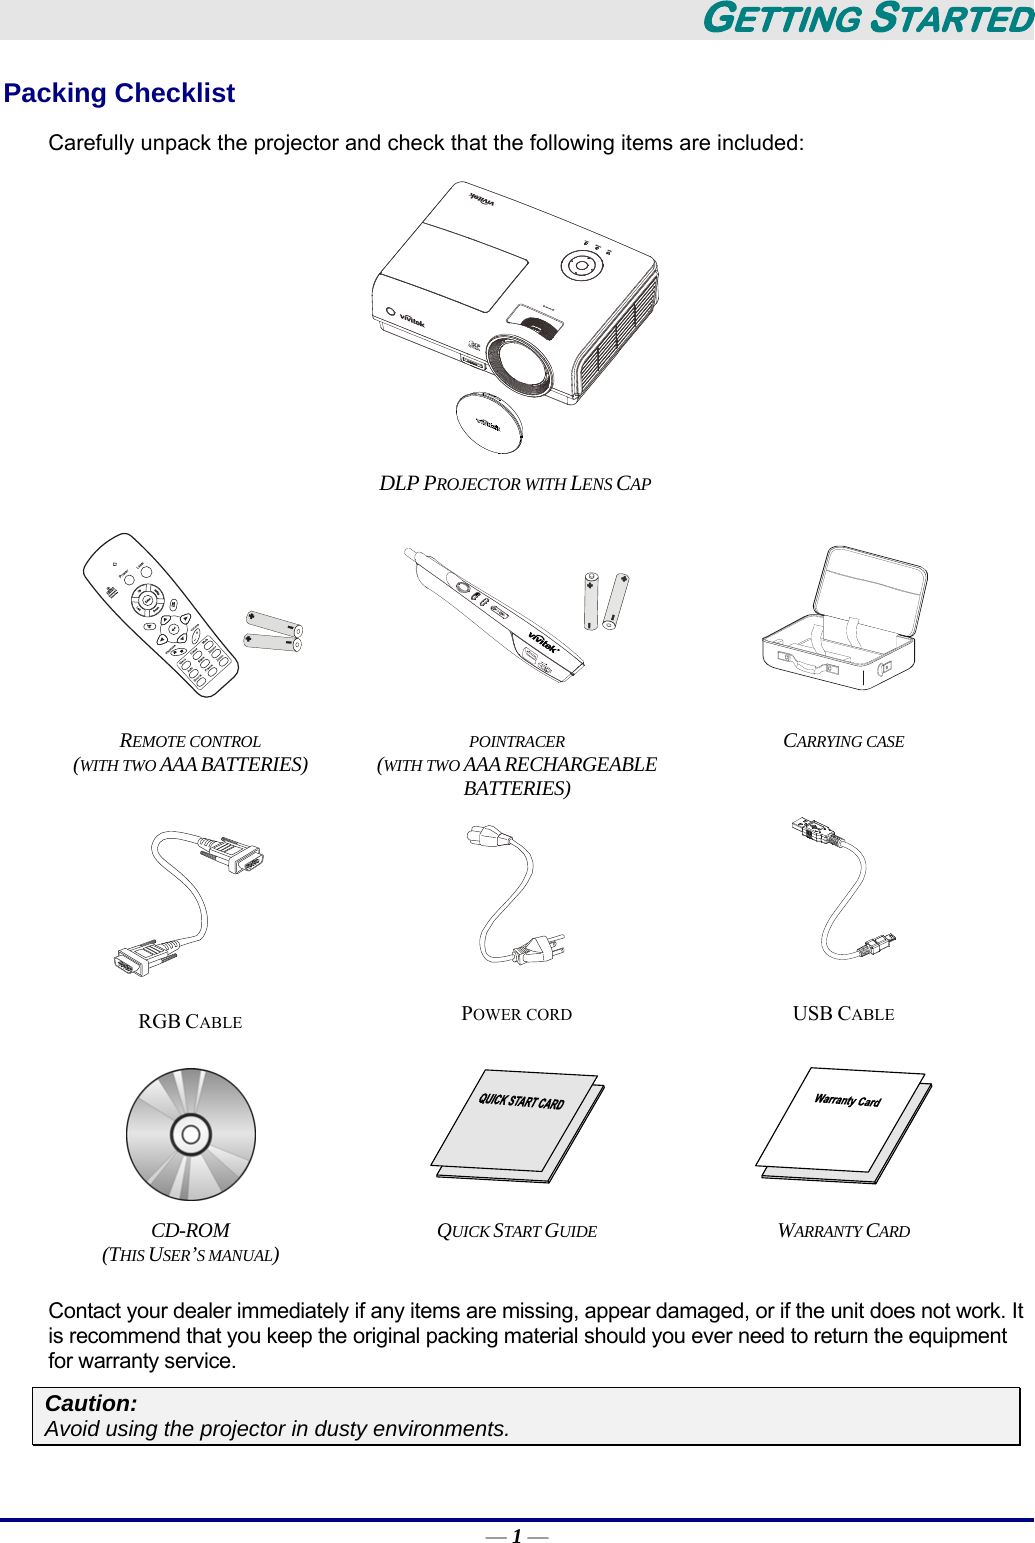


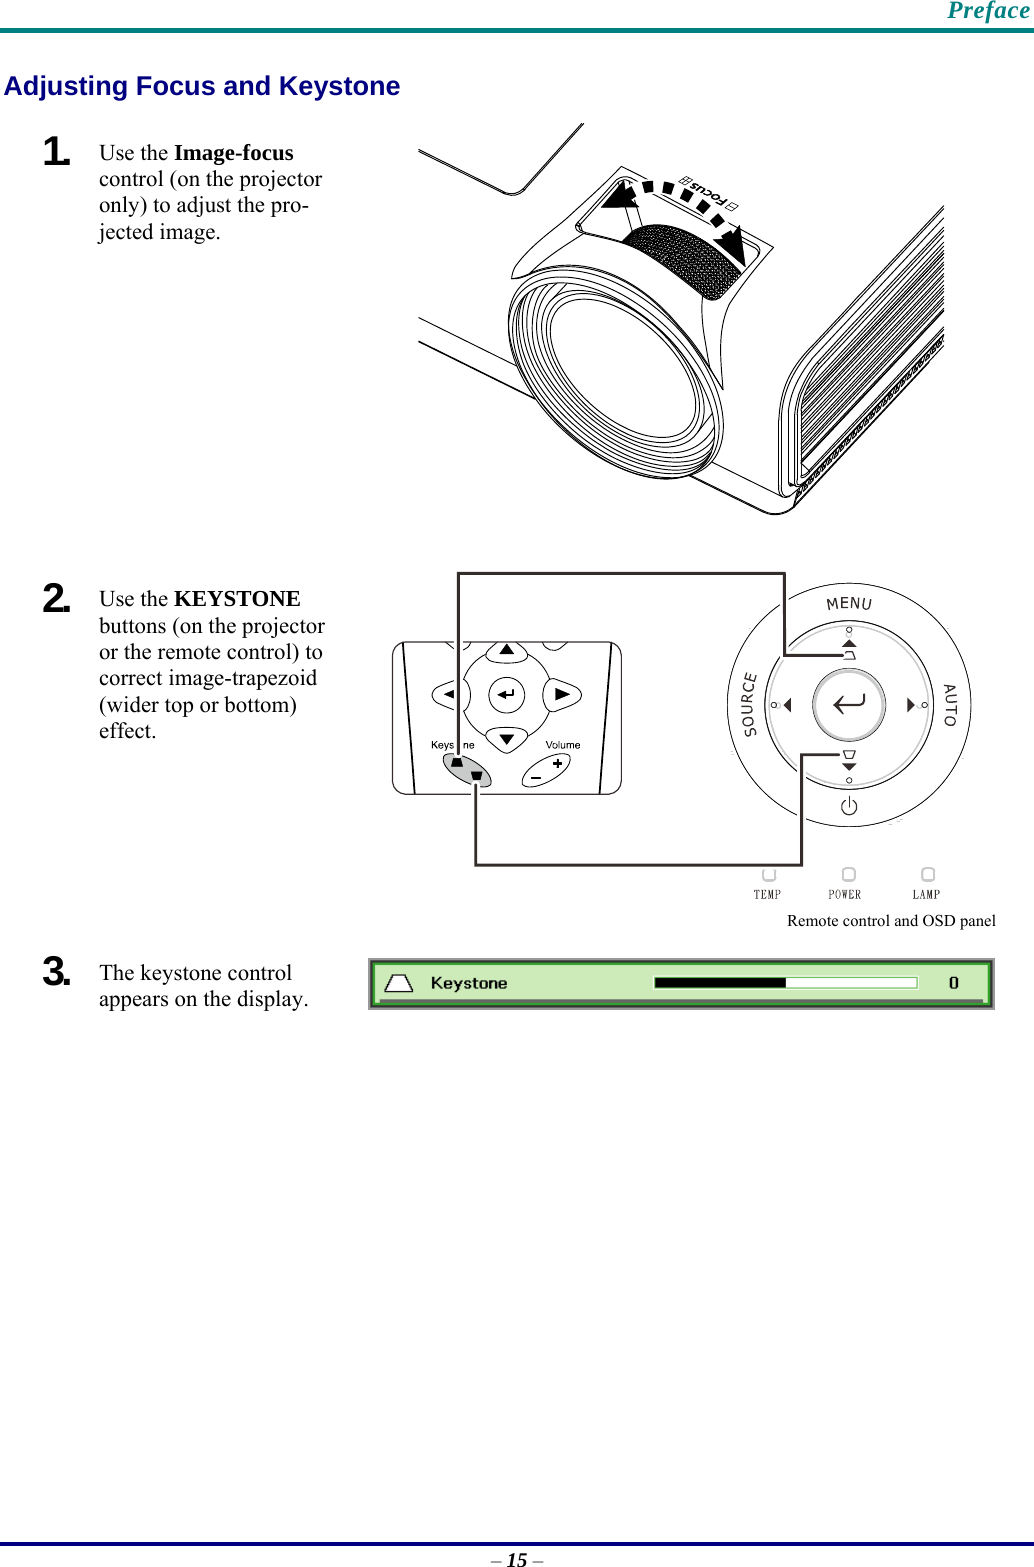
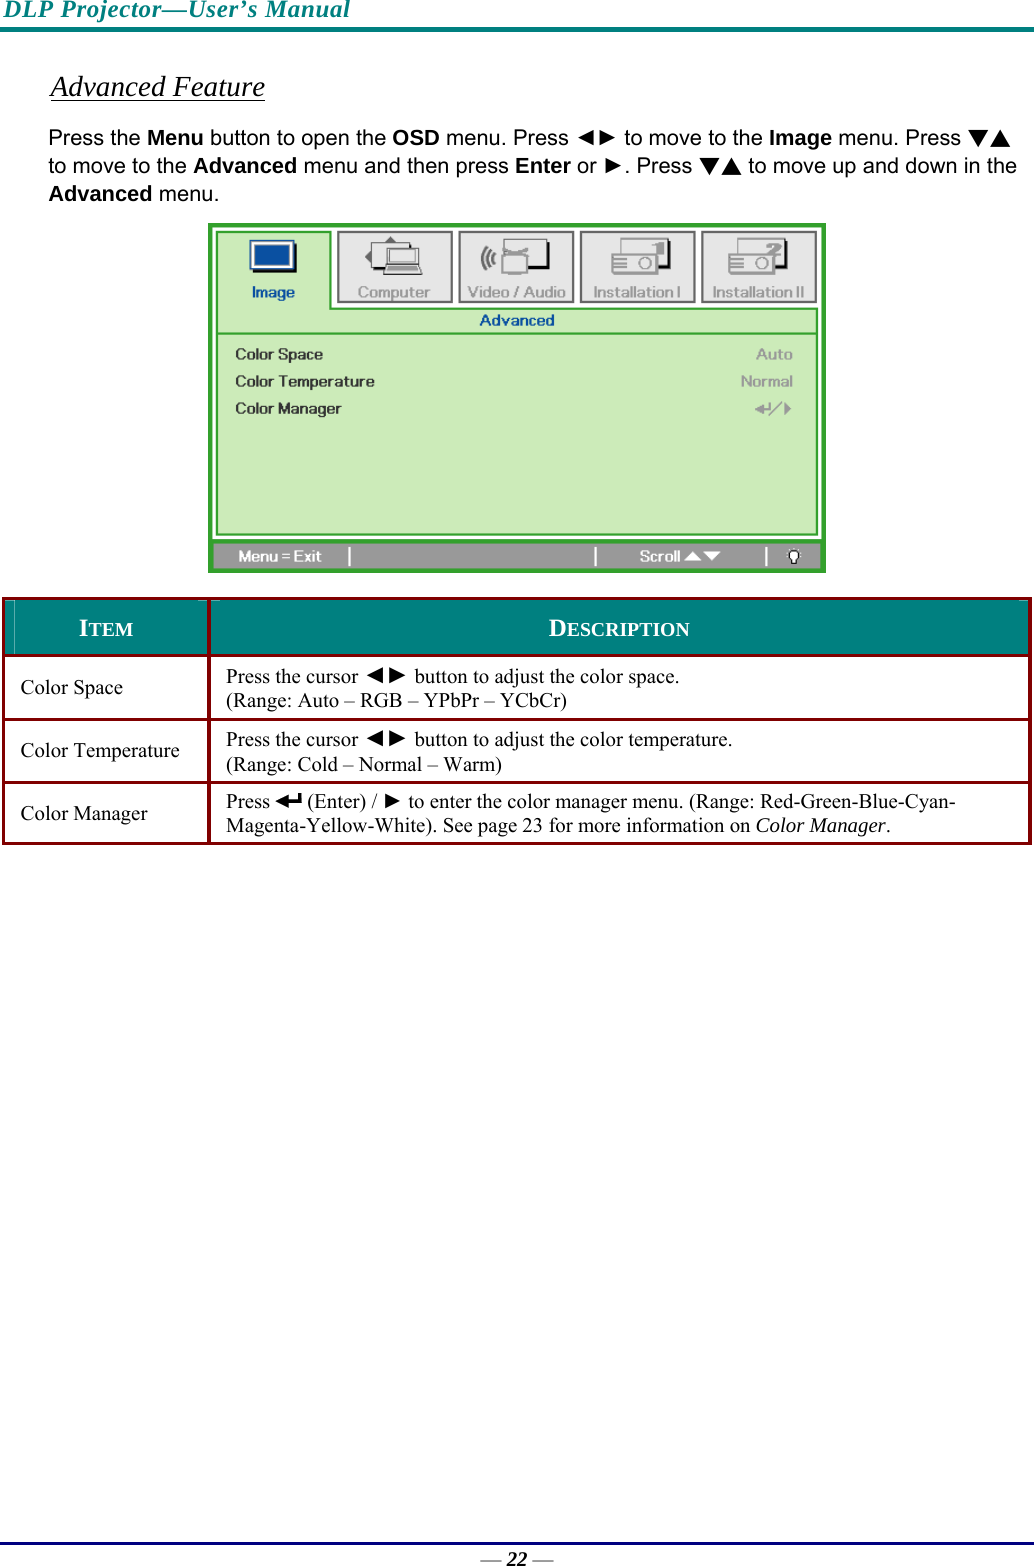
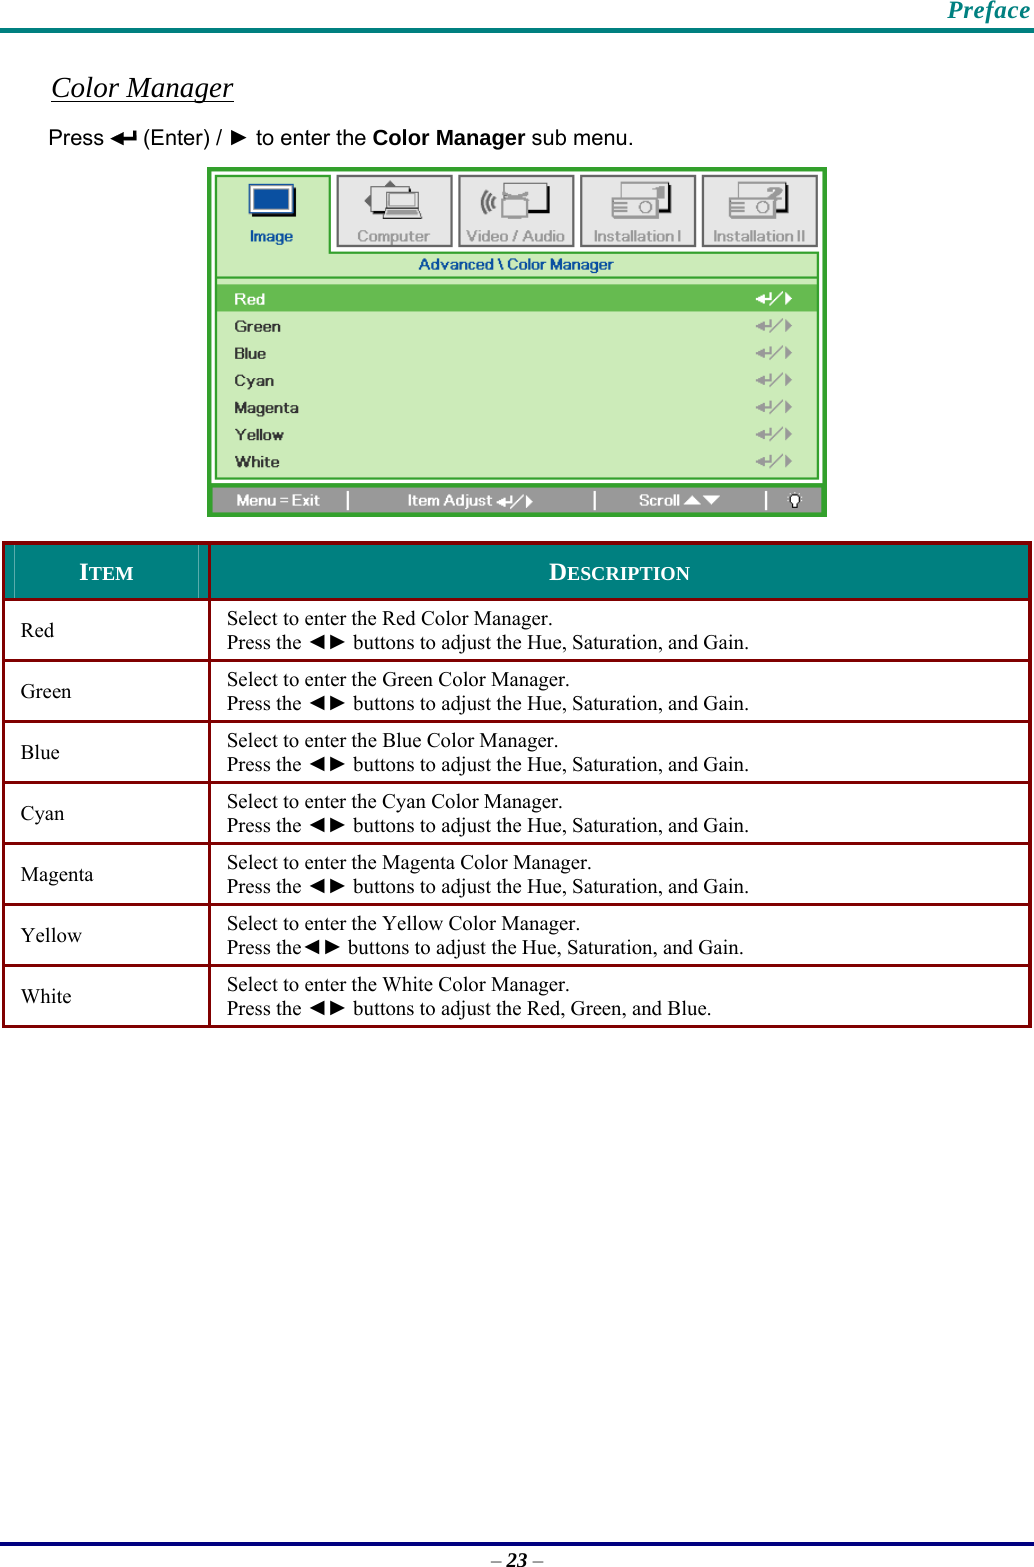
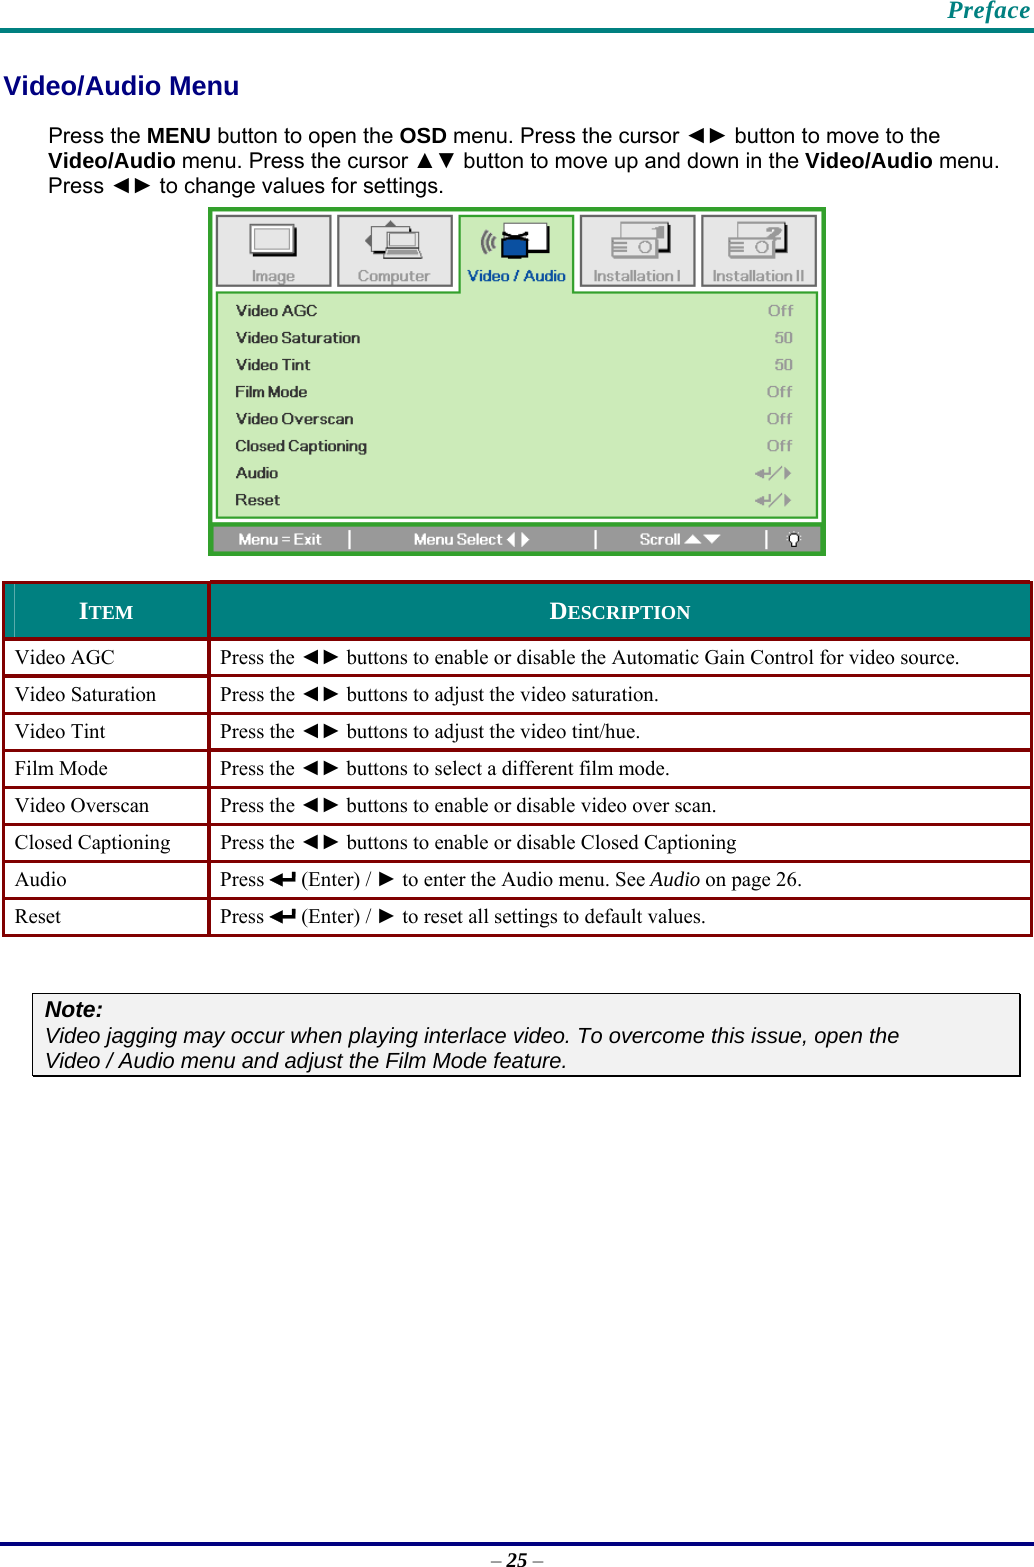
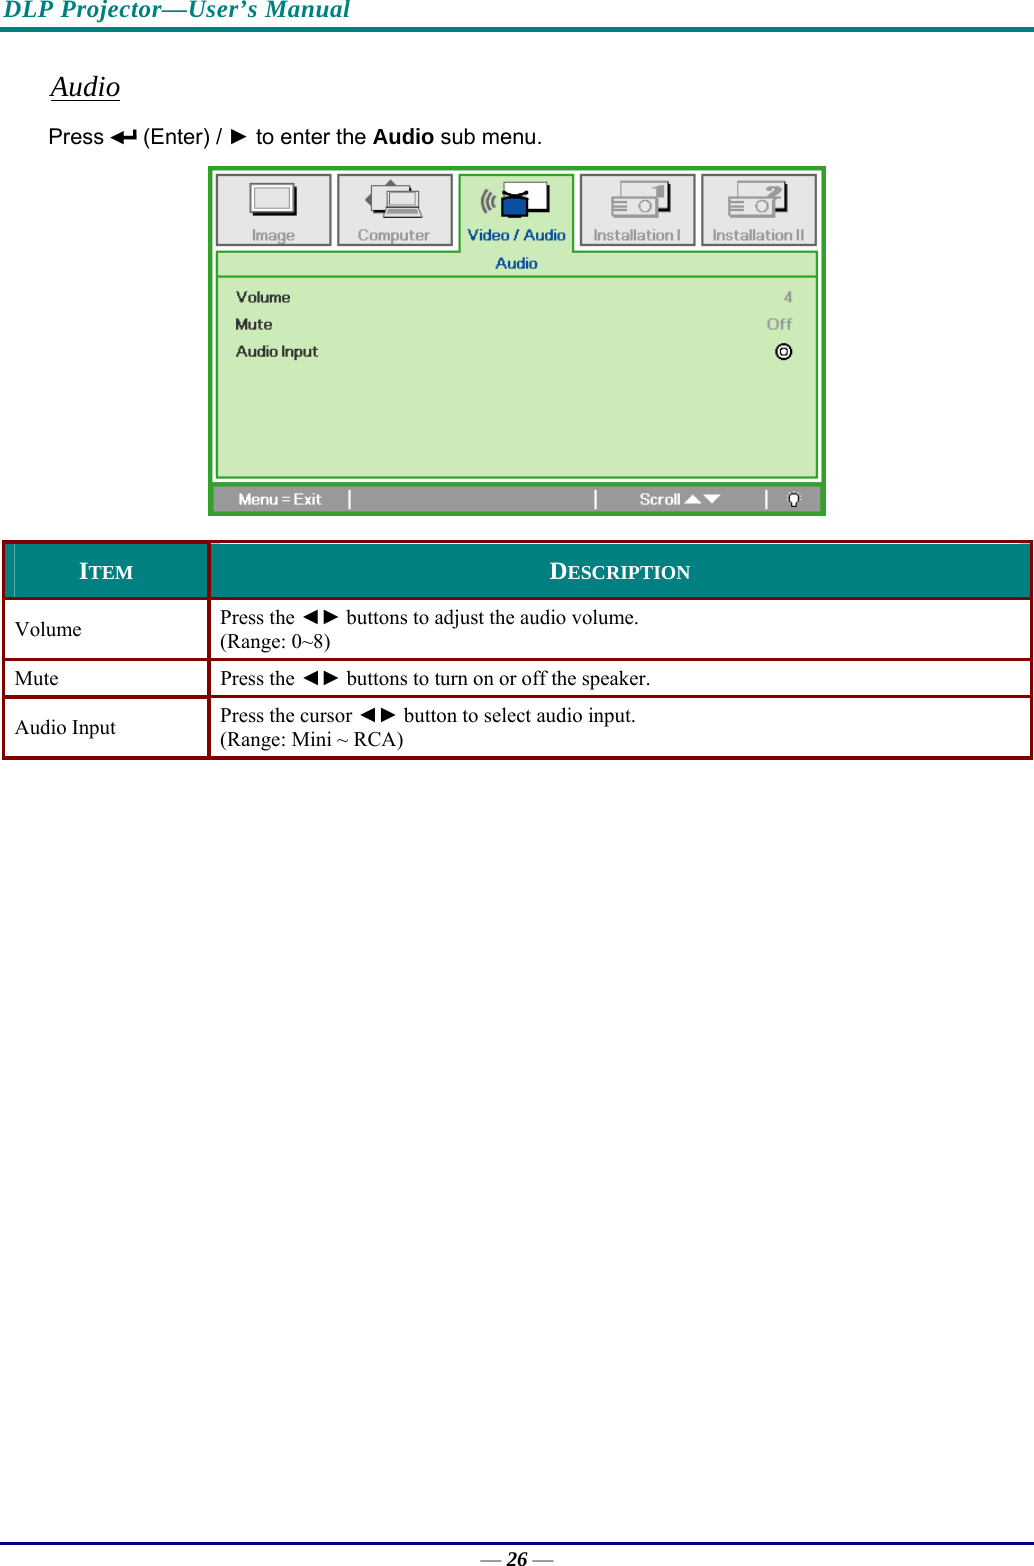
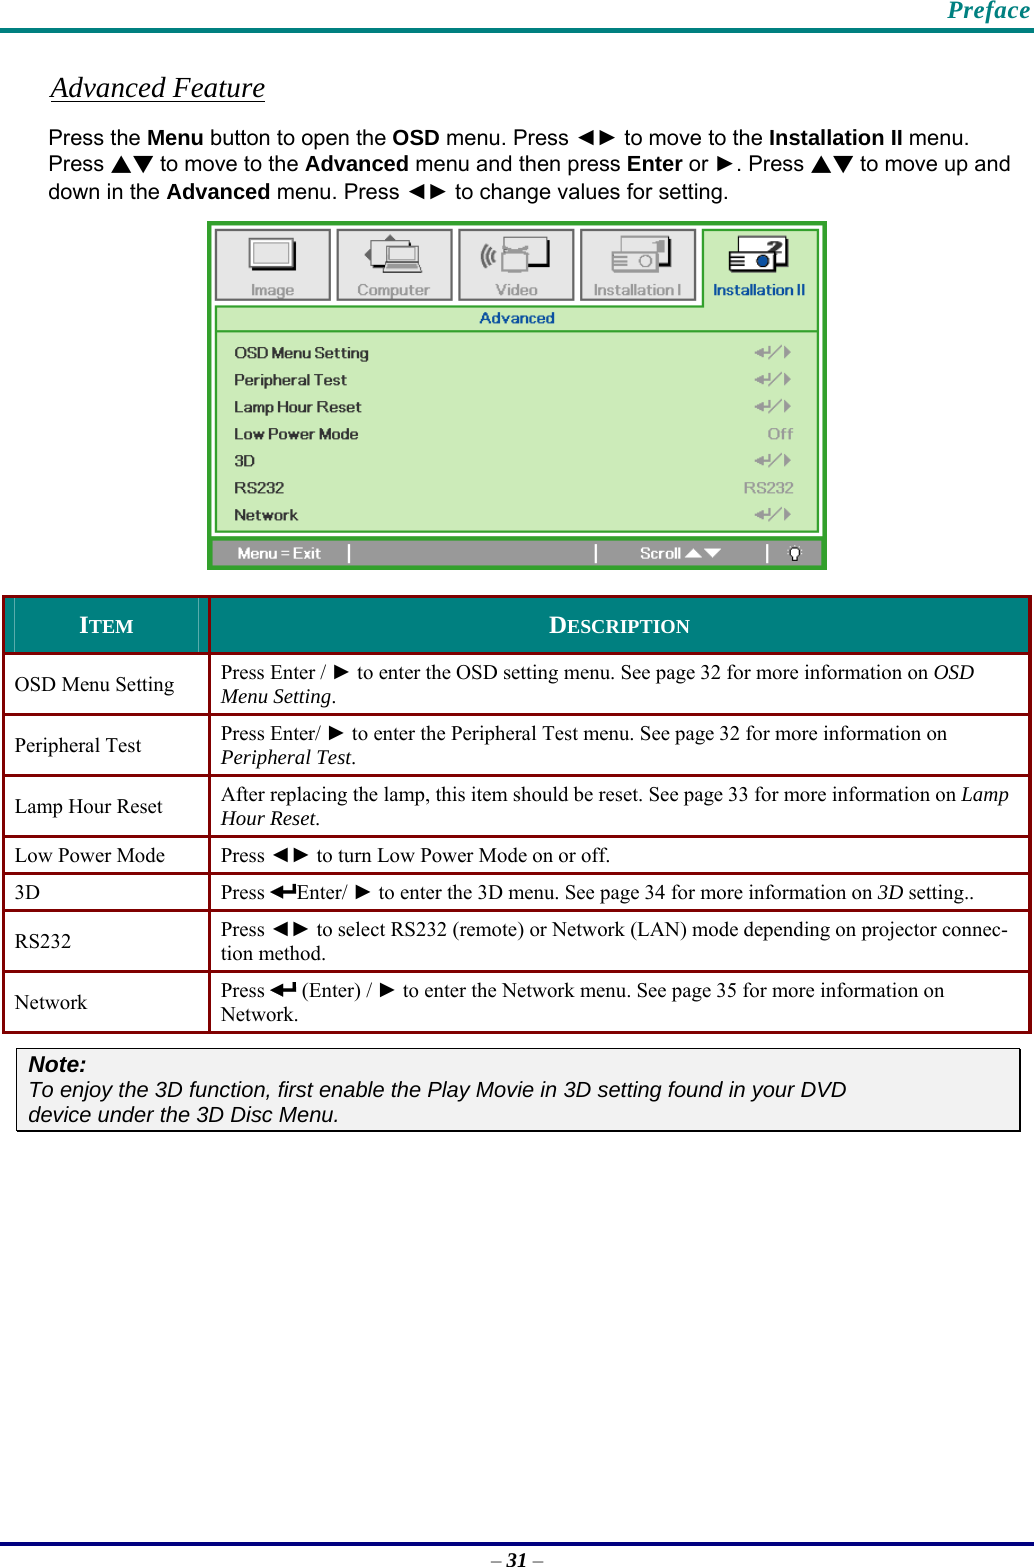
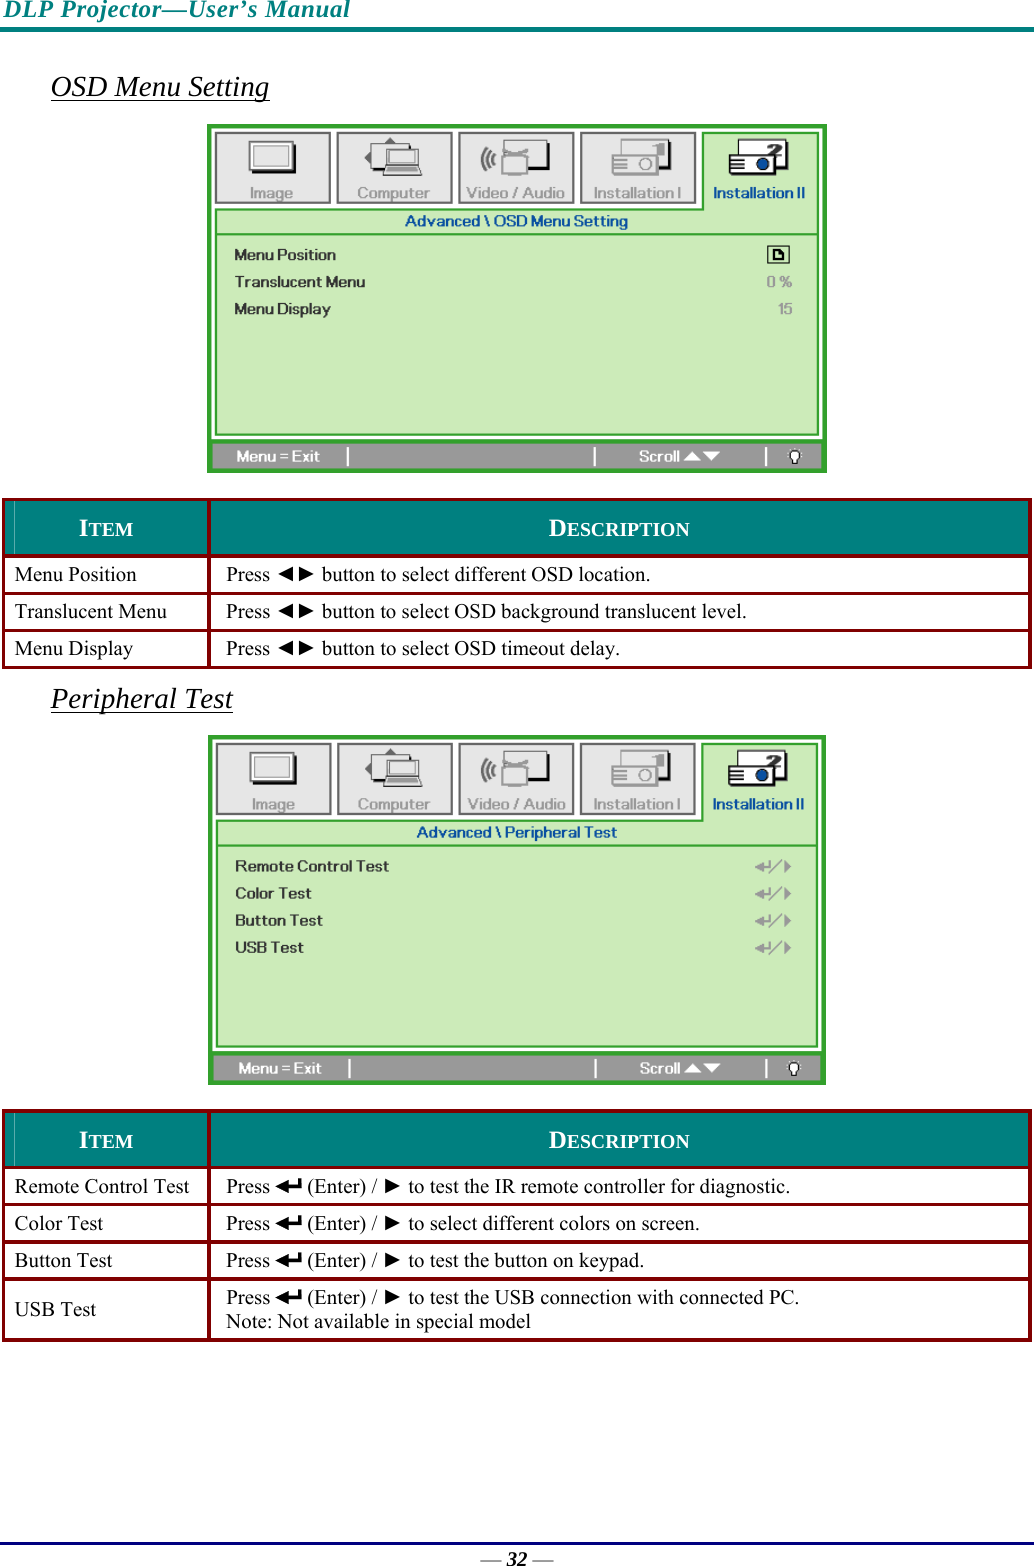
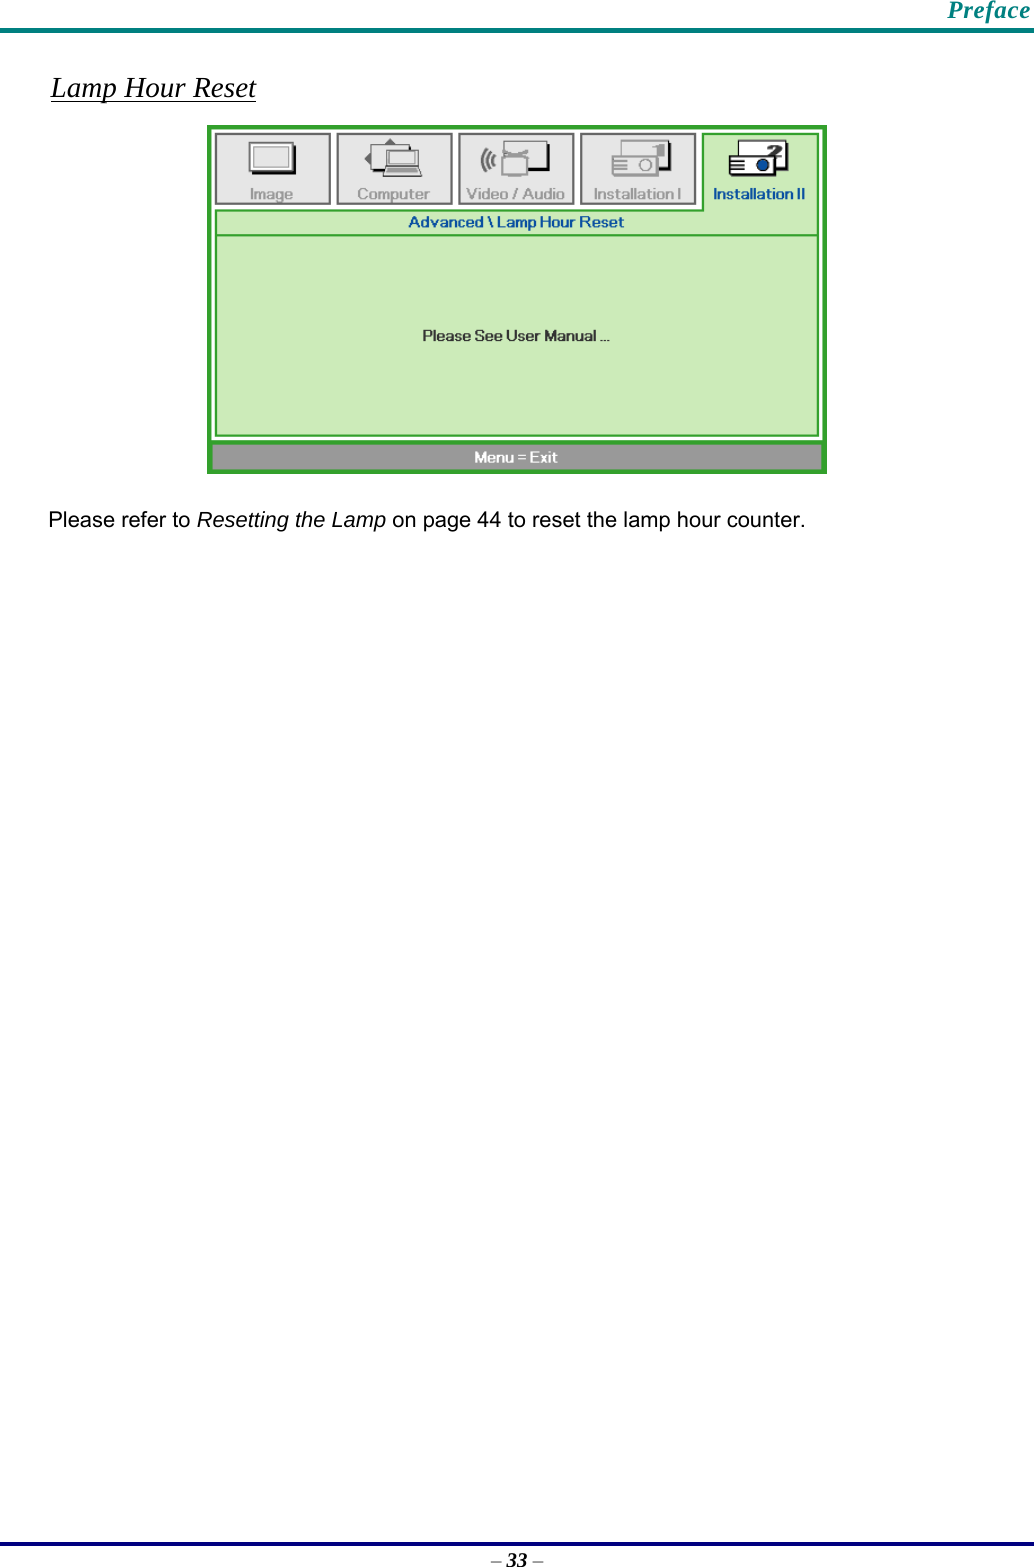
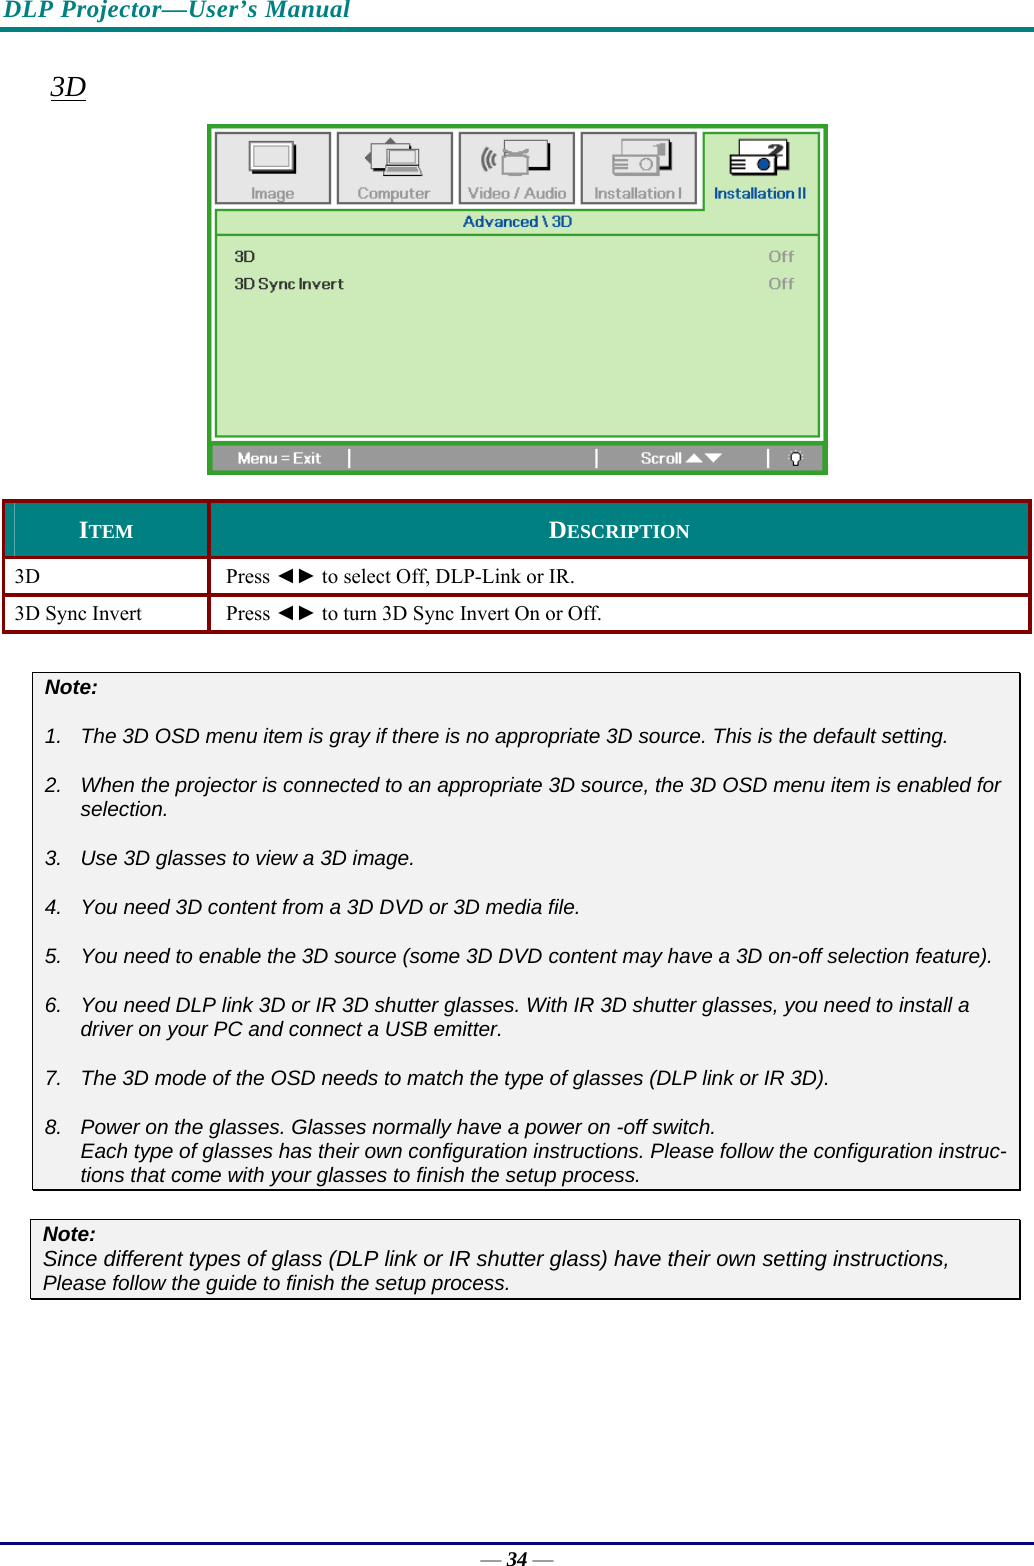
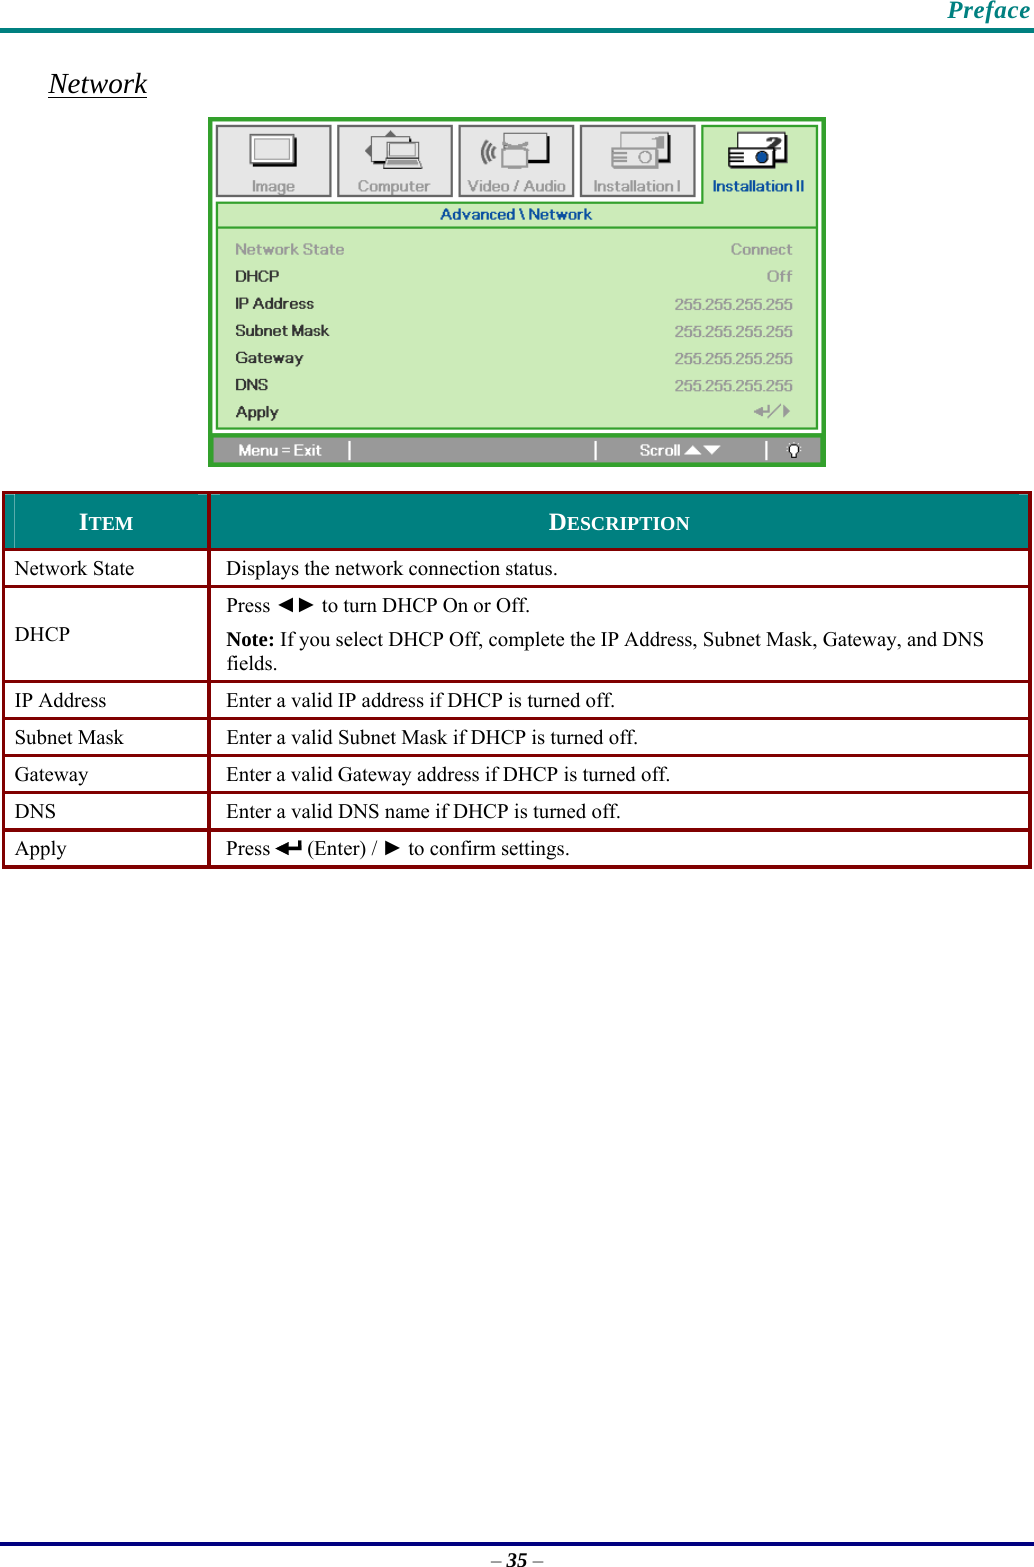
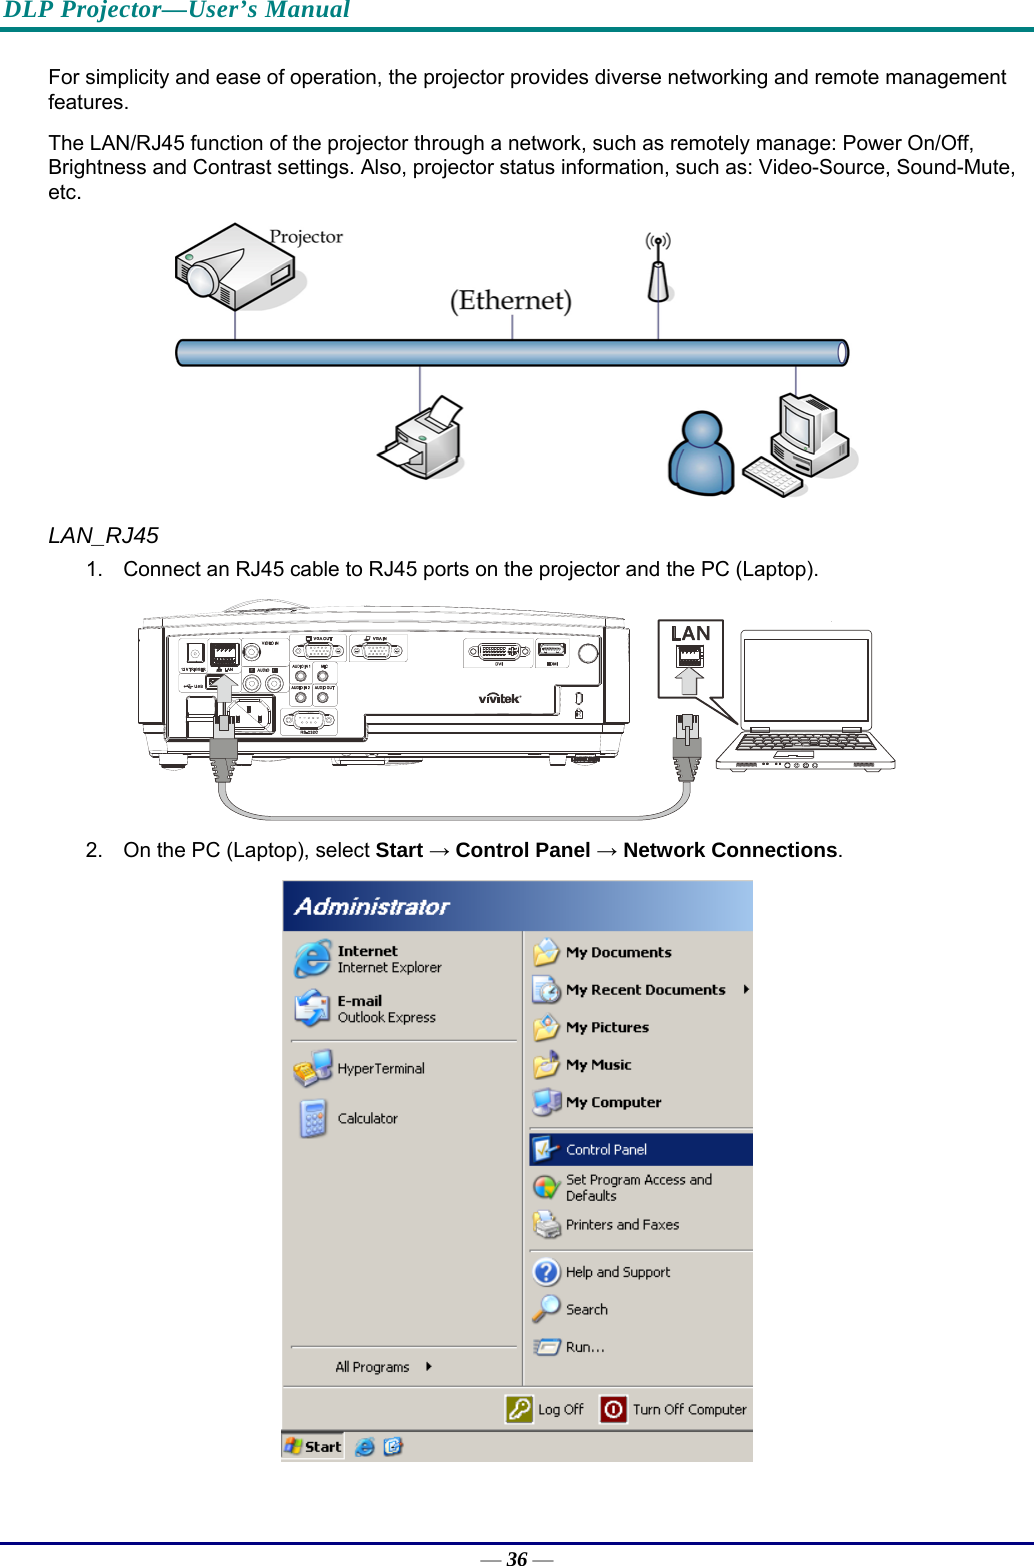
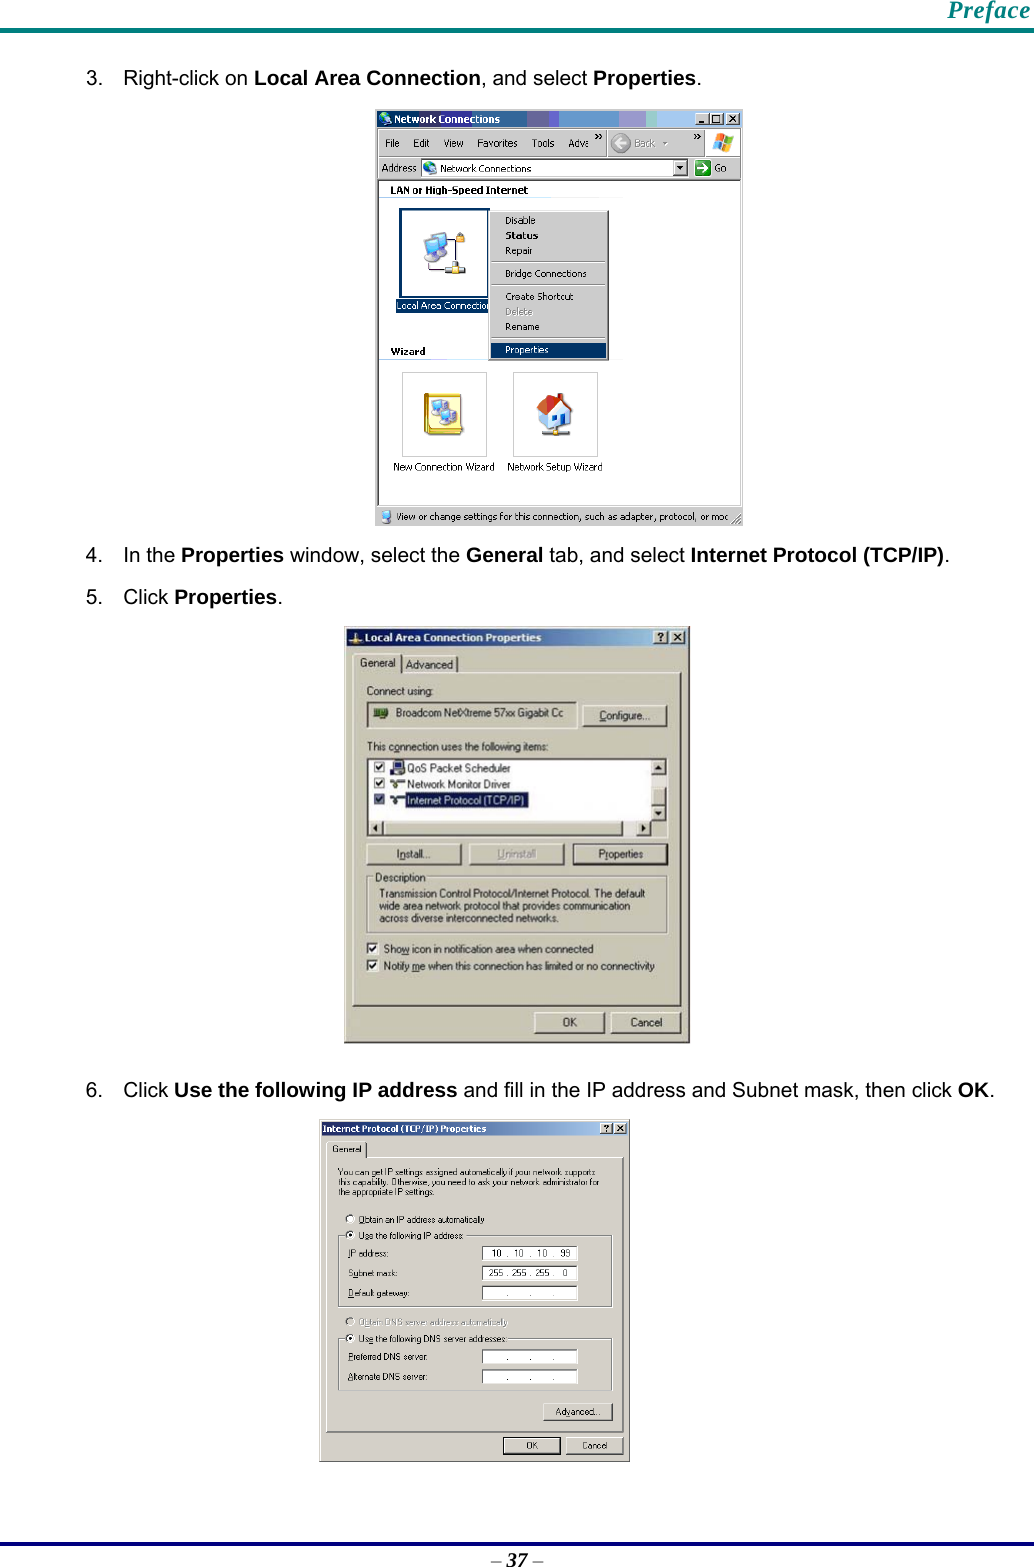
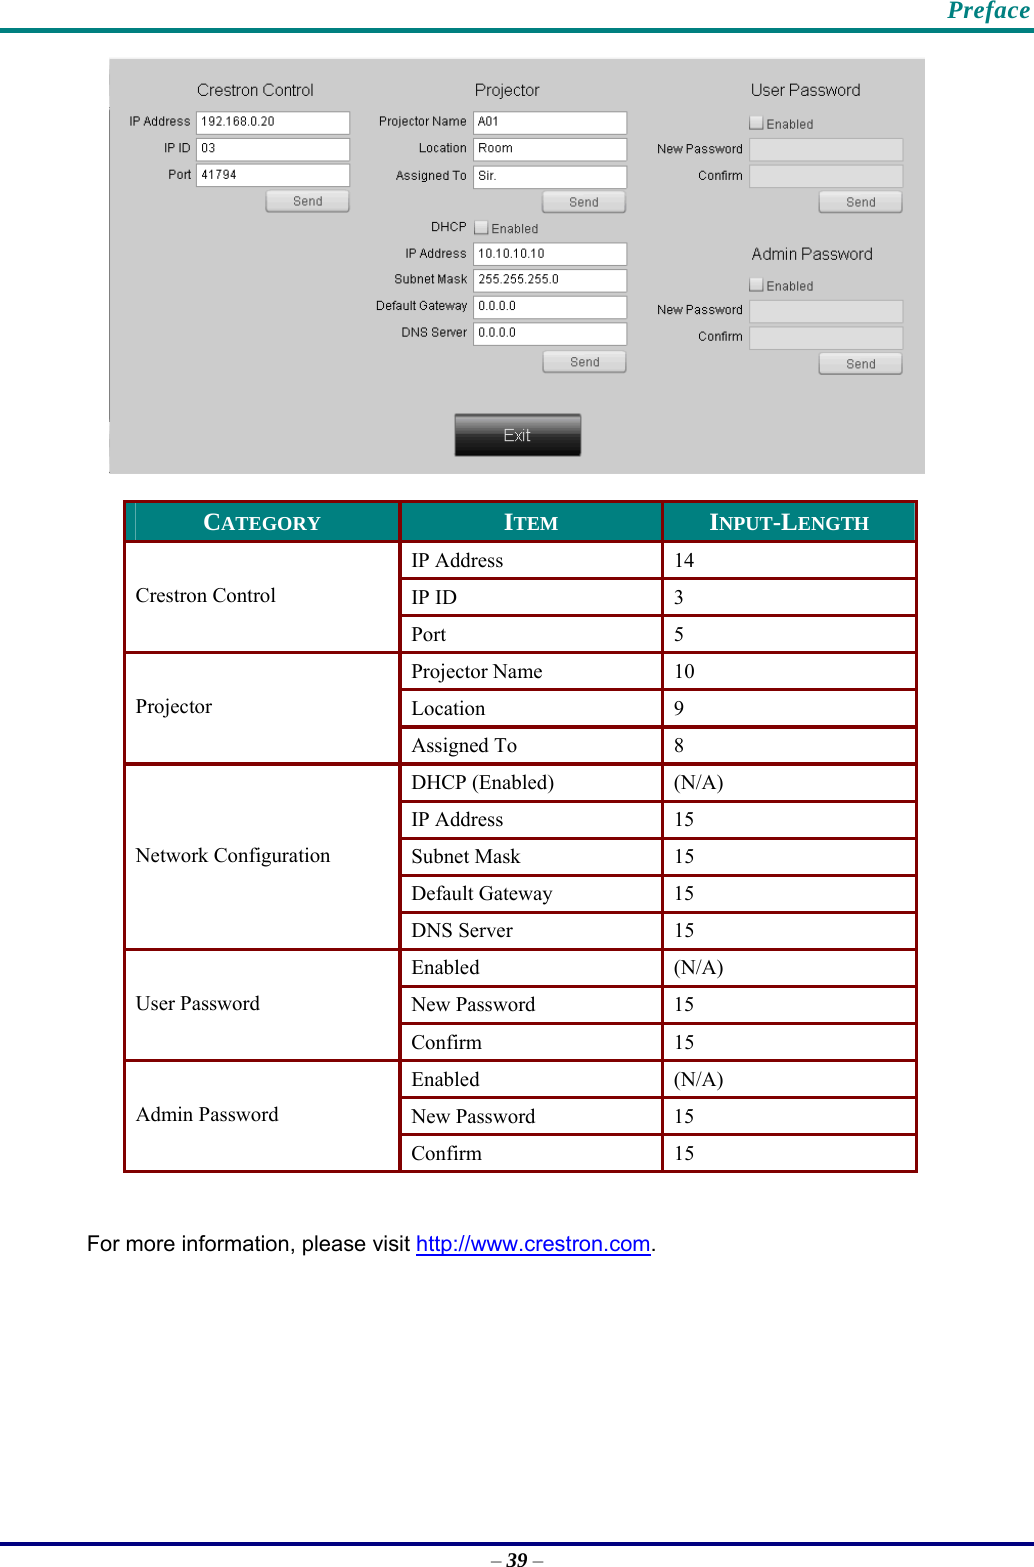
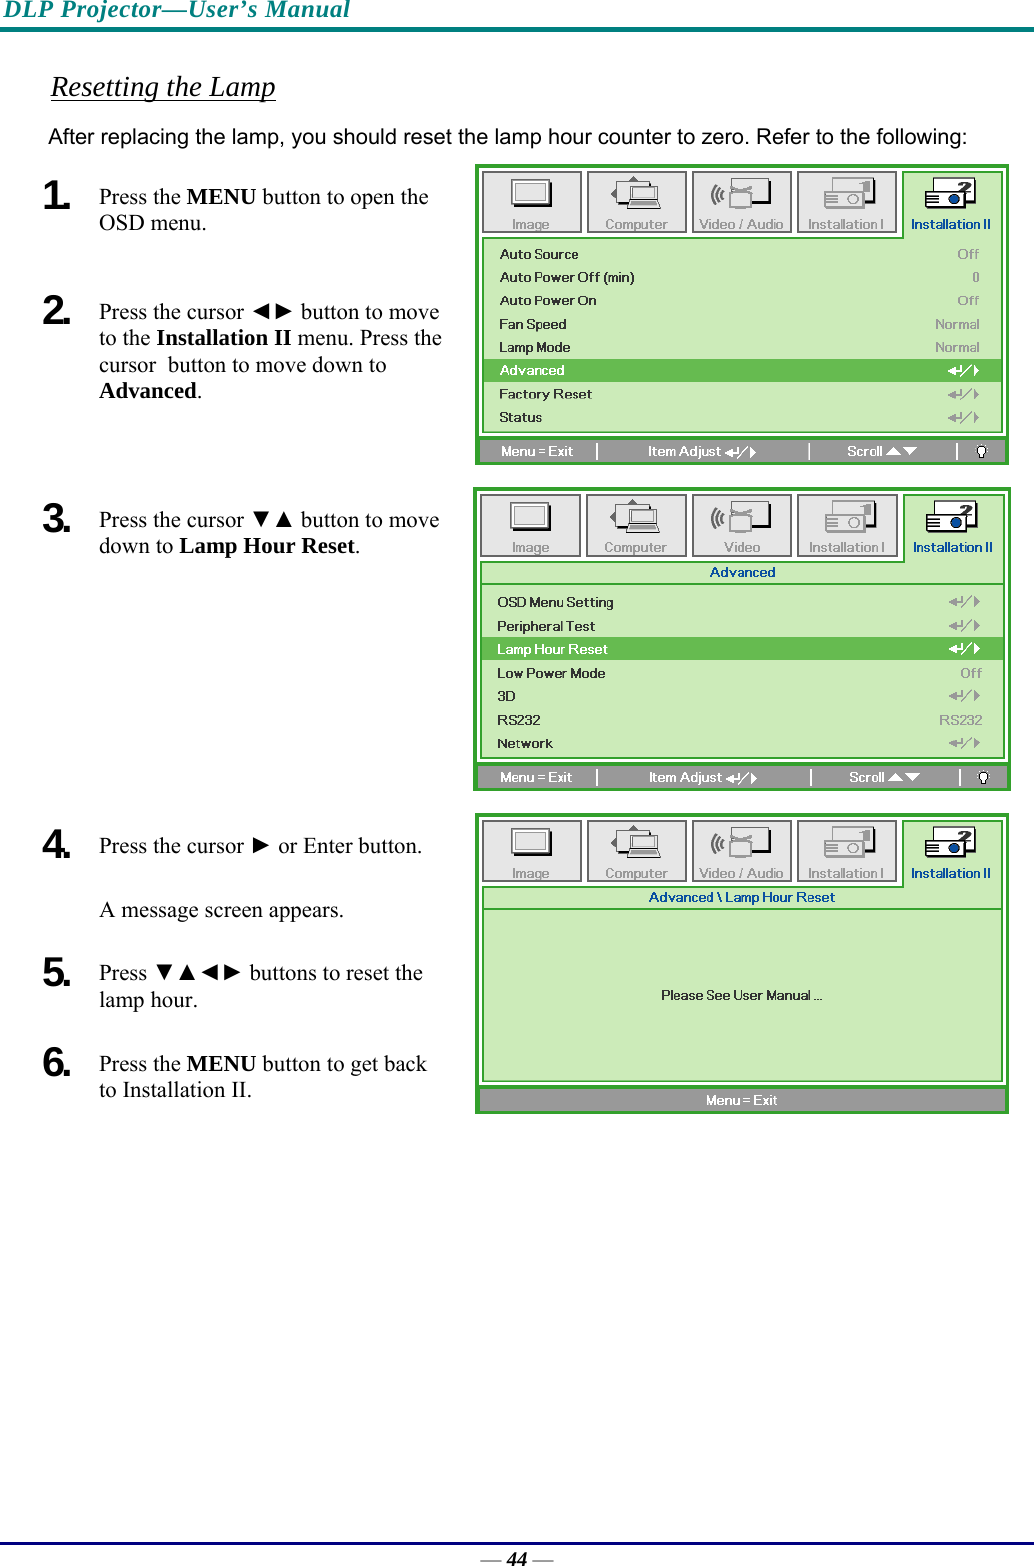
![DLP Projector—User’s Manual Adjusting the Projector Level Take note of the following when setting up the projector: • The projector table or stand should be level and sturdy. • Position the projector so that it is perpendicular to the screen. • Ensure the cables are in a safe location. You could trip over them. ADC 1. To raise the level of the projector, lift the projector [A] and press the height-adjuster button [B]. The height adjuster drops down [C]. 2. To lower the level of the projector, press the height-adjuster button and push down on the top of the projector. 3. To adjust the angle of the picture, turn the tilt-adjuster [D] right or left until the desired angle has been achieved. — 14 —](https://usermanual.wiki/Delta-Electronics-orporated/D85YYYYYY/User-Guide-1722801-Page-22.png)