Delta Electronics orporated DP3625W Projector User Manual wireless manaul
Delta Electronics Incorporated Projector wireless manaul
User Manual

ADDENDUM FOR THE DLP PROJECTOR
About this Document
This document is intended for network administrators.
Copyright
This publication, including all photographs, illustrations and software, is protected under international copy-
right laws, with all rights reserved. Neither this document, nor any of the material contained herein, may be
reproduced without written consent of the author.
© Copyright July, 2004
Disclaimer
The information in this document is subject to change without notice. The manufacturer makes no repre-
sentations or warranties with respect to the contents hereof and specifically disclaims any implied
warranties of merchantability or fitness for any particular purpose. The manufacturer reserves the right to
revise this publication and to make changes from time to time in the content hereof without obligation of
the manufacturer to notify any person of such revision or changes.
Trademark Recognition
All product names used in this document are the properties of their respective owners and are acknowl-
edged.

T
T
TD
D
DW
W
W6
6
68
8
80
0
0
M
M
Ma
a
an
n
nu
u
ua
a
al
l
l(
(
(W
W
Wi
i
ir
r
re
e
el
l
le
e
es
s
ss
s
s
p
p
po
o
or
r
rt
t
ti
i
io
o
on
n
n)
)
)
I. OPERATING ENVIRONMENT
Computer Configuration Recommended
Hardware requirements: CPU: Intel Pentium II or higher
Memory: 128M or more
Wireless NIC: based on 802.11b protocol
OS: Windows 2000 (Chinese/English version)
Windows XP (Chinese/English version)
Windows 98 is not supported.
Recommended NIC models
802.11
Protocol Brand Model
11b CISCO AIR-PCM340
ORINOCO ORINOCO
GOLD
INTEL Centrino
11g NETGEAR WG511
LINKSYS WPC54G
Projector
Lenovo Wireless Projector TDW680
Lenovo Wireless Projector TDW660

T
T
TD
D
DW
W
W6
6
68
8
80
0
0
M
M
Ma
a
an
n
nu
u
ua
a
al
l
l(
(
(W
W
Wi
i
ir
r
re
e
el
l
le
e
es
s
ss
s
s
p
p
po
o
or
r
rt
t
ti
i
io
o
on
n
n)
)
)
II. FUNCTIONAL OVERVIEW
Wireless Projector
Developed and manufactured by Lenovo independently, the wireless projectors has integrated the
IGRS technology (automatic search, automatic identification and automatic configuration). Avoid the
fussy setup process of the wireless projector you have experienced before. With Lenovo wireless pro-
jector, you will get a rapid response plus smooth and natural projection.
Wireless Projector has the Following Ten Unique Functions
1. Simple Wireless Solution
With simple operation, Lenovo Wireless Projector never requires the user to master any particular
knowledge on computer and network. The installation can be completed through easy operation. The
“Setup-free wireless” feature sets the user free from the fussy operation on IP and network name set-
tings.
2. Smart Automatic Search
With the integrated IGRS protocol, Lenovo Wireless Projector can automatically search and find the
wireless projection device.
3. Unique USB Device Play
With the built-in USB port, Lenovo Wireless Projector can play the pictures stored in the flash disk
without connecting to a computer. It supports the current popular five picture formats, which are JPG,
BMP, GIF, PCX and PNG.
4. Personalized Controller
After connecting to a computer, Lenovo Wireless Projector can be controlled through a controller in-
terface on the computer side to conduct some operations such as shut down and parameter settings.
5. Convenient Remote Mouse
Acting like a mouse, the remote controller of Lenovo Wireless Projector can operate the computer to
open a file, or select a menu, and etc. In addition, it can end the wireless projection through its unique
“Wireless” button.
6. Unrestricted Switch Over
Lenovo Wireless Projector enable the user with unprecedented flexibility to start the projection any-
time and anywhere. The user not only can freely switch between the wire and wireless mode, but also
can switch among a number of notebook computers that are using the wireless projection program.
This makes it possible that multiple projectors are wirelessly shared.
7. Excellent Wireless Transmission
Besides the wireless convenience, high resolution, high refresh rate, and true color display, Lenovo
Wireless Projector can play PPT, WORD and FLASH animation in a smooth way.
8. Quick Projection

T
T
TD
D
DW
W
W6
6
68
8
80
0
0
M
M
Ma
a
an
n
nu
u
ua
a
al
l
l(
(
(W
W
Wi
i
ir
r
re
e
el
l
le
e
es
s
ss
s
s
p
p
po
o
or
r
rt
t
ti
i
io
o
on
n
n)
)
)
TDW680 applications allow user to perform quick projection to the binding projector by using hotkeys
(Ctrl+F5), making the projection more convenient.
9. NIC Management
TDW680 allows user to select one of the wireless NICs to project, enjoying the fun of both Internet
Surfing and projecting.
10. Compatible with TDW660
TDW680 application is compatible with TDW 660, which can not only realize the TDW 680 project,
also support the TDW660 project.
Solution with Lenovo Wireless Projector
Lenovo has incorporated the software mirror and real-time compressing solution in its wireless pro-
jector. The data to be displayed is obtained before reaching the display device through the software
(can be regarded as a desktop mirror), and then is transferred through the wireless network to the
built-in wireless processing board inside the projector after being compressed. In the end, the final
decoded data is displayed. It has been proved by experiments that the overall effect of the solution is
very satisfactory.
The IGRS protocol is the key technology to enable the IGRS terminals. A number of technologies,
such as secure access mechanism, basic protocol, and intelligent application frame, are both the key
and difficult points to fulfill the IGRS. The wireless projector developed by Lenovo features PNP and
automatic configuration and management of IP address, which avoids the complicated network and
hardware settings and the bothering computer reboot process of the ordinary projectors. This has al-
lowed the user to use the Lenovo Wireless Projector in an easier and quicker way.
T
T
TD
D
DW
W
W6
6
68
8
80
0
0
M
M
Ma
a
an
n
nu
u
ua
a
al
l
l(
(
(W
W
Wi
i
ir
r
re
e
el
l
le
e
es
s
ss
s
s
p
p
po
o
or
r
rt
t
ti
i
io
o
on
n
n)
)
)
III. LENOVO WIRELESS PROJECTOR SERVICE PROGRAM
Installation and Uninstallation
Description of installation and uninstallation in this section is under Windows XP OS, the screen and
text maybe have light difference if using Windows 2000 OS.
Installation
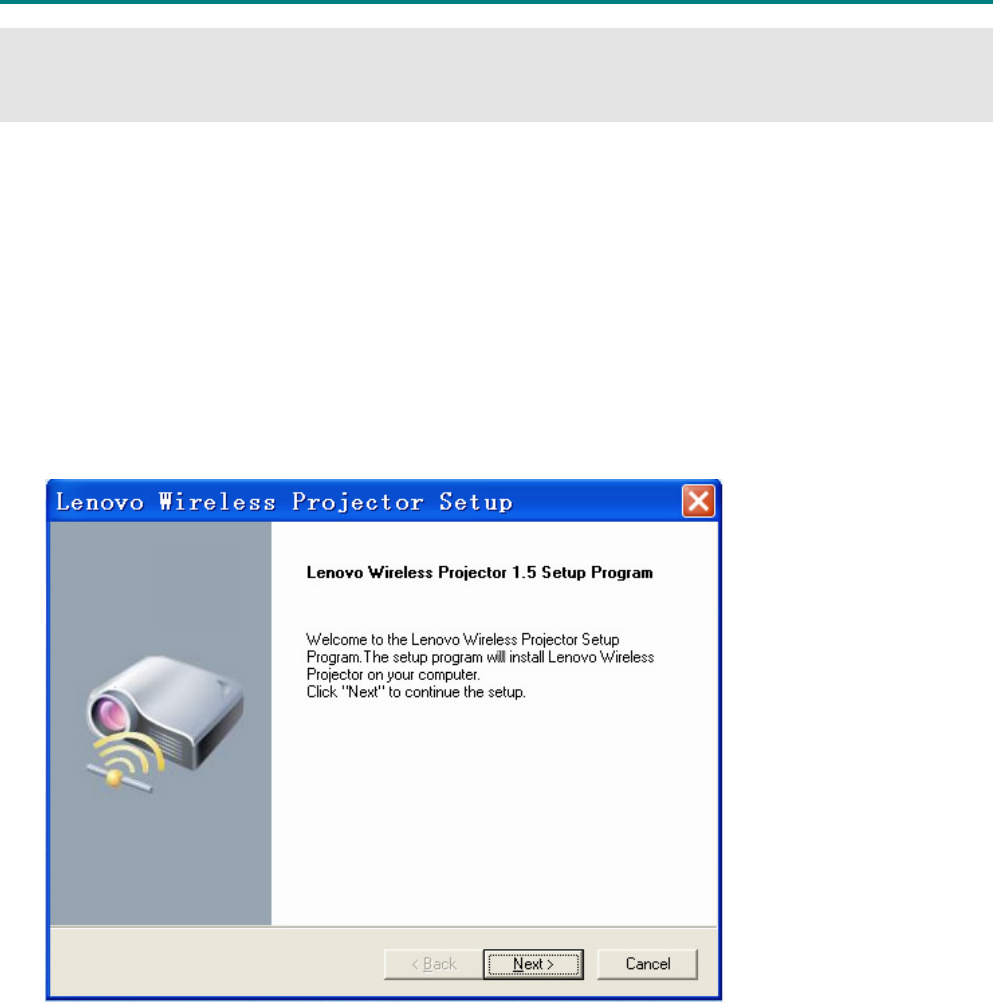
1. Insert the “TDW680 Wireless projector” CD to CD-ROM driver, and CD will run automatically, se-
lect “English”, then click “Software Installation”. The following screen will appear, Click “Next” to
continue:
Note: please select English version here. There are Chinese and English versions for Lenovo Wire-
less Projector Setup Program.
If you want to install the Chinese version, insert the “TDW680 Wireless projector” CD to CD-ROM
driver, and CD will run automatically, select “中文(Chinese)”, then click “安装程序(Software Instal-
lation)” to install.
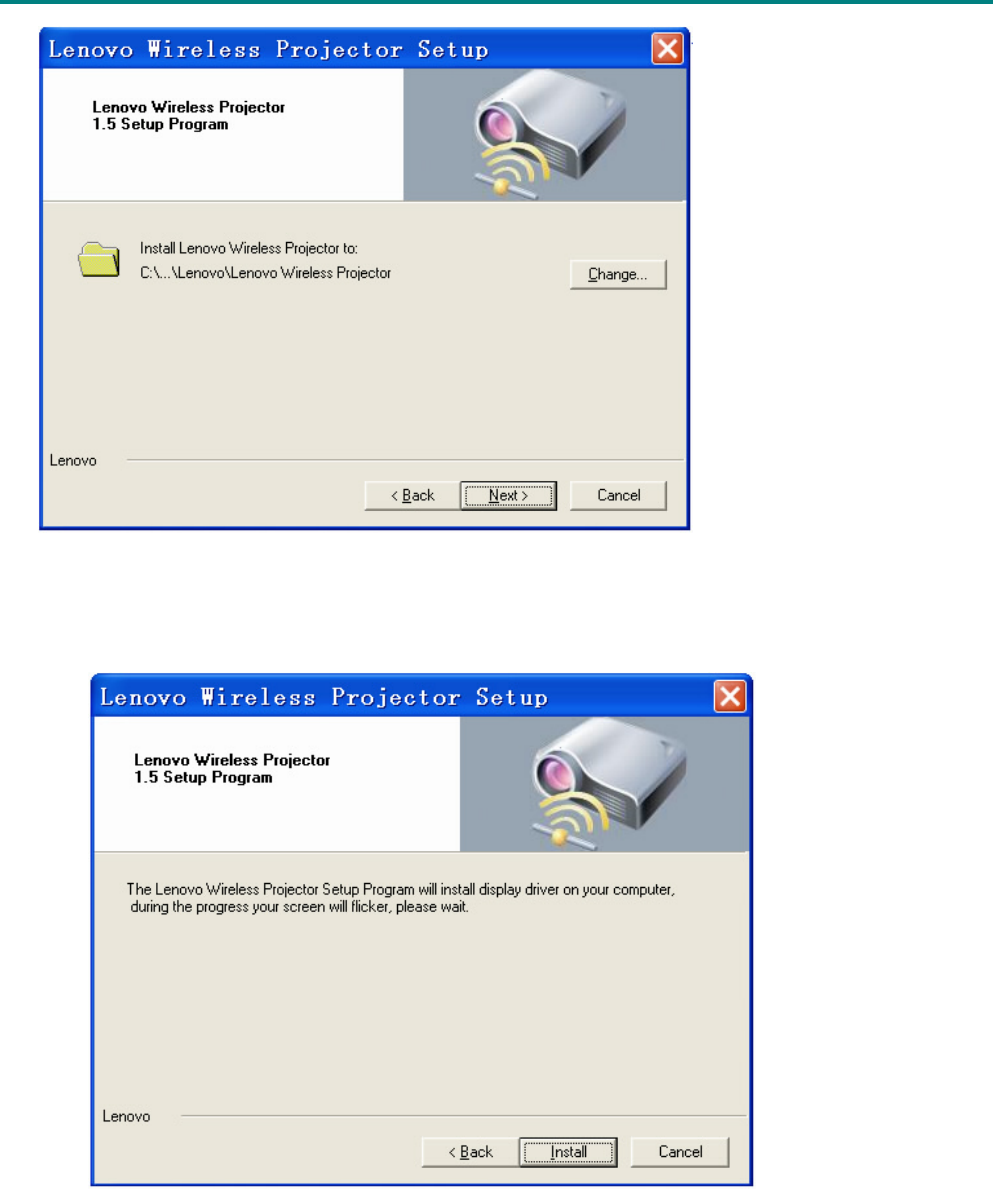
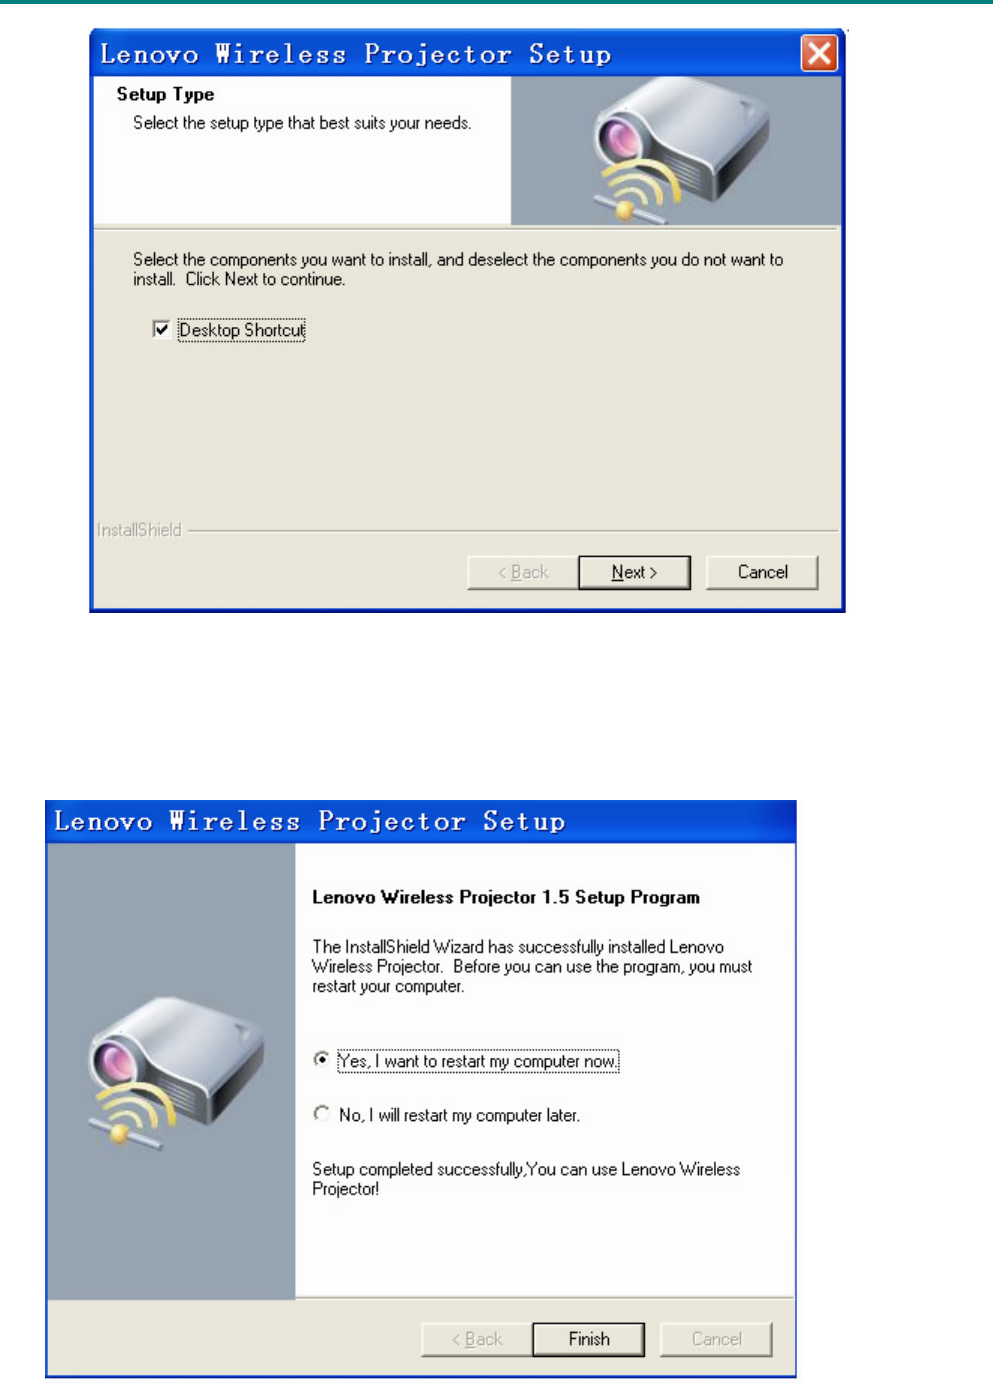
2. The following screen will appear, Click “Next” to continue:
T
T
TD
D
DW
W
W6
6
68
8
80
0
0
M
M
Ma
a
an
n
nu
u
ua
a
al
l
l(
(
(W
W
Wi
i
ir
r
re
e
el
l
le
e
es
s
ss
s
s
p
p
po
o
or
r
rt
t
ti
i
io
o
on
n
n)
)
)
Note: Select “Change...” to change the installation path.
3. The following screen will appear, click “Install”:
T
T
TD
D
DW
W
W6
6
68
8
80
0
0
M
M
Ma
a
an
n
nu
u
ua
a
al
l
l(
(
(W
W
Wi
i
ir
r
re
e
el
l
le
e
es
s
ss
s
s
p
p
po
o
or
r
rt
t
ti
i
io
o
on
n
n)
)
)
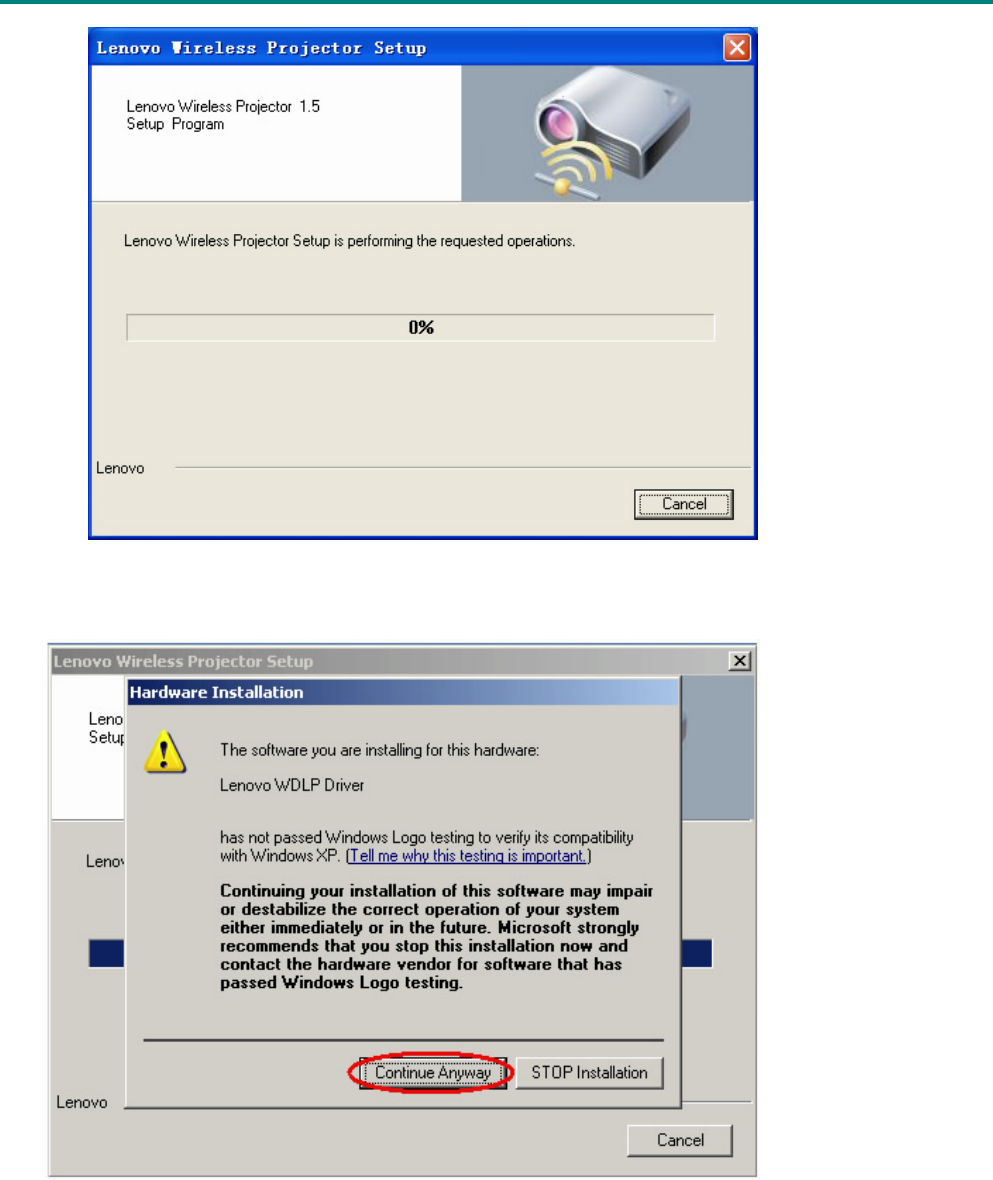
4. You will get a prompt of “Windows Logo testing”, click “Continue Anyway”.
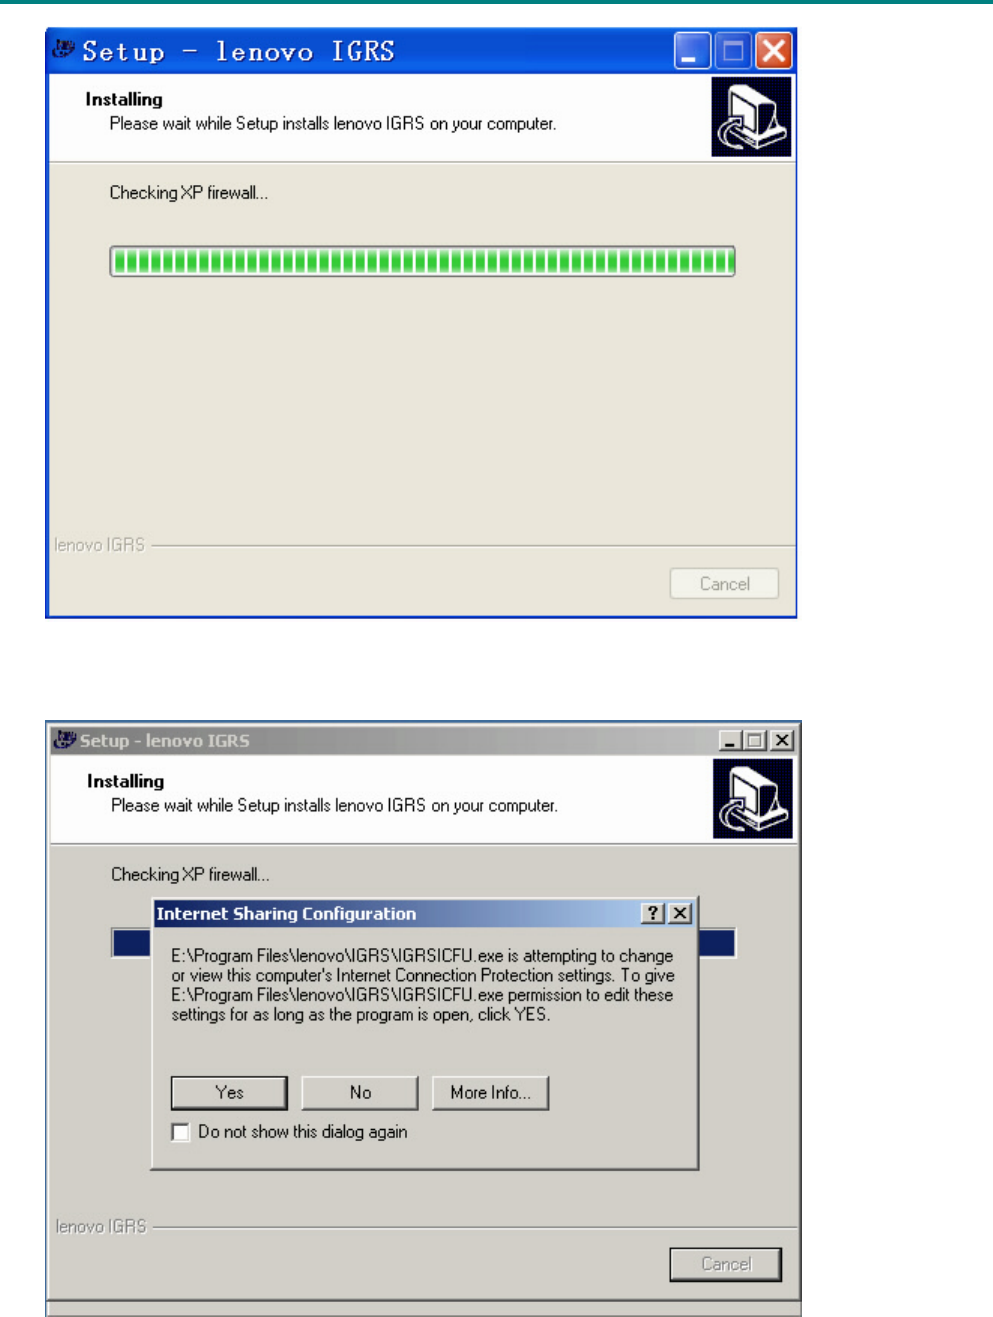
5. Install Lenovo IGRS
T
T
TD
D
DW
W
W6
6
68
8
80
0
0
M
M
Ma
a
an
n
nu
u
ua
a
al
l
l(
(
(W
W
Wi
i
ir
r
re
e
el
l
le
e
es
s
ss
s
s
p
p
po
o
or
r
rt
t
ti
i
io
o
on
n
n)
)
)
6. The following prompt will appear during the installation of Lenovo IGRS, click “Yes” to continue.
7. The following screen will appear, Click “Next” to continue:
T
T
TD
D
DW
W
W6
6
68
8
80
0
0
M
M
Ma
a
an
n
nu
u
ua
a
al
l
l(
(
(W
W
Wi
i
ir
r
re
e
el
l
le
e
es
s
ss
s
s
p
p
po
o
or
r
rt
t
ti
i
io
o
on
n
n)
)
)
Notes: Select “Add Desktop Shortcut” to run the “Lenovo Wireless Projector” program more conven-
iently.
8. The following screen will appear, Click “Finish” to complete the installation, your computer will be
restarted now or later according to your choice.
Note 1: The projector can be operated normally only after restarting the computer.
T
T
TD
D
DW
W
W6
6
68
8
80
0
0
M
M
Ma
a
an
n
nu
u
ua
a
al
l
l(
(
(W
W
Wi
i
ir
r
re
e
el
l
le
e
es
s
ss
s
s
p
p
po
o
or
r
rt
t
ti
i
io
o
on
n
n)
)
)
Note 2: IGRS will be installed automatically while you install the program, but it is not be uninstalled
when you uninstall the program.
Uninstallation
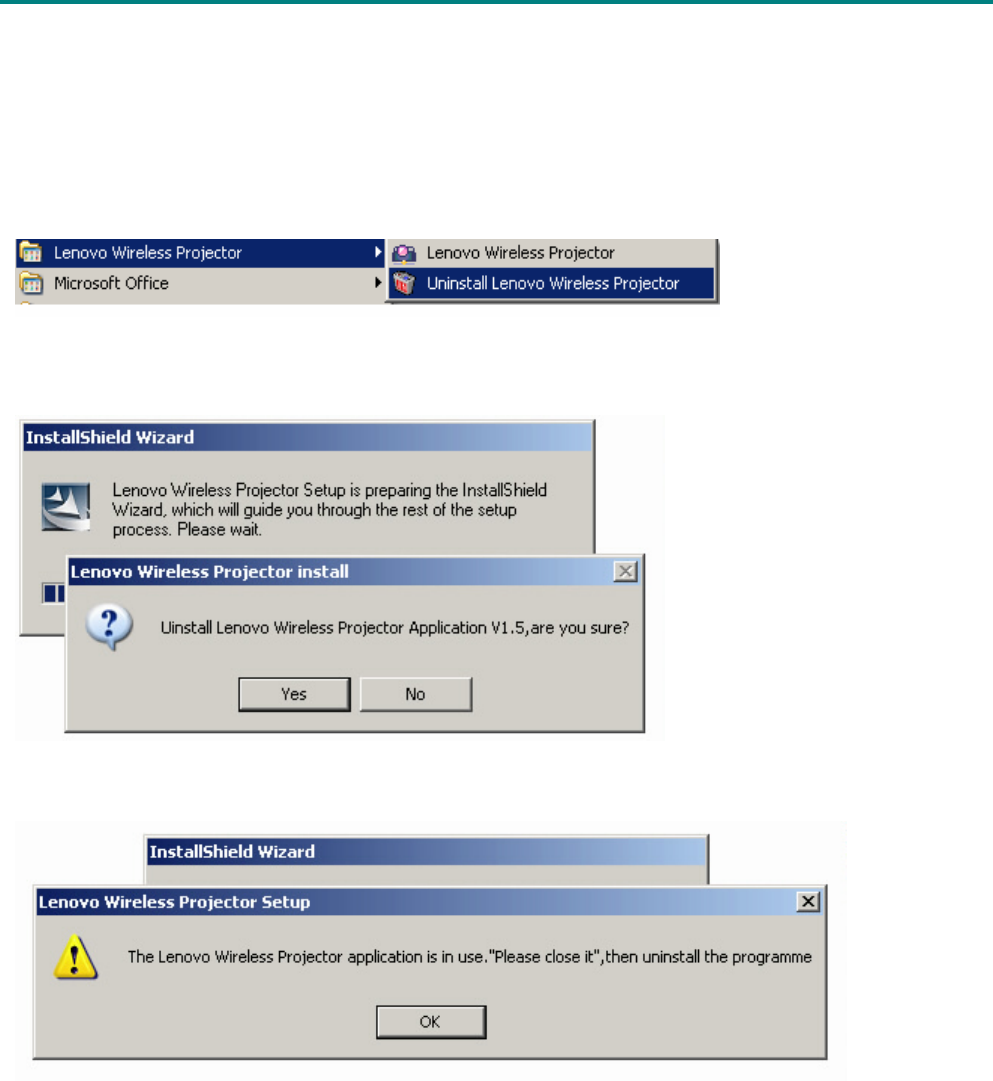
1. When uninstalling, please click “Start/applications/Lenovo Wireless Projector” on the bottom
left corner of the computer screen, and select “Uninstall Lenovo Wireless Projector”. as shown below:
2. The following screen will appear, click “Yes” to confirm the uninstallation.
Note: If the Lenovo Wireless Projector application is in use during the uninstallation, then the following
prompt will appear:
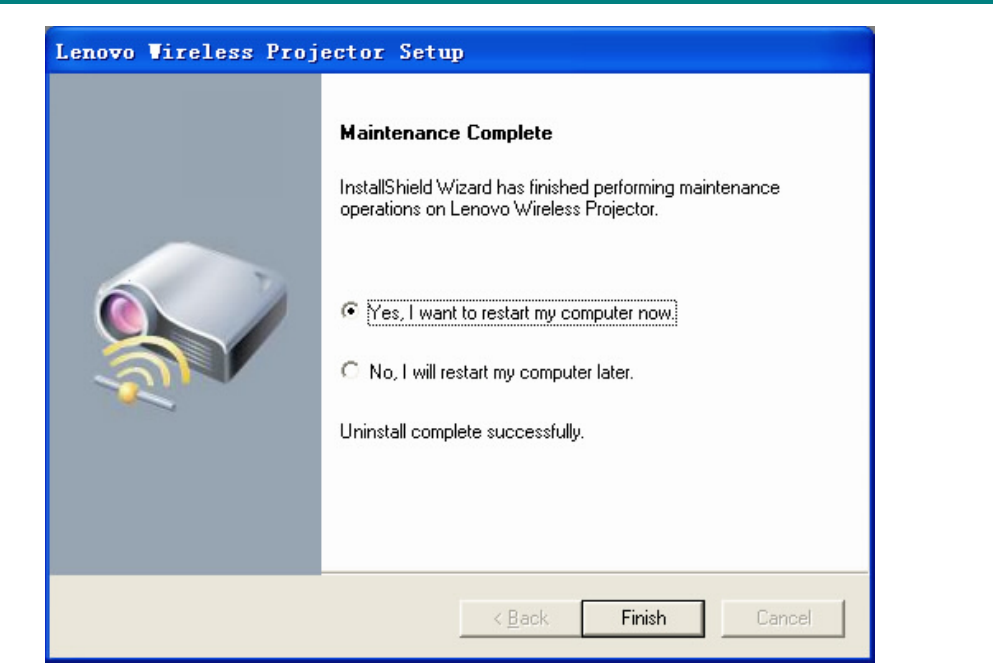
3. Click “Finish” to complete the uninstallation, your computer will be restarted now or later accord-
ing to your choice.
T
T
TD
D
DW
W
W6
6
68
8
80
0
0
M
M
Ma
a
an
n
nu
u
ua
a
al
l
l(
(
(W
W
Wi
i
ir
r
re
e
el
l
le
e
es
s
ss
s
s
p
p
po
o
or
r
rt
t
ti
i
io
o
on
n
n)
)
)
Note: The projector can be operated normally only after restarting the computer.
T
T
TD
D
DW
W
W6
6
68
8
80
0
0
M
M
Ma
a
an
n
nu
u
ua
a
al
l
l(
(
(W
W
Wi
i
ir
r
re
e
el
l
le
e
es
s
ss
s
s
p
p
po
o
or
r
rt
t
ti
i
io
o
on
n
n)
)
)
Function Description:
Lenovo Wireless Projection Program mainly includes multi-functions, such as Starting, Refreshing,
Starting projection, Quick projection, Viewing the Attribute of the wireless projector, Project
configuration, Switch card, Controller, USB play, End the projection and Quit, etc..
1. Starting
You should turn on the Wireless projector before starting the wireless project. After turning on,
the wireless function of projector is on unconnected status, waiting for the wireless connection with
computer.
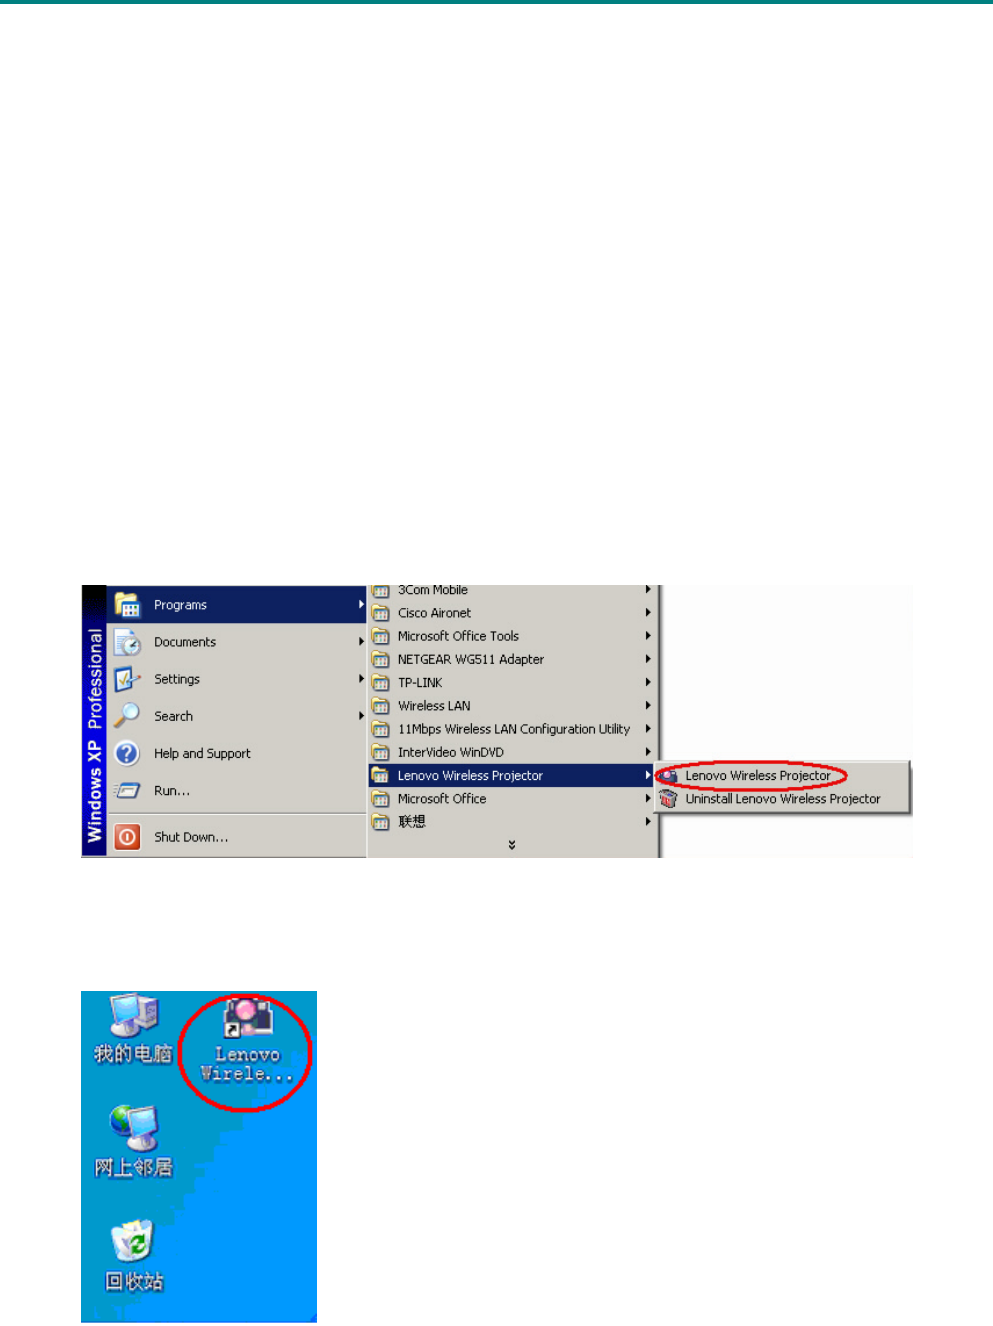
Method 1 of starting “Lenovo Wireless Project” Program:
After installing the “Lenovo Wireless Project” Program and restarting the computer, the shortcut will
be created automatically in the program group. Click Start/All programs/ Lenovo wireless projec-
tor, then click Lenovo wireless projector icon to start “Lenovo Wireless Projector” program. As
shown below.
Method 2 of starting “Lenovo Wireless Project” Program:
If you select “Add Desktop Shortcut” during the installation, you may double click the shortcut icon af-
ter restarting the system to directly run the “Lenovo Wireless Projector” program. As shown below:
T
T
TD
D
DW
W
W6
6
68
8
80
0
0
M
M
Ma
a
an
n
nu
u
ua
a
al
l
l(
(
(W
W
Wi
i
ir
r
re
e
el
l
le
e
es
s
ss
s
s
p
p
po
o
or
r
rt
t
ti
i
io
o
on
n
n)
)
)
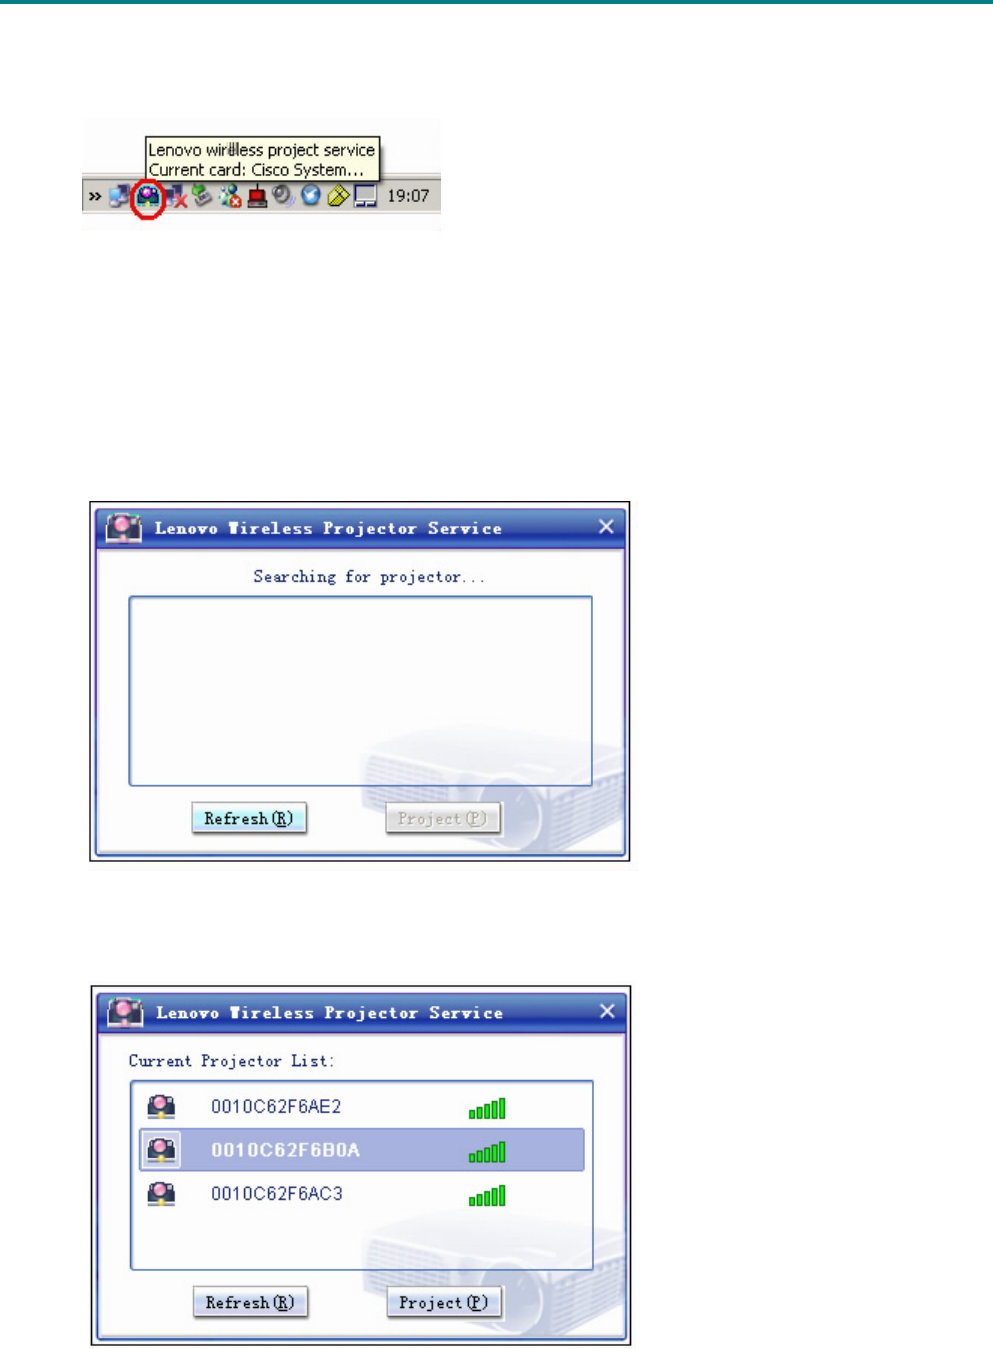
After starting the Wireless Projection, the Refresh screen will display and the “Lenovo Wireless Pro-
jector” tray icon will appear on the bottom right corner of the screen. If you put the mouse point over
the tray icon, you may see the information about the current wireless projection.
2. Refreshing
After starting the “Lenovo Wireless Projector” program, it will refresh automatically and search current
available wireless projector in the wireless network, it will display all ID numbers of wireless projector
searched. If there is an available NIC, you may search manually by pressing “Refresh” button
whenever you want.
After starting the program, the screen of “Searching for projector” will appear:
If any projector is searched, the projector list will appear:
T
T
TD
D
DW
W
W6
6
68
8
80
0
0
M
M
Ma
a
an
n
nu
u
ua
a
al
l
l(
(
(W
W
Wi
i
ir
r
re
e
el
l
le
e
es
s
ss
s
s
p
p
po
o
or
r
rt
t
ti
i
io
o
on
n
n)
)
)
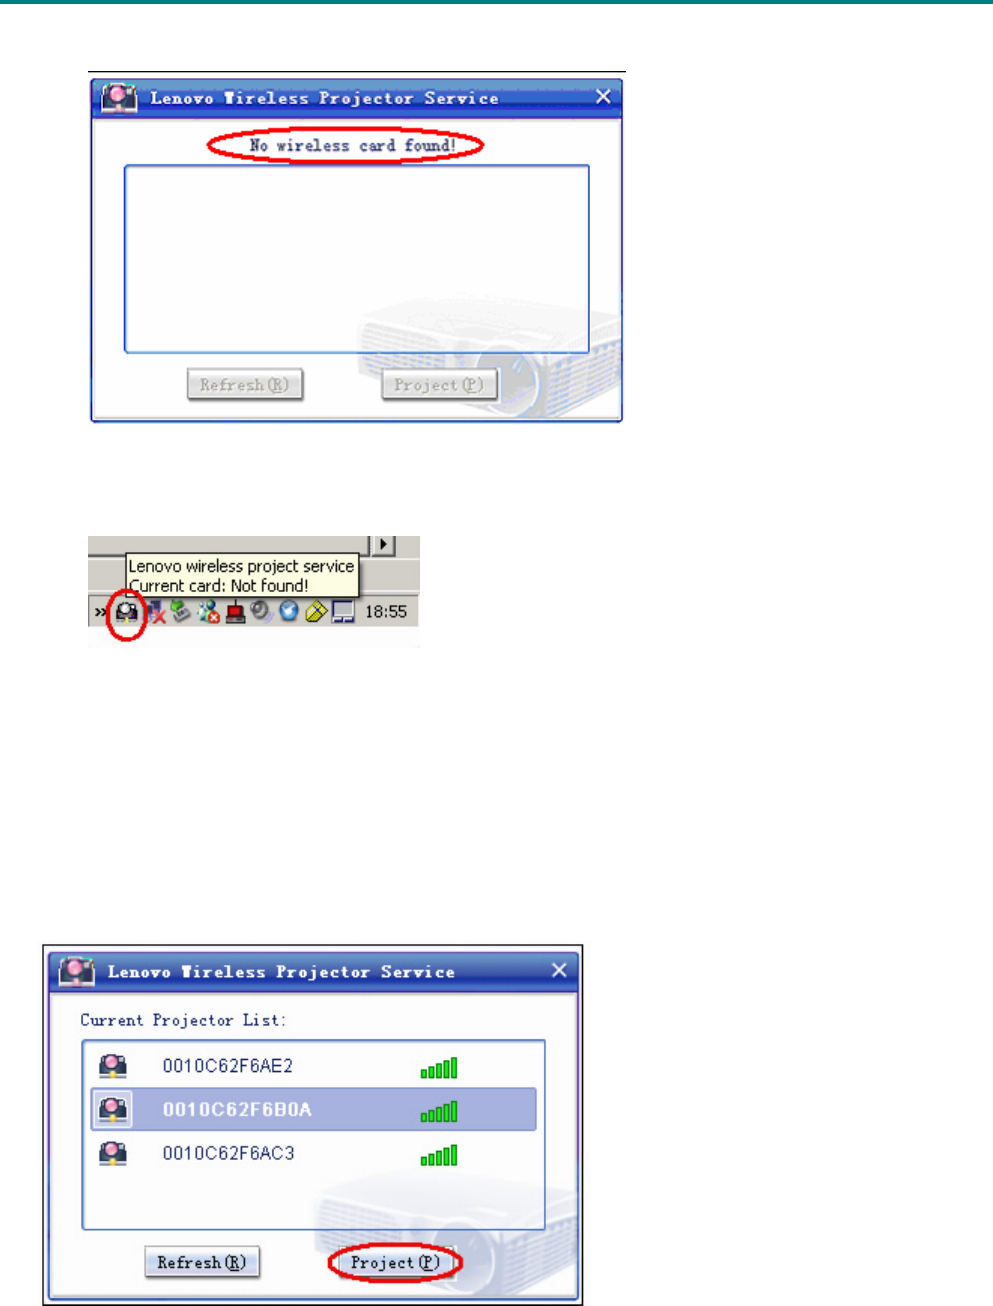
Notes: If no wireless card is found, the system will give you a message:
At the same time, the tray icon on the bottom right corner of the PC screen will display as gray, if you
put the mouse point over the icon, you may see a message of “Current card: Not found!”. Please plug
in the wireless NIC, and then try again!
3. Starting Projection
In the wireless projector list searched, click to select one projector, and the selected one will display
as blue.
Method 1 of selecting to start the projection:
Press “Project” button, and the selected projector will perform the wireless projection, as shown be-
low:
Method 2 of selecting to start the projection:
T
T
TD
D
DW
W
W6
6
68
8
80
0
0
M
M
Ma
a
an
n
nu
u
ua
a
al
l
l(
(
(W
W
Wi
i
ir
r
re
e
el
l
le
e
es
s
ss
s
s
p
p
po
o
or
r
rt
t
ti
i
io
o
on
n
n)
)
)
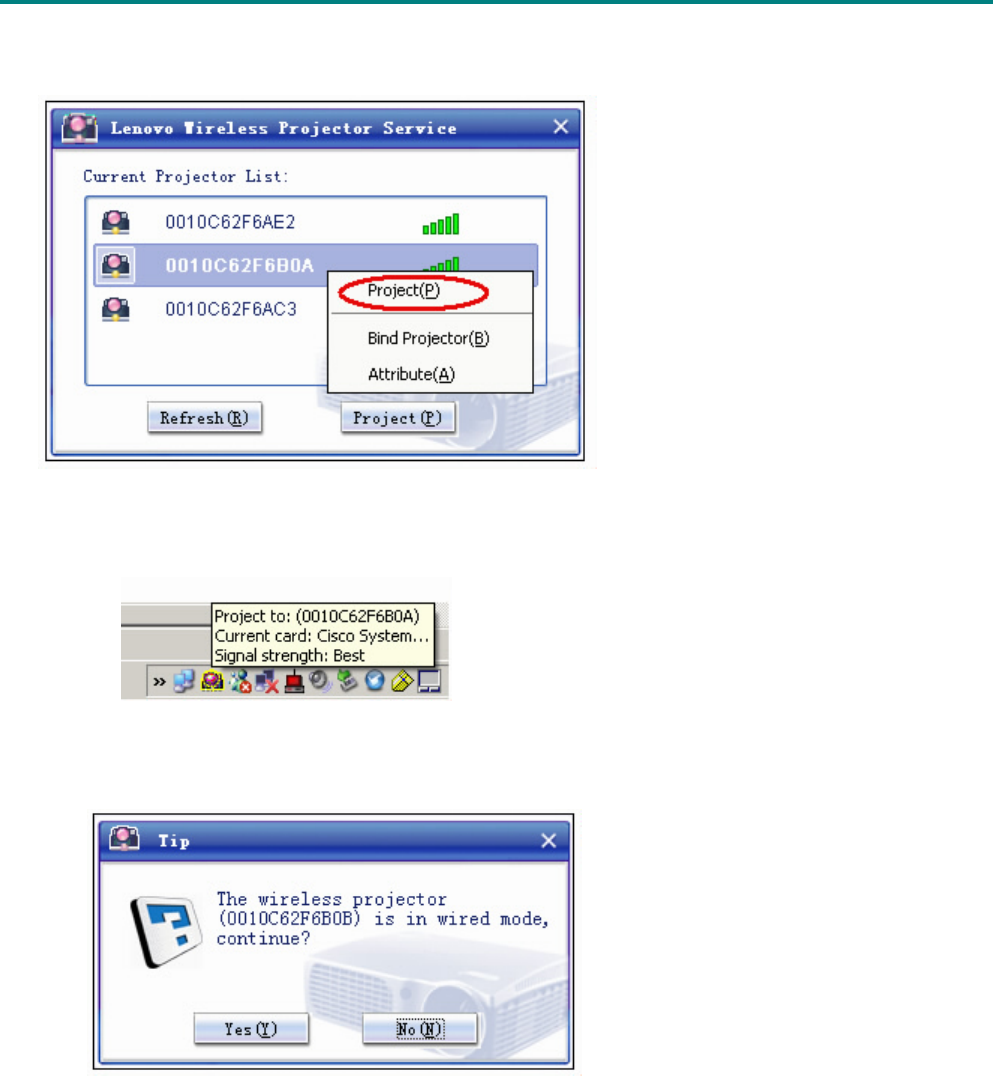
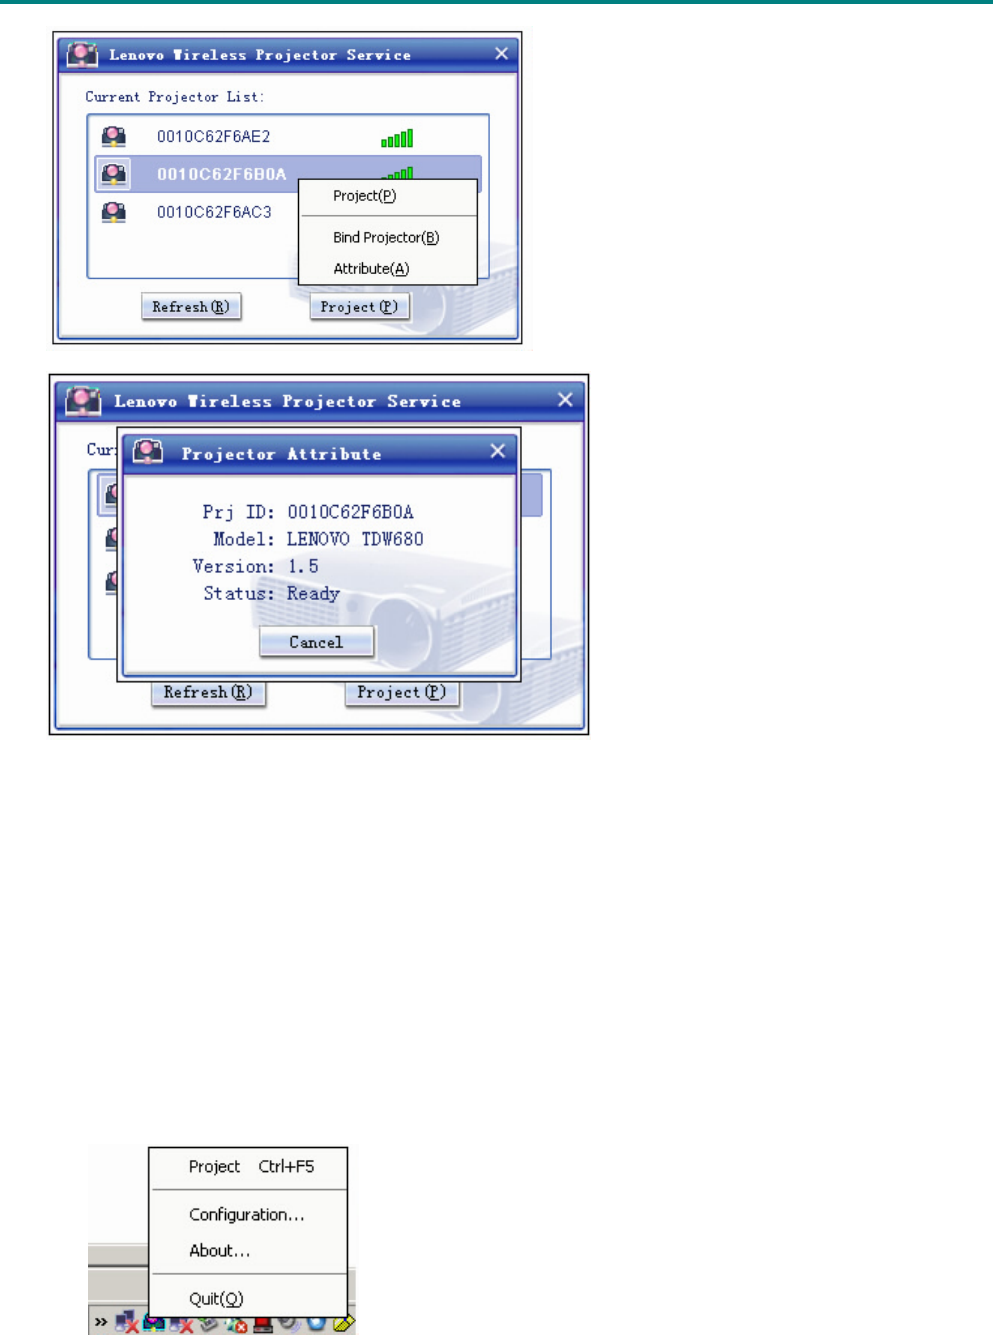
After selecting the projector, right click the blue mark to display “Right key menu”, and then select
“Project”, and the selected projector will perform the wireless project, as shown below:
While performing the wireless projection, if you put the mouse point over the “Lenovo Wireless Pro-
jector” tray icon on the bottom right corner of the screen, you may see relevant information such as
Projector ID, NIC used and Signal intensity etc., as shown below:
After selecting “Project”, if the projector is in wired mode, the following prompt will appear:
If you select “Yes”, wireless projection signal will be transferred to the projector side for waiting,
which will not cut off the wired projection signal. If you want to perform the wireless projection, you
need to press again the “Wireless” button on the remote control.
Select “No” to continue the wired projection, and wireless projection signal will not be trans-
ferred.
4. Quick Projection
To realize the wireless quick projection, you may bind the wireless projector used frequently.
T
T
TD
D
DW
W
W6
6
68
8
80
0
0
M
M
Ma
a
an
n
nu
u
ua
a
al
l
l(
(
(W
W
Wi
i
ir
r
re
e
el
l
le
e
es
s
ss
s
s
p
p
po
o
or
r
rt
t
ti
i
io
o
on
n
n)
)
)
After starting the wireless project program and one projector has been bound, you may perform the
quick projection to the binding projector by using hotkeys (Ctrl+F5).
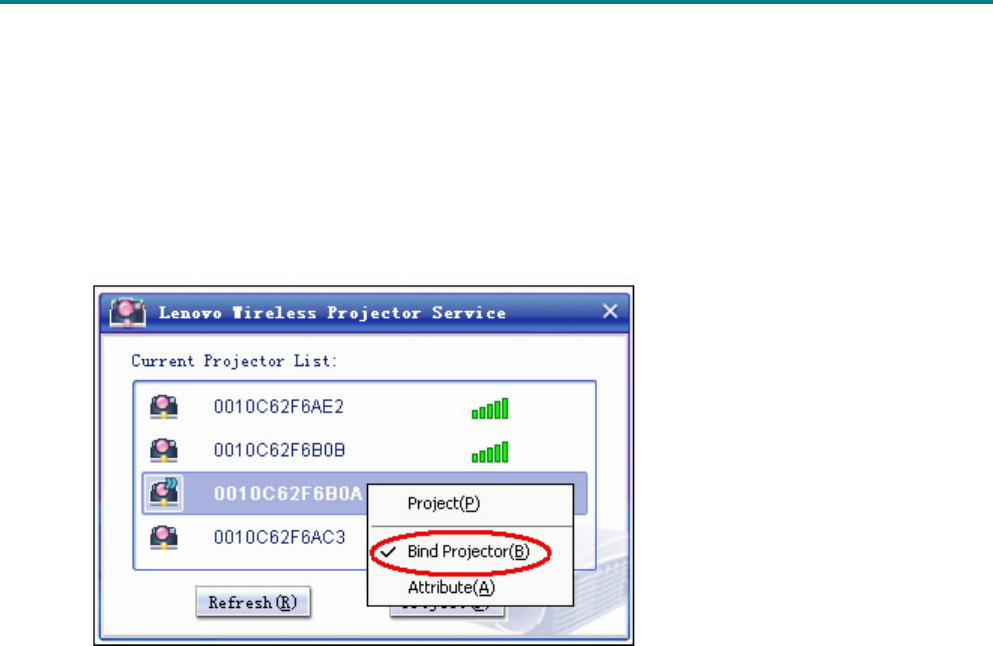
Setting the Bind projector
After starting the wireless project program, you may select one projector in the current projector list,
right click the blue mark to display “Right-click menu”, and then select “Bind Projector”, the icon of
the binding projector will be highlighted by blue double arrow.
Performing the quick projection:
After setting the bind projector, each time you use the wireless projection, you may perform quick pro-
jection to the binding projector by using hotkeys (Ctrl+F5) after starting the wireless project program.
Canceling the Bind projector
After starting the wireless project program, in the current projector list, right click the binding projector
to display “Right-click menu”, and click “Bind Projector” to cancel the binding. The icon of the un-
binding projector will be no longer highlighted by blue double arrow.
5. Attribute of Wireless Projector
After starting the wireless project program, you may select one projector in the current projector list,
right click the blue mark to display “Right-click menu”, and then select “Attribute”, to view the infor-
mation of selected projector, for example Prj ID, Model, Version, status, etc., as shown below:
Double click the Prj ID, you may also view the “Attribute” of the projector.
T
T
TD
D
DW
W
W6
6
68
8
80
0
0
M
M
Ma
a
an
n
nu
u
ua
a
al
l
l(
(
(W
W
Wi
i
ir
r
re
e
el
l
le
e
es
s
ss
s
s
p
p
po
o
or
r
rt
t
ti
i
io
o
on
n
n)
)
)
Status of Projector:
You may view the attribute of projector, there are five main working status of projector: Ready, being
used by other users, ongoing USB play, ongoing wired projection and Unknown.
The projector in Ready status is available for use.
Projector’s attribute can not be viewed if the projector is performing the wireless projection.
6. “Wireless Projector” tray icon
After starting the Wireless Projector program, right click “Wireless Projector” tray icon on the bottom
right corner of the screen before performing the wireless projection, the following tray menu will ap-
pear:
Project: Select “Project”, or press the hotkeys (Ctrl+F5) for the quick projection to the binding projec-
tor.
T
T
TD
D
DW
W
W6
6
68
8
80
0
0
M
M
Ma
a
an
n
nu
u
ua
a
al
l
l(
(
(W
W
Wi
i
ir
r
re
e
el
l
le
e
es
s
ss
s
s
p
p
po
o
or
r
rt
t
ti
i
io
o
on
n
n)
)
)
Configuration: select “Configuration”, Project configuration and Switch card can be selected by using
“Configuration” window.
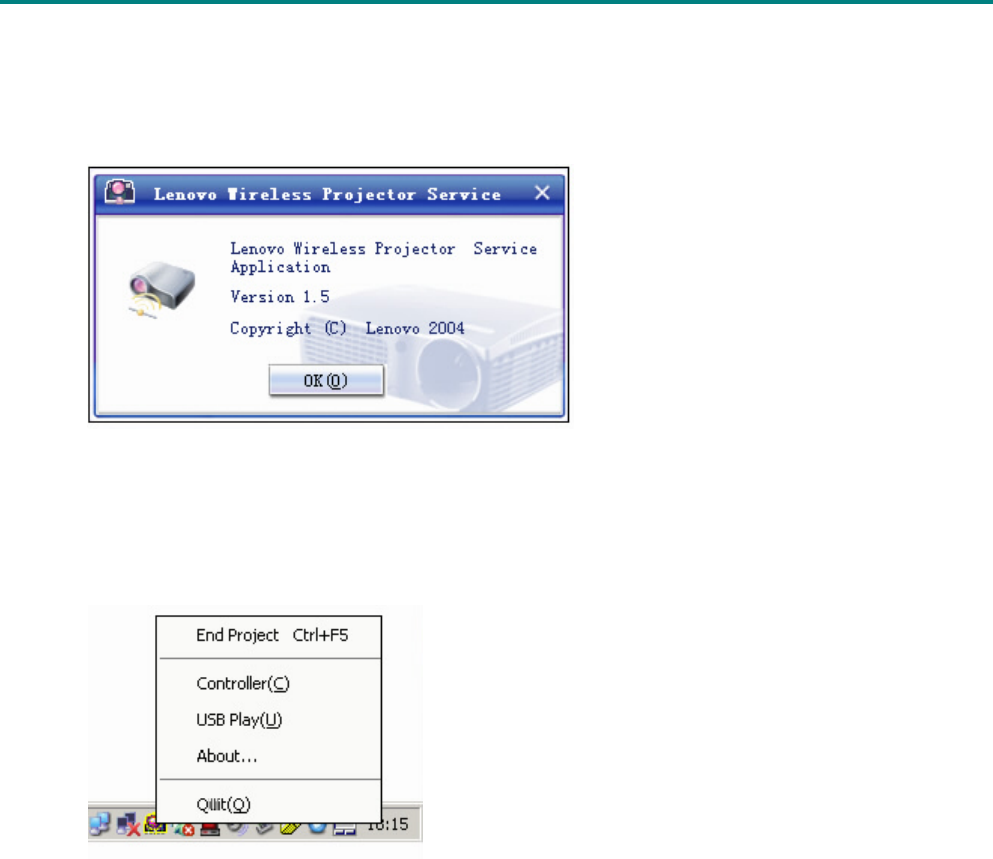
About: Select “About”, you may check the Version information of “Lenovo Wireless Projector Service
Application”, as shown below:
Quit: Select “Quit” to close “Lenovo Wireless Projector Service Application”.
After starting the Wireless Projection, right click “Wireless Projector” tray icon on the bottom right cor-
ner of the screen, the following tray menu will appear:
End Project: Select “End Project”, or press the hotkeys (Ctrl+F5), to end the current wireless pro-
jection.
Controller: Select “Controller” to open the controller.
USB Play: Select “USB Play” to switch the play mode to USB play.
7. Project Configuration
Right click the “Lenovo Wireless Projector” tray icon on the bottom right corner of the screen, select
“Configuration” to open “Configuration” window.
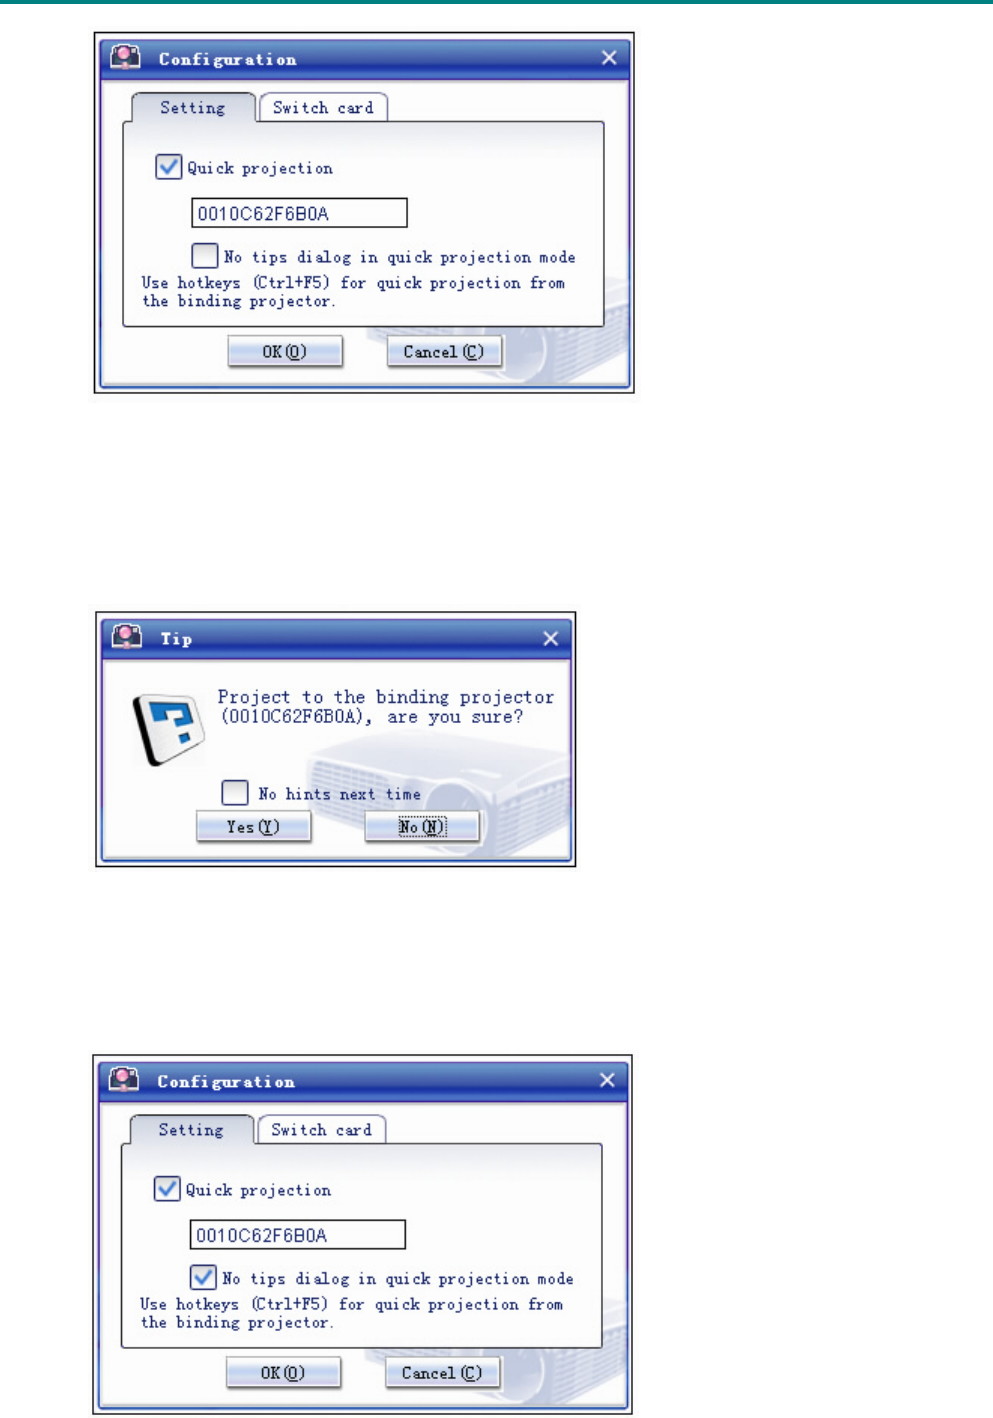
If you have bound the projector, the following “Setting” window will appear:
T
T
TD
D
DW
W
W6
6
68
8
80
0
0
M
M
Ma
a
an
n
nu
u
ua
a
al
l
l(
(
(W
W
Wi
i
ir
r
re
e
el
l
le
e
es
s
ss
s
s
p
p
po
o
or
r
rt
t
ti
i
io
o
on
n
n)
)
)
If “Quick projection” is checked, which means to allow user to bind the projector. The default is
checked.
ID number of the binding projector will appear in the box below “Quick projection”, as shown above.
When you use press hotkeys (Ctrl+F5) to perform the quick projection, you may see the projecting
confirmation dialog, as shown below:
Click “Yes” button to perform the quick projection; or click “No” button to cancel the quick projection.
If you don't want to get the above tips in quick projection mode, you may select “No hints next time”.
You may also make this setting in the “Setting” Window. You may select “No tips dialog in quick pro-
jection mode”, as shown below:
T
T
TD
D
DW
W
W6
6
68
8
80
0
0
M
M
Ma
a
an
n
nu
u
ua
a
al
l
l(
(
(W
W
Wi
i
ir
r
re
e
el
l
le
e
es
s
ss
s
s
p
p
po
o
or
r
rt
t
ti
i
io
o
on
n
n)
)
)
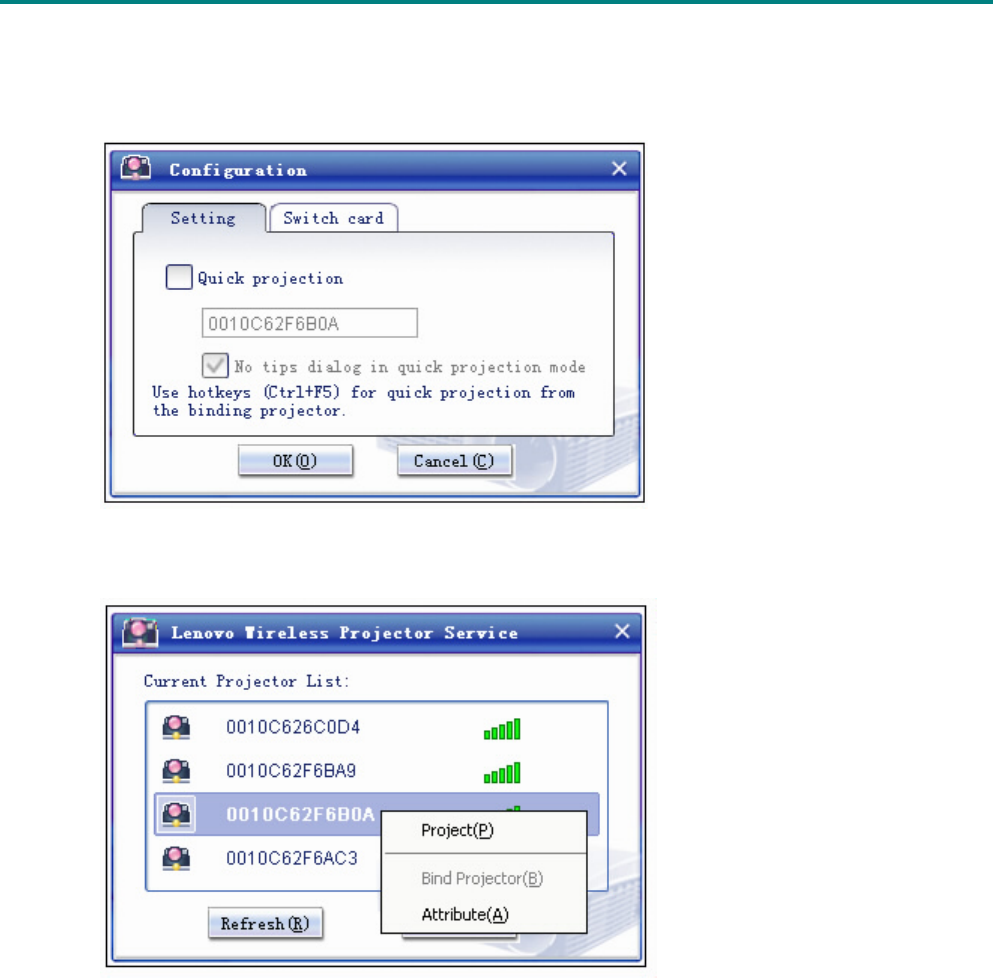
If you want to disable the binding projector function or quick projection function, you may unselect the
“Quick Projection” checkbox, and then click “OK”. As shown below.
After canceling “Quick projection”, in the projector list, “Bind Projector” in the right-click menu
will be gray, and then you can not bind the designated projector.
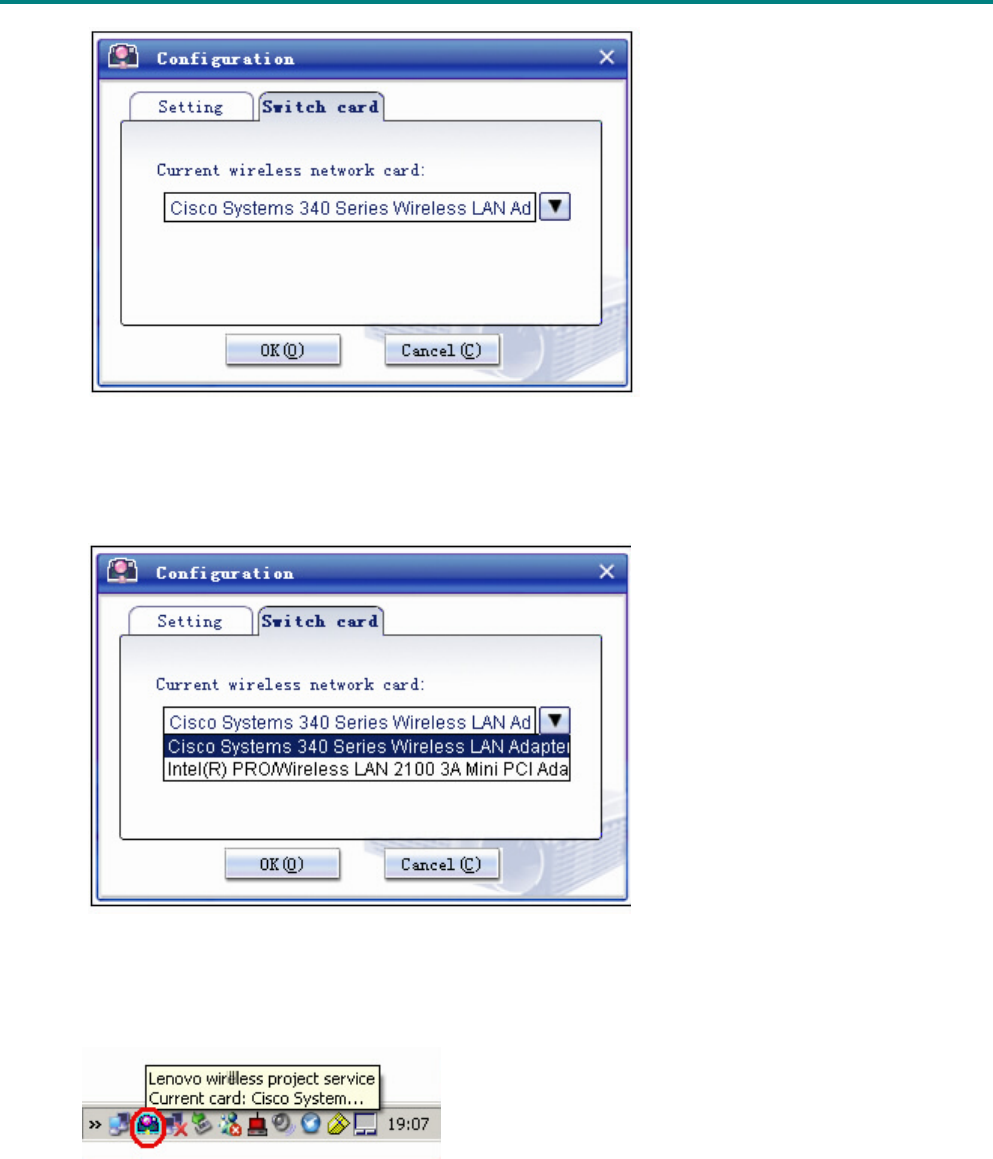
8. Switch Card
Right click the “Lenovo Wireless Projector” tray icon on the bottom right corner of the screen, select
“Configuration” to open the “Configuration” window. Select “Switch card”.
In the “Switch card” window, you may see the current wireless network card in use, as shown below:
T
T
TD
D
DW
W
W6
6
68
8
80
0
0
M
M
Ma
a
an
n
nu
u
ua
a
al
l
l(
(
(W
W
Wi
i
ir
r
re
e
el
l
le
e
es
s
ss
s
s
p
p
po
o
or
r
rt
t
ti
i
io
o
on
n
n)
)
)
If there is more than one wireless network card in your computer, you may perform wireless projec-
tion while Internet surfing. TDW 680 allows user to select one of the wireless NICs to project. You
may select the NIC to project by clicking the drop-down menu, as shown below:
After the configuration, put the mouse point over the “Lenovo Wireless Projector” tray icon, and you
may see the below information of the selected NIC.
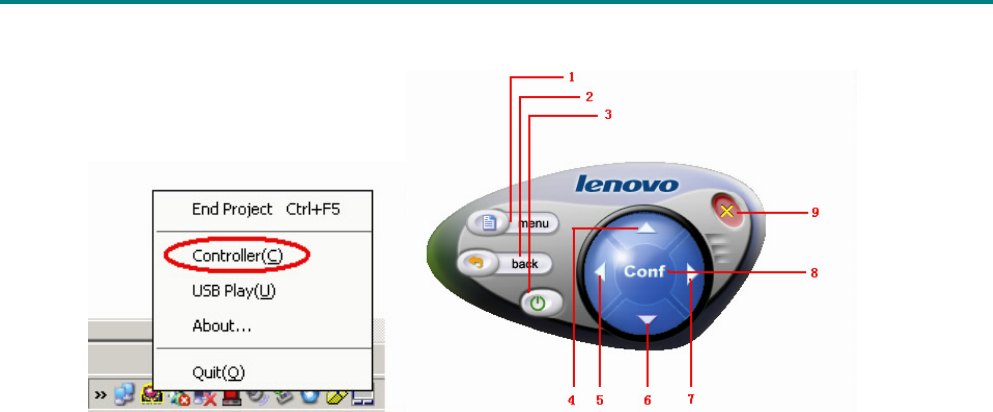
9. Controller
Controller has common functions of real controller, which can realize the function of projector con-
trolled by computer side, for example, it can open the projector menu and set the projector parameter,
and it can also turn off the projector.
The “Controller” option can only be shown on the tray menu (on the bottom right corner of computer
side) when the projector is on the “Projecting” status, as shown below:
T
T
TD
D
DW
W
W6
6
68
8
80
0
0
M
M
Ma
a
an
n
nu
u
ua
a
al
l
l(
(
(W
W
Wi
i
ir
r
re
e
el
l
le
e
es
s
ss
s
s
p
p
po
o
or
r
rt
t
ti
i
io
o
on
n
n)
)
)
The projector parameter can be set by opening the controller panel at the computer side during pro-
jecting.
Right click “Lenovo Wireless Projector” tray icon, select “Controller” to open the controller panel, as
show above, which functions are the same with the remote control.
Function keys of controller:
1- Menu: Open the projector OSD menu and back to the previous menu level.
2- Back: Back to previous menu level.
3- Close: Turn the projector off.
4, 5, 6, 7- Up, down, left and right keys: Select the items to be adjusted and set the parameter se-
lected on the projector OSD menu.
8- Conf: Confirm the amended projector parameter.
9- Close panel: Close the controller.
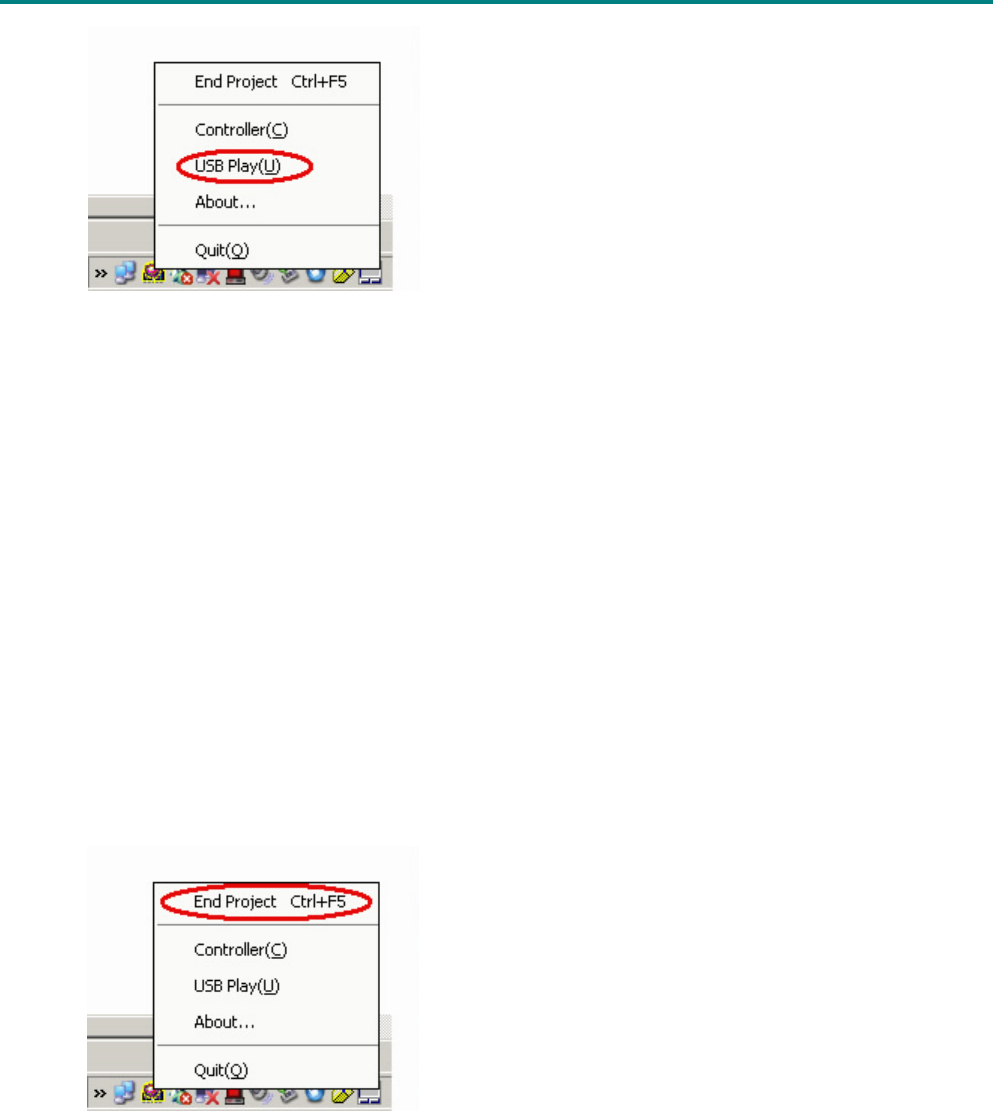
10. USB Play
The “USB Play” option can only be shown on the “ Lenovo Wireless Projector” tray menu (on the
bottom right corner of computer side) when the projector is on the “Projecting” status. as shown be-
low:
T
T
TD
D
DW
W
W6
6
68
8
80
0
0
M
M
Ma
a
an
n
nu
u
ua
a
al
l
l(
(
(W
W
Wi
i
ir
r
re
e
el
l
le
e
es
s
ss
s
s
p
p
po
o
or
r
rt
t
ti
i
io
o
on
n
n)
)
)
Projector has build-in USB interface, which can dependently play the pictures stored in flash disk
without computer.
Right click the “Lenovo Wireless Projector” icon in the tray, select “USB play” to bring up the USB
play interface at the projector side, you can play the pictures stored in flash disk of the projector.
Note: you may also bring up the USB play interface by the projector menu to use the USB play func-
tions. For details, please refer to “USB Play Description”.
11. End Project
After finishing, the user can end the current wireless project.
Methods to end project:
1. Right click “Lenovo Wireless Projector” icon in the tray to select “End project”.
2. Press Ctrl+F5 keys to end the current project.
3. Double click the “Lenovo Wireless Projector” icon in the tray to end the project, and the following
prompt will appear:
T
T
TD
D
DW
W
W6
6
68
8
80
0
0
M
M
Ma
a
an
n
nu
u
ua
a
al
l
l(
(
(W
W
Wi
i
ir
r
re
e
el
l
le
e
es
s
ss
s
s
p
p
po
o
or
r
rt
t
ti
i
io
o
on
n
n)
)
)
Select “Yes” to end the project, and “No” to abort this task.
4. Right click “Lenovo Wireless Projector” icon in the tray to select “End project”, directly exit
“Lenovo Wireless Projector” program.
5. Press “Wireless” button on the remote control of projector to forcibly end the projection.
After ending the projection, your original network environment will be restored, and other computers
can use this projector to perform the wireless projection.
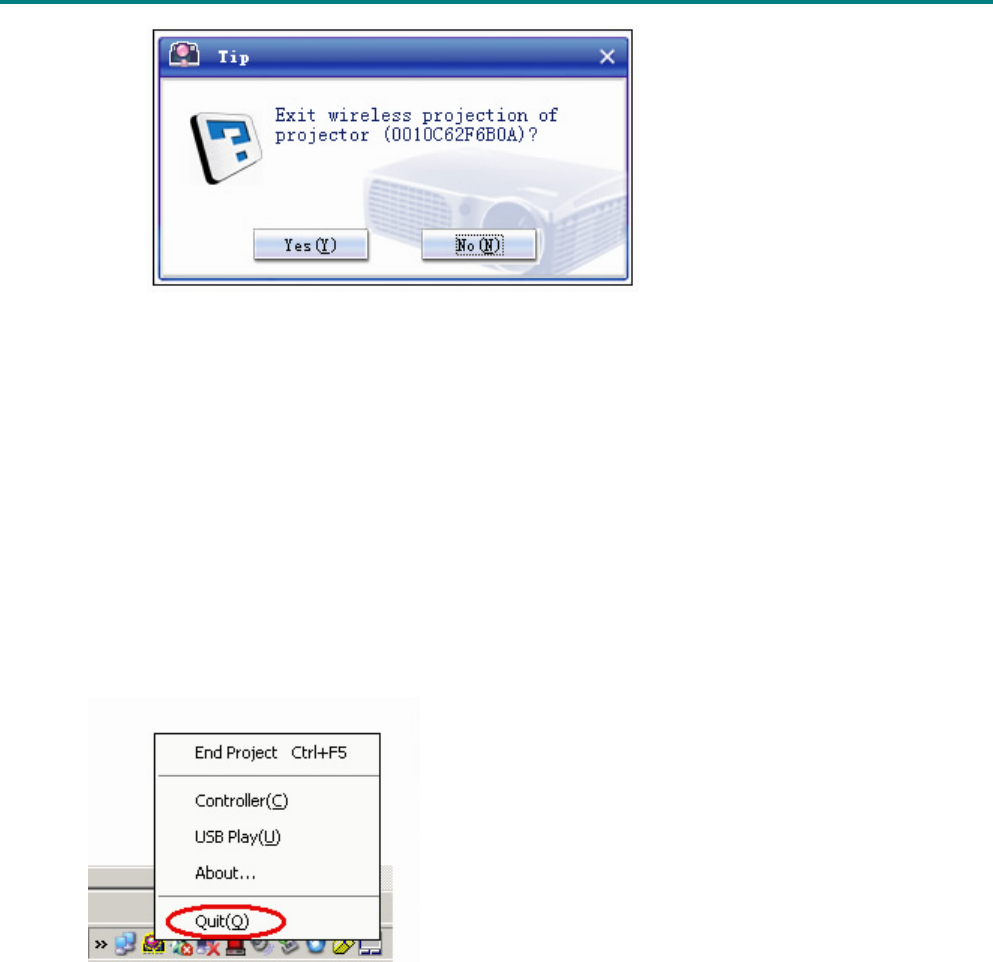
12. Quit
After completing the projection, right click “Lenovo Wireless Projector” icon in the tray to select “Quit”,
to exit “Lenovo Wireless Projector” program.

T
T
TD
D
DW
W
W6
6
68
8
80
0
0
M
M
Ma
a
an
n
nu
u
ua
a
al
l
l(
(
(W
W
Wi
i
ir
r
re
e
el
l
le
e
es
s
ss
s
s
p
p
po
o
or
r
rt
t
ti
i
io
o
on
n
n)
)
)
IV. DESCRIPTION OF USB DISPLAY
Main Functions
“USB Play” can read and show static image files stored in USB mobile storage device (including
USB flash disk, USB mobile hard disk, and digital camera with USB interface, and etc.), which can
auto-scale, auto-play and full screen show the pictures.
“USB Play” can support 5 image file formats (JPG, BMP, GIF, PCX and PNG, except the animate
feature of GIF89a) and 1 image index file format (.IDX).
Operation Description
1. Starting USB play and operation method
Starting USB play:
1. When the projector is on “Projecting” status, right click “Lenovo Wireless Projector” icon in the tray
(on the right bottom of computer), then select “USB Play” in the tray menu.
2. Press “Menu” button on the control panel of the projector or remote control, then click in turn “Wire-
less”, ”Play USB” and “Play” in the projector menu.
Operation Method:
You may use simulative mouse functions (“left mouse button”, “right mouse button”, “up”, “down”,
“left” and “right”) of projector IR remote control, and “Page Up”, “Page Down” to perform “USB Play”.
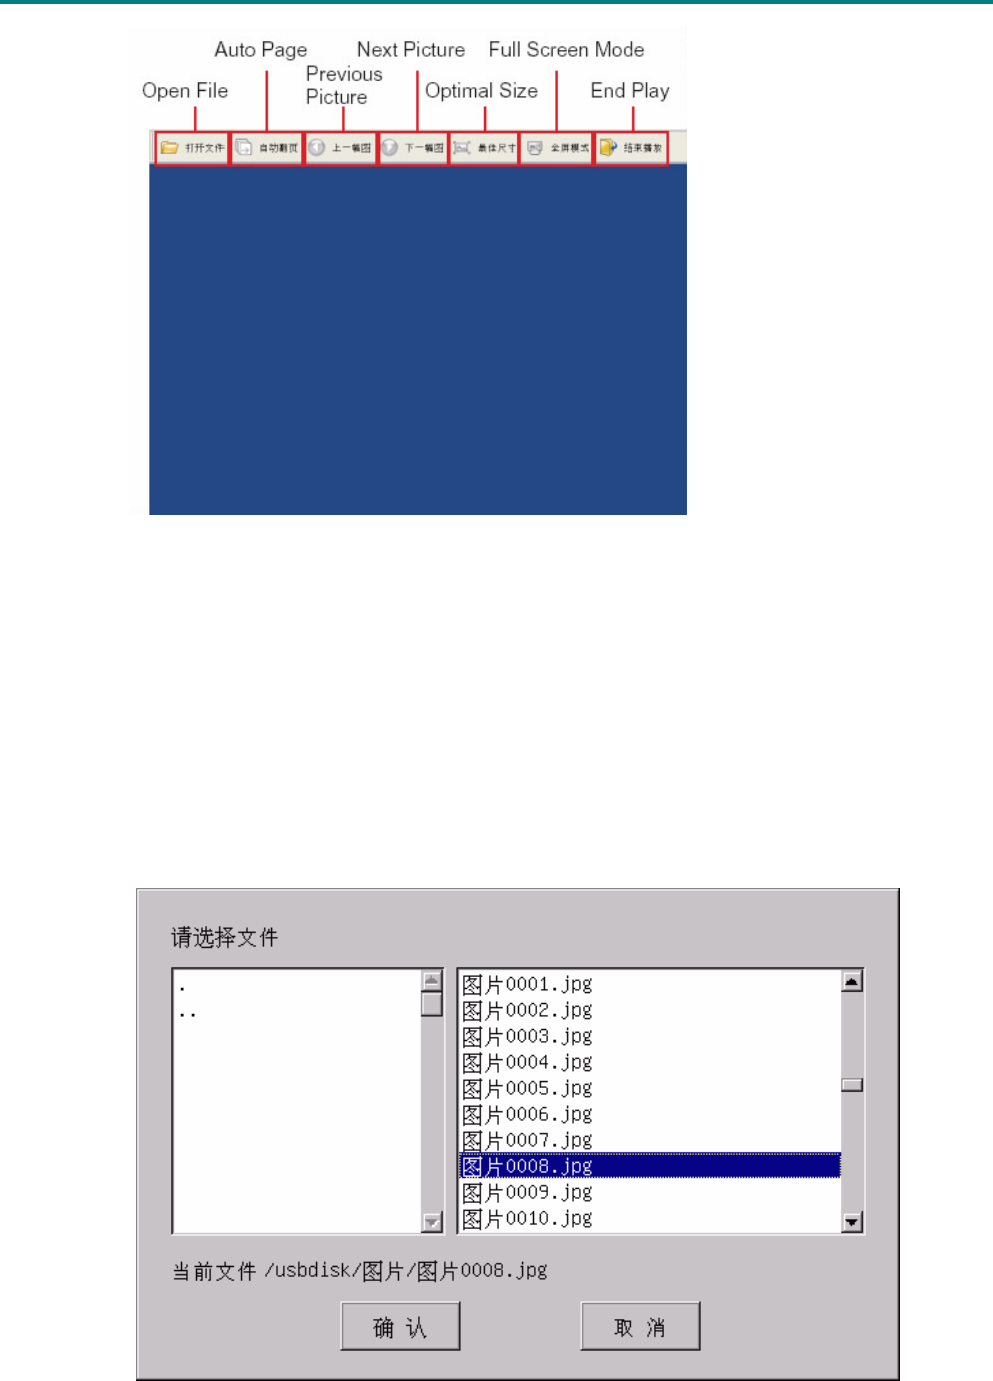
2. Main Interface
After you start the “USB Play”, the main interface shown blow will appear, the buttons in the toolbar are:
“Open file”, “Auto Page/Manual Page”, “Previous Picture”, “Next Picture”, “Optimal Size/Original Size”,
“Full Screen Mode” and “End Play”.
T
T
TD
D
DW
W
W6
6
68
8
80
0
0
M
M
Ma
a
an
n
nu
u
ua
a
al
l
l(
(
(W
W
Wi
i
ir
r
re
e
el
l
le
e
es
s
ss
s
s
p
p
po
o
or
r
rt
t
ti
i
io
o
on
n
n)
)
)
Main Interface
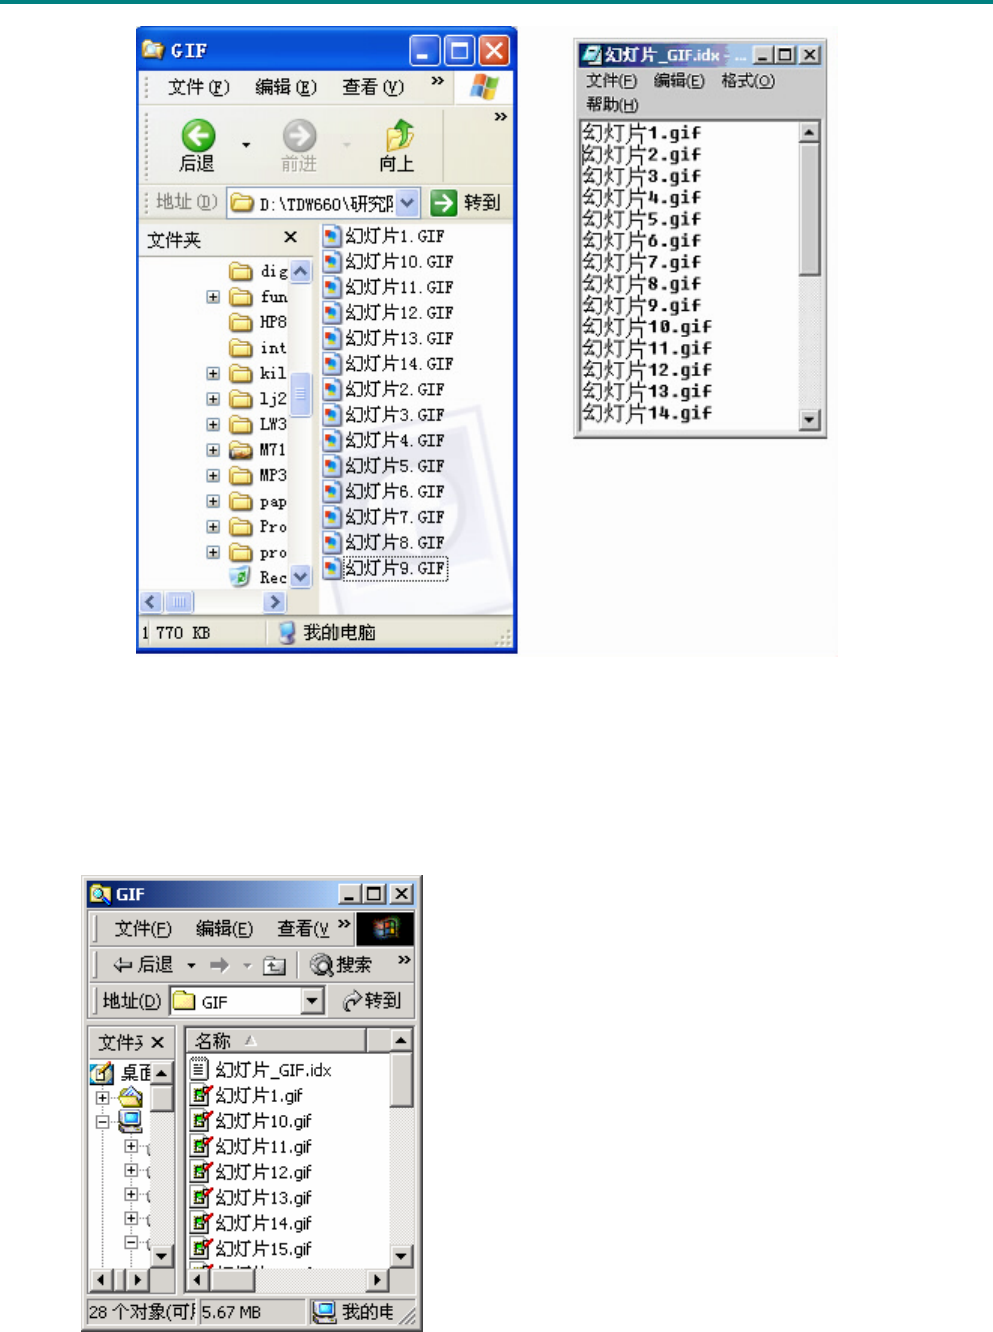
3. Open File
Use the simulative mouse function of remote control to click “Open File” button. The window as
shown below will appear, in which lists all the file names and file directories that can be played in
USB storage device.
Select the file to be played from the listed file names, then click “Confirm” button to start playing.
Note 1: If the selected file is index file (it is a plain text file with .idx as its extension), the first file listed in
the file directory will be played after clicking “Confirm” button; otherwise, the selected file will be
played.
“Open File” dialog box

T
T
TD
D
DW
W
W6
6
68
8
80
0
0
M
M
Ma
a
an
n
nu
u
ua
a
al
l
l(
(
(W
W
Wi
i
ir
r
re
e
el
l
le
e
es
s
ss
s
s
p
p
po
o
or
r
rt
t
ti
i
io
o
on
n
n)
)
)
Note 2: If the flash disk is set to FD mode, and there is no response when you click “Open File”, please
set the flash disk to HD mode.
4. Auto Page/Manual Page
The “Auto Page/Manual Page” button is a diplex one. After opening file, this file is on Manual Page
status, and this button displays as “Auto Page”. After click “Auto Page”, the system will be on auto
page status, then the button displays as “Manual Page”. Click “Manual Page” to switch system to
Manual Page status.
When the system is on auto page status, next picture will be automatically played every 3 seconds.
After the last picture has been played, the system will automatically back to play the first picture.
5. Previous Picture
When you open the file and the current file is not the first picture, use “Previous Picture” to open
the previous picture stored in the same directory, equal to the function of Page Up key.
6. Next Picture
When you open the file and the current file is not the last picture, use “Next Picture” to open the
next picture stored in the same directory, equal to the function of Page Down key.
When the last picture is played in full screen mode, press Page Down key to automatically switch
to the first picture.
7. Optimal Size/Original Size
After opening the file, the shown picture is on the original size status and the button displays as
“Optimal Size”. If you click “Optimal Size” button or double click left button of mouse (non full
screen mode), the system will switch to optimal size status, which will stretch and compact the pic-
ture in scale (do not change aspect ratio), and show the picture in optimal size. Or you may click
“Original Size” button or double click left button of mouse (non full screen mode), the system will
switch to original size status.
8. Full Screen Mode
After opening the file, you can click “Full Screen Mode” or click right button of mouse to switch the
system to full screen mode status. Click right button of mouse to switch the system to non-full
screen mode status.
In full screen mode, when the last picture is shown, you may click the left button of mouse to
automatically show the first picture.
9. End Play

T
T
TD
D
DW
W
W6
6
68
8
80
0
0
M
M
Ma
a
an
n
nu
u
ua
a
al
l
l(
(
(W
W
Wi
i
ir
r
re
e
el
l
le
e
es
s
ss
s
s
p
p
po
o
or
r
rt
t
ti
i
io
o
on
n
n)
)
)
The function of “End Play” button is to end the playing of USB pictures and restore the projector to
“Ready” status.
When USB playing, the working status of projector will be on “USB Play” at the connected com-
puter side, and after ending USB play, the working status of projector will be automatically
changed to “Ready” status to wait for the next wireless project. At this time, if you click “Start pro-
ject” at the computer side, the wireless project can be started again.

T
T
TD
D
DW
W
W6
6
68
8
80
0
0
M
M
Ma
a
an
n
nu
u
ua
a
al
l
l(
(
(W
W
Wi
i
ir
r
re
e
el
l
le
e
es
s
ss
s
s
p
p
po
o
or
r
rt
t
ti
i
io
o
on
n
n)
)
)
V. FAQ
What’s the ID number of the projector?
Each projector is assigned an ID number as the unique identification mark in the factory, which is the
“name” of the projector. This ID number will be shown on the left bottom of the screen after the
TDW680 projector is turn on.
Why is the ID number of the projector still not in the list after clicking [Refresh] for several
times?
Solution 1: Try to search once more (please open its antenna first if Centrino notebook.
Solution2: Re-insert the NIC or press [Wireless] button of remote control, and try again.
Solution 3: Run [Connection reset] option in the menu of projector, and then try again.
What to do when the message of failed wireless project appears?
Solution 1: Try to project once more.
Solution2: Re-insert the NIC or press [Wireless] button of remote control, and try again.
Solution 3: Run [Connection reset] option in the menu of projector, and then try again.
How to do if offline is happened during the wireless project?
Solution 1: please restart the NIC and try again.
Solution 2: please re-insert the NIC and try again.
Solution 3: Logoff the user at the PC side, then restart the project software and try again.
How to freely switch between the wire and wireless mode?
1. Press the “Source” button in the remote control or control panel of the projector, it will first search
the wired signal twice for the prior project; if no wired signal is found, then it will search wireless
signal to project at the third time.
2. Press the “Wireless” button in the remote control, if the current status is wired project mode, then
it will be switched to wireless project mode; or if the current status is wireless project mode, then
it will be ended.
3. Select “Management” and “Select signal source” in the projector menu, then click “Computer” or
“Wireless” to switch over.
Why can't I get a full-screen PPT presentation under the Wireless Project status?

T
T
TD
D
DW
W
W6
6
68
8
80
0
0
M
M
Ma
a
an
n
nu
u
ua
a
al
l
l(
(
(W
W
Wi
i
ir
r
re
e
el
l
le
e
es
s
ss
s
s
p
p
po
o
or
r
rt
t
ti
i
io
o
on
n
n)
)
)
You maybe use a pirate copy of OFFICE software, please close this PPT file, and then open the file
and play again. Please use the official OFFICE.
How to play videos, for example DVD?
Please select the wired mode to play videos.
How to project the wireless network content by using the wireless mode?
If you use Windows XP OS, please connect to Internet first, and then perform the projection.
How to do if the wireless Internet Surfing can be realized before the projection, but not after
the projection ends?
Solution 1: please restart the NIC and try again.
Solution 2: please re-insert the NIC and try again.
Can the remote control act as a remote mouse?
Yes. You can use the remote control to access the computer remotely with some operations, such as
select the directory and open a file. You can also skip to the next or previous slide when play a PPT
presentation.
Why do I get an error message “Display service does not exist” when I start the program?
VGA card driver may be disabled, please select “Lenovo WDLP Driver”} in my com-
puter/property/hardware/device manager/VGA card, then right click and select “enable”.
VGA card driver may be uninstalled, please uninstall and re-install “Lenovo wireless program” to
auto-load the IGRS program.
What’s the USB play function?
This function enables you to automatically or manually play the pictures stored in a flash disk at the
projector side. Therefore, you can play the PPT presentation even without the presence of a com-
puter. If you use this function, please first save the PPT file format as the PIC format.
Why is there no response when I select “USB play” at the computer side sometimes?
The last reason may be the network quality is not good or the connection is timeout. Please select
“USB play” again.
Why do I get a notice that no USB device is found?

T
T
TD
D
DW
W
W6
6
68
8
80
0
0
M
M
Ma
a
an
n
nu
u
ua
a
al
l
l(
(
(W
W
Wi
i
ir
r
re
e
el
l
le
e
es
s
ss
s
s
p
p
po
o
or
r
rt
t
ti
i
io
o
on
n
n)
)
)
The plugged USB device is not supported. Please try with other type of USB device such as a flash
disk of Lenovo or Netac.
Why aren’t the files stored in the flash disk displayed?
There are no files in this flash disk, or the picture file format stored in this flash disk is not supported.
Please convert the pictures into the format that is supported.
Why is there no response when I open the file in the USB play mode?
Some flash disk has both FD and HD modes. Please select the HD mode.
What picture formats are supported in the USB play function?
The current five popular picture formats are supported, which are JPG, GIF, PCX, BMP and PNG.
How can I play the PPT files with the USB play function?
Open the PPT file and save it as into the picture format that is supported, such as JPG. It is recom-
mended to use the PowerPoint 2000 version or above.
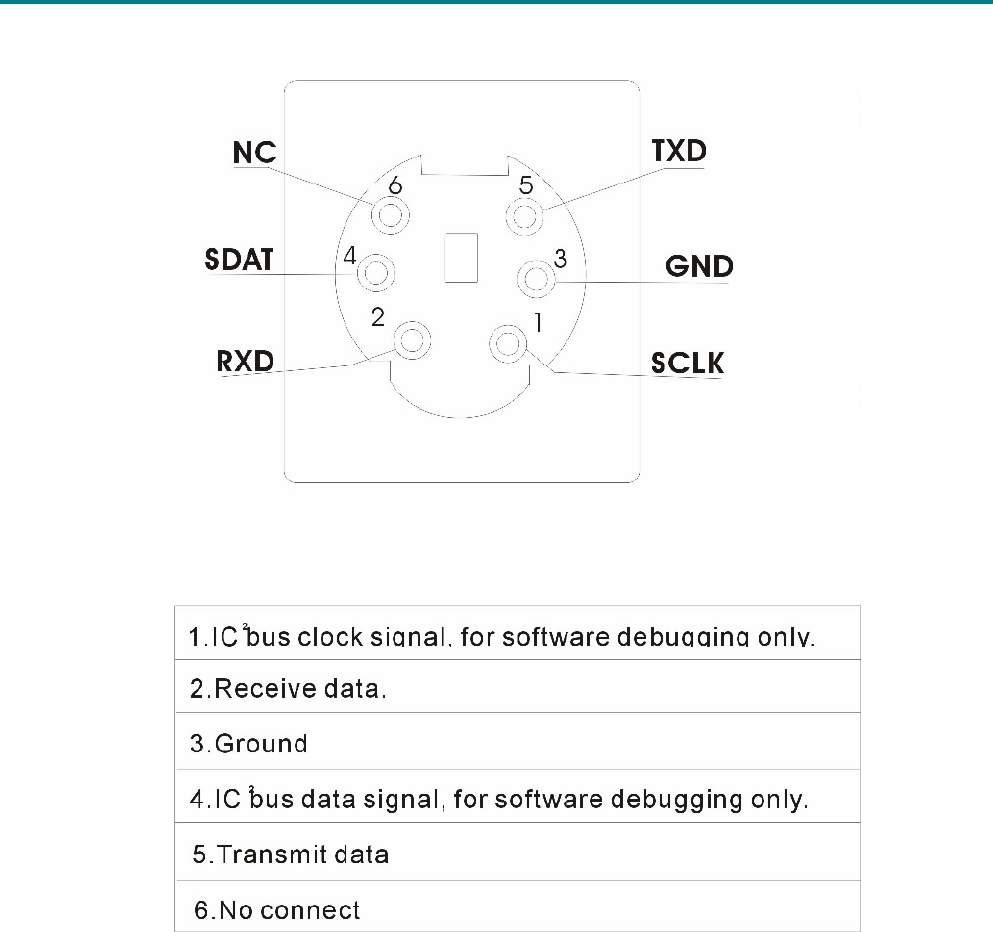
How to play the files in a certain sequence in the USB play mode?
Place all files into a same directory. Then create an index file in the same directory according to the
play sequence. Then the program will play these picture files in an order as appointed by the index
file. The left screenshot below is the order of the picture files before editing, while the right screenshot
below shows the order of the picture files after editing.
T
T
TD
D
DW
W
W6
6
68
8
80
0
0
M
M
Ma
a
an
n
nu
u
ua
a
al
l
l(
(
(W
W
Wi
i
ir
r
re
e
el
l
le
e
es
s
ss
s
s
p
p
po
o
or
r
rt
t
ti
i
io
o
on
n
n)
)
)
How to create an index file?
The index file is a plain text file with the suffix name as .idx. The content of the index file is a se-
quence of the files to be played. There should be no space in the file names. The index file and the
picture files should be in the same directory. As shown in the screenshot below, the index file “幻灯片
_GIF.idx” and the picture files are in the same directory called “GIF”.
T
T
TD
D
DW
W
W6
6
68
8
80
0
0
M
M
Ma
a
an
n
nu
u
ua
a
al
l
l(
(
(W
W
Wi
i
ir
r
re
e
el
l
le
e
es
s
ss
s
s
p
p
po
o
or
r
rt
t
ti
i
io
o
on
n
n)
)
)
RS32 PIN ASSIGNMENT (PS2 PORT)
FCC RF Radiation Exposure Statement
This device complies with Part 15 of the FCC Rules. Operation is subject to the following two conditions:
(1) this device may not cause harmful interference, and (2) this device must accept any interference received,
including interference that may cause undesired operation.
Any changes or modifications not expressly approved by the party responsible for compliance could void the authority
tto operate equipment.
This equipment must be installed and operated in accordance with provided instructions and the antenna(s) used for
this transmitter must be installed to provide a separation distance of at least 20 cm from all persons and
must not be co-located or operating in conjunction with any other antenna or transmitter. End-users and
installers must be provide with antenna installation instructions and transmitter operating conditions for
conditions for
FEDERAL COMMUNICATIONS COMMISSION INTERFERENCE STATEMENT
This equipment has been tested and found to comply with the limits for a Class B digital
device, pursuant to Part 15 of the FCC Rules. These limits are designed to provide
reasonable protection against harmful interference in a residential installation. This
equipment generates, uses and can radiate radio frequency energy and, if not installed
and used in accordance with the instructions, may cause harmful interference to radio
communications. However, there is no guarantee that interference will not occur in a
particular installation. If this equipment does cause harmful interference to radio or
television reception, which can be determined by turning the equipment off and on, the
user is encouraged to try to correct the interference by one or more of the following
measures:
--Reorient or relocate the receiving antenna.
--Increase the separation between the equipment and receiver.
--Connect the equipment into an outlet on a circuit different from that to which the receiver
is connected.
--Consult the dealer or an experienced radio/TV technician for help.
CAUTION:
Any changes or modifications not expressly approved by the grantee of this device could
void the user's authority to operate the equipment.