Delta Electronics orporated VVKPBT PointRacer User Manual Delta PointRacer UM
Delta Electronics Incorporated PointRacer Delta PointRacer UM
UserManual.wiki
>
Delta Electronics orporated
>
VVKPBT User Manual
user manual
Navigation menu
Upload a User Manual
Namespaces
Wiki Guide
HTML
PDF
Info
Views
User Manual
Discussion / Help
Navigation


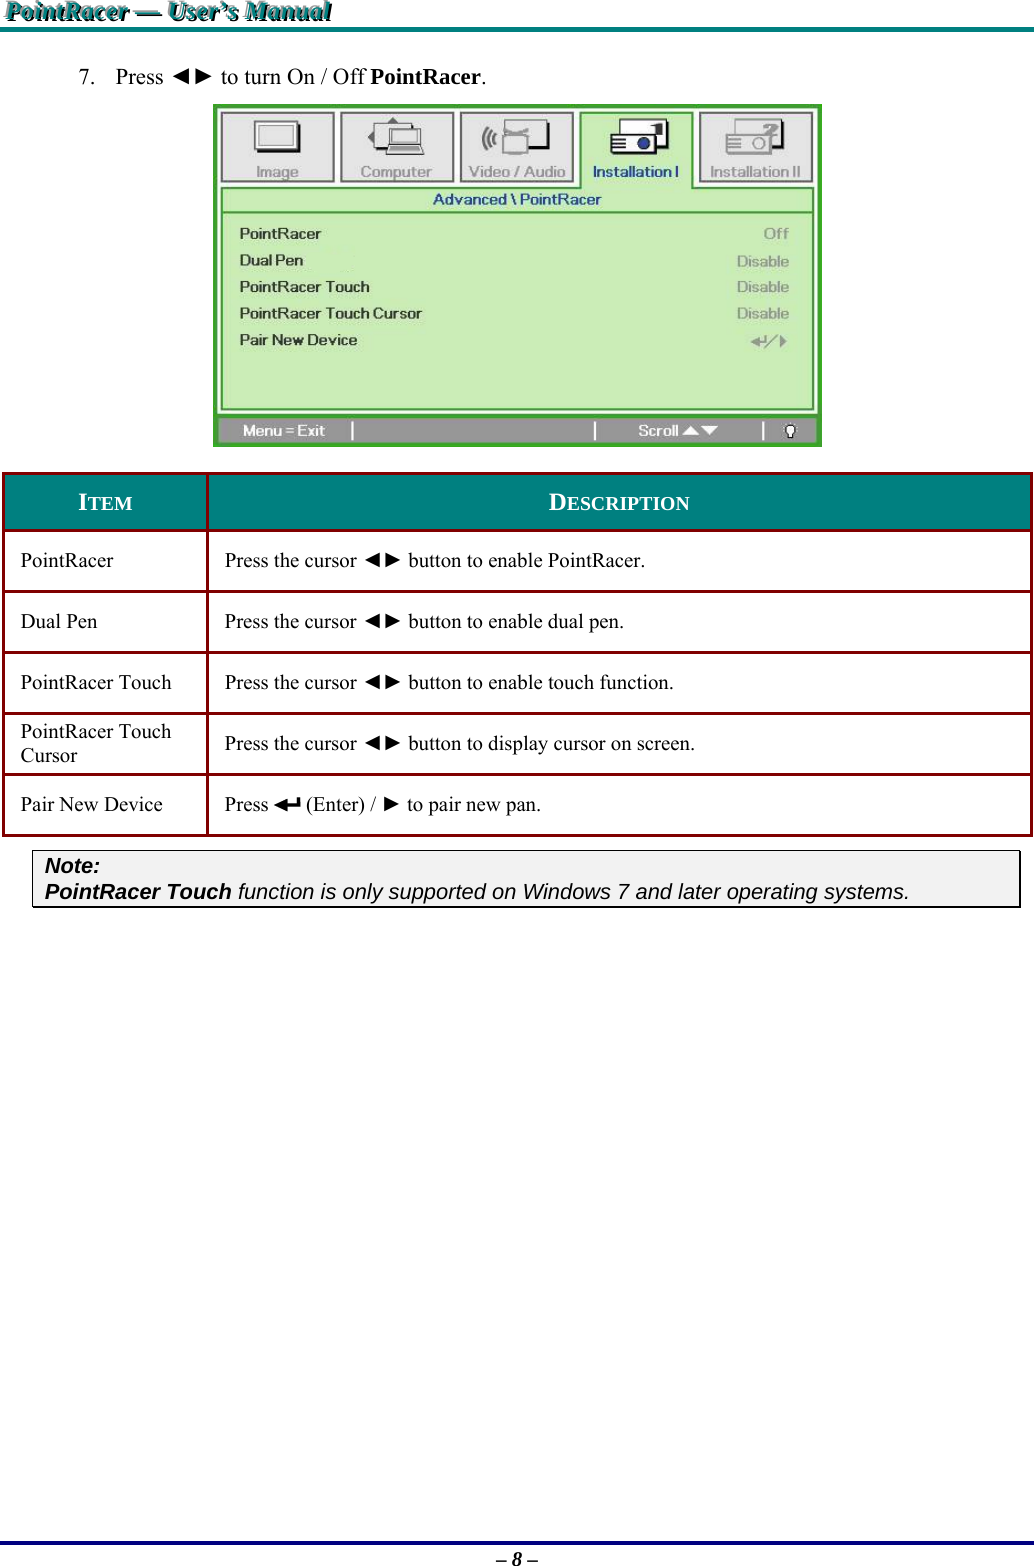
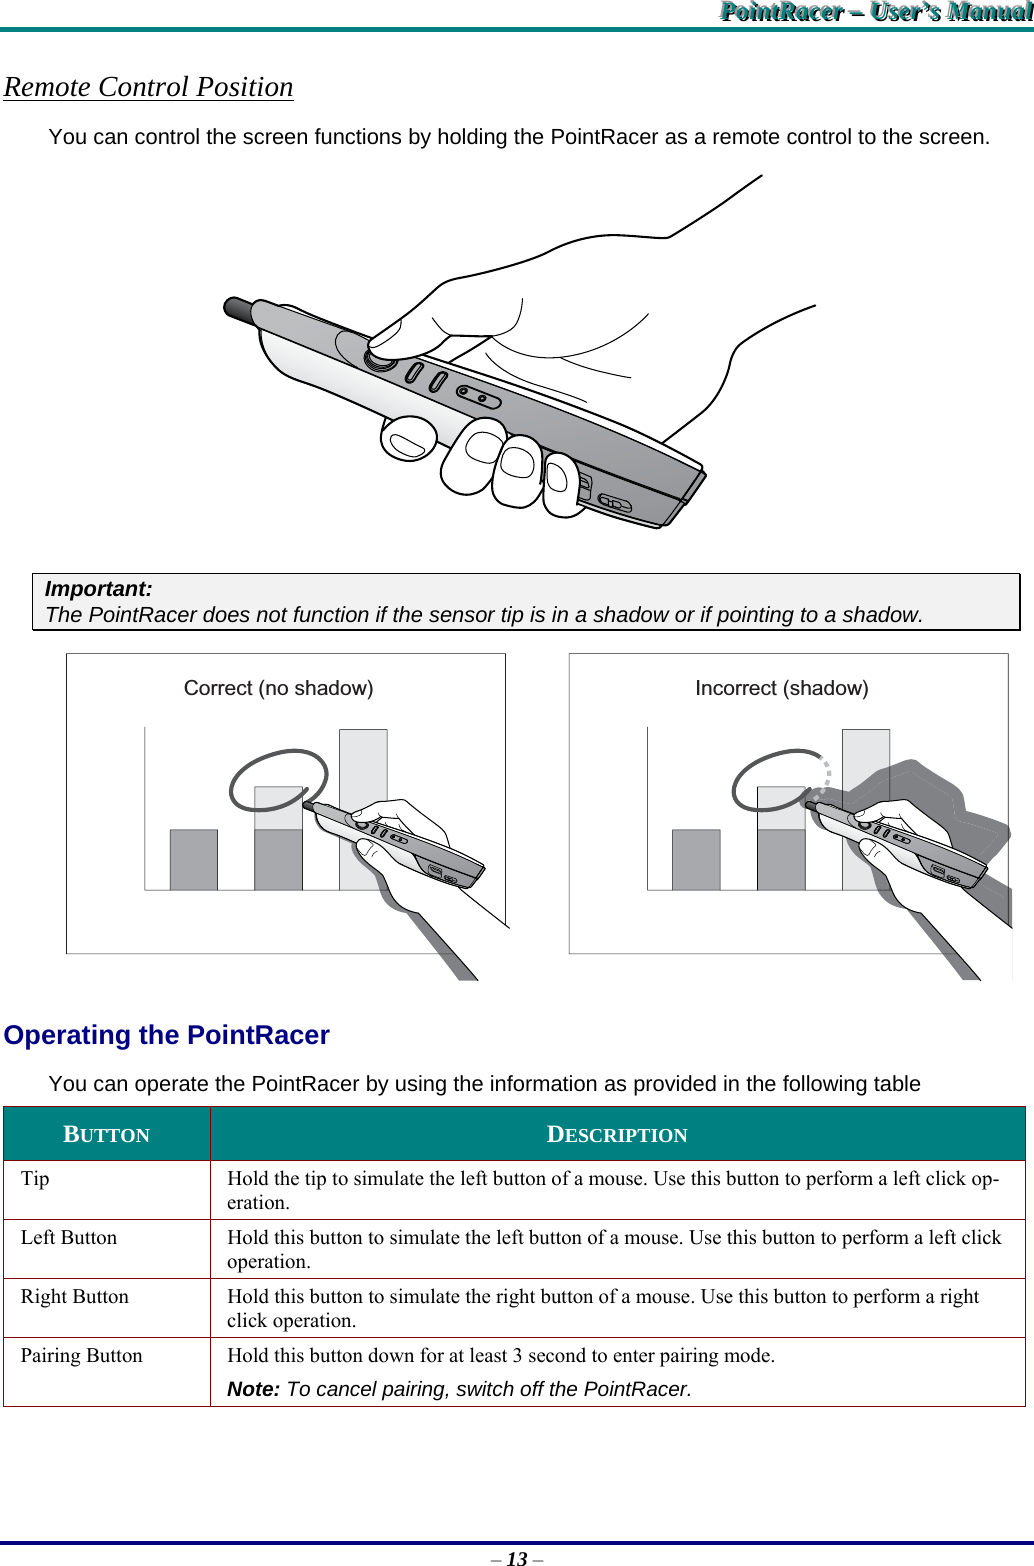
![PPPoooiiinnntttRRRaaaccceeerrr ––– UUUssseeerrr’’’sss MMMaaannnuuuaaalll – 9 – Pairing Your Device In this section, the PoinRacer interactive pen is paired with the projector. The PointRacer function must first be enabled on the projector. 1. Turn on the PointRacer. The Link LED blinks [green] and the interactive pen starts to search for a matching projec-tor. If a link is found the Link LED starts to blink and displays a solid red light when the con-nection is established. 2. Turn on the projector. 3. On the projector, navigate to Installation I > Advanced > PointRacer, press ▲▼ to Pair New Device and press (Enter) / ► to begin the process. 4. Press Pair Matching button for at least 3 seconds. The PointRacer is paired with your projector. Note: 1. First time use of a PointRacer device requires pairing to a projector. 2. PointRacer device retains settings for the last paired projector. To use with a different projector, you must pair the PointRacer to the new projector.](https://usermanual.wiki/Delta-Electronics-orporated/VVKPBT/User-Guide-1723706-Page-13.png)
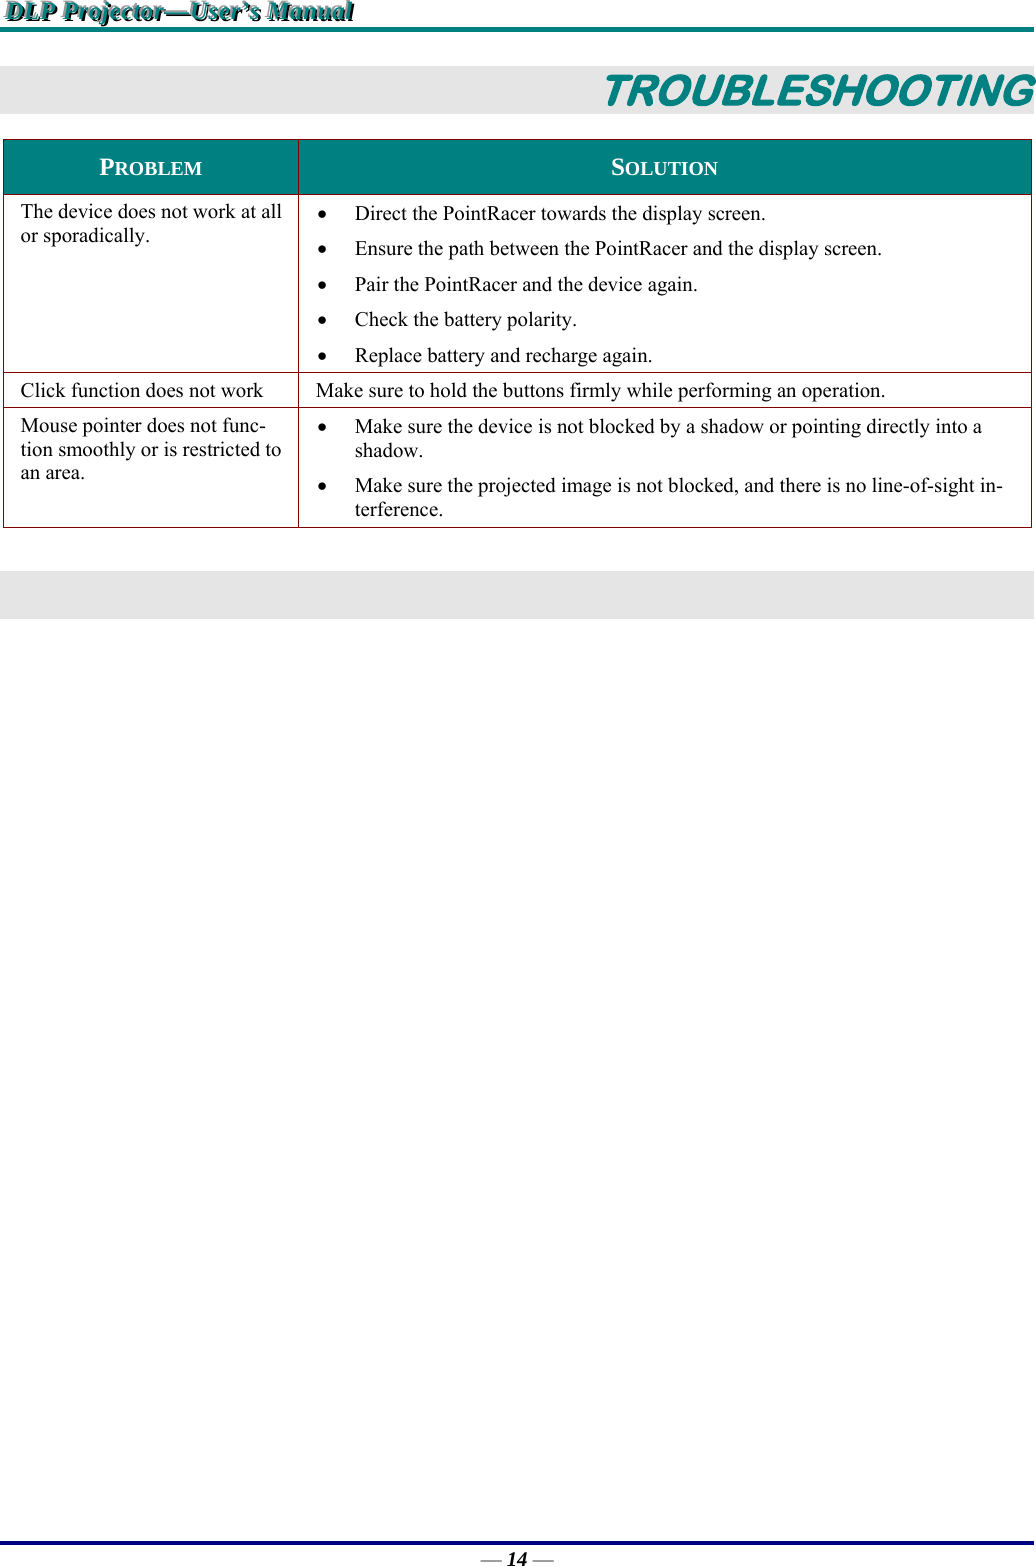
![PPPoooiiinnntttRRRaaaccceeerrr ——— UUUssseeerrr’’’sss MMMaaannnuuuaaalll – 10 – Driver Installation System Requirements Make sure your system meets the following minimum requirements: Windows 7 operating system DVI/VGA or HDMI connector Installing Drivers 1. Open a web browser and enter http://www.microsoft.com/download/en/details.aspx?id=17368. 2. Select the [touch-pack-web.exe] and press CONTINUE. 3. Once the file is downloaded, run the file to install. 4. Follow the on-screen prompts to finish in-stallation. Confirming Installation Once hardware connection and the drivers are installed, you can confirm a successful installation by using the following information. The projector, target computer, and PointRacer must be connected at this point. In addition, the PointRacer function must be enabled on the projector before proceeding. 1. Turn on your computer and boot up the operating system. 2. Navigate to Control Panel > System Security > System. 3. Under the System menu, Pen and Touch setting displays the available inputs. Correct installation: Displays Touch Input Available Incorrect installation: Displays No Pen or Touch Input is Available](https://usermanual.wiki/Delta-Electronics-orporated/VVKPBT/User-Guide-1723706-Page-14.png)