Delta Electronics LMWA200 WLAN PCI Adapter User Manual LM WA200 user s manual
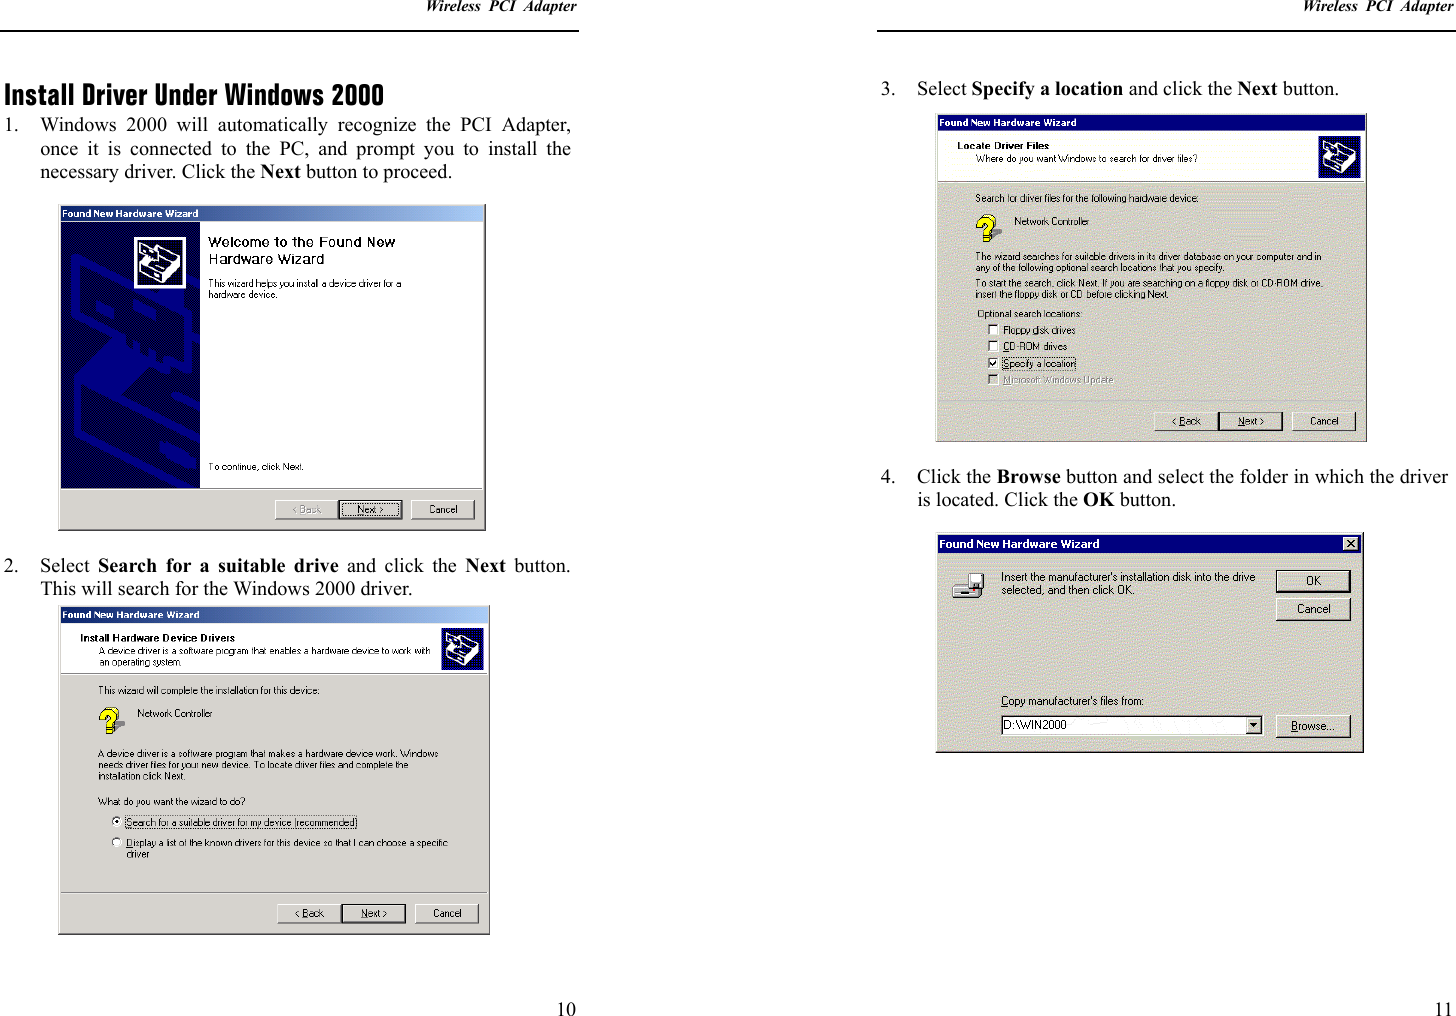
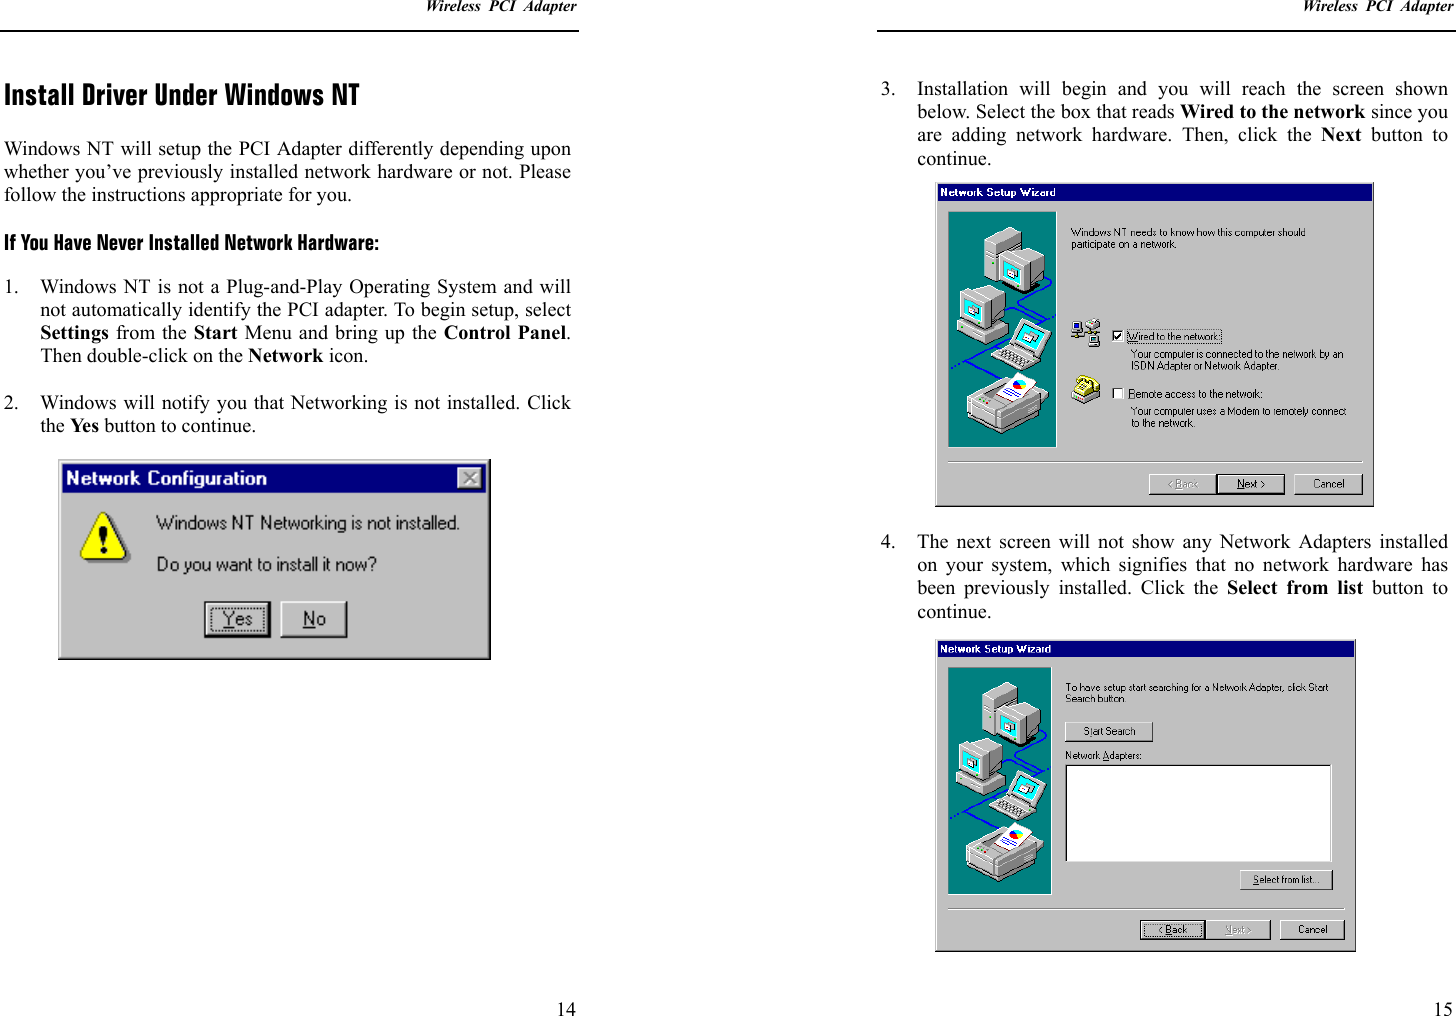
Delta Networks, Inc. WLAN PCI Adapter LM WA200 user s manual
UserManual.wiki
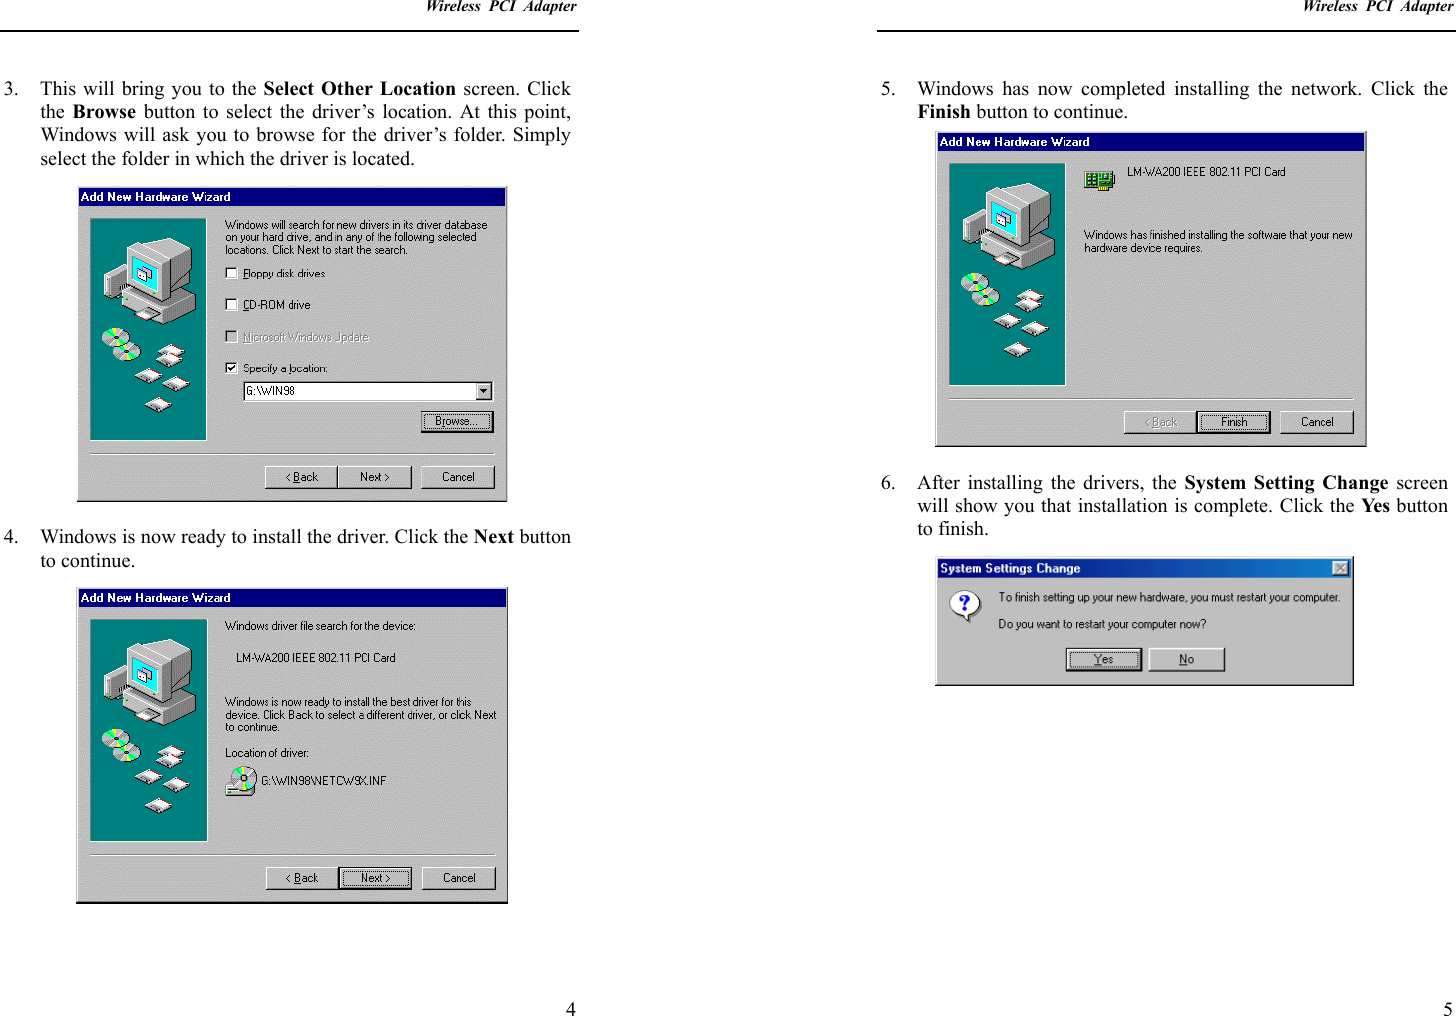
>
Delta Electronics
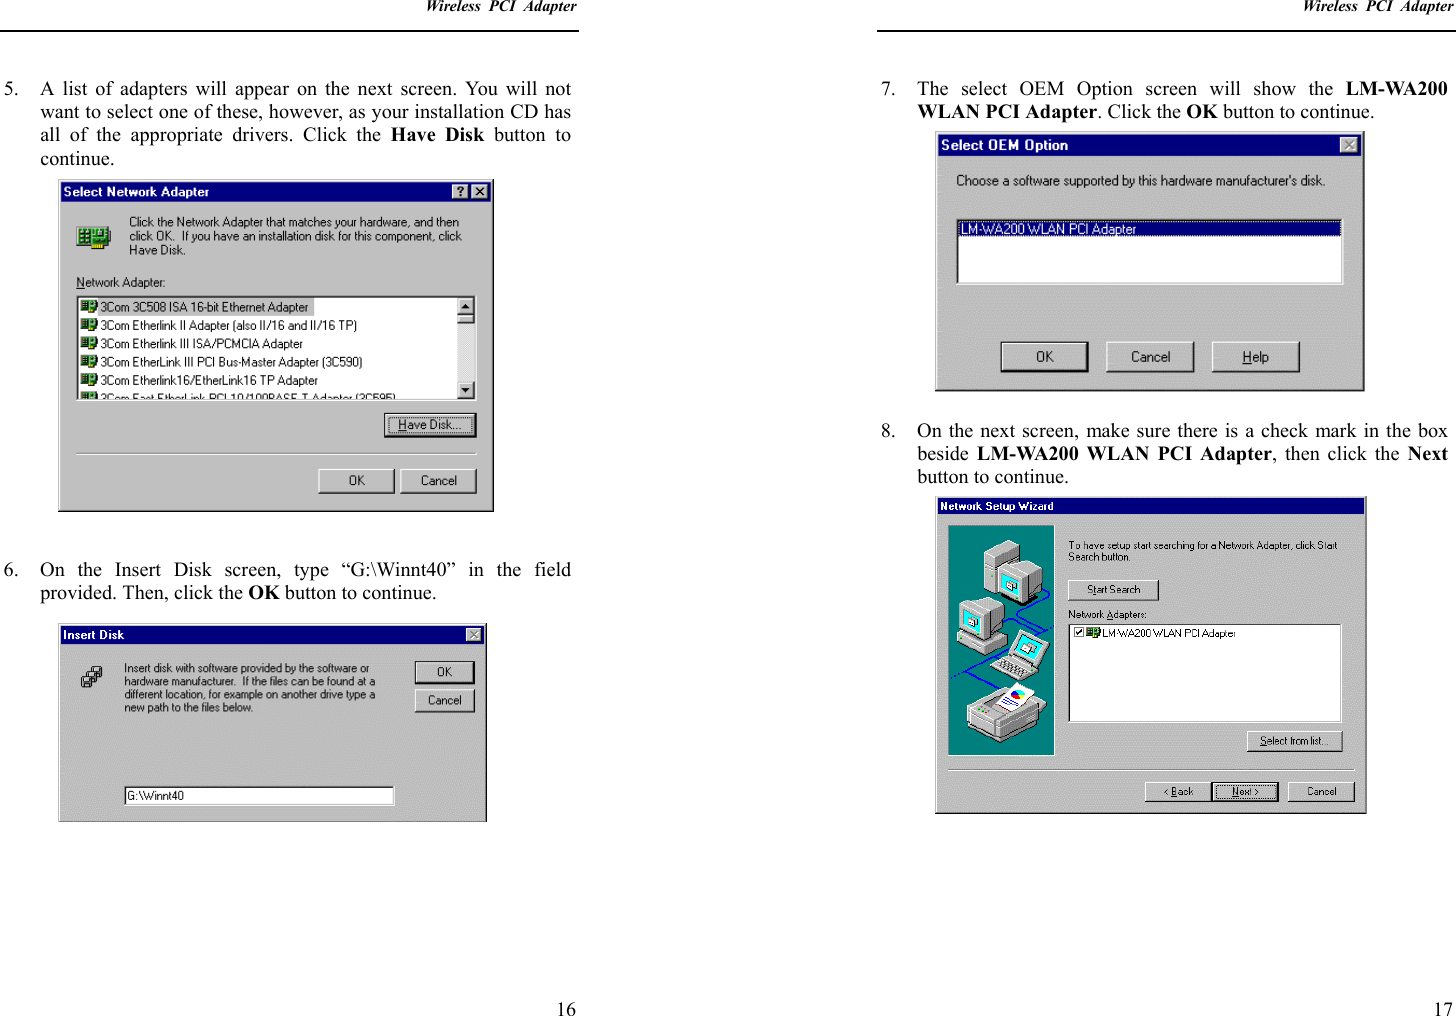
>
LMWA200 User Manual
Manual
Navigation menu
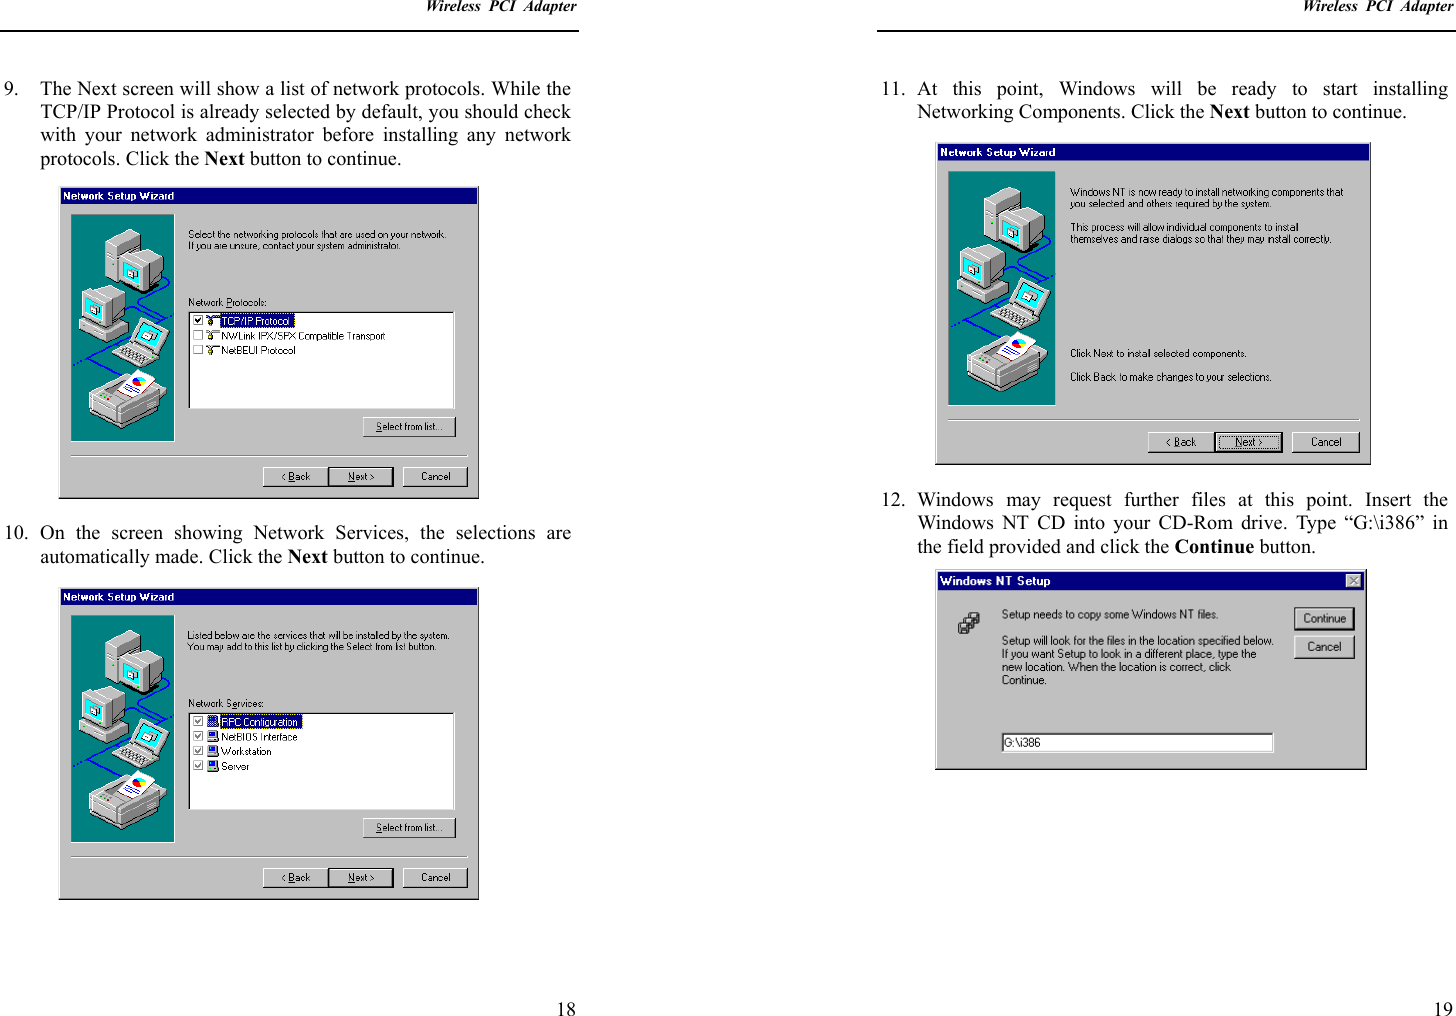
Upload a User Manual
Namespaces
Wiki Guide
HTML
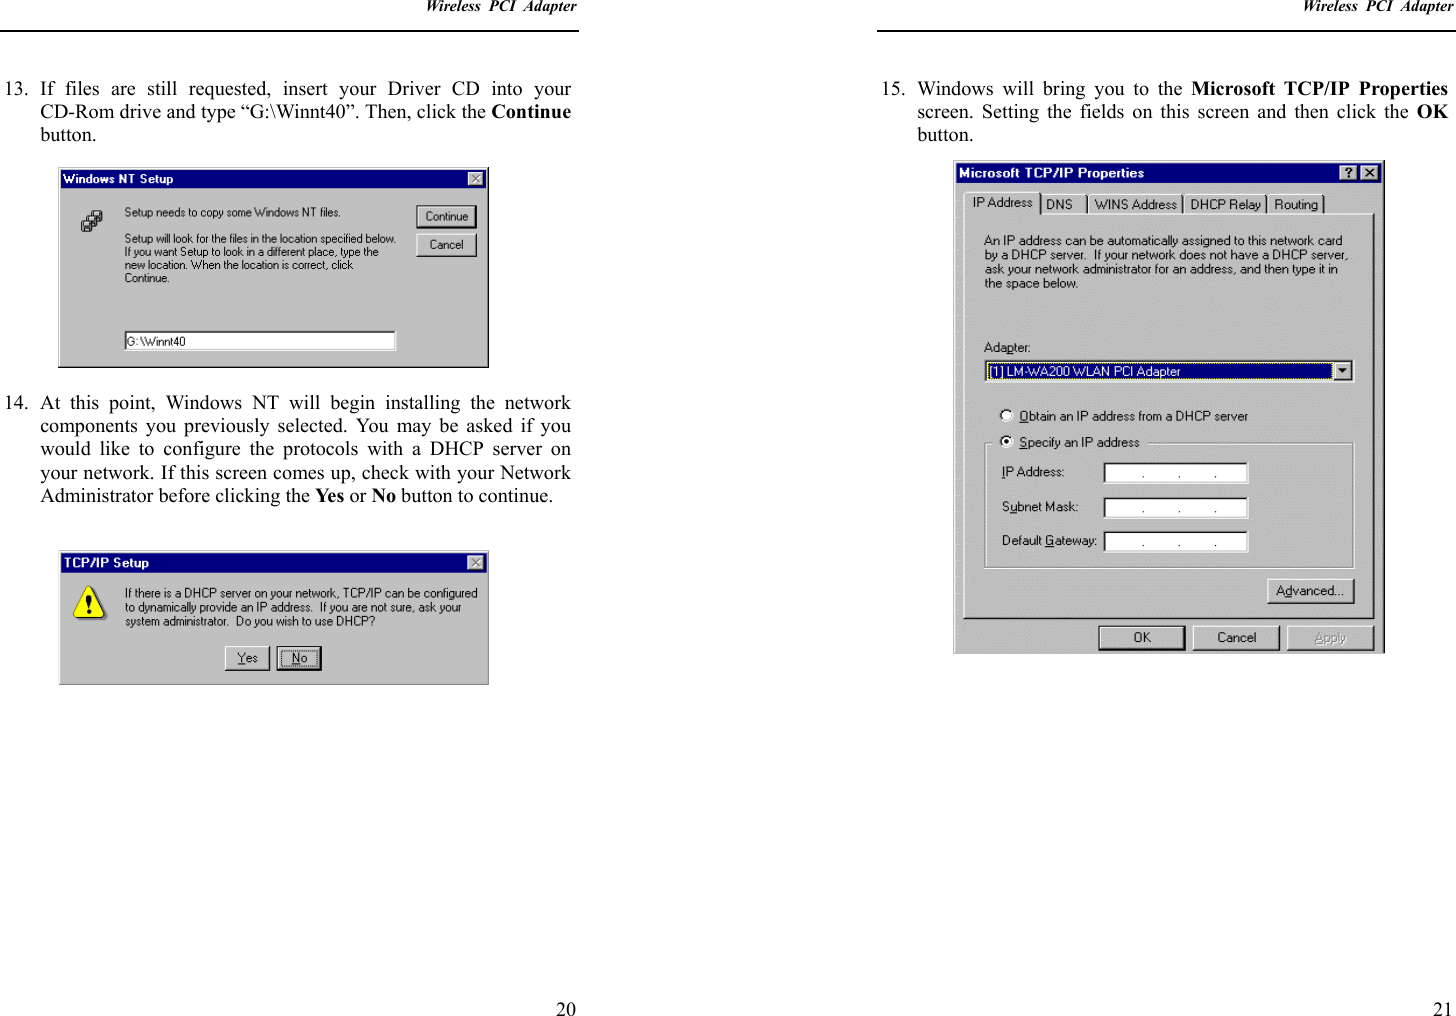
PDF
Info
Views
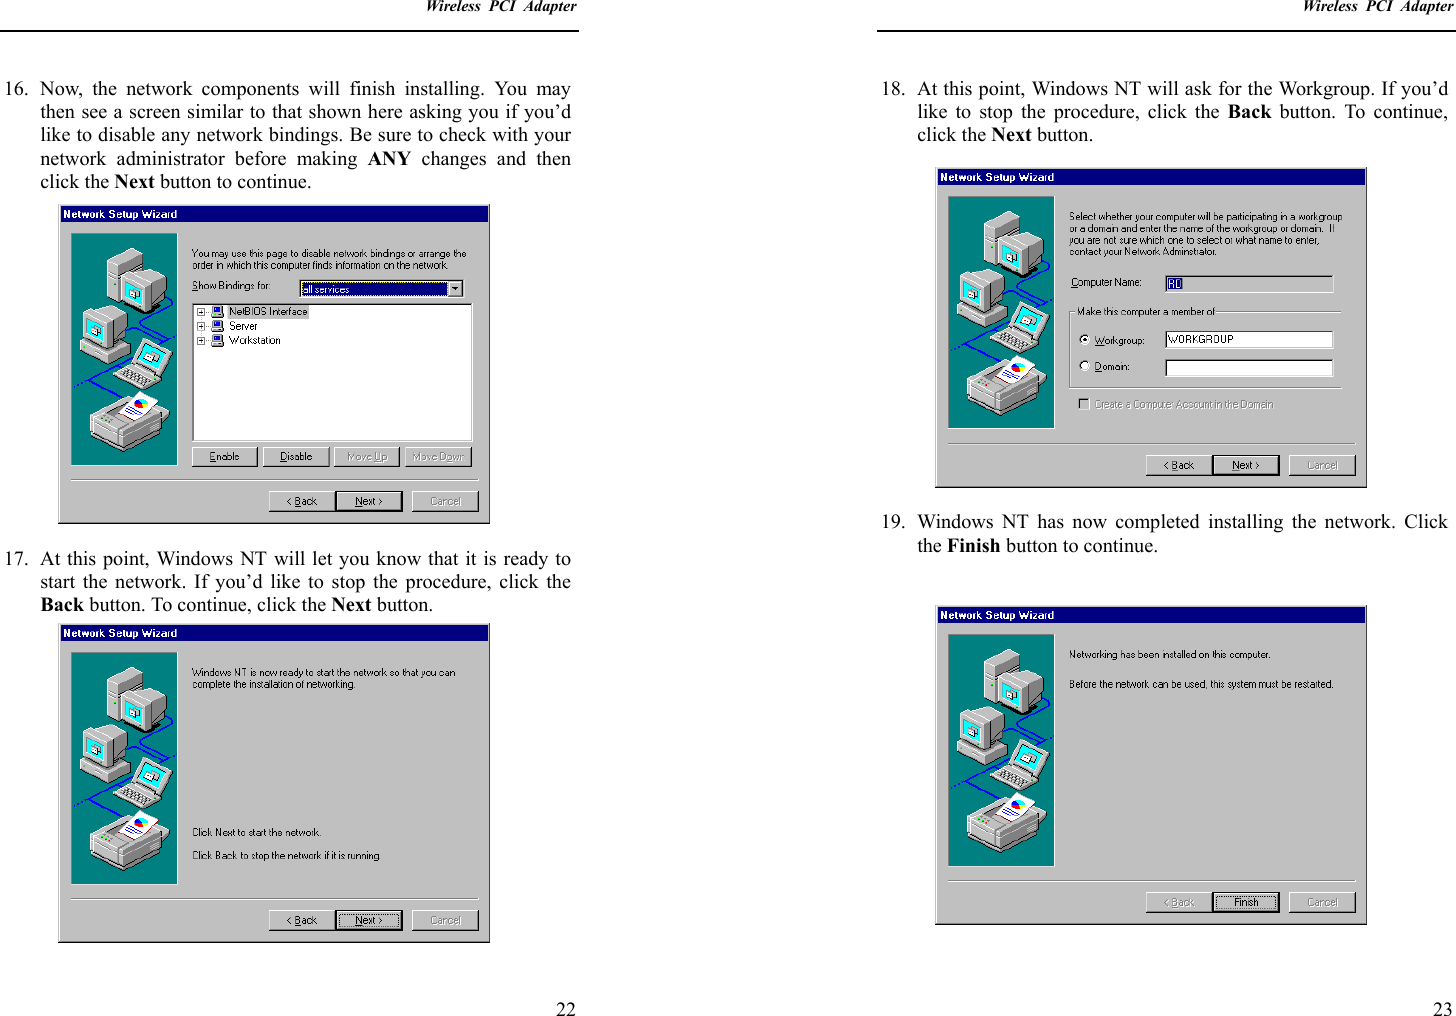
User Manual
Discussion / Help
Navigation
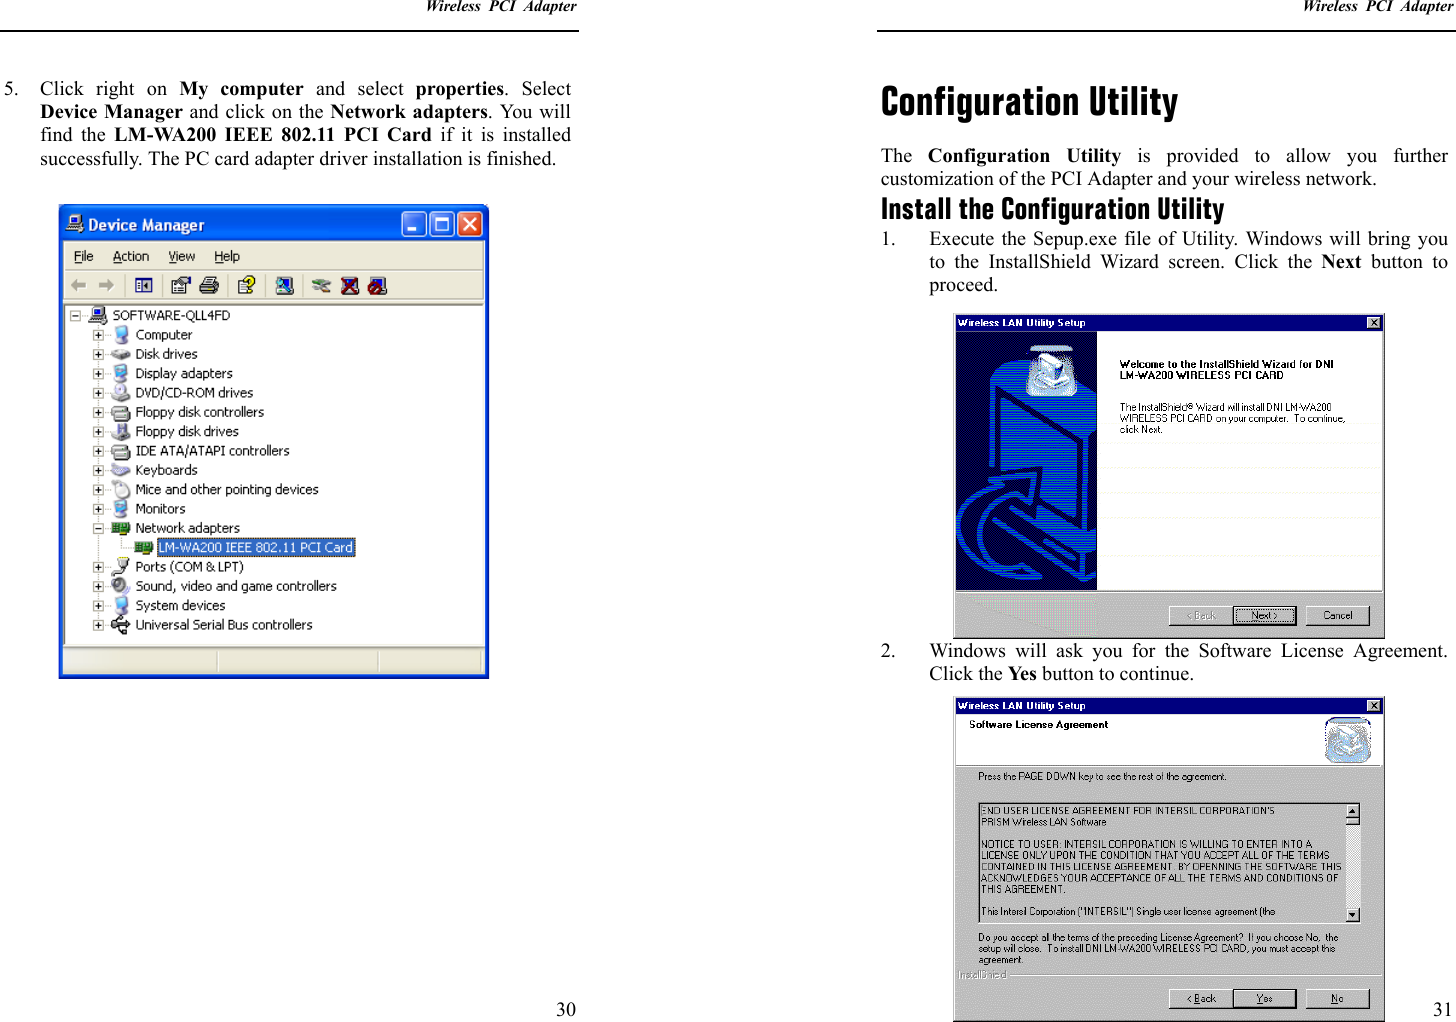
![Wireless PCI Adapter 6 7. Click right on My computer and select properties. Select Device Manager and click on the Network adapters. You will find the LM-WA200 IEEE 802.11 PCI Card if it is installed successfully. The PCI Adapter driver installation is finished. Wireless PCI Adapter 7 Install Driver Under Windows ME 1. Windows automatically recognizes a new PCI Adapter added. Select Automatic search for a better driver [Recommended] and click the Next button to proceed. 2. At this point, Windows will ask for the cw10.sys file. Browse the driver of the CD-ROM.](https://usermanual.wiki/Delta-Electronics/LMWA200/User-Guide-176375-Page-5.png)


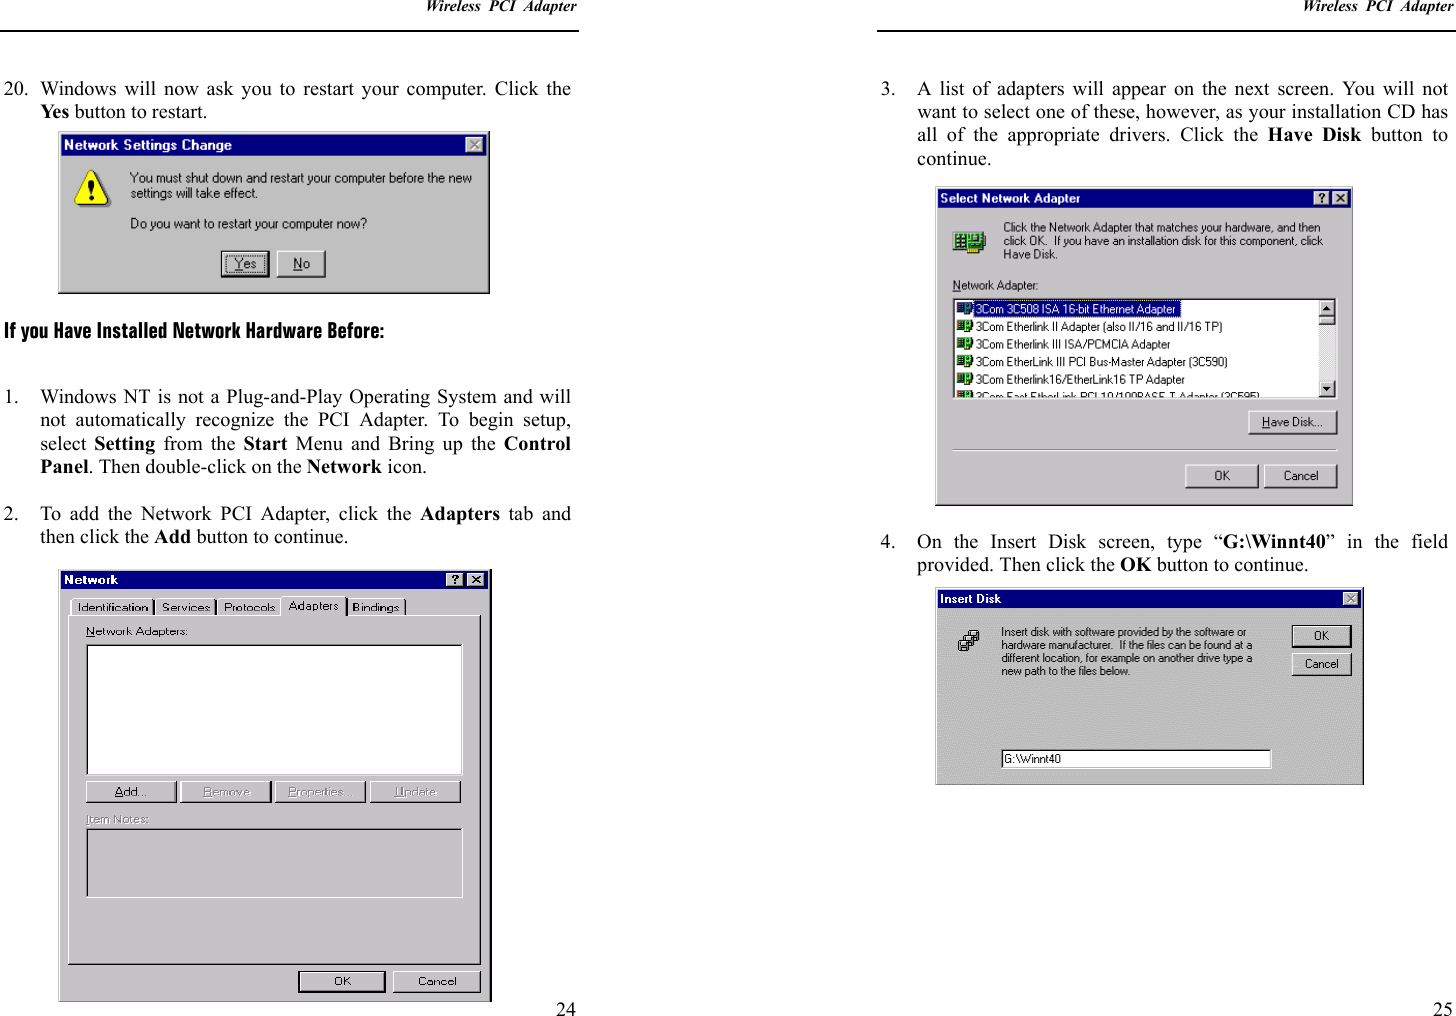
![Wireless PCI Adapter 28 Install Driver Under Windows XP 1. Connect the Wireless PC card into your Notebook PC. Windows XP will automatically recognize a new LM-WA200 IEEE 802.11 PCI Card. Select Install from a list or specific location [Advanced] and click the Next button to proceed. 2. At this point, Windows will ask for the driver location. Make sure Include this location in the search is selected and browse the path of the driver. Wireless PCI Adapter 29 3. Windows will notify you that it has not passed Windows Logo testing to verify its compatibility with Whistler. Click the Continue Anyway button to continue. 4. Windows has now completed installing the network. Click the Finish button to continue.](https://usermanual.wiki/Delta-Electronics/LMWA200/User-Guide-176375-Page-16.png)