Denso Wave orporated BHT710BB Bar Code Handy Terminal User Manual 0 BHT700Bseries OperatorsGuide
Denso Wave Incorporated Bar Code Handy Terminal 0 BHT700Bseries OperatorsGuide
UserManual.wiki
>
Denso Wave orporated
>
BHT710BB User Manual
BHT-710BB-CE_UserMan
Navigation menu
Upload a User Manual
Namespaces
Wiki Guide
HTML
PDF
Info
Views
User Manual
Discussion / Help
Navigation


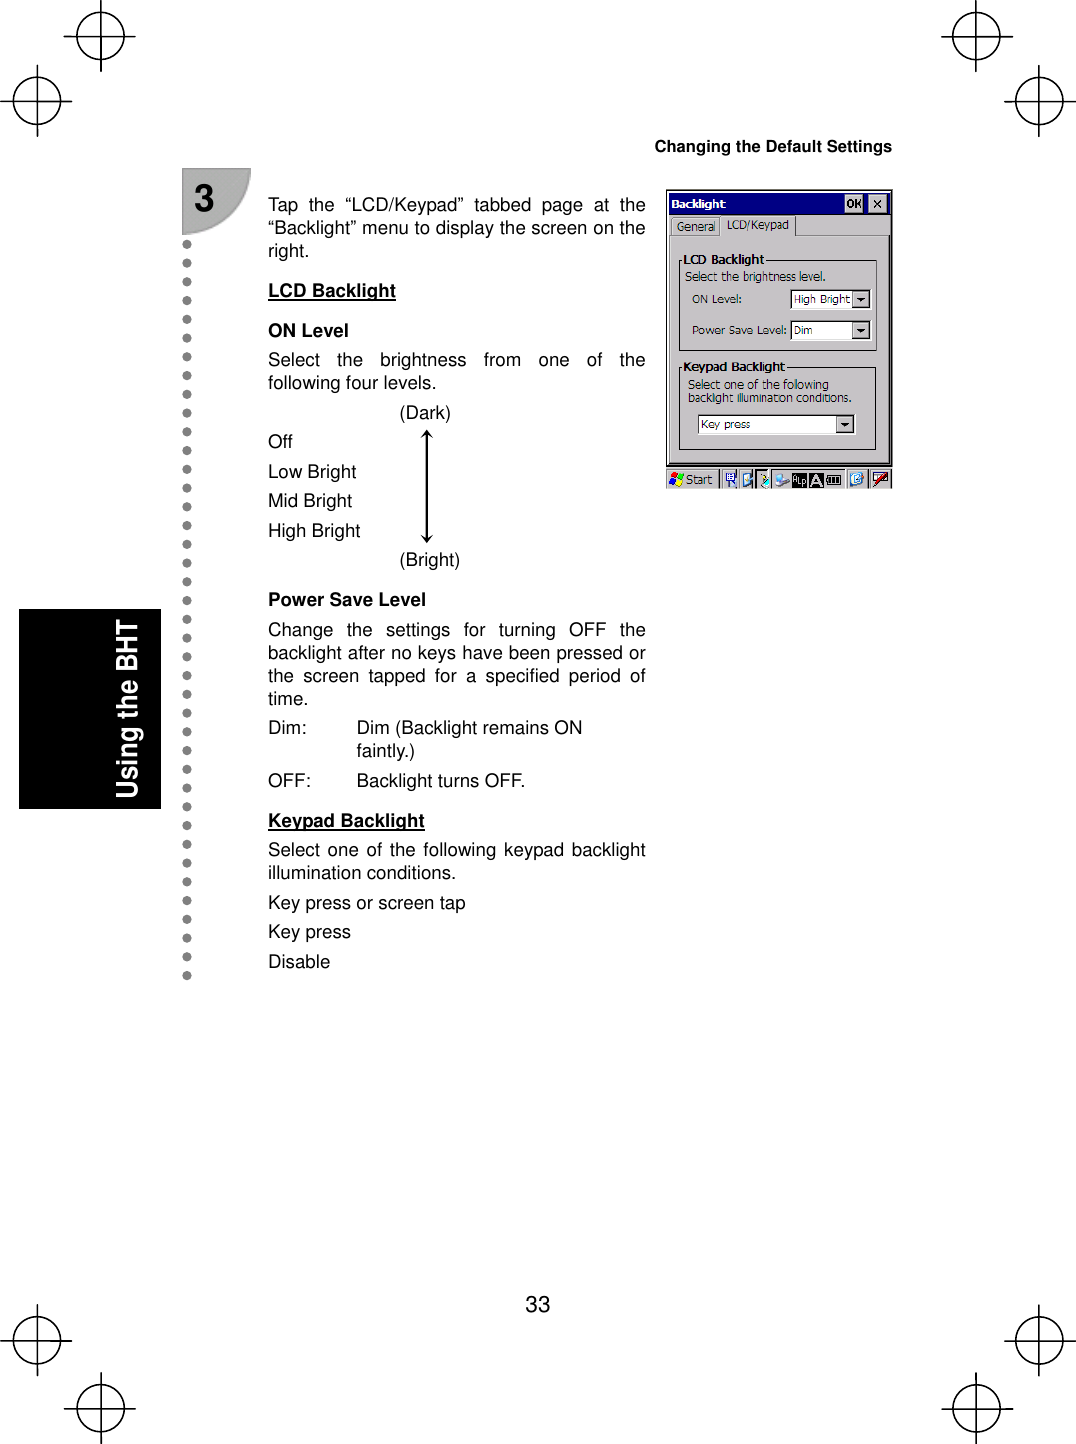
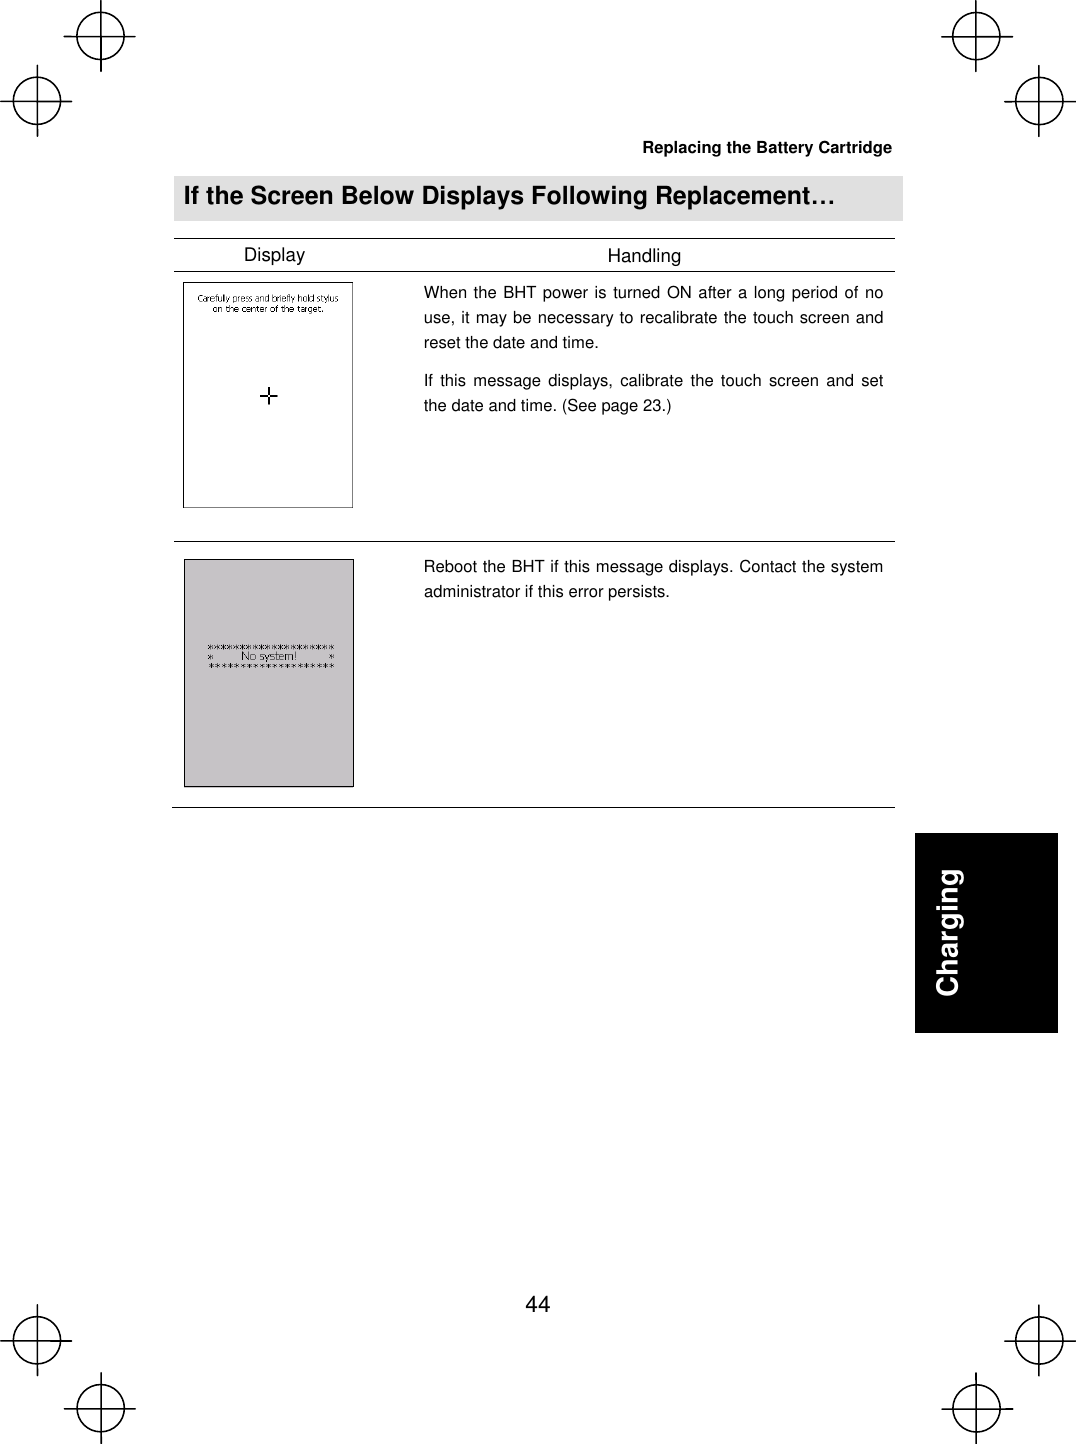
![31 Using the BHT 4 Tap the “Calibration” tabbed page. 5 Tab the [Recalibrate] button to display the screen on the right. Follow the instructions displayed on the screen. (See page 23.) (3) Backlight 1 Double-tap the “Backlight” icon at the “Control Panel”. Changing the Default Settings](https://usermanual.wiki/Denso-Wave-orporated/BHT710BB/User-Guide-1263181-Page-38.png)