Dewalt D26441 TYPE 1 User Manual SANDER Manuals And Guides 1310383L
User Manual: Dewalt D26441 TYPE 1 D26441 TYPE 1 DEWALT SANDER - Manuals and Guides View the owners manual for your DEWALT SANDER #D26441TYPE1. Home:Tool Parts:Dewalt Parts:Dewalt SANDER Manual
Open the PDF directly: View PDF ![]() .
.
Page Count: 6
E
O
m
,Q
<(03
NLU
>-©
©_>
oo
rr_
WI--
(/)u)
w_z
_cu
uJ
m<(
O'W
OZ .
m_
a.w_
c <2
_'-- j
v_z_,,,
rr <( 03
C3_
O
ztr
t_
Z_.7--
opw
NC N
@
¢O '4
m
•
t3) 'r- -0
R_
r, _ r,
DEWALT Industrial Tool Co., 701 East Joppa Road, Baltimore, MD 21286
(AUG04) Form No. 624290-00 D26441 Copyright © 2004 DEWALT
The following are trademarks for one or more DEWALT power tools: the yellow and black color
scheme; the "D" shaped air intake grill; the array of pyramids on the handgrip; the kit box
configuration; and the array of lozenge-shaped humps on the surface of the tool.
IF YOU HAVE ANY QUESTIONS OR COMMENTS ABOUT THIS OR ANY DEWALT TOOL,
CALL US TOLL FREE AT: 1-800-4-DEWALT (1-800-433-9258)
Genera_ Safety _nstructions
AARNING! Read and understand all instructions. Failure to follow all instructions listed
below may result in electric shock, fire and/or serious personal injui3z.
SAVE THESE _NST_UCT_ONS
WORK AREA
* Keep your work area clean and well fit. Cluttered benches and dark areas invite accidents.
* Do not operate power tools in explosive atmospheres, such as in the presence of flam-
mable liquids, gases, or dust. Power tools create sparks which may ignite the dust or
fumes.
* Keep bystanders, children, and visitors away while operating a power tool Distractions
can cause you to lose control.
ELECTRICAL SAFETY
* Grounded tools must be plugged into an outlet properly installed and grounded in
accordance with all codes and ordinances. Never remove the grounding prong or
modify the plug in any way. Do not use any adaptor plugs. Check with aquafified elec-
trician if you are in doubt as to whether the outlet is properly grounded, ff the tools
should electrically malfunction or break down, grounding provides a low resistance path to
carry electricity away from the user. Applicable only to Class I (grounded) tools.
* Double insulated tools are equipped with a polarized plug (one blade is wider than the
other.) This plug will fit in a polarized outlet only one way. If the plug does not fit fully
in the outlet, reverse the plug. if it still does not fit, contact a qualified electrician to
install a polarized outlet. Do not change the plug in any way. Double insulation [] elim-
inates the need for the three wire grounded power cord and grounded power supply system.
Applicable only to Class II (double insulated) tools.
* Avoid body contact with grounded surfaces such as pipes, radiators, ranges and
refrigerators. There is an increased risk of electric shock if your body is grounded.
* Don't expose power tools to rain or wet conditions. Water entering a power tool will
increase the risk of electric shock.
* Do not abuse the cord. Never use the cord to carry the tools or pull the plug from an
outlet. Keep cord away from heat, oil, sharp edges or moving parts. Replace damaged
cords immediately. Damaged cords increase the risk of electric shock.
* When operating a power tool outside, use an outdoor extension cord marked "W-A"
or "W." These cords are rated for outdoor use and reduce the risk of electric shock. When
using an extension cord, be sure to use one heavy enough to carry the current your product
will draw. An undersized cord will cause a drop in line voltage resulting in loss of power and
overheating. The following table shows the correct size to use depending on cord length and
nameplate ampere rating. If in doubt, use the next heavier gage. The smaller the gage num-
ber, the heavier the cord.
Minimum Gage for Cord Sets
Volts Total Length of Cord in Feet
120V 0-25 26-50 51-100 101-150
240V 0-50 51-100 101-200 201-300
Ampere Rating
More Not more AWG
Than Than
0 6 18 16 16 14
PERSONAL SAFETY
* Stay alert, watch what you are doing and use common sense when operating a power
tool Do not use tool while tired or under the influence of drugs, alcohol, or medication.
A moment of inattention while operating power tools may result in serious personal injui3z
* Dress properly. Do not wear loose clothing or jewelry. Contain long hair. Keep your hair,
clothing, and gloves away from moving parts. Loose clothing, jewelry, or long hair can be
caught in moving parts. Air vents often cover moving parts and should also be avoided.
* Avoid accidental starting. Be sure switch is off before plugging in. Carrying tools with
your finger on the switch or plugging in tools that have the switch on invites accidents.
* Remove adjusting keys or wrenches before turning the tool on. A wrench or a key that
is left attached to a rotating part of the tool may result in personal injury.
* Do not overreach. Keep proper footing and balance at all times. Proper footing and bal-
ance enables better control of the tool in unexpected situations.
* Use safety equipment. Always wear eye protection. Dust mask, non-skid safety shoes,
hard hat, or hearing protection must be used for appropriate conditions.
TOOL USE AND CARE
* Use clamps or other practical way to secure and support the workpiece to astable
platform. Holding the work by hand or against your body is unstable and may lead to loss of
control.
* Do not force tool Use the correct tool for your application. The correct tool will do the
job better and safer at the rate for which it is designed.
* Do not use tool if switch does not turn it on or off. Any tool that cannot be controlled with
the switch is dangerous and must be repaired.
* Disconnect the plug from the power source before making any adjustments, changing
accessories, or storing the tool Such preventative safety measures reduce the risk of
starting the tool accidentally.
*Store idle tools out of reach of children and other untrained persons. Tools are dan-
gerous in the hands of untrained users.
.Maintain tools with care. Keep cutting tools sharp and clean. Properly maintained tools,
with sharp cutting edges are less likely to bind and are easier to control.
* Check for misalignment or binding of moving parts, breakage of parts, and any other
condition that may affect the tool's operation. If damaged, have the tool serviced
before using. Many accidents are caused by poorly maintained tools.
* Use only accessories that are recommended by the manufacturer for your model
Accessories that may be suitable for one tool, may become hazardous when used on
another tool.
SERVICE
* Tool service must be performed only by qualified repair personnel Service or mainte-
nance performed by unqualified personnel could result in a risk of injury
* When servicing a tool, use only identical replacement parts. Follow instructions in the
Maintenance section of this manual Use of unauthorized parts or failure to follow mainte-
nance instructions may create a risk of electric shock or injury.
_dditiona_ Safety _nstructions for Sanders
,Accessories must be rated for at least the speed recommended on the tool warning
label Wheels and other accessories running over rated speed can fly apart and cause injury.
Accessory ratings must be above listed minimum wheel speed as shown on tool nameplate.
,Hold tool by insulated gripping surfaces when performing an operation where the cut-
ting tool may contact hidden wiring or its own cord. Contact with a 'five" wire will make
exposed metal parts of the tool 'five" and shock the operator.
,Always wear eye protection and a respirator when sanding.
,Sanding of lead-based paint is not recommended. See Precautions To Take When
Sanding Paint for additional information before sanding paint.
,Do not operate the unit without the dust collection bag.
* Clean your tool outperiodically.
,Empty dust bag frequently, especially when sanding resin coated surfaces such as
polyurethane, varnish, shellac, etc. Dispose of coated dust particles according to the finish
manufacturer's guidelines, or place in a metal can with a tight-fitting metal lid. Remove coated
dust particles from the premises daily. The accumulation of fine sanding dust particles may
serf ignite and cause fire.
J&WARNING: Some dust created by power sanding, sawing, grinding, drilling, and other con-
struction activities contains chemicals known to cause cancer, birth defects or other reproduc-
tive harm. Some examples of these chemicals are:
* lead from lead-based paints,
* crystalline silica from bricks and cement and other masonry products, and
* arsenic and chromium from chemically-treated lumber (CCA).
Your risk from these exposures varies, depending on how often you do this type of work. To
reduce your exposure to these chemicals: work in a weft ventilated area, and work with approved
safety equipment, such as those dust masks that are specially designed to filter out microscop-
ic particles.
* Avoid prolonged contact with dust from power sanding, sawing, grinding, drilling, and
other construction activities. Wear protective clothing and wash exposed areas with
soap and water. Allowing dust to get into your mouth, eyes, or lay on the skin may promote
absorption of harmful chemicals.
WARNING: Use of this tool can generate and/or disburse dust, which may cause serious and
permanent respiratory or other injury. Always use NIOSH/OSHA approved respiratory protection
appropriate for the dust exposure. Direct particles away from face and body.
ACAUTION: Wear appropriate hearing protection during use. Under some conditions and
duration of use, noise from this product may contribute to hearing loss.
* The label on your tool may include the following symbols. The symbols and their definitions
are as follows:
V.............. volts
Hz ............ hertz
min............ minutes
.... ..........direct current
[] .............. Class II Construction
_, .............. safety alert symbol
A................ amperes
W.............. watts
* ............ alternating current
no .............. no load speed
.............. earthing terminal
.../min ........revolutions per minute
SAVE THESE _NSTRUCT_ONS
COMPONENTS (Fig. 1)
A. On/Off switch E. Vac-adapter
B. Clamp lever R Paper clamp
C. Base plate/pad G. Paper-limiting ribs
D. Dust collection bag
Motor
Your DEWALT tool is powered by a DEWALT-built motor. Be sure your power supply agrees with
the nameplate marking (Volts, 120 AC only). A Voltage decrease of more than 10% will cause
loss of power and overheating. All tools DEWALT tools are factory tested; if this tool does not
operate, check the power supply.
_ttaching Abrasive Paper (Fig. 1, 2)
J},CAUTION: Turn off and unplug the tool before making any adjustments or removing
or installing attachments or accessories. Be sure the switch is in the OFF position.
Your sander is designed to use 1/4-sized sanding sheets. Pre-cut 4-1/2" x 5-1/2" sandpaper is
available at extra cost.
TO MAKE 4-1/2" X 5-1/2" SANDPAPER
a. Cut full-sized (9"x 11") sandpaper into 1/4 sheets of 4-1/2" x 5-1/2".
b. Cut 1/2 sheet sandpaper into two 4-1/2" x 5-1/2" sheets.
For normal operation, assemble the abrasive paper to your unit as follows:
1. Soften the stiff sandpaper by pulling it over the 90 ° edge of a table or other straight edge, as
shown in Figure 2. Concentrate on softening the edges to be clamped.
2. Release the clamp by pulling up on the clamp lever (B) and disengaging it from the tab on the
base plate/pad (C).
3. Insert the 4-1/2" edge of the abrasive paper under the front paper clamp (F) until it hits the
paper-limiting ribs (G). Close the front paper clamp and hook it into the lock position behind
the tab on the base plate/pad.
4. Stretch paper over sanding pad and insert under the opposite clamp in the same way.
5. If you are using the dust extraction feature, perforate the sandpaper (see Paper Punch).
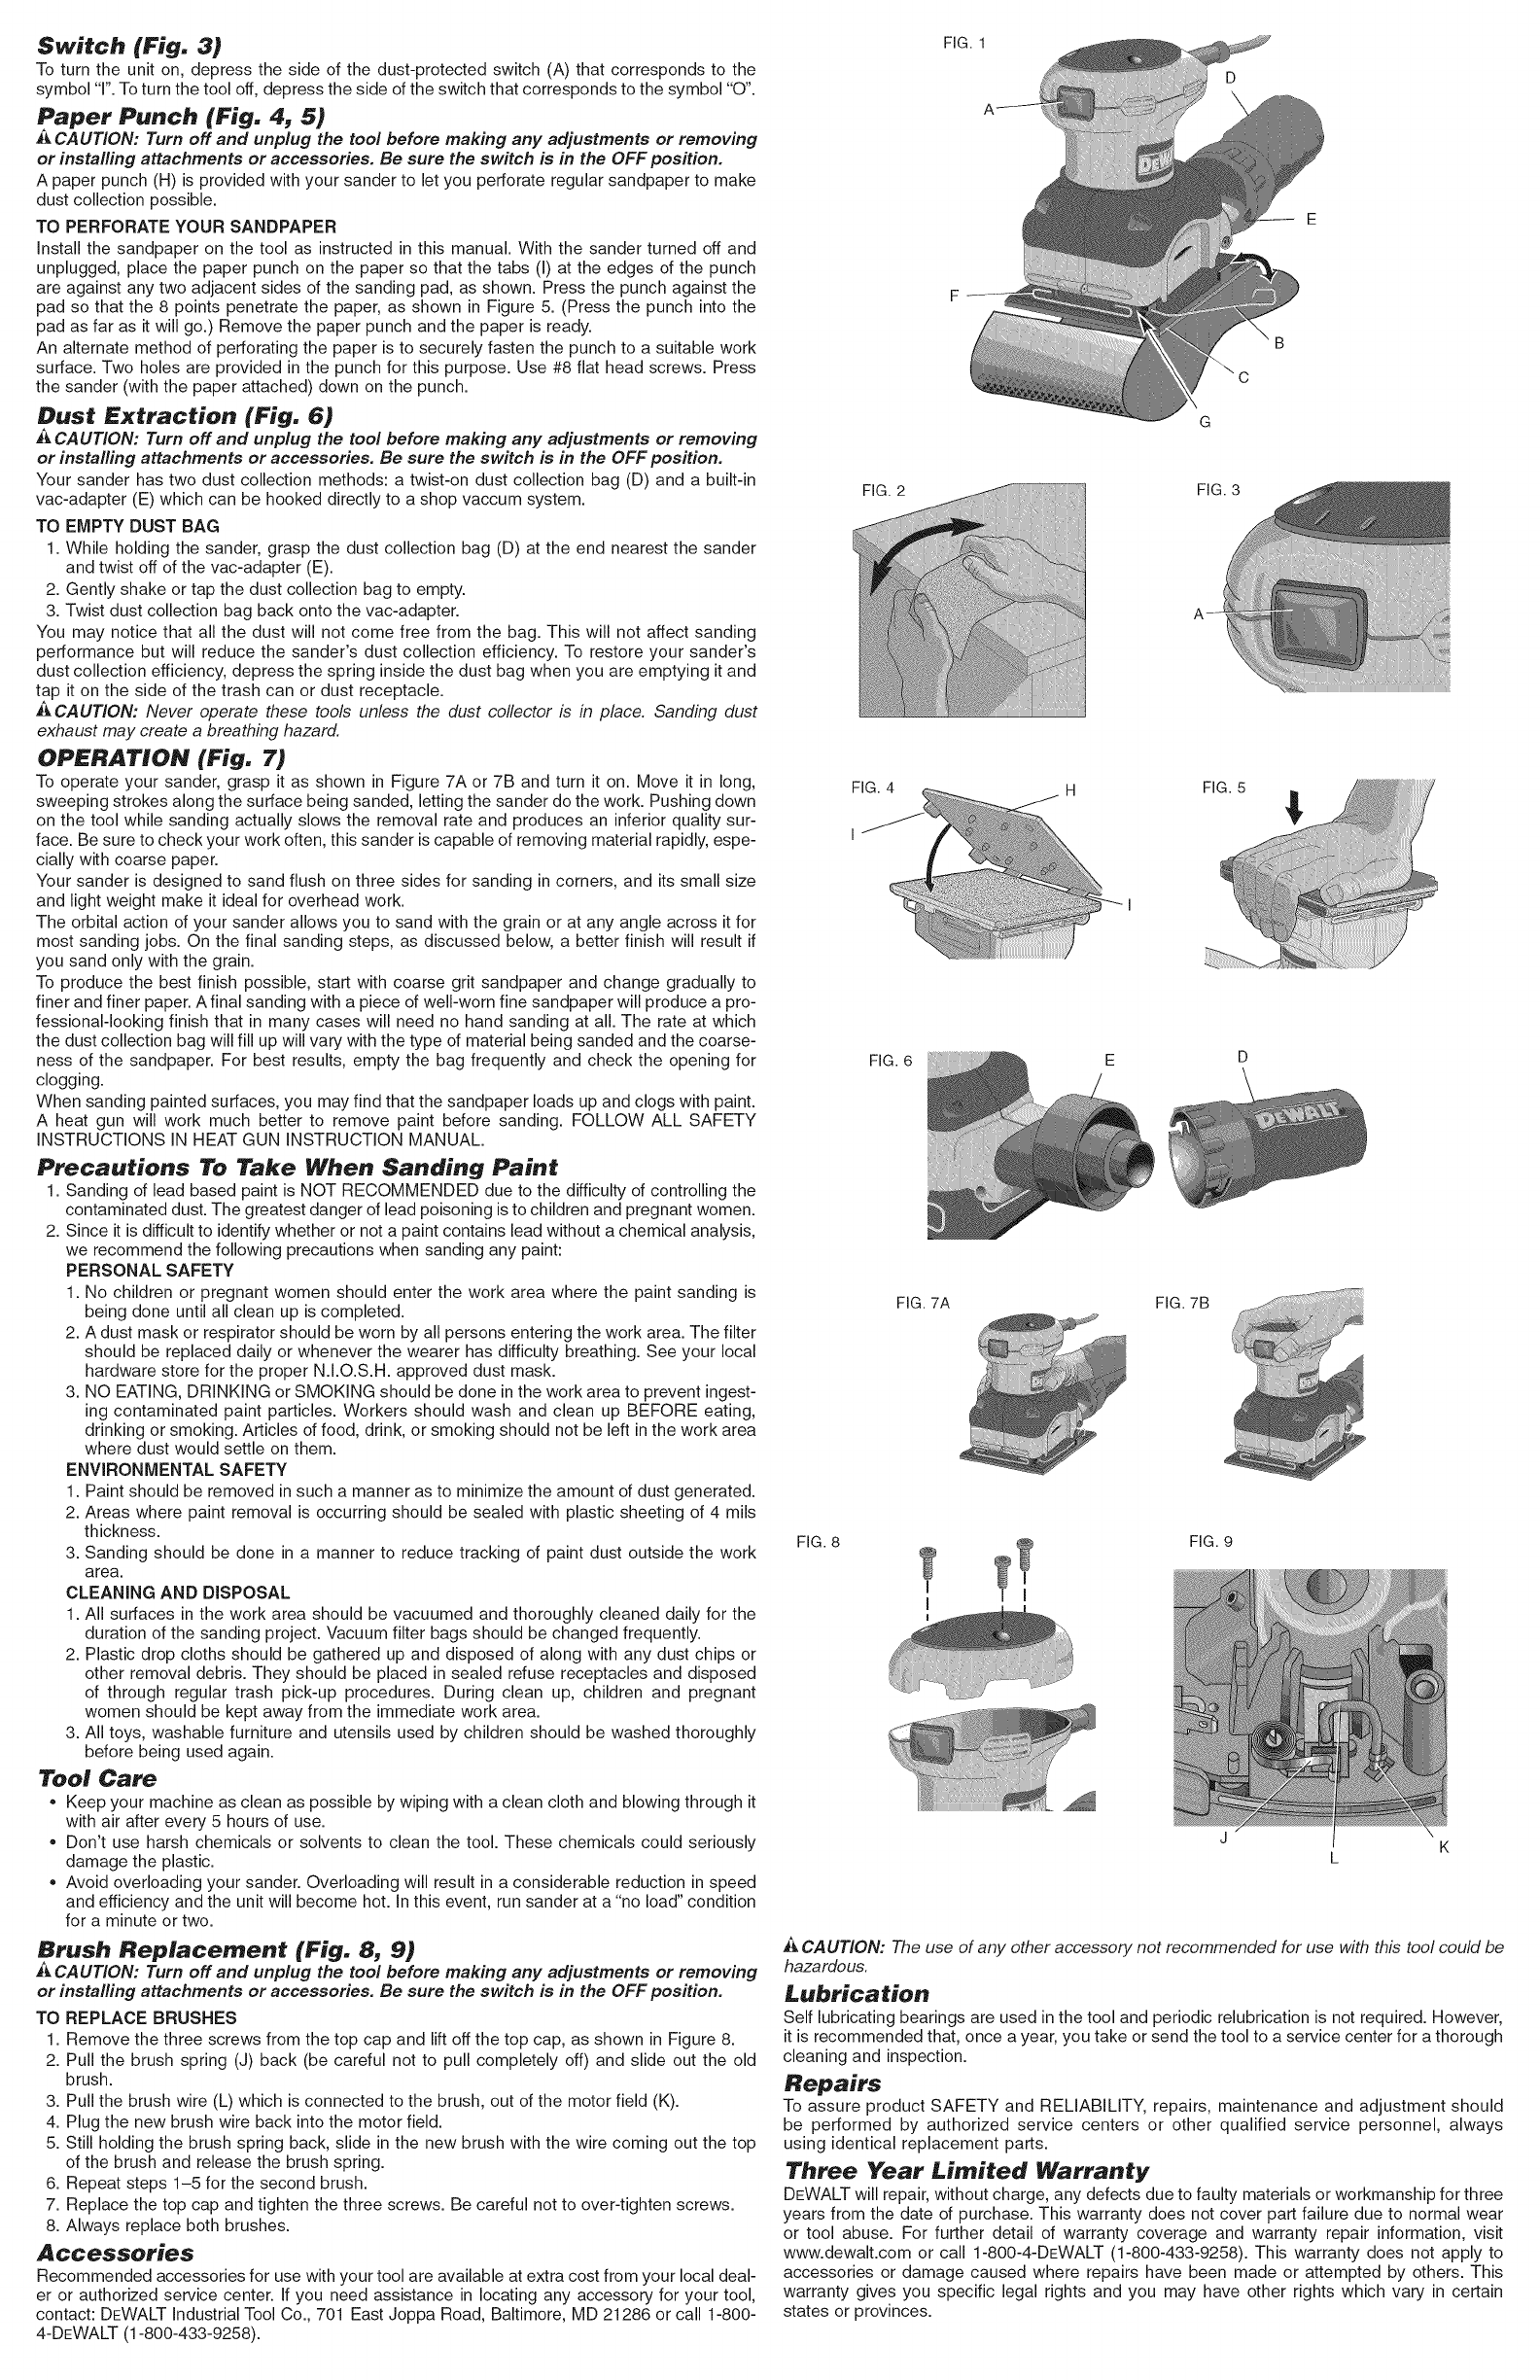
Switch (Fig. 3)
To turn the unit on, depress the side of the dust-protected switch (A) that corresponds to the
symbol 'T'. To turn the tool off, depress the side of the switch that corresponds to the symbol "O".
Paper Punch (Fig. 4, 5)
ACAUTION: Turn off and unplug the tool before making any adjustments or removing
or installing attachments or accessories. Be sure the switch is in the OFF position.
A paper punch (H) is provided with your sander to let you perforate regular sandpaper to make
dust collection possible.
TO PERFORATE YOUR SANDPAPER
Install the sandpaper on the tool as instructed in this manual. With the sander turned off and
unplugged, place the paper punch on the paper so that the tabs (I) at the edges of the punch
are against any two adjacent sides of the sanding pad, as shown. Press the punch against the
pad so that the 8 points penetrate the paper, as shown in Figure 5. (Press the punch into the
pad as far as it will go.) Remove the paper punch and the paper is ready.
An alternate method of perforating the paper is to securely fasten the punch to a suitable work
surface. Two holes are provided in the punch for this purpose. Use #8 flat head screws. Press
the sander (with the paper attached) down on the punch.
Dust Extraction (Fig. 6)
ACAUTION: Turn off and unplug the tool before making any adjustments or removing
or installing attachments or accessories. Be sure the switch is in the OFF position.
Your sander has two dust collection methods: a twist-on dust collection bag (D) and a built-in
vac-adapter (E) which can be hooked directly to a shop vaccum system.
TO EMPTY DUST BAG
1. While holding the sander, grasp the dust collection bag (D) at the end nearest the sander
and twist off of the vac-adapter (E).
2. Gently shake or tap the dust collection bag to empty.
3. Twist dust collection bag back onto the vac-adapter.
You may notice that all the dust will not come free from the bag. This will not affect sanding
performance but will reduce the sander's dust collection efficiency. To restore your sander's
dust collection efficiency, depress the spring inside the dust bag when you are emptying it and
tap it on the side of the trash can or dust receptacle.
ACAUTION: Never operate these tools unless the dust collector is in place. Sanding dust
exhaust may create a breathing hazard.
OPERATION (Fig. 7)
To operate your sander, grasp it as shown in Figure 7A or 7B and turn it on. Move it in long,
sweeping strokes along the surface being sanded, letting the sander do the work. Pushing down
on the tool while sanding actually slows the removal rate and produces an inferior quality sur-
face. Be sure to check your work often, this sander is capable of removing material rapidly, espe-
cially with coarse paper.
Your sander is designed to sand flush on three sides for sanding in corners, and its small size
and light weight make it ideal for overhead work.
The orbital action of your sander allows you to sand with the grain or at any angle across it for
most sanding jobs. On the final sanding steps, as discussed below, a better finish will result if
you sand only with the grain.
To produce the best finish possible, start with coarse grit sandpaper and change gradually to
finer and finer paper. Afinal sanding with a piece of well-worn fine sandpaper will produce a pro-
fessional-looking finish that in many cases will need no hand sanding at all. The rate at which
the dust collection bag will fill up will vary with the type of material being sanded and the coarse-
ness of the sandpaper. For best results, empty the bag frequently and check the opening for
clogging.
When sanding painted surfaces, you may find that the sandpaper loads up and clogs with paint.
A heat gun will work much better to remove paint before sanding. FOLLOW ALL SAFETY
INSTRUCTIONS IN HEAT GUN INSTRUCTION MANUAL.
Precautions To Take When Sanding Paint
1. Sanding of lead based paint is NOT RECOMMENDED due to the difficulty of controlling the
contaminated dust. The greatest danger of lead poisoning is to children and pregnant women.
2. Since it is difficult to identify whether or not a paint contains lead without a chemical analysis,
we recommend the following precautions when sanding any paint:
PERSONAL SAFETY
1. No children or pregnant women should enter the work area where the paint sanding is
being done until all clean up is completed.
2. A dust mask or respirator should be worn by all persons entering the work area. The filter
should be replaced daily or whenever the wearer has difficulty breathing. See your local
hardware store for the proper N.I.O.S.H. approved dust mask.
3. NO EATING, DRINKING or SMOKING should be done in the work area to prevent ingest-
ing contaminated paint particles. Workers should wash and clean up BEFORE eating,
drinking or smoking. Articles of food, drink, or smoking should not be left in the work area
where dust would settle on them.
ENVIRONMENTAL SAFETY
1. Paint should be removed in such a manner as to minimize the amount of dust generated.
2. Areas where paint removal is occurring should be sealed with plastic sheeting of 4 mils
thickness.
3. Sanding should be done in a manner to reduce tracking of paint dust outside the work
area.
CLEANING AND DISPOSAL
1. All surfaces in the work area should be vacuumed and thoroughly cleaned daily for the
duration of the sanding project. Vacuum filter bags should be changed frequently.
2. Plastic drop cloths should be gathered up and disposed of along with any dust chips or
other removal debris. They should be placed in sealed refuse receptacles and disposed
of through regular trash pick-up procedures. During clean up, children and pregnant
women should be kept away from the immediate work area.
3. All toys, washable furniture and utensils used by children should be washed thoroughly
before being used again.
Tool Care
• Keep your machine as clean as possible by wiping with a clean cloth and blowing through it
with air after every 5 hours of use.
• Don't use harsh chemicals or solvents to clean the tool. These chemicals could seriously
damage the plastic.
• Avoid overloading your sander. Overloading will result in a considerable reduction in speed
and efficiency and the unit will become hot. In this event, run sander at a "no load" condition
for a minute or two.
Brush Replacement (Fig. 8, 9)
J_CAUTION: Turn off and unplug the tool before making any adjustments or removing
or installing attachments or accessories. Be sure the switch is in the OFF position.
TO REPLACE BRUSHES
1. Remove the three screws from the top cap and lift off the top cap, as shown in Figure 8.
2. Pull the brush spring (J) back (be careful not to pull completely off) and slide out the old
brush.
3. Pull the brush wire (L) which is connected to the brush, out of the motor field (K).
4. Plug the new brush wire back into the motor field.
5. Still holding the brush spring back, slide in the new brush with the wire coming out the top
of the brush and release the brush spring.
6. Repeat steps 1-5 for the second brush.
7. Replace the top cap and tighten the three screws. Be careful not to over-tighten screws.
8. Always replace both brushes.
Accessories
Recommended accessories for use with your tool are available at extra cost from your local deal-
er or authorized service center. If you need assistance in locating any accessory for your tool,
contact: DEWALT Industrial Tool Co., 701 East Joppa Road, Baltimore, MD 21286 or call 1-800-
4-DEWALT (1-800-433-9258).
FIG. 1
FIG. 2 FIG. 3
FIG. 4
I
FIG. 5
FIG. 6
FIG. 7A FIG. 7B
FIG. 8 1_ FIG. 9
ACAUTION: The use of any other accessory not recommended for use with this tool could be
hazardous.
Lubrication
Self lubricating bearings are used in the tool and periodic relubrication is not required. However,
it is recommended that, once a year, you take or send the tool to a service center for a thorough
cleaning and inspection.
Repairs
To assure product SAFETY and RELIABILITY, repairs, maintenance and adjustment should
be performed by authorized service centers or other qualified service personnel, always
using identical replacement parts.
Three Year Limited Warranty
DEWALT will repair, without charge, any defects due to faulty materials or workmanship for three
years from the date of purchase. This warranty does not cover part failure due to normal wear
or tool abuse. For further detail of warranty coverage and warranty repair information, visit
www.dewalt.com or call 1-800-4-DEWALT (1-800-433-9258). This warranty does not apply to
accessories or damage caused where repairs have been made or attempted by others. This
warranty gives you specific legal rights and you may have other rights which vary in certain
states or provinces.
Inadditiontothewarranty,DEWALTtoolsarecoveredbyour:
1YEARFREESERVICE
DEWALTwillmaintainthetoolandreplacewornpartscausedbynormaluse,forfree,anytime
duringthefirstyearafterpurchase.
90DAYMONEYBACKGUARANTEE
IfyouarenotcompletelysatisfiedwiththeperformanceofyourDEWALTPowerTool,Laser,or
Nailerforanyreason,youcanreturnitwithin90daysfromthedateofpurchasewithareceipt
forafullrefund- noquestionsasked.
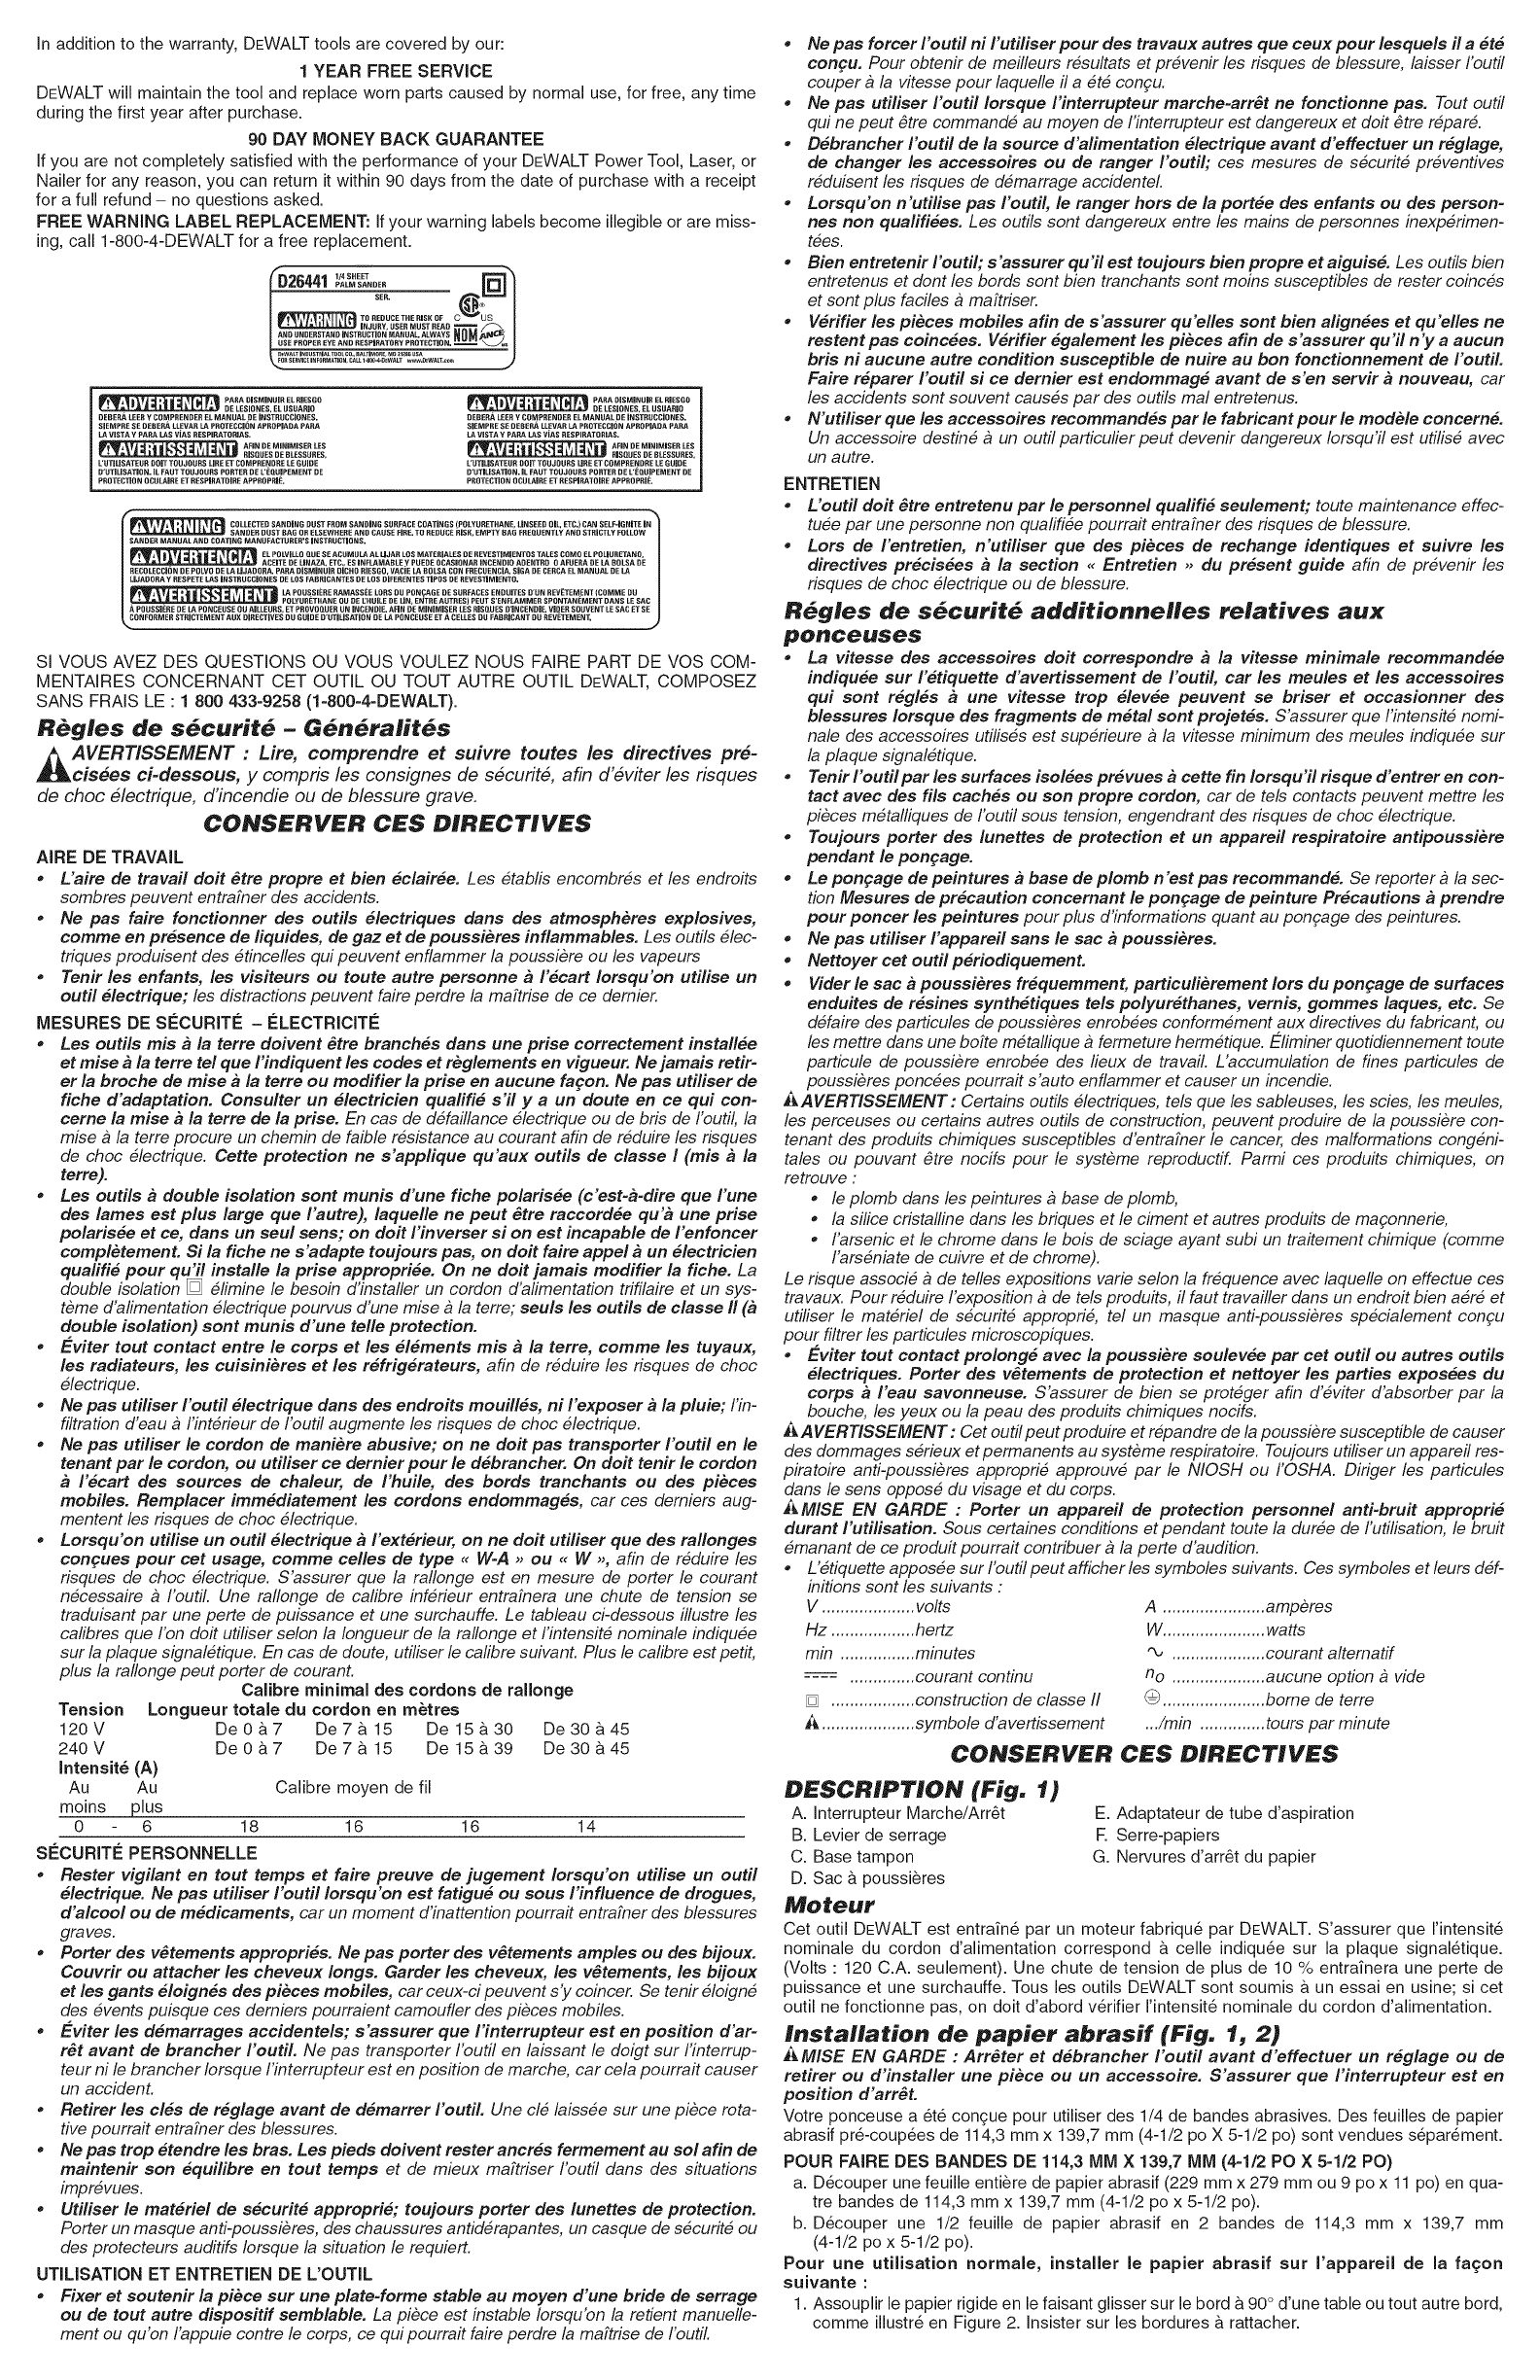
FREEWARNINGLABELREPLACEMENT:Ifyourwarninglabelsbecomeillegibleoraremiss-
ing,call1-800-4-DEWALTforafreereplacement.
f 1/4SHEET _'
D26441 []
USEPROPEREYEANDRESPIRATDRYPROTECTION.NUM _
_EWA[T INDUSTRIALTOeL_O,rBALTIMORE,M_ 2lag USA
_,_o_ SERVICEI_ FeRMA_eN. CAlL1_4_JEWALT www.0EWALT.coa
DISMINUM EL RJESD8 PARA GISMJNUJR EL RJESGO
_T__ ABA ; wDE LEJEIDNES, EL DSUARID
DE LESIONED, EL UBUARID
DEBER, _, LEER Y CDMPRENDED EL MANUAL DE INRTRHGGIDNE8. DEREBA LEER Y CDMPRENDEB EL MANUAL DE INSTRDCCIDNES,
SIEMPRE SE DEBER_. LLEVAR [A PROTECCIf_N APROPIADA PARA GIEMPRE SE DEDERA LLEVAR LA PROTECCI{JN APRGPIADA PARA
LA VISTA Y PABA [-AS VJAS BESPiRATDMAS. [A VISTA Y PADA [AS V[AS RESPIBATDMAS.
,,, ,., AFIN RE MINIMISER LED ,,, ,., AFIN DE MINIMMER LED
BISQUES DE BLEBSURES, ; J_J'_JJ3L_Lm BISQUES RE RLESSURES,
L'UTILiSATEGR DOlT TOUJGURS LiRE JET COMPRJENDRE LE GUIDE L'UTiLiSATEQR DOlT TOUJOGRS LJRE ST GOMPRENDRE LE GUIDE
B'UTiLISATJDN. IL FAUT TDUJDURB PORTER DE L'EQUiPEMENT DE D'UTJLISATIDN. JL FADT TDDJDUBS PORTER DE L'EQDJPEMENT DE
PROTECTION OCULAJRE ET RESPJRATDME APPJEGPRI_. PROTECTION OGUtAIRE ET RESPJRATOiRE APPROPJEiE.
f
_DLLECTED SANDING DUST FRDM SANDING SURFACE COATIN JES(POLYDRETHANE, LINSEED OiL, ETC.) CAN SELF-iGNiTE JN
SANDER DUST BAG OB ELSEWHERE AND CAUSE FIRE. TO JEEDUCE RISK, EMPTY GAG FREQUENTLY AND STRICTLY FOLLOW
SANDER MANUAL AND COATING MANUFACTURER'S iNSTRUCTiONS.
EL POLVILLO QGE GE ACGMG[A AL U JAR LOS MATJEMALEG DE REVESTIMIENTDS TALES CDMO EL POLiURJETANO,
ACEiTE DE UNAZA, ETC., ES INF[AMABLE Y PUEDE DCAMDNAB INCENRID ABENTRO DAFUEBA DE [A BOLSA DE
REGDLECC ON RE POLVD DE [A LJJADORA. PARA D SM NU R D CHO JEERGO, VACIE [A ROLSA CON ERECUENC A, S GA DE CERCA EL MANUAL DE [A
LiJAGORA YRESPETE LAD JNSTRUCCJONES BE LOS FAGRICANTES DE LOS DIFERENTES TJPOS DE REVESTJMiENTG,
[A PDDSSIEBE RAMASSEE LOBS DD PDN_AGE DE SDRFACES ENDUITES D'UN BEVETEM[NT (CDMME DD
FDWDBETHANE DU DE I_HUILE DE LJN, ENTRE AUTRES) PEUT S'ENF[AMMER SPONTANEMENT DANS LESAC
,_, PODJESJ_REDE [A PONCEUSE OU AitLEQRS ET PROVOQUEG UN INCENGIE. AFJN UE MiNIMiSER LED JEJSQUESDINGENGJE VIDEO SOUVENT LE SAC ET SE
_.=GONFORMER GTRJCTEMENT AGX DiRECTiVES DU GGJDE D'GTJLiGATJON DIE [A PONGEGGE ET A CELLED DU FADRJGANT DG REVJETEMENT, J
SI VOUS AVEZ DES QUESTIONS OU VOUS VOULEZ NOUS FAIRE PART DE VOS COM-
MENTAIRES CONCERNANT CET OUTIL OU TOUT AUTRE OUTIL DEWALT, COMPOSEZ
SANS FRAIS LE : 1 800 433=9258 (I=800=4=DEWALT).
R_gles de s_curit_ -G_re_ralit_s
AVERTISSEMENT : Lire, comprendre et suivre toutes les, directives pr#-
cis#es ckdessous, y compris /es consignes de securit6, afin d eviter les risques
de choc electrique, d'incendie ou de blessure grave,
CONSERVER CES DIRECTIVES
AIRE DE TRAVAIL
*L'aire de travail dolt #tre propre et bien #clair#e. Les #tablis encombr#s et les endroits
sombres peuvent entrafner des accidents.
* Ne pas faire fonctionner des outils #leetriques clans des atmospheres explosives,
eomme en pr#sence de/iquides, de gaz et de poussi#res inflammables. Les outils 61ec-
triques produisent des etincelles qui peuvent enflammer la poussiere ou les vapeurs
* Tenir/es enfants, /es visiteurs ou toute autre personne b/'#cart/orsqu'on utilise un
outil #leetrique; les distractions peuvent faire perdre la maTtrise de ce demier.
MESURES DE SECURITE - I_LECTRICITE
* Les outils mis _/a terre doivent #tre braneh#s darts une prise correctement instal/ee
et mise _/a terre tel que /'indiquent /es codes et r#g/ements en vigueur. Ne jamais retir-
er /a broche de mise _/a terre ou modifier/a prise en aueune fa_on. Ne pas utiliser de
fiche d'adaptation. Consulter un #lectricien quafifie s'il y a un doute en ce qui con-
eerne /a mise _/a terre de/a prise. En cas de d#faillance #lectrique ou de bris de I'outil, la
mise a la terre procure un chemin de faible resistance au courant afin de reduire les risques
de choc #lectrique. Cette protection ne s'app/ique qu'aux outils de e/asse I (mis _/a
terre).
* Les outils _double isolation sont munis d'une fiche po/aris#e (c'est-#-dire que/'une
des lames est plus large que /'autre), /aquelle ne peut #tre raceord#e qu'# une prise
po/aris#e et ee, dans un seul sens; on dolt/'inverser si on est incapable de/'enfoncer
eomp/#tement. Si/a fiche ne s'adapte toujours pas, on doit faire appe/ _ un #/ectricien
qualifi# pour qu'i/ insta//e /a prise appropri#e. On ne doit jamais modifier/a fiche. La
double isolation _ #fimine le besoin d'installer un cordon d'alimentation trifilaire et un sys-
teme d'alimentation #lectrique pourvus d'une mise a la terre; seu/s /es outils de e/asse // (_
double isolation) sont munis d'une teile protection.
* Eviter tout contact entre/e corps et/es #l#ments mis _/a terre, comme/es tuyaux,
/es radiateurs, /es euisini#res et /es r#frig#rateurs, afin de r#duire les risques de choc
#lectrique.
* Ne pas utiliser/'outil #leetrique dans des endroits mouill#s, ni/'exposer b/a p/uie;/'in-
filtration d'eau a I'int#rieur de I'outilaugmente les risques de choc #lectrique.
* Ne pas utiliser/e cordon de mani#re abusive; on ne dolt pas transporter/'outil en/e
tenant par/e cordon, ou utiliser ce dernier pour/e d#brancher. On doit tenir /e cordon
/'#cart des sources de cha/eur, de /'hui/e, des bords tranchants ou des pi#ees
mobiles. Remp/acer imm#diatement /es cordons endommag#s, car ces demiers aug-
mentent les risques de choc electrique.
* Lorsqu'on utilise un outi/#lectrique _/'ext#rieur, on ne dolt utiliser que des railonges
eon_ues pour cet usage, comme ceiles de type, W-A _ou ,W_, afin de r#duire les
risques de choc #lectrique. S'assurer que la ra/Ionge est en mesure de porter le courant
necessaire a I'outil. Une rallonge de calibre inf#rieur entrMnera une chute de tension se
traduisant par une perte de puissance et une surchauffe. Le tableau ci-dessous illustre les
calibres que /'on dolt utiliser selon la Iongueur de la rallonge et I'intensit# nominale indiquee
sur la plaque signal#tique. En cas de doute, utiliser le calibre suivant. Plus le calibre est petit,
plus la rallonge peut porter de courant.
Calibre minimal des cordons de raiJonge
Tension Longueur totaie du cordon en m_tres
120V De0&7 De7a15 De15a30 De 30&45
240V De0a7 De7a15 De15a39 De 30a45
Intensit_ (A)
Au Au Calibre moyen de fil
moins plus
0 6 18 16 16 14
SECURIT[_ PERSONNELLE
* Rester vigilant en tout temps et faire preuve de jugement/orsqu'on utilise un outil
#/eetrique. Ne pas utiliser /'outil /orsqu'on est fatigu# ou sous /'influence de drogues,
d'a/coo/ ou de m_dicaments, car un moment d'inattention pourrait entrMner des blessures
graves.
* Porter des v#tements appropri#s. Ne pas porter des v#tements amp/es ou des bijoux.
Couvrir ou attaeher /es cheveux longs. Garder les eheveux, /es v#tements, /es bijoux
et /es gants #/oign#s des pibces mobiles, car ceux-ci peuvent s'y coincer. Se tenir #loigne
des #vents puisque ces demiers pourraient camoufler des pi#ces mobiles.
* Eviter/es d#marrages accidente/s; s'assurer que/'interrupteur est en position d'ar-
r#t avant de brancher /'outil. Ne pas transporter I'outil en laissant le doigt sur I'interrup-
teur nile brancher Iorsque I'interrupteur est en position de marche, car cela pourrait causer
un accident.
* Retirer/es cl#s de r#glage avant de d#marrer/'outil. Une cl# laissee sur une piece rota-
tive pourrait entrMner des blessures.
* Ne pas trop #tendre/es bras. Les pieds doivent rester ancr#s fermement au sol afin de
maintenir son #quilibre en tout temps et de mieux maTtriser I'outil clans des situations
imprevues.
* Utiliser/e materiel de s#curit# appropri#; toujours porter des/unettes de protection.
Porter un masque anti-poussi#res, des chaussures antiderapantes, un casque de securite ou
des protecteurs auditifs Iorsque la situation le requiert.
UTILISATION ET ENTRETIEN DE L'OUTIL
* Fixer et soutenir/a piece sur une p/ate-forme stable au moyen d'une bride de serrage
ou de tout autre dispositif semb/ab/e. La piece est instable Iorsqu'on la retient manuelle-
ment ou qu'on I'appuie contre le corps, ce qui pourrait faire perdre la maTtrise de I'outil.
* Ne pas forcer I'outil ni I'utiliser pour des travaux autres que ceux pour lesque/s il a#t#
eon_u. Pour obtenir de meilleurs resultats et pr#venir les risques de blessure, laisser I'outil
couper a la vitesse pour laquelle il a et# con_u.
* Ne pas utiliser/'outil/orsque/'interrupteur marehe-arr#t ne fonctionne pas. Tout outil
qui ne peut #tre commande au moyen de I'interrupteur est dangereux et dolt #tre r#par#.
* D#brancher/'outi/de/a source d'a/imentation #lectrique avant d'effectuer un reg/age,
de changer/es accessoires ou de ranger/'outil; ces mesures de securit# preventives
r#duisent les risques de d#marrage accidenteL
* Lorsqu'on n'utilise pas/'outil,/e ranger hors de/a port#e des enfants ou des person-
nes non qualifi#es. Les outils sont dangereux entre les mains de personnes inexperimen-
tees.
* Bien entretenir I'outi/; s'assurer qu'il est toujours bien propre etaiguis_. Les outils bien
entretenus et dont les bords sont bien tranchants sont moins susceptibles de rester coiners
et sont plus faciles _mMtriser.
* V#rifier/es pibces mobiles afin de s'assurer qu'eiles sont bien a/ign#es et qu'eiles ne
restent pas coinc#es. V#rifier ega/ement /es pibces afin de s'assurer qu'il n 'y a aucun
bris ni aueune autre condition susceptible de nuire au bon fonetionnement de I'outi/.
Faire reparer /'outi/ si ce demier est endommag# avant de s'en servir # nouveau, car
les accidents sont souvent causes par des outils mal entretenus.
* N'utiliser que/es aceessoires reeommand#s par/e fabricant pour/e module coneern#.
Un accessoire destine a un outil particulier peut devenir dangereux Iorsqu'il est utilise avec
un autre.
ENTRETIEN
L'outil dolt _tre entretenu par le personnel qualifi_ seulement; toute maintenance effec-
tu_e par une personne non qualifiee pourrait entrMner des risques de blessure.
* Lors de I'entretien, n'utiliser que des pi_ces de reehange identiques et suivre les
directives precisees _ /a section ,Entretien _du pr#sent guide afin de pr#venir les
risques de choc #lectrique ou de blessure.
R_gles de s_curit_ additionneUes relatives aux
ponceuses
*La vitesse des accessoires dolt correspondre & /a vitesse minima/e recommandde
indiquee sur /'etiquette d'avertissement de/'outil, car/es meu/es et led accessoires
qui sont rdgl_s & une vitesse trop dlev#e peuvent se briser et occasionner des
blessures Iorsque des fragments de m_ta/ sont projetes. S'assurer que I'intensit_ nomi-
nale des accessoires utilises est sup#rieure a la vitesse minimum des meules indiquee sur
la plaque signal#tique.
* Tenir/'outil par/es surfaces iso/#es pr#vues _ cette fin/orsqu'il risque d'entrer en con-
tact avec des fi/s caches ou son propre cordon, car de tels contacts peuvent mettre les
pi#ces metalliques de I'outil sous tension, engendrant des risques de choc #lectrique.
,Toujours porter des/unettes de protection et un appareil respiratoire antipoussi#re
pendant/e pon_age.
,Le pon¢age de peintures _base de p/omb n'est pas recommand#. Se reporter a la sec-
tion Mesures de precaution eoncemant /e port,age de peinture Pr#cautions _ prendre
pour poncer /es peintures pour plus d'informations quant au pon_age des peintures.
,Ne pas utiliser/'appareil sans/e sac b poussi#res.
,Nettoyer cet outil p#riodiquement.
,Vider/e sac _ poussi#res fr#quemment, particu/ibrement/ors du port,age de surfaces
enduites de r#sines synth#tiques te/s polyurethanes, vernis, gommes /aques, etc. Se
d#faire des particules de poussi#res enrobees conformement aux directives du fabricant, ou
les mettre dans une bo7te meta/lique a fermeture hermetique. Eliminer quotidiennement toute
particule de poussi#re enrobee des lieux de travail. L'accumulation de fines particules de
poussi#res ponc#es pourrait s'auto enflammer et causer un incendie.
_AVERTISSEMENT :Certains outils electriques, te/s que les sableuses, les scies, les meules,
les perceuses ou certains autres outils de construction, peuvent produire de la poussiere con-
tenant des produits chimiques susceptibles d'entrMner le cancer, des malformations congeni-
tales ou pouvant #tre nocifs pour le systeme reproductif. Parmi ces produits chimiques, on
retrouve :
* le plomb dans les peintures a base de plomb,
* la silice cristalline dans les briques et le ciment et autres produits de ma_onnerie,
* /'arsenic et le chrome dans le bois de sciage ayant subi un traitement chimique (comme
/'arseniate de cuivre et de chrome).
Le risque associe a de telles expositions varie selon la fr#quence avec laquelle on effectue ces
travaux. Pour reduire I'exposition a de tels produits, il faut travailler clans un endroit bien aere et
utiliser le materiel de securit# approprie, tel un masque anti-poussi#res sp#cialement con_u
pour flitter les particules microscopiques.
* Eviter tout contact prolong# avec la poussi#re sou/ev#e par cet outil ou autres outils
#leetriques. Porter des v#tements de protection et nettoyer les parties expos#es du
corps bI'eau savonneuse. S'assurer de bien se prot#ger afin d'#viter d'absorber par la
bouche, les yeux ou la peau des produits chimiques nocifs.
A VERTI$SEMENT: Get outil peut produire et repandre de la poussiere susceptible de causer
des dommages serieux et permanents au syst#me respiratoire. Toujours utiliser un appareil res-
piratoire anti-poussi#res appropri# approuv# par le NIOSH ou I'OSHA. Diriger les particules
dans le sens oppose du visage et du corps.
_MISE EN GARDE :Porter un appareil de protection personnel anti-bruit approprie
durant I'utilisation. Sous certaines conditions et pendant toute la dur#e de I'utilisation, le bruit
#manant de ce produit pourrait contribuer a la perte d'audition.
* L'etiquette appos#e sur I'outil peut afficher les symboles suivants. Ces symboles et leurs d#f-
initions sont les suivants :
V.................... volts
Hz .................. hertz
min ................ minutes
.... .............. courant continu
[] .................. construction de classe II
_, .................... symbole d'avertissement
A...................... amperes
W...................... watts
* .................... courant altematif
no .................... aucune option a vide
...................... bome de terre
.../min .............. tours par minute
CONSERVER CES D_RECT_VES
DESCRIPTION {Fig. 1)
A. Interrupteur Marche/Arr_t E. Adaptateur de tube d'aspiration
B. Levier de serrage F. Serre-papiers
C. Base tampon G. Nervures d'arr_t du papier
D. Sac & poussi_res
Moteur
Get outil DEWALT est entrafn_ par un moteur fabriqu_ par DEWALT. S'assurer que I'intensit_
nominale du cordon d'alimentation correspond & celle indiqu_e sur la plaque signal_tique.
(Volts : 120 C.A. seulement). Une chute de tension de plus de 10 % entrafnera une perte de
puissance et une surchauffe. Tousles outils DEWALT sont soumis & un essai en usine; si cet
outil ne fonctionne pas, on doit d'abord v_rifier I'intensit_ nominale du cordon d'alimentation.
_restaHatiore de papier abrasif (Fig. 1, 2)
J_M/SE EN GARDE : Arr#ter et ddbrancher I'outil avant d'effectuer un rdglage ou de
retirer ou d'installer une piece ou un aceessoire. S'assurer que I'interrupteur est en
position d'arr_L
Votre ponceuse a _t_ congue pour utiliser des 1/4 de bandes abrasives. Des feuilles de papier
abrasif pr_-coup_es de 114,3 mm x 139,7 mm (4-1/2 po X 5-1/2 po) sont vendues s_par_ment.
POUR FAIRE DES BANDES DE 114,3 MM X 139,7 MM (4-1/2 PO X 5-1/2 PO)
a. D_couper une feuille enti_re de papier abrasif (229 mm x 279 mm ou 9 pox 11 po) en qua-
tre bandes de 114,3 mm x 139,7 mm (4-1/2 pox 5-1/2 po).
b. D_couper une 1/2 feuille de papier abrasif en 2 bandes de 114,3 mm x 139,7 mm
(4-1/2 pox 5-1/2 po).
Pour une utiJisation normale, installer Je papier abrasif sur J'appareil de Ja faDon
suivante :
1. Assouplir le papier rigide en le faisant glisser sur le bord & 90° d'une table ou tout autre bord,
comme illustr_ en Figure 2. Insister sur les bordures a rattacher.

2.Rel&cherleserre-papiersentirantsurlelevierdeserrage(B)etenledGgageantdela
languettesurlabasetampon(C).
3.InsGrerleborddelabandeabrasivede114,3mm(4-1/2po)sousI'avantduserre-papiers
(F)jusqu'&cequ'elleentreencontactaveclesnervuresd'arrGtdupapier(G).Refermer
I'avantduserre-papiersetleverrouiller&I'arri_redelalanguettesurlabasetampon.
4.t_taler le papier sur tampon ponceur puis insGrer I'autre bout dans le serre-papiers oppos6
de la mGme fa£on.
5. Si le syst_me de dGpoussiGrage est utilisG, perforer le papier abrasif (se reporter & la section
Perforateur & papier).
Interrupteur (Fig. 3)
Pour mettre I'appareil en marche, appuyer sur le cGt6 de I'interrupteur (A) 6tanche &la pous-
si_re correspondant au symbole <<I>>.Pour arrGter routil, appuyer sur le cGt6 de I'interrupteur
correspondant au symbole <<O>_.
Perforateur _papier (Fig. 4, 5)
AMISE EN GARDE : Arr_ter et d_brancher I'outil avant d'effectuer un rdglage ou de
retirer ou d'installer une piece ou un accessoire. S'assurer que I'interrupteur est en
position d'arr#t.
Un perforateur & papier (H) est compris avec la ponceuse pour permettre de perforer du papier
abrasif normal et rendre ainsi le dGpoussiGrage possible.
POUR PERFORER LE PAPIER ABRASIF
Installer le papier sur I'appareil comme expliqu6 dans ce manuel. Alors que la ponceuse est
arrGtGe et dGbranchGe, placer le perforateur & papier sur le papier de fa£on & ce que les mar-
ques (I) sur les bords du perforateur soient alignGes sur deux cGtGs adjacents du tampon pon-
ceur, comme illustr& Appuyer le perforateur contre le tampon pour que les 8 pointes rentrent
dans le papier, comme illustr6 en Figure 5. (Pousser le perforateur contre le tampon autant que
possible.) Retirer le perforateur & papier et le papier sera prGt.
Une autre mGthode pour perforer le papier est d'attacher solidement le perforateur & une sur-
face adGquate. Le perforateur est muni de deux trous con£us & cet effet. Utiliser pour ce des vis
& tGte plate n-°8. Appuyer la ponceuse (munie du papier) sur le perforateur.
D_poussi_rage (Fig. 6)
AMISE EN GARDE :Arr_ter et d_brancher I'outil avant d'effectuer un r#glage ou de
retirer ou d'installer une piece ou un accessoire. S'assurer que I'interrupteur est en
position d' arr#t.
La ponceuse peut utiliser les deux modes d'61imination de la poussi_re suivants : un sac &pous-
si_res verrouillable par rotation (D) et un adaptateur de tube d'aspiration intGgr6 (E) pouvant 6tre
connect6 directement sur un aspirateur d'atelier.
WDANGE DU SAC .& POUSSI#RE
1. Tout en maintenant la ponceuse, saisir le sac a poussi_res (D) par son bout le plus pros de
la ponceuse et dGvisser radaptateur de tube d'aspiration (E).
2. Secouer doucement ou tapoter le sac & poussi_res pour le vider.
3. Reverrouiller le sac & poussi_res sur I'adaptateur de tube d'aspiration.
II se peut que toute la poussi_re ne soit pas 6vacuGe du sac. Cela n'affectera pas les perfor-
mances de la ponceuse mais rGduira I'efficacit6 d'aspiration de la poussi_re. Pour restaurer son
rendement d'aspiration, appuyer sur le ressort a I'intGrieur du sac a poussi_re tout en vidant ce
dernier et en le tapotant sur les cGtGs du rGceptacle de rGcupGration utilisG, poubelle ou autre.
MISE EN GARDE :Ne jamais utiliser cet outil sans le systGme de depoussierage en place.
L'#vacuation des poussiGres du pon_age pose des risques au systeme respiratoire.
FONCTIONNEMENT (FIG. 7)
Pour utiliser la ponceuse, la saisir comme iiiustr6 en Figure 7Aou 7B et la mettre en marche.
DGplacer la ponceuse par larges mouvements de balayage sur la surface & poncer, en la
laissant effectuer le travail.
Le fait d'appuyer sur I'appareil pendant le pon£age ralentit le rendement et produit une surface
de qualit6 moindre. VGrifier souvent les progr_s du travail, cette ponceuse est capable de pon-
cer le matGriau rapidement, surtout avec du papier & gros grains.
La ponceuse a 6t6 con£ue pour un pon£age affleur6 sur trois cGtGspour poncer dans les coins,
et sa petite taille et sa 16g_ret6 la rendent idGale pour tout travaux en hauteur.
L'action orbiculaire alGatoire de la ponceuse permet de poncer dans le sens du grain ou &
n'importe quel angle pour la plupart des travaux de pon£age. En fin de pon£age, comme
discut6 ci-dessus, un meilleur fini sera rendu par un pon£age dans le sens du grain.
Pour le meilleur fini possible, commencer avec un papier abrasif & gros grains puis passer
graduellement & du papier de plus en plus fin. Un pon£age final avec du papier abrasif fin bien
us6 produira un fini d'aspect professionnel qui ne nGcessitera dans la plupart des cas d'aucun
pon£age & la main. La vitesse & laquelle le sac & poussi_res se remplira dGpendra du type de
matGriau ponc6 et de la grosseur de grain du papier. Pour des rGsultats optimum, vider le sac
frGquemment et vGrifier que I'ouverture n'est pas bouchGe.
Lors du pon£age de surfaces peintes, il se peut que le papier abrasif s'entartre de peinture. Un
pistolet & air chaud convient mieux .pour retirer la peinture avant le pon£age. SUIVRE TOUTES
LES DIRECTIVES DE St_CURITE INCLUES DANS LE MANUEL DU PISTOLET A, AIR
CHAUD.
Mesures de precaution concernaret le pon_age
de peireture
1. Le pon_age de peintures & base de plomb n'est PAS RECOMMANDE puisqu'il est trop dif-
ficile de maftriser la poussi_re contaminGe. Les enfants et les femmes enceintes courent le
plus grand risque d'intoxication par le plomb.
2. Puisqu'il est difficile de savoir, sans effectuer une analyse chimique, si une peinture contient
du plomb, on recommande de suivre les mesures de prGcaution dGcrites ciapr_s "
SECUR_TE PERSONNELLE
1. S'assurer que les enfants et les femme enceintes n'entrent pas dans I'aire de travail avant
qu'elle n'ait 6t6 nettoyGe & fond.
2. -route personne qui entre dans I'aire de travail dolt porter un masque anti-poussi_re ou un
appareil respiratoire; le filtre dolt 6tre remplac6 chaque jour ou Iorsque la respiration
devient difficile. Se renseigner aupr_s de son quincaillier local pour obtenir la liste des
masques anti-poussi_res approuvGs par le NIOSH.
3. NE PAS MANGER, BOIRE OU FUMER sur les lieux de travail pour prGvenir I'ingestion
de particules de peinture contaminGes. II est recommand6 aux ouvriers de se laver et net-
toyer AVANT de manger, boire ou fumer. Ne pas laisser sur les lieux de travail, la oQ la
poussi_re pourrait s'y dGposer, toute nourriture, boisson, cigarette ou autre produit de
consommation.
RESPECT DE L'ENWRONNEMENT
1. Enlever la peinture de mani_re a rGduire au minimum la quantit6 de poussi_re gGnGrGe.
2. Sceller les zones oQ on enl_ve la peinture au moyen de grandes feuilles de plastique
d'une 6paisseur de 4 mils.
3. Effectuer le pon(2age de mani_re a 6viter autant que possible de trafner de la poussi_re
I'extGrieur de raire de travail.
ENTRETIEN ET RANGEMENT
1. Passer quotidiennement I'aspirateur sur les lieux de travail et les nettoyer soigneuse-
ment pendant toute la durGe du projet de pon£age. Changer frGquemment les filtres
d'aspirateur.
2. Recueillir toute toile de protection plastifiGe utilisGe et s'en dGfaire avec toute particule de
poussi_re ou autre dGbris a 61iminer. Les placer dans un contenant pour dGchets et s'en
dGfaire suivant la procGdure normale d'61imination des ordures. Pendant le nettoyage,
maintenir 61oign6 de la zone immGdiate de travail les enfants ou les femmes enceintes.
3. Nettoyer soigneusement jouet, meuble lavable ou tout ustensile utilis6 par les enfants
avant toute nouvelle rGutilisation.
Entretien de I'outil
•Maintenir la ponceuse aussi propre que possible en la nettoyant avec un chiffon propre et
en y propulsant de I'air toutes les 5 heures d'utilisation.
•Ne pas utiliser de produits chimiques ou solvants dGcapants pour nettoyer I'appareil. Ces
produits pourraient endommager sGrieusement les parties plastifiGes.
•Eviter de surcharger la ponceuse. -route surcharge aura pour rGsultat de diminuer la vitesse
et I'efficacit6 de I'appareil et de le faire chauffer. Dans cette 6ventualitG, faire fonctionner la
ponceuse a vide une minute ou deux.
Rernplacernent des brosses (Fig. 8, 9)
_,MISE EN GARDE :Arr_ter et d_brancher I'outil avant d'effectuer un r_glage ou de
retirer ou d'installer une piece ou un accessoire. S'assurer que I'interrupteur est en
position d' arr#t.
POUR REMPLACER LES BROSSES
1. Retirer les trois vis du capuchon puis soulever se dernier, (Fig. 8).
2. Tirer le ressort de la brosse (J) vers I'arri_re en faisant attention a ne pas le retirer com-
pl_tement et retirer la brosse usagGe.
3. Tirer la tige mGtallique de la brosse (L) rattachGe a la brosse, hors de I'orifice du moteur (K).
4. InsGrer la nouvelle tige dans I'orifice du moteur.
5. Toujours en maintenant le ressort de la brosse vers I'arri_re, insGrer la nouvelle brosse avec
la tige dGpassant sur le dessus de la brosse puis rel&cher le ressort.
6. RGpGter les 6tapes 1 a 5 pour la deuxi_me brosse.
7. Remettre le capuchon et resserrer les trois vis. Faire attention a ne pas trop serrer les vis.
8. Toujours remplacer les deux brosses en mGme temps.
Accessoires
Les accessoires recommandGs avec cet outil sont vendus sGparGment chez votre distributeur
local ou dans les centres de service autorisGs. Pour obtenir plus d'information sur les acces-
soires, communiquer avec DEWALT Industrial Tool Co., 701 East Joppa Road, Baltimore, MD
21286, aux Etats-Unis ou composer le 1 800 433-9258 (1-800-4-DEWALT).
_MISE EN GARDE : L'usage de tout autre accessoire non recommande avec cet outil peut
presenter un danger.
Lubrificatiore
Des roulements auto-lubrifiants sont utilisGs dans cet appareil et aucune lubrification pGriodique
n'est nGcessaire. II est cependant recommand6 d'amener ou d'envoyer I'appareil une fois par
an dans un centre de service autoris6 pour y 6tre soigneusement nettoy6 et inspectG.
R_.parations
Pour assurer la SECURIT¢: et la FIABILIT¢: de ce produit, toutes les opGrations de rGparation,
d'entretien et de rGglage doivent 6tre effectuGes dans un centre de service autoris6 ou par du
personnel qualifi6 "on ne doit utiliser que des pi_ces de rechange identiques.
Garantie lirnit_e de trois ares
DEWALT rGparera, sans frais, tout produit dGfectueux caus6 par un dGfaut de matGriel ou de fab-
rication pour une pGriode de trois ans a compter de la date d'achat. La prGsente garantie ne cou-
vre pas les pi_ces dont la dGfectuosit6 a 6t6 causGe par une usure normale ou rusage abusif
de I'outil. Pour obtenir de plus amples renseignements sur les pi_ces ou les rGparations cou-
vertes par la prGsente garantie, visiter le site www.dewalt.com ou composer le 1 800 433-9258
(1 800 4-DEWALT). Cette garantie ne s'applique pas aux accessoires et ne vise pas les dom-
mages causGs par des rGparations effectuGes par un tiers. Cette garantie conf_re des droits
16gaux particuliers a I'acheteur, mais celui-ci pourrait aussi bGnGficier d'autres droits variant d'un
6tat ou d'une province & I'autre.
En plus de la prGsente garantie, les outils DEWALT sont couverts par notre "
CONTRAT D'ENTRETIEN GRATUIT D'UN AN
DEWALT entretiendra I'outil et remplacera les pi_ces usGes au cours d'une utilisation normale et
ce, gratuitement, pendant une pGriode d'un an & compter de la date d'achat, et la
GARANTIE DE REMBOURSEMENT DE 90 JOURS
Si I'acheteur n'est pas enti_rement satisfait, pour quelque raison que ce soit, du rendement de
I'outil 61ectrique, du laser ou de la cloueuse DEWALT, celui-ci peut le retourner, accompagn6
d'un re(;u, dans les 90 jours a compter de la date d'achat, pour obtenir un remboursement intG-
gral, sans aucun probl_me.
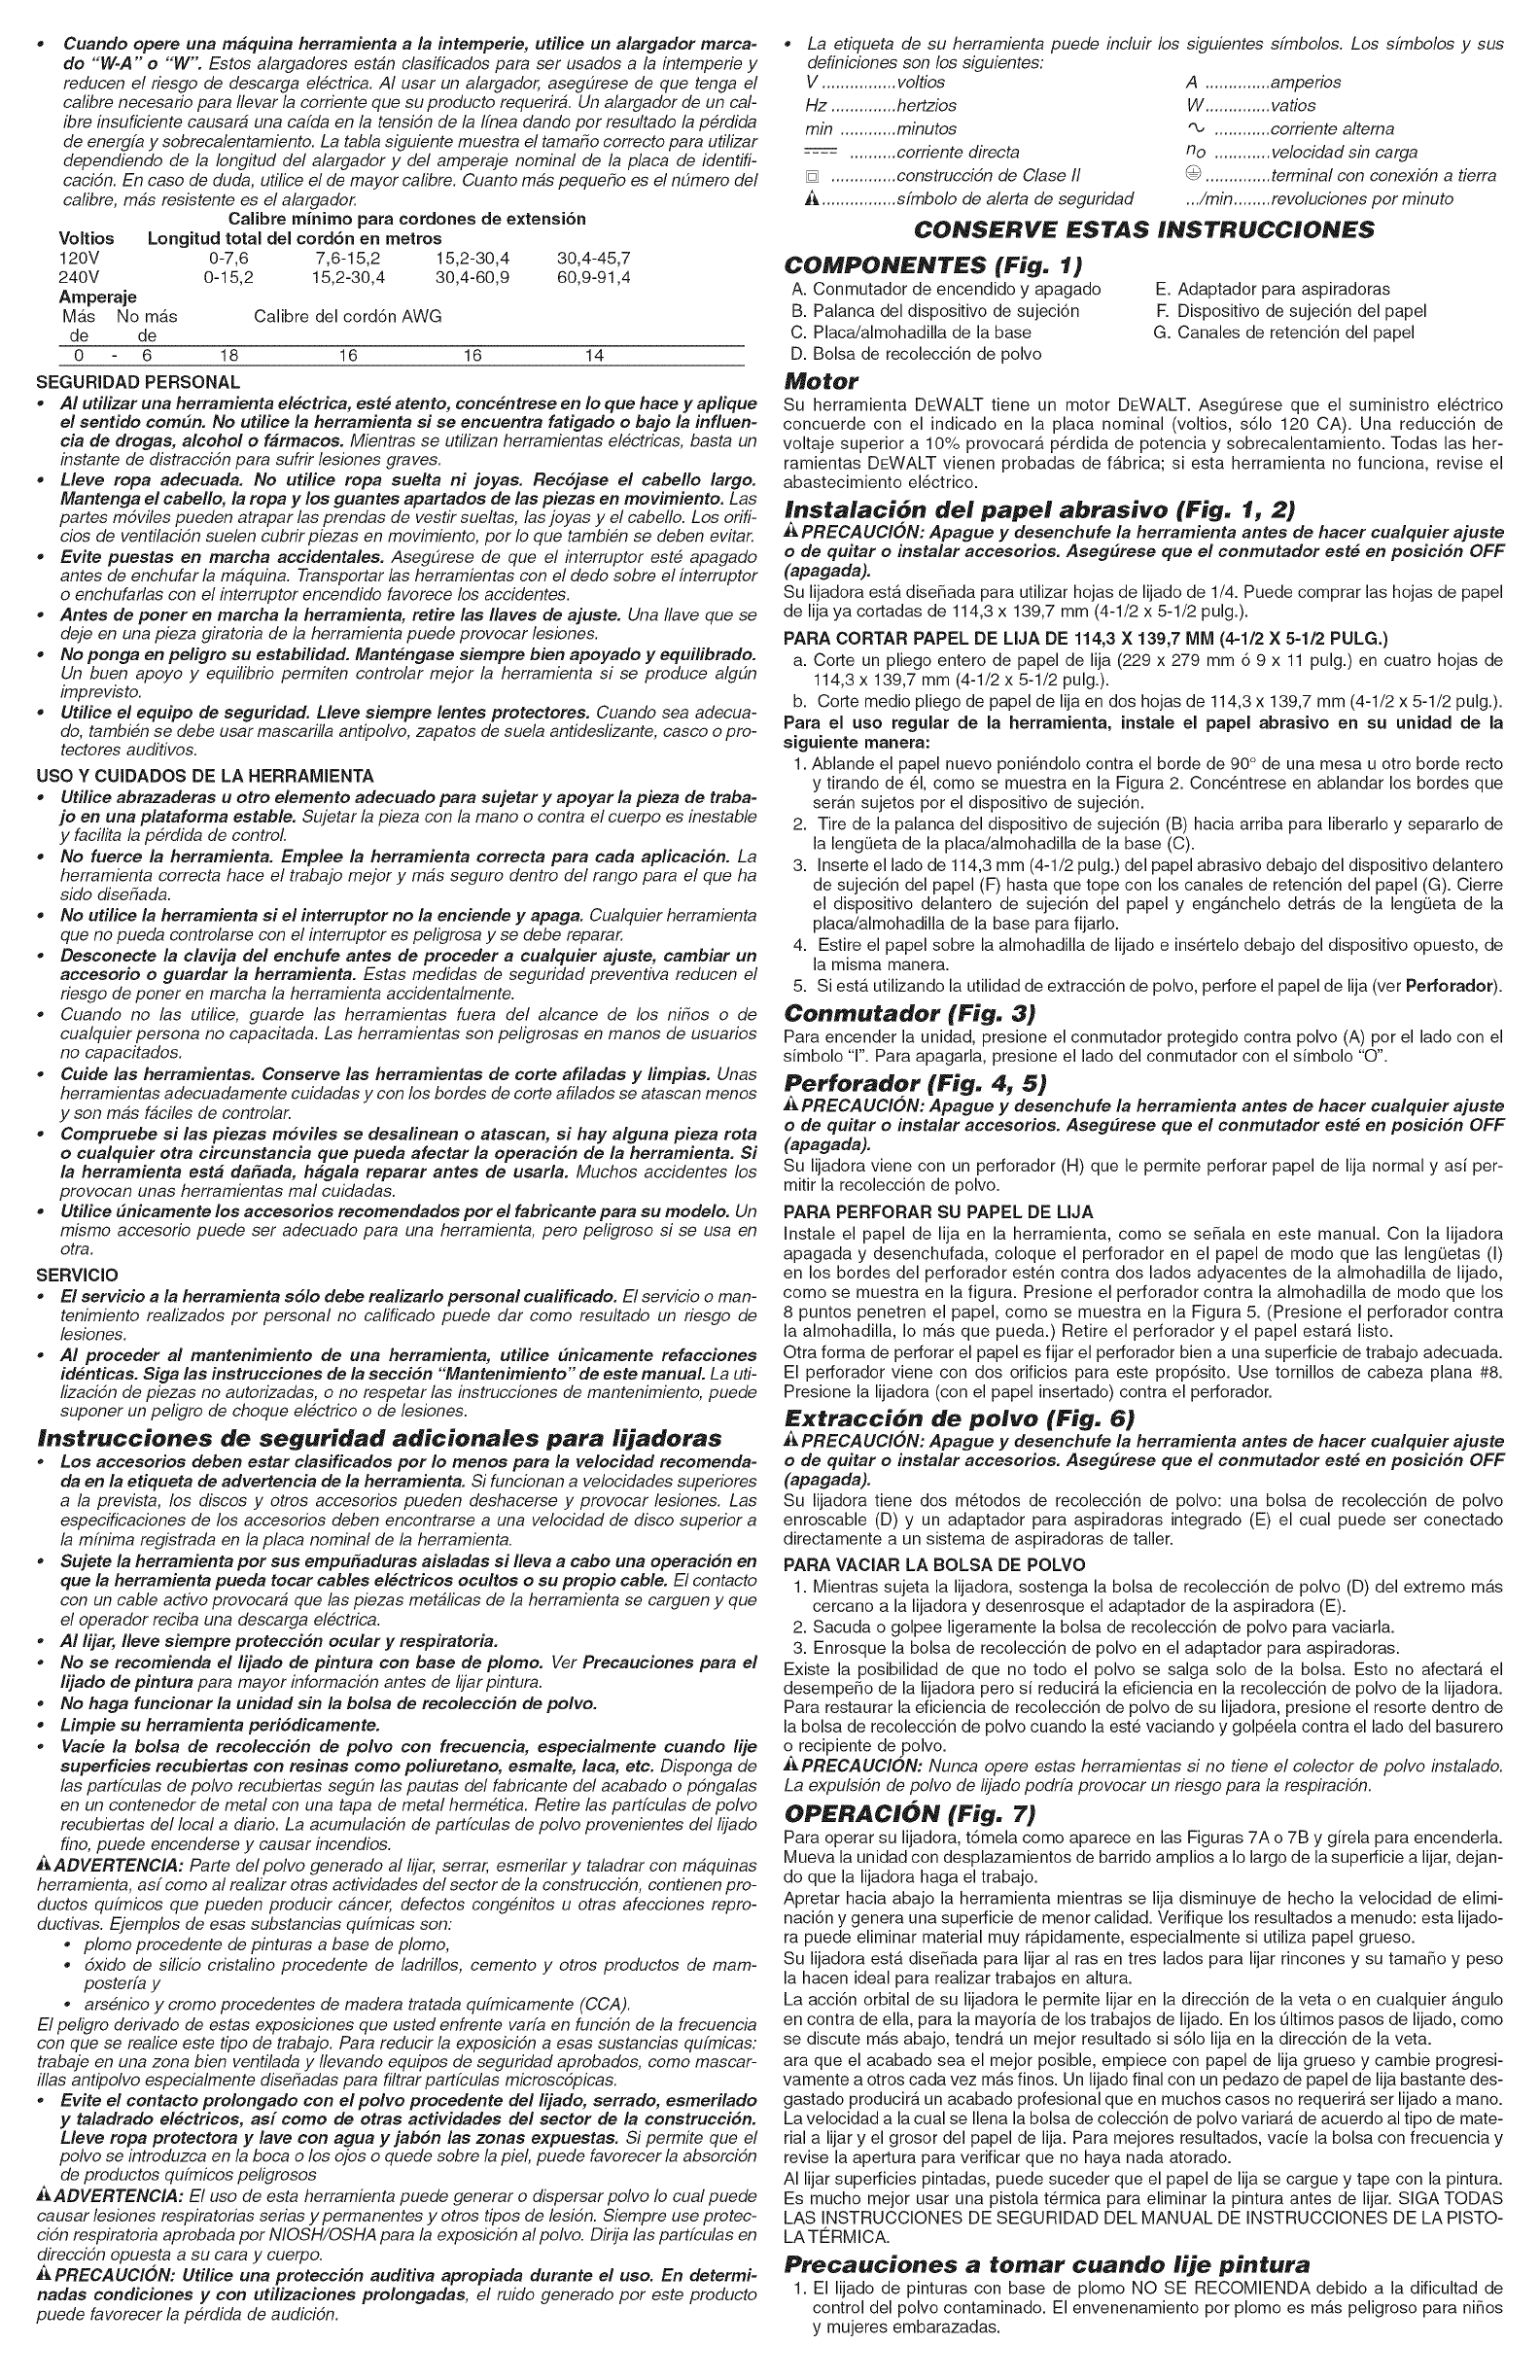
REMPLACEMENT GRATUW DE L'ETIQUETTE D'AVERTISSEMENT : En cas de perte ou
d'endommagement des 6tiquettes d'avertissement, composer le 1 800 433-9258 afin d'en
obtenir de nouvelles sans frais.
1/'4 SHEET
TO HEOOCETHE RJSHOF C US
I_ ,N.,ORY.USE.MUSTR_AH--
J AND UNBERSTANR JNSTRUETION MANUAL, ALWAYS _ _ M _
O._."_,o,,'_.,oo"o.o_'O,'rOO,,O.0,_OSEPROPERE'EANORERP'PATORYP"OT.......".... '_
_._'_'_ _,_r _,T_ PA RA91SMINUM EL RIESSB _ _ | _ , _ PAHA OISMINUM EL RBESGB
DE LEMONEO, EL OSOAHIO _DE LEBIONE& EL OSUARIO
UEGERi_ LEER Y COMPRENBER EL MANUAL BE INSTRUCCIBNES. BEOERJ_ LEER YCBMPSENOEH EL MANUAL RE INBTRUCCIONES.
SIEMPRE SE GEBERA LLEVAR LA PHOTECCI(_N APROPIAGA PARA OIEMPRE SE OEGERA LEBUAR LA PRBTECCI{)N APROPIAOA PARA
LA VISTA Y PARA LA$ UiAS RESPIPATORIAS. LA VISTA Y PAPA LAB YiAS GEBPMATORIAS.
t= = = AFIN HE MINIMISER LEO t_= ,,, AFiN DE MiNIMISER LEO
RISQOER BE BLESSURES, ¥;_J';'_' D =lJtl_ ]Z D*£_1_ _ _l _ 1" _ _ BISQUES HE GLESSOGES,
L'UTILMATSUR DOlT TOOJOURS LIHE ET COMPHENDRE LB GUIDE L'UTILMATEOH DOlT TOUJOORS MRS ST COMPRENORE LE GOiOE
D'OTILISATION. IL FAUT TOUJOQRS PORTER OR L'EQUIPEMENT DE D'UTILISATION. JL FAOT TOHJOURO PORTER DE L'EQOIPEMENT DE
PROTECTION BCULAJRE ET RESPJRATBME APPHBPRJE. PROTECTION OCULAJRE ET HESPJRATBME APPROPME.
_OLLECTED SANDING OUST FROM SANBJNB SURFACE COATINBS (POLYURETHANE, LINSEED OiL ETC.) CAN SELF-BONITE BN
SANDER DUST BAG OR ELSEWHERE AND CAUSE FME. TO REDUCE HJSR, EMPTY BAG FREQUENTLY AND STRICTLY FOLLOW
SANDRH MANUAL AND COATING MANUFACTURER'S iNSTRUCTIONS.
EL POLWLLO QOE SE ACOMOLA AL LIJAR LOS MATEMALES DE REVESTIMMNTOS TALES COMO EL POLiUHETANO,
ACE TB DE LNAZA, ETC, ES NFLAMABLE Y POEDR OCAS ONAH NCRNO 0 ADENTHO 0AFOERA DE LA BBLSA DE
ORA. PAPA UISMJNHIH DJCUB RIESGO, VACiE LA OOLSA CON FRECUENCIA, RiGA BE CESCA EL MANUAL BE IA
LiJABBRA Y RESPETE LAB JNSTRUCCJBNES DE LOS FAORICANTES DE LOS GIFERENTES TJPOS DE RBVEST|MJENTO.
'I_--'_ A POUSSIERE RAMASSEE LOBS DO PONCAGE DE OOHFACES ENDOri'ES O'UN HEV_TEt_ENT (COMME DO
. , POLYURETHANE BU BE EHUILE BE LIN, ENTRE AUTHES) PEUT S'ENFLAMMER SPONTANEMENT BANS LESAC
A PBUSSJRHE DE LA PBNCRUSE BU AJLLEURS, ET PRBUBOUBR UN JNCENGIE. Ai_N DE MJNIMJ_ER LEO RJSQUES O'JNCENGJE, VJDER SBUVENT LE SAC ET SE
CONFORMED STRICTEMENT AUX DiRECTiVES OO GOIDE O'UTiLMATION OS LA PONCEOSE El" A CELLOS OU FAUMCANT OU REVETEMBNT.
_r iJ
Instrucciones de seguridad generales
_ADVERTENCIA! Lea todas /as instrucciones hasta comprenderlas. No
ajustarse a/as instrucciones siguientes puede set causa de choque electrico,
incendio o/esiones graves.
CONSERVE EST_S INSTRUCCiONES
AREA DE TRABAJO
,Mantenga el #rea de trabajo limpia y bien fluminada. Las bancadas desordenadas y las
zonas oscuras propician los accidentes.
,No opere herramientas el_ctricas en atmSsferas explosivas, como en presencia de
I[quidos, gases o polvos inflamables. Las herramientas electricas producen chispas que
pueden originar la ignicidn del polvo o los vapores.
,Mientras opere una herramienta el#ctrica, mantenga lejos alos observadores, hinds y
visitantes. Las distracciones pueden ocasionar que pierda el control
SEGURIDAD EL[_CTRICA
* Las herramientas con conexiGn a tierra deben conectarse a una toma de corriente
debidamente instalada y con conexiSn a tierra, de acuerdo con todos los cSdigos y
ordenanzas aplicables. Nunca quite la pata de conexiSn a tierra ni modifique el enchufe
en ninguna manera. No emplee ning#n adaptador para enchufes. Si tiene alguna duda
acerca de si la toma de corriente est# debidamente conectada atierra, consulte aun
electricista cafificado. Si las herramientas presentasen fallas el#ctricas o aveffas, la conex-
idn a tierra ofrece una vfa de baja resistencia para alejar la corriente el#ctrica del usuario. $61o
es aplicable a/as herramientas de Clase I(con conexiGn a tierra).
,Las herramientas con doble aislamiento est#n equipadas con una clavija polarizada
(una pata es m#s ancha que la otra). Esta clavija se acoplar# a un enchufe polarizado
de una sola manera. Si la clavija no se acopla al contacto, invi#rtala. Si a_n as(no se
ajusta, comun[quese con un electricista cualificado para que instale un enchufe polar-
izado apropiado. Nunca cambie la clavija. El doble aislamiento [] elimina la necesidad de
cables con tres hilos y sistemas de suministro el#ctrico con conexidn a tierra. $51o es aplic-
able a/as herramientas de Clase II.
,Evite el contacto de/cuerpo con superficies conectadas atierra, tales como tuber[as,
radiadores, registros y refrigeradores. El riesgo de choque el#ctrico aumenta si su cuer-
po hace tierra.
,No exponga/as herramientas electricas a la Iluvia o a condiciones de mucha humedad.
Si entra agua en una herramienta el#ctrica, aumenta el riesgo de choque el#ctrico.
,No maltrate el cable. Nunca tome el cable para transportar la herramienta ni para
desconectarla de/enchufe. Mantenga el cable alejado de/as fuentes de calor, el ace#e,
/as orillas afiladas o/as piezas en movimiento. Cambie inmediatamente los cables
da#ados. Los cables da#ados aumentan el peligro de choque el#ctrico.
Cuandoopereuna m&quina herramienta a la intemperie, utilice un alargador marca-
do "W-A" o "W'. Estos alargadores estan clasificados para set usados a la intemperie y
reducen el riesgo de descarga el@ctrica.AI usar un alargador, aseg_rese de que tenga el
calibre necesario para Ilevar la corriente que su producto requerira. Un alargador de un cal-
ibre insuficiente causar_ una cafda en la tensi6n de la ffnea dando pot resultado la p@rdida
de energfa y sobrecalentamiento. La tabla siguiente muestra el tamado correcto para utilizar
dependiendo de la Iongitud del alargador y del amperaje nominal de la placa de identifi-
caci6n. En caso de duda, utilice el de mayor calibre. Cuanto mas pequedo es el n_mero del
calibre, mas resistente es el alargador.
Calibre minimo para cordones de e×tensi6n
Voltios Longitud total del cord6n en metros
120V 0-7,6 7,6-15,2 15,2-30,4 30,4-45,7
240V 0-15,2 15,2-30,4 30,4-60,9 60,9-91,4
Amperaje
M_.s No m_s Calibre del cord6n AWG
de de
0 6 18 16 16 14
SEGURIDAD PERSONAL
. AI utilizar una herramienta electrica, est_ atento, conc_ntrese en Io que hace y aplique
el sentido com_n. No utilice la herramienta si se encuentra fatigado o bajo la influen-
cia de drogas, alcohol o f&rmacos. Mientras se utilizan herramientas el@ctricas, basta un
instante de distracci6n para sufrir lesiones graves.
. Lleve ropa adecuada. No utilice ropa suelta ni joyas. Rec6jase el cabello largo.
Mantenga el cabello, la ropa y los guantes apartados de las piezas en movimiento. Las
partes m6viles pueden atrapar las prendas de vestir sueltas, las joyas y el cabello. Los orifi-
cios de ventilaci6n suelen cubrir piezas en movimiento, pot Io que tambi@n se deben evitar.
. Evite puestas en marcha accidentales. Aseg_rese de que el interruptor est@ apagado
antes de enchufar la mbquina. Transportar las herramientas con el dedo sobre el interruptor
o enchufarlas con el interruptor encendido favorece los accidentes.
. Antes de poner en marcha la herramienta, retire las Ilaves de ajuste. Una Ilave que se
deje en una pieza giratoria de la herramienta puede provocar lesiones.
. No ponga en peligro su estabilidad. Mant@ngase siempre bien apoyado y equilibrado.
Un buen apoyo y equilibrio permiten controlar mejor la herramienta si se produce alg_n
imprevisto.
. Utilice el equipo de seguridad. Lleve siempre lentes protectores. Cuando sea adecua-
do, tambi@n se debe usar mascarilla antipolvo, zapatos de suela antideslizante, casco o pro-
tectores auditivos.
USO Y CUIDADOS DE LA HERRAMIENTA
*Utilice abrazaderas uotto elemento adecuado para sujetar y apoyar la pieza de traba-
jo en una plataforma estable. Sujetar la pieza con la mano o contra el cuerpo es inestable
y facilita la p@rdida de control.
* No fuerce la herramienta. Emplee la herramienta correcta para carla aplicaci6n. La
herramienta correcta hace el trabajo mejor y mas seguro dentro del tango para el que ha
sido disedada.
. No utilice la herramienta si el interruptor no la enciende y apaga. Cualquier herramienta
que no pueda controlarse con el interruptor es peligrosa y se debe reparar.
* Desconecte la clavija del enchufe antes de proceder acualquier ajuste, cambiar un
accesorio o guardar la herramienta. Estas medidas de seguridad preventiva reducen el
riesgo de poner en marcha la herramienta accidentalmente.
* Cuando no las utilice, guarde las herramientas fuera de/ alcance de los nidos o de
cualquier persona no capacitada. Las herramientas son peligrosas en manos de usuarios
no capacitados.
* Cuide las herramientas. Conserve las herramientas de corte afiladas ylimpias. Unas
herramientas adecuadamente cuidadas y con los hordes de corte afilados se atascan menos
y son mas faciles de controlar.
* Compruebe si las piezas m6viles se desalinean o atascan, si hay alguna pieza rota
ocualquier otra circunstancia que pueda afectar la operaci6n de la herramienta. Si
la herramienta est& da_ada, h&gala reparar antes de usarla. Muchos accidentes los
provocan unas herramientas mal cuidadas.
* Utilice _nicamente los accesorios recomendados pot el fabricante para su modelo. Un
mismo accesorio puede set adecuado para una herramienta, pero peligroso si se usa en
otra.
SERVlCIO
* El servicio a la herramienta s61o debe realizarlo personal cualificado. El servicio o man-
tenimiento realizados pot personal no calificado puede dar como resultado un riesgo de
lesiones.
* AI proceder al mantenimiento de una herramienta, utilice Emicamente refacciones
id_nticas. Siga las instrucciones de la secci6n "Mantenimiento" de este manual. La uti-
lizaci6n de piezas no autorizadas, o no respetar las instrucciones de mantenimiento, puede
suponer un peligro de choque el@ctrico o de lesiones.
Instrucciones de seguridad adicionales para iijadoras
, Los accesorios deben estar clasificados pot Io menos para la velocidad recomenda-
da en la etiqueta de advertencia de la herramienta. Si funcionan a velocidades superiores
a la prevista, los discos y otros accesorios pueden deshacerse y provocar lesiones. Las
especificaciones de los accesorios deben encontrarse a una velocidad de disco superior a
la mfnima registrada en la placa nominal de la herramienta.
* Sujete la herramienta pot sus empu_aduras aisladas si Ileva a cabo una operaci6n en
que la herramienta pueda tocar cables el_ctricos ocultos o su propio cable. El contacto
con un cable activo provocara que las piezas metalicas de la herramienta se carguen y que
el operador reciba una descarga el@ctrica.
* AI lijar, Ileve siempre protecci6n ocular y respiratoria.
* No se recomienda el lijado de pintura con base de plomo. Vet Precauciones para el
lijado de pintura para mayor informaci6n antes de lijar pintura.
* No haga funcionar la unidad sin la bolsa de recolecci6n de polvo.
. Limpie su herramienta peri6dicamente.
* Vac[e la bolsa de recolecci6n de polvo con frecuencia, especialmente cuando lije
superficies recubiertas con resinas como poliuretano, esmalte, laca, etc. Disponga de
las partfculas de polvo recubiertas seg_n las pautas del fabricante de/acabado o p6ngalas
en un contenedor de metal con una tapa de metal herm@tica. Retire las partfculas de polvo
recubiertas de/local a diario. La acumulacidn de partfculas de polvo provenientes del lijado
fino, puede encenderse y causar incendios.
AADVERTENCIA: Parte del polvo generado al lijar, serrar, esmefilar y taladrar con maquinas
herramienta, as[ como al realizar otras actividades del sector de la construcci6n, contienen pro-
ductos qufmicos que pueden producir cancer, defectos cong@nitos u otras afecciones repro-
ductivas. Ejemplos de esas substancias qufmicas son:
* plomo procedente de pinturas a base de plomo,
* 6xido de silicio cristalino procedente de ladrillos, cemento y otros productos de mam-
posteria y
* ars@nico y cromo procedentes de madera tratada qufmicamente (CCA).
El peligro defivado de estas exposiciones que usted enfrente varfa en funci6n de la frecuencia
con que se realice este tipo de trabajo. Para reducir la exposici6n a esas sustancias qufmicas:
trabaje en una zona bien ventilada y Ilevando equipos de seguridad aprobados, como mascar-
illas antipolvo especialmente disedadas para filtrar partfculas microsc6picas.
* Evite el contacto prolongado con el polvo procedente del lijado, serrado, esmerilado
y taladrado el_ctricos, as[ como de otras actividades del sector de la construcci6n.
Lleve ropa protectora y lave con agua y jab6n las zonas expuestas. Si permite que el
polvo se introduzca en la boca o los ojos o quede sobre la piel, puede favorecer la absorci6n
de productos qufmicos peligrosos
_,ADVERTENCIA: El uso de esta herramienta puede generar o dispersar polvo Io cual puede
causar lesiones respiratorias serias y permanentes y otros tipos de lesi6n. Siempre use protec-
ci6n respiratoria aprobada pot NIOSH/OSHA para la exposici6n al polvo. Dirija las partfculas en
direcci6n opuesta a su cara y cuerpo.
_PRECAUCION: Utilice una protecci6n auditiva apropiada durante el uso. En determi-
nadas condiciones y con utilizaciones prolongadas, el ruido generado pot este producto
puede favorecer la p@rdida de audici6n.
La etiqueta de su herramienta puede incluir los siguientes sfmbolos. Los sfmbolos y sus
definiciones son los siguientes:
V................ voltios
Hz .............. hertzios
min ............ minutos
.... .......... corriente directa
[] .............. construccidn de Clase II
_ ................ sfmbolo de alerta de seguridad
A.............. amperios
W.............. vatios
'_ ............ corriente altema
no ............ velocidad sin carga
_ .............. terminal con conexi6n a tierra
.../min ........revoluciones pot minuto
CONSERVE ESTAS INSTBUCCIONES
COMPONENTES (Fig. 1)
A. Conmutador de encendido y apagado
B. Palanca del dispositivo de sujeci6n
C. Placa/almohadilla de la base
D. Bolsa de recolecci6n de polvo
Motor
Su herramienta DEWALT tiene un motor DEWALT. Aseg_rese que el suministro el@ctrico
concuerde con el indicado en la placa nominal (voltios, s61o 120 CA). Una reducci6n de
voltaje superior a 10% provocar_, p@rdida de potencia y sobrecalentamiento. Todas las her-
ramientas DEWALT vienen probadas de f_.brica; siesta herramienta no funciona, revise el
abastecimiento el@ctrico.
E. Adaptador para aspiradoras
R Dispositivo de sujeci6n del papel
G. Canales de retenci6n del papel
PARA CORTAR PAPEL DE LIJA DE 114,3 X 139,7 MM (4-1/2 X 5-1/2 PULG.)
a. Corte un pliego entero de papel de lija (229 x 279 mm 6 9 x 11 pulg.) en cuatro hojas de
114,3 x 139,7 mm (4-1/2 x 5-1/2 pulg.).
b. Corte medio pliego de papel de lija en dos hojas de 114,3 x 139,7 mm (4-1/2 x 5-1/2 pulg.).
Para el uso regular de la herramienta, instale el papel abrasivo en su unidad de la
siguiente manera:
1. Ablande el papel nuevo poni@ndolo contra el borde de 90° de una mesa u otro borde recto
y tirando de 51,como se muestra en la Figura 2. Conc@ntrese en ablandar los bordes que
seran sujetos por el dispositivo de sujeci6n.
2. Tire de la palanca del dispositivo de sujeci6n (B) hacia arriba para liberarlo y separarlo de
la leng0eta de la placa!almohadilla de la base (C).
3. Inserte el lado de 114,3 mm (4-1/2 pulg.) del papel abrasivo debajo del dispositivo delantero
de sujeci6n del papel (F) hasta que tope con los canales de retenci6n del papel (G). Cierre
el dispositivo delantero de sujeci6n del papel y eng&nchelo detr_.s de la leng0eta de la
placa!almohadilla de la base para fijarlo.
4. Estire el papel sobre la almohadilla de lijado eins@rtelo debajo del dispositivo opuesto, de
la misma manera.
5. Si est,. utilizando la utilidad de extracci6n de polvo, perfore el papel de lija (ver Perforador).
Conrnutador (Fig. 3)
Para encender la unidad, presione el conmutador protegido contra polvo (A) por el lado con el
simbolo "r'. Para apagarla, presione el lado del conmutador con el simbolo "O".
Perforador (Fig. 4, 5)
_PRECAUCION: Apague y desenchufe la herramienta antes de hacer cualquier ajuste
o de quitar o instalar accesorios. Aseg_rese que el conmutador est_ en posici6n OFF
(apagada).
Su lijadora viene con un perforador (H) que le permite perforar papel de lija normal y asi per-
mitir la recolecci6n de polvo.
PARA PERFORAR SU PAPEL DE LIJA
Instale el papel de lija en la herramienta, como se seSala en este manual. Con la lijadora
apagada y desenchufada, coloque el perforador en el papel de modo que las lengOetas (I)
en los bordes del perforador est@n contra dos lados adyacentes de la almohadilla de lijado,
como se muestra en la figura. Presione el perforador contra la almohadilla de modo que los
8 puntos penetren el papel, como se muestra en la Figura 5. (Presione el perforador contra
la almohadilla, Io m_s que pueda.) Retire el perforador y el papel estar_ listo.
Otra forma de perforar el papel es fijar el perforador bien a una superficie de trabajo adecuada.
El perforador viene con dos orificios para este prop6sito. Use tornillos de cabeza plana #8.
Presione la lijadora (con el papel insertado) contra el perforador.
ExtractiOn de polvo (Fig. 6)
_, PRECAUCION: Apague y desenchufe la herramienta antes de hacer cualquier ajuste
o de quitar o instalar accesorios. Aseg_rese que el conmutador est_ en posici6n OFF
(apagada).
Su lijadora tiene dos m@todos de recolecci6n de polvo: una bolsa de recolecci6n de polvo
enroscable (D) y un adaptador para aspiradoras integrado (E) el cual puede ser conectado
directamente a un sistema de aspiradoras de taller.
PARA VAClAR LA BOLSA DE POLVO
1. Mientras sujeta la lijadora, sostenga la bolsa de recolecci6n de polvo (D) del extremo m&s
cercano a la lijadora y desenrosque el adaptador de la aspiradora (E).
2. Sacuda o golpee ligeramente la bolsa de recolecci6n de polvo para vaciarla.
3. Enrosque la bolsa de recolecci6n de polvo en el adaptador para aspiradoras.
Existe la posibilidad de que no todo el polvo se salga solo de la bolsa. Esto no afectar_ el
desempeSo de la lijadora pero si reducirg, la eficiencia en la recolecci6n de polvo de la lijadora.
Para restaurar la eficiencia de recolecci6n de polvo de su lijadora, presione el resorte dentro de
la bolsa de recolecci6n de polvo cuando la est@vaciando y golp@ela contra el lado del basurero
o recipiente de polvo.
_PRECAUCION: Nunca opere estas herramientas si no tiene el colector de polvo instalado.
La expulsidn de polvo de lijado podrfa provocar un riesgo para la respiracidn.
OPERACI_)N (Fig. 7)
Para operar su lijadora, t6mela como aparece en las Figuras 7A o 7B y girela para encenderla.
Mueva la unidad con desplazamientos de barrido amplios a Io largo de la superficie a lijar, dejan-
do que la lijadora haga el trabajo.
Apretar hacia abajo la herramienta mientras se lija disminuye de hecho la velocidad de elimi-
naci6n y genera una superficie de menor calidad. Verifique los resultados a menudo: esta lijado-
ra puede eliminar material muy r_.pidamente, especialmente si utiliza papel grueso.
Su lijadora est,. diseSada para lijar al ras en tres lados para lijar rincones y su tamaSo y peso
la hacen ideal para realizar trabajos en altura.
La acci6n orbital de su lijadora le permite lijar en la direcci6n de la veta o en cualquier _,ngulo
en contra de ella, para la mayoria de los trabajos de lijado. En los Oltimos pasos de lijado, como
se discute m&s abajo, tendra un mejor resultado si s61o lija en la direcci6n de la veta.
ara que el acabado sea el mejor posible, empiece con papel de lija grueso y cambie progresi-
vamente a otros cada vez mb,s finos. Un lijado final con un pedazo de papel de lija bastante des-
gastado producira un acabado profesional queen muchos casos no requerira set lijado a mano.
La velocidad a la cual se Ilena la bolsa de colecci6n de polvo variarg, de acuerdo al tipo de mate-
rial a lijar y el grosor del papel de lija. Para mejores resultados, vacie la bolsa con frecuencia y
revise la apertura para verificar que no haya nada atorado.
AI lijar superficies pintadas, puede suceder que el papel de lija se cargue y tape con la pintura.
Es mucho mejor usar una pistola t@rmica para eliminar la pintura antes de lijar. SlGA TODAS
LAS INSTRUCCIONES DE SEGURIDAD DEL MANUAL DE INSTRUCCIONES DE LA PISTO-
LATERMICA.
Precauciones a tornar cuando fije pintura
1. El lijado de pinturas con base de plomo NO SE RECOMIENDA debido a la dificultad de
control del polvo contaminado. El envenenamiento por plomo es m&s peligroso para niSos
y mujeres embarazadas.
lnstalacidn del papei abrasivo (Fig. 1, 2)
PRECAUCION: Ppague y desenchufe la herramienta antes de hacer cualquier ajuste
o de quitar o instalar accesorios. Aseg_rese que el conmutador est_ en posici6n OFF
(apagada).
Su lijadora esta diseSada para utilizar hojas de lijado de 1/4. Puede comprar las hojas de papel
de lija ya cortadas de 114,3 x 139,7 mm (4-1/2 x 5-1/2 pulg.).
2.Yaqueesdificilidentificarsiunapinturacontieneplomoono,sinanteshacerunanalisis
quimico,lerecomendamosquesetomenlassiguientesprecaucionescuandolijecualquier
pintura:
SEGURIDADPERSONAL
1.Ning_nniGoomujerembarazadadeberiaentraralAreadetrabajodondeseestAlijando
lapinturahastaqueseterminedelimpiarelArea.
2.TodapersonaqueentrealAreadetrabajodebeusarunamascaraantipolvoorespirador.
Elfiltrodeberiaserreemplazadoadiarioocuandoelusuariotengadificultadesparares-
pirar.Visitesuferretefialocalparaobtenerunamascaraantipolvoapropiada,aprobada
porNJ.O.S.H.
3.NOsedebeCOMER,BEBERniFUMARenlazonadetrabajo,paraevitarlaingesti6n
departiculasdepinturacontaminadas.LostrabajadoresdeberAnlavarsebienANTESde
comer,beberofumar.Nodebedejarsecomida,bebidanitabacoenlazonadetrabajo,
dondeelpolvosepodriaposarsobreellos.
SEGURIDADMEDIOAMBIENTAL
1.Lapinturadebeserquitadadetalmaneraqueseminimicelacantidaddepolvogen-
erada.
2.AquellasAreasenlasqueseestAquitandopinturadeberianserselladasconlaminasde
plAsticode4mmdegrosor.
3.Ellijadodeberiahacersedemodoquesereduzcalacantidaddepolvodepinturaquese
Ileveafuera.
LIMPIEZAYELIMINACION
1. Todas las superficies de la zona de trabajo deben de ser aspiradas y limpiadas en
profundidad todos los dias mientras dure el proyecto de lijado. Las bolsas de filtrado de
la aspiradora se deben cambiar con frecuencia.
2. Disponga de cubiertas plAsticas junto con cualquier astilla de polvo u otro desecho del
proceso de lijado. Deberan colocarse en un recipiente para desechos sellado y eliminarse
de acuerdo con los procedimientos de eliminaci6n de la basura normal. Durante la
limpieza, mantenga alejados a niGos y mujeres embarazadas de la zona de trabajo.
3. Todos los juguetes, muebles lavables y utensilios usados por niGos deberan lavarse a
fondo antes de volverlos a usar.
Cuidado de la herrarreienta
• Mantenga la lijadora tan limpia como sea posible, pasandole un trapo limpio y soplando aire
a trav_s de ella cada cinco horas de funcionamiento.
•No utilice quimicos o solventes fuertes para limpiar la herramienta. Estos quimicos podrian
causar graves daGos al plAstico.
•Evite sobrecargar la lijadora. Las sobrecargas resultarAn en una velocidad y eficiencia
considerablemente menores y la unidad se harA caliente. En este caso, opere la lijadora sin
carga por uno o dos minutos.
Sustituci6n de las escobillas (Fig. 8, 9)
,_ PRECA UCION: Apague y desenchufe la herramienta antes de hacer eualquier ajuste
o de quitar o instalar accesorios. Aseg#rese que el conmutador est# en posici6n OFF
(apagada).
PARA CAMBIAR LAS ESCOBILLAS
1. Retire los tres tornillos de la tapa superior y levante la tapa, coreD Io muestra la Figura 8.
2. Tire el resorte de la escobilla (J) hacia atrAs (cuidando de no sacarla completamente) y
deslice de 51la escobilla vieja.
3. Tire del alambre de la escobilla (L) el cual estA conectado a la escobilla, para sacarlo del
campo inductor del motor (K).
4. Enchufe el alambre nuevo de la escobilla de vuelta en el campo inductor del motor.
5. Mientras sostiene at3n el resorte de la escobilla, deslice la nueva escobilla con el alambre
saliendo de la parte de arriba de la escobilla y suelte el resorte de la escobilla.
6. Repita los pasos 1-5 para la segunda escobilla.
7. Cambie la tapa superior y ajuste los tres tornillos. Tenga cuidado de no ajustar los tornillos
demasiado.
8. Sustituya siempre ambas escobillas.
ACCESORIOS
Los accesorios recomendados para su herramienta estAn disponibles por un cargo adicional en
su distribuidor local o en el centro de servicio autorizado. Si necesita ayuda para encontrar un
accesorio para su herramienta, contacte a: DEWALT Industrial Tool Co., 701 East Joppa Road,
Baltimore, MD 21286 (1-800-4-DEWALT).
_},PRECA UCION: La utilizacidn de cualquier accesorio no recomendado para esta herramienta
puede ser peligrosa.
£ubricaci6re
La herramienta incorpora cojinetes autolubricantes, por Io que no requiere lubricaci6n peri6di-
ca. Sin embargo, se recomienda que una vez al ago un centro de servicio proceda a una inspec-
ci6n y limpieza a fondo de la herramienta.
Reparaciones
Para garantizar la SEGURIDAD y la CONFIABILIDAD, deberan hacerse reparaciones, man-
tenimiento y ajustes de esta herramienta en los centros autorizados de servicio DEWALT u otras
organizaciones autorizadas. Estas organizaciones prestan servicio alas herramientas DEWALT
y emplean siempre refacciones legitimas DEWALT.
P61iza de Garantia
IDENTIFICACION DEL PRODUCTO:
Sello o firma del Distribuidor.
Nombre del producto: Mod./Cat.:
Marca: NOra. de serie:
(Datos para ser Ilenados por el distribuidor)
Fecha de compra y/o entrega del producto:
Nombre y domicilio del distribuidor donde se adquiri6 el producto:
AdemAs de la garantia, las herramientas DEWALT estAn cubiertas por:
1 ANO BE SERVICIO GRATUITO
DEWALT mantendrA la herramienta y reemplazarA las piezas gastadas por su uso normal, sin
cobro, en cualquier momento durante un ago a contar de la fecha de compra.
GARANT|A DE REEMBOLSO DE SU DINERO POR 90 D|AS
Si no estA completamente satisfecho con el desempeGo de su mAquina herramienta, laser o
clavadora DEWALT, cualquiera sea el motivo, podra devolverlo hasta 90 dias de la fecha de
compra con su recibo y obtener el reembolso completo de su dinero - sin necesidad de respon-
der a ninguna pregunta.
SUSTITUCK)N GRATUITA DE LAS ETIQUETAS DE ADVERTENCIA: Si sus etiquetas de
advertencia se vuelven ilegibles o se pierden, Ilame al 1-800-544-6986 para conseguir
repuestos gratuitos.
rD20441
TORES 0.....,SRCTO@ S
DEWALTmDaSTRIALT0eLCO.,eALTIMORE,MD21a6US_
_aR S[RVlCEINFORMAll0N,C_ I-S_-_WALf www.D_W_L_,o,_
'_=_'_"_ PARA DiSMINUIR EL MERGU _ _ _ = , _ PAUA UMMiNUBR El. MESGO
DE LESIONES, EL USUA01O tr : _=_'_ R'_ _ B'_ _ _r] _=S RE LESIONED, EL USUASI0
UEBER/i. LEER Y COMPSENDES EL MANUAL DE INSTRURMUNES. DESESA LEES Y COMPSENUER EL MANUAL DE INSTRUCCiONES.
MEMPSE SE UESESA LLEVAS LA PSUTECCJ0N APROPJAUA PASA SJEMPRE SE UERERA LLEVAR LA PSOTECCD)N APRUPJAUA PARA
LA VISTA Y SARA LAD VIAS SESPJRATDMAS. LA VISTA Y PASA LA$ ViAS SESPJRATOMAS.
,, . , AE'N DE MI'M'SEO LED ,,. ,,, AF'N UE MiNiMiSEO LED
MSQSER DE BLESSUSES, _ _ _=t J=_ P-PJ =_lJJ =_ _ MSQUES DE SLESSUSES,
L'UTILMATEUR DOlT TOUJUURD [JOE ET COMPOENDRE [E GUIDE L'CTI[JRATEUS UOIT TOUJOURS [JOE ET CUMPSEI!IURE LE GUIDE
D'UTILMATJON, IL FAUT TOUJOUSS PORTER DR L'EQUJPEMENT DE U'UTJ[JSAT|0N. JL EAUT TOUJOURS PORTER DE L'EQUIPEMENT RE
PSOTECTJON SCULAiRE ET RESPJRATUiRE APPSUPME. PROTECTION ORULAJRE ET SESPJRATUME APPSORME.
f_ _COLLECTED SANDING RUST FROM SANDING SURFACE COATINGS (POLYURETHANE, LINSEED OiL, ETC.) CAN SELF-IGNITE IN|_
SANDERDUSTRAGOSELSEWHEREAND CAUSEFIRE.TOSEUUCERISK,EMSTYRANFREQUENTLYANDSTRICTLYFOLLOW|
SANDERMANUALAND COATINGMANUFACTURER'SINSTOUC110NS. !
_i_T_ ELPOLVILLOQUESEARUMULAALUJARLOSMATERIALESDEREVECTIMIENTOSTALERCDM0 ELPO[JURETAN0,
•ACEITEUE[JNAZA,ETD.,ESINELAMABLEyPUEREOCASIONARINCENUIOARENTROOAEUERAUELAUOLSAUE|
SECOLECCIONRE ROLYODELAUJAUORA.PASASIRMINUIRDICHOMESGO,VAME LAROLRACSNFRECUENCIA,RIGARECERCAELMANUALDELA !
[JJARORAYSESPETELADINSTSUCCIONESDELOSFAUMCANTESRELOSUIFESENTESTIPOSRESEUESTIMIENTO.
_.= _ _ L LA POU_MERESAMASSEELORDDURUN,AGE BESURFACESENDUITE$U'UNREVETEM_NT(COMMEDO
•" " " POLYURETHANEOUDE L'UUILEDE[JN, ENTREAUTSES)PERTR'ENFLAMMERSPONTANEMENTUANS LESAC|
AROUSMESEDE LA PONCEUSEOUADLEUSR,ETPSOVOQUESUNINCENUIE.AFIN DE MINIMIRERLEDMSQUESU'INCENUIE,SIDERROUVENTLESACETSE/
CONFOSMESSTSICTEMENTAUNDIRECTIVESUUGUIDEU'U11[JRATIONDELA PONCEUSEETACELLEDUU FARMCANTRUSEV_TEMEN_ |
_J
PARA REPARACK)N YSERVIClO DE SUS HERRAMIENTAS ELECTRICAS, FAVOR DE
DIRIGIRSE AL CENTRO DE SERVICIO MAS CERCANO
CULIACAN, SIN
Av. Nicolb,s Bravo #1063 Sur - Col. Industrial Bravo
GUADALAJARA, JAL
Av. La Paz #1779 - Col. Americana Sector Jub,rez
MEXICO, D.E
Eje Central Lb,zaro Cardenas No. 18
Local D, Col. Obrera
MERIDA, YUC
Calle 63 #459-A - Col. Centro
MONTERREY, N.L
Av. Francisco I. Madero No.831 - Col. Centro
PUEBLA, PUE
17 Norte #205 - Col. Centro
QUERETARO, QRO
Av. Madero 139 Pte. - Col. Centro
SAN LUIS POTOSI, SLP
Av. Universidad 1525 - Col. San Luis
TORREON, COAH
Blvd. Jndependencia, 96 Pte. - Col. Centro
VERACRUZ, VER
Prolongaci6n Diaz Mir6n #4280 - Col. Remes
WLLAHERIVIOSA, TAB
Constituci6n 516-A- Col. Centro
PARA OTRAS LOCALIDADES LLAIVIE AL: (55) 5326 7100
(667) 7 12 42 11
(33) 3825 6978
(55) 5588 9377
(999) 928 5038
(81) 8375 2313
(222) 246 3714
(442) 214 1660
(444) 814 2383
(871) 716 5265
(229) 921 7016
(993) 312 5111
Epecificaciones
Tensi6n de alimentaci6n
Consumo de corriente:
Frecuencia de operaci6n:
Potencia nominal:
120 V AC '_
2,4A
50/60 Hz
260 W
IMPORTADOR: DEWALT S.A. DE C.V.
BOSQUES DE CIDROS ACCESO RADIATAS NO. 42
COL. BOSQUES DE LAS LOMAS, 3A. SECCION, CP 05120
DELEGACION CUAJIMALPA, MEXICO, D.F
TEL. 5 326 7100
R.RC.: BDE810626-1W7
Para servicio yventas consulte ,,..... ',,
"HERRAIVIIENTAS ELECTRICAS" S_J_;_
en la secci6n amarilla.
Este producto estA garantizado por un ago a partir de la fecha de entrega, contra cualquier
defecto en su funcionamiento, asi como en materiales y mano de obra empleados para su fab-
ricaci6n. Nuestra garantia incluye la reparaci6n o reposici6n del producto y/o componentes sin
cargo alguno para el cliente, incluyendo mano de obra, asi como los gastos de transportaci6n
razonablemente erogados derivados del cumplimiento de este certificado.
Para hacer efectiva esta garantia deberA presentar su herramienta y esta p61iza sellada por
el establecimiento comercial donde se adquiri6 el producto, de no contar con _sta, bastara la
factura de compra.
EXCEPCIONES.
Esta garantia no serA valida en los siguientes casos:
• Cuando el producto se hubiese utilizado en condiciones distintas alas normales;
• Cuando el producto no hubiese sido operado de acuerdo con el instructivo de uso que se
acompaGa;
• Cuando el producto hubiese sido alterado o reparado por personas distintas a las
enlistadas al final de este certificado.
Anexo encontrarA una relaci6n de sucursales de servicio de fAbrica, centros de servicio autor-
izados y franquiciados en la Rept3blica Mexicana, donde podra hacer efectiva su garantia y
adquirir partes, refacciones y accesorios originales.
Garantia lirnitada per tres a_os
DEWALT reparar& sin cargo, cualquier falla que surja de defectos en el material o la fabricaci6n
del producto, por hasta tres aGos a contar de la fecha de compra. Esta garantia no cubre fallas
de las piezas causadas por su desgaste normal o abuso a la herramienta. Para mayores
detalles sobre la cobertura de la garantia e informaci6n acerca de reparaciones realizadas bajo
garantia, visitenos en www.dewalt.com o dirigase al centro de servicio mAs cercano. Esta
garantia no aplica a accesorios o a daGos causados por reparaciones realizadas o intentadas
por terceros. Esta garantia le otorga derechos legales especificos, ademAs de los cuales puede
tener otros dependiendo del estado o provincia en que se encuentre.
