Dexcom 9400 Glucose Monitoring System User Manual Manual Draft
Dexcom, Inc. Glucose Monitoring System Manual Draft
Dexcom >
Users manual
Caution: Investigational device. Limited by Federal (United States) law to investigational use.
CONFIDENTIAL Page 1 of 3
Under FDA Review
D
EX
C
OM
™ STS™ C
ONTINUOUS
G
LUCOSE
M
ONITORING
S
YSTEM
U
SER
G
UIDE
F
OR
T
RANSMITTER
M
ODEL
N
UMBER
9400 & R
ECEIVER
M
ODEL
N
UMBER
8204
Starting Continuous Glucose Monitoring
Choose a site on your abdomen (belly) to put the Sensor that is a flat area and where you don’t have any scarring or rough patches
of skin and clean the site with an alcohol swab. Remove the adhesive backing from the STS™ Sensor Pod and place the STS™
Sensor on the selected site.
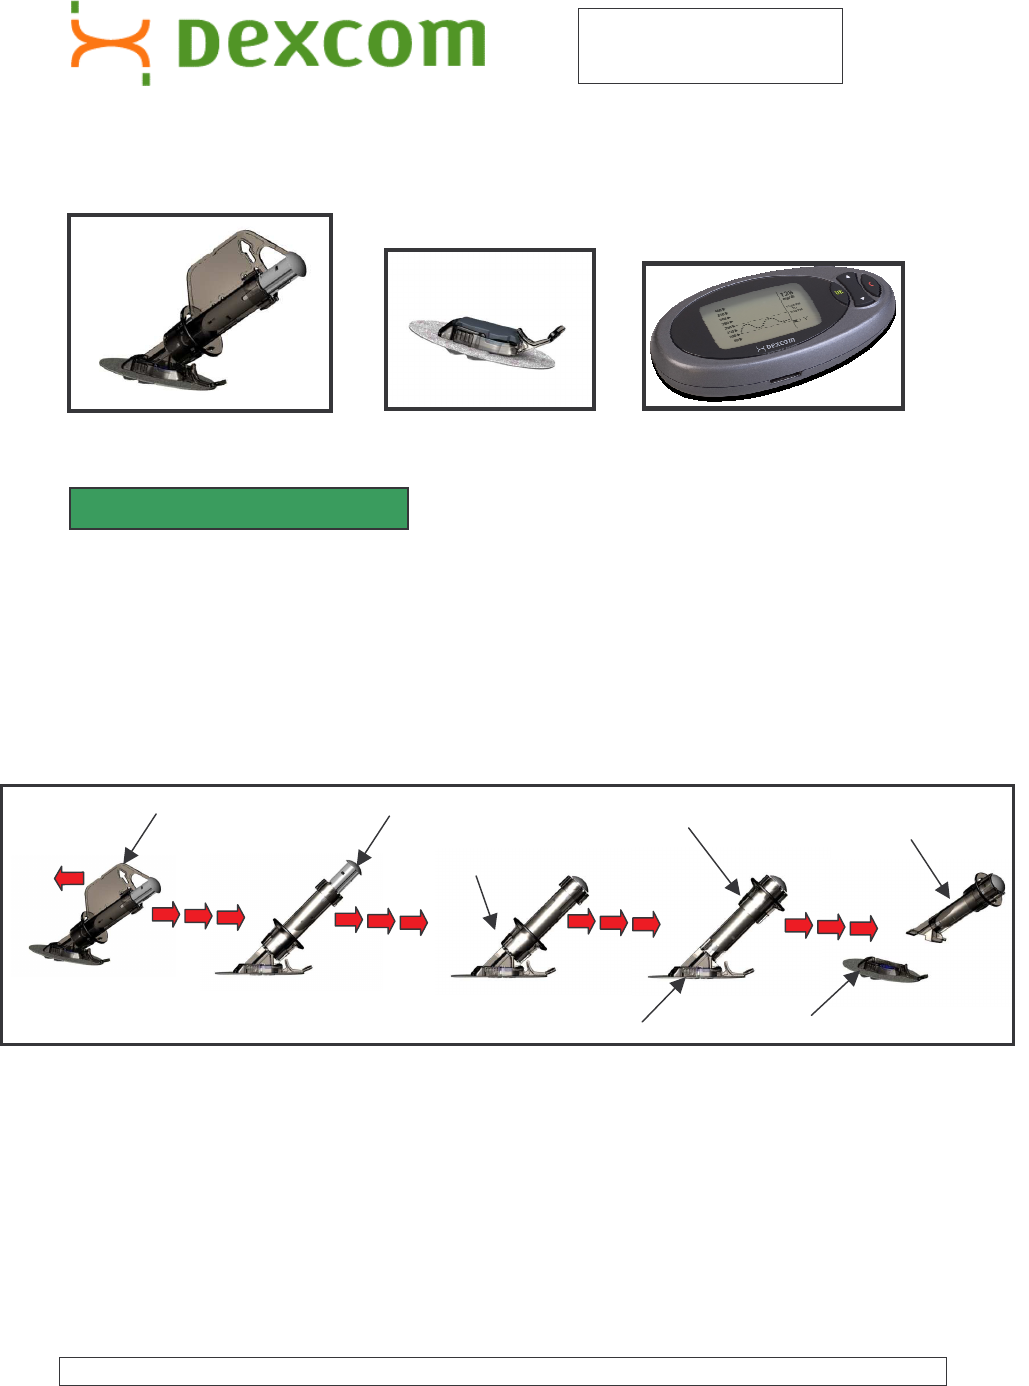
1. Pull the safety lock out from the Applicator.
2. Place 2 fingers under the collar, with your thumb on the plunger, and push the plunger down completely.
3. At the same time that you are pushing the plunger down, pull the collar back completely until you hear a click.
4. Press the tabs on the sides of the STS™ Sensor Pod and pull out the STS™ Applicator.
4
.
S
TEP
1- Inserting a New STS™ Sensor
Push plunger
Remove STS™ Applicator
STS™ Sensor Pod remains adhered
Press tabs
Collar completely back
Safety Lock
1
.
Pull Collar
2.
3.
4.
STS™ Sensor & STS™ Applicator
STS
™
Sensor &
STS™ Transmitter
STS™ Receiver
Caution: Investigational device. Limited by Federal (United States) law to investigational use.
CONFIDENTIAL Page 2 of 3
Under FDA Review
The antenna should appear here
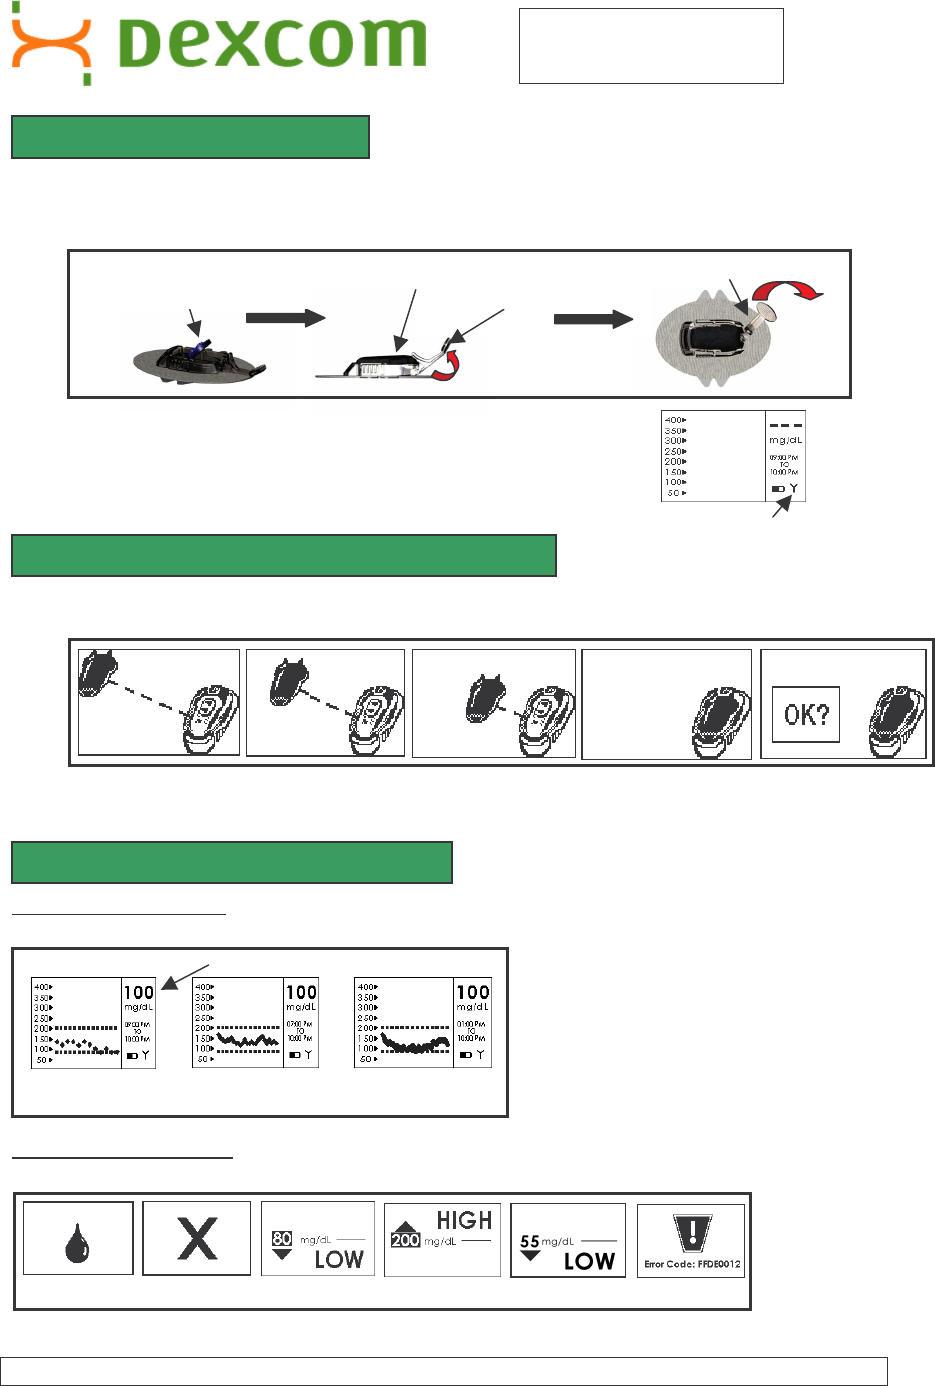
Place the STS™ Transmitter into the STS™ Sensor Pod with the flat side facing down.
Pull the STS™ Transmitter Latch up onto the to STS™ Transmitter to snap it into place.
Remove the STS™ Transmitter Latch by holding the end of the latch and quickly twisting off the latch away from your body.
Press any button on the STS™ Receiver to check for the Antenna icon (Y) before you
continue.
Press the Down Arrow 3 times until you come to the 9-hour Glucose Trend Screen and then press and hold the Down
Arrow for at least 7 seconds until you see the Sensor Insertion Screen.
Press the OK button.
Viewing your Glucose Trends
You can view trends and patterns using the 1-hour, 3-hour, and 9-hour glucose screens. (See screens below).
STS™ Receiver Alert Screens
The device may vibrate and/or beep and display one of the following screens during use:
S
TEP
2- Installing Your STS™ Transmitter
S
TEP
3- Beginning your Continuous Glucose Monitoring Session
C
ONTINUOUS
M
ONITORING
Calibration Update
Screen
Out of Calibration
Screen
Low Glucose Alert High Glucose Alert Low Glucose Alarm
Error Code
Remove STS™ Transmitter Latch
STS™ Transmitter installed
STS™ Transmitter Latch
Install STS™ Transmitter in STS™
Sensor Pod
Press
Press
1
-
hour
Glucose Trend Screen
3
-
hour
Glucose Trend Screen
9
-
hour
Glucose Trend Screen
Glucose Value
Caution: Investigational device. Limited by Federal (United States) law to investigational use.
CONFIDENTIAL Page 3 of 3
Under FDA Review
If the Calibration Update Screen or the Out of Calibration Screen appears on the STS™ Receiver, clear the prompt, take a BG
fingerstick to bring the STS™ System back into calibration.
When the STS™ Sensor glucose value is above or below the alert settings you have selected (factory settings are 80 and 200),
the STS™ Receiver will notify you of a high or low glucose value. Press any button on the STS™ Receiver to acknowledge the
alert. Take a fingerstick before you make any treatment decisions. In addition to your personal glucose alert settings, your STS™
Receiver also has an automatic low glucose alarm set at 55mg/dL (3.1 mmol/L).
The error code indicates the STS™ Receiver is not functioning properly. Note the Error code, use your meter to check your
blood glucose readings, and contact Technical Support immediately. Your Continuous Glucose Monitoring Session is
finished and you should remove the STS™ Sensor.
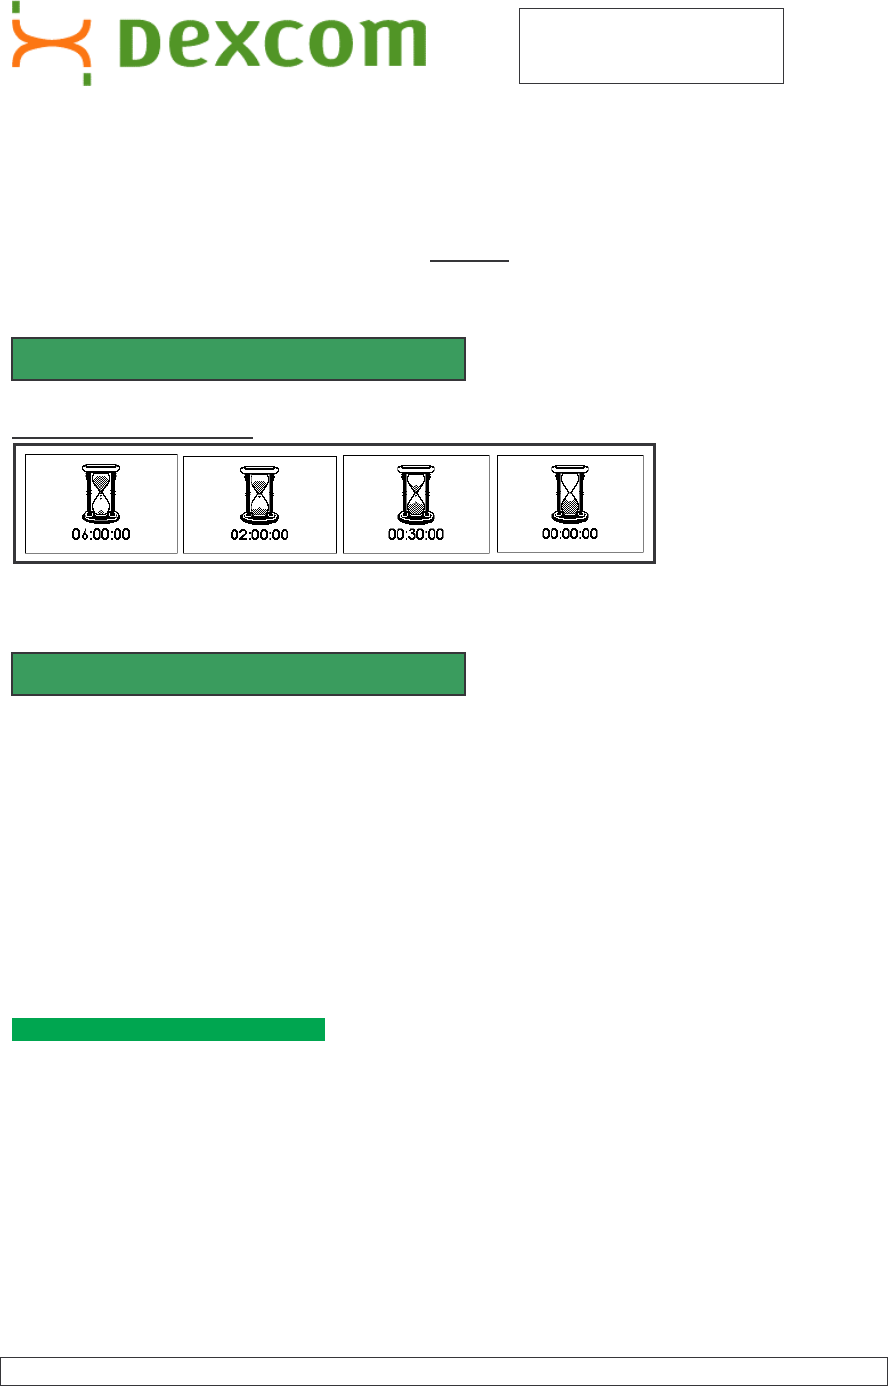
STS™ Sensor Expiration Notification
The STS™ Receiver will display screens that notify you how long you have until the end of your Continuous Glucose
Monitoring Session. You will be notified at 6 hours, 2 hours, 30 minutes to the end of your sensing period, and when your
session is finished. Press any button to clear the alert.
This transmitter is authorized by rule under the Medical Implant Communication Service (47 C.F.R. Part 95) and must not cause
harmful interference to stations operating in the 400.150 – 406.000 MHz band in the Meteorological Satelite, or Earth Exploration
Satelite Services and must accept interference that may be caused by such aids, including interference that may cause undesired
operation.
This transmitter shall be used only in accordance with the FCC Rules governing the Medical Implant Communications Service.
Analog and digital voice communications are prohibited. Although this transmitter has been approved by the Federal
Communications Commission, there is no guarantee that it will not receive interference or that any particular transmission from this
transmitter will be free from interference.
LBLXXXX, Rev. XX, © 2005. DexCom, Inc.
E
NDING YOUR
C
ONTINUOUS
G
LUCOSE
M
ONITORING
S
ESSION
C
ONSUMER
I
NFORMATION AND
FCC R
EQUIREMENTS