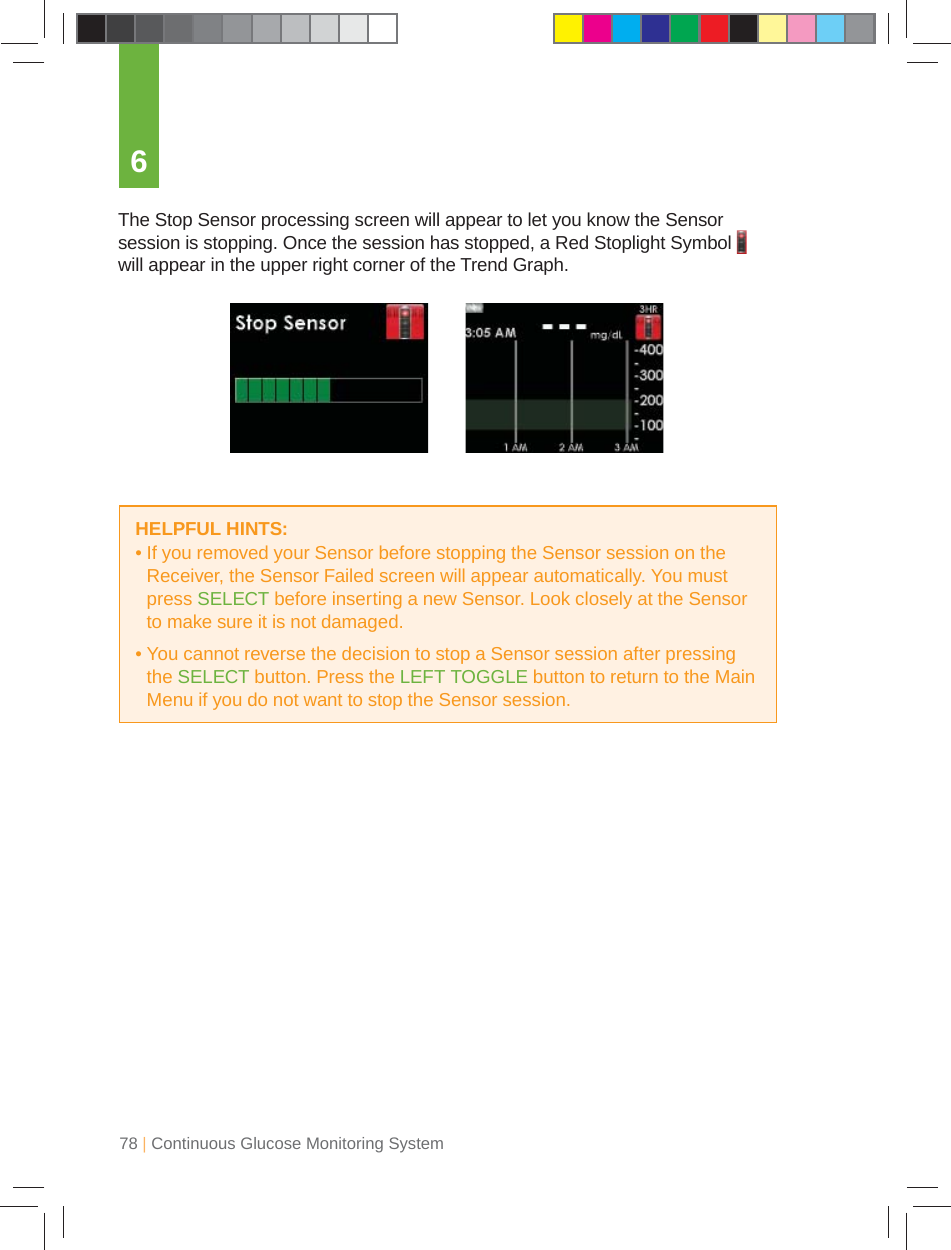
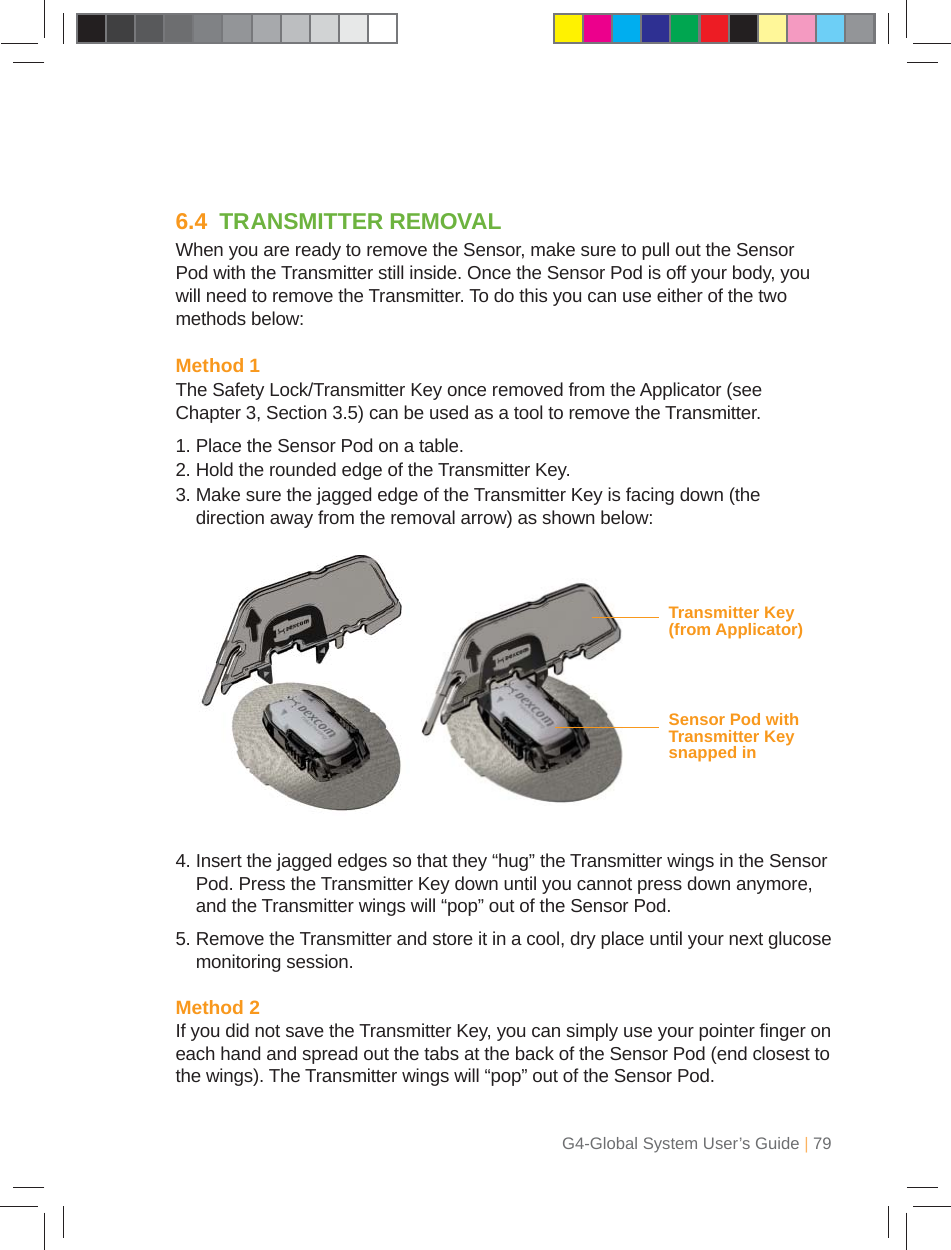
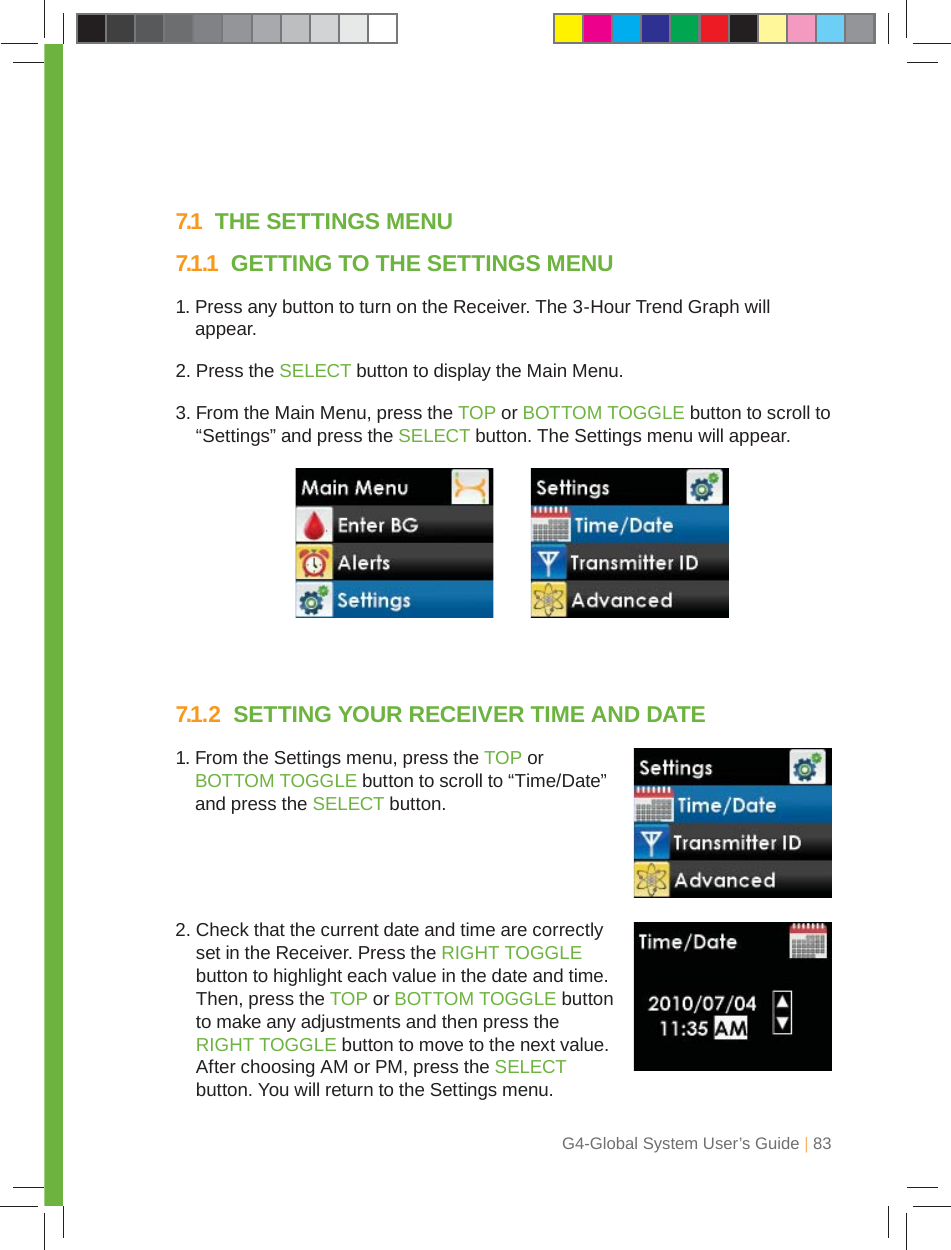
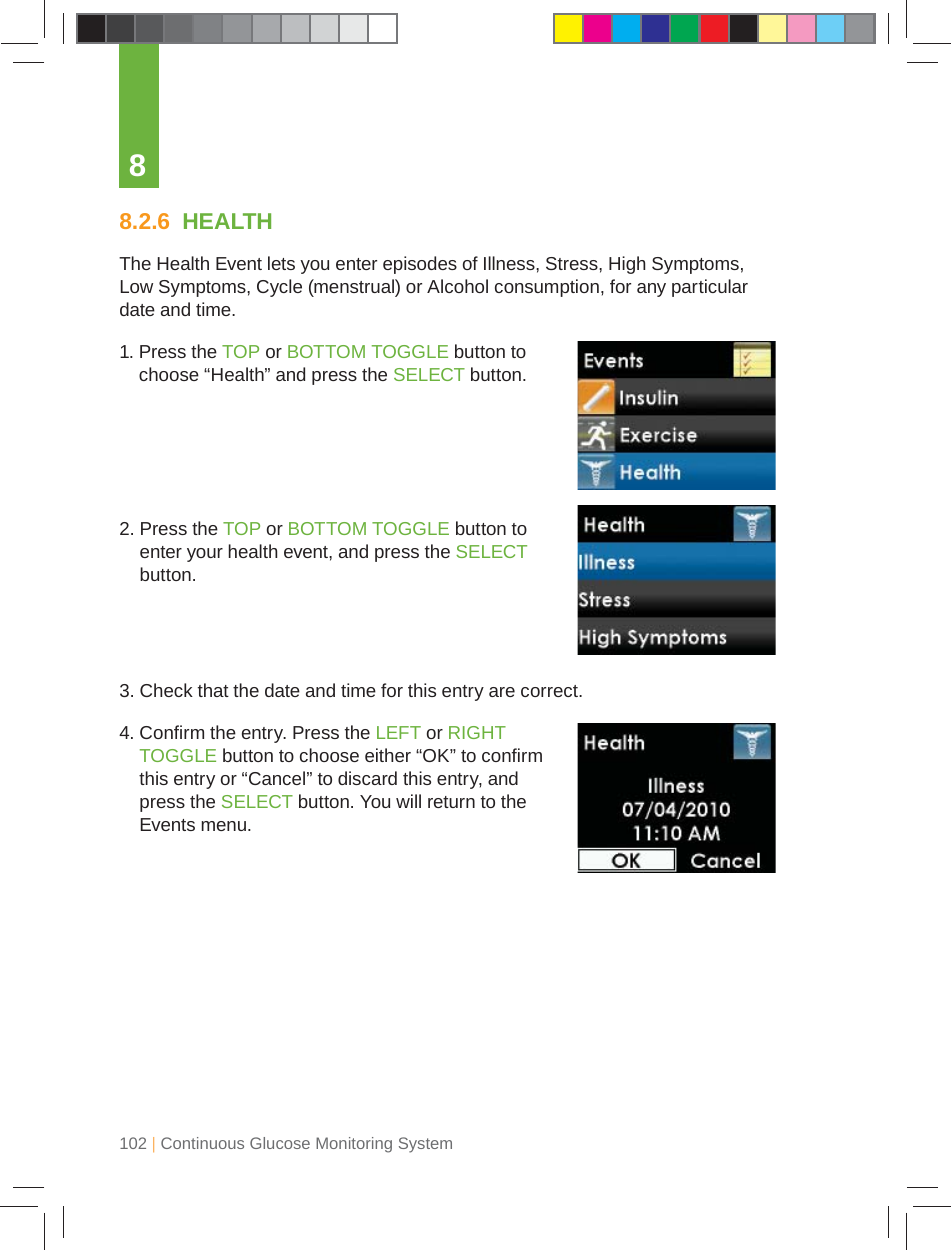
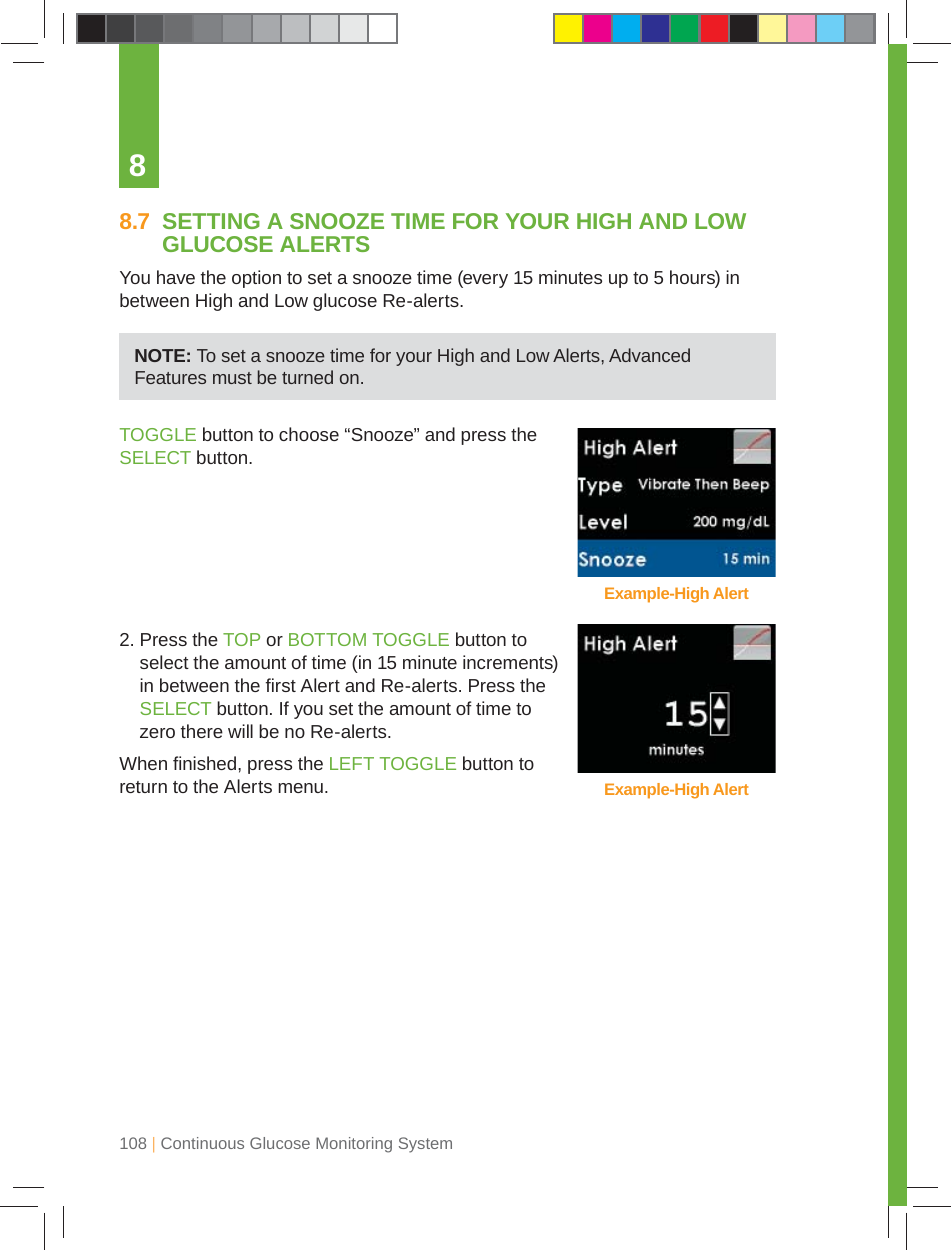
Dexcom 9433 Glucose Monitor User Manual LBL 010797 Rev01 Users Guide IUO indd
Dexcom, Inc. Glucose Monitor LBL 010797 Rev01 Users Guide IUO indd
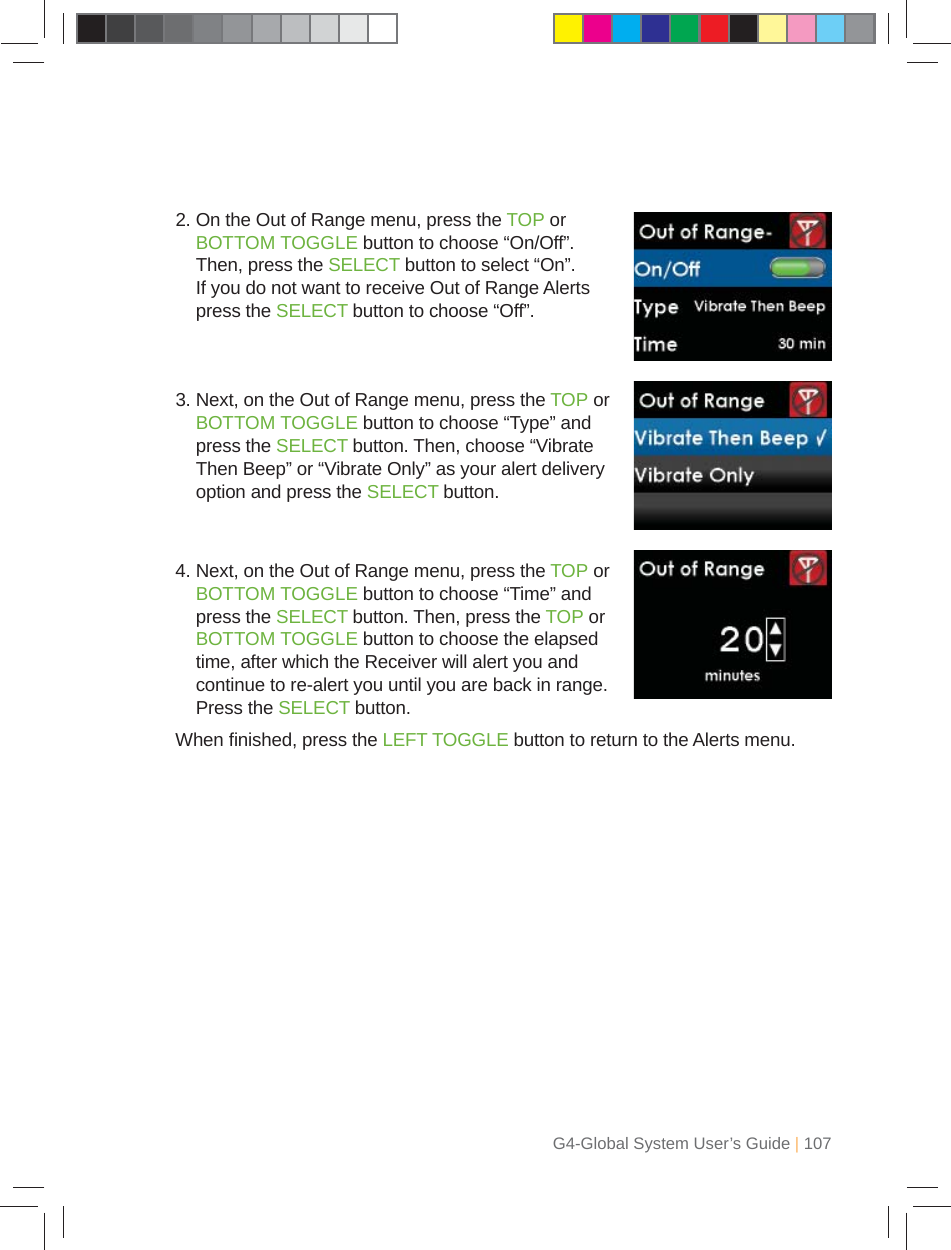
UserManual.wiki
>
Dexcom
>
9433 User Manual
Users Manual
Navigation menu
Upload a User Manual
Namespaces
Wiki Guide
HTML
PDF
Info
Views
User Manual
Discussion / Help
Navigation


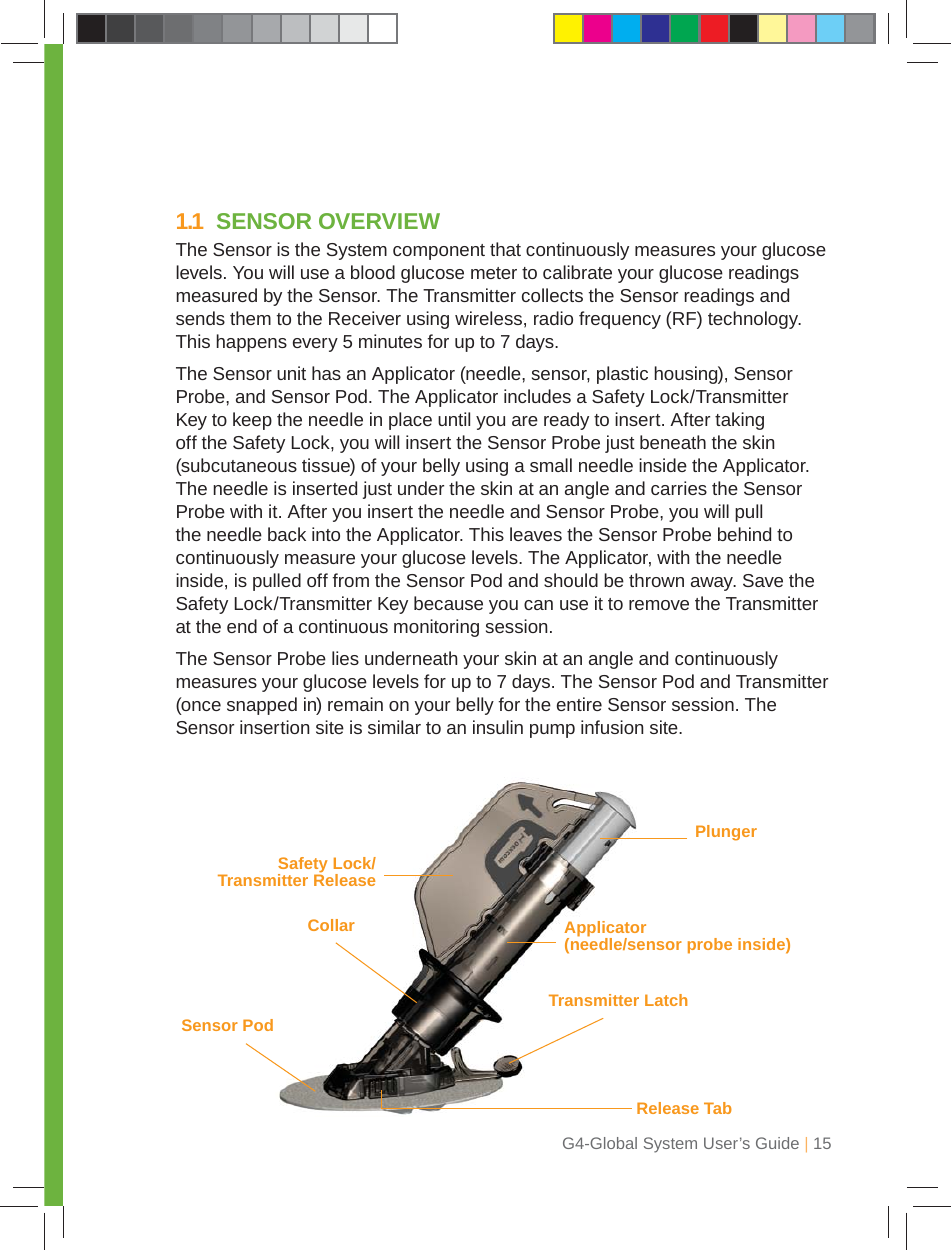


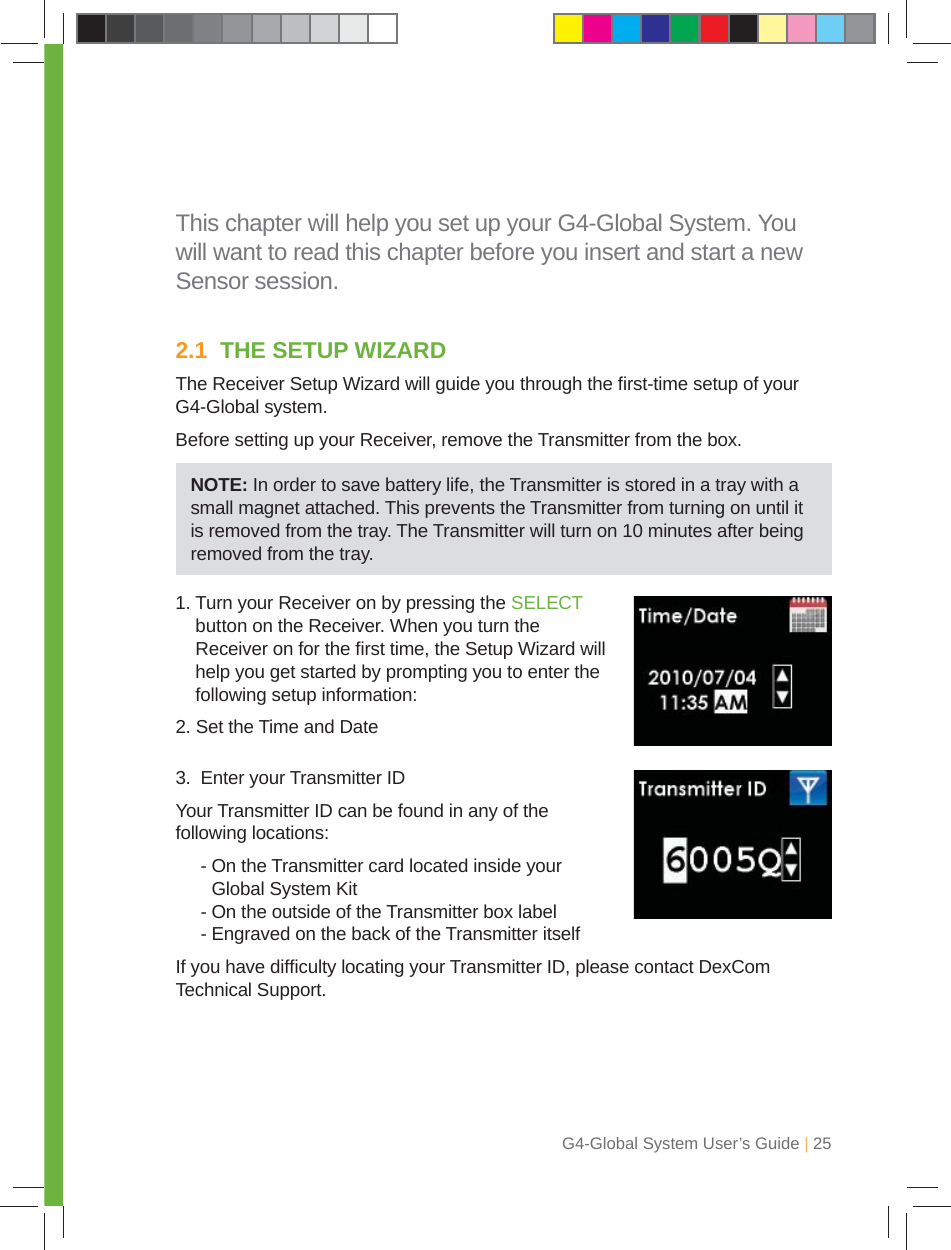
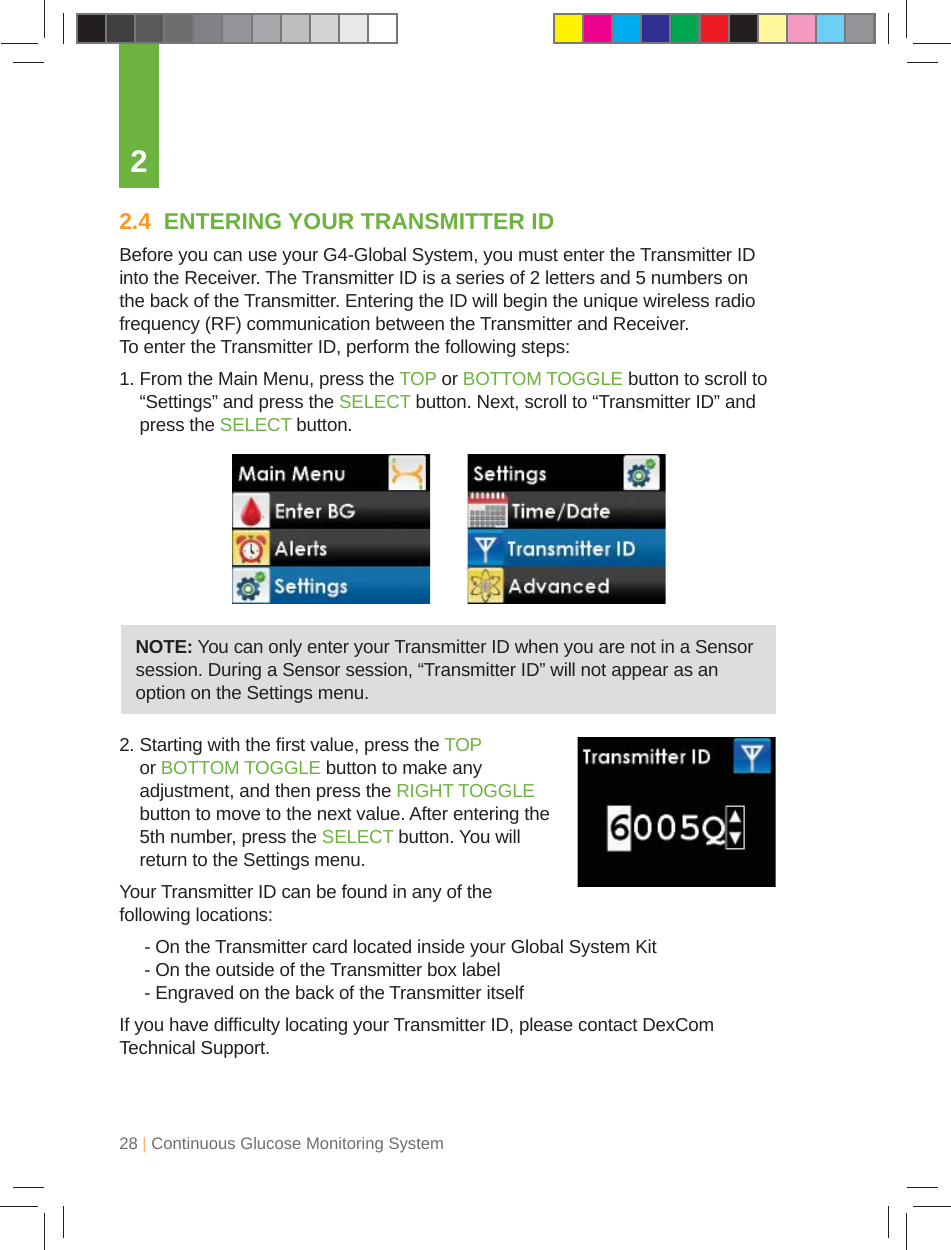

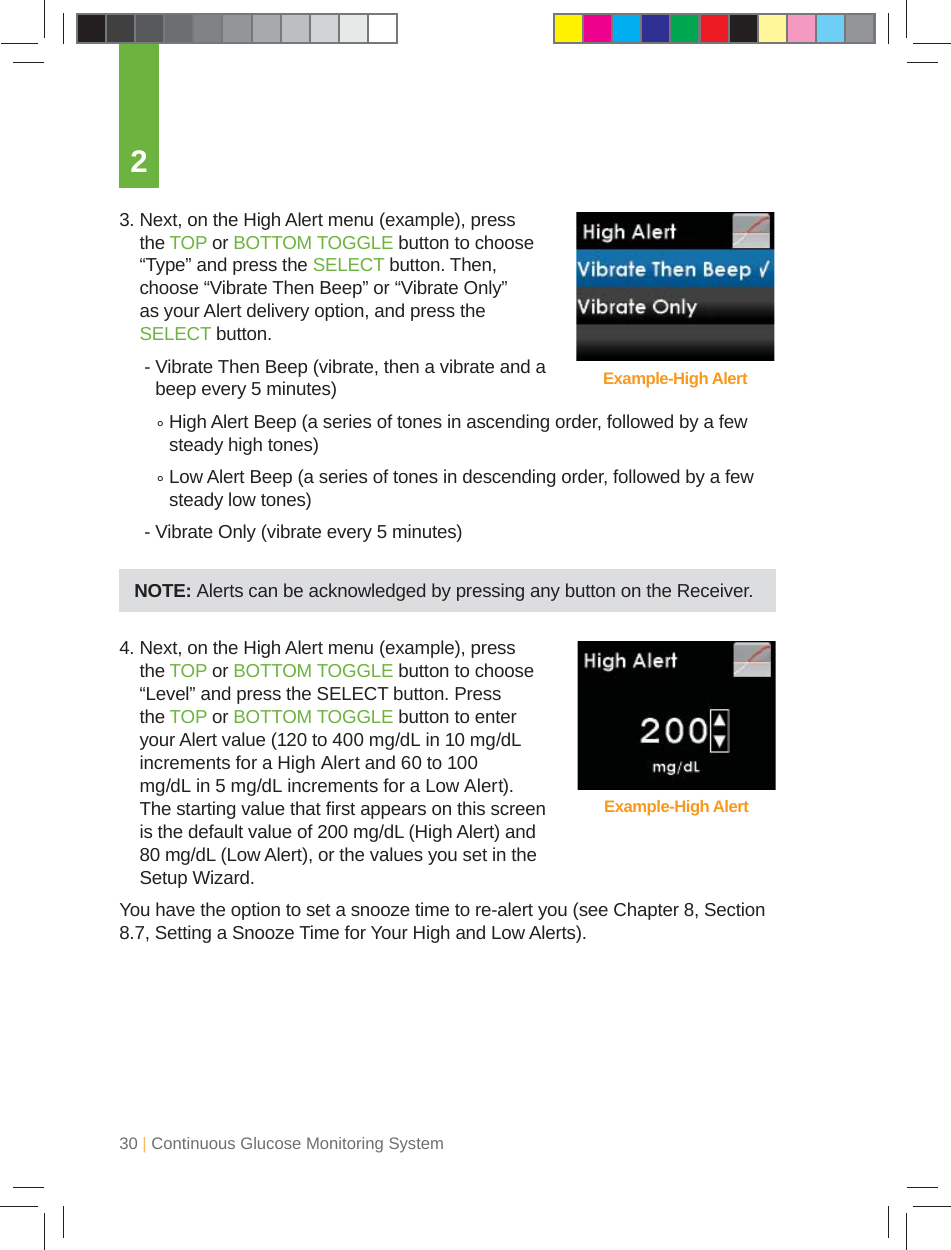
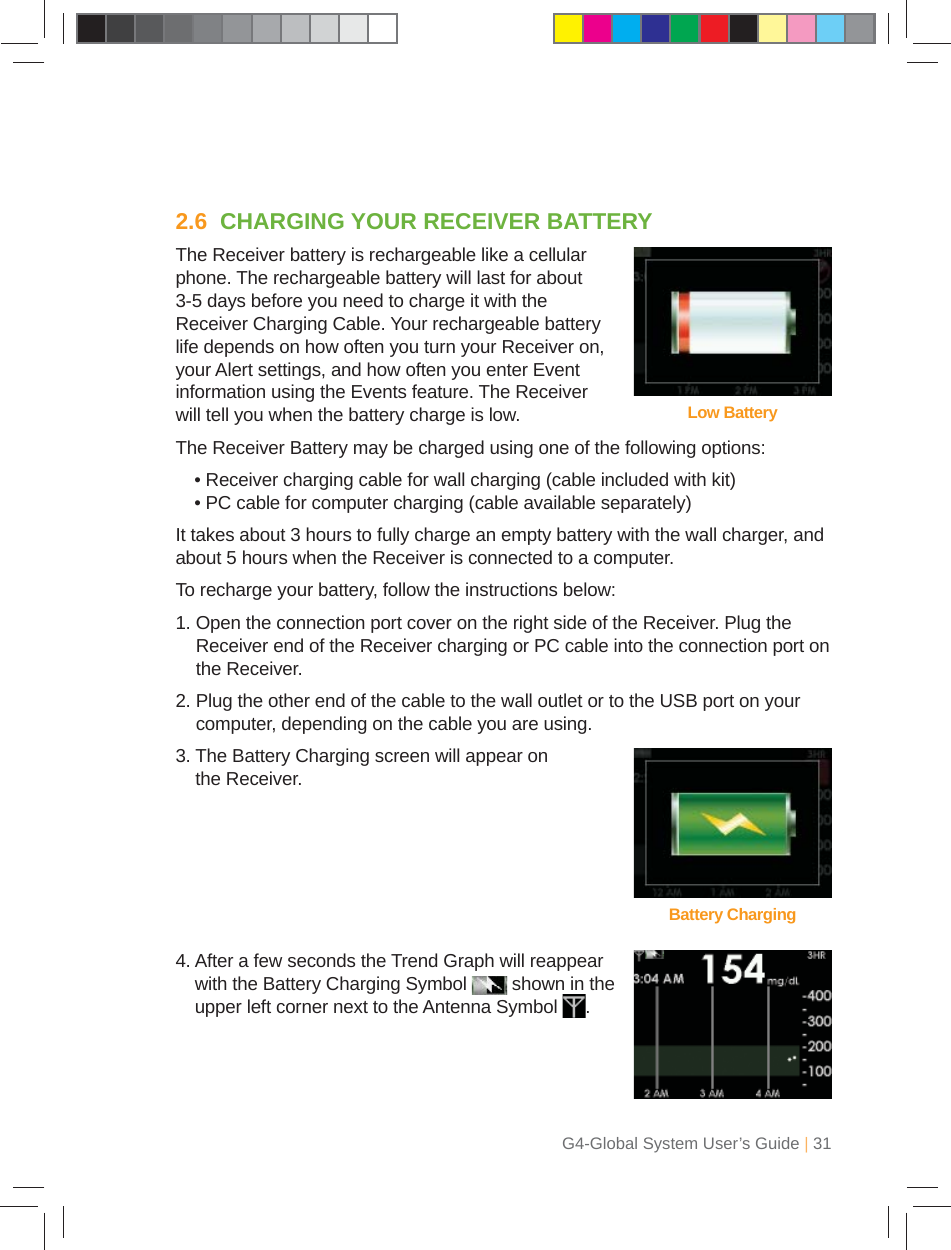


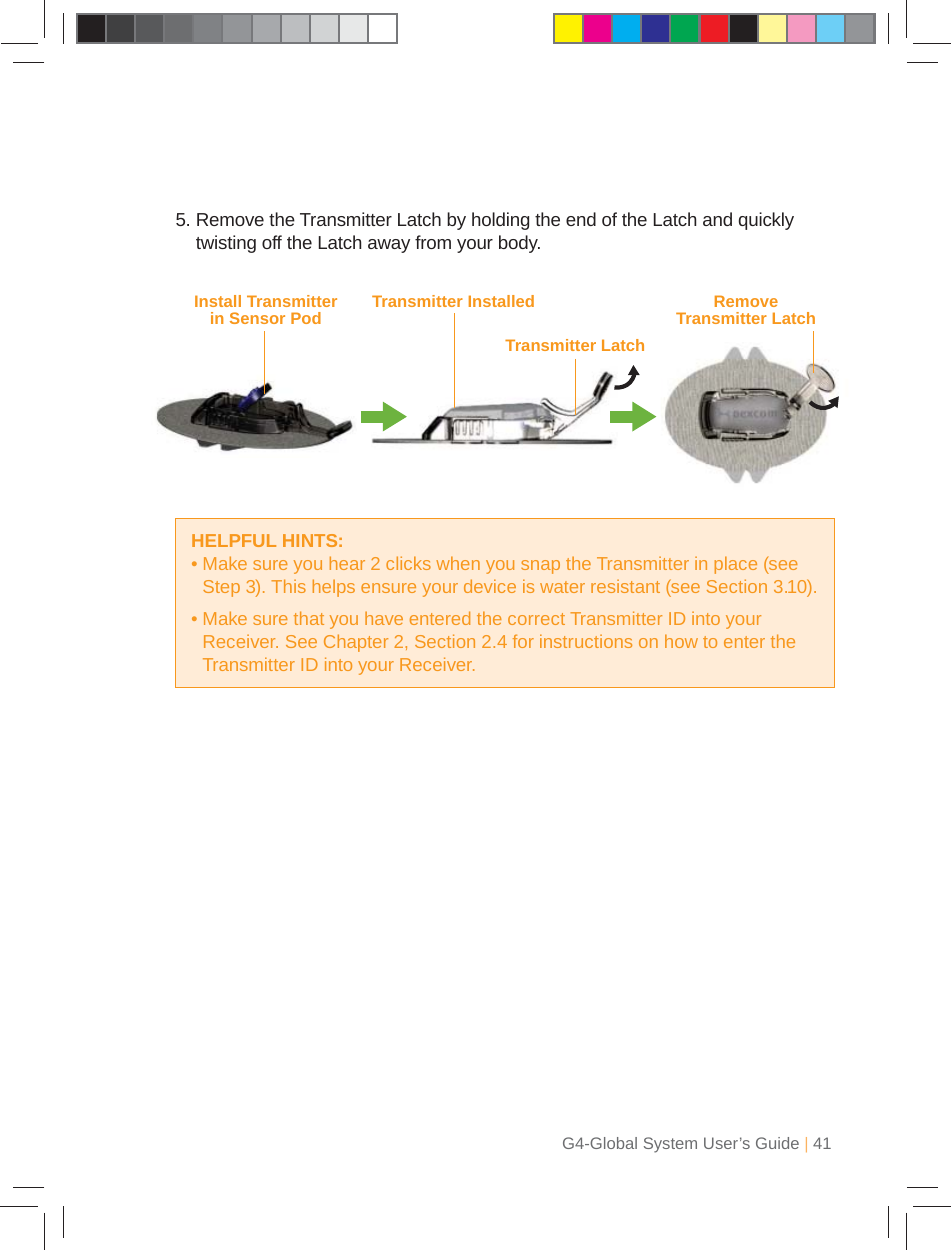
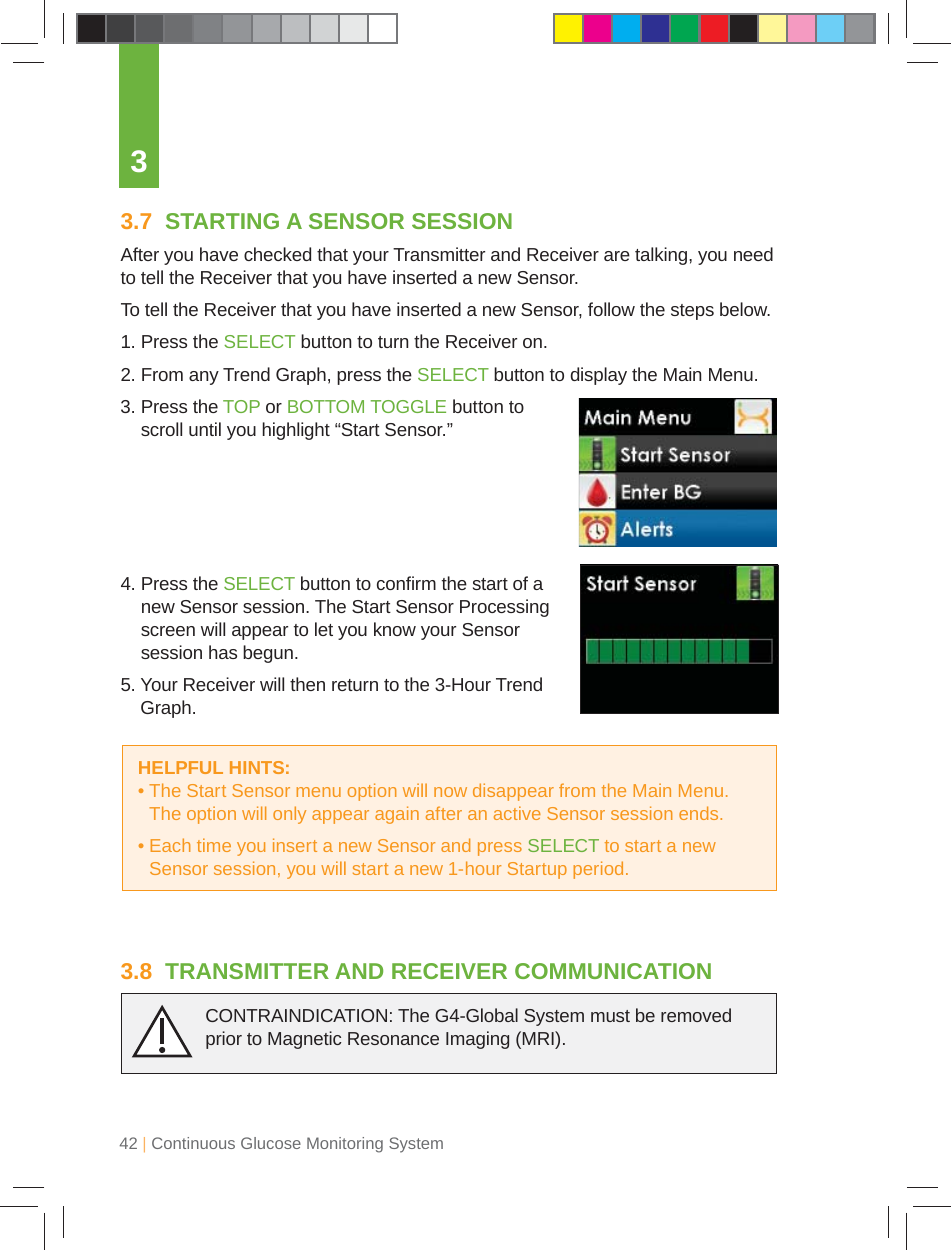
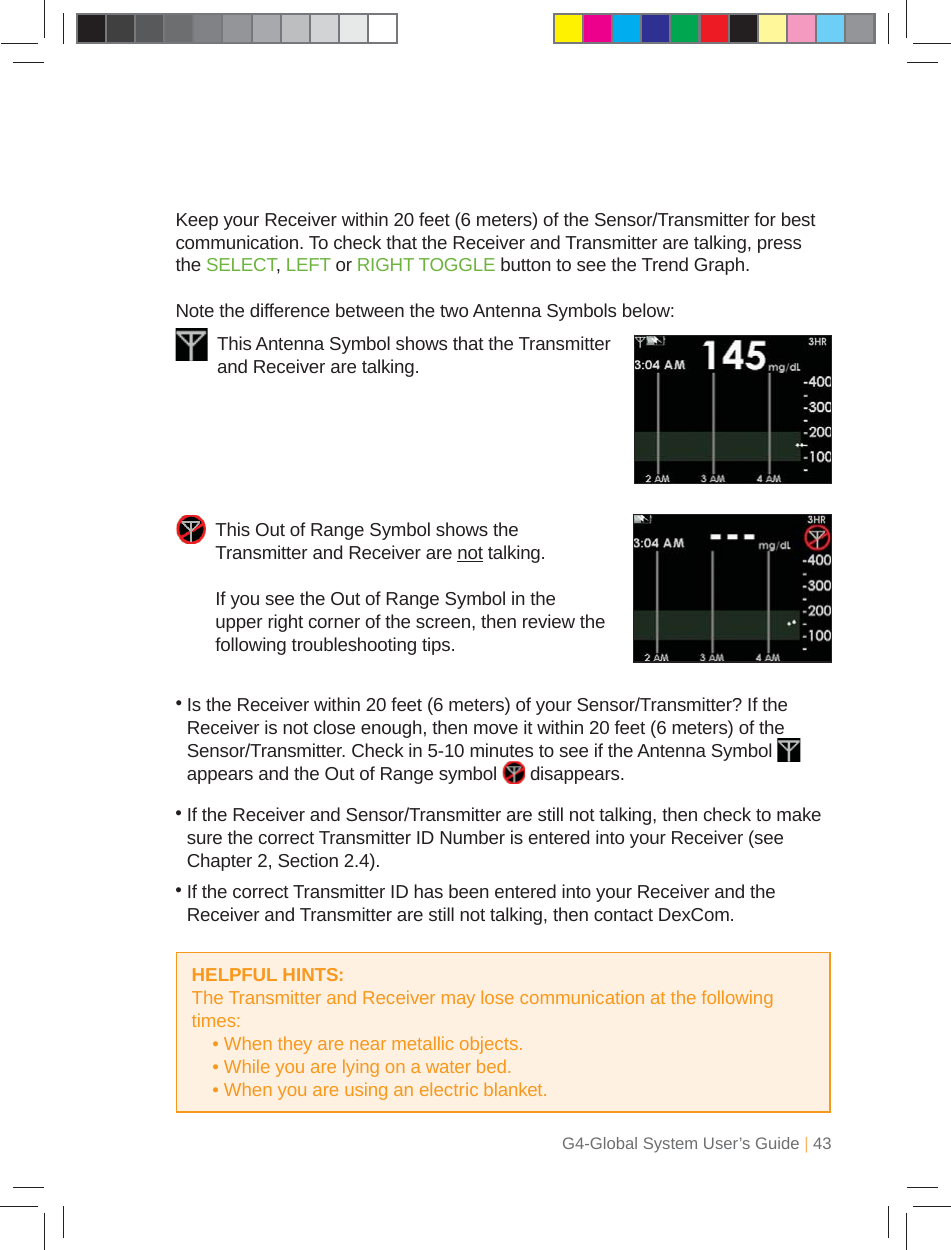
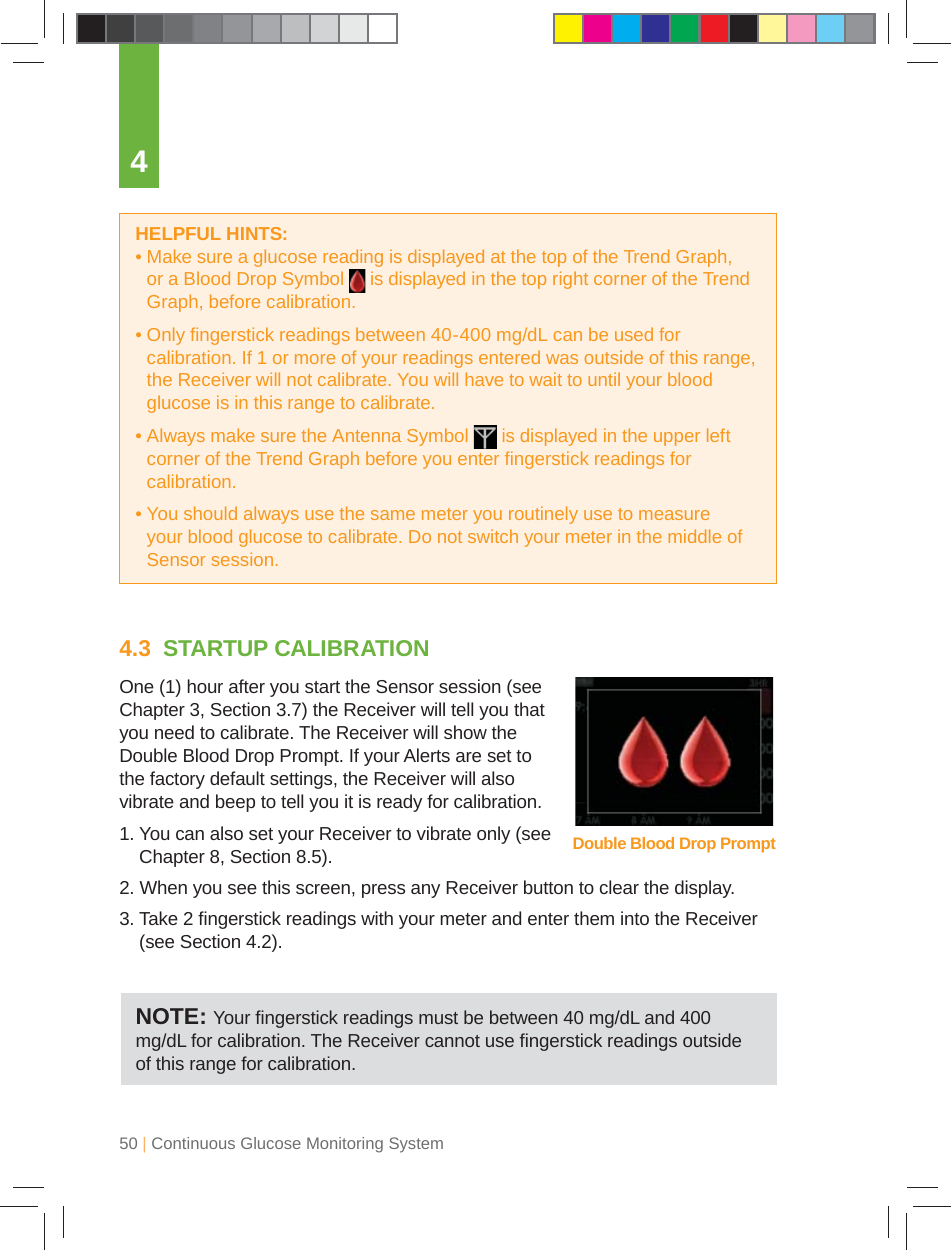
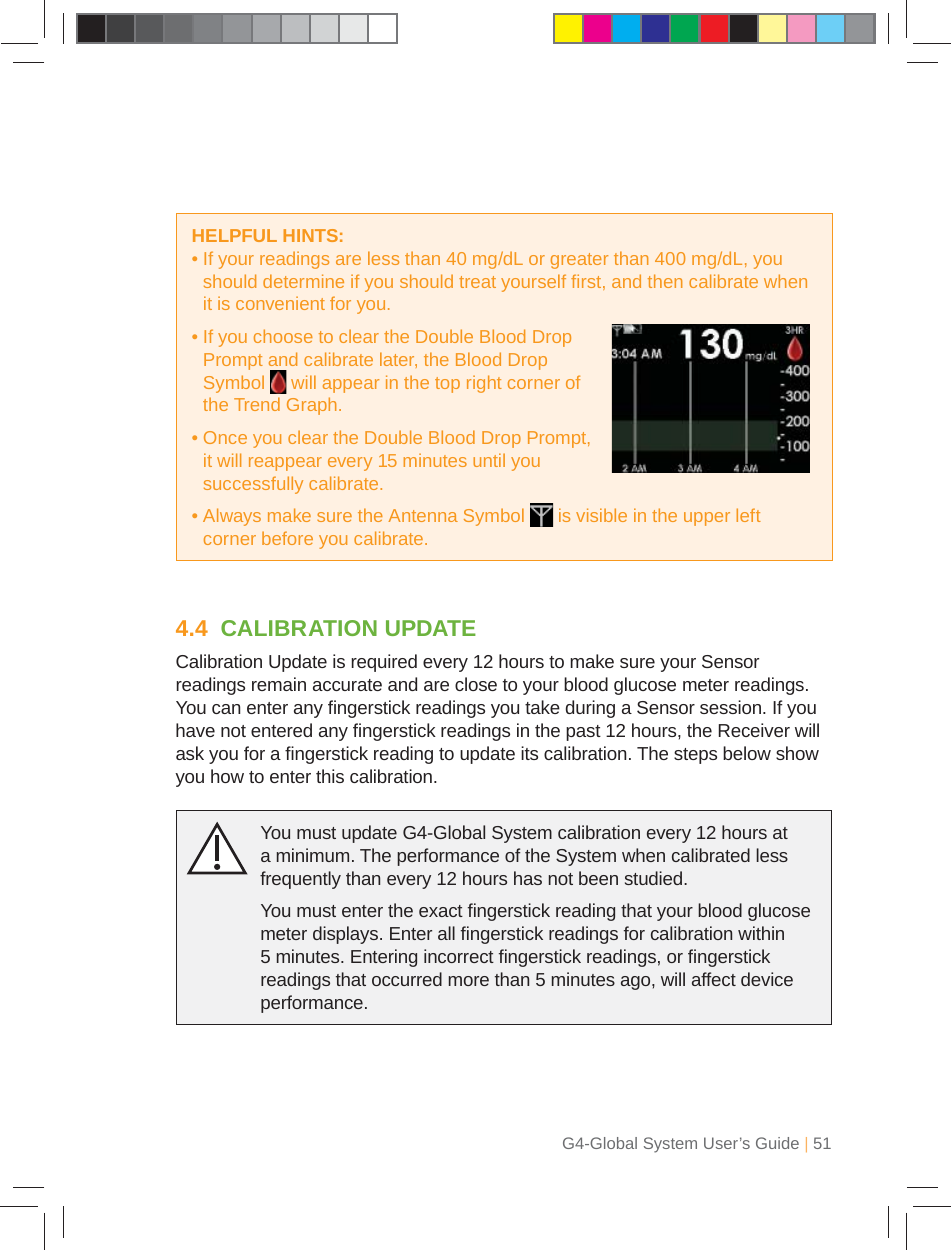
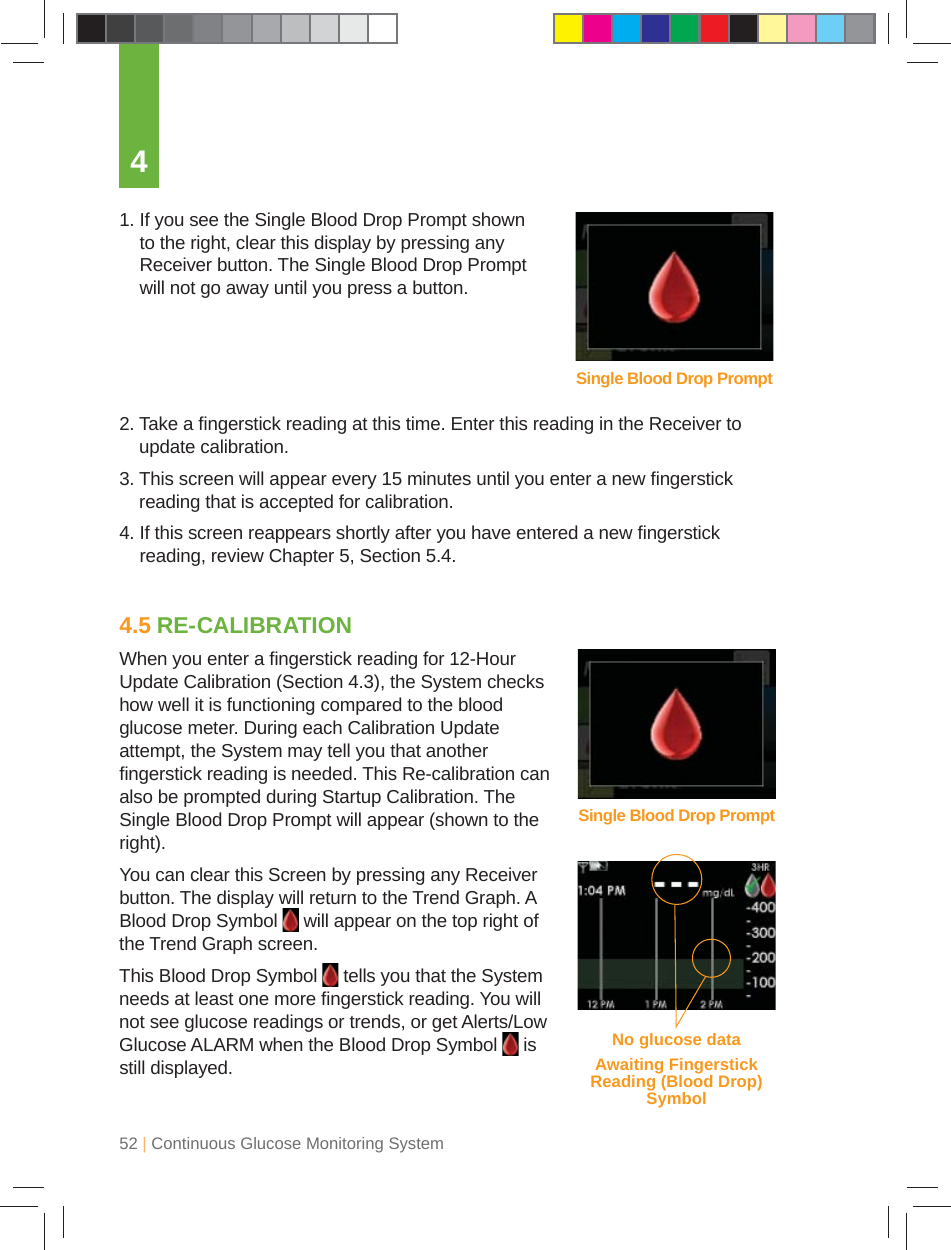
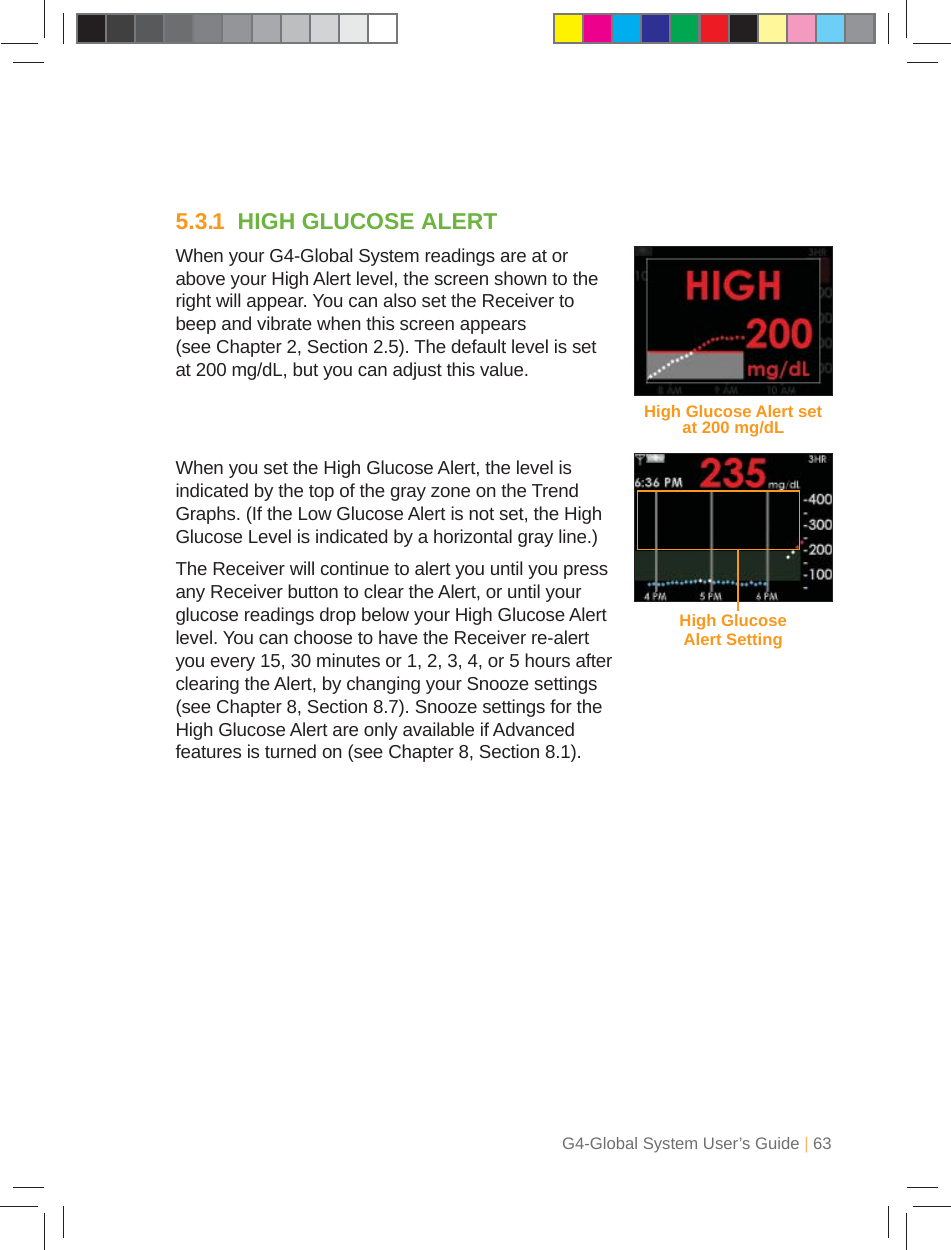
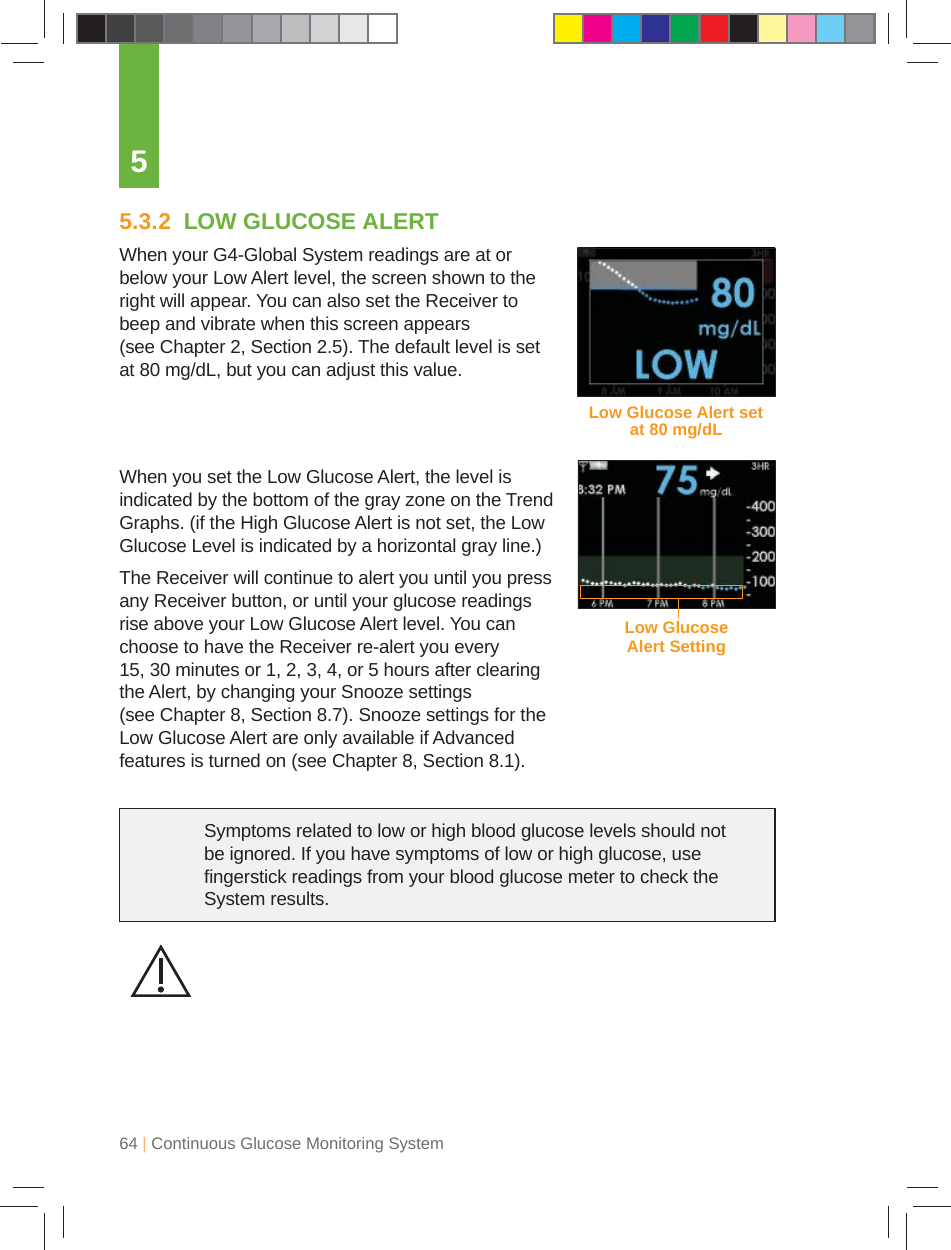
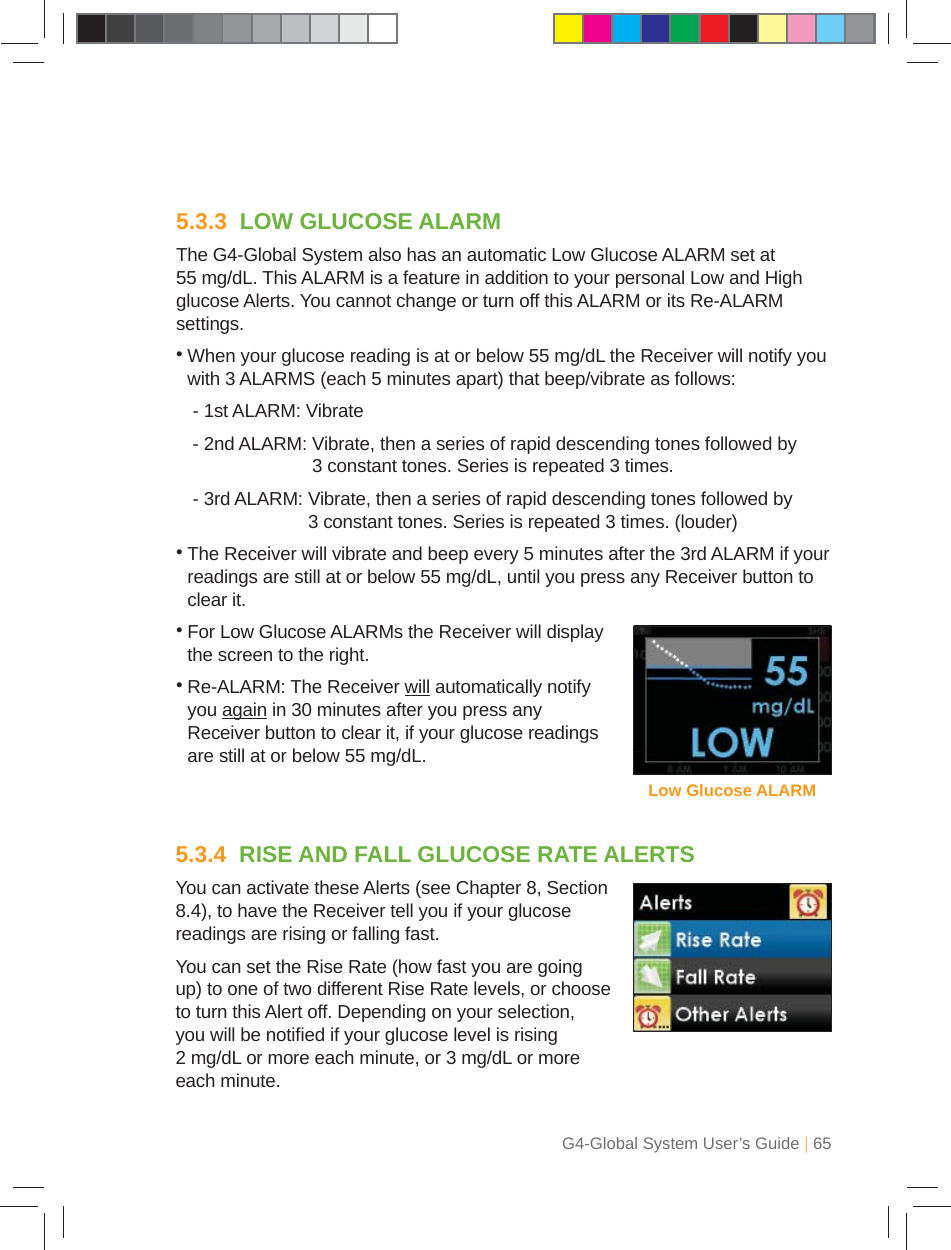
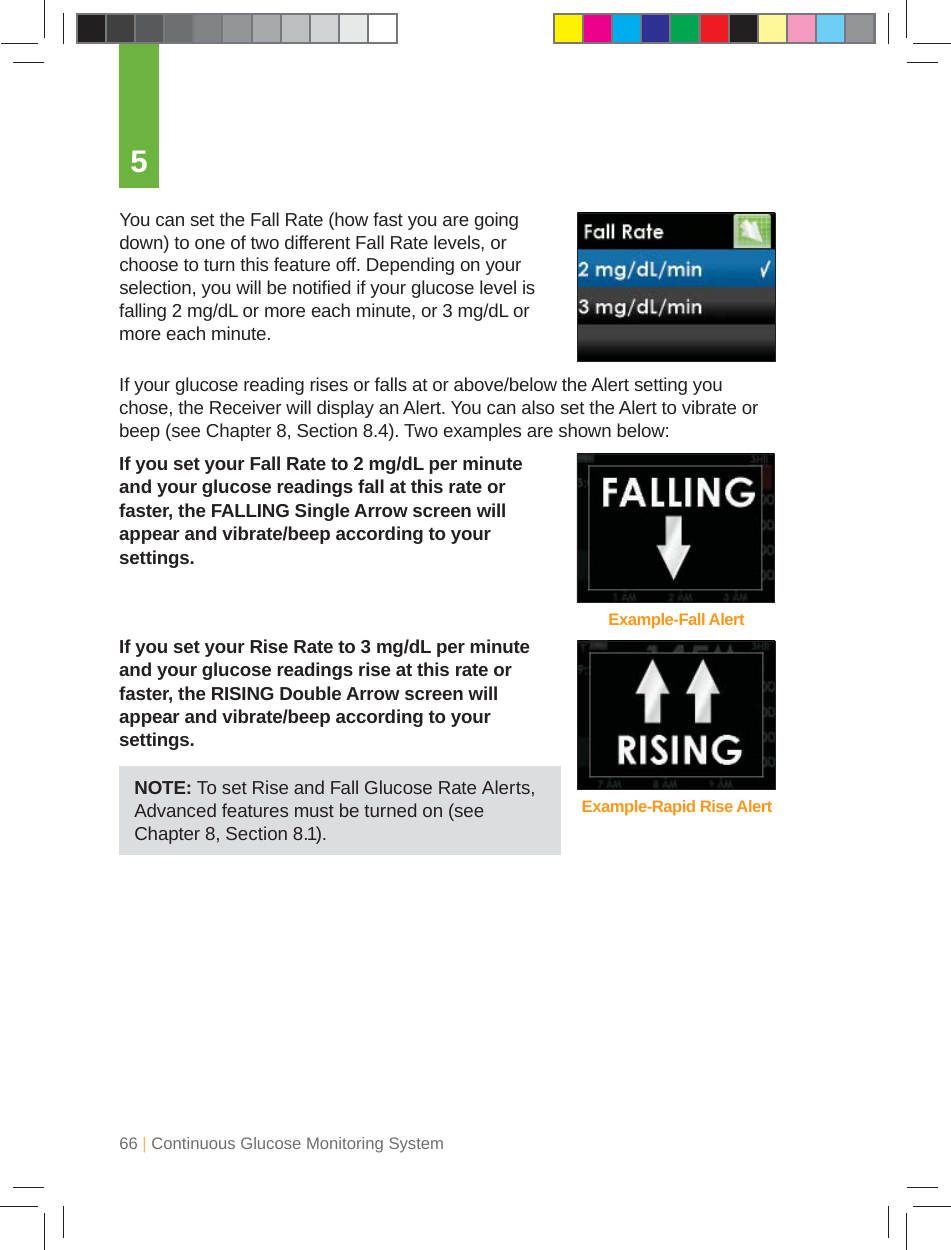
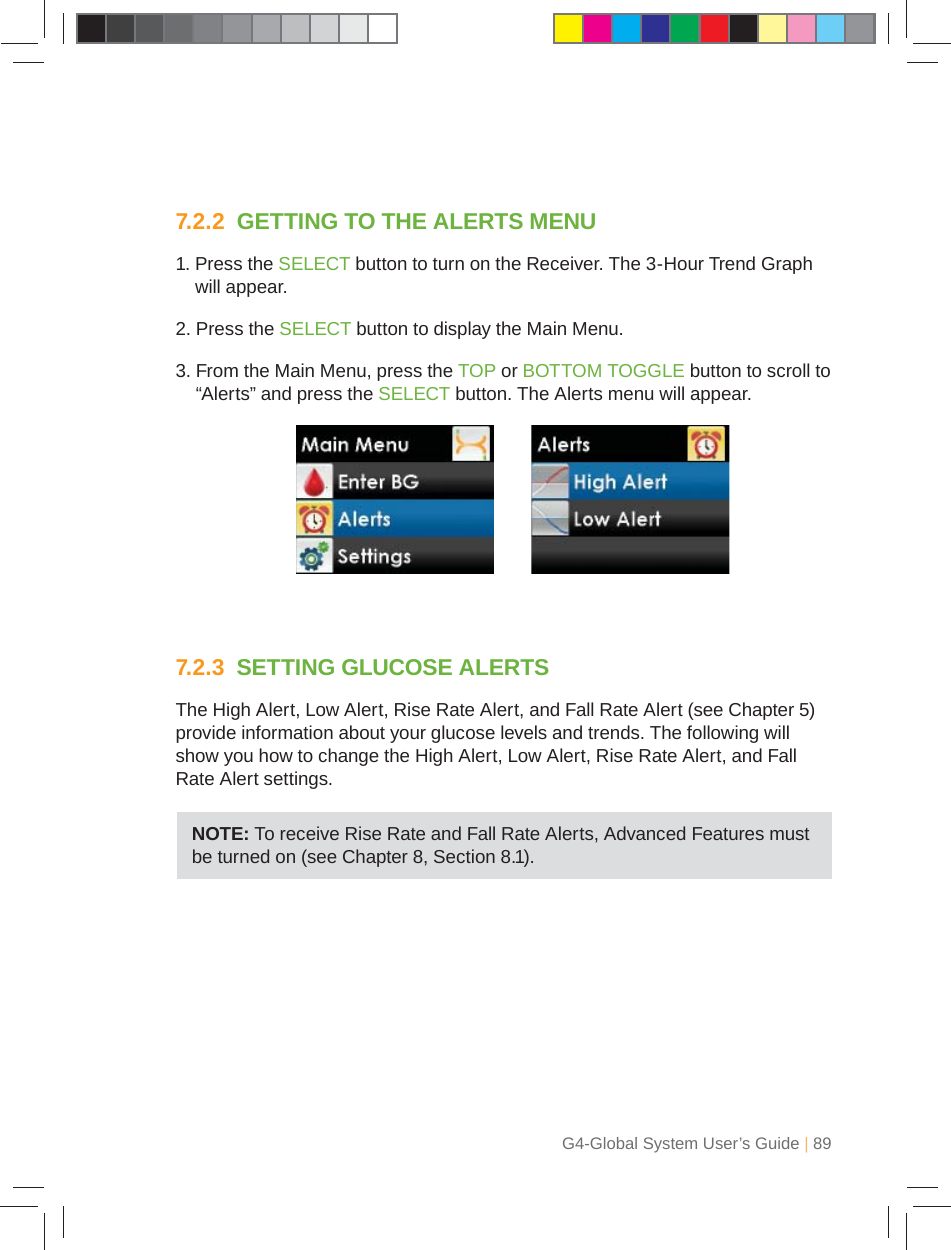
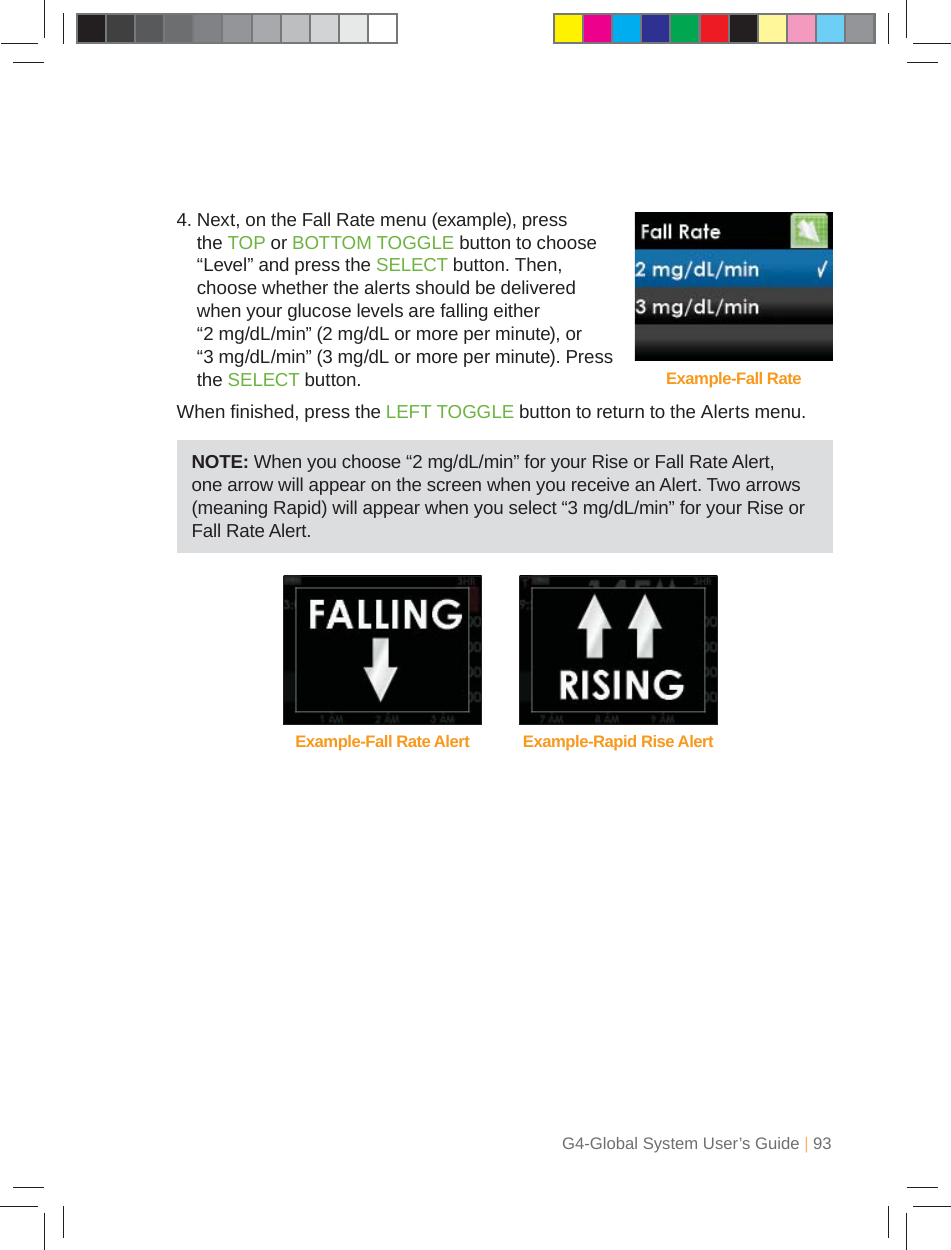
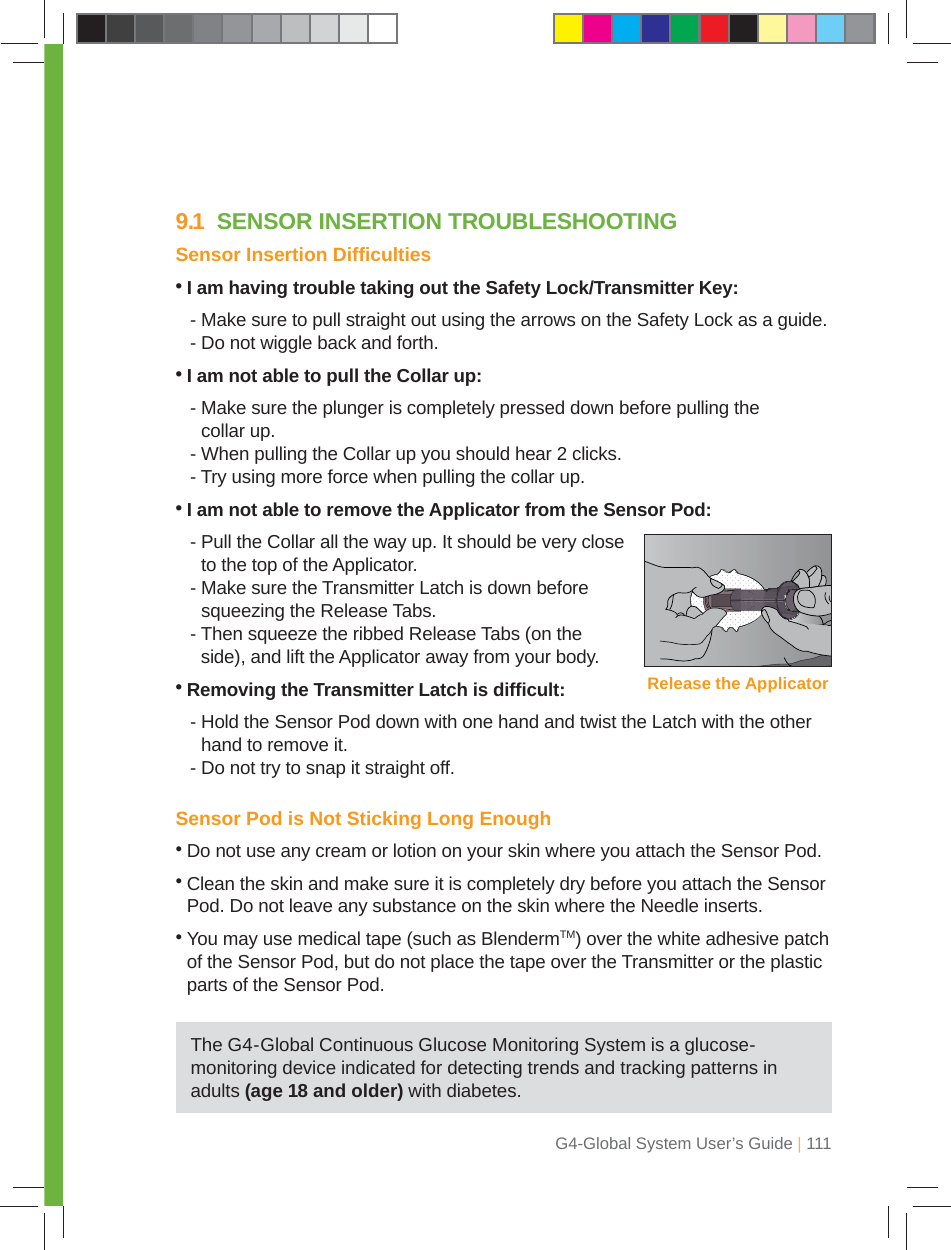
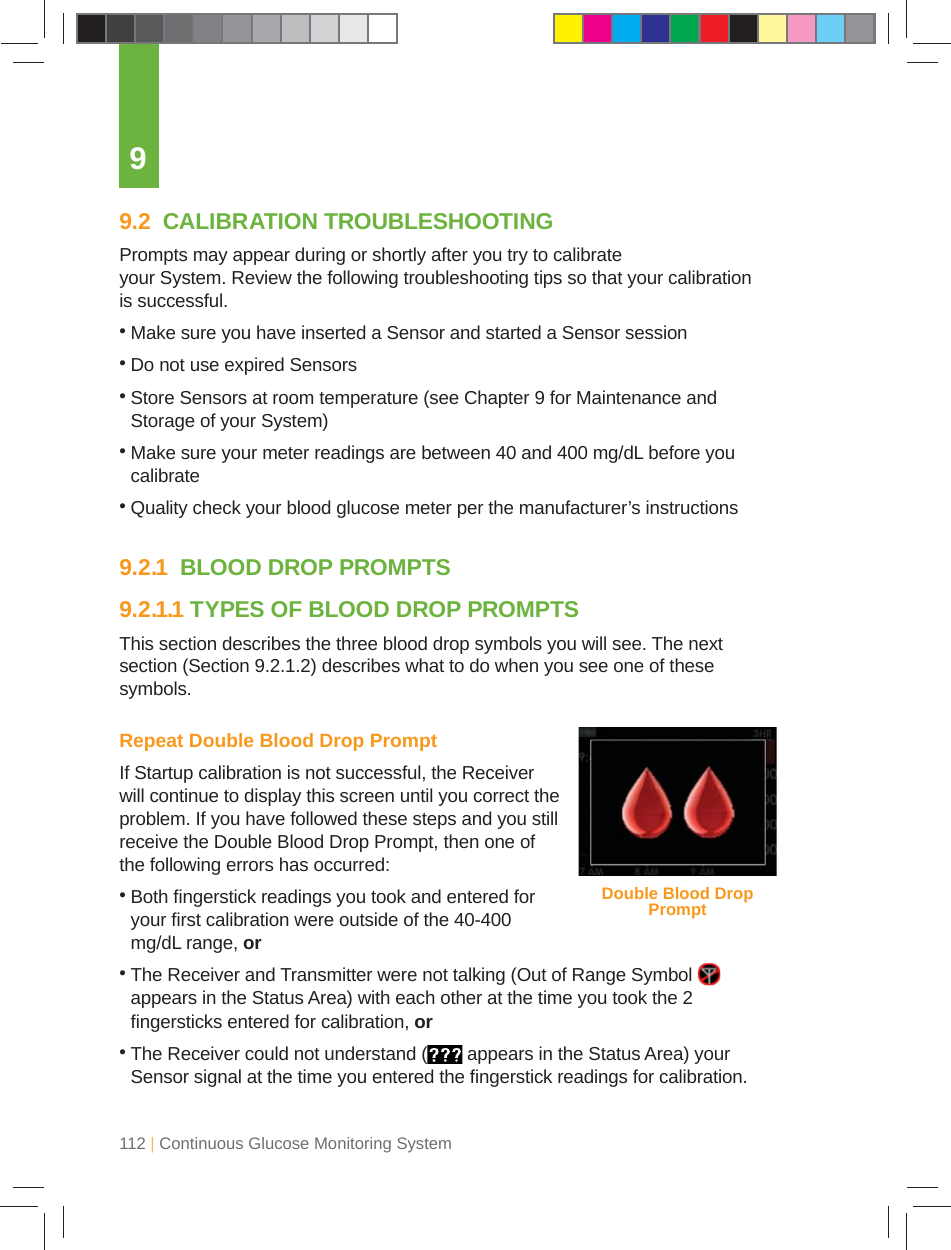
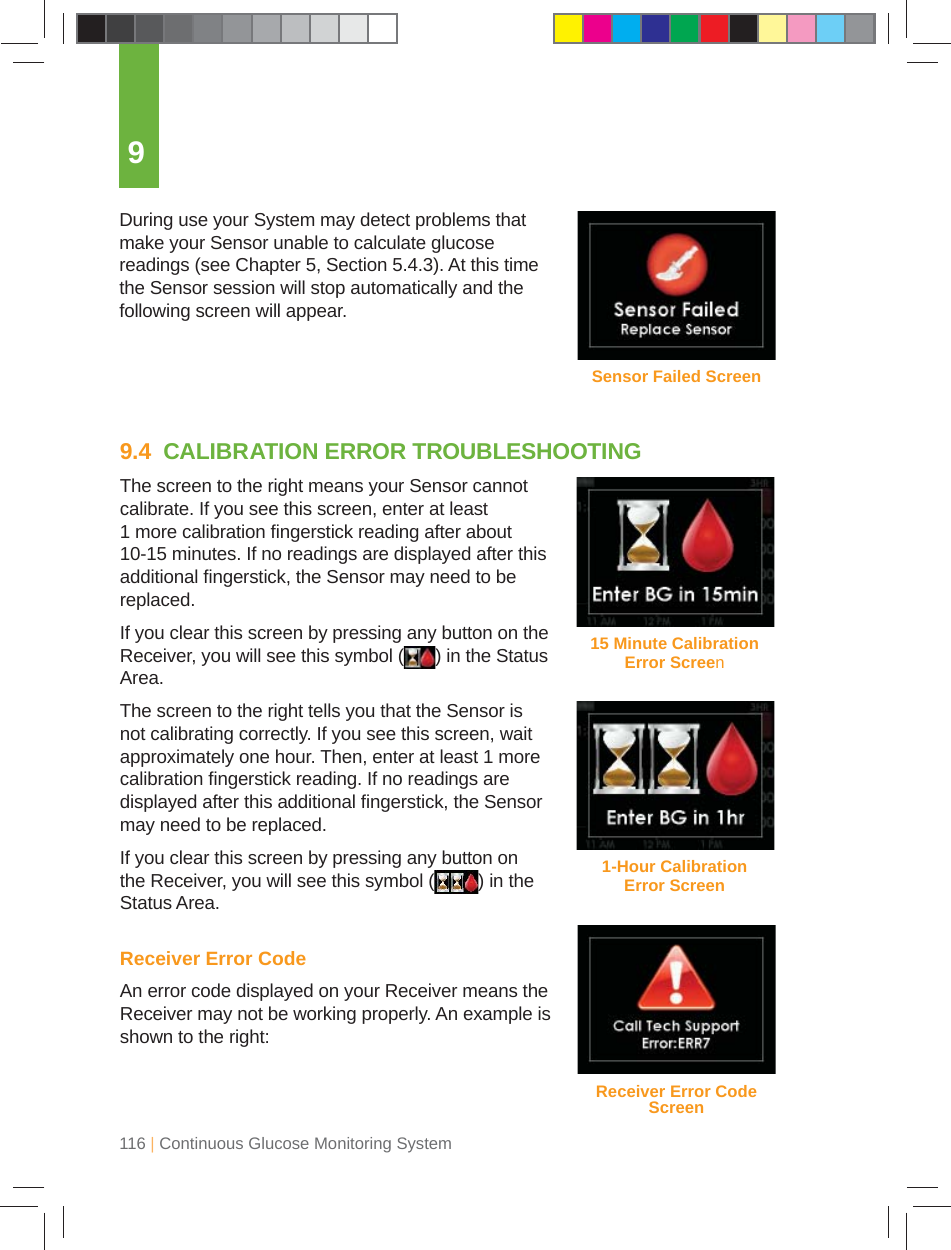
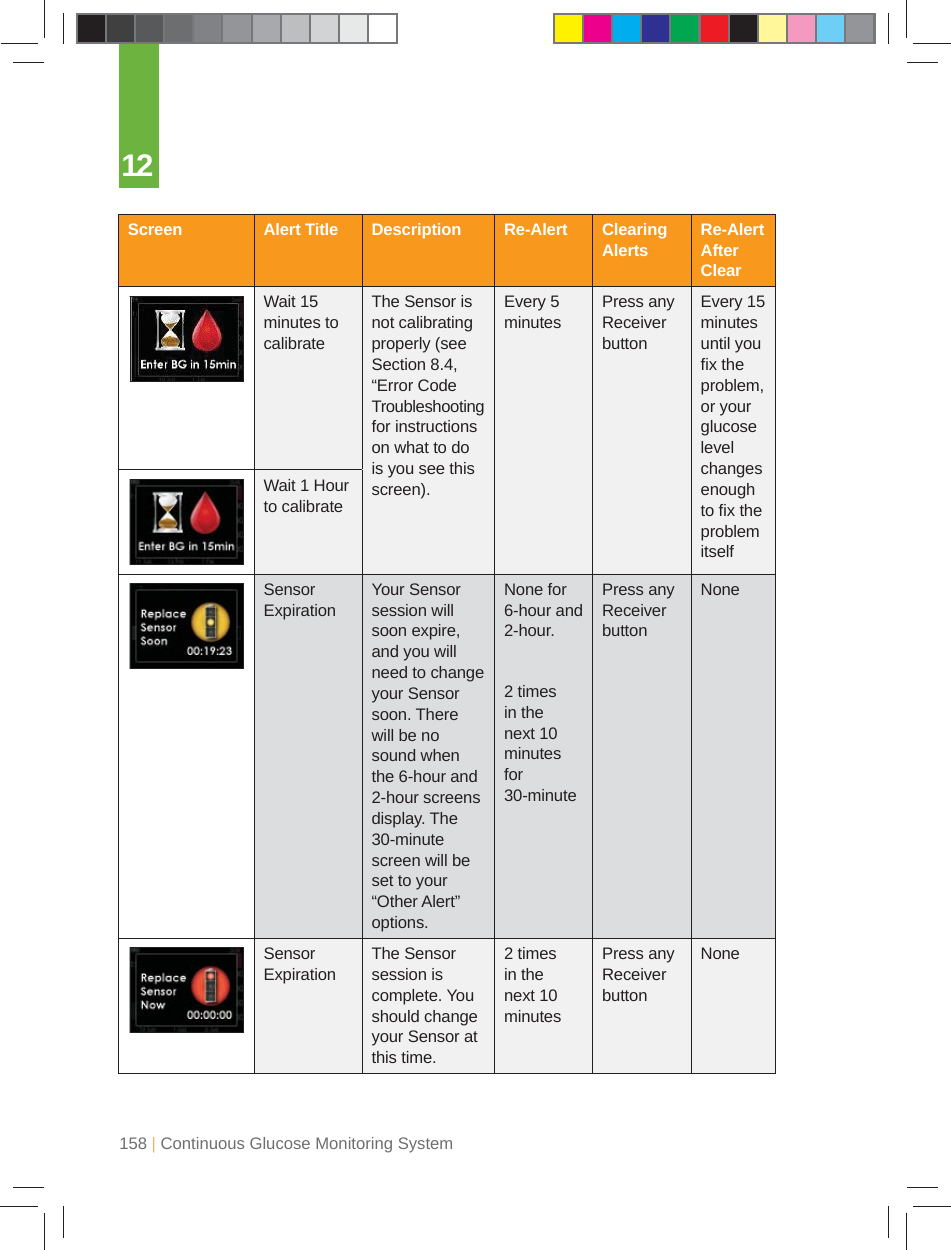
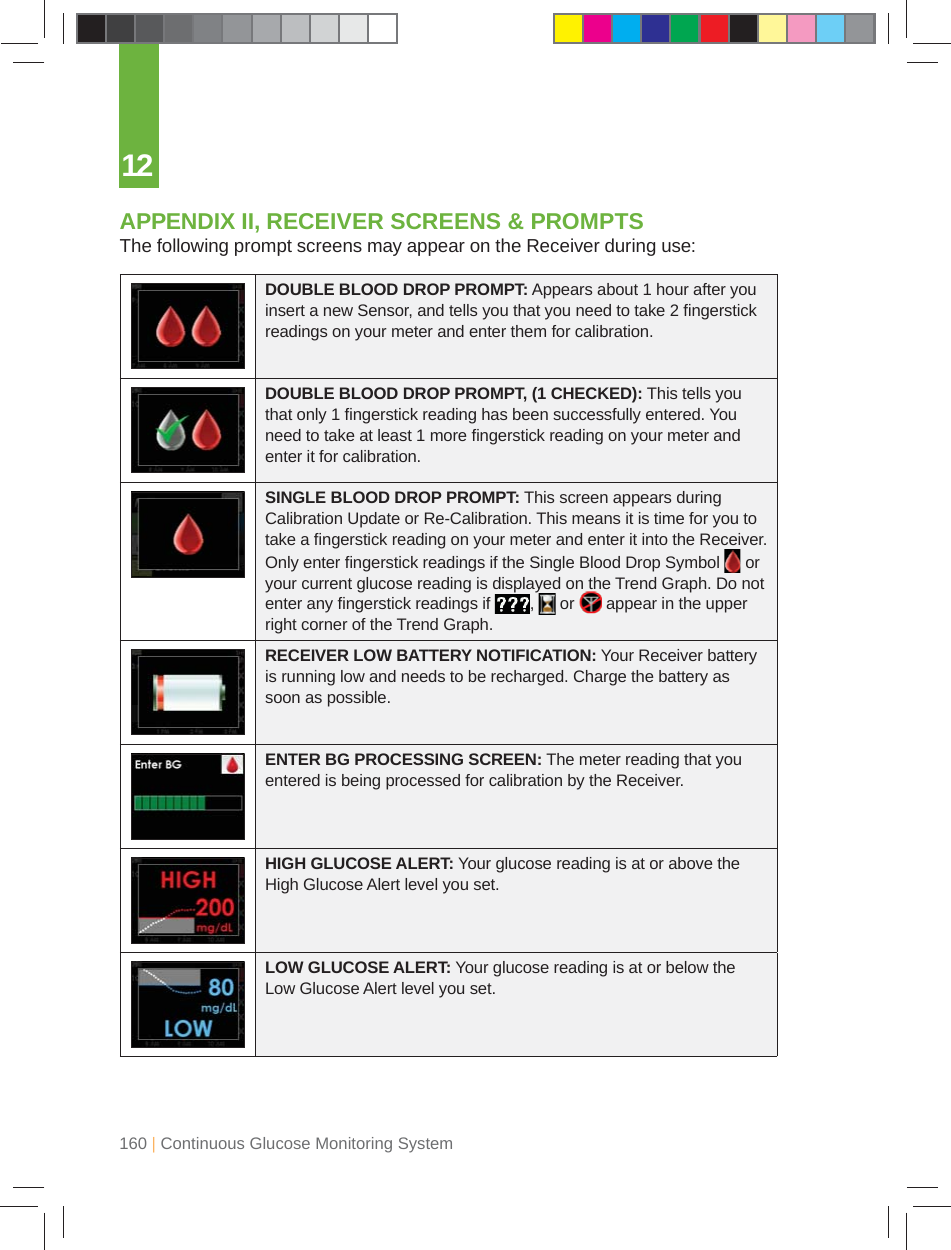
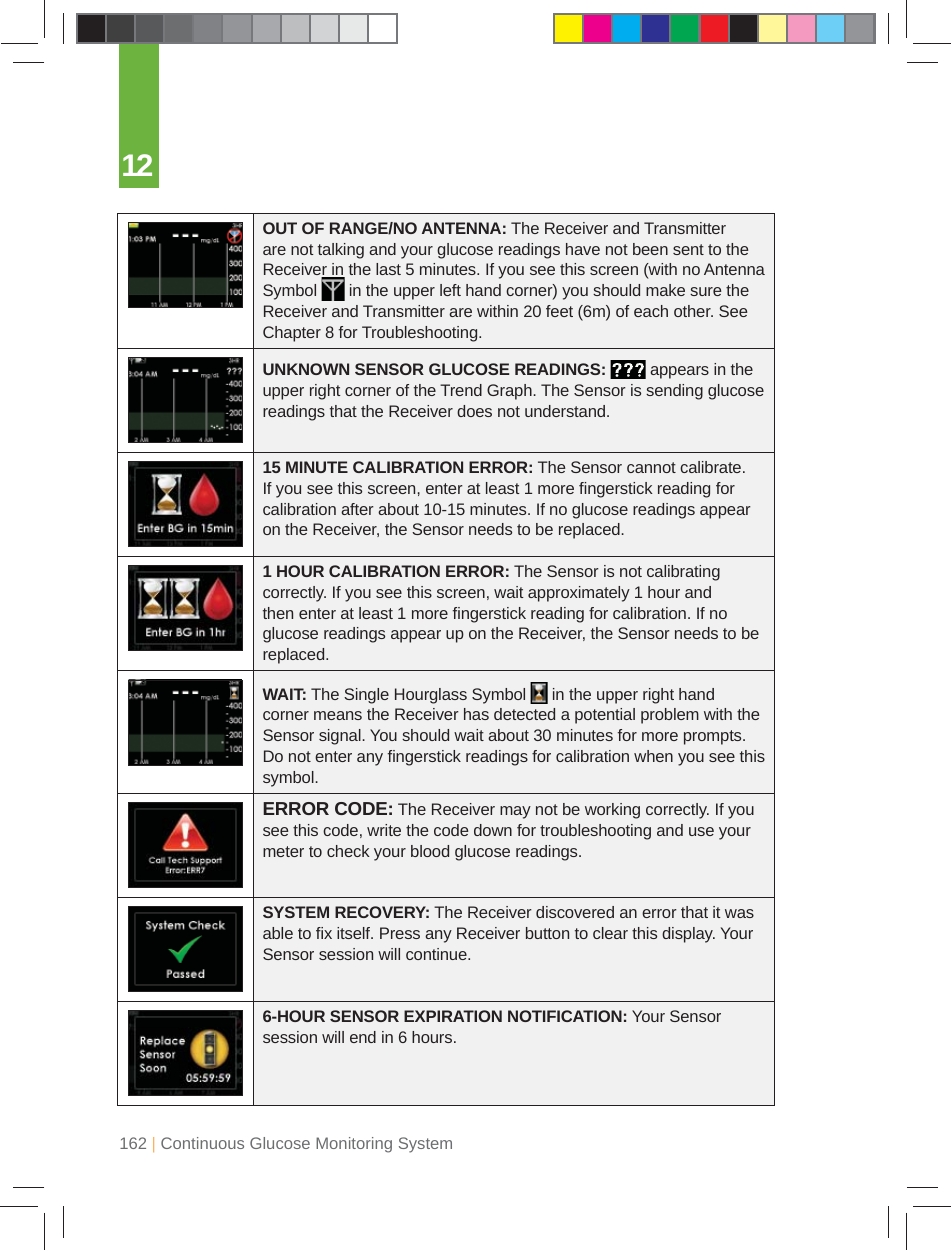
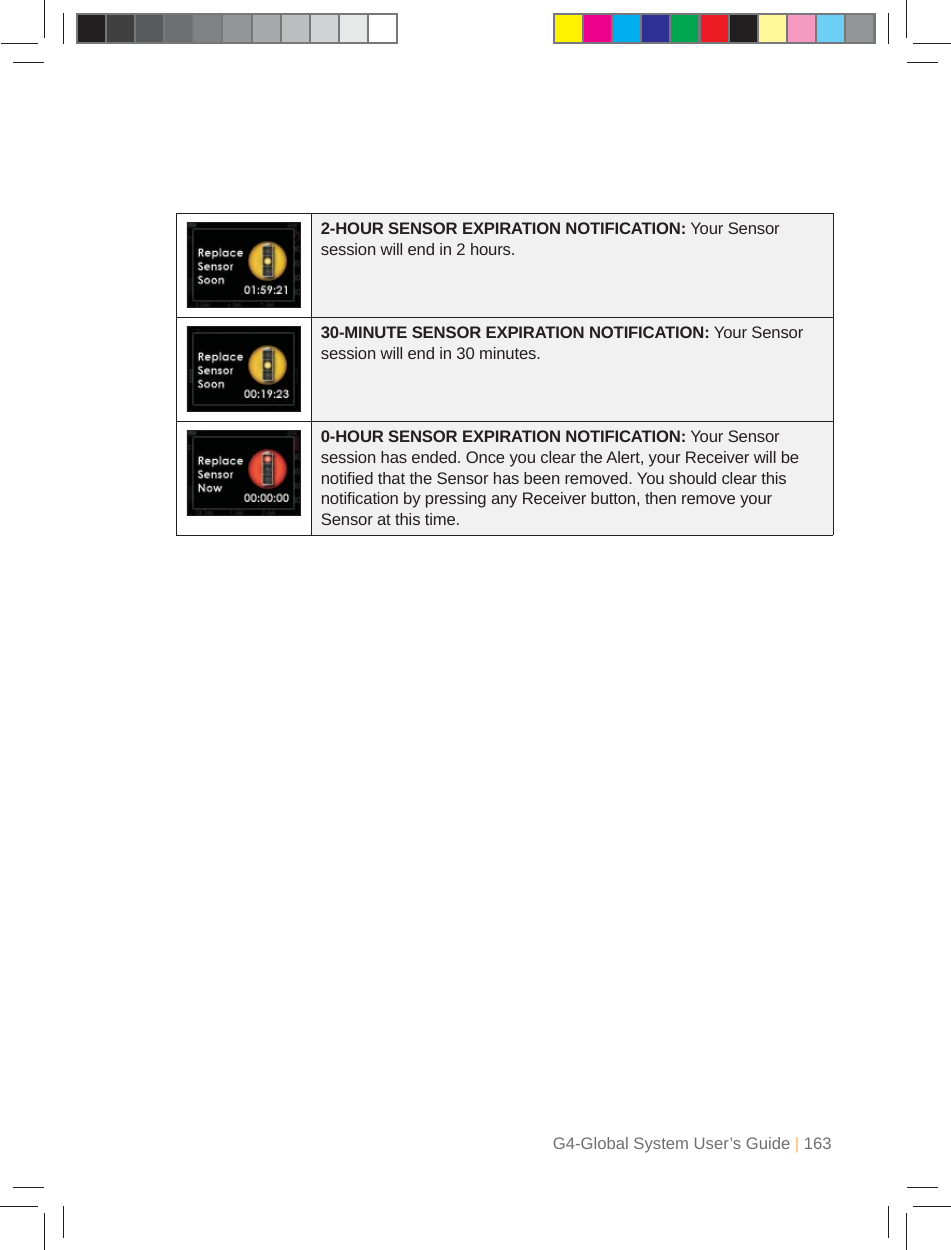
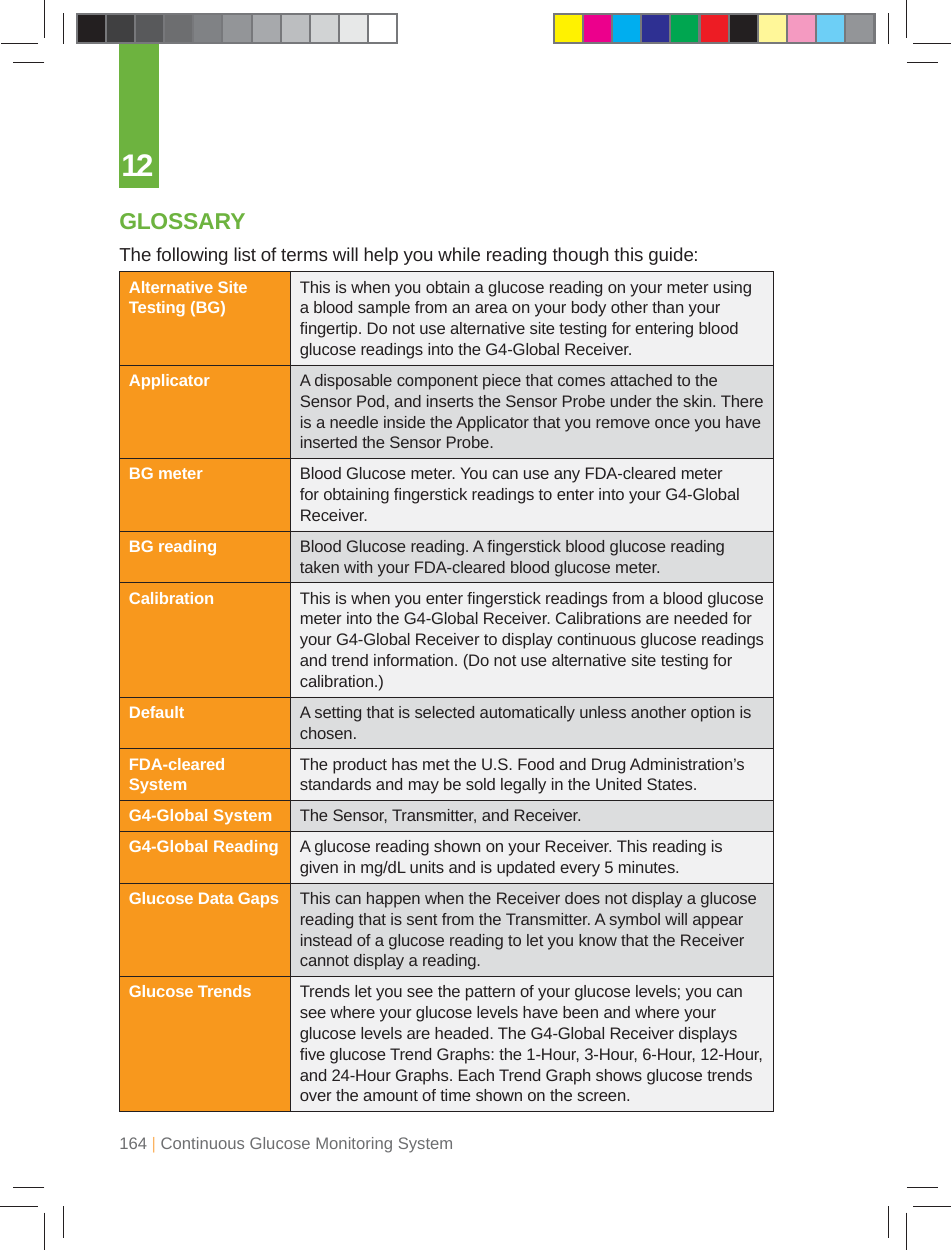
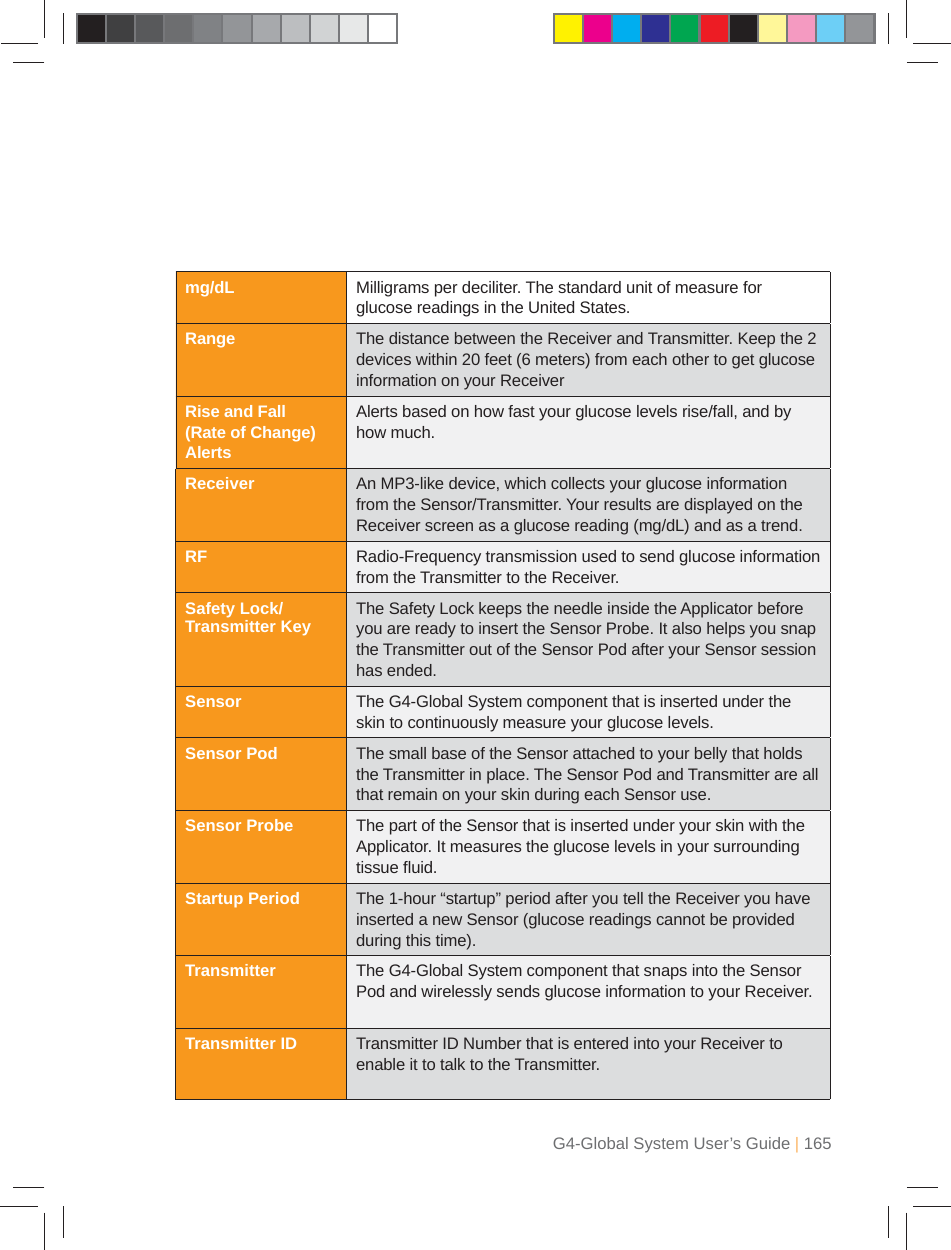
![44 | Continuous Glucose Monitoring SystemAt the end of the 1-hour Startup period the Receiver will let you know that it is time to calibrate your Sensor. Chapter 4 tells you how to calibrate your Sensor.3.10 THE G4-GLOBAL SYSTEM AND WATERYour Sensor (including the installed Transmitter) is water resistant when showering, bathing, or swimming. The Sensor has been tested to be water resistant when submerged for up to 3 feet (0.9 meters) for a maximum of 30 minutes. For added protection you can use a shower cover. The Receiver is not water resistant. Do not get your Receiver wet at any time.3.11 TAPING THE SENSOR PODThe Sensor Pod should stay securely attached using its own adhesive. But, if the patch is peeling up, you can use medical tape (such as BlendermTM) for extra support. If you use tape, only tape over the white adhesive patch on all sides for even support. Do not tape over the Transmitter or any of the plastic parts of the Sensor Pod. Do not tape under the Sensor Pod or leave any substance on the skin where you insert the Needle.3.9 SENSOR STARTUP PERIODThe Sensor needs a 1-hour Startup period. This is so the Sensor can get used to its new insertion site. During the Startup period, check every so often to make sure the Antenna Symbol is in the upper left corner of the Trend Graph. Also make sure your Receiver battery is fully charged.When you press the SELECT button during the Startup period to turn the Receiver display on, your Trend Graph will include a 1-hour Countdown Symbol in the upper right hand corner.Over time, the Countdown Symbol will fi ll to indicate that you are getting closer to initial calibration time. See the pictures below for an example of what this looks like.3Start [0-12] [12-24] [36-48] Ready for calibration[24-36]](https://usermanual.wiki/Dexcom/9433/User-Guide-1372766-Page-44.png)