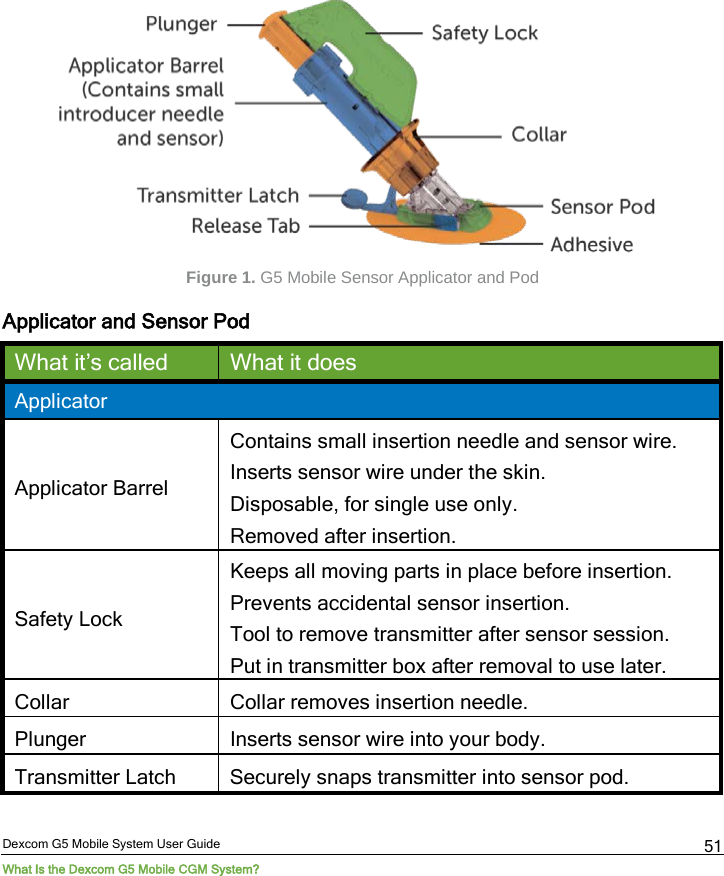
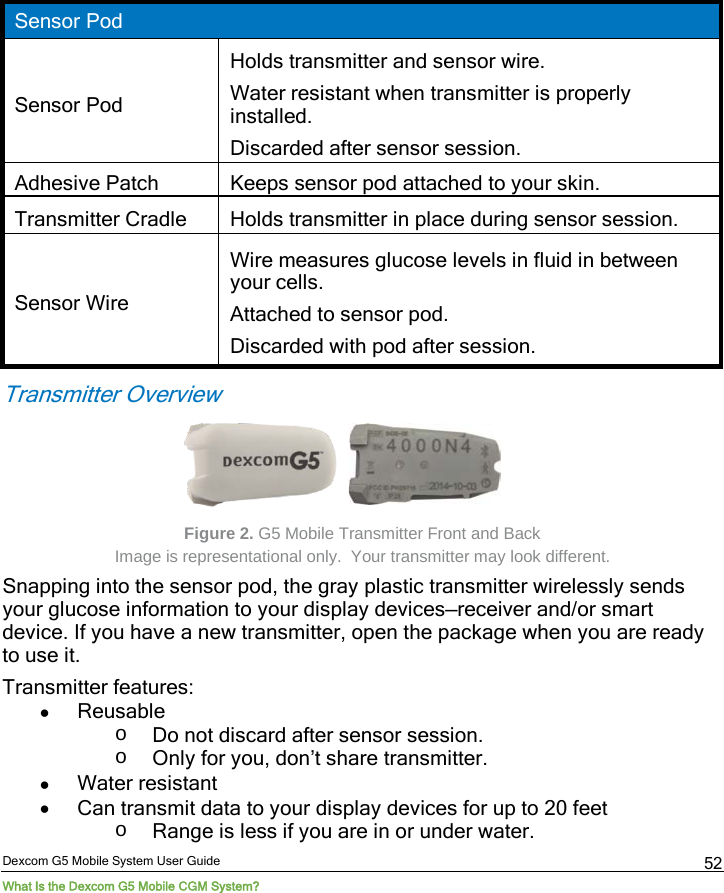
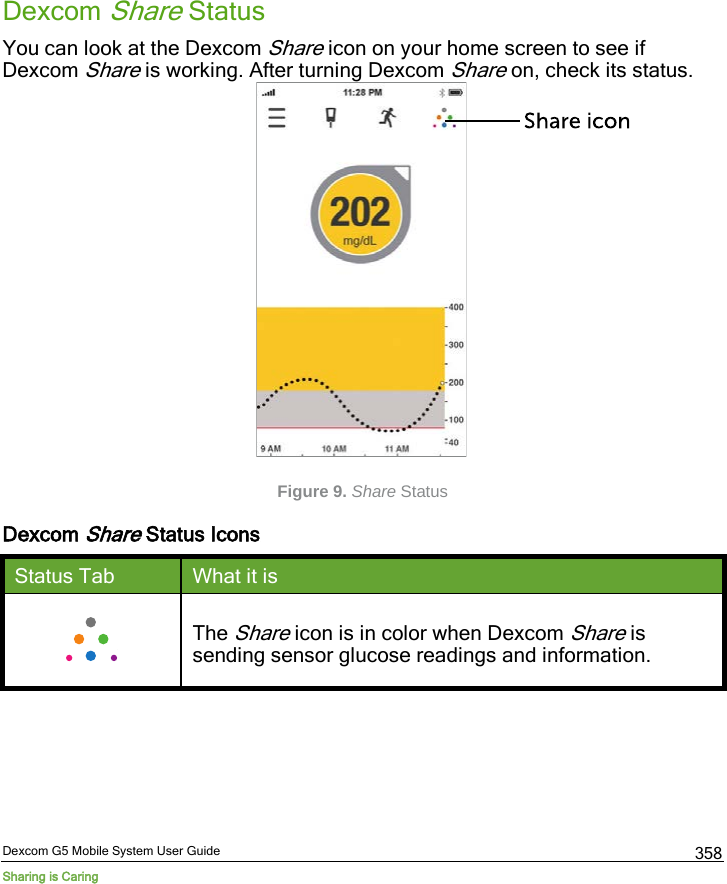
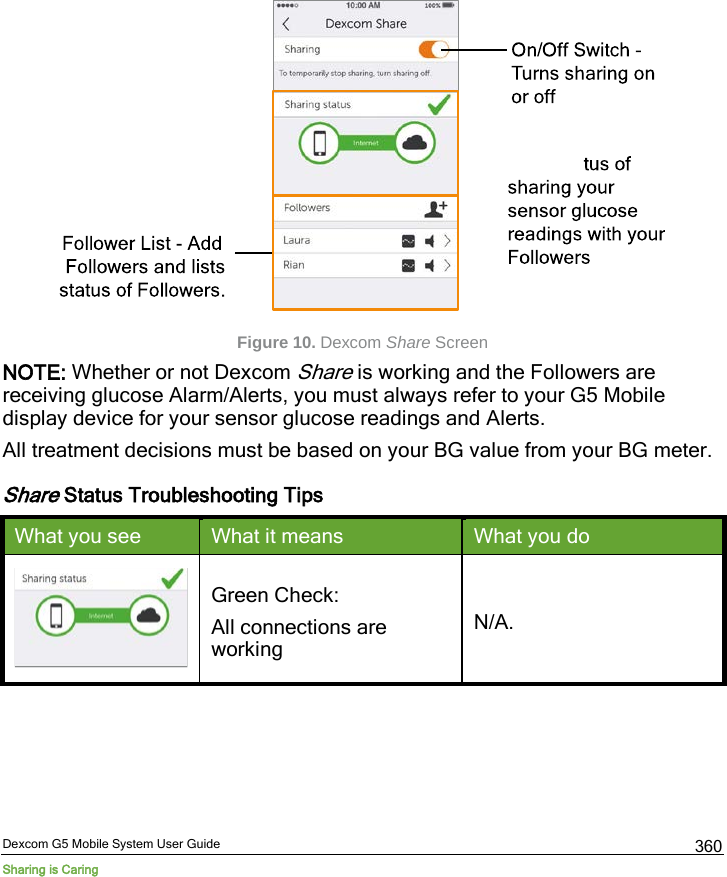
Dexcom 9949 Scout Receiver User Manual
Dexcom, Inc. Scout Receiver
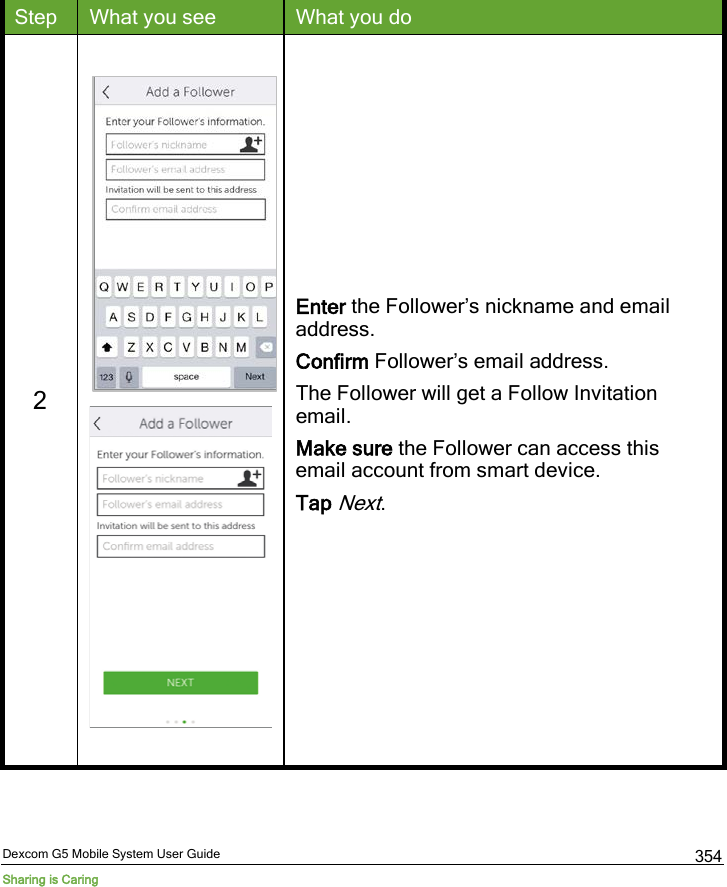
UserManual.wiki
>
Dexcom
>
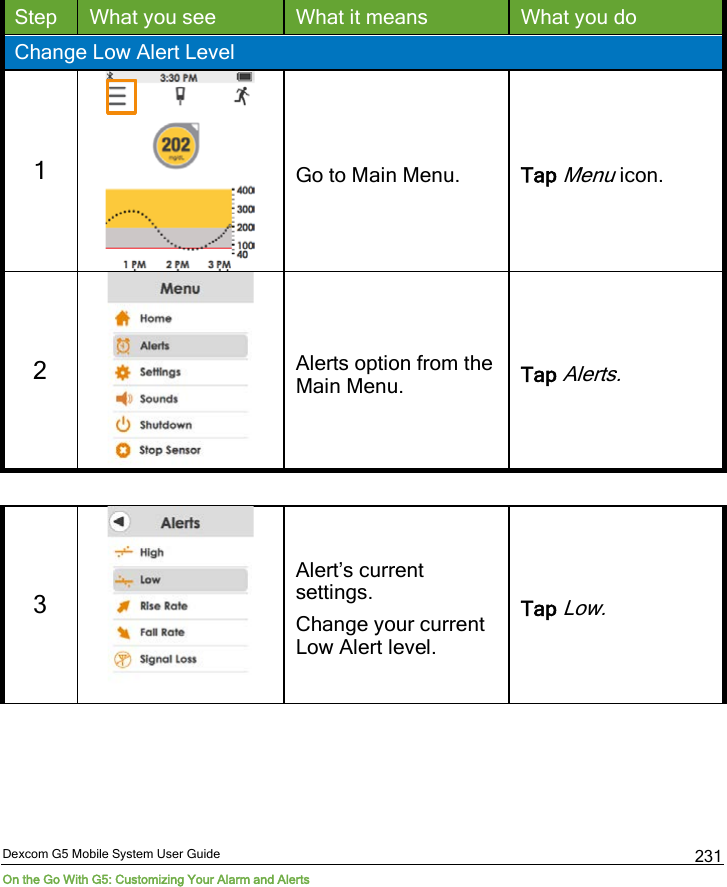
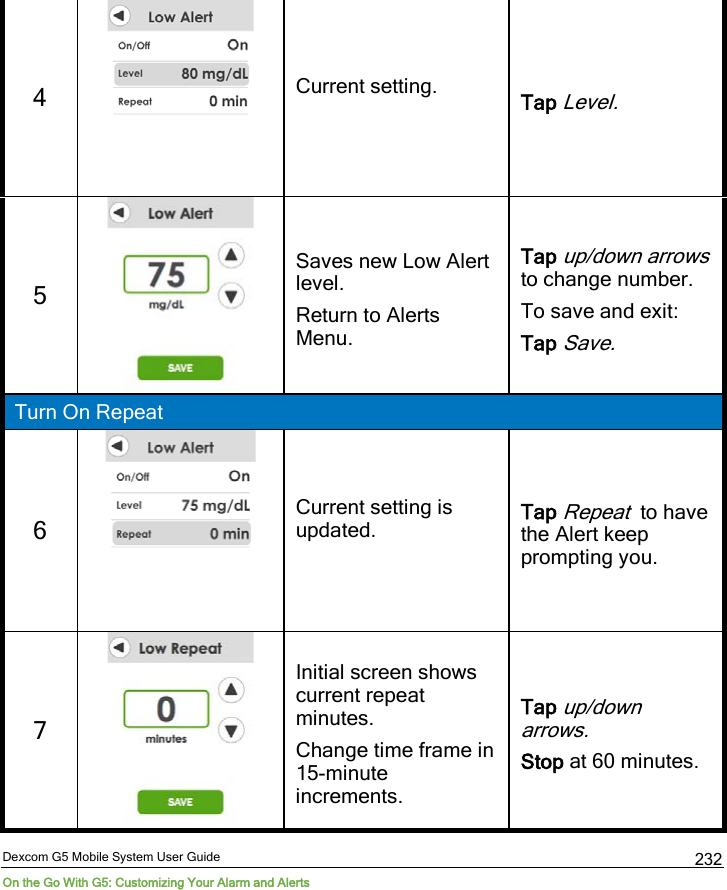
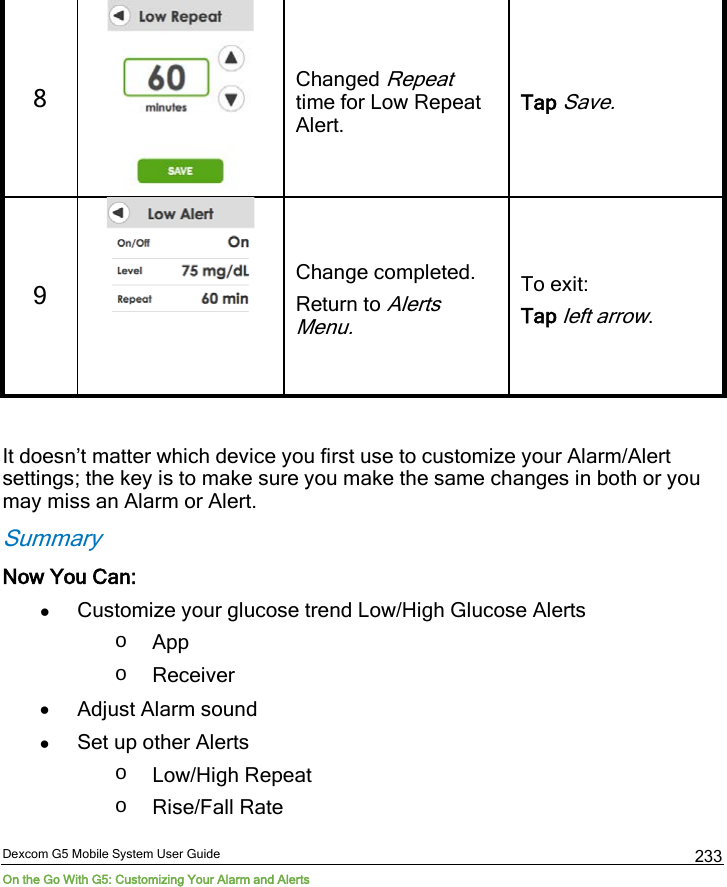
9949 User Manual
User Manual
Navigation menu
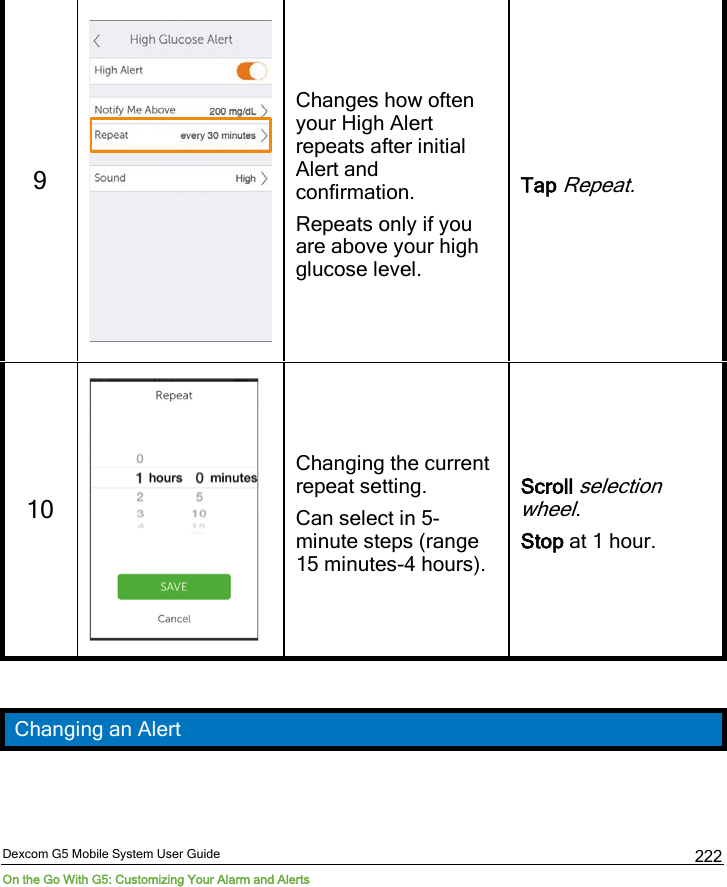
Upload a User Manual
Namespaces
Wiki Guide
HTML
PDF
Info
Views
User Manual
Discussion / Help
Navigation


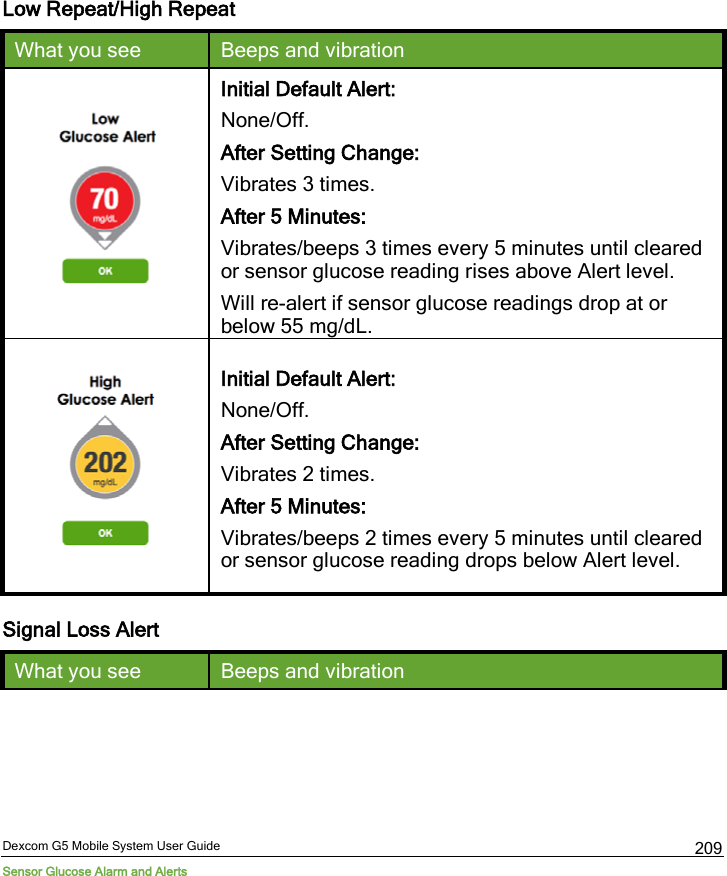


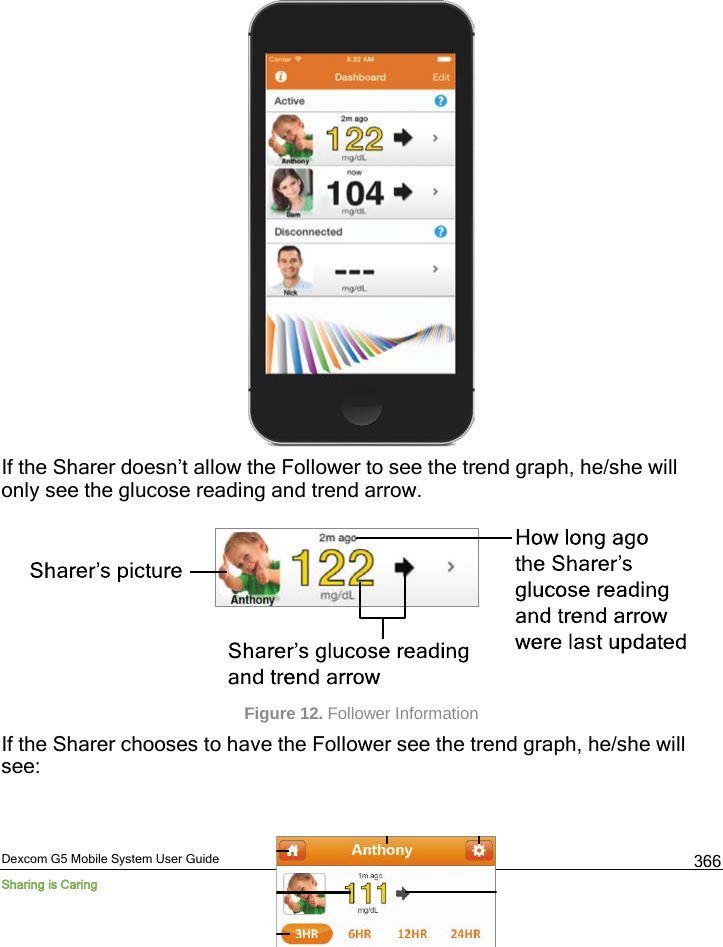
![Dexcom G5 Mobile System User Guide Sharing is Caring 365 A glucose prompt is a visual message saying “Glucose notification from [Sharer’s name]” that appears on the screen of the Follower’s smart device. The prompt may include sounds, depending on the smart device’s settings. Types of prompts Followers get: • Low Sensor Glucose Reading • Urgent Low Glucose Alarm (< 55 mg/dL) • High Sensor Glucose Reading The Follower can change some of the initial settings to fit his/her needs. The Follower cannot change the Sharer’s permission settings to see the trend graph. Sharer Status Changes That Notify the Follower Some Sharer status changes will prompt the Followers. • Not Sharing - Sharer decides to temporarily stop sharing • Removed by Sharer - Sharer removes Follower • No More Data - Prompt sent when active glucose sharing is stopped for any reason, other than the Sharer turning Share “Off” o The Follower should contact the Sharer for more information about the data interruption The Follower Dashboard](https://usermanual.wiki/Dexcom/9949/User-Guide-3195524-Page-365.png)