Diasonic Technology Co DDR-4310 DIGITAL VOICE RECORDER User Manual Manual CC Witness
Diasonic Technology Co Ltd DIGITAL VOICE RECORDER Manual CC Witness
UserManual.wiki
>
Diasonic Technology Co
>
DDR 4310 User Manual
Users Manual
Navigation menu
Upload a User Manual
Namespaces
Wiki Guide
HTML
PDF
Info
Views
User Manual
Discussion / Help
Navigation

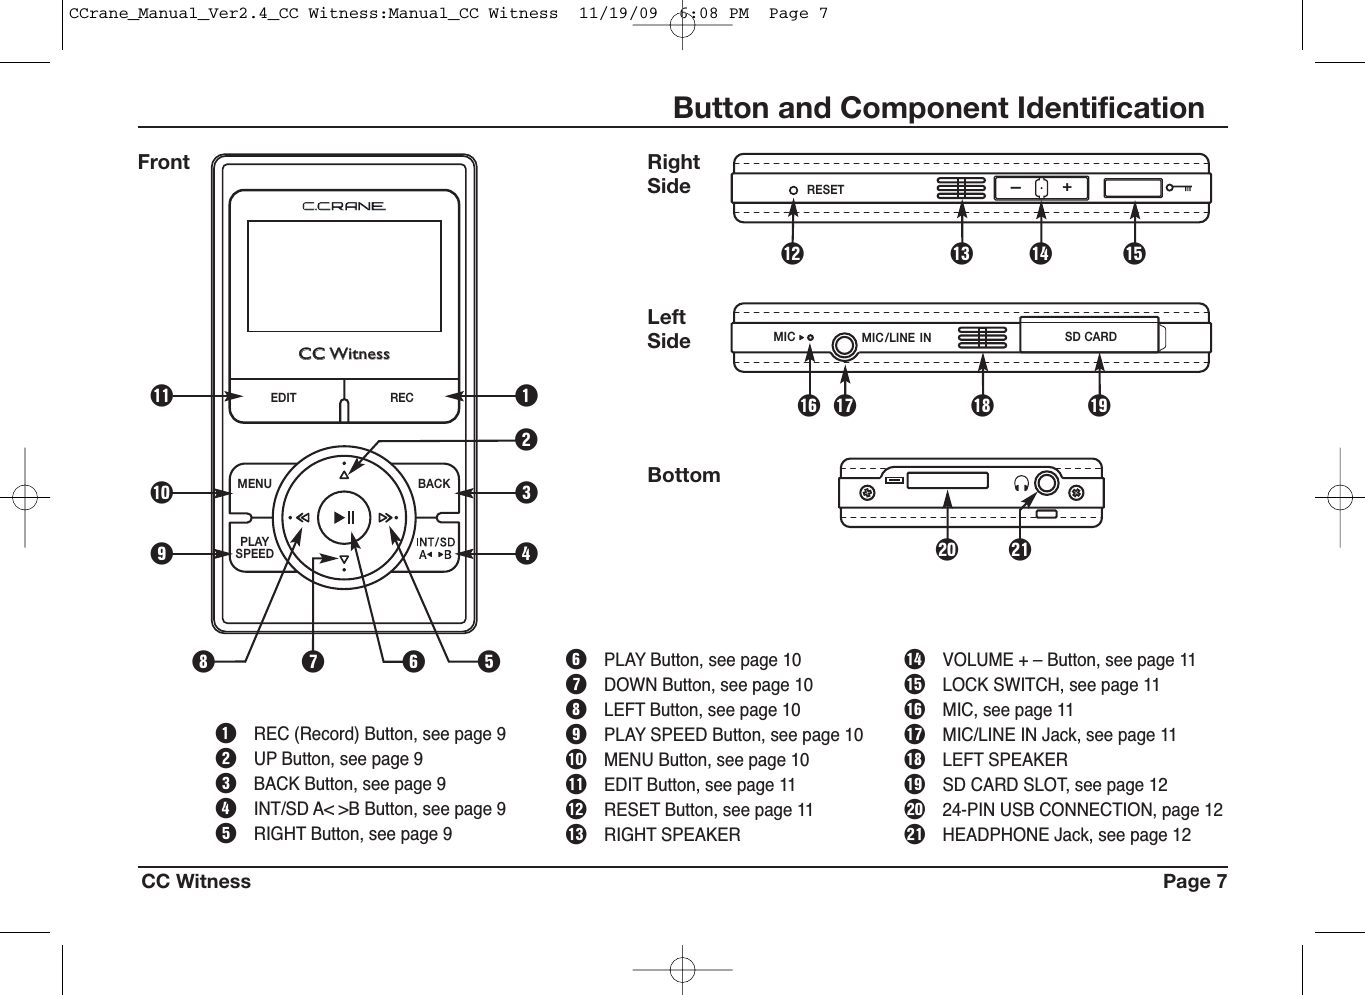
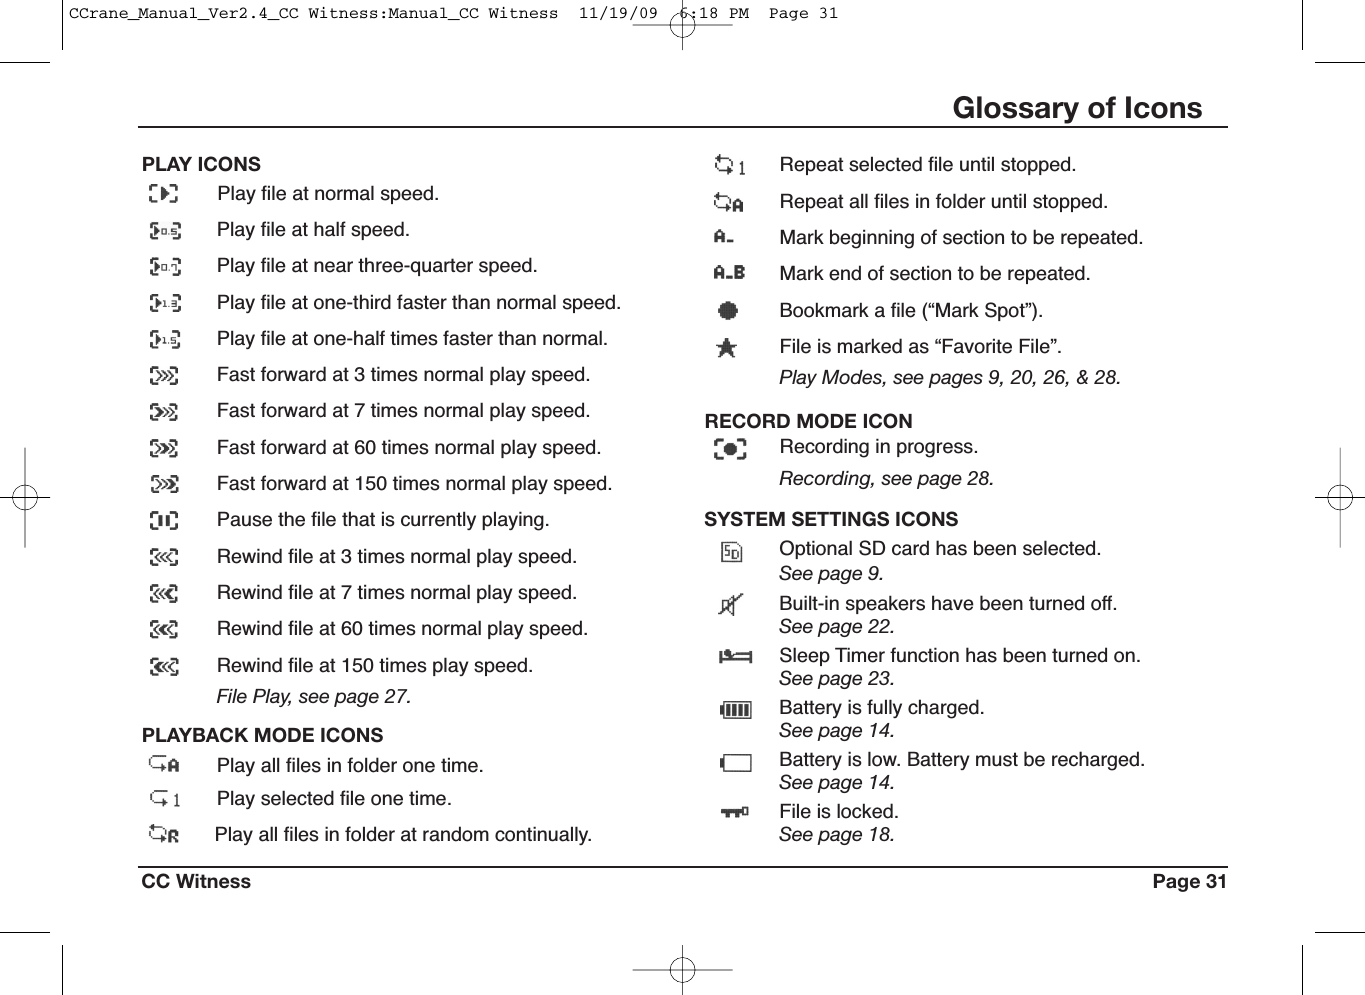
![Play FilePage 8 CC WitnessDisplay Identification and IconsAFJHKLkdsafp[]Main MenuRecord from Radio Record from MicDhjgl;zGpMainMenu, see page 15[Speakers Off, see page 22]Battery Strength Indicator, see page 14AAM RADIO (highlighted for selection)SSleep Timer On, see page 23DFILES menu title, see page 27FTime elapsed in PlaybackGPLAY Speed Symbol, see page 27HName of File being playedJProgress BarKPlayback Mode, see page 20LFavorite File symbol, see page 18:File Locked symbol, see page 18aMarked File symbol, see page 26sRecording Quality see page 20dMarked Spot in File, see page 26, 28fFolder NamegNumber of Files in FolderhTime elapsed in RecordingjRECORD SymbolkRECORD QUALITY, see page 20lAmount of Recording Time Available;Time elapsed in RecordingzSD Card selected, see page 9S:CCrane_Manual_Ver2.4_CC Witness:Manual_CC Witness 11/19/09 6:09 PM Page 8](https://usermanual.wiki/Diasonic-Technology-Co/DDR-4310/User-Guide-1592373-Page-8.png)