Disetronic Medical Systems 3 Bluetooth Transceiver Insulin Pump User Manual USer Manual
Disetronic Medical Systems AG Bluetooth Transceiver Insulin Pump USer Manual
USer Manual
Navigation menu
Upload a User Manual
Namespaces
Wiki Guide
HTML
PDF
Info
Views
User Manual
Discussion / Help
Navigation
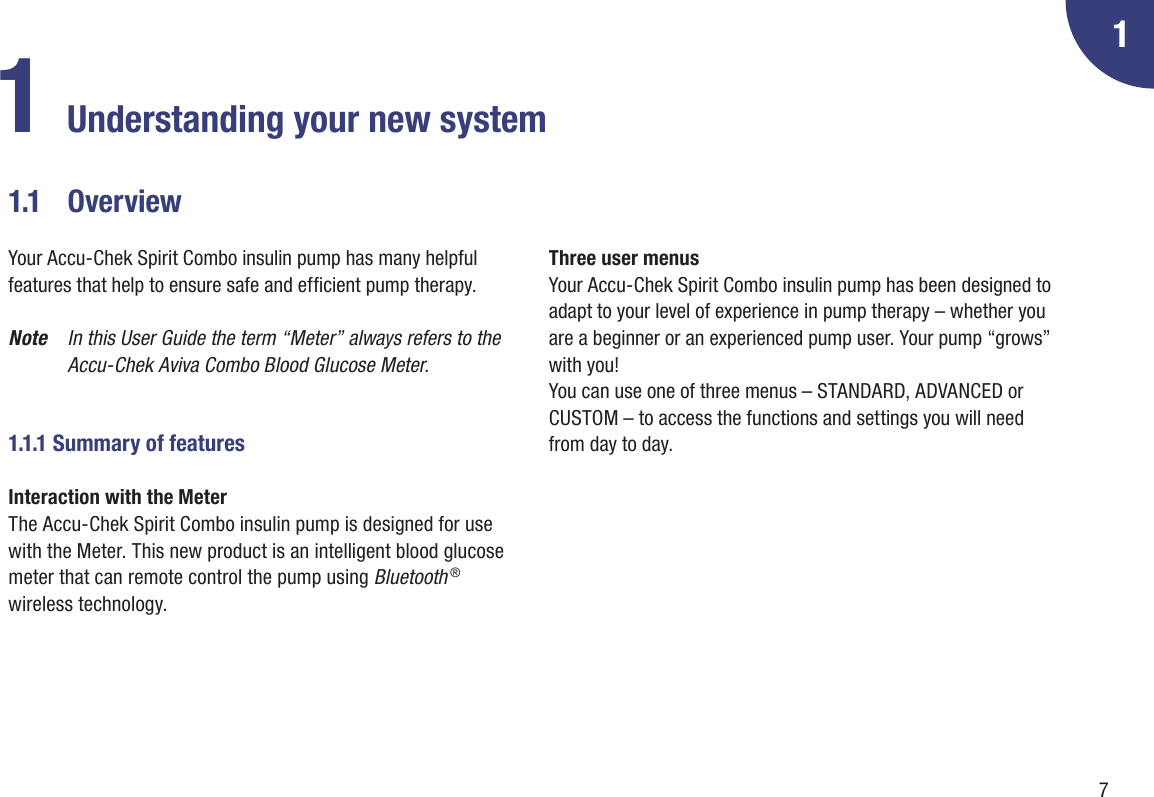

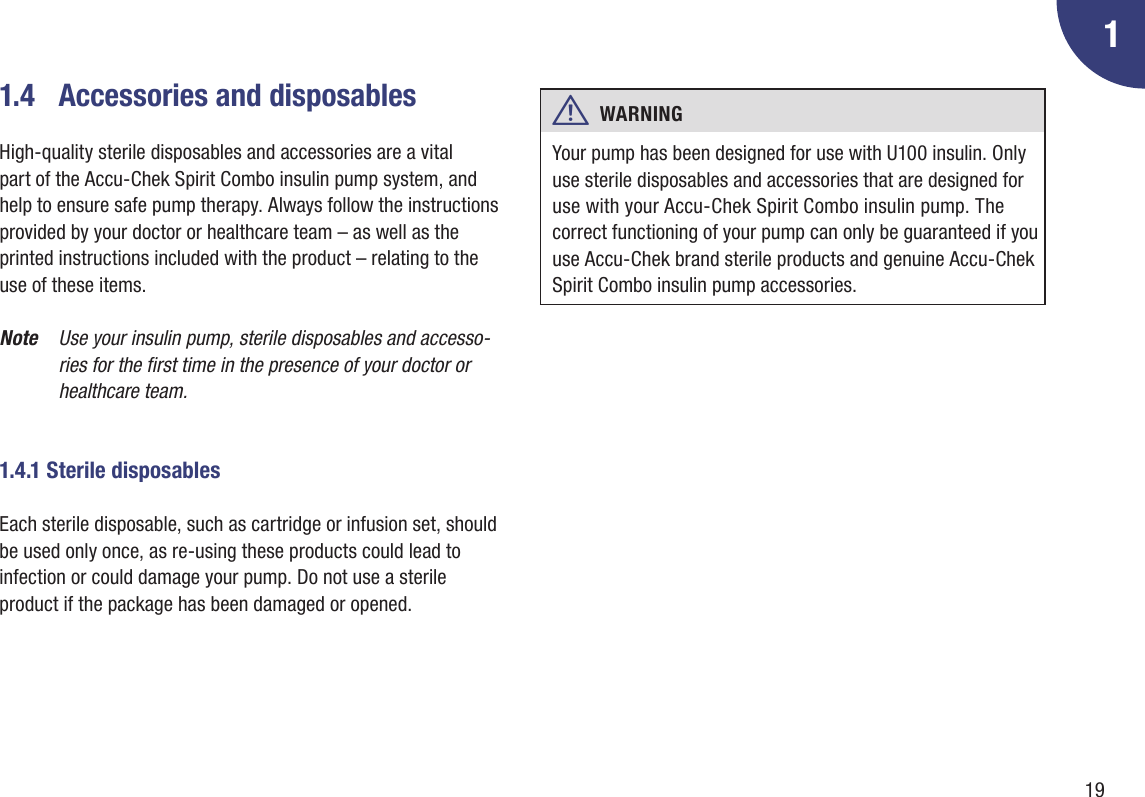

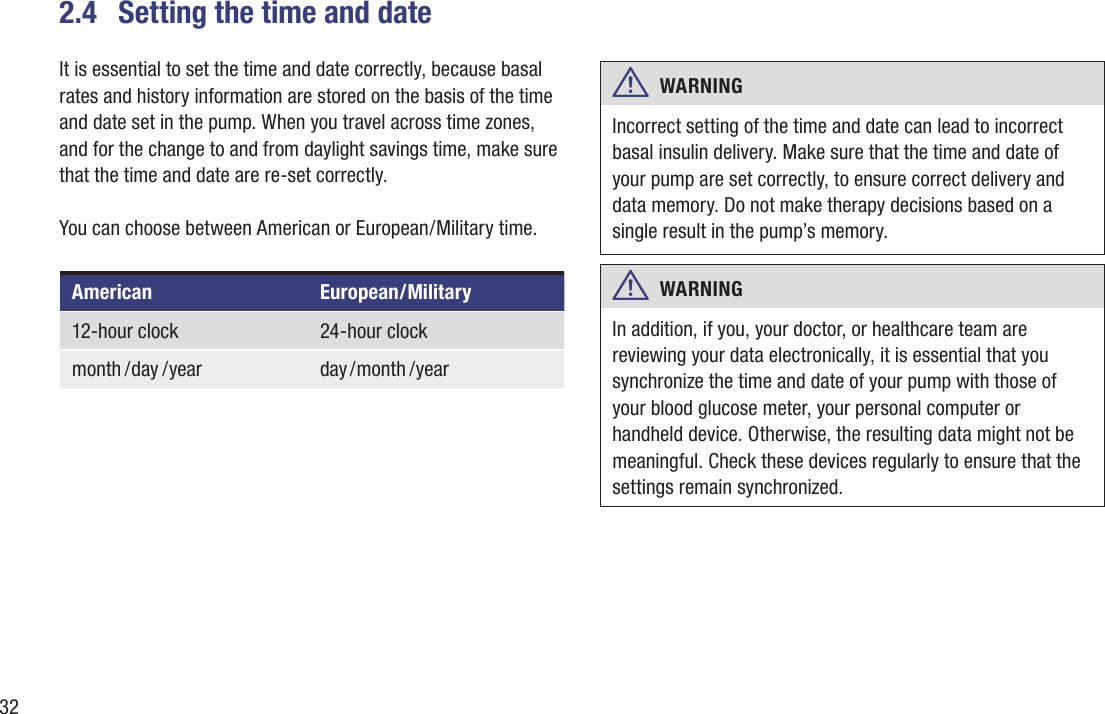
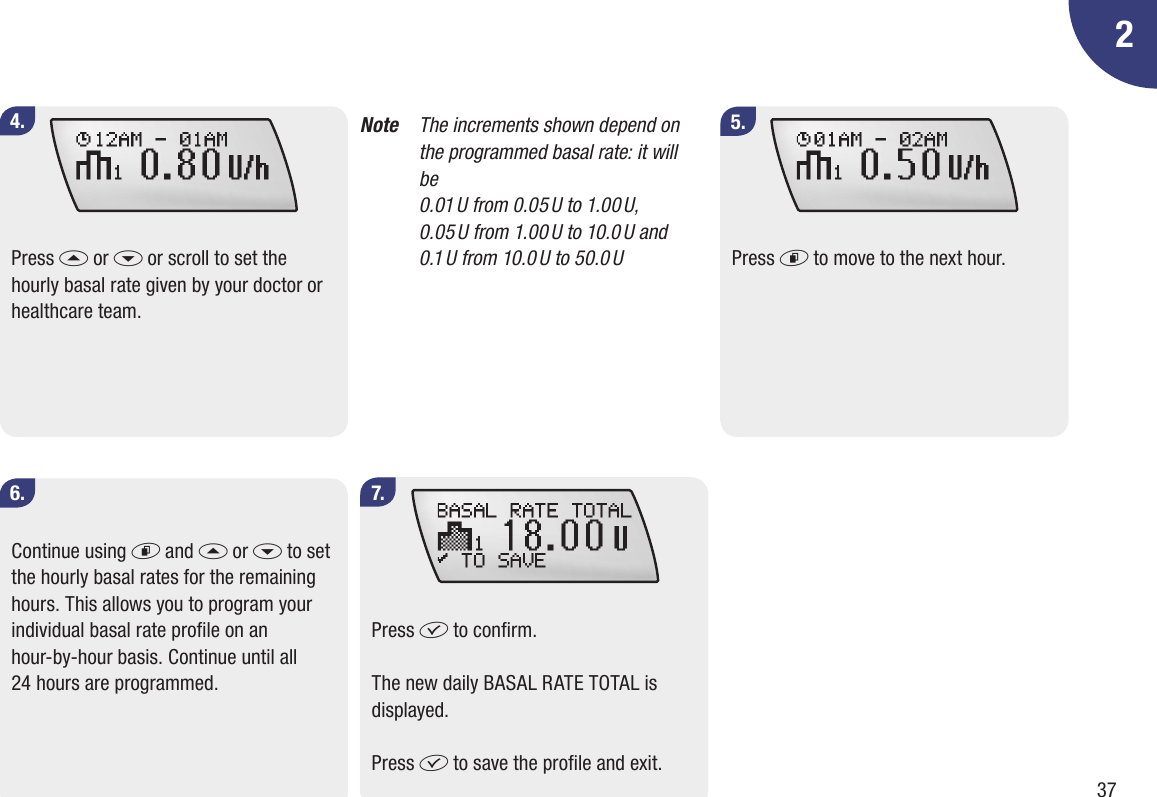
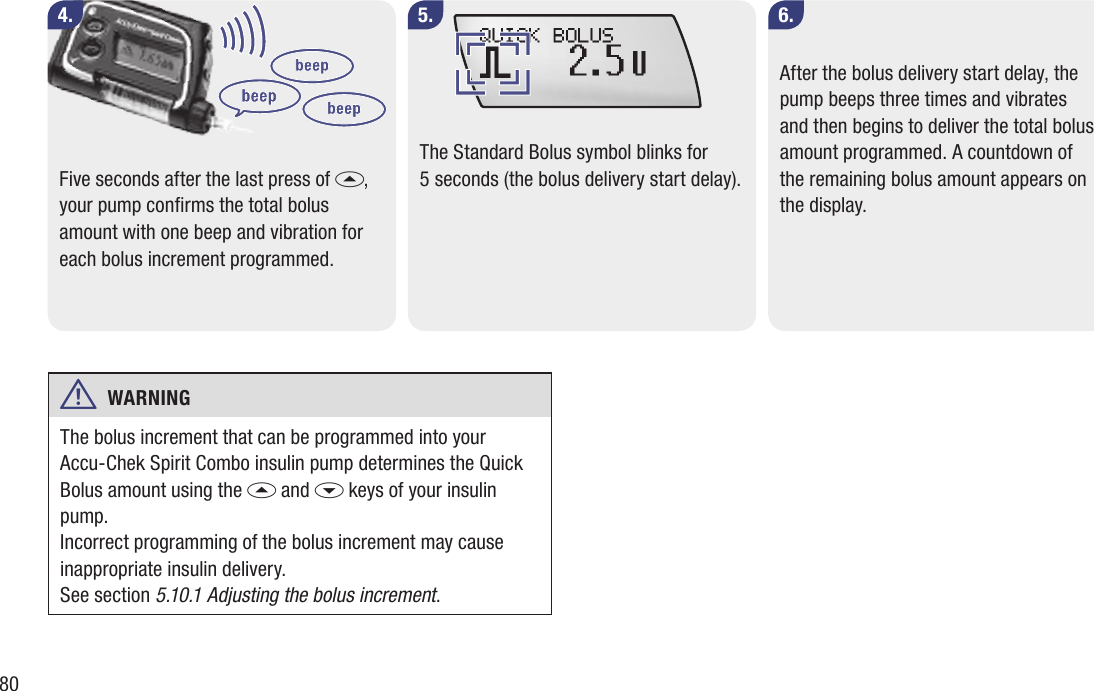
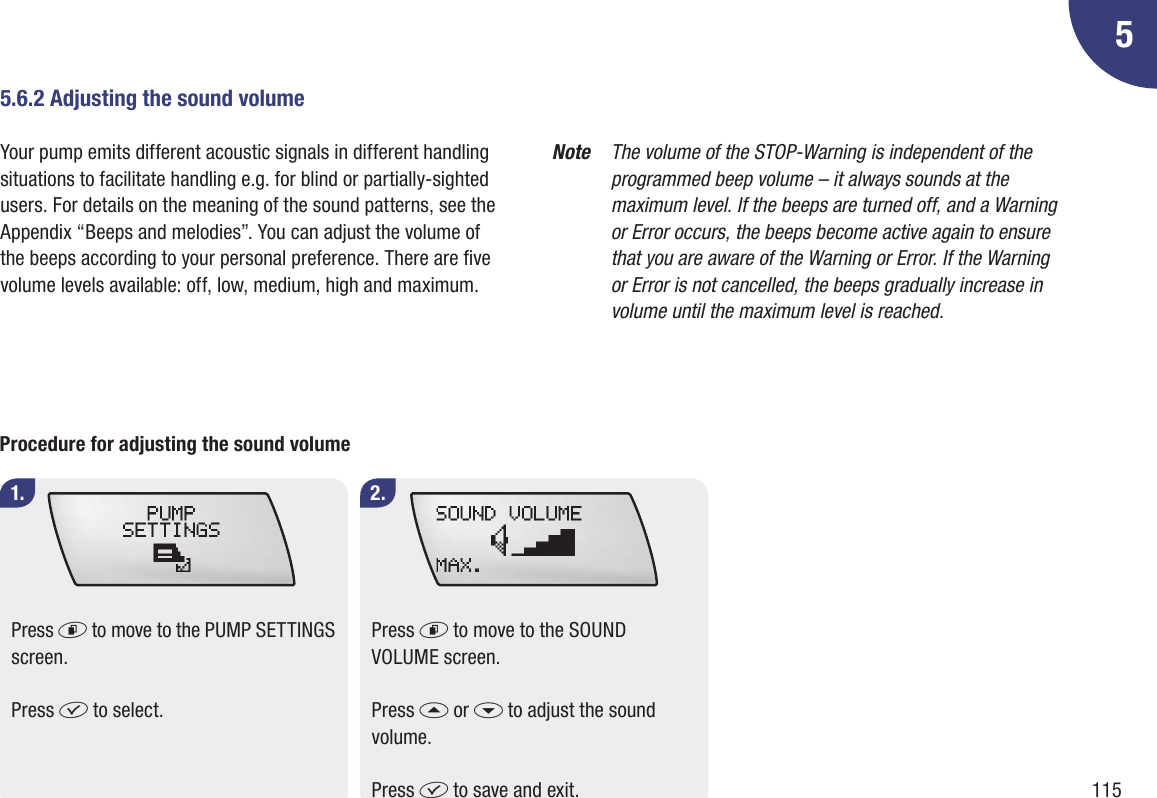
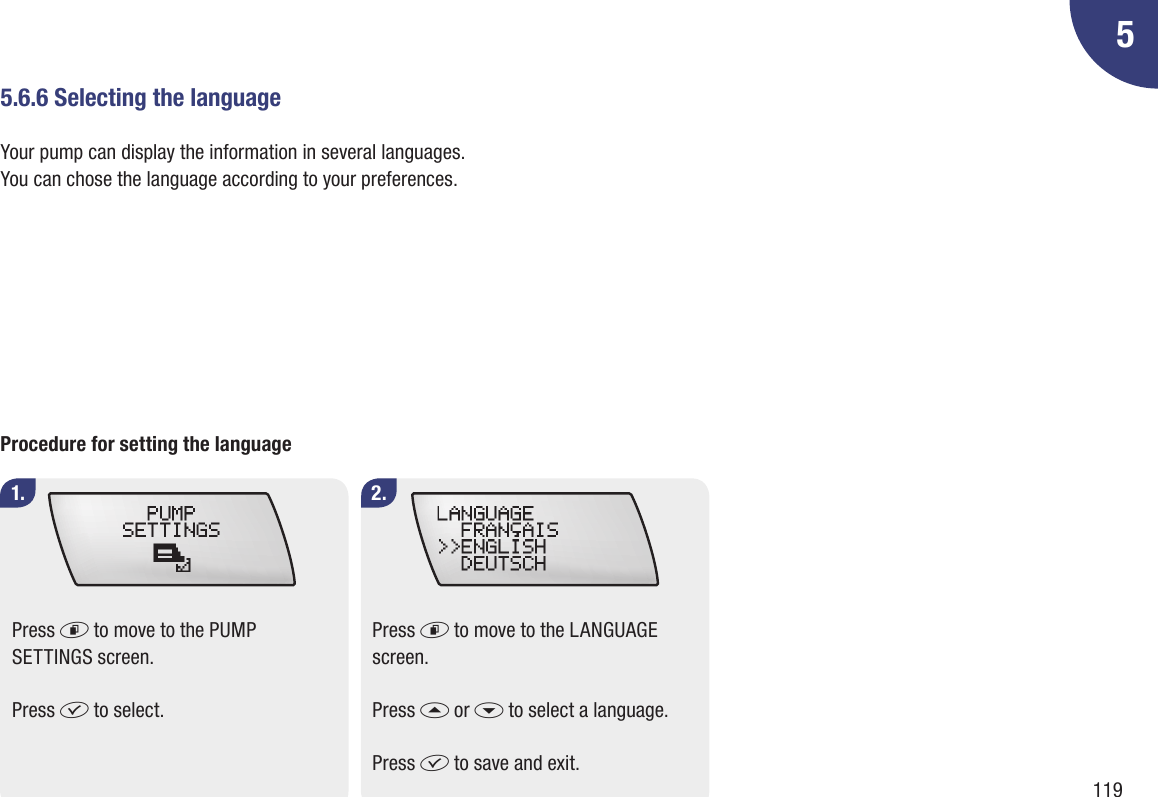
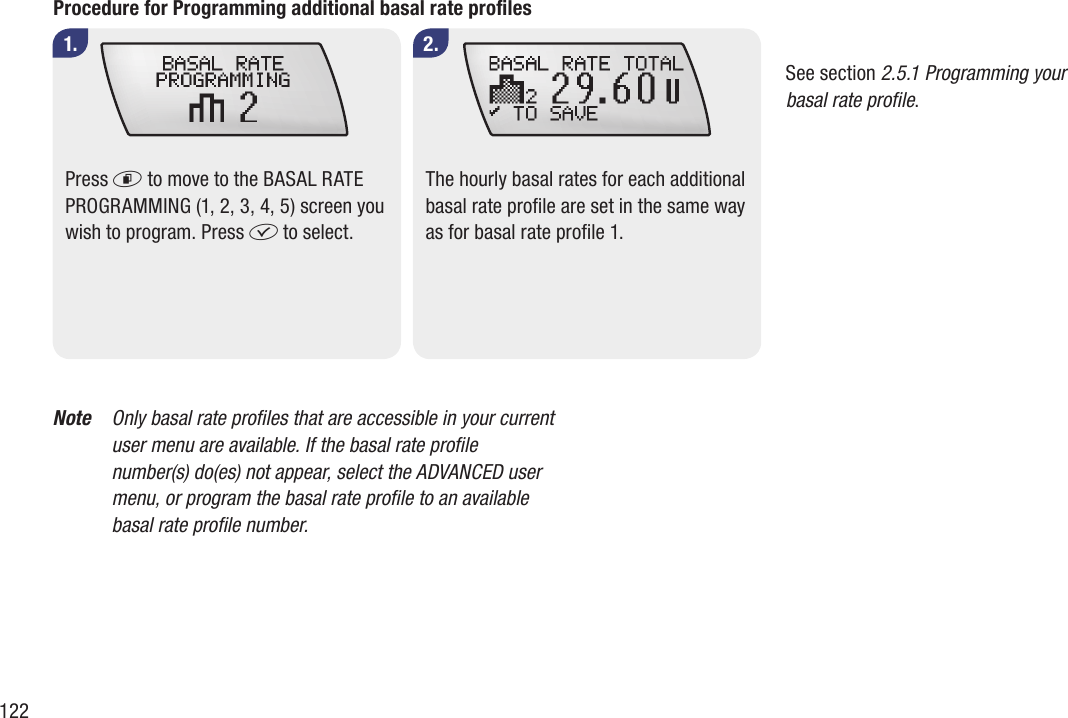
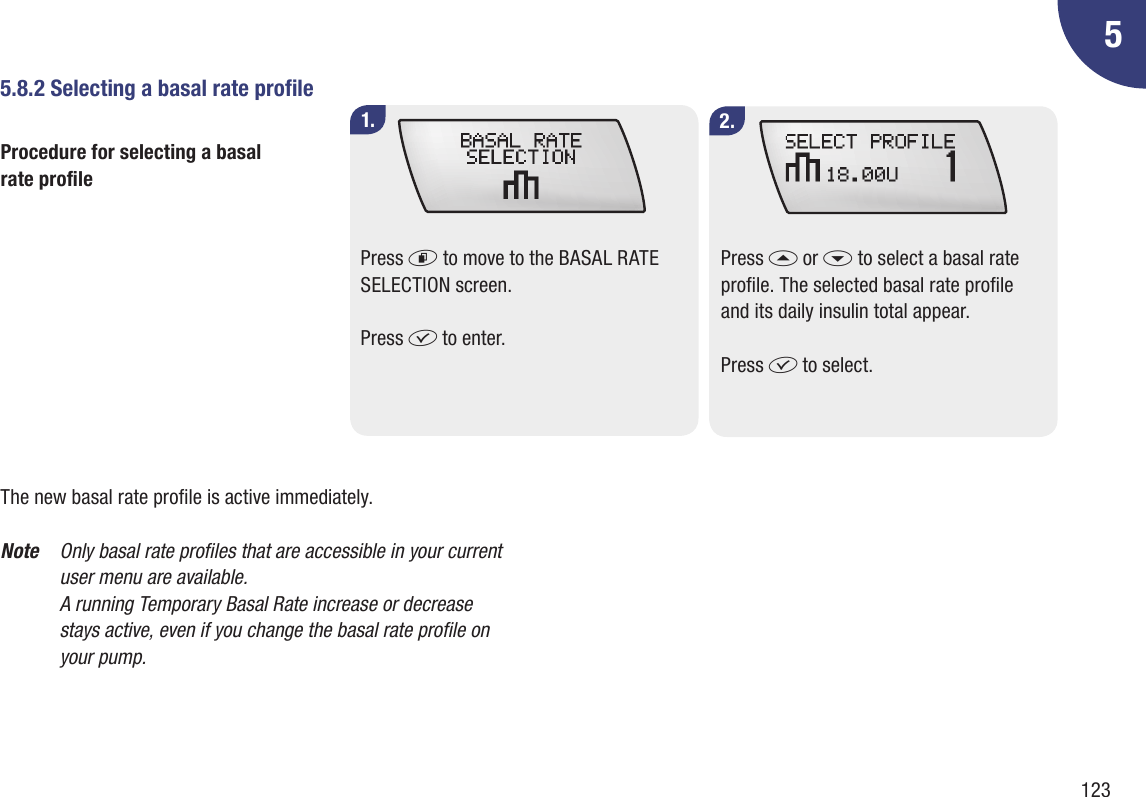
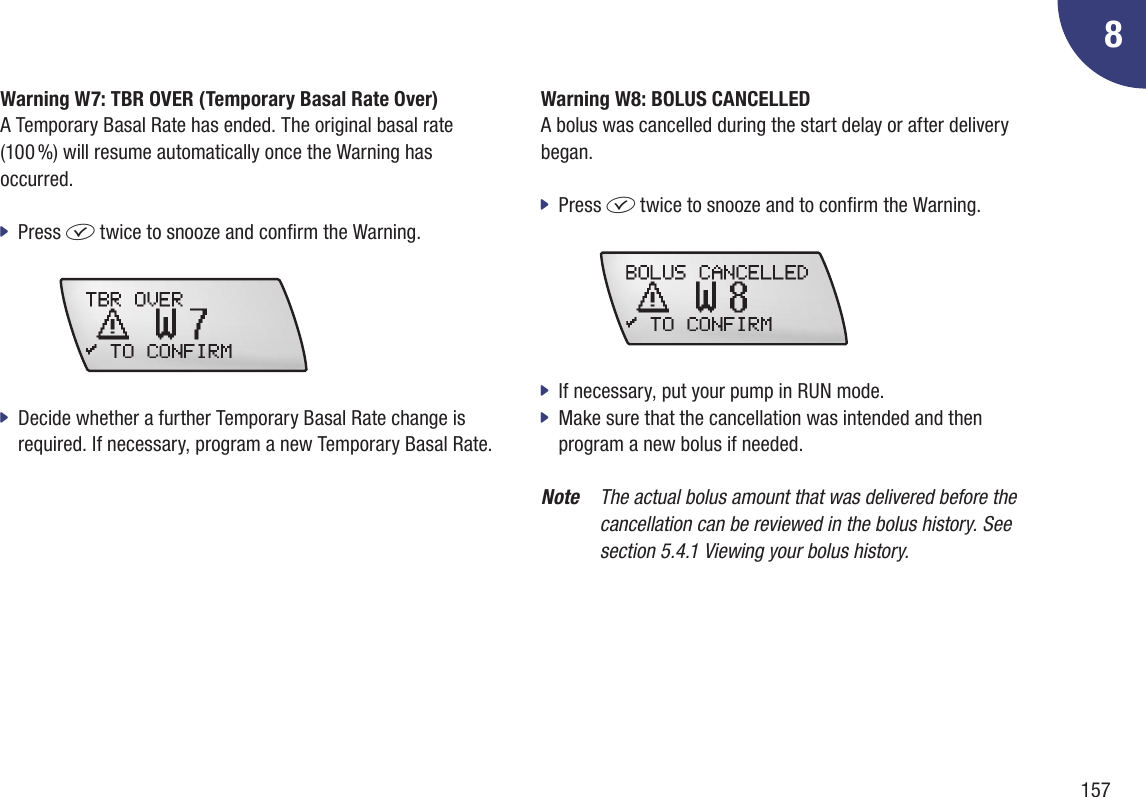
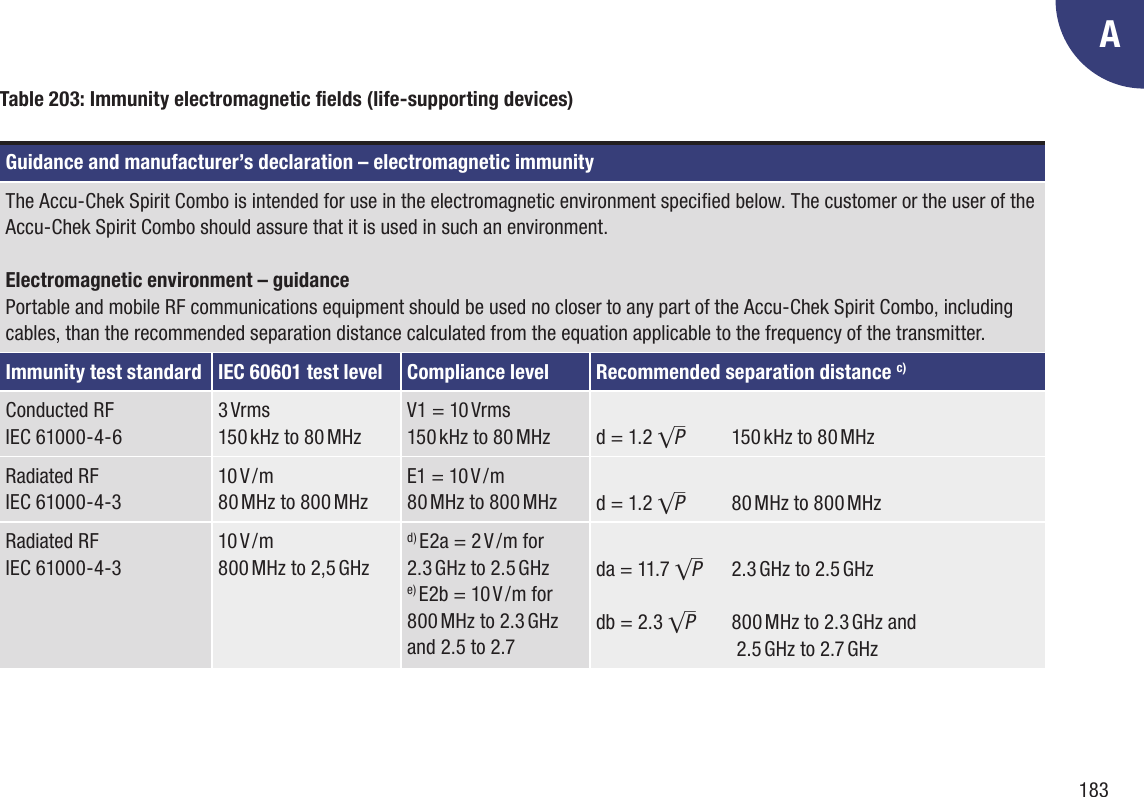
![3522.5 Your basal rate proleYour Accu-Chek Spirit Combo insulin pump must be programmed with your personal settings before you begin pump therapy. Your doctor or healthcare team can help you to understand how to use the pump.2.5.1 Programming your basal rate proleYour Accu-Chek Spirit Combo insulin pump delivers insulin every 3 minutes, in 20 equal doses every hour, 24 hours a day. This ow of insulin, measured in international units per hour (U / h), is called the basal rate prole and is calculated to meet your basic insulin needs.The pump can store up to ve different basal rate proles to match your changing insulin needs – for example: Monday to Friday, Exercise Day or Sleeping Late Day.Note For your safety and convenience during programming, your Accu-Chek Spirit Combo insulin pump switches to RUN or STOP screen if no key is pressed within 20 sec-onds. Any changes you have made before this “time-out” occurs will not be saved .An Accu-Chek Spirit Combo insulin pump basal rate prole consists of up to 24 different hourly basal rates. Each hourly rate may be changed independently. The total of all 24 basal rates in one basal rate prole is called the (daily) basal rate total.012345678910 11 12 13 14 15 16 17 18 19 20 21 22 23 24TimeExample: Basal rate prole for 18 U / 24 hoursInsulin delivery[U / h] Hourly basal rate](https://usermanual.wiki/Disetronic-Medical-Systems/3/User-Guide-1165229-Page-38.png)
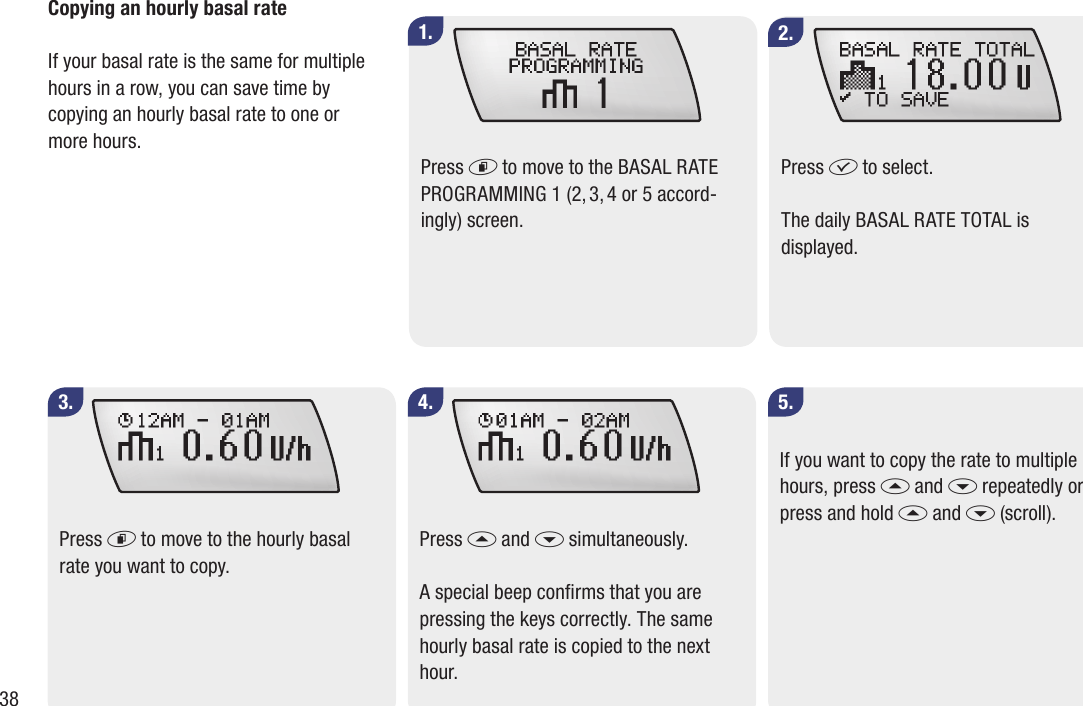


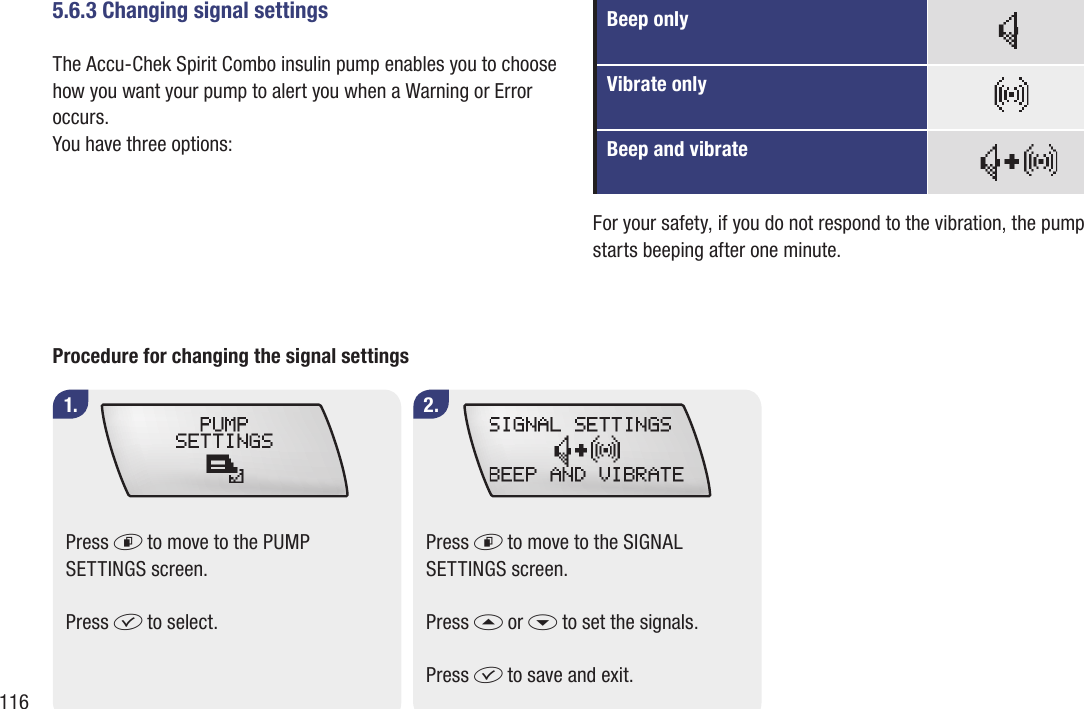


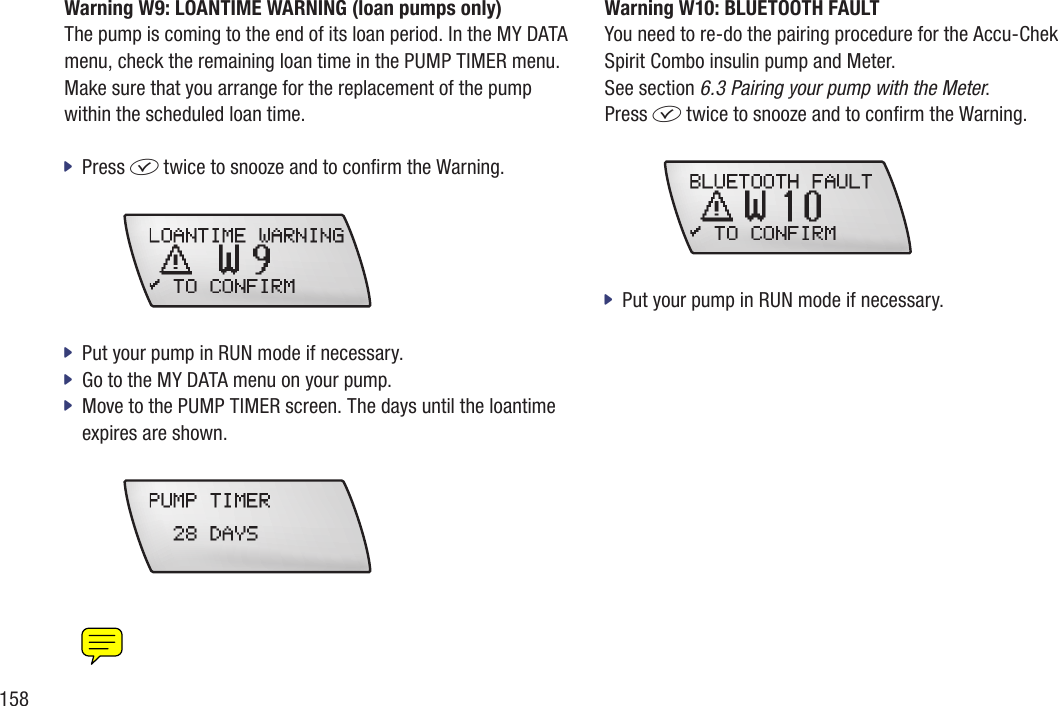
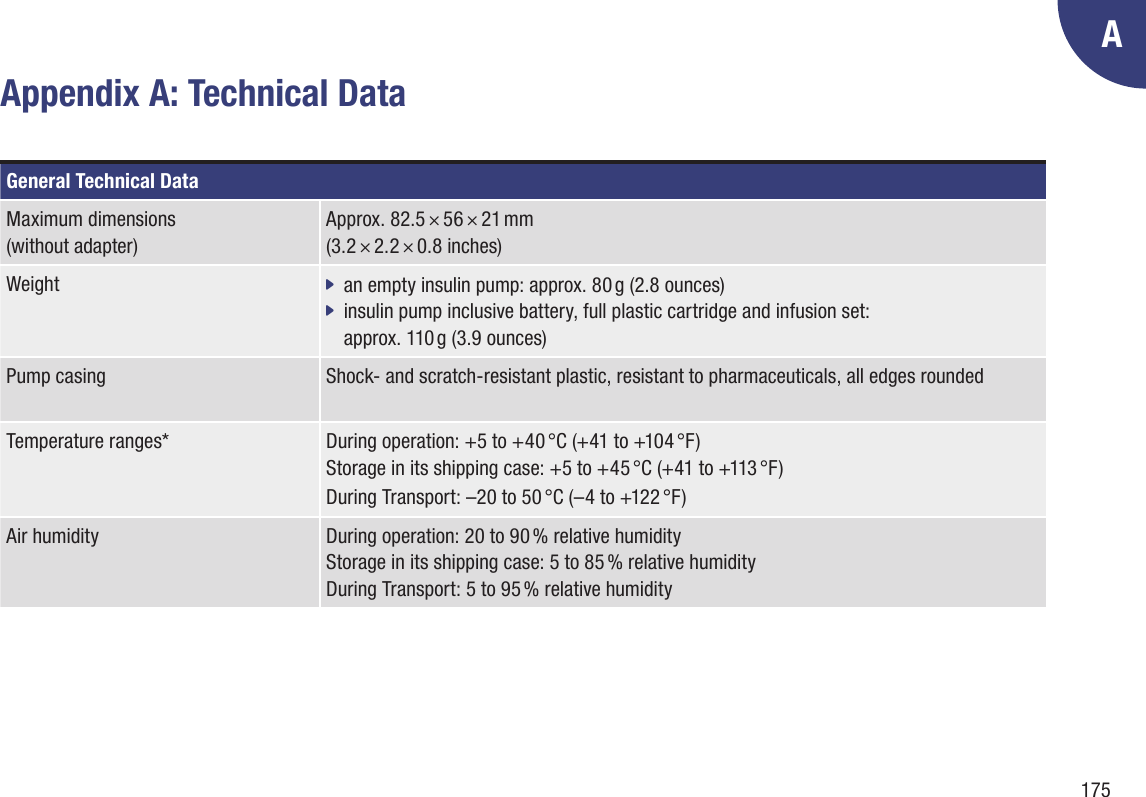
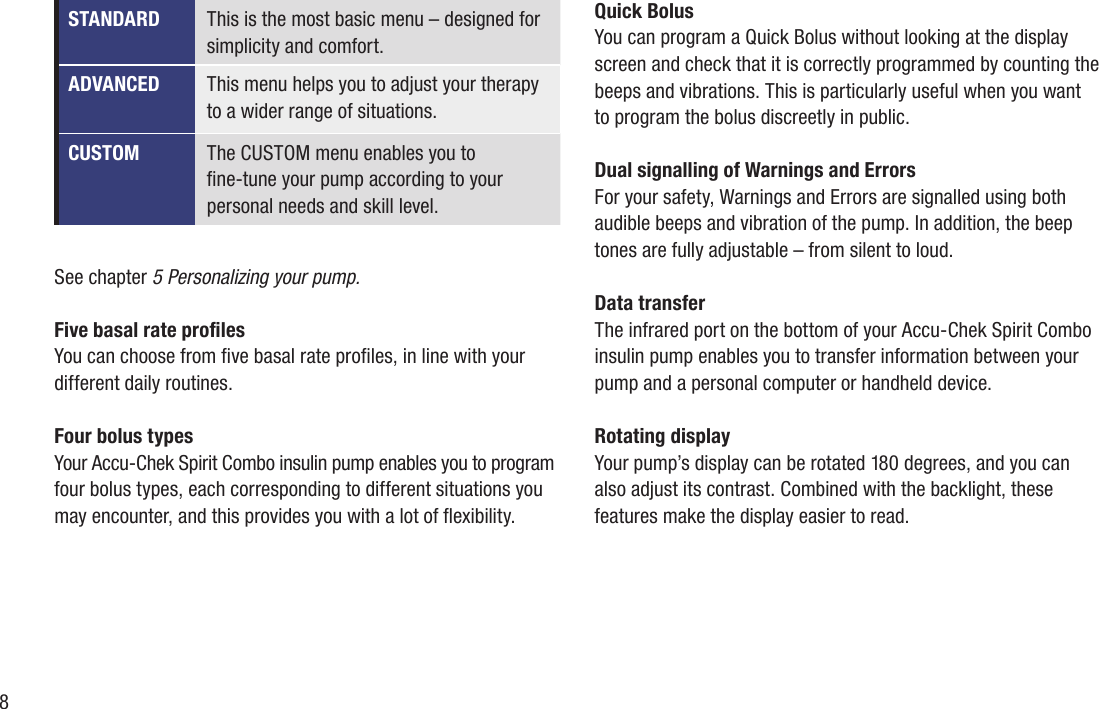
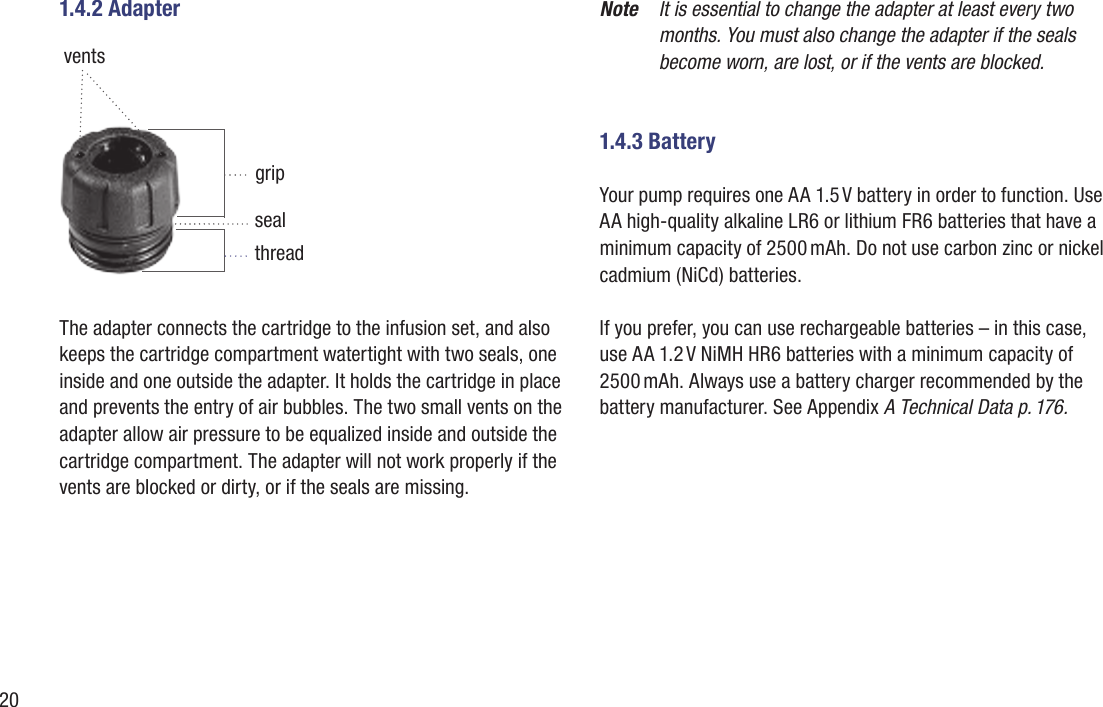
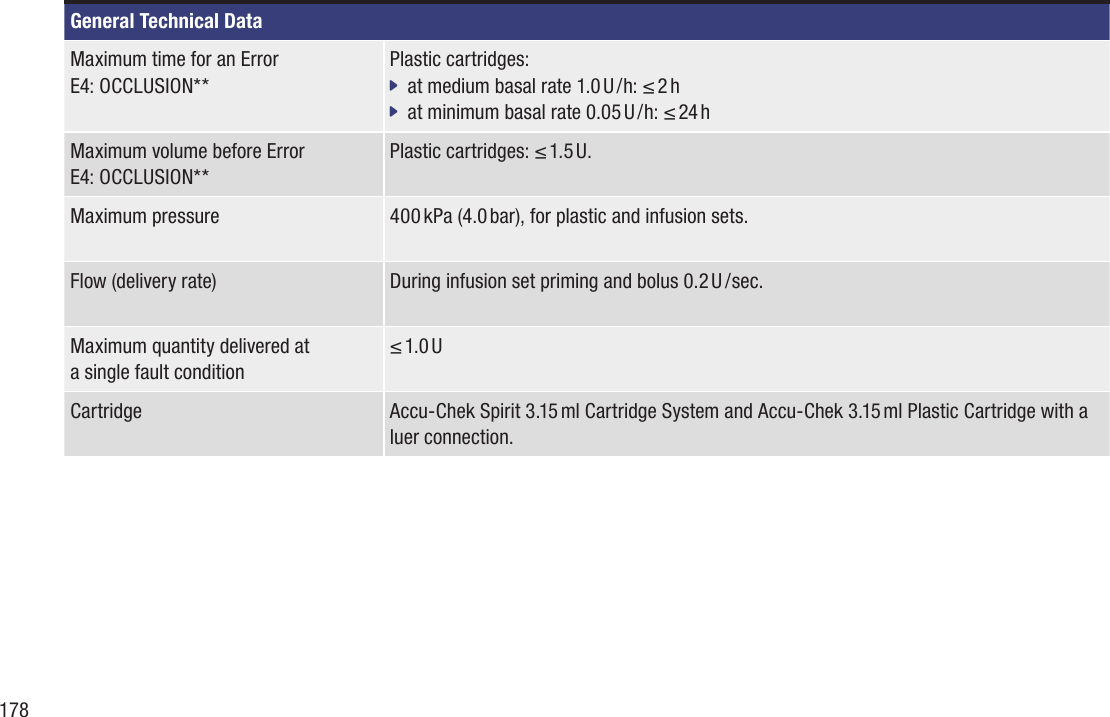
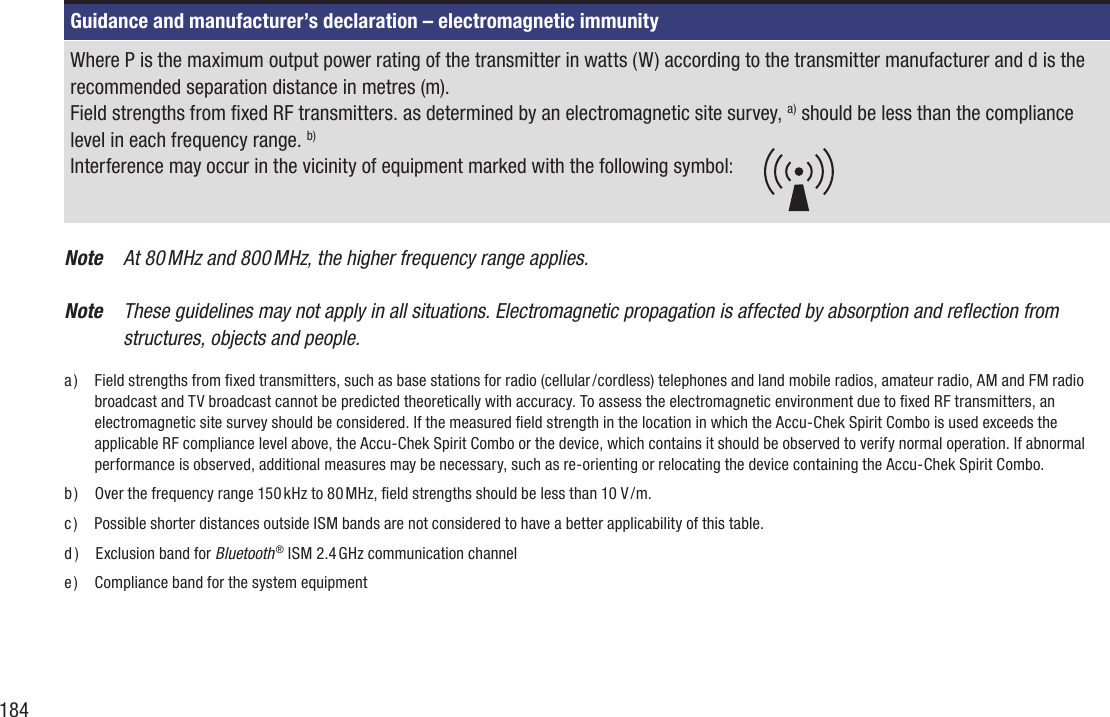
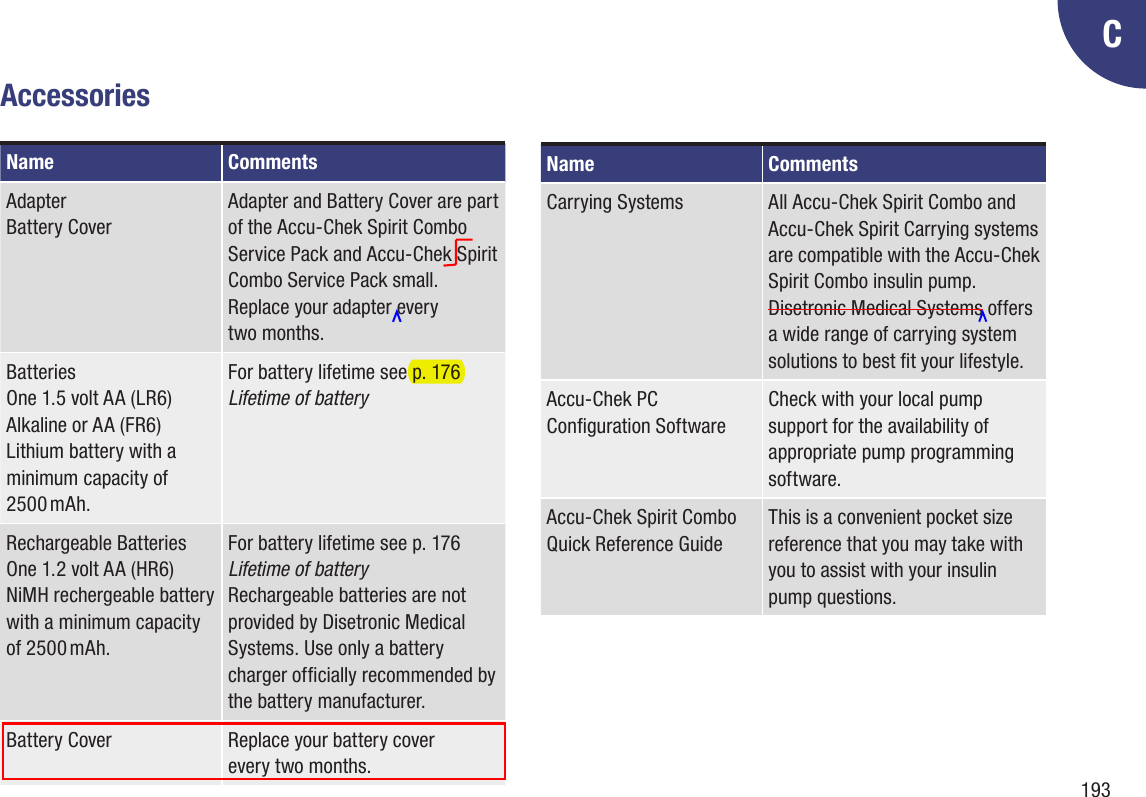
![176General Technical DataBarometric pressure During operation or storage in its shipping case: 70 to 106 kPA (700 to 1060 mbar) (do not exceed 3000 meters [10 000 feet] above sea level)During Transport: 50 to 106 kPA (500 to 1060 mbar)Power supply One 1.5 volt AA Alkaline (LR6) or Lithium (FR6) battery or one 1.2 volt rechargeable NiMH AA (HR6) battery. Batteries should have a minimum capacity of 2500 mAh. Use only a battery charger ofcially recommended by the battery manufacturer.Lifetime of battery If used in a typical usage pattern (50 U / day using U100 insulin; operating temperature 23 °C ±2 °C [73 °F ±4 °F]) the battery life is approximately:Alkaline: 70 days for Bluetooth ® off; 30 days for Bluetooth ® onLithium: 200 days for Bluetooth ® off; 80 days for Bluetooth ® onNiMH: 100 days for Bluetooth ® off; 40 days for Bluetooth ® onData storage time The time and date are safely stored in the memory for about 1 hour after the battery has been removed. Other insulin pump settings (the hourly basal rates, remaining cartridge content, bolus increments and active user menu) and the event memory (bolus history, history of daily insulin totals, Temporary Basal Rate history, alarm history) are saved, regardless of battery voltage and the time your insulin pump has been without a battery.](https://usermanual.wiki/Disetronic-Medical-Systems/3/User-Guide-1165229-Page-179.png)
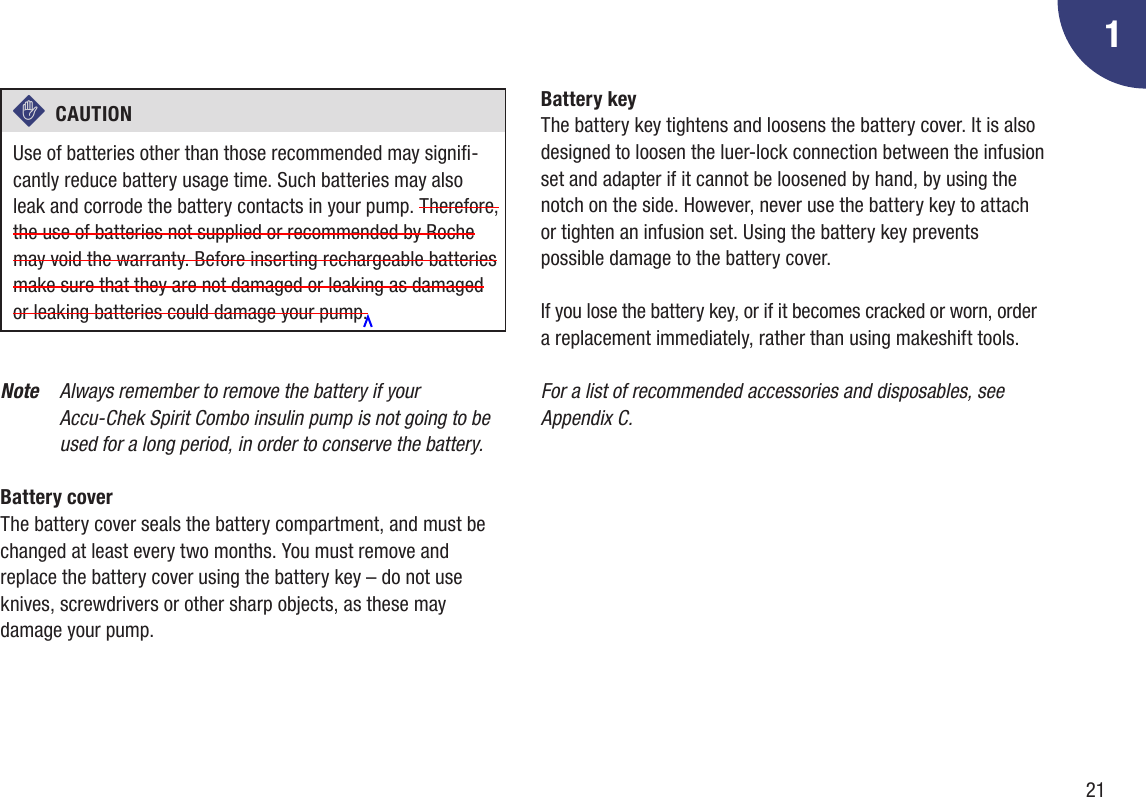
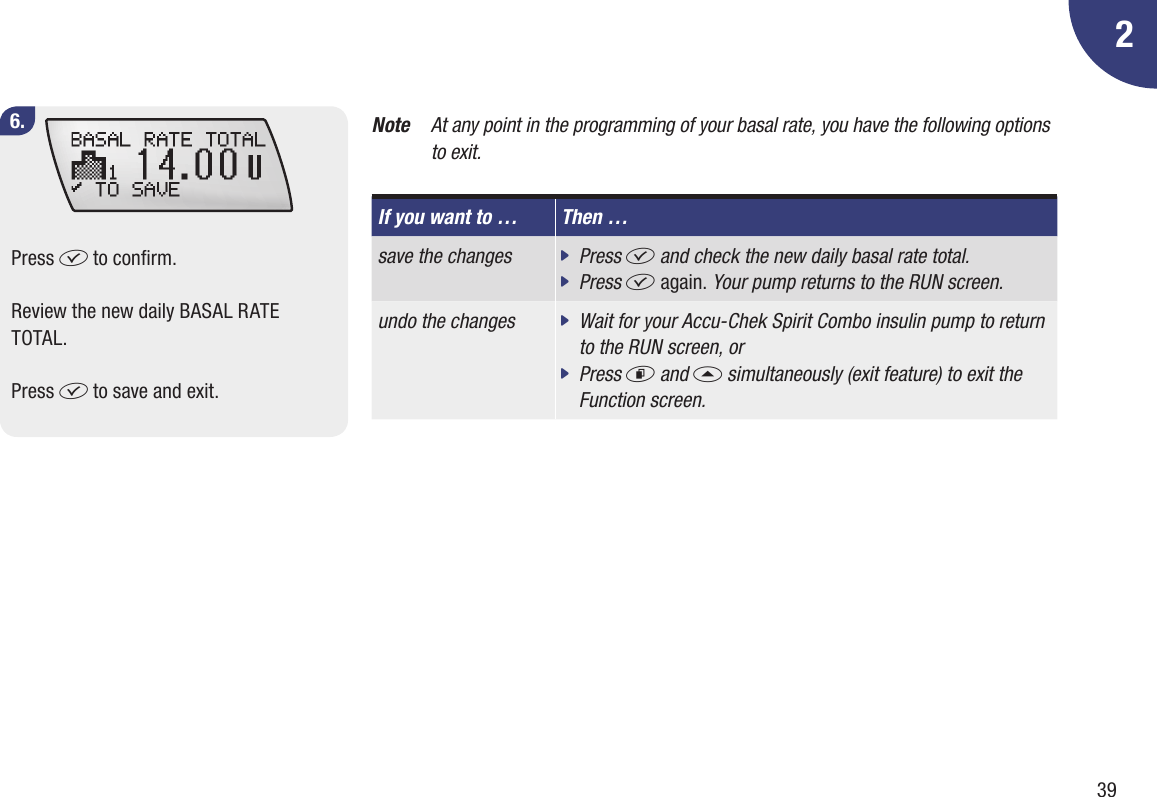
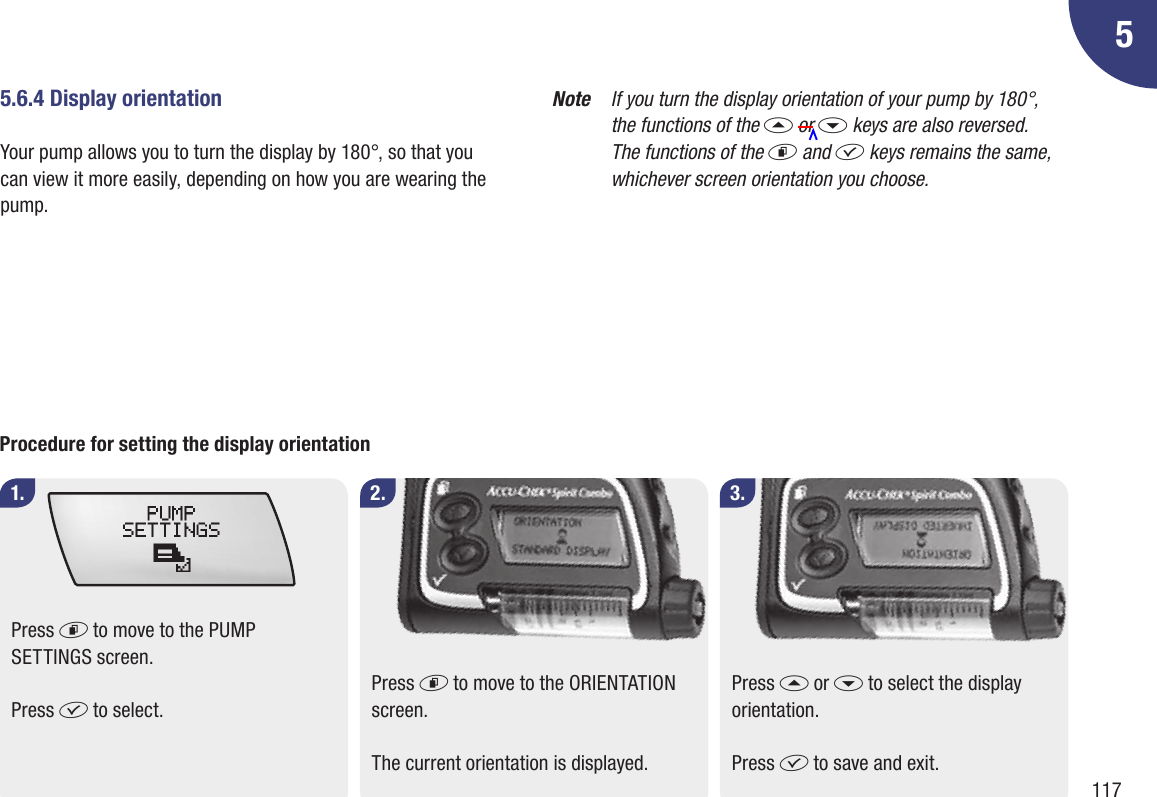
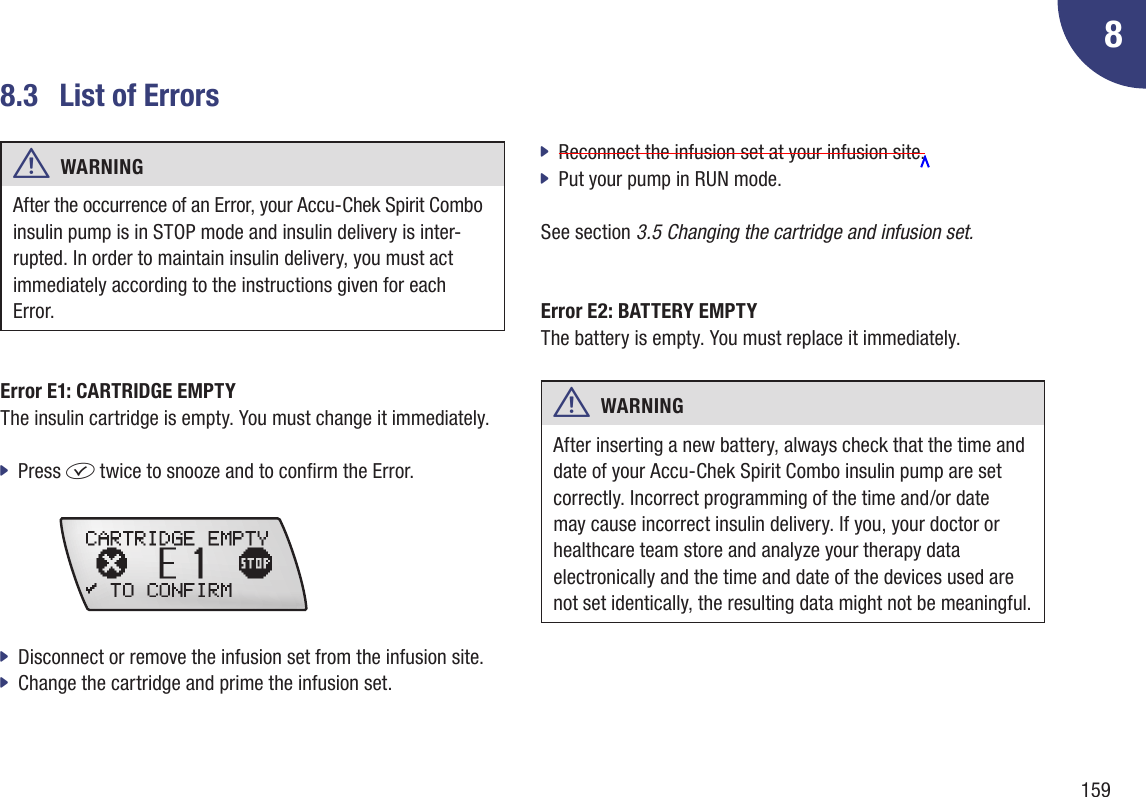
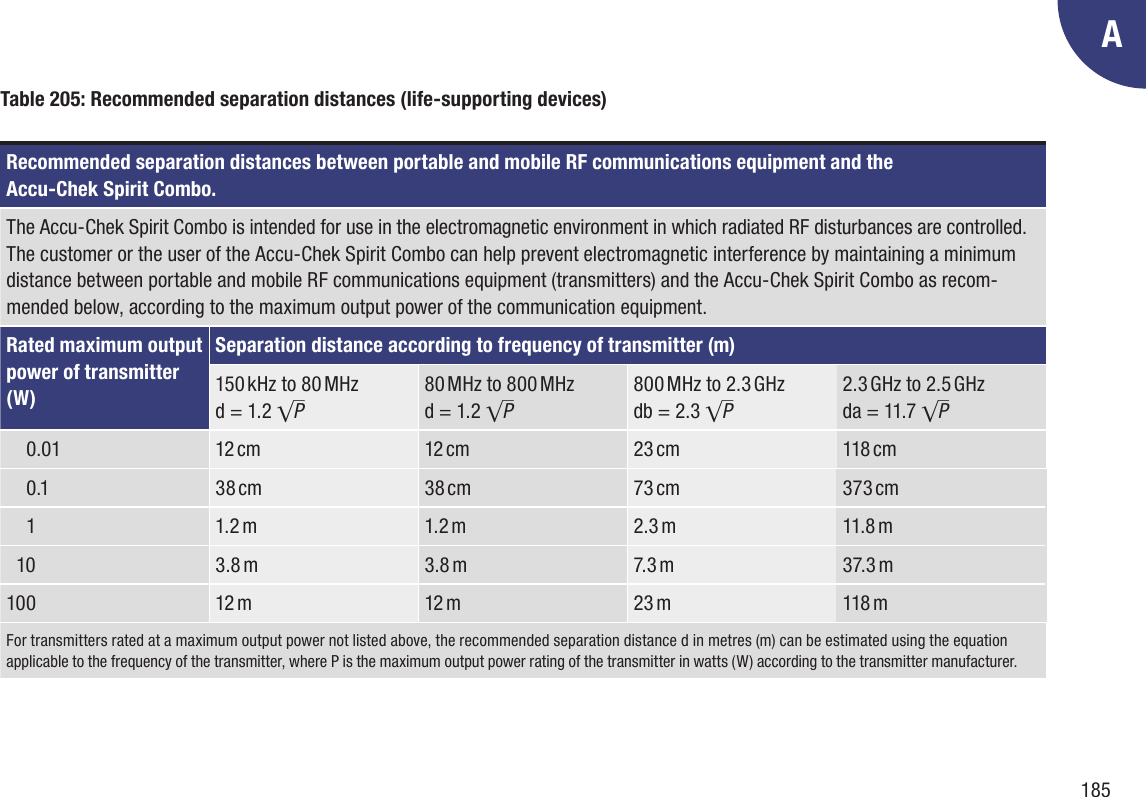
![179AGeneral Technical DataInfusion sets Accu-Chek infusion sets with a luer-lock connector.Accu-Chek Infusion sets are PCV and latex free.Data transfer Infrared interfaceSafety system Alert system, beeps, information on the display, vibrations, dual microprocessors. Your insulin pump is controlled by two microprocessors. The safety concept is based on one processor (supervisor processor) supervising the other (main processor). Whenever a defect or fault occurs in the main processor, it is identied by the supervisor processor. The motor is immediately switched off and an Error E7: ELECTRONIC ERROR occurs. Conversely, the main processor can also determine at any time whether the supervisor is working correctly. The motor also constitutes an important safety component, as the combination of the main and supervisor processor and brushless motor provides the best possible reliability and accuracy in insulin delivery. IPX8 Protected against the effects of temporary immersion in water under standardized condi-tions (up to 60 minutes and 2.5 meters [8 feet]).* See the instructions for use of the insulin you are using for information on the acceptable temperature range for storage and handling.** Determined using measurement methods according to IEC 60601-2-24-1998.](https://usermanual.wiki/Disetronic-Medical-Systems/3/User-Guide-1165229-Page-182.png)
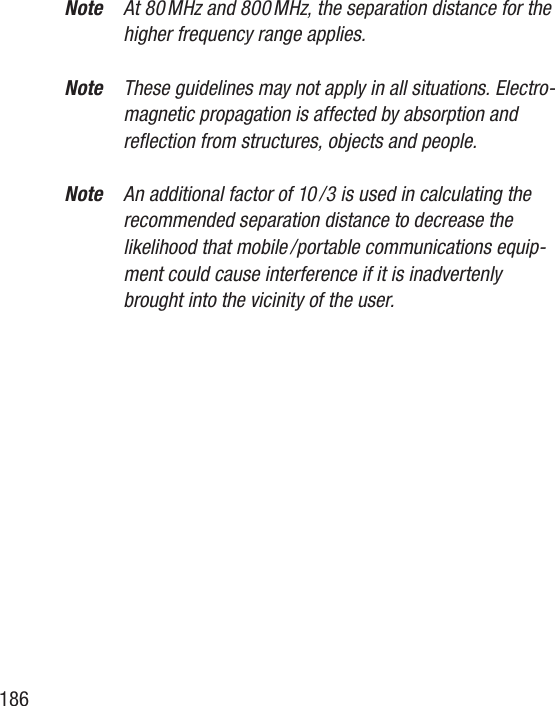


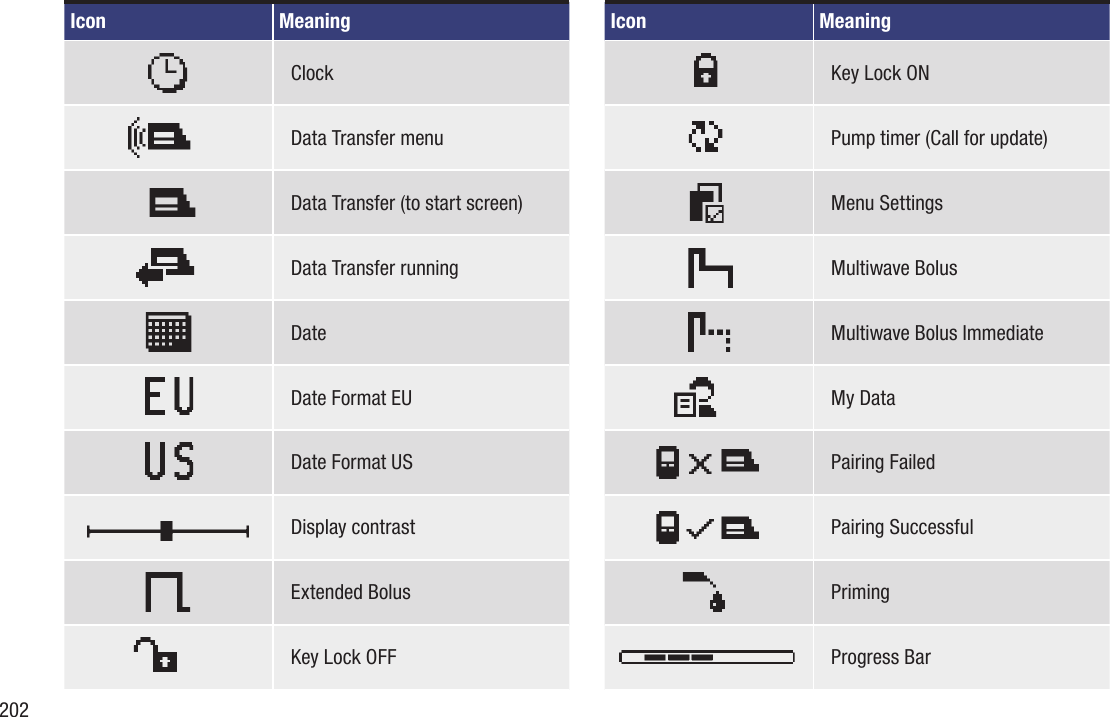
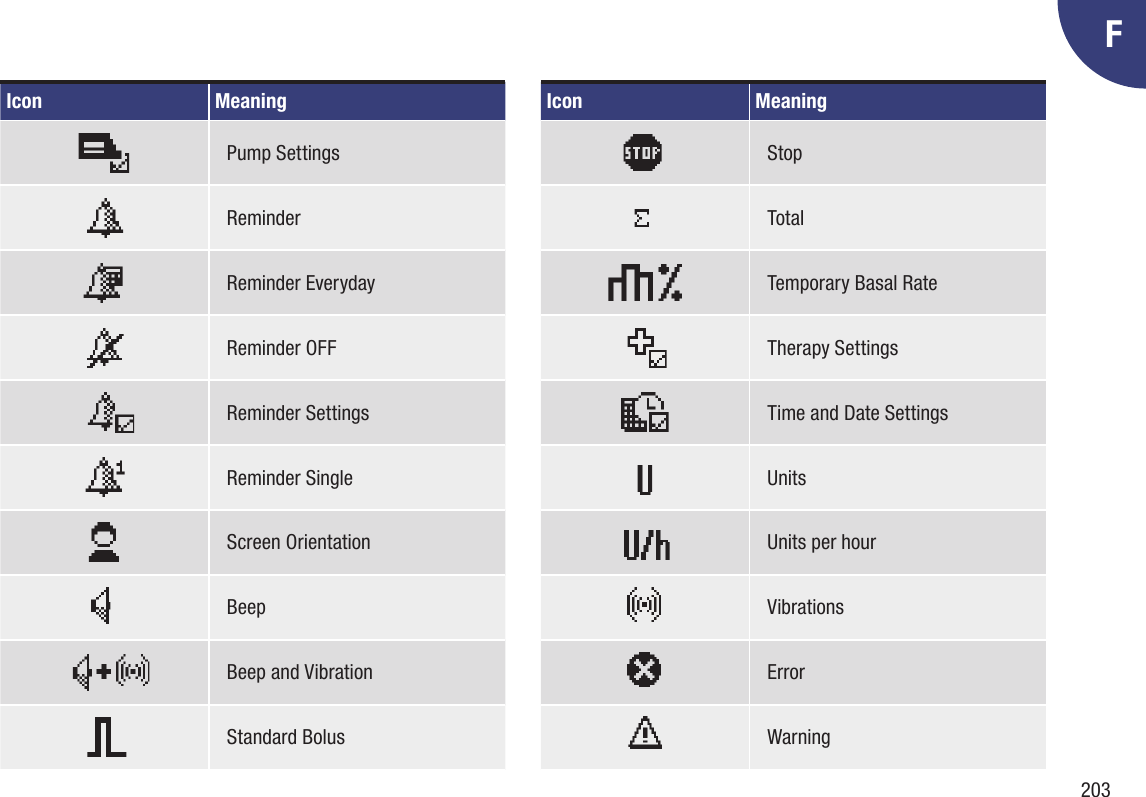
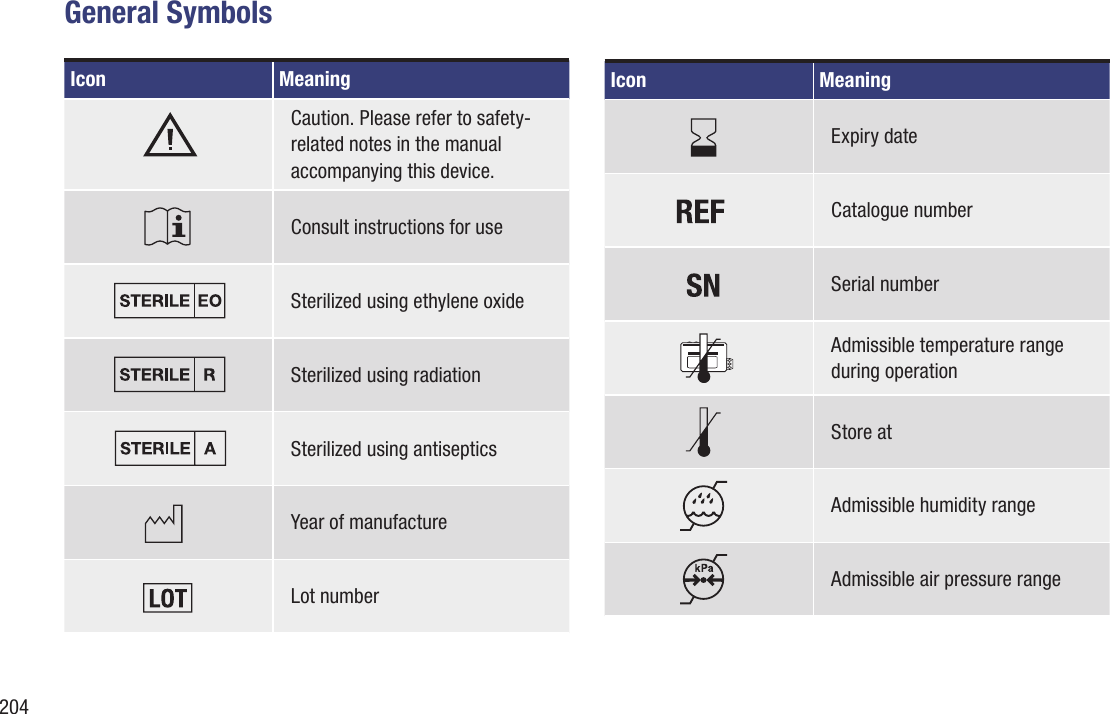
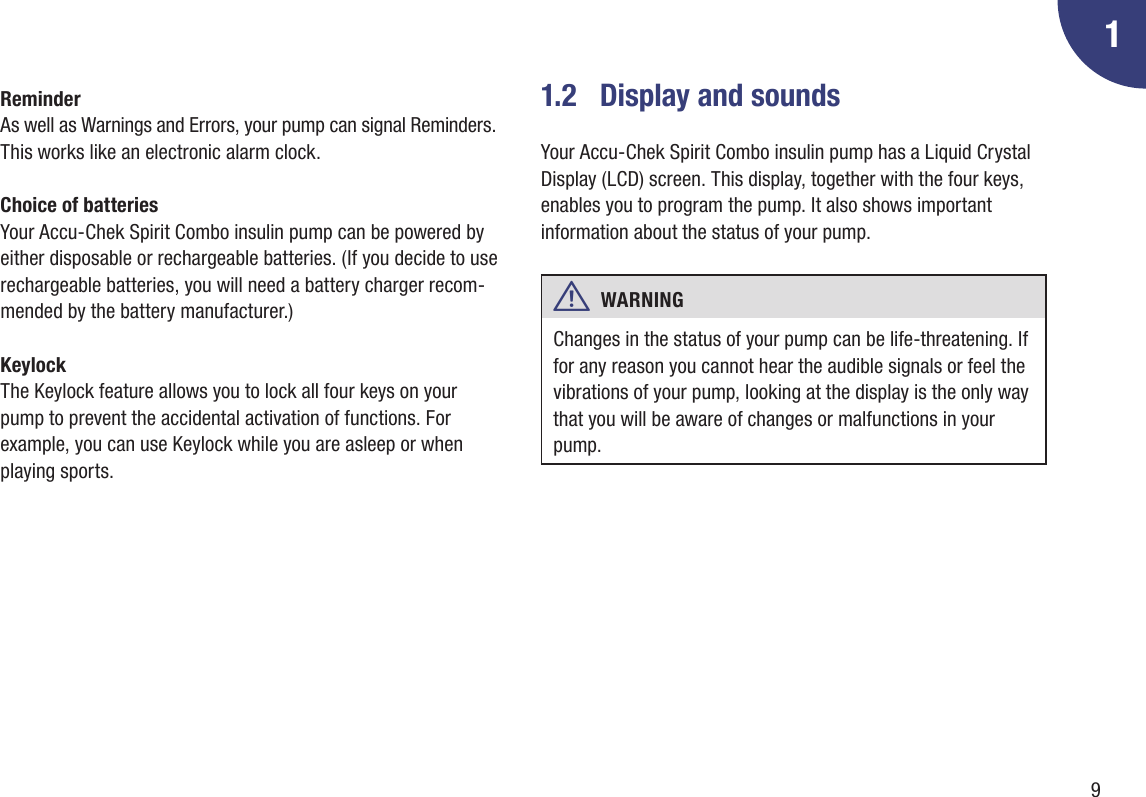
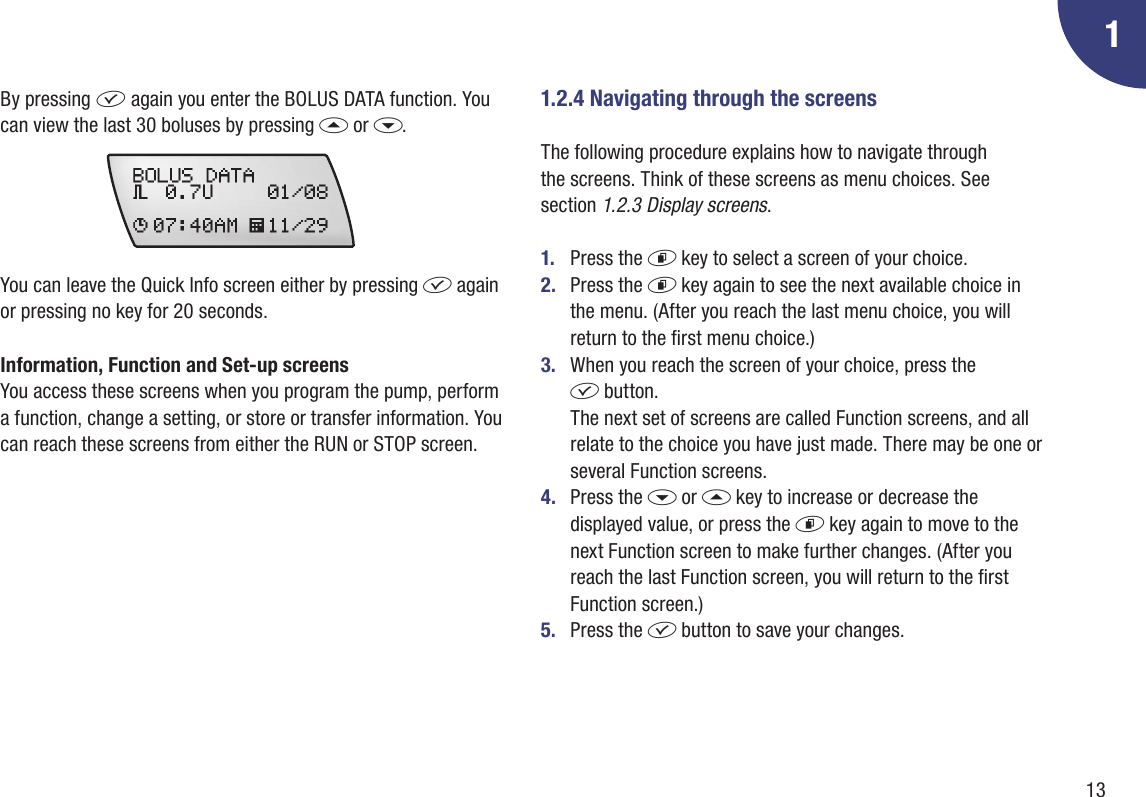
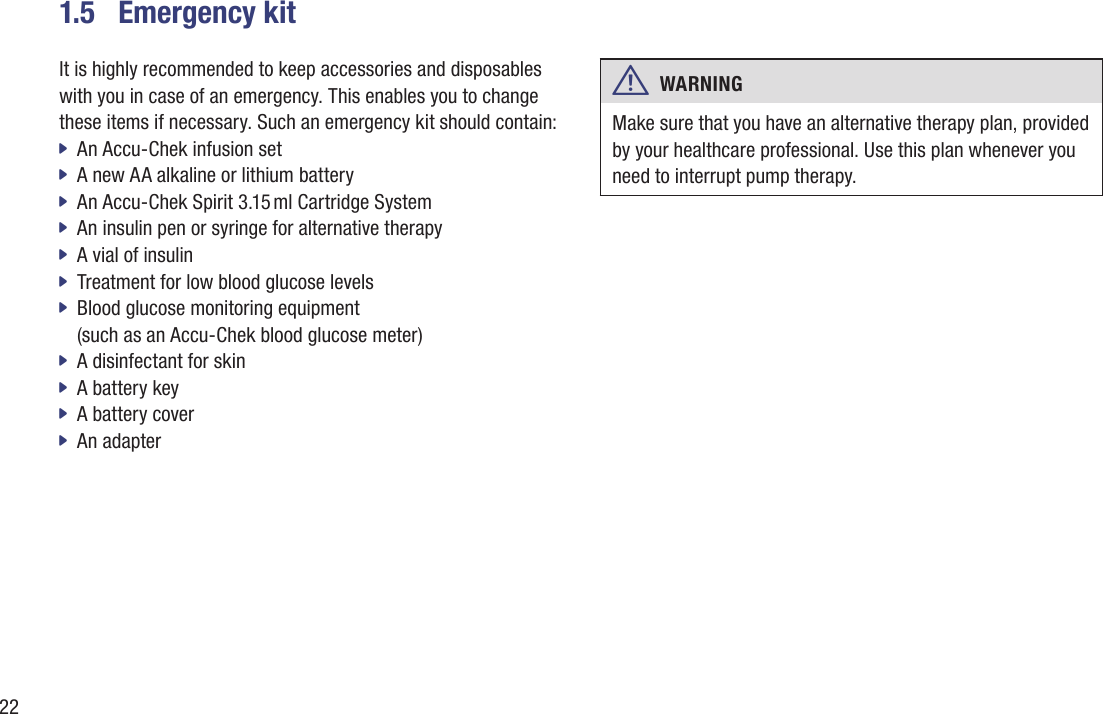
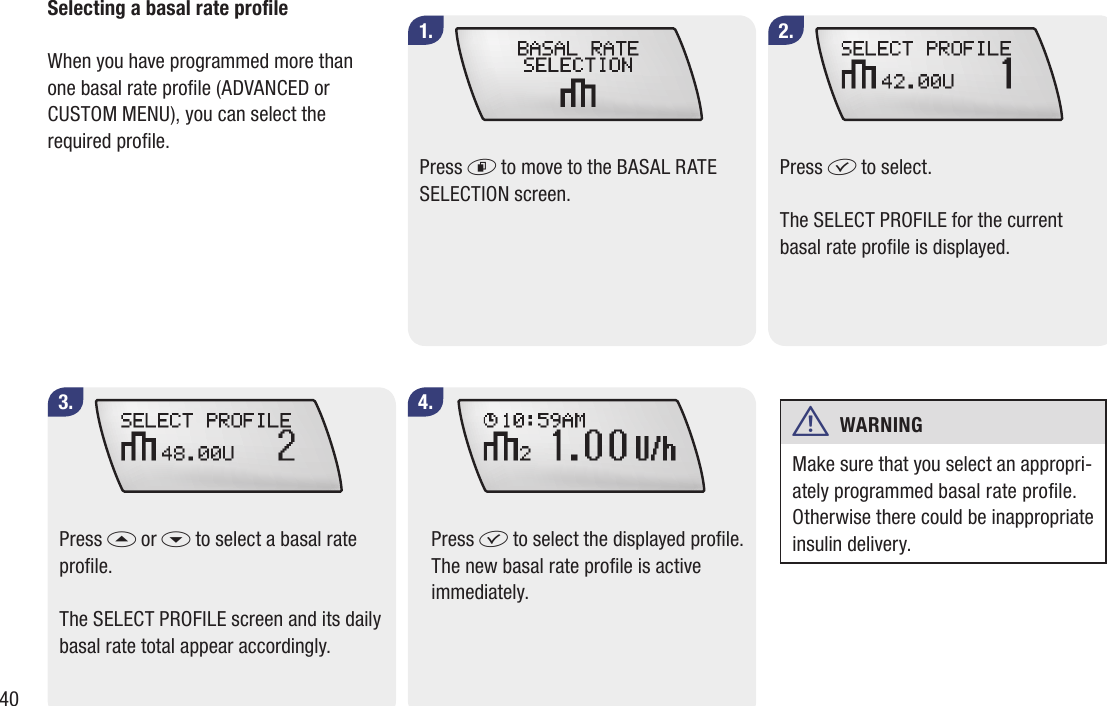
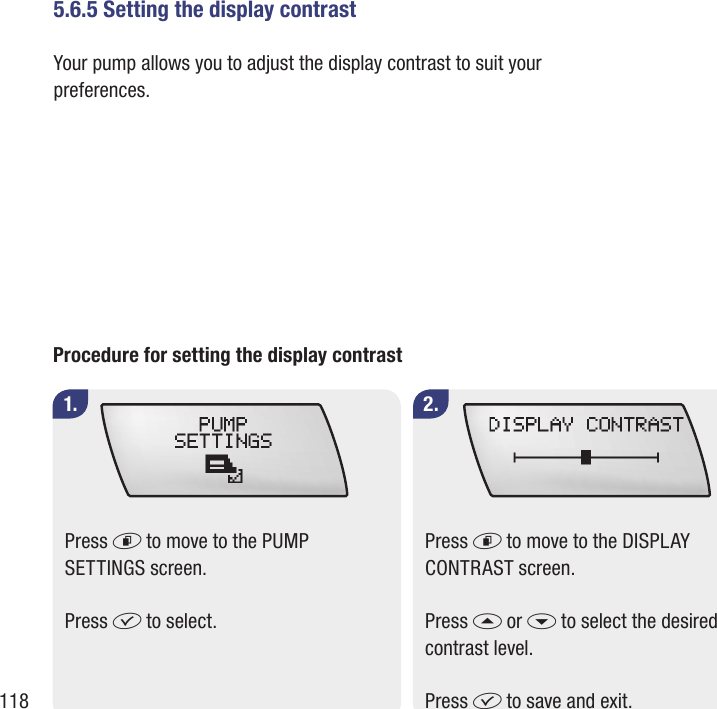
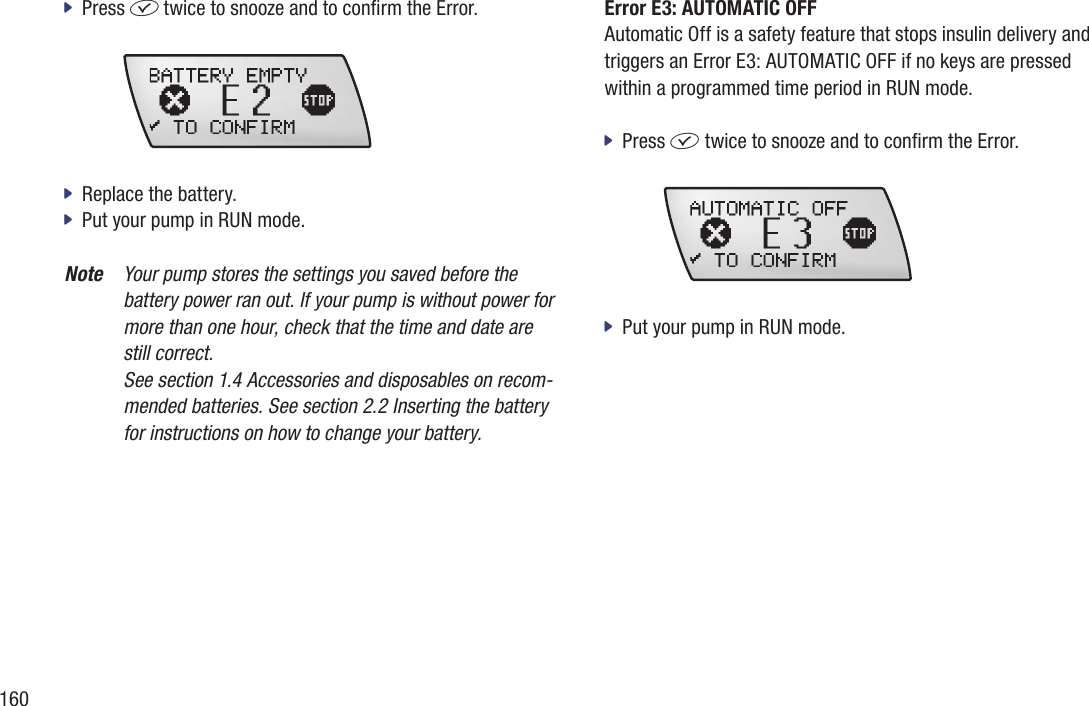
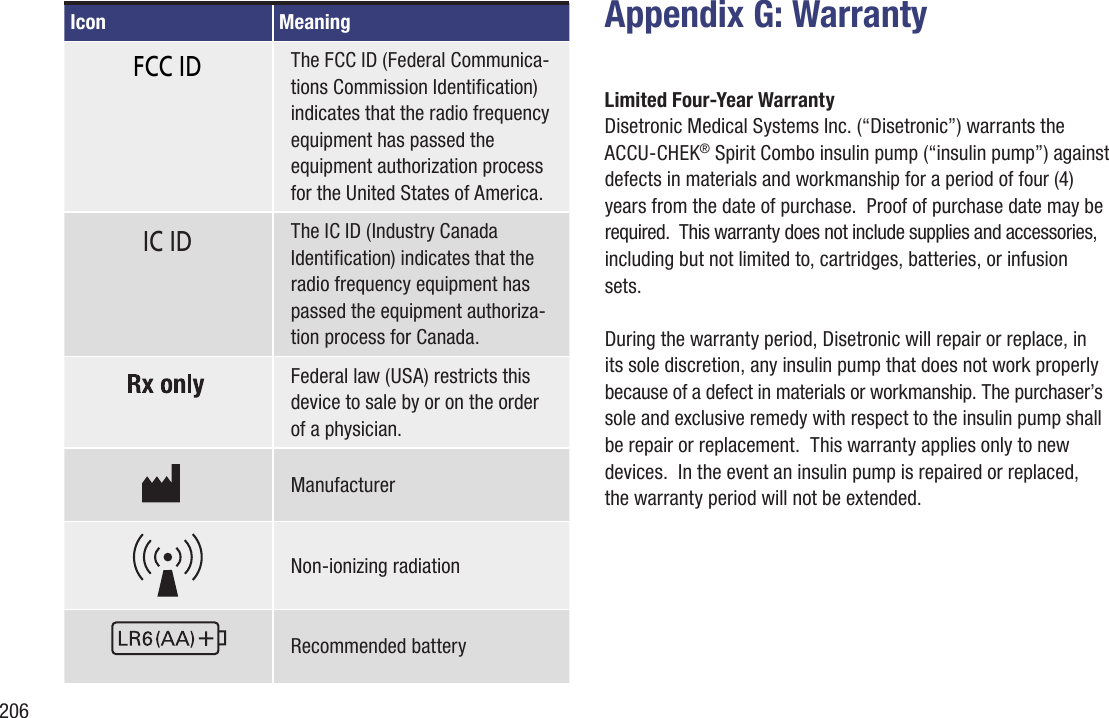
![205FIcon MeaningFragile – handle with careProtect against moistureProtect from heat and sunlightFor single use onlyDoes not contain pyrogenDoes not contain PVCRecyclingDo not throw awayIcon MeaningDo not use if the package is damagedFlammableBluetooth ® wireless technologyElectronic device of type BF according the standard IEC 60601-1. Protection against electrical shock.IPX8Symbol for protection against the effect of temporary immersion of water (up to 60 minutes and 2.5 meters [8 feet]), according to IEC 60529.Marking of conformity according to the European Medical Device Directive MDD 93 / 42 / EEC with the number of the notied body. Includes also RTTE DIRECTIVE 1999 / 5 / EC.](https://usermanual.wiki/Disetronic-Medical-Systems/3/User-Guide-1165229-Page-208.png)

![211 Infusion setInfusion sets connect your Accu-Chek Spirit Combo insulin pump to your body. The insulin is delivered from the cartridge through the infusion set tubing and cannula or needle into your subcutaneous tissue. Infusion sets can be disconnectable or non-disconnectable.Infusion siteThe place where the infusion set cannula or needle is inserted into your subcutaneous tissue to deliver insulin.InsulinA hormone that helps cells transform glucose into energy. Insulin is produced in the beta cells of the pancreas (also called islets of Langerhans).Insulin (rapid-acting)A type of insulin created using recombinant DNA technology. The onset time of insulin analogue is shorter than the onset time of regular insulin.IPX8 according to IEC 60529Protection against the effects of temporary immersion in water. Ingress of water in quantities causing damage is not possible when the device is temporarily immersed in water under standardized conditions (maximal 60 minutes a day and 2.5 meters [8 feet]).Luer-lock connectorA standardized tting at the end of the infusion set which allows to tightly connect the infusion set and cartridge through the adapter. MeterSee Accu-Chek Aviva Combo.OcclusionAn occlusion is a blockage which prevents the insulin from owing correctly from the insulin pump into the body.](https://usermanual.wiki/Disetronic-Medical-Systems/3/User-Guide-1165229-Page-214.png)