01225e Cwaug15 Highres
2016-10-12
: 01225E Cwaug15 Highres 01225e_cwaug15_highres dcp images 1161 p4dbimg
Open the PDF directly: View PDF ![]() .
.
Page Count: 68
®
Find Us
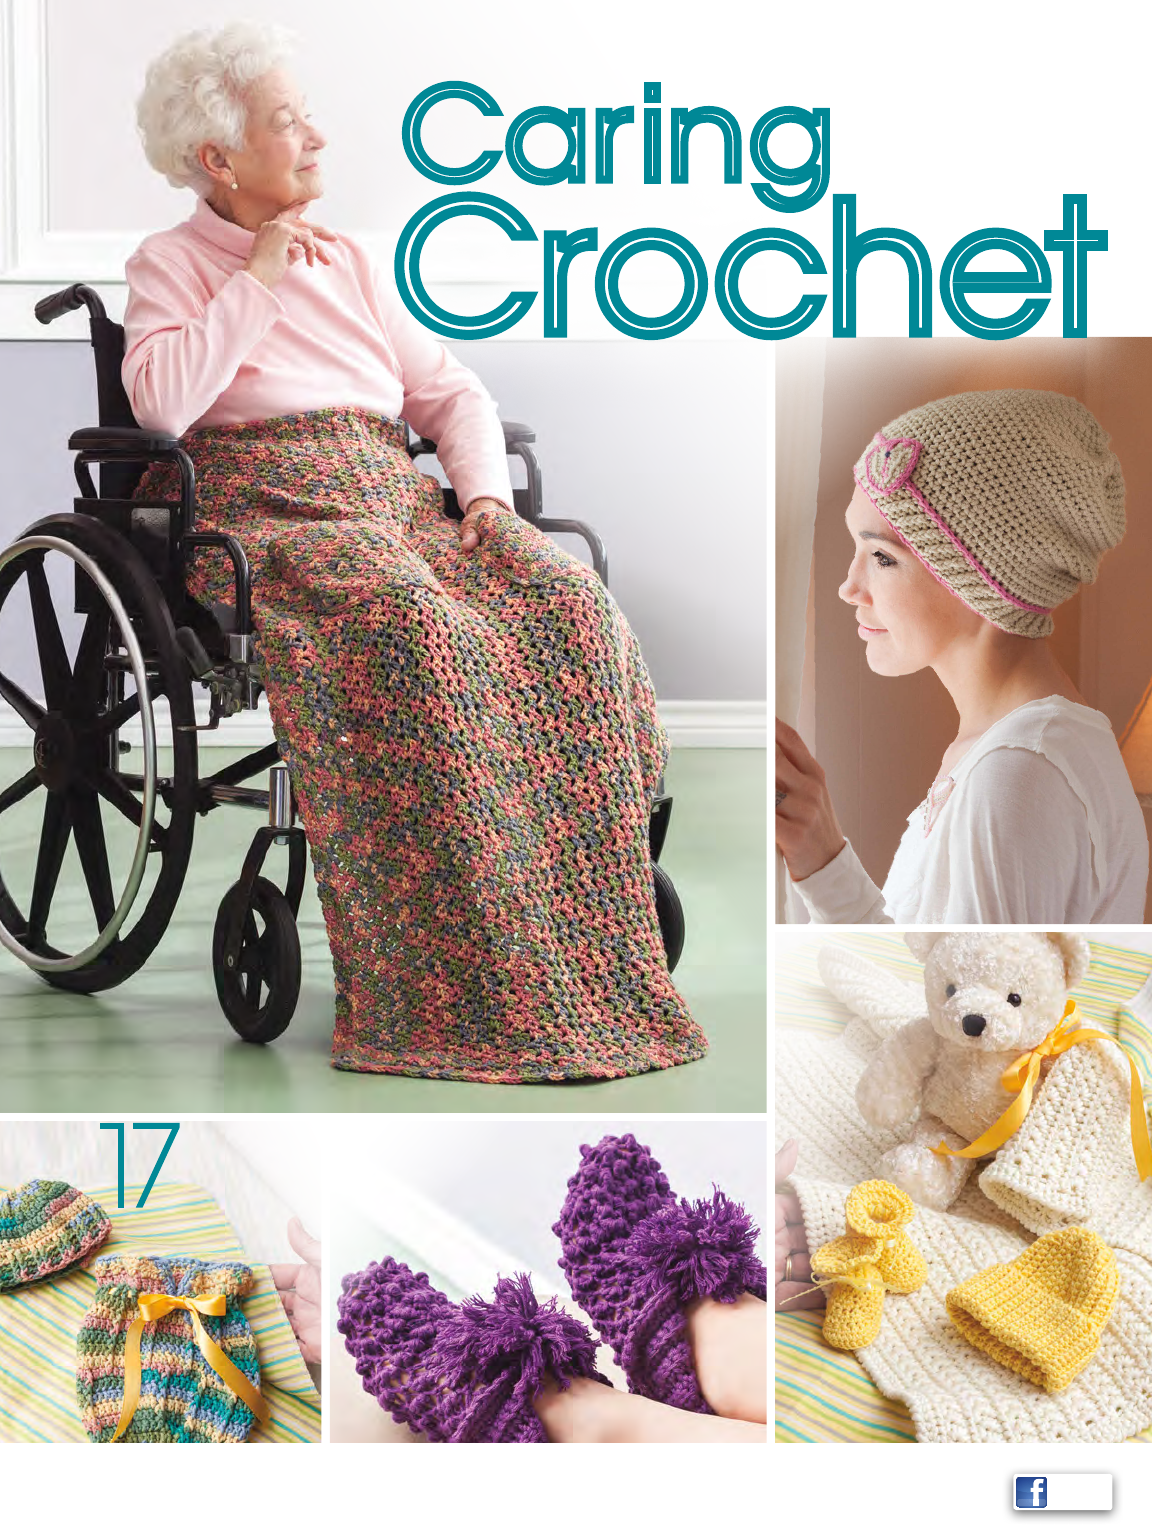
PROJECTS YOU’LL ABSOLUTELY LOVE TO STITCH!
Little Bits
Mug Rugs
page 32
25
Reinvent &
Recycle
The Magazine for Crochet Lovers AUGUST 2015
Celebrate
Friends
Thoughtful Gifts That
Show You Care
Turn Used Items Into New
Creations With Crochet!
C
rochet World

3 AUGUST 2015 CROCHETWORLD.COM Crochet World
REINVENT & RECYCLE
20 Crochet Accent Tee
Design by Amanda Saladin
22 Rag-ety Rug
Design by Jennifer Raymond
24 Denim Pocket
Place Mat
Design by Kenneth Cormier
26 Stow & Go Yarn Tote
Design by Debra Arch
CELEBRATE FRIENDS
28 Flower for a Friend
Necklace
Design by Catherine Ryan
30 Pretty Blossoms
Eyewear Case
Design by Kenneth Cormier
32 Little Bits Mug Rugs
Design by Kenneth Cormier
34 Glamour Girl Scarf
Design by Leshia Tweddle
FEATURES
38 At the Zoo, Part 2
Designs by Cindy Cseh
42 Following Mommy
Ladybug Blanket
Design by Tara Cousins
47 Step-by-Step Afghan
Design by Margret Willson
48 Cabin Retreat Throw
Design by Katherine Eng
50 Rippling Waters
Handbag
Design by Dorothy Warrell
52 Picots & Leaves
Shawlette
Design by Abbey Swanson
of the Firefly Hook
54 Trellis Lace Socks
Design by Rohn Strong
DEPARTMENTS
4 First Row
6 Winner’s Circle
Nyla the Indian Elephant
Design by Eve Leder
8 Just Threads
Colorful Catchalls
Designs by Agnes Russell
10 Scrap Delights
Button & Bead Earrings
Design by Lori Zeller
12 Heirloom Treasures
Teal Fantasy Doily
Design by Josie Rabier
14 Beginner’s Luck
Little Hugs Baby Blanket
Design by Dorothy Warrell
15 Fast, Easy, Fun!
Little Ladybug Booties
Design by Kristen Stoltzfus
16 Touch of Style
Cabled Elegance Cardigan
Design by Ann E. Smith
36 Back Talk!
61 Product Review
62 Yarn Weights
62 Buyer’s Guide
64 Skill Levels
64 Coming Next Issue
65 Stitch Guide
66 Design
Directory
AUGUST 2015 • Volume 38, No. 4
Find us on the Web at Crochet-World.com
®
FOR SUBSCRIPTION SERVICE, including change of address, visit online at Crochet-World.com (select
Customer Service). Or send an email to Customer_Service@Crochet-World.com. 24 hours a day, 7 days a
week. Or write to Crochet World Customer Service, P.O. Box 9001, Big Sandy, TX 75755. Please enclose your label
from a recent issue. Or call (800) 829-5865 Monday–Friday, 8 a.m.–7 p.m. CT, Saturday, 7 a.m.–5 p.m. CT and
Sunday, 9 a.m.–5 p.m. CT.
52
648
A NOTE TO OUR READERS: Due to
declining interest
, regretfully the
Crochet Connections column is being
discontinued beginning with this issue.
But please be assured that Crochet
World will contiue to include valuable
content that we know has wide appeal
for our readers.
4 Crochet World CROCHETWORLD.COM AUGUST 2015
The lifeblood of any magazine is made
up of top-notch contributors and dedicated
readers. Over the years, Crochet World has
published countless quality designs from
many talented and diverse crochet artists.
It’s what our loyal readers have come to
expect and grown to love about this award-
winning magazine that’s truly America’s
favorite crochet publication (check out our
latest award below!).
This issue is no exception when it comes
to creative designs with a little something for everyone. With so
much focus these days on recycling and reusing, we have several
great designs that let you take items you may already have on
hand and use them in a new way. Our Denim Pocket Place Mat
and Rag-ety Rug are perfect projects for recycling old jeans. A
large plastic container from the grocery store that once contained
cheese puffs can be reinvented into a cute yarn or storage tote.
And don’t get rid of that plain long-sleeve T-shirt that has lost
its charm. By adding lacy crochet inserts in the sleeves, you can
create a whole new look with longer wearability.
Aug. 2, 2015, is National Friendship Day, and our Celebrate
Friends section offers several gift ideas for remembering those
special people in our lives. Included are a set of cute mug rugs, a
pretty eyewear case, a glamorous scarf and a sweet oral necklace.
Thank you to all of the designers who have helped make
Crochet World the outstanding magazine it is, and to the readers
who have made Crochet World America’s favorite crochet magazine!
Happy stitching,
Newsstand buyers can access a digital version of this issue with
a limited-time code of CW5163.
Letters and submissions to the editor should be sent via email to Editor@Crochet-World.com
or through our website at Crochet-World.com. They can also be faxed to (260) 589-8093 or mailed
to Crochet World Editor, Annie’s, 306 East Parr Road, Berne, IN 46711. Letters chosen for publication
may be edited for clarity and space.
Every effort is made to return submissions if accompanied by return postage. Publisher assumes
no responsibility for return or safety of unsolicited materials.
C
rochet World
®
An Annie’s Publication
Crochet-World.com
EXECUTIVE EDITOR Carol Alexander
CREATIVE DIRECTOR Brad Snow
PUBLISHING SERVICES DIRECTOR Brenda Gallmeyer
MANAGING EDITOR Jackie Daugherty
EDITORIAL ASSISTANT Sara Meyer
GRAPHIC DESIGNER Joe Taylor
COPY MANAGER Corene Painter
SENIOR COPY EDITOR Emily Carter
COPY EDITOR Rebekah R. Blomenberg
TECHNICAL EDITORS Randy Cavaliere
Agnes Russell
TECHNICAL ARTISTS Amanda Joseph
Debera Kuntz
HOW TO CONTACT US
Internet: Crochet-World.com
Mail: Crochet World, P.O. Box 9001,
Big Sandy, TX 75755
Email: Customer_Service@Crochet-World.com
Telephone: (800) 829-5865
Include your full name, mailing address
and daytime phone number.
ADVERTISING
Advertising Sales Director: Michelle Thorpe
(260) 849-4508
email: Michelle_Thorpe@Annies-Publishing.com
Advertising Account Manager: Joan Lynch Luckett
(260) 849-4504
email: JoanLynch_Luckett@Annies-Publishing.com.
Responsibility for advertised products lies with the advertisers.
Crochet World will not knowingly publish fraudulent materials
and is not liable for any damages arising from the purchase
or use of any products. If you have any consumer complaints
concerning goods purchased from our advertisers, please
send us written notification to aid our screening process.
CROCHET WORLD (ISSN 0164-7962, USPS 511-570) is
published bimonthly by Annie’s, 306 East Parr Road,
Berne, IN 46711, (260) 849-4874. Periodicals postage
paid at Berne, Ind., and additional mailing offices.
POSTMASTER: Send change of address to Crochet
World, P.O. Box 9001, Big Sandy, TX 75755. Canada
Post International Publications Mail Product (Canadian
Distribution) Sales Agreement Number 40012306.
Printed in USA. GST Account Number 13541 4274
RT. Copyright © 2015 Annie’s. All rights reserved. This
publication may not be reproduced in part or in whole
without written permission from the publisher.
SUBSCRIPTIONS: $24.97 + $2.98 p/p per year in USA,
$24.97 + $9.98 p/p elsewhere, U.S. funds only.
To subscribe, see Crochet-World.com or write to
Crochet World, P.O. Box 9001, Big Sandy, TX 75755.
RETAIL STORES: If you are not presently being provided
copies of this magazine by your area newsstand
wholesaler, visit us at AnniesWSL.com.
FIRST ROW
PRODUCTION SPECIALIST Nicole Gage
PRODUCTION ARTISTS Dustin Garlinger
Debby Keel
PRODUCTION ASSISTANTS Laurie Lehman
Marj Morgan
Judy Neuenschwander
PHOTOGRAPHY SUPERVISOR Tammy Christian
PHOTOGRAPHER Matthew Owen
PHOTO STYLISTS Tammy Shupenia
Tammy Steiner
MAKEUP ARTIST/HAIR STYLIST Ellen Monce
CHIEF EXECUTIVE OFFICER David McKee
EXECUTIVE VICE PRESIDENT Michele Fortune
PUBLISHER Mike Klansek
MAGAZINE MARKETING DIRECTOR
Scott Moss
Crocheters Have Spoken!
Crochet World is the recipient of the 2014
Flamie Crochet Award for Best Crochet Maga-
zine. This award is voted on by a large online
community of crochet enthusiasts, and we
are honored to have been chosen as their
favorite magazine! For more information,
visit www.thecrochetawards.com.
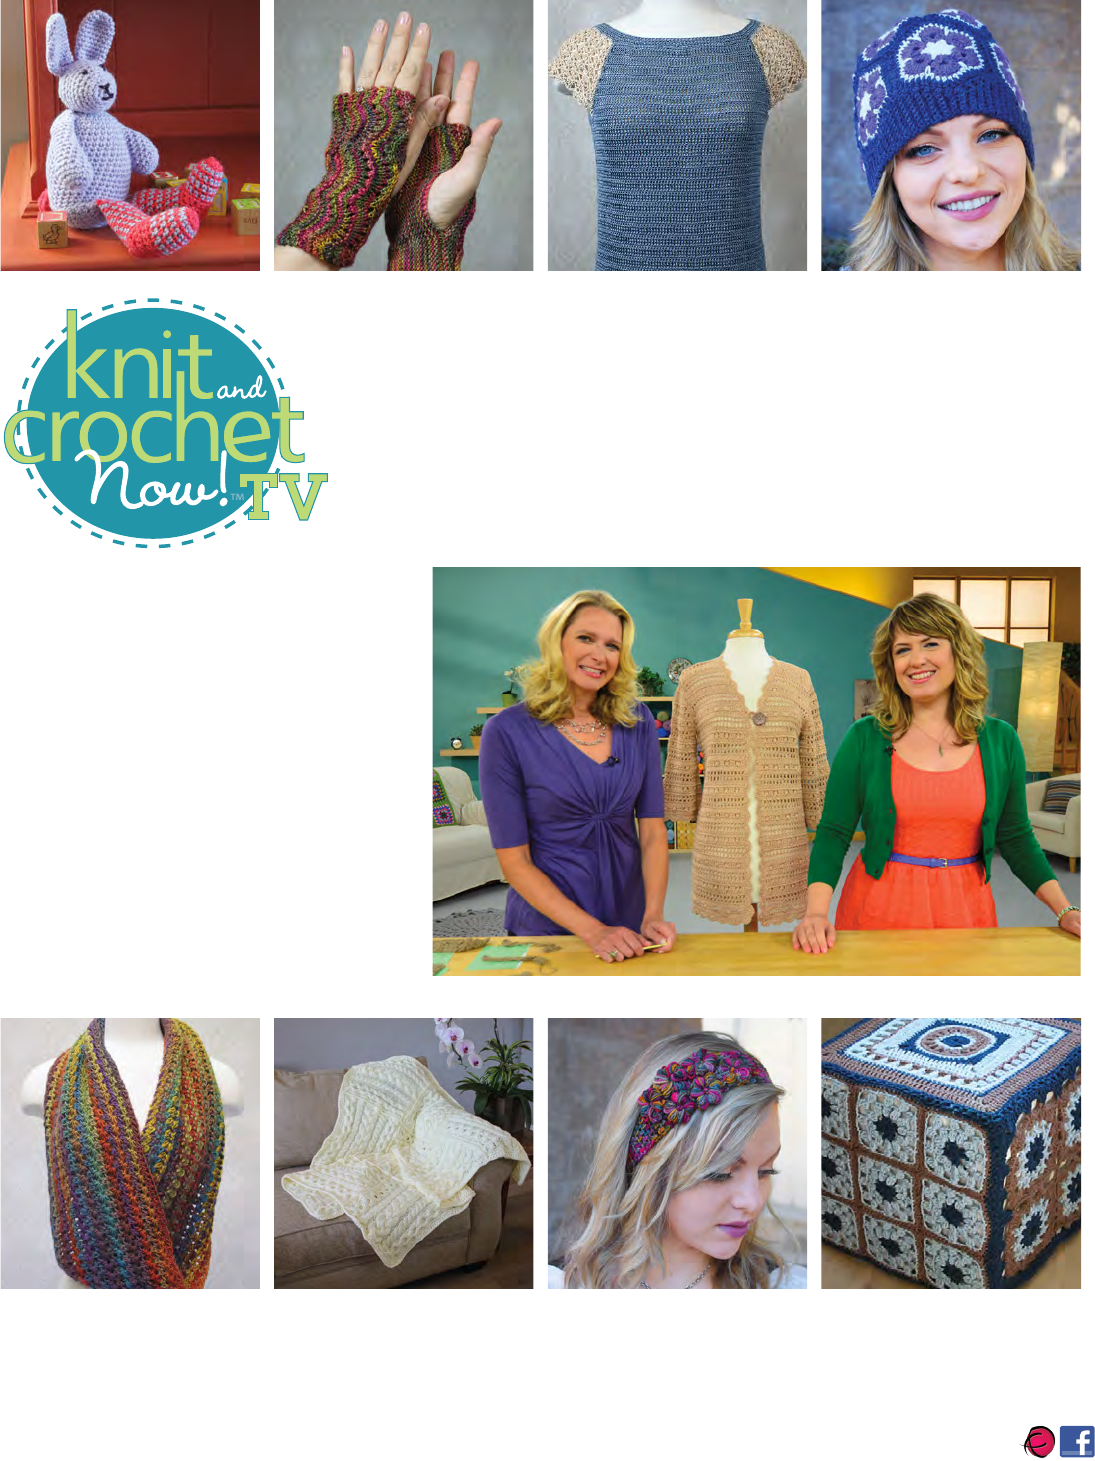
To nd
Knit and Crochet Now!
stations and times in your area, visit our website at
KnitandCrochetNow.com
An Annie’s Production
Find us on
Watch season 6, now airing
on your local PBS station!
Watch “how-tos” by the industry’s
top-rated designers.
Learn popular stitching and nishing
techniques (time-saving tips too).
Download the free patterns
demonstrated on the show.
Gain up-to-date expertise on today’s
colors, trends and styles!
Above all, relax and enjoy the show!
PRODUCTION SPECIALIST Nicole Gage
PRODUCTION ARTISTS Dustin Garlinger
Debby Keel
PRODUCTION ASSISTANTS Laurie Lehman
Marj Morgan
Judy Neuenschwander
PHOTOGRAPHY SUPERVISOR Tammy Christian
PHOTOGRAPHER Matthew Owen
PHOTO STYLISTS Tammy Shupenia
Tammy Steiner
MAKEUP ARTIST/HAIR STYLIST Ellen Monce
CHIEF EXECUTIVE OFFICER David McKee
EXECUTIVE VICE PRESIDENT Michele Fortune
PUBLISHER Mike Klansek
MAGAZINE MARKETING DIRECTOR
Scott Moss
6 Crochet World CROCHETWORLD.COM AUGUST 2015
PATTERN NOTES
Weave in loose ends as work
progresses.
FINISHED MEASUREMENTS
5½ inches tall x 7 inches long,
excluding trunk
MATERIALS
• Lion Brand Yarn Jiffy
bulky (chunky) weight
acrylic yarn (3 oz/
135 yds/85g per ball):
1 ball #155 silver heather
• Size H/8/5mm crochet hook or
size needed to obtain gauge
• Tapestry needle
• Embroidery needle
• Lion Brand Yarn split ring
stitch markers
• Darice 9mm black solid eyes with
plastic washers: 2
• Fiberfill
• Steam-A-Seam 2 double-stick
fusible web
• National Nonwovens WoolFelt:
TOY002 #0593 wisteria,
WCF001 #0504 blue snow,
WCF001 #0409 buttercup,
WCF001#0729 pea soup and
WCF001 #0420 old gold
• DMC embroidery floss (9 yds
per skein):
#917 medium plum, #704
bright chartreuse, #472 ultra-
light avocado green, #3078
very light golden yellow and
#3852 very dark straw
• Iron
• Fabric glue
• Scissors
• ¼-inch hole punch
GAUGE
7 sc = 2 inches; 5 sc rows =
1½ inches
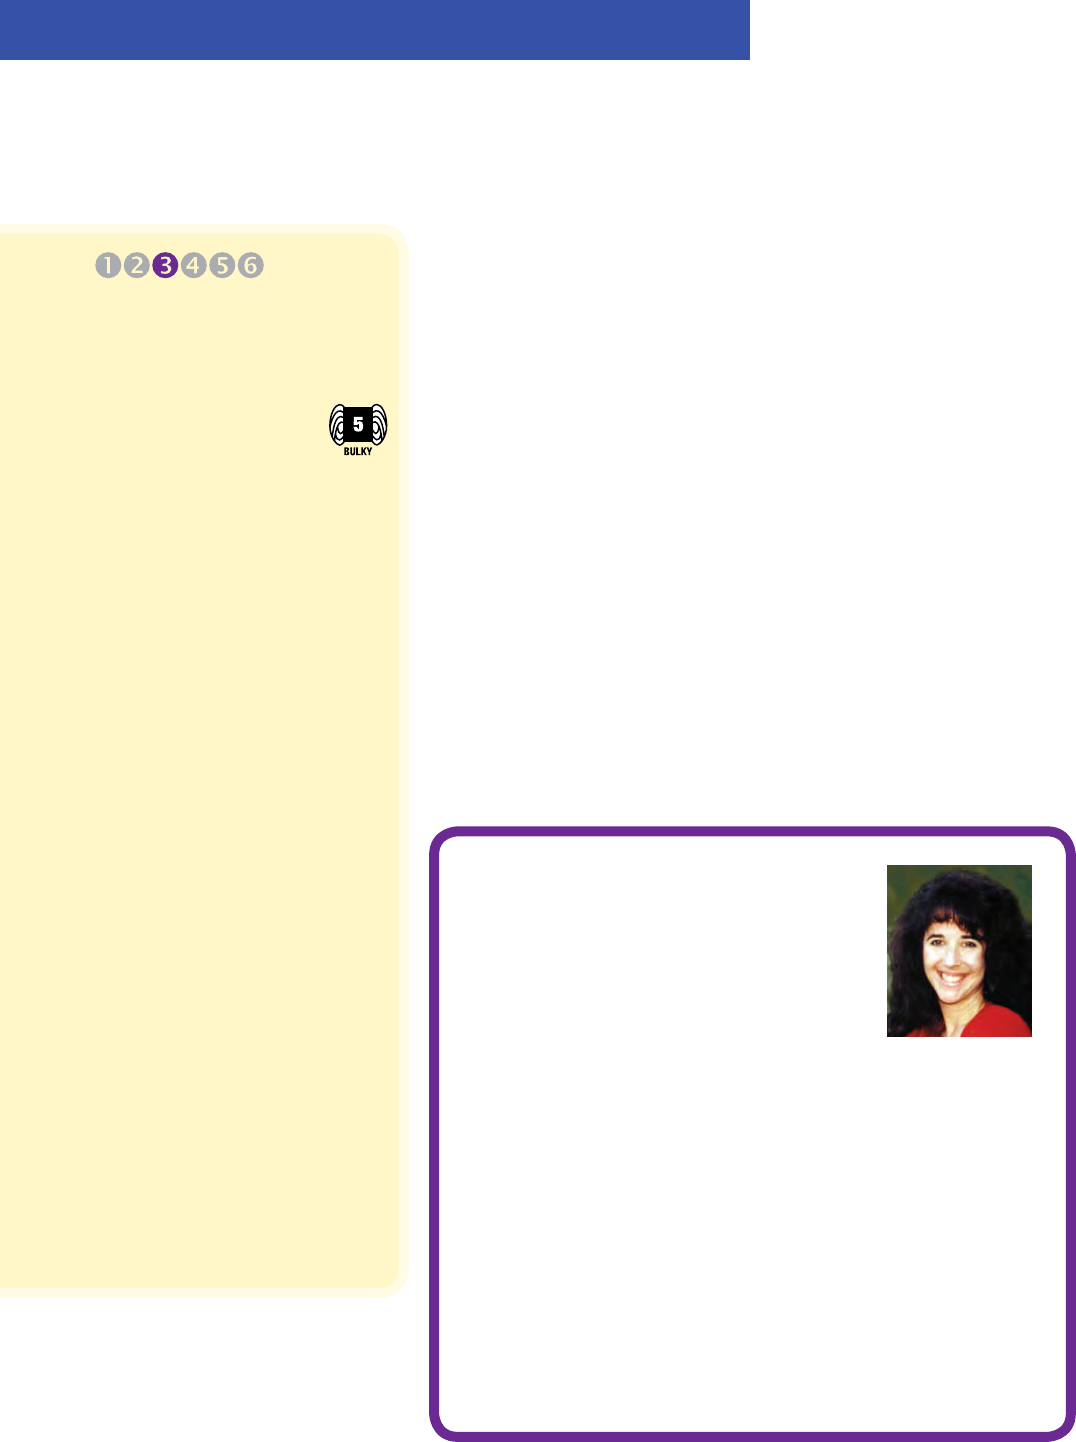
WINNER’S CIRCLE
Nyla the Indian Elephant
Design by Eve Leder
EASY
Meet the Winner
Eve Leder
I cannot remember a time when I was not
interested in some sort of artistic expression. I am
self-taught and love beading, crochet, decorative
painting, decoupage, jewelry making, knitting,
paper crafts, polymer clay and sewing!
I got hooked on crochet when I started crocheting afghans. Busy
crafters understand how hard it can be to carve out large blocks of
time to work on and to nish a project, so crocheting afghans one
square at a time was the solution. Each square is like a mini project
that can be nished in a spare moment.
The creation of Nyla the Indian Elephant for the Winner’s Circle
was the result of a trip to a Japanese bookstore with my friend. I
discovered amigurumi, the Japanese art of making small stued
animals and anthropomorphic creatures.
My work has appeared in Bead Design Studio, Bead Unique,
BeadWork, Crafts ’n Things, Craft Ideas, Create & Decorate,
Crochet World, Just Cards!, PolymerCAFE, Quick & Easy Painting,
RubberStampMadness, Scrap & Stamp Arts, Soft Dolls & Animals and
Stitch. If you are interested in seeing more of my work, please visit my
blog at www.craftdesignerforhire.blogspot.com.
Do not join rounds. Use stitch
marker to mark rounds as
work progresses unless other-
wise stated.
Join with slip stitch as indicated
unless otherwise stated.
ELEPHANT
HEAD
Rnd 1: Ch 2, 6 sc in 2nd ch from
hook, place stitch marker (see
Pattern Notes). (6 sc)
Rnd 2: 2 sc in each sc around.
(12 sc)
Rnd 3: [Sc in next sc, 2 sc in
next sc] around. (18 sc)
Rnd 4: [Sc in each of next 2 sc,
2 sc in next sc] around. (24 sc)
Rnd 5: [Sc in each of next 3 sc,
2 sc in next sc] around. (30 sc)
Rnd 6: Sc in each sc around.
Rnds 7 & 8: Rep rnd 6.
Rnd 9: [Sc in each of next 3 sc,
sc dec (see Stitch Guide) in next
2 sc] around. (24 sc)
Rnd 10: Rep rnd 6.
Rnd 11: [Sc in each of next
2 sc, sc dec in next 2 sc] around.
(18 sc)
Rnd 12: Rep rnd 6.
Rnd 13: [Sc in next sc, sc dec in
next 2 sc] around. (12 sc)
Rnd 14: Rep rnd 6.
Insert eyes in rnd 11 with
1½ inch sp between eyes and
stuff Head with fiberfill.
Rnd 15: [Sc dec in next 2 sc]
around. (6 sc)
Rnd 16: Rep rnd 6.
Trunk
Rnd 17: Sc dec in next 2 sc, sc
in next sc, 2 sc in next sc, sc in
each of next 2 sc. (6 sc)
7 AUGUST 2015 CROCHETWORLD.COM Crochet World
Rnd 18: Rep rnd 6.
With 6 strands medium plum,
embroider mouth with back-
stitch (see illustration) over
rnd 14.
Rnd 19: Sc dec in next 2 sc, sc
in each of next 2 sc, 2 sc in next
sc, sc in next sc. (6 sc)
Rnds 20 & 21: Rep rnd 6.
Rnd 22: Sc dec in next 2 sc, sc
in each of next 4 sc, leaving a
6-inch length of yarn, fasten
off. (5 sc)
Stuff Trunk lightly with fiber-
fill, sew opening closed.
EAR
Make 2.
Row 1: Now working in rows,
ch 4, sc in 2nd ch from hook,
sc in each rem ch across,
turn. (3 sc)
Row 2: Ch 1, 2 sc in first sc,
sc in next sc, 2 sc in next sc,
turn. (5 sc)
Continued on page 56
Her name means “winner” in the
Indian culture, and it couldn’t be
more appropriate for this adorable
Winner’s Circle design!
Backstitch
2
31
PATTERN NOTES
Weave in loose ends as work
progresses.
It’s not necessary to use colors
in the materials list. Feel free to
use your scraps, but make sure
to work with 10 strands held
together.
Join with slip stitch as indicated
unless otherwise stated.
SPECIAL STITCH
Shell: 5 dc in indicated st or sp.
BASKET
LARGE BASKET
Rnd 1 (RS): Holding 10 strands
of cotton tog, ch 5, join (see
Pattern Notes) to form a ring,
ch 1, 12 sc in ring, join in beg sc,
turn. (12 sc)
Rnd 2 (WS): Ch 1, sc in same sc
as beg ch-1, 2 sc in next sc, [sc in
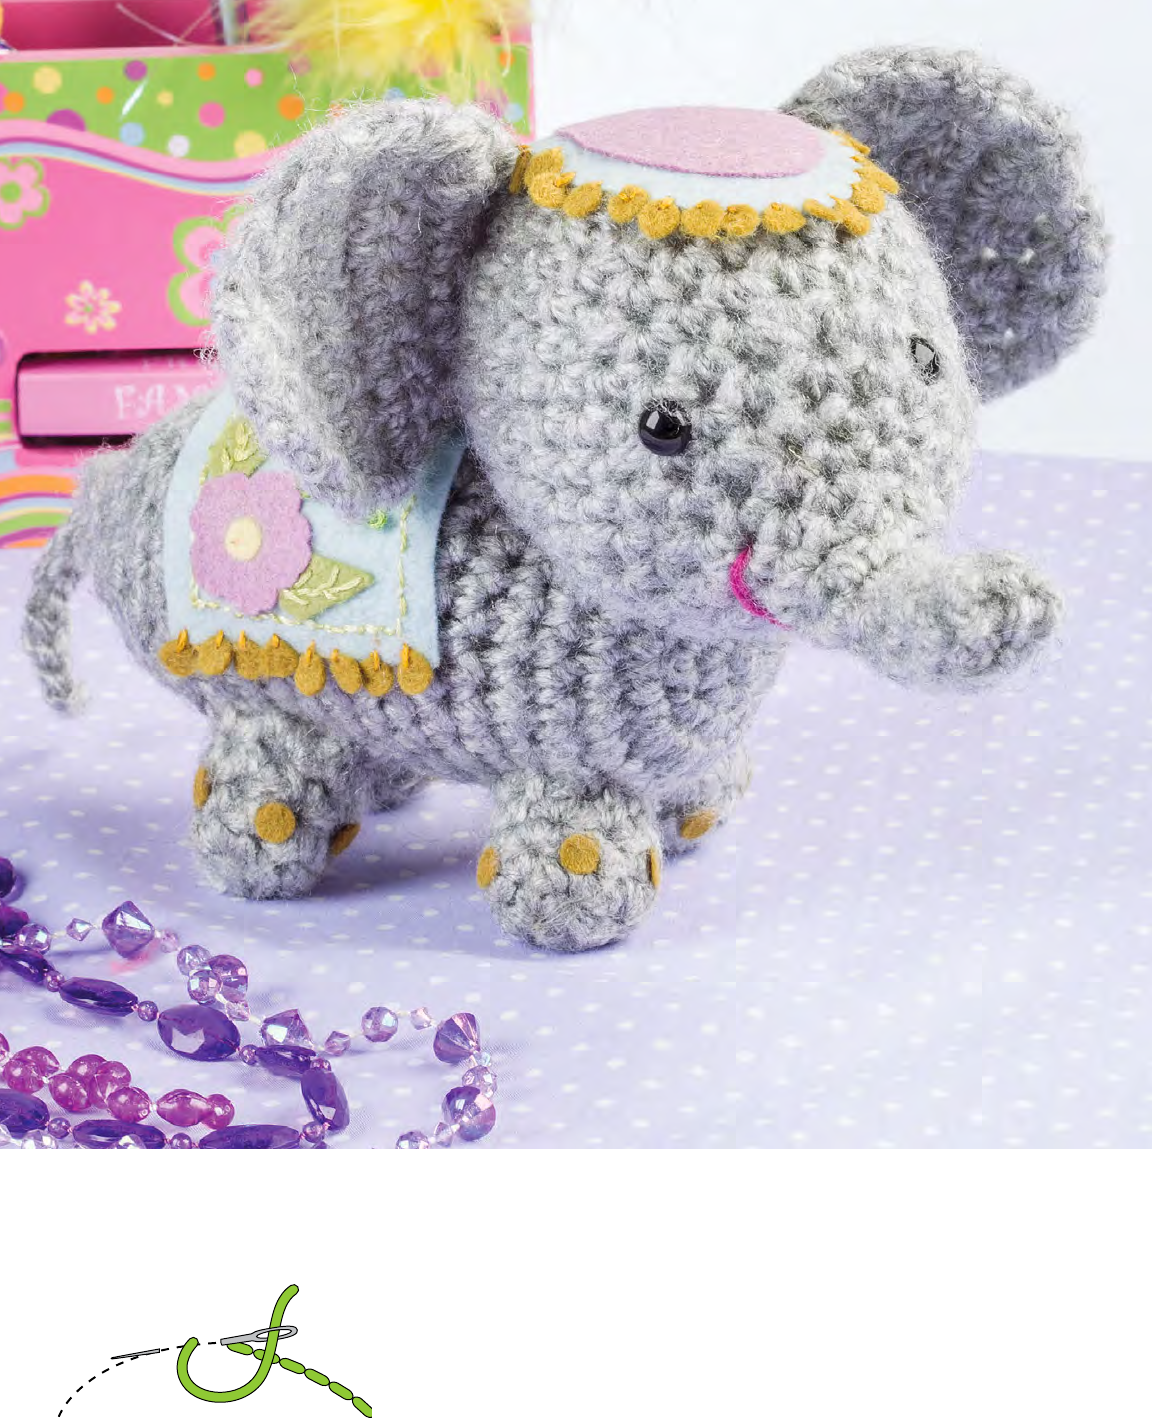
FINISHED MEASUREMENTS
Large Basket: 6½ inches square x
4½ inches tall
Medium Basket: 5¼ inches square
x 4 inches tall
Small Basket: 4½ inches square x
3 inches tall
MATERIALS
• Aunt Lydia’s Classic Cro-
chet size 10 crochet cot-
ton (natural: 400 yds per
ball; solids: 350 yds per ball):
4 balls #12 black
2 balls each #423 maize,
#428 mint green, #431
pumpkin, #494 victory
red, #495 wood violet
and #805 blue Hawaii
1 ball #226 natural
• Size I/9/5.5mm crochet hook or
size needed to obtain gauge
• Tapestry needle
GAUGE
4 sc = 1½ inches; 6 sc rnds = 2 inches
Colorful Catchalls
Designs by Agnes Russell
JUST THREADS
BEGINNER
These quick-to-stitch clutter-busters will put leftover
size 10 thread to practical use and provide handy
ways to store small items.
Pantone uncoated (below)
Logo over stacked tagline
Logo next to stacked tagline
Logo alone
Minimum allowed sizes
Pantone uncoated (below)
Pantone uncoated (below) 4 color process (below)
Black (below) White (below)
Annie’s Logo Purple:
Pantone: 268C, GOE Medium Purple U
CMYK: C82, M100, K12
RGB: R82, G43, B133
Hexadecimal: 522b85
Annie’s Logo Gray:
Pantone: Cool Gray 9 U
CMYK: 60K
RGB: R130, G131, B134
Hexadecimal: 828386
Color specications:
Note: Symbols such as ®, ©, and ™ are never to appear as less than 5 pt. in size. If, in the event
of reducing art to t a space the symbol appears too small, that symbol must be reset to the
minimum 5 pt. type size.
A art, pantone uncoated (below)
Pantone uncoated (below)
Annie’s ocial logo, created 8/12, revised 7/13
(You must be familiar with the DRG corporate logo
standards before any usage attempt.)
4 color process (below)
Black (below)
White (below)
4 color process (below)
Black (below)
White (below)
4 color process (below)
Black (below)
White (below)
Buy this
YARN NOW!
AnniesYarnShop.com

9 AUGUST 2015 CROCHETWORLD.COM Crochet World
How to Contact Us
For assistance concerning your
subscription or any other questions,
our Customer Service representatives
are ready to assist you by whichever
means are most convenient for you.
For online subscription assistance, go to
Crochet-World.com
Select Customer Service to:
• Subscribe
• Renew your subscription
• Pay your bill
• Check your account status
(expiration and latest payment)
• Change your address or email address
• Report a duplicate issue
• Report a missing or damaged issue
Mail subscription questions to:
Crochet World magazine
P.O. Box 9001
Big Sandy, TX 75755
Email:
Customer_Service@Crochet-World.com
Call us Monday–Friday, 8 a.m.–
7 p.m. CT, Saturday, 7 a.m.–5 p.m.
CT and Sunday, 9 a.m.–5 p.m. CT.
Please have your address label, renewal
or billing invoice handy.
(800) 829-5865
For Pattern Services:
Revisions: Crochet-World.com
Write: Crochet Pattern Services
306 East Parr Road, Berne, IN 46711
Email: Editor@Crochet-World.com
Call: (260) 849-4874, weekdays
The Crochet World guarantee:
If, for any reason, you’re not completely
satisfied with Crochet World magazine,
you can cancel your subscription and
receive a full and immediate refund of
the entire subscription price. No
questions asked.
Mailing Lists:
From time to time we make our
subscriber list available to companies
that sell goods and services by mail that
we believe would interest our readers.
If you would rather not receive such
mailings, please send your current
mailing label or an exact copy to Crochet
World, Mail Preference Service, P.O. Box
9001, Big Sandy, TX 75755.
If the post oce alerts us that your
magazine is undeliverable, we have no
further obligation unless we receive a
corrected address within two years.
next sc, 2 sc in next sc] 5 times,
join in beg sc, turn. (18 sc)
Rnd 3: Ch 1, sc in same sc as
beg ch-1, sc in next sc, 2 sc in
next sc, [sc in each of next 2 sc,
2 sc in next sc] 5 times, join in
beg sc, turn. (24 sc)
Rnd 4: Ch 1, sc in same sc as
beg ch-1, sc in each of next 2 sc,
2 sc in next sc, [sc in each of next
3 sc, 2 sc in next sc] 5 times, join
in beg sc, turn. (30 sc)
Rnd 5: Ch 1, sc in same sc as
beg ch-1, sc in each of next 3 sc,
2 sc in next sc, [sc in each of next
4 sc, 2 sc in next sc] 5 times, join
in beg sc, turn. (36 sc)
Rnd 6: Ch 1, sc in same sc as
beg ch-1, sc in each of next 3 sc,
[(sc, ch 2, sc) in next sc for cor-
ner, sc in each of next 8 sc]
3 times, (sc, ch 2, sc) in next sc
for corner, sc in each of next
4 sc, join in beg sc, turn. (40 sc,
4 ch-2 sps)
Rnd 7: Ch 1, sc in each sc
around, working (sc, ch 2, sc) in
each corner ch-2 sp, join in beg
sc, turn. (48 sc, 4 corner ch-2 sps)
Rnd 8: Rep rnd 7. (56 sc, 4
ch-2 sps)
Rnd 9 (RS): Ch 1, sc in each
sc around, working 3 sc in each
corner ch-2 sp, join in beg sc, do
not turn. (68 sc)
Rnd 10 (RS): Ch 1, bpsc (see
Stitch Guide) around each sc
around, join in beg sc, turn.
Rnd 11: Ch 1, sc in each sc
around, join in beg sc, turn.
Rnds 12–26: Rep rnd 11.
Rnd 27 (WS): Ch 1, sc in each
sc around, join in beg sc, do
not turn.
Rnd 28 (WS): Ch 1, sc in same
sc as beg ch-1, sk next sc, shell
(see Special Stitch) in next sc,
sk next sc, [sc in next sc, sk next
sc, shell in next sc, sk next sc]
around, join in beg sc. Fasten off.
(17 shells)
To form cuff, fold rnds 25–28
down on Basket or as desired.
MEDIUM BASKET
Rnds 1–3: Rep rnds 1–3 of
Large Basket. (24 sc)
Rnd 4: Ch 1, sc in same sc as
beg ch-1, sc in next sc, [(sc, ch
2, sc) in next sc for corner, sc in
each of next 5 sc] 3 times, (sc,
ch 2, sc) in next sc for corner, sc
in each of next 3 sc, join in beg
sc, turn. (28 sc, 4 ch-2 sps)
Rnd 5: Ch 1, sc in same sc as
beg ch-1, sc in each of next 3 sc,
[(sc, ch 2, sc) in next corner
ch-2 sp, sc in each of next 7 sc]
3 times, (sc, ch 2, sc) in next
corner ch-2 sp, sc in each of next
3 sc, join in beg sc, turn. (36 sc,
4 ch-2 sps)
Rnd 6: Ch 1, sc in same sc as
beg ch-1, sc in each of next 3 sc,
[(sc, ch 2, sc) in next corner
ch-2 sp, sc in each of next 9 sc]
3 times, (sc, ch 2, sc) in next cor-
ner ch-2 sp, sc in each of next
5 sc, join in beg sc, turn. (44 sc,
4 ch-2 sps)
Rnd 7 (RS): Ch 1, sc in each
sc around, working 3 sc in each
corner ch-2 sp, join in beg sc,
do not turn. (56 sc)
Rnd 8 (RS): Ch 1, bpsc (see
Stitch Guide) around each sc
around, join in beg sc, turn.
Rnd 9: Ch 1, sc in each sc
around, join in beg sc, turn.
Rnds 10–21: Rep rnd 9.
Rnd 22 (RS): Ch 1, sc in each
sc around, join in beg sc, do
not turn.
Rnd 23 (RS): Ch 1, sc in same
sc as beg ch-1, sk next sc, shell
in next sc, sk next sc, [sc in next
sc, sk next sc, shell in next sc, sk
next sc] around, join in beg sc.
Fasten off. (14 shells)
To form cuff, fold rnds 21–23
down on Basket or as desired.
Continued on page 57
PATTERN NOTES
Weave in loose ends as work
progresses.
A dab of white glue smoothed on
end of thread will make beads
easier to string, so you will not
need a beading needle.
For each Earring, thread beads
on cotton in following order:
1 pearl bead, 6 clear rocaille
beads, 1 pearl bead, 6 rocaille
beads, 1 pearl bead.
Join with slip stitch as indicated
unless otherwise stated.
EARRING
Make 2.
Rnd 1: Thread beads (see Pat-
tern Notes) on cotton, join cotton
with sc in any eyelet of button
and around outside of button,
work 4 sc in same eyelet, sc in
next eyelet, push up pearl bead,
2 sc in same eyelet, push up
next 3 beads, 2 sc in same eye-
let, push up next 7 beads, 2 sc
in next eyelet, push up next 3
beads, 2 sc in same eyelet, push
up pearl bead, sc in same eyelet,
5 sc in next eyelet, join (see Pat-
tern Notes) in first sc, leaving
length for sewing, fasten off.
FINISHING
Thread 2 pearl beads on rem
length, thread end through hole
on ear wire, thread end back
down through the 2 pearl beads
and to back of button.
Pull thread end through an
eyelet on button, thread 1 pearl
bead on thread, pull thread
through another eyelet to back
of button, secure end of thread
and trim. CW
10 Crochet World CROCHETWORLD.COM AUGUST 2015
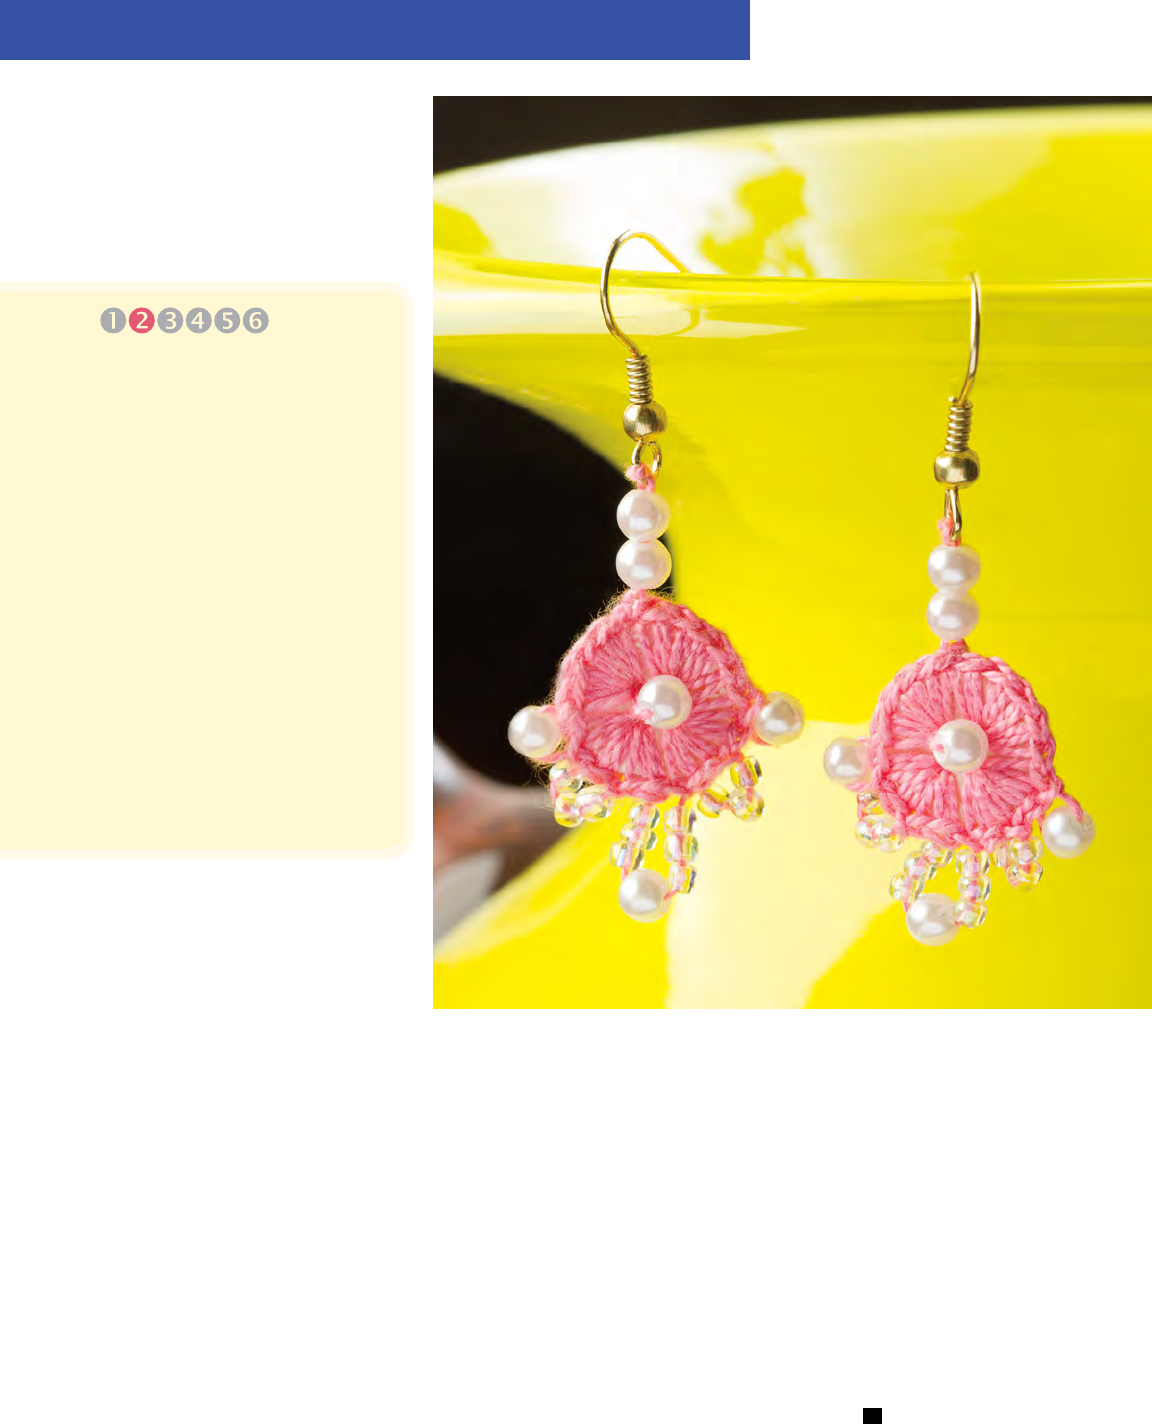
Button & Bead
Earrings
Design by Lori Zeller
FINISHED MEASUREMENTS
1⁄ inches long, excluding wires
MATERIALS
• DMC Pearl Cotton size 8 crochet
cotton (87 yds per skein):
5 yds #957 pale geranium
• Size 12/1.00mm steel
crochet hook
• Tapestry needle
• 15mm white buttons with
4 eyelets: 2
• 2 gold ear wires
• 5mm pearl beads from Darice: 12
• Clear rocaille beads from
Darice: 24
• White glue
GAUGE
Gauge is not important for
this project.
SCRAP DELIGHTS
CONFIDENT
BEGINNER
Have fun creating these beaded earrings—all you need
are a few buttons and a little bit of size 8 thread!

ANNIE’S VIDEO CLASSES
Pantone uncoated (below)
Logo over stacked tagline
Logo next to stacked tagline
Logo alone
Minimum allowed sizes
Pantone uncoated (below)
Pantone uncoated (below) 4 color process (below)
Black (below) White (below)
Annie’s Logo Purple:
Pantone: 268C, GOE Medium Purple U
CMYK: C82, M100, K12
RGB: R82, G43, B133
Hexadecimal: 522b85
Annie’s Logo Gray:
Pantone: Cool Gray 9 U
CMYK: 60K
RGB: R130, G131, B134
Hexadecimal: 828386
Color specications:
Note: Symbols such as ®, ©, and ™ are never to appear as less than 5 pt. in size. If, in the event
of reducing art to t a space the symbol appears too small, that symbol must be reset to the
minimum 5 pt. type size.
A art, pantone uncoated (below)
Pantone uncoated (below)
Annie’s ocial logo, created 8/12, revised 7/13
(You must be familiar with the DRG corporate logo
standards before any usage attempt.)
4 color process (below)
Black (below)
White (below)
4 color process (below)
Black (below)
White (below)
4 color process (below)
Black (below)
White (below)
Crafts
AnniesOnlineClasses.com
Learn Tunisian Crochet Colorwork
Instructor Rohn Strong
In this informative video class you’ll
learn how to:
• Work Tunisian knit and purl stitches, honeycomb
stitch, simple stitch and double stitch.
• Work four dierent colorwork techniques.
• Make crisp and clean color changes.
• Duplicate the Fair Isle technique of knitting with
Tunisian crochet.
• Crochet a Norwegian star design.
• Lock in oats to prevent unsightly snags.
• Add hat shaping with Tunisian
Simple Stitch.
CCV03 Learn Tunisian Crochet
Colorwork
Learn Tunisian
Crochet Colorwork
5
exclusive projects
included in this class!
Available
as an online
class or
DVD!

12 Crochet World CROCHETWORLD.COM AUGUST 2015
PATTERN NOTES
Weave in loose ends as work
progresses.
Join with slip stitch as indicated
unless otherwise stated.
Chain-3 at beginning of round
counts as first double crochet
unless otherwise stated.
SPECIAL STITCHES
Beginning 6-dc split cluster
(beg 6-dc split cl): Ch 2 (counts
as first dc), [yo, insert hook in
next dc, yo, draw up a lp, yo,
draw through 2 lps on hook]
twice (3 lps on hook), sk next 2
dc, [yo, insert hook in next dc, yo,
draw up a lp, yo, draw through
2 lps on hook] 3 times (6 lps on
hook), yo, draw through all 6 lps
on hook.
5-double crochet cluster (5-
dc cl): [Yo, insert hook in next
dc, yo, draw up a lp, yo, draw
through 2 lps on hook] 5 times,
yo, draw through all 6 lps on
hook, ch 1 to lock.
5-treble crochet cluster (5-tr
cl): *Yo hook twice, insert hook
in next st, yo, draw up lp, [yo,
draw through 2 lps on hook]
twice, rep from * 4 times, yo,
draw through all 6 lps on hook,
ch 1 to lock.
6-dc split cluster (6-dc split
cl): [Yo, insert hook in next dc,
yo, draw up a lp, yo, draw 2 lps
on hook] 3 times (4 lps on hook),
sk next 2 dc, [yo, insert hook
in next dc, yo, draw up a lp, yo,
draw through 2 lps on hook] 3
times (7 lps on hook), yo, draw
through all 7 lps on hook.
DOILY
Rnd 1 (RS): Ch 8, join (see Pat-
tern Notes) to form a ring, ch 3
(see Pattern Notes), 23 dc in ring,
join in 3rd ch of beg ch-3. (24 dc)
Rnd 2: Ch 3, dc in same st as
joining, 2 dc in each dc around,
join in 3rd ch of beg ch-3. (48 dc)
Rnd 3: Ch 3, dc in each dc
around, join in 3rd ch of
beg ch-3.
Rnd 4: Ch 3, 4 dc in same st
as joining, [sk next 2 dc, 5 dc in
next dc] around, join in 3rd ch of
beg ch-3. (16 groups of 5 dc)
Rnd 5: Sl st in each of next 2 dc,
ch 3, 6 dc in same st, 7 dc in 3rd
dc of each 5-dc group around,
join in 3rd ch of beg ch-3. (16
groups of 7 dc)
Note: Rnds 6–12 are not visible
on finished project; they’re
underneath Petal Overlay of
the Doily. The Petal Overlay
will be worked after rnd 25 is
completed.
Rnd 6: Sl st in each of next 3 dc,
ch 3, 8 dc in same st, 9 dc in 4th
dc of each 7-dc group around,
join in 3rd ch of beg ch-3. (16
groups of 9 dc)
Rnd 7: Ch 3, dc in each of next
7 dc, *sk next 2 dc, dc in each
of next 8 dc, ch 5**, dc in each
of next 8 dc, rep from * around,
ending last rep at **, join in
3rd ch of beg ch-3. (128 dc, 8
ch-5 sps)
Rnd 8: Ch 3, dc in each of next
6 dc, *sk next 2 dc, dc in each of
next 7 dc, ch 5, sl st in next ch-5
sp, ch 5**, dc in each of next 7
dc, rep from * around, ending
last rep at **, join in 3rd ch of
beg ch-3. (112 dc, 16 ch-5 sps)
Rnd 9: Ch 3, dc in each of
next 5 dc, *sk next 2 dc, dc in
each of next 6 dc, [ch 5, sl st in
next ch-5 sp] twice, ch 5**, dc
in each of next 6 dc, rep from *
around, ending last rep at **,
join in 3rd ch of beg ch-3. (96 dc,
24 ch-5 sps)
Rnd 10: Ch 3, dc in each of
next 4 dc, *sk next 2 dc, dc in
each of next 5 dc, [ch 5, sl st in
next ch-5 sp] 3 times, ch 5 **,
dc in each of next 5 dc, rep from
* around, ending last rep at **,
join in 3rd ch of beg ch-3. (80 dc,
32 ch-5 sps)
Rnd 11: Ch 3, dc in each of
next 3 dc, *sk next 2 dc, dc in
each of next 4 dc, [ch 5, sl st in
next ch-5 sp] 4 times, ch 5**, dc
in each of next 4 dc, rep from *
around, ending last rep at **,
join in 3rd ch of beg ch-3. (64 dc,
40 ch-5 sps)
Rnd 12: Ch 3, dc in each of
next 2 dc, *sk next 2 dc, dc in
each of next 3 dc, [ch 5, sl st in
next ch-5 sp] 5 times, ch 5**, dc
in each of next 3 dc, rep from *
around, ending last rep at **,
join in 3rd ch of beg ch-3. (48 dc,
48 ch-5 sps)
Rnd 13: Ch 3, dc in next dc, *sk
next 2 dc, dc in each of next 2
dc, [ch 5, sl st in next ch-5 sp] 6
times, ch 5**, dc in each of next
2 dc, rep from * around, ending
last rep at **, join in 3rd ch of
beg ch-3. (32 dc, 56 ch-5 sps)
Rnd 14: Ch 3, *sk next 2 dc, dc
in next dc, [ch 5, sl st in next
ch-5 sp] 7 times, ch 5**, dc in
Teal Fantasy Doily
Design by Josie Rabier
FINISHED MEASUREMENT
22 inches in diameter
MATERIALS
• Nazli Gelin Garden 10
size 10 crochet cotton
(306 yds per ball):
3 balls #17 teal
• Size 7/1.65mm steel crochet
hook or size needed to
obtain gauge
• Tapestry needle
GAUGE
8 dc = 1 inch; 3 dc rnds = 1 inch
HEIRLOOM TREASURES
INTERMEDIATE
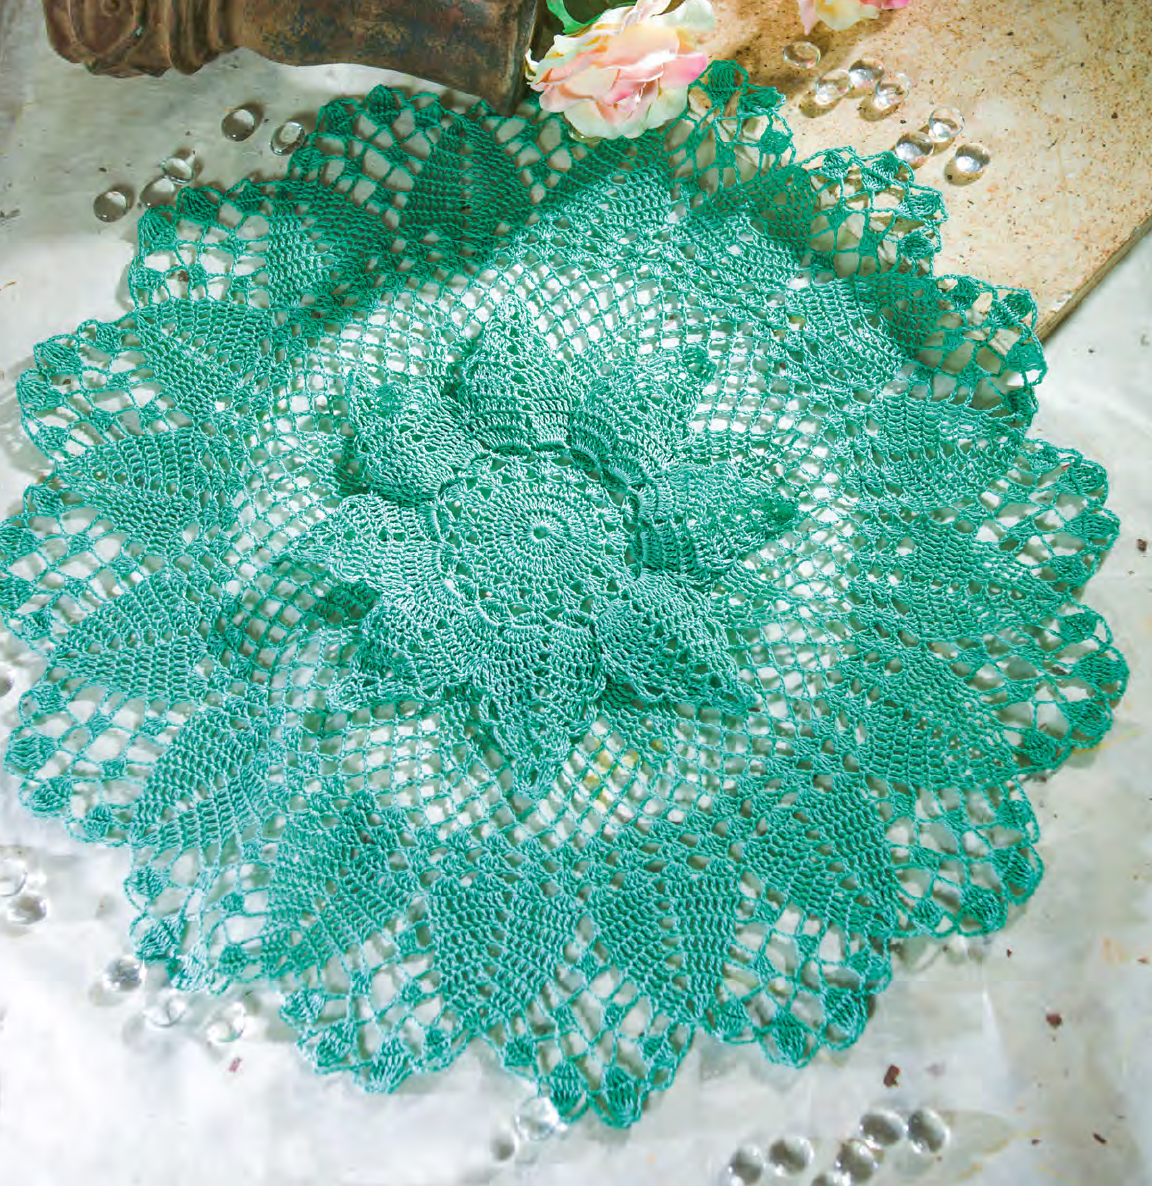
Few doilies achieve such a beautiful, dimensional
effect as this one. This classic piece would make a
stunning showpiece for your home.
next dc, rep from * around, end-
ing last rep at **, join in 3rd ch
of beg ch-3. (16 dc, 64 ch-5 sps)
Rnd 15: Sl st in next dc and
each of next 3 chs of next ch-5
sp, *ch 5, sl st in 3rd ch of next
ch-5 sp, rep from * around, end-
ing with sl st in base of beg ch-5.
(64 ch-5 sps)
Rnd 16: Sl st in each of next
3 chs of ch-5 sp, ch 3, 4 dc in
same ch, 5 dc in 3rd ch of each
ch-5 sp around, join in 3rd ch of
beg ch-3. (64 groups of 5 dc)
Rnds 17 & 18: Sl st in each of
next 2 dc, ch 3, 4 dc in same st,
5 dc in 3rd dc of each 5-dc group
around, join in 3rd ch of beg ch-3.
Rnd 19: Ch 3, dc in each of next
8 dc, *sk next 2 dc, dc in each of
next 9 dc, ch 5**, dc in each of
next 9 dc, rep from * around, end-
ing last rep at **, join in 3rd ch of
beg ch-3. (288 dc, 16 ch-5 sps)
Rnd 20: Ch 3, dc in each of next
7 dc, *sk next 2 dc, dc in each of
13 AUGUST 2015 CROCHETWORLD.COM Crochet World
Continued on page 58
14 Crochet World CROCHETWORLD.COM AUGUST 2015
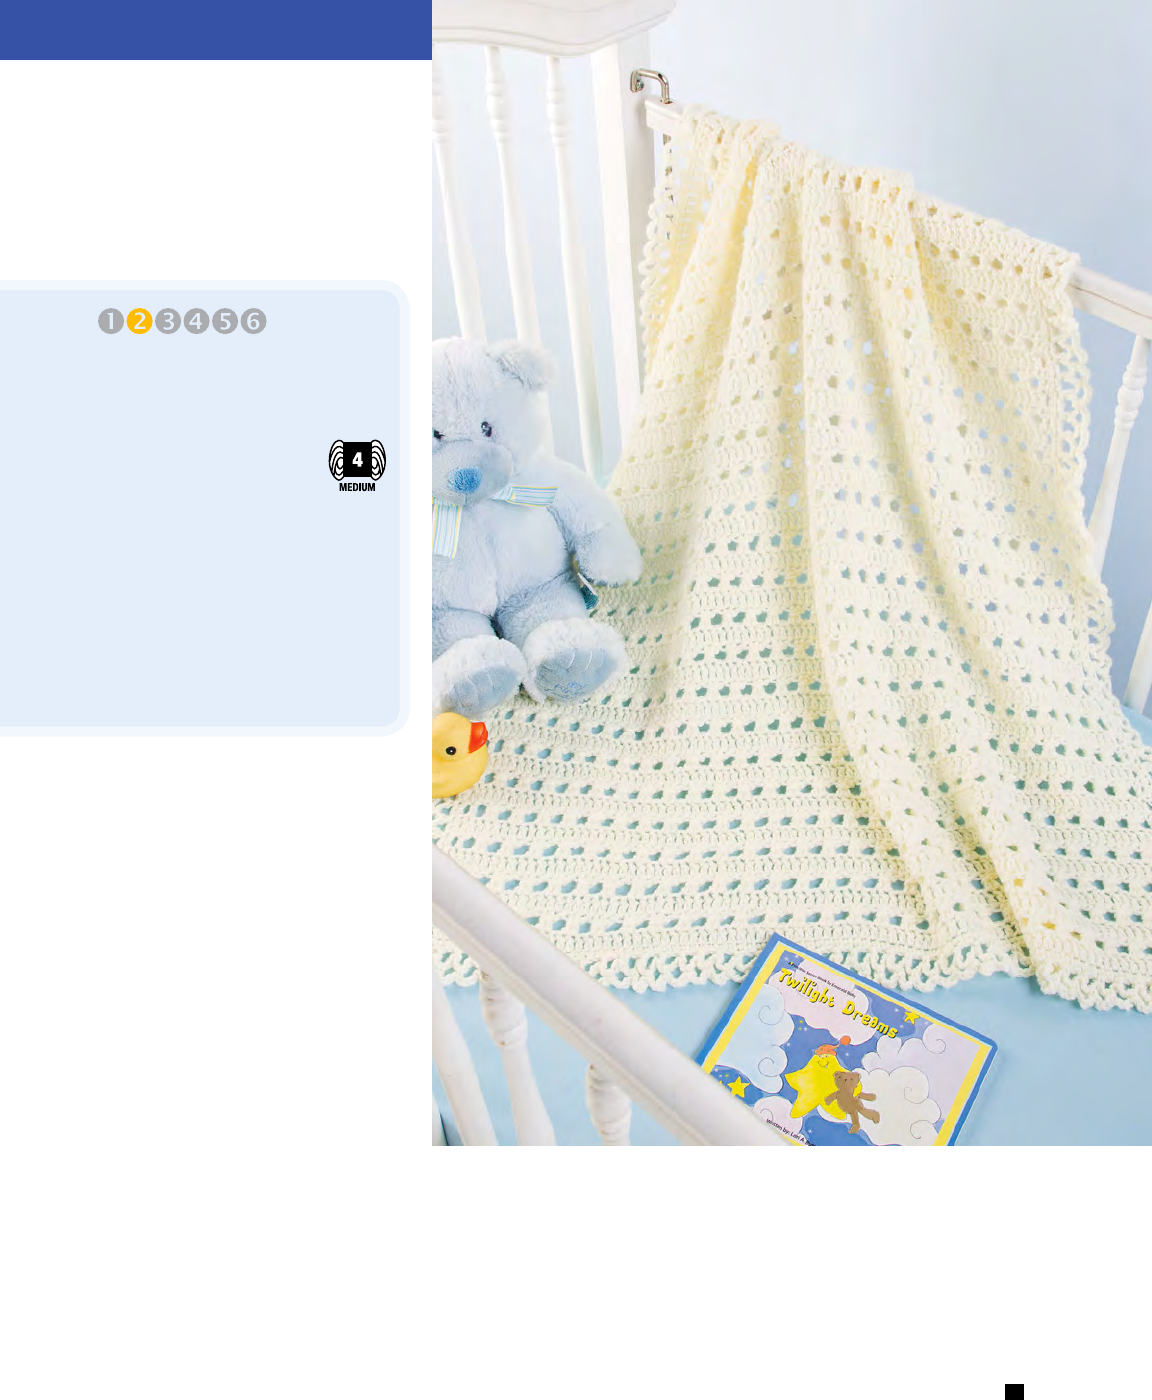
Little Hugs
Baby Blanket
Design by Dorothy Warrell
FINISHED MEASUREMENTS
34 inches wide x 35 inches long
MATERIALS
• Lion Brand Yarn Pound
of Love medium (wor-
sted) weight acrylic yarn
(16 oz/1,020 yds/454g per ball):
1 ball #099 antique white
• Size H/8/5mm crochet hook or
size needed to obtain gauge
• Tapestry needle
GAUGE
13 dc = 4 inches; rows 1–5 =
3 inches
BEGINNER’S LUCK
PATTERN NOTES
Weave in loose ends as work
progresses.
Chain-3 at beginning of row
counts as first double crochet
unless otherwise stated.
Join with slip stitch as indicated
unless otherwise stated.
BLANKET
Row 1 (RS): Ch 103, dc in 4th
ch from hook (beg 3 sk chs count
as a dc) and in each rem ch
across, turn. (101 dc)
Row 2: Ch 3 (see Pattern Notes),
dc in next dc, ch 1, *sk next
dc, dc in each of next 2 dc, dc
around posts of 2 dc just made,
rep from * across to last 3 dc, sk
next st, dc in each of last 2 dc,
turn. (100 dc, 1 ch-1 sp)
Row 3: Ch 3, dc in each dc and
ch-1 sp across, turn. (101 dc)
Rows 4–51: [Rep rows 2 and
3 alternately] 24 times. Do not
turn at end of row 51.
BORDER
Rnd 1: Working across next
side, 2 sc in end of each row to
first row, working in opposite
side of foundation ch, 3 sc in
first ch, sc in each ch across to
last ch, 3 sc in last ch, working
across next side, 2 sc in end of
each row to last row, 3 sc in first
st, sc in each dc across to last dc,
3 sc in last dc, join (see Pattern
Notes) in beg sc. (414 sc)
Rnd 2: Ch 4, sk first sc, *sc in
next sc, ch 4, sk next sc, rep from
* around, join in first ch of beg
ch-4. (207 sc, 207 ch-4 sps)
Rnd 3: Sc in first ch-4 sp, ch 4,
[sc in next ch-4 sp, ch 4] around,
join in beg sc. Fasten off. CW
CONFIDENT
BEGINNER
Sweet and simple, this perfect-size
baby blanket will make a much-
appreciated baby shower gift.
FINISHED SIZES
Instructions given fit infant’s size
0–3 months; changes for size 6–9
months are in [ ].
FINISHED MEASUREMENTS
Sole: 1½ [2] inches wide x 3
[3½] long
MATERIALS
• Caron Simply Soft Light
light (DK) weight acrylic
yarn (3 oz/330
yds/85g per skein):
1 skein each
#0014 black
and #0013
real red
• Size F/5/3.75mm
crochet hook or size
needed to obtain gauge
• Tapestry needle
• Stitch markers
• ⁄-inch (15mm) #20450 ladybug
buttons from JHB by Blumenthal
Lansing: 2
GAUGE
5 hdc = 1 inch
PATTERN NOTES
Weave in loose ends as work
progresses.
Join with slip stitch as indicated
unless otherwise stated.
Place stitch marker in first
stitch of last round of Sides
and move up as each round is
completed.
SPECIAL STITCH
Single crochet join (sc join):
Place a slip knot on hook,
insert hook in indicated st, yo
and draw up a lp, yo and draw
through both lps on hook.
BOOTIE
Make 2.
SOLE
Rnd 1 (RS): With black, ch 13,
2 sc in 2nd ch from hook, sc in
each of next 10 chs, 3 sc in next
ch, working in opposite side of
foundation ch, sk first ch, sc in
each of next 11 chs, join (see
Pattern Notes) in beg sc. (26 sc)
Rnd 2: Ch 1, 3 hdc in same st as
beg ch-1, hdc in each st across to
center sc of 3-sc group, 3 hdc in
center sc, hdc in each st across,
join in beg hdc. (30 hdc)
Rnd 3: Ch 1, [hdc in each st
across to center sc of next 3-sc
group, 3 hdc in center sc] twice,
hdc in each rem st, join in beg
hdc. (34 hdc)
FAST, EASY, FUN!
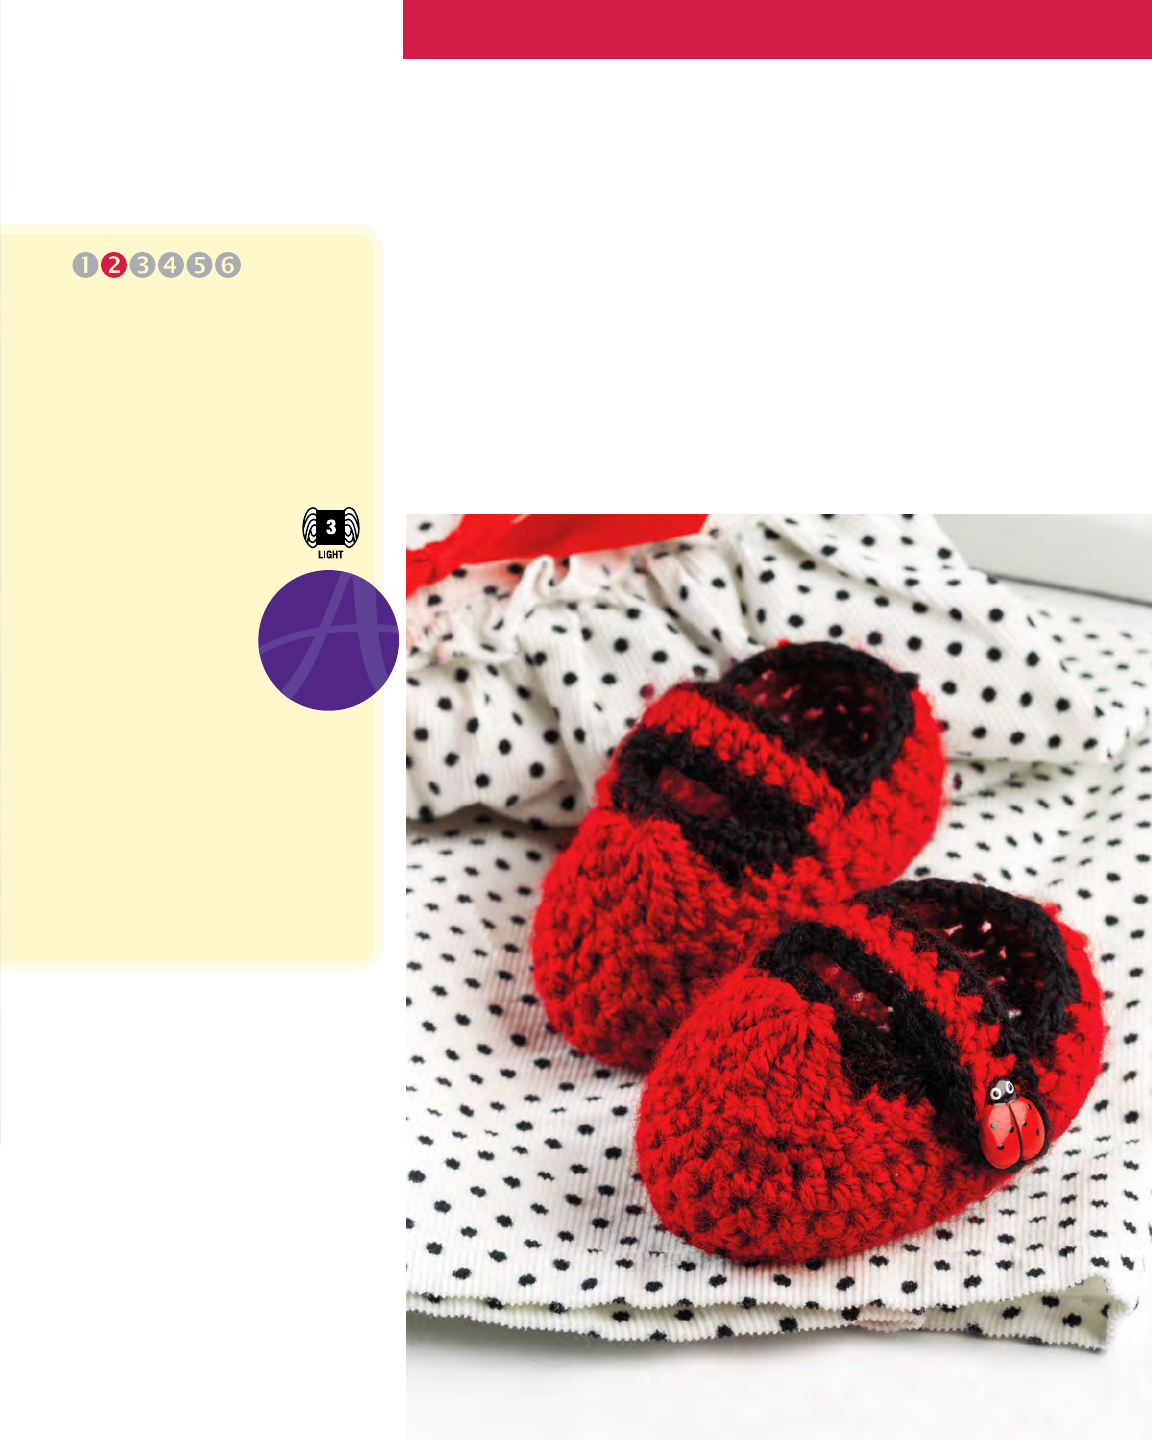
Little Ladybug Booties
Design by Kristen Stoltzfus
FINISHED SIZES
Instructions given fit infant’s size
0–3 months; changes for size 6–9
months are in [ ].
FINISHED MEASUREMENTS
Sole: 1½ [2] inches wide x 3
[3½] long
MATERIALS
• Caron Simply Soft Light
light (DK) weight acrylic
yarn (3 oz/330
yds/85g per skein):
1 skein each
#0014 black
and #0013
real red
• Size F/5/3.75mm
crochet hook or size
needed to obtain gauge
• Tapestry needle
• Stitch markers
• ⁄-inch (15mm) #20450 ladybug
buttons from JHB by Blumenthal
Lansing: 2
GAUGE
5 hdc = 1 inch
CONFIDENT
BEGINNER
What special little lady wouldn’t look adorable in
these “grown-up” Mary Janes?
Continued on page 59
Pantone uncoated (below)
Logo over stacked tagline
Logo next to stacked tagline
Logo alone
Minimum allowed sizes
Pantone uncoated (below)
Pantone uncoated (below) 4 color process (below)
Black (below) White (below)
Annie’s Logo Purple:
Pantone: 268C, GOE Medium Purple U
CMYK: C82, M100, K12
RGB: R82, G43, B133
Hexadecimal: 522b85
Annie’s Logo Gray:
Pantone: Cool Gray 9 U
CMYK: 60K
RGB: R130, G131, B134
Hexadecimal: 828386
Color specications:
Note: Symbols such as ®, ©, and ™ are never to appear as less than 5 pt. in size. If, in the event
of reducing art to t a space the symbol appears too small, that symbol must be reset to the
minimum 5 pt. type size.
A art, pantone uncoated (below)
Pantone uncoated (below)
Annie’s ocial logo, created 8/12, revised 7/13
(You must be familiar with the DRG corporate logo
standards before any usage attempt.)
4 color process (below)
Black (below)
White (below)
4 color process (below)
Black (below)
White (below)
4 color process (below)
Black (below)
White (below)
Buy this
YARN NOW!
AnniesYarnShop.com
15 AUGUST 2015 CROCHETWORLD.COM Crochet World
16 Crochet World CROCHETWORLD.COM AUGUST 2015
PATTERN NOTES
Weave in loose ends as work
progresses.
Join with slip stitch as indicated
unless otherwise stated.
Always work front post double
crochet around stitch 2 rows
below; skip stitch on this row
behind front post double crochet
unless otherwise stated.
SPECIAL STITCH
Puff stitch (puff st): [Yo,
insert hook in indicated st, yo,
pull lp through] 5 times, yo, pull
through all 11 lps on hook.
PATTERN STITCH
Cable Panel (13-st panel)
Row 1 (WS): Sc in fpdc, sc in
each of next 3 sc, sc in each of
next 2 fpdc, puff st in next sc, sc
in each of next 2 fpdc, sc in each
of next 3 sc, sc in next fpdc.
Row 2: Fpdc around next fpdc
2 rows below, sc in each of next
2 sc, fpdc around each of next
2 fpdc, sc in each of next 3 sts,
fpdc around each of next 2 fpdc,
sc in each of next 2 sc, fpdc
around next fpdc.
Row 3: Sc in each st across.
Row 4: Fpdc around next fpdc,
sc in next sc, fpdc around each
of next 2 fpdc, sc in each of next
5 sts, fpdc around each of next
2 fpdc, sc in next sc, fpdc around
next fpdc.
Row 5: Sc in each st across.
Row 6: Rep row 2.
Row 7: Sc in each st across.
Row 8: Fpdc around next fpdc,
sc in each of next 3 sc, fpdc
around each of next 2 fpdc, sc in
next sc, fpdc around each of next
2 fpdc, sc in each of next 3 sc,
fpdc around next fpdc.
Rep rows 1–8 for pattern.
CARDIGAN
BACK
Row 1: With size G hook, ch 66
[74, 82, 89, 97], sc in 2nd ch from
hook and in each ch across, turn.
(65 [73, 81, 88, 96] sc)
Row 2: Ch 1, sc in each st
across, turn.
Next rows: Rep row 2 until
piece measures 16 inches from
beg, end ing with WS row.
Armhole Shaping
Row 1: Sl st in each of first
4 [4, 5, 6, 7] sts, ch 1, sc in
next st, sc in each st across,
leaving last 4 [4, 5, 6, 7] sts
unworked, turn. (57 [65, 71,
76, 82] sc)
Rows 2–4 [2–7, 2–8, 2–9, 2–10]:
Dec 1 st at each end of every
row 3 [6, 7, 8, 9] times. (51 [53,
57, 60, 64] sc)
Next rows: Work even in pat-
tern until piece measures 20½
[21, 21½, 22, 22½] inches from
beg, ending with WS row.
First Shoulder
Row 1: Ch 1, sc in each of first
15 [15, 16, 17, 18] sts, leaving
rem sts unworked, turn.
Row 2: Sl st in first st, ch 1, sc
in each st across, turn.
Row 3: Ch 1, sc in each st across,
leaving last st unworked, turn.
Rows 4–14: [Rep last 2 rows
alternately] 11 times. (2 [2, 3,
4, 5] sc)
Next rows: Work even in pat-
tern until piece measures 24
[24½, 25, 25½, 26] inches from
beg. At end of last row, fasten off.
2nd Shoulder
Row 1: With RS facing, sk
center 21 [23, 25, 26, 28] sts on
Back, join (see Pattern Notes)
with sc in next st, sc in each st
across, turn. (15 [15, 16, 17,
18] sc)
FINISHED SIZES
Instructions given fit size small;
changes for medium, large, X-large
and 2X-large are in [ ].
FINISHED MEASUREMENT
Bust: 36 inches (small) [40 inches
(medium), 45 inches (large), 49 inches
(X-large), 53 inches (2X-large)]
MATERIALS
• Plymouth Yarn Encore
DK light (DK) weight
acrylic/wool yarn
(1¾ oz/150 yds/50g per ball):
10 [11, 12, 14, 15] balls
#0355 garnet mix
• Sizes F/5/3.75mm and G/6/4mm
crochet hooks or size needed to
obtain gauge
• Tapestry needle
• 1-inch buttons: 3
• Stitch markers
GAUGE
Size G hook: 18 sc = 5 inches;
23 sc rows = 5 inches
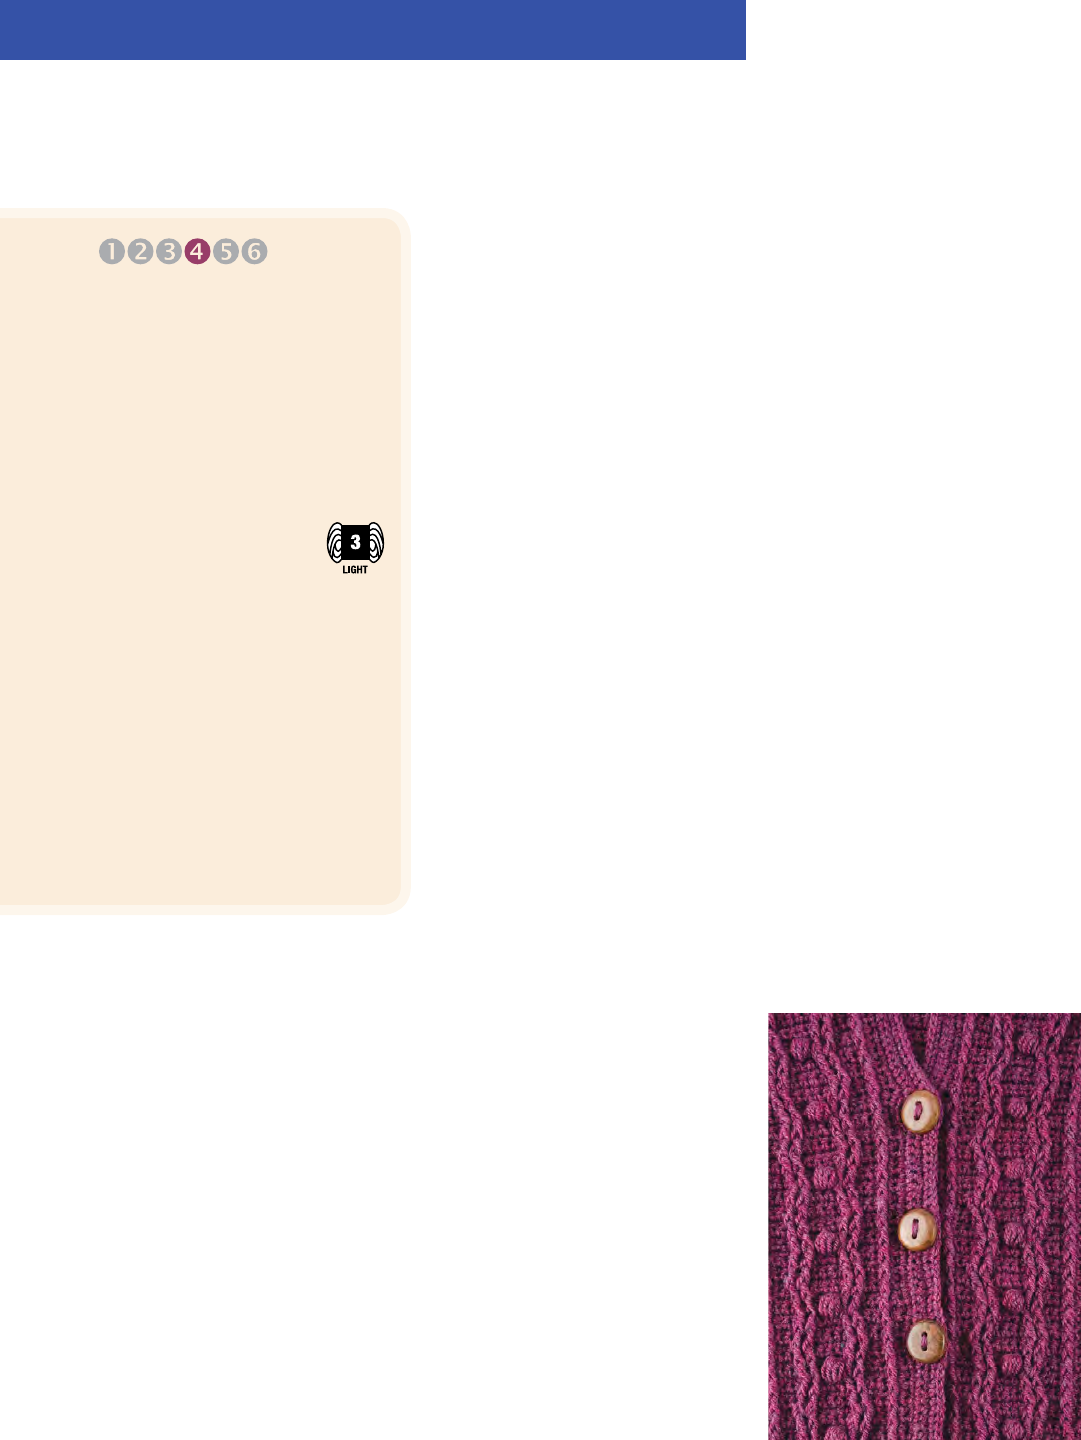
Cabled Elegance Cardigan
Design by Ann E. Smith
TOUCH OF STYLE
INTERMEDIATE

Add an elegant cable pattern
to the front and sleeves of a
simple, basic cardigan and the
result is a classy rendition of a
fashion standard.
Next rows: Work same as next
rows on First Shoulder revers-
ing shaping.
RIGHT FRONT
Row 1 (RS): With size G hook,
ch 33 [37, 41, 45, 49], sc in 2nd
ch from hook, sc in each rem
ch across, turn. (32 [36, 40, 44,
48] sc)
Row 2: Ch 1, sc in each of first
18 [22, 26, 30, 34] sc, dc in next
sc, sc in each of next 3 sc, dc in
each of next 2 sc, sc in next sc,
dc in each of next 2 sc, sc in each
of next 3 sc, dc in next sc, sc in
last sc, turn.
Row 3: Ch 1, sc in first st,
[fpdc (see Stitch Guide and
Pattern Notes) around next dc,
sc in each of next 3 sc, fpdc
around each of next 2 dc, sc in
next sc, fpdc around each of
next 2 dc, sc in each of next 3 sc,
fpdc around next dc (Cable
Panel setup made)], sc in each
sc across, turn.
Row 4: Ch 1, sc in each of first
24 [28, 32, 36, 40] sts, puff st
(see Special Stitch) in next sc,
sc in each of last 7 sts, turn.
Next rows: Working sc at each
side of Cable Panel setup, beg
Cable Panel (see Pattern Stitch)
with row 2, work even in pattern
until piece measures 14 [14½,
15, 15½, 16] inches from beg,
ending with WS row.
Neck & Armhole Shaping
Next row: Place marker for
first dec row, work in pattern
across first 14 sts, sc dec (see
Stitch Guide) in next 2 sts, sc in
each st across, turn. (31 [35, 39,
43, 47] sts)
Next rows: Continue in estab-
lished pat tern with dec in every
4th row 2 [5, 8, 10, 11] times,
then dec every 6th row 5 [3, 1,
0, 0] time(s) and at same time
when piece measures 16 inches
from beg, end ing with WS row,
beg Armhole Shaping of working
Sized
to
2X
18 Crochet World CROCHETWORLD.COM AUGUST 2015
in pattern across, leaving last
4 [4, 5, 6, 7] sts unworked, then
dec 1 st at Armhole edge every
row 3 [6, 7, 8, 9] times. (17 [17,
18, 19, 20] sts)
Next rows: Work even in
established pat tern until piece
measures 24 [24½, 25, 25½, 26]
inches from beg, ending with
RS row. Do not fasten off.
Shoulder & Back Neckband
Row 1: Sl st in each of first 2 [2,
3, 4, 5] sts (Shoulder completed),
ch 1, sc in next st, work in pat-
tern across, turn. (15 [15, 15, 15,
15] sts)
Next rows: Working Back
Neckband sc in first and last sts
and maintaining Cable Panel
pattern, work until piece mea-
sures 5½ [6, 6½, 6¾, 7¼] inches
from Shoulder, ending with RS
row. Leaving long end, fasten off.
LEFT FRONT
Row 1: With size G hook, ch 33
[37, 41, 45, 49], sc in 2nd ch from
hook, sc in each rem ch across,
turn. (32 [36, 40, 44, 48] sc)
Row 2: Ch 1, sc in first st, dc in
next sc, sc in each of next 3 sc,
dc in each of next 2 sc, sc in next
sc, dc in each of next 2 sc, sc in
each of next 3 sc, dc in next sc,
sc in each sc across, turn.
Row 3: Ch 1, sc in each of
first 18 [22, 26, 30, 36] sc, [fpdc
around next dc, sc in each of
next 3 sc, fpdc around each of
next 2 dc, sc in next sc, fpdc
around each of next 2 dc, sc in
each of next 3 sc, fpdc around
next dc], sts inside brackets are
the beg of Cable Panel, sc in last
st, turn.
Row 4: Ch 1, sc in each of first
7 sts, puff st in next sc, sc in
each rem st across, turn.
Next rows: Work same as for
Right Front reversing Neck and
Armhole Shaping.
SLEEVE
Make 2.
Row 1: With size G hook, ch 40
[40, 42, 44, 46], sc in 2nd ch from
hook, sc in each rem ch across,
turn. (39 [39, 41, 43, 45] sc)
Row 2: Ch 1, sc in each of first
13 [13, 14, 15, 16] sc, dc in next
sc, sc in each of next 3 sc, dc in
each of next 2 sc, sc in next sc,
dc in each of next 2 sc, sc in each
of next 3 sc, dc in next sc, sc in
each rem sc across, turn.
Row 3: Ch 1, sc in each of
first 13 [13, 14, 15, 16] sc, [fpdc
around next dc, sc in each of
next 3 sc, fpdc around each of
next 2 dc, sc in next sc, fpdc
around each of next 2 dc, sc in
each of next 3 sc, fpdc around
next dc (beg of Cable Panel
made)], sc in rem st across, turn.
Row 4: Ch 1, sc in each of first
19 [19, 20, 21, 22] sts, puff st
in next sc, sc in each rem st
across, turn.
Next rows: Working sc at each
side of Cable Panel, beg Cable
Panel with row 2, work even in
pattern until piece measures 10
[9, 8, 7, 6] inches from beg, end-
ing with WS row.
Next rows: Inc 1 st at each end
of row by working 2 sc in first
and last sts on this row and on
every 6th row 4 [5, 6, 7, 8] times.
(49 [51, 55, 59, 63] sts at end of
last row)
Next rows: Work even in estab-
lished pat tern until piece mea-
sures 18 inches from beg, ending
with WS row.
Cap Shaping
Next row: Sl st in each of first
4 [4, 5, 6, 7] sts, work in pattern
across, leaving last 4 [4, 5, 6, 7]
sts unworked, turn. (41 [43, 45,
47, 49] sts)
Next rows: Dec 1 st at each end
of every row 4 times, then every
other row 6 [7, 8, 9, 10] times,
ending with RS row, then every
row 3 times. Fasten off. (15 [15,
15, 15, 15] sts)
SLEEVE TRIM
Row 1: With RS facing and size
F hook, working in opposite side
of foundation ch of row 1, sc in
each ch across, turn.
Row 2: Sl st in each st
across, turn.
Row 3: Working in sts on row 1,
ch 1, sk first st, sl st in between
sts across. Fasten off.
FINISHING
Sew Shoulder seams.
With long length, sew Shoulder
and Neckbands on Fronts tog.
Sew Shoulder and Neckband
to Back.
Fold 1 Sleeve in half lengthwise,
place fold at shoulder seam and
sew Sleeve in place.
Rep the same with rem Sleeve.
Sew side and Sleeve seams.
FRONT TRIM
Row 1: With RS facing and size
F hook, working in ends of rows,
join with sc in end of first row, sc
in end of each row across to first
Continued on page 59

25
NEWSSTAND
PRICE!
%
OFF
SUBSCRIBE TODAY AT
AnniesCrochetSpecials.com
FIRST-EVER NEWSSTAND
SPECIAL SUBSCRIPTION!
The editors of Crochet World and
Crochet! present a never-before-oered
subscription—get four premium newsstand
special issues with guaranteed home delivery!
Become one of the rst Charter Subscribers today!
Annie’s
Crochet
Specials
Don’t Miss Out!
Get 4 newsstand special issues (2 in spring, 2 in fall)
for $10 OFF the newsstand price!
20 Crochet World CROCHETWORLD.COM AUGUST 2015
REINVENT & RECYCLE
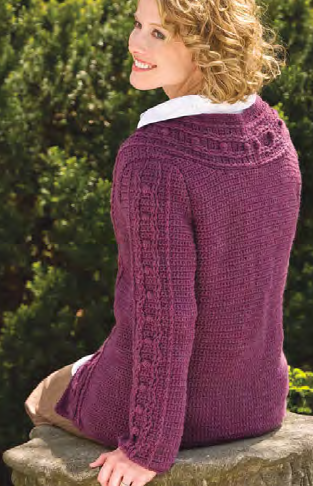
Crochet Accent Tee
Design by Amanda Saladin
FINISHED MEASUREMENTS
Motif: 3½ inches wide x 9 inches
long
MATERIALS
• Aunt Lydia’s Fashion
Crochet size 3
crochet cotton
(150 yds per ball):
1 ball #226
natural
• Size E/4/3.5mm crochet hook or
size needed to obtain gauge
• Tapestry needle
• Sewing needle
• Matching sewing thread
• Long-sleeved T-shirt
GAUGE
[Sc in next ch, ch 5, sk 2 chs]
4 times = 2½ inches
PATTERN NOTES
Weave in loose ends as work
progresses.
Join with slip stitch as indicated
unless otherwise stated.
MOTIF
Make 2.
FIRST HALF
Row 1: Ch 48, sc in 9th ch from
hook, [ch 5, sk next 2 chs, sc in
next ch] 12 times to last 3 ch, ch
2, dc in last ch to position hook
in center of last ch-5 sp, turn.
(14 ch-5 sps)
Row 2: Ch 5, sc in next ch-5 sp,
*ch 1, [dc, ch 1] 6 times in next
ch-5 sp, sc in next ch-5 sp, ch
5, sc in next ch-5 sp, rep from *
twice, ch 1, [dc, ch 1] 6 times in
next ch-5 sp, sc in next ch-5 sp,
ch 2, dc in last ch-5 sp to posi-
tion hook in center of last ch-5
sp, turn. (5 ch-5 sps, 24 dc)
EASY
Row 3: Ch 1, sc in top of dc
joining, *ch 2, [dc in dc, ch 2]
6 times, sc in next ch-5 sp, rep
from * 3 times, turn. (24 dc, 5 sc)
Row 4: Ch 1, sc in first ch-2 sp,
*(sc, ch 3, sc) in each of next 5
ch-2 sps, sc in each of next 2 ch-2
sps, rep from * twice, (sc, ch 3,
sc) in each of next 5 ch-2 sps, sc
in next ch-2 sp, ch 1, join with
sl st to first sc of previous row.
Fasten off. (20 ch-3 sps)
2ND HALF
With opposite side of founda-
tion ch facing, join (see Pattern
Notes) in 5th ch from end (1 ch
to the left of first sc).
Row 1: [Ch 5, sk next 2 ch, sc in
next ch] 10 times, ch 2, sk 2 ch,
dc in next ch, sc in last ch-5 sp to
round out the edge of the Motif,
turn. (11 ch-5 sps)
Row 2: Ch 5, sc in first ch-5 sp,
*ch 1, (dc, ch 1) 6 times in next
ch-5 sp, sc in next ch-5 sp, ch
5, sc in next ch-5 sp, rep from *
once, ch 1, (dc, ch 1) 6 times in
next ch-5 sp, sc in next ch-5 sp,
ch 2, dc in last ch-5 sp, sc in first
ch-5 sp of First Half. (4 ch-5 sps,
18 dc)
Row 3: Ch 1, sc in top of dc join-
ing, *ch 2, [dc in next dc, ch 2]
6 times, sc in next ch-5 sp, rep
from * twice, turn. (18 dc)
Row 4: Ch 1, sc in first ch-2 sp,
*(sc, ch 3, sc) in each of next 5
ch-2 sps, sc in each of next 2 ch-2
sps, rep from * once, (sc, ch 3, sc)
in each of next 5 ch-2 sps, sc
in next ch-2 sp, ch 1, join with
sl st to first sc of previous row.
Fasten off.
FINISHING
Block Motifs lightly. Sew each
Motif to outer edge of each
sleeve. With care, cut fabric from
each sleeve beneath Motif. With
sewing needle and thread, over-
cast stitch (see illustration) raw
fabric edges. CW
Overcast Stitch
Overcast Stitch
Pantone uncoated (below)
Logo over stacked tagline
Logo next to stacked tagline
Logo alone
Minimum allowed sizes
Pantone uncoated (below)
Pantone uncoated (below) 4 color process (below)
Black (below) White (below)
Annie’s Logo Purple:
Pantone: 268C, GOE Medium Purple U
CMYK: C82, M100, K12
RGB: R82, G43, B133
Hexadecimal: 522b85
Annie’s Logo Gray:
Pantone: Cool Gray 9 U
CMYK: 60K
RGB: R130, G131, B134
Hexadecimal: 828386
Color specications:
Note: Symbols such as ®, ©, and ™ are never to appear as less than 5 pt. in size. If, in the event
of reducing art to t a space the symbol appears too small, that symbol must be reset to the
minimum 5 pt. type size.
A art, pantone uncoated (below)
Pantone uncoated (below)
Annie’s ocial logo, created 8/12, revised 7/13
(You must be familiar with the DRG corporate logo
standards before any usage attempt.)
4 color process (below)
Black (below)
White (below)
4 color process (below)
Black (below)
White (below)
4 color process (below)
Black (below)
White (below)
Buy this
YARN NOW!
AnniesYarnShop.com

Wear your favorite hobby
on your sleeve! Using size
3 thread, you can turn
a plain tee into a chic
pullover with these lacy
crochet sleeve accents.
REINVENT & RECYCLE
22 Crochet World CROCHETWORLD.COM AUGUST 2015
PATTERN NOTES
Weave in loose ends as work
progresses.
Single crochet stitches are
worked around fabric strips.
When working around the fab-
ric strips, make sure to stretch
the single crochet over the
fabric, so it lies tidily and not
clumped up.
Strips at end of rows are folded
back around for the next row,
forming a continuous zigzag.
If Rug bunches, slide the fabric
through single crochets to make
sure they lie flat.
Every couple of rows, measure
to make sure Rug maintains
width of 25 inches.
FABRIC PREPARATION
When preparing fabric strips for
use, strips can be prepared one
of two ways:
For tidier look, sew strips to-
gether at short ends at an angle,
to create a long rag ball. Fold
strips over twice and press with
an iron to create a strip that is
½ inch wide.
For more rustic look, simply
crochet over the strips without
pressing them or seaming them.
When a strip ends, simply fold
end of a new strip into middle of
old strip and work over them.
RUG
Measure 36 inches in from end
of first strip, holding 2 strands
of yarn tog, fold yarn over strip,
ch 1, work 100 sc toward beg
of strip, distributing sts evenly
along strip, stop 1½ inches
from end. Fold strip over, 6 sc
over doubled strip, place stitch
marker. Work 6 sc in lp formed
by strip. Now hold the strip so
the side just worked is pointing
toward ground, and work along
other side of strip.
Work 107 sc between sc on other
side of strip. Fasten off.
*Fold strip over to beg working
next row, insert hook in first sc,
draw lp through, holding both
ends, ch 1, drop tail, ch 1, sc in
same st as beg ch-1, [sk next
2 sts, 2 sc in next st, ch 1] 35
times, sk next 2 sts, 2 sc in st
with stitch marker, fasten off,
do not turn.
Fold strip over and position it
along next row to be worked,
with unworked end pointing to
the right. Insert hook in first
sc, draw lp through and holding
both ends, ch 1, drop tail, ch 1,
sc in same first sc, ch 1, [sk next
2 sts, 2 sc in next st, ch 1] 35
times, sk next 2 sts, 2 sc in next
st with stitch marker, fasten off,
do not turn.
Rep from * until a total of 61
rows are completed.
LAST ROW
Fold strip over to begin working
next row. Insert hook in first sc,
draw up a lp, holding both ends,
ch 1, drop tail, ch 1, sc in first sc,
ch 1, [sc in each of next 2 sts, 2
sc in next st] across. Fasten off
yarn. Leaving a 2-inch length
of denim, cut and fold under to
WS inserting underneath sc of
previous row.
FINISHING
Using sharp tapestry needle,
weave in ends, burying them in
fabric strips.
Block with steam or wet-block
and allow to dry completely. CW
Rag-ety Rug
Design by Jennifer Raymond
FINISHED MEASUREMENTS
25 inches wide x 36 inches long
MATERIALS
• Lily Sugar ’n Cream
medium (worsted)
weight cotton yarn
(2½ oz/120 yds/71g per ball):
5 balls #118 stonewash
• Size H/8/5mm crochet hook or
size needed to obtain gauge
• Sharp tapestry needle
• 2-inch wide denim strips (or
other cotton rags): 44 yds
• Measuring tape
• Locking stitch marker
GAUGE
16 sc rows over fabric strips =
10 inches; 18 sc over fabric strips =
4 inches
EASY
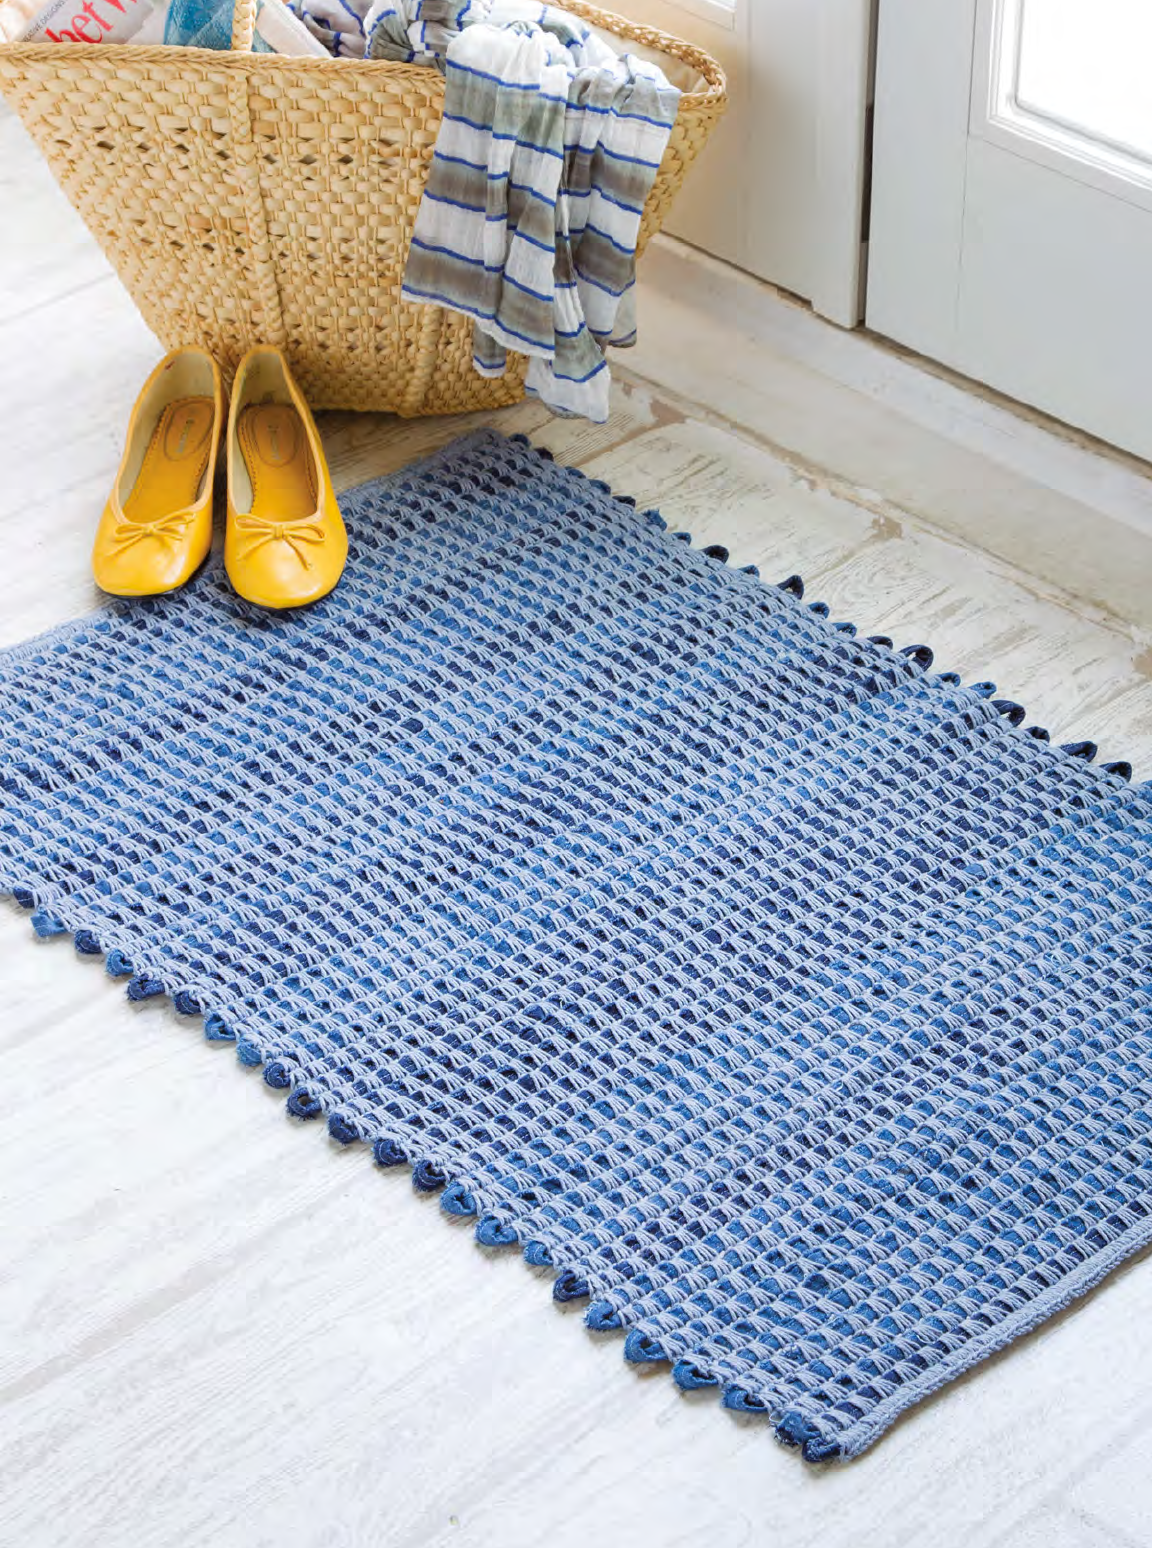
Strips of material from old jeans
create this cushy and practical
"rag-ety" rug for any room of
the house. It’s a great way to use
jeans that kids have outgrown.
REINVENT & RECYCLE
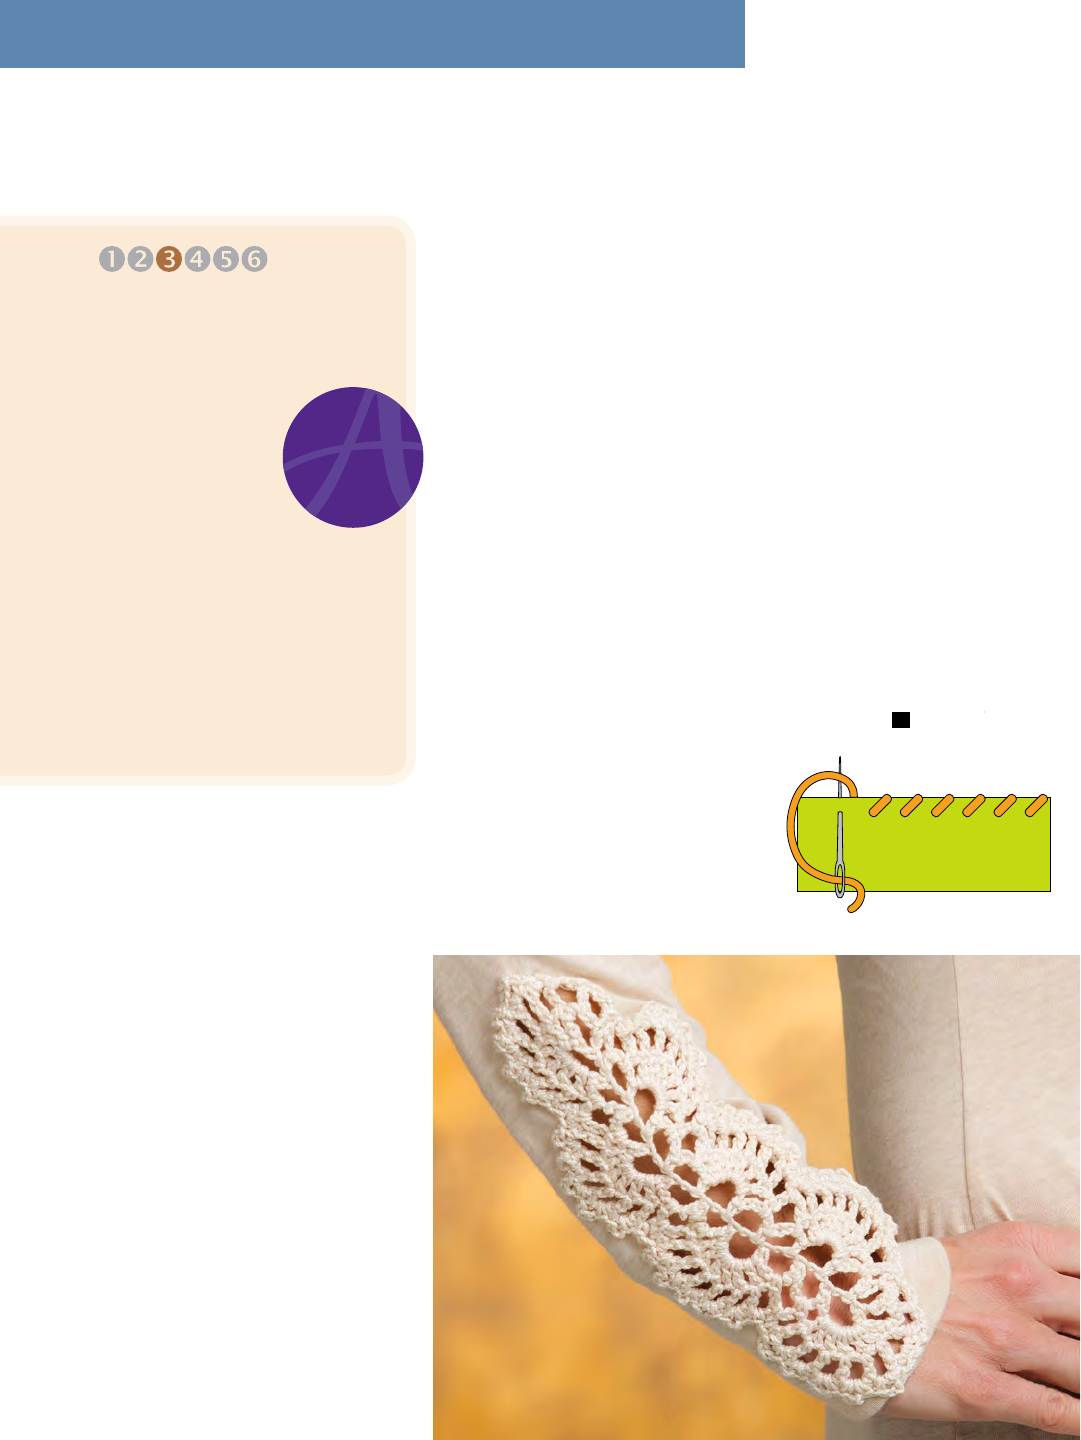
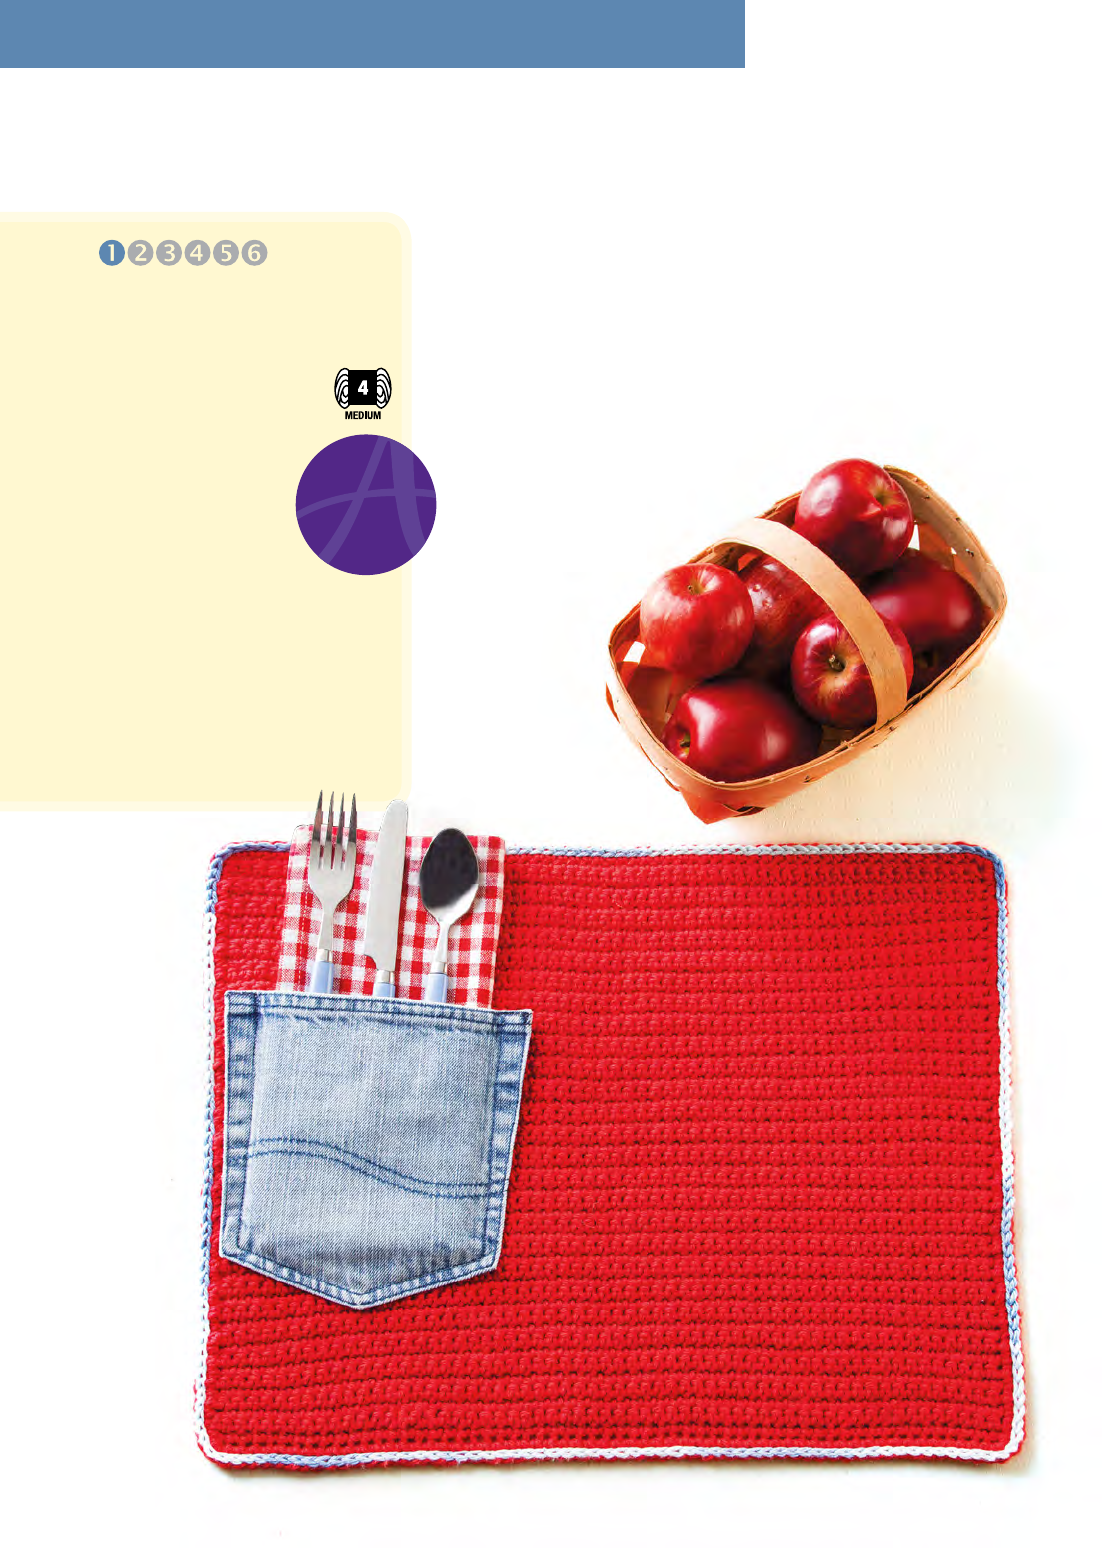
Denim Pocket Place Mat
Design by Kenneth Cormier
24 Crochet World CROCHETWORLD.COM AUGUST 2015
FINISHED MEASUREMENTS
17½ inches wide x 13½ inches long
MATERIALS
• Lily Sugar ‘n Cream
medium (worsted) weight
cotton yarn (solids:
2½ oz/120 yds/71g per
ball; ombrés: 2 oz/95
yds/57g per ball):
2 balls #0095 red
1 ball #0181 faded
denim ombré
• Size H/8/5mm crochet hook
or size needed to obtain gauge
• Back pocket from old denim jeans
• Sewing needle
• Tapestry needle
• Sewing thread to match pocket
GAUGE
14 sc = 4 inches; 4 rows = 1 inch
PATTERN NOTES
Weave in loose ends as work
progresses.
Join with slip stitch as indicated
unless otherwise stated.
PLACE MAT
Rnd 1 (RS): With red, ch 60, sc
in 2nd ch from hook and in each
ch across, turn. (59 sc)
BEGINNER
This fun place mat
design is a great
way to use pockets
from recycled
jeans to create
a unique table
setting.
Continued on page 58
Pantone uncoated (below)
Logo over stacked tagline
Logo next to stacked tagline
Logo alone
Minimum allowed sizes
Pantone uncoated (below)
Pantone uncoated (below) 4 color process (below)
Black (below) White (below)
Annie’s Logo Purple:
Pantone: 268C, GOE Medium Purple U
CMYK: C82, M100, K12
RGB: R82, G43, B133
Hexadecimal: 522b85
Annie’s Logo Gray:
Pantone: Cool Gray 9 U
CMYK: 60K
RGB: R130, G131, B134
Hexadecimal: 828386
Color specications:
Note: Symbols such as ®, ©, and ™ are never to appear as less than 5 pt. in size. If, in the event
of reducing art to t a space the symbol appears too small, that symbol must be reset to the
minimum 5 pt. type size.
A art, pantone uncoated (below)
Pantone uncoated (below)
Annie’s ocial logo, created 8/12, revised 7/13
(You must be familiar with the DRG corporate logo
standards before any usage attempt.)
4 color process (below)
Black (below)
White (below)
4 color process (below)
Black (below)
White (below)
4 color process (below)
Black (below)
White (below)
Buy this
YARN NOW!
AnniesYarnShop.com
BEADING
CROCHET & KNITTING
KIDS CRAFTS
CRAFTS
®®
QUILTING
®
CARD MAKING
For girls 7–12 years old
KIDS WOODWORKING
WOODWORKERSWOODWORKERS
YOUNG
KIT CLUB ™
MAKE YOUR CHOICE TODAY AT
KitClubSavings.com
LEARN HOW YOU CAN GET FABULOUS
INTRODUCTORY SAVINGS!
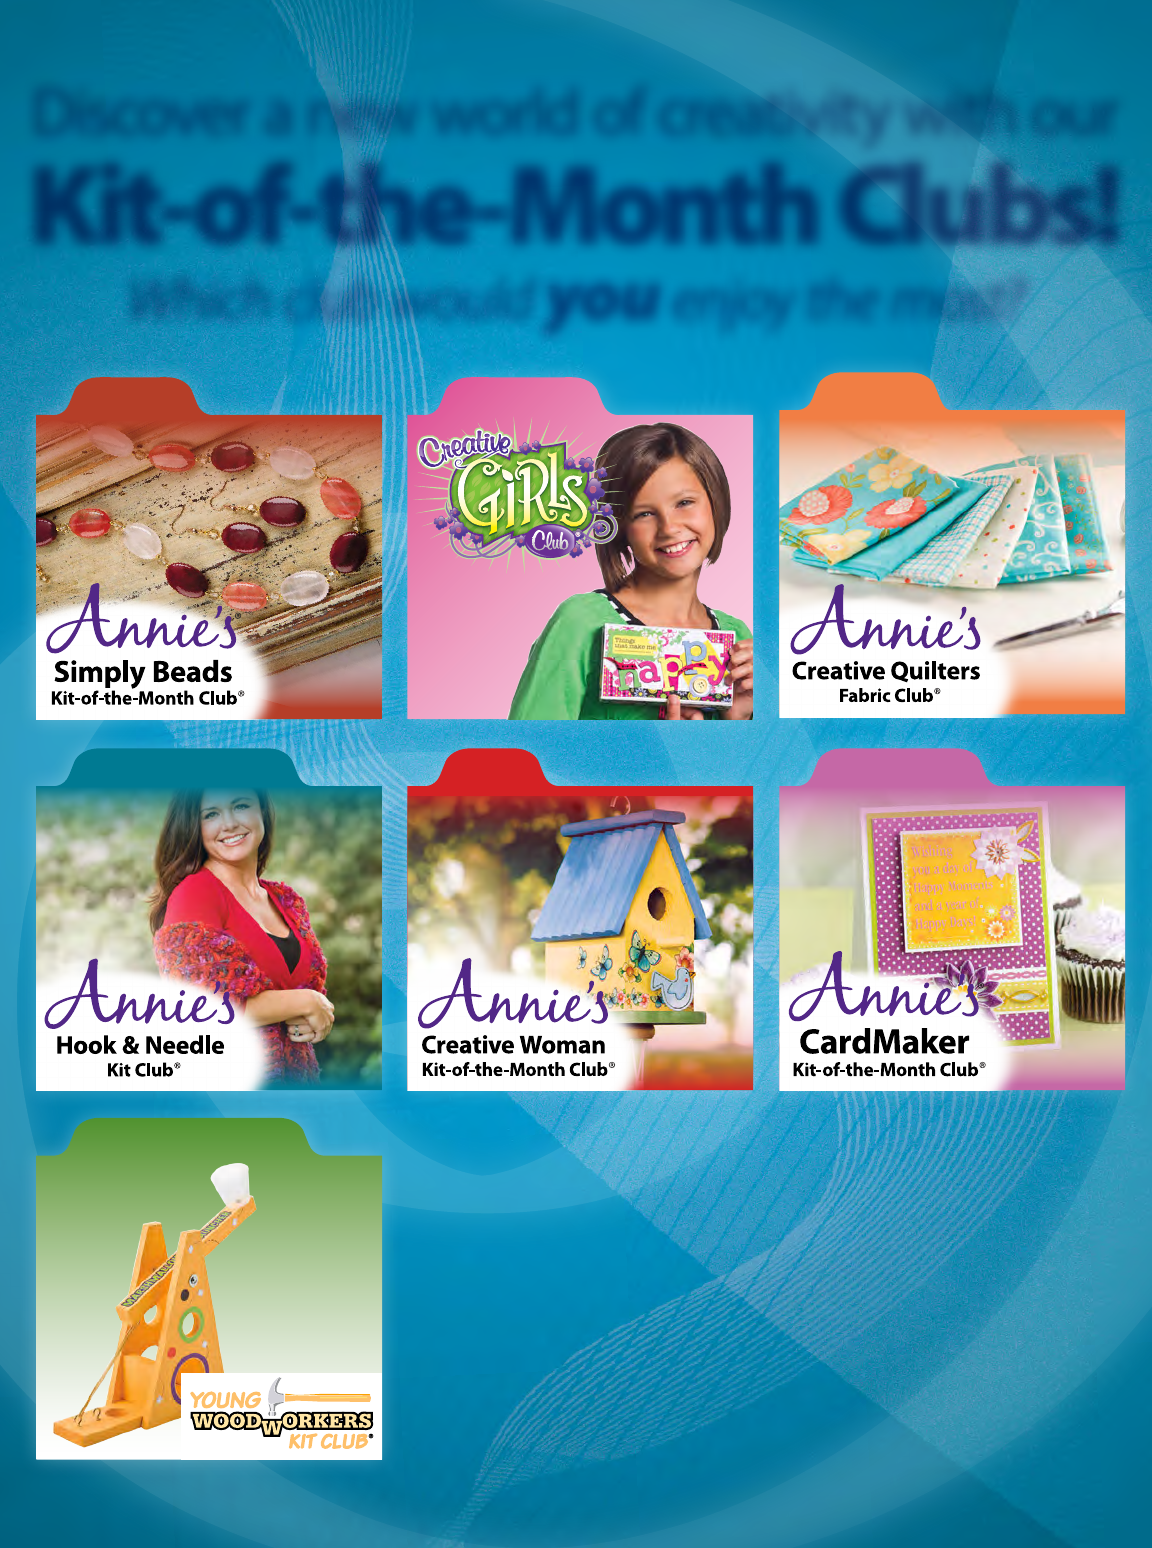
Discover a new world of creativity with our
Kit-of-the-Month Clubs!
Which club would you enjoy the most?
26 Crochet World CROCHETWORLD.COM
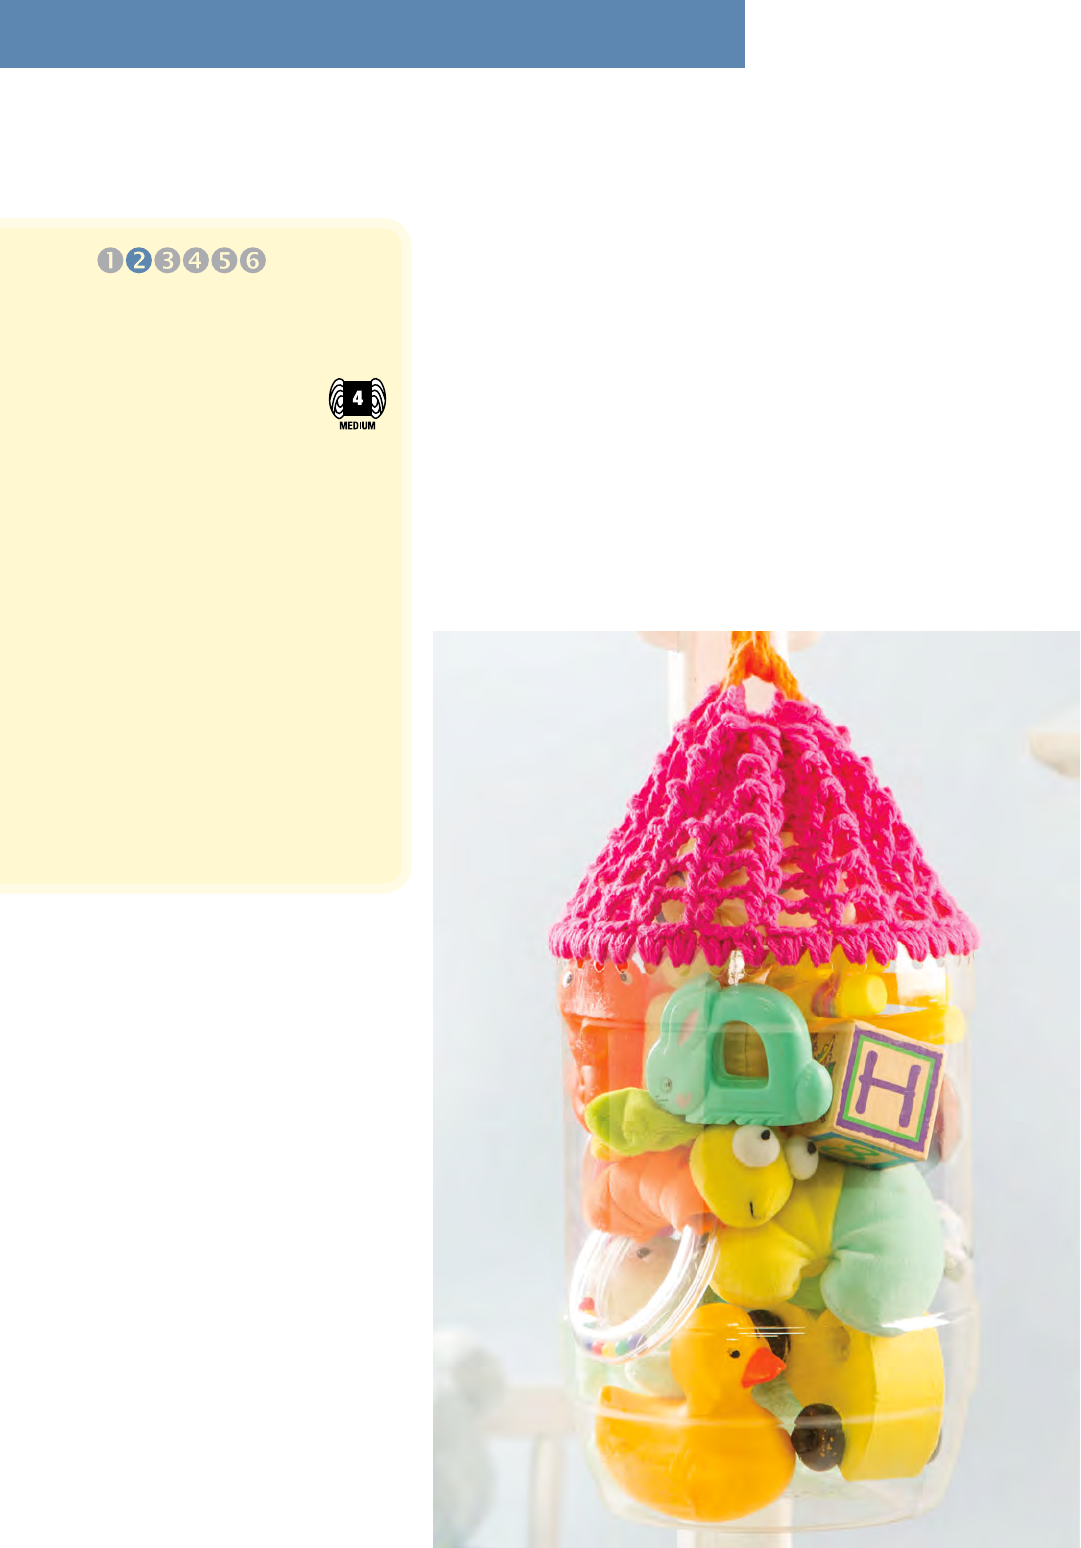
Stow & Go Yarn Tote
Design by Debra Arch
FINISHED MEASUREMENT
Mesh: 3¾ inches high
MATERIALS
• Lily Sugar ’n Cream wor-
sted (medium) weight
cotton yarn (2½ oz/
120 yds/71g per ball):
1 ball each #1740 hot pink,
#1628 hot orange and
#1712 hot green
• Sizes C/2/2.75mm and H/8/5mm
crochet hooks
• Clear plastic container: 6½ inches
in diameter x 9 inches tall
after cutting
• Heavy-duty scissors
• Heavy-duty ¼-inch hole punch
• 6mm orange acrylic multifaceted
beads: 2
• Tapestry needle
GAUGE
Gauge is not important for
this project.
REINVENT & RECYCLE
PATTERN NOTES
Weave in loose ends as work
progresses.
Join with slip stitch as indicated
unless otherwise stated.
Chain-3 at beginning of round
counts as first double crochet
unless otherwise stated.
Work V-stitch in space between
2 indicated groups or between
2 stitches of V-stitch.
SPECIAL STITCH
V-stitch (V-st): 2 dc in indi-
cated sp.
TOTE
MESH
Carefully cut off upper tapered
portion of container. Punch an
even number of holes approxi-
mately ½ inch below cut edge
and ½ inch apart around top
of container. (38 holes shown
in model)
Rnd 1 (RS): With size H hook,
join (see Pattern Notes) pink in
any hole, ch 1, 2 sc in same hole,
2 sc in each hole around, join in
beg sc. (38 2-sc groups)
Rnd 2: Sl st in next sc, sl st
in first sp between 2-sc groups,
ch 3 (see Pattern Notes), dc
in same sp (V-st—see Special
Stitch), *ch 2, sk next sp be-
tween 2-sc groups, V-st in next
sp (see Pattern Notes) between
2-sc groups, rep from * around,
ch 2, join in sp of beg V-st.
(19 V-sts)
Rnds 3–7: Ch 3, dc in same sp
as beg ch-3, ch 2, [2 dc in sp of
next 2-dc, ch 2] around, join in
sp of beg V-st. Fasten off.
FLOWER
Make 2.
Rnd 1 (RS): With size C hook
and pink, ch 2, 10 sc in 2nd ch
CONFIDENT
BEGINNER
This tote is great
for storing kids'
items too!
from hook, join in beg sc. Fasten
off. (10 sc)
Rnd 2: With RS facing, join or-
ange in any sc, (hdc, 2 dc, hdc) in
next sc, [sl st in next sc, (hdc, 2
dc, hdc) in next sc] 4 times, join
in beg sl st. Fasten off. (20 sts)
LEAVES
Make 2.
Row 1: With C hook and green,
ch 4, *dc in 4th ch from hook,
ch 3, sl st in same ch as first dc
(leaf made)*, ch 9, rep from * to
* once. Fasten off. (2 leaves)
ICORD
Row 1: With size H hook and
orange, make a ch 30 inches
long, working in back bar of ch
(see illustration) and bottom lp
of each ch, sl st in 2nd ch from
hook and in each rem ch across.
Fasten off.
FINISHING
Weave I-Cord in and out of ch-2
sps of rnd 7 beg and ending in
same ch-2 sp.
Thread tapestry needle with
8-inch length of orange and in-
sert needle from back to front
through flower center, through
1 bead, and then back down
through flower center. Hold
chain of leaves to underside of
Flower and tie ends of yarn in a
tight knot over chain to secure.
Thread each tail through each
end of I-Cord and knot tightly to
secure. Fasten off.
Rep in same manner to attach
2nd flower, leaves and bead by
threading and securing at mid-
point of I-Cord on opposite side
of container. CW
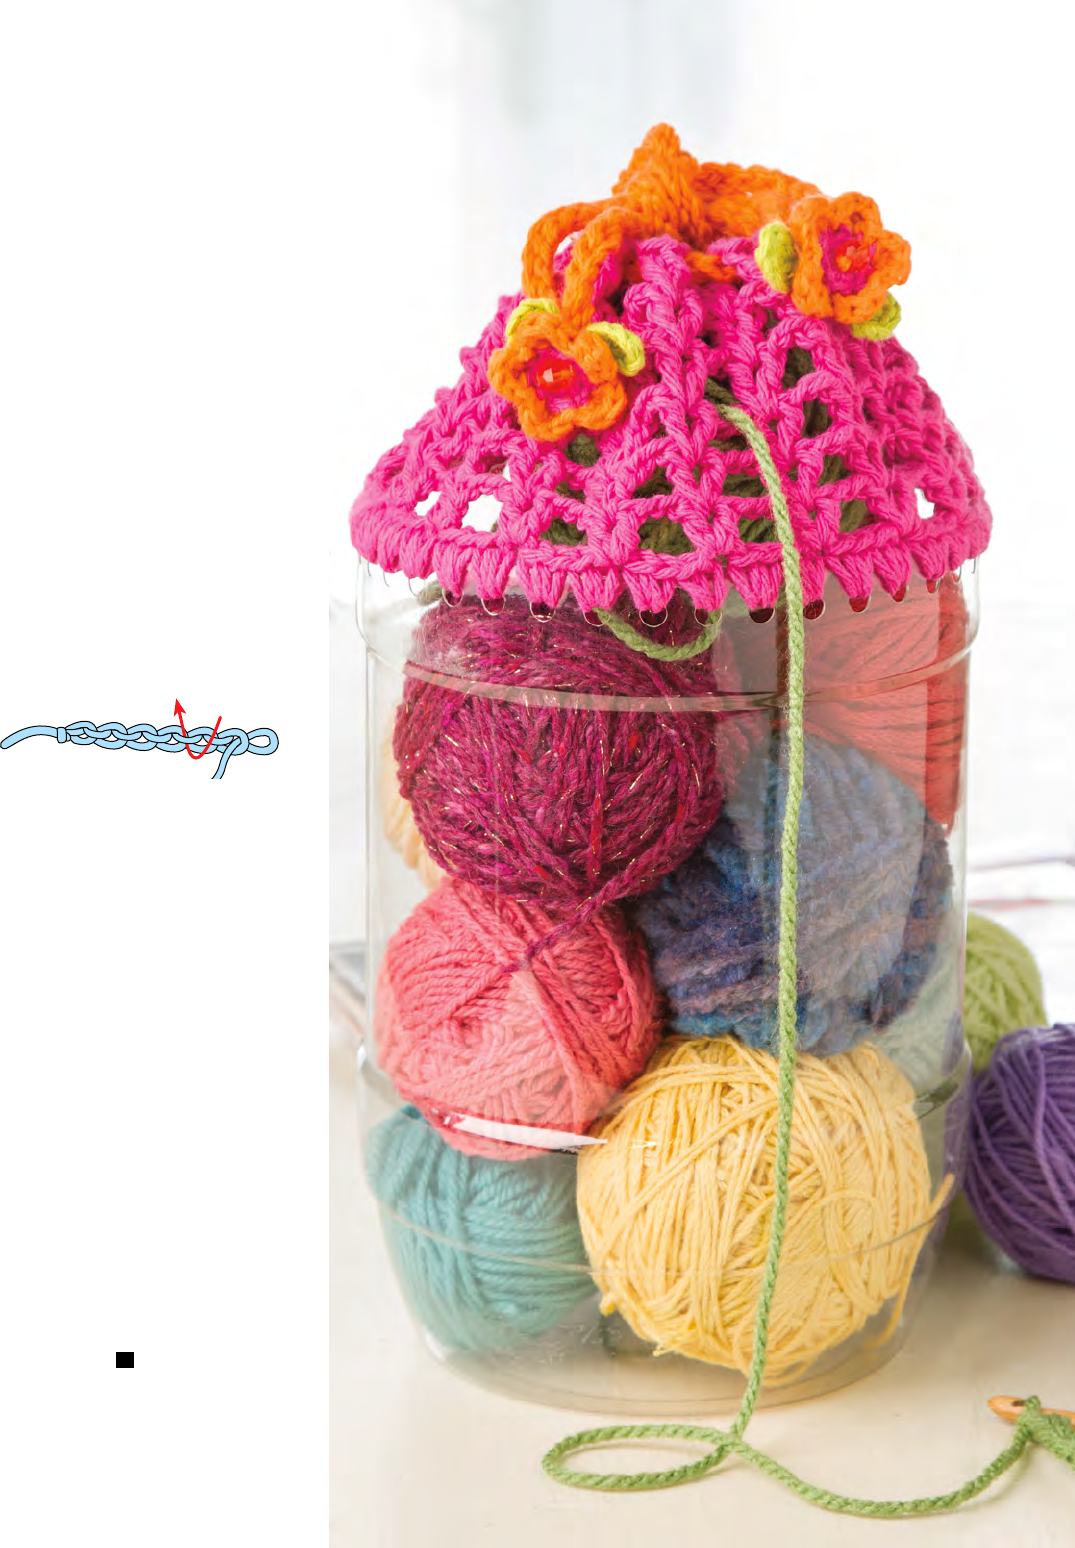
Take your crochet project with you
in this clever recycled tote made
from a jumbo plastic container.
Pull your yarn through the
mesh to work tangle free!
Back Bar of Chain

28 Crochet World CROCHETWORLD.COM AUGUST 2015
Flower for
a Friend
Necklace
Design by Catherine Ryan
FINISHED MEASUREMENTS
Necklace: 25 inches in circum-
ference
Large Flower: 1¾ inches in
diameter
Small Flower: 1½ inches in
diameter
MATERIALS
• Nazli Gelin Garden 3 size 3
crochet cotton (136 yds
per ball):
1 ball each #18 leaf green and
#10 purple
• Sizes C/2/2.75mm and
F/5/3.75mm crochet hooks
• Beading needle
• 1½-inch metal washer
• Dark green permanent marker
• 10mm transparent yellow round
glass bead
• Size 6/0 glass beads: 7 light
yellow, 16 dark green and 16
light green
• 6mm light green bicone beads: 8
• 2 ribbon clamps
• Necklace clasp
GAUGE
Gauge is not important for
this project.
CELEBRATE FRIENDS
EASY
PATTERN NOTES
Weave in loose ends as work
progresses.
Join with slip stitch as indicated
unless otherwise stated.
Chain-3 counts as double cro-
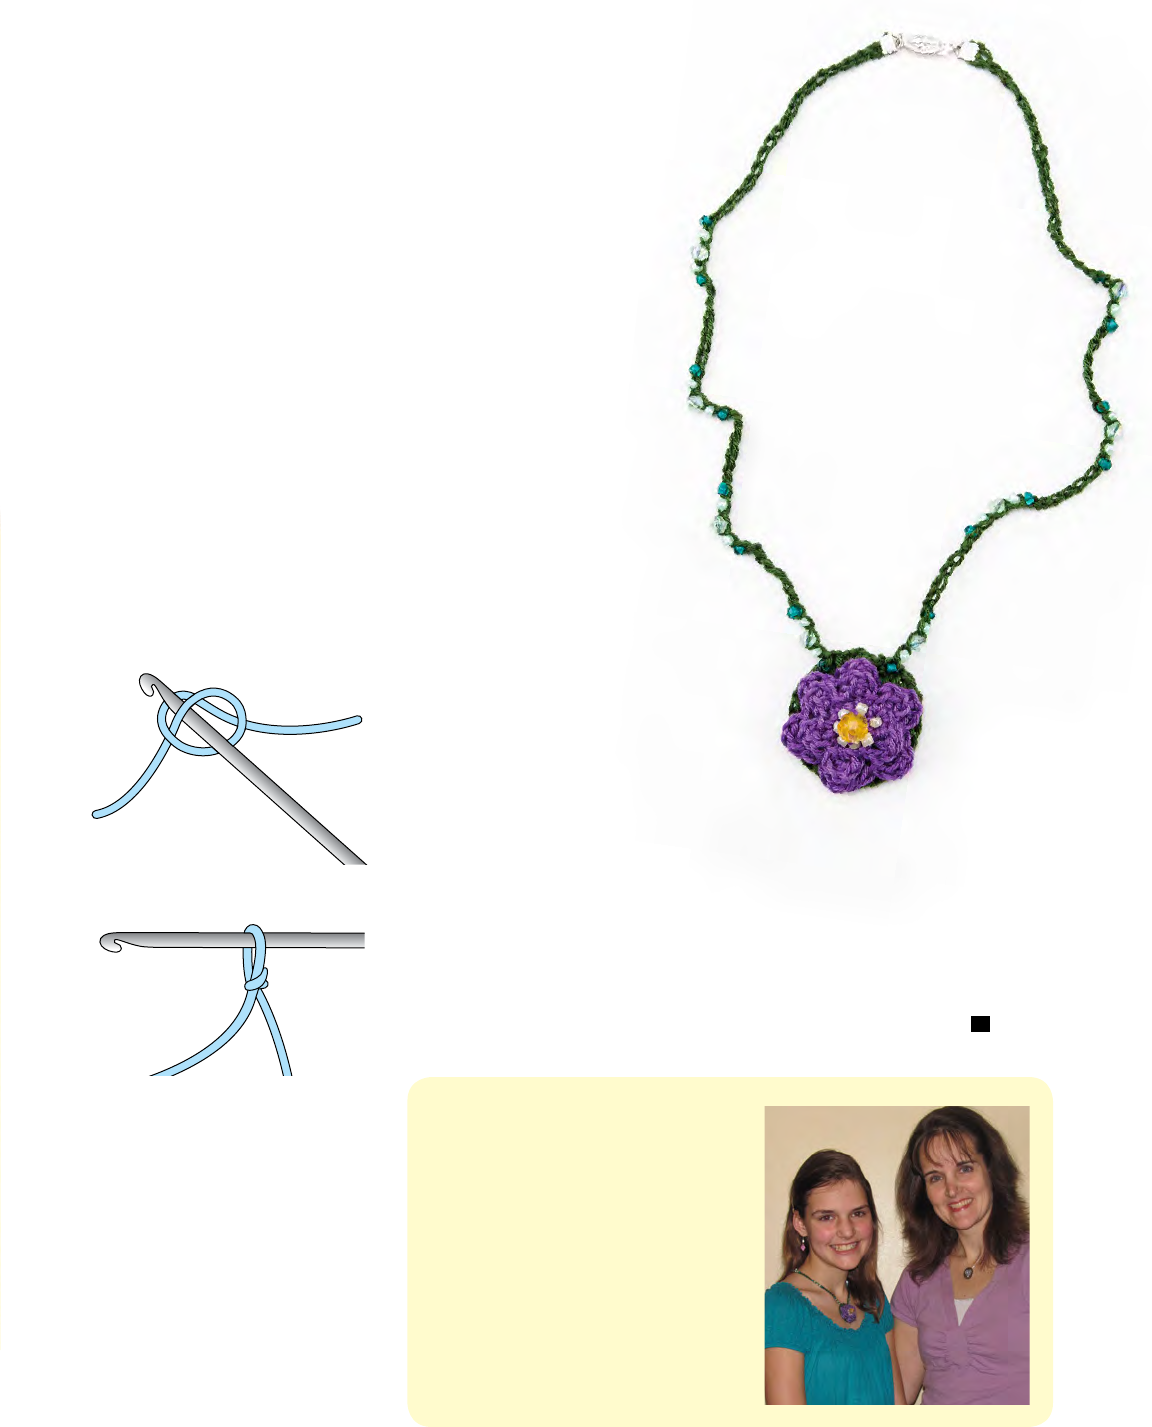
chet unless otherwise stated. This darling necklace makes the perfect gift for a tween or teen,
and it’s easy enough for kids to crochet. Our designer
for this project is 13 years old!
29 AUGUST 2015 CROCHETWORLD.COM Crochet World
SPECIAL STITCHES
Single crochet around wash-
er (sc around washer): Insert
hook in center opening of wash-
er, yo, draw up a lp, yo (above
outer edge of washer), draw
through both lps on hook.
Bead chain (bead ch): Push
up a bead next to hook, yo, draw
through lp on hook. Bead will be
inside ch just made on WS.
WASHER BASE
Note: Color washer on both
sides and inner and outer edges
with marker.
Rnd 1: With size F hook
and green, form a slip knot (see
illustration) on hook, sc around
washer (see Special Stitches) 30
times, join (see Pattern Notes) in
beg sc. Fasten off.
LARGE FLOWER
Rnd 1: With size F hook and
purple, ch 2, 10 sc in 2nd ch from
hook, join in beg sc.
Rnd 2: Ch 1, sc in same sc as
beg ch-1, 2 sc in each of next 4
sc, sc in next sc, 2 sc in each of
next 4 sc, join in beg sc. (18 sc)
Rnd 3: [Ch 3, dc in next sc, sc in
next sc, sl st in next sc] 6 times.
Fasten off. (6 petals)
Catherine Ryan, age 13, learned to
crochet from her mom, crochet
designer Jennifer E. Ryan, when she
was 6 years old. She loves to crochet
just about anything making up her
own designs and patterns. Her
favorite projects include jewelry,
garments and gifts for family and
friends. Catherine also enjoys acting,
singing, roller blading and bike riding.
She says, “I love crocheting because
I think it’s fast, and you can make so
many things.”
Slip Knot
A
B
SMALL FLOWER
Rnd 1: With size C hook and
purple, ch 2, 6 sc in 2nd ch
from hook, join in beg sc.
Rnd 2: (Ch 3—see Pattern
Notes, dc, sc) in same sc
(petal made), sl st in next
sc, [(ch 3, dc, sc) in same
st as last sl st, sl st in
next sc] 5 times. Fasten
off. (6 petals)
NECKLACE
Note: Thread beads on
green in the following order:
[Dark green, light green,
bicone, light green, dark
green] 8 times.
Rnd 1: With size F hook,
leaving a 6-inch length at
beg, ch 20, [bead ch (see
Special Stitches) each of next
5 beads, ch 5] 7 times, bead
ch each of next 5 beads, ch 20,
leaving a 6-inch length,
fasten off.
FINISHING
Thread 12-inch length of purple
on beading needle, sew 10mm
yellow bead to center of Small
Flower. Sew 7 light yellow
beads in a circle around center
yellow bead.
With a length of green, sew
center ch-5 sp of Necklace to sc
sts on edge of washer (this is the
4th ch-5 sp from either edge).
Leaving petals free, sew center
of Small Flower to center of
Large Flower. Sew Flowers
centered over Washer Base.
With rem beg lengths, secure
necklace clasp to each end of
Necklace, cut excess strands of
beg and ending lengths. CW
30 Crochet World CROCHETWORLD.COM AUGUST 2015
FINISHED MEASUREMENTS
Case: 7½ inches long x
4 inches wide
Flower: 1½ inches in diameter
MATERIALS
• Lily Sugar ‘n Cream
medium (worsted)
weight cotton yarn
(2½ oz/120 yds/71g per ball):
1 ball each #1530 country
red, #1004 soft ecru and
#0084 sage green
• Sizes G/6/4mm and H/8/5mm
crochet hooks or size needed to
obtain gauge
• ½-inch (12.5mm) Sew-Ology
#460592 buttons from Hobby
Lobby: 3
• Sewing needle
• Tapestry needle
• Sewing thread to match
buttons
GAUGE
With size H hook: 8 sc dec sts =
4 inches; 6 rows = 4 inches
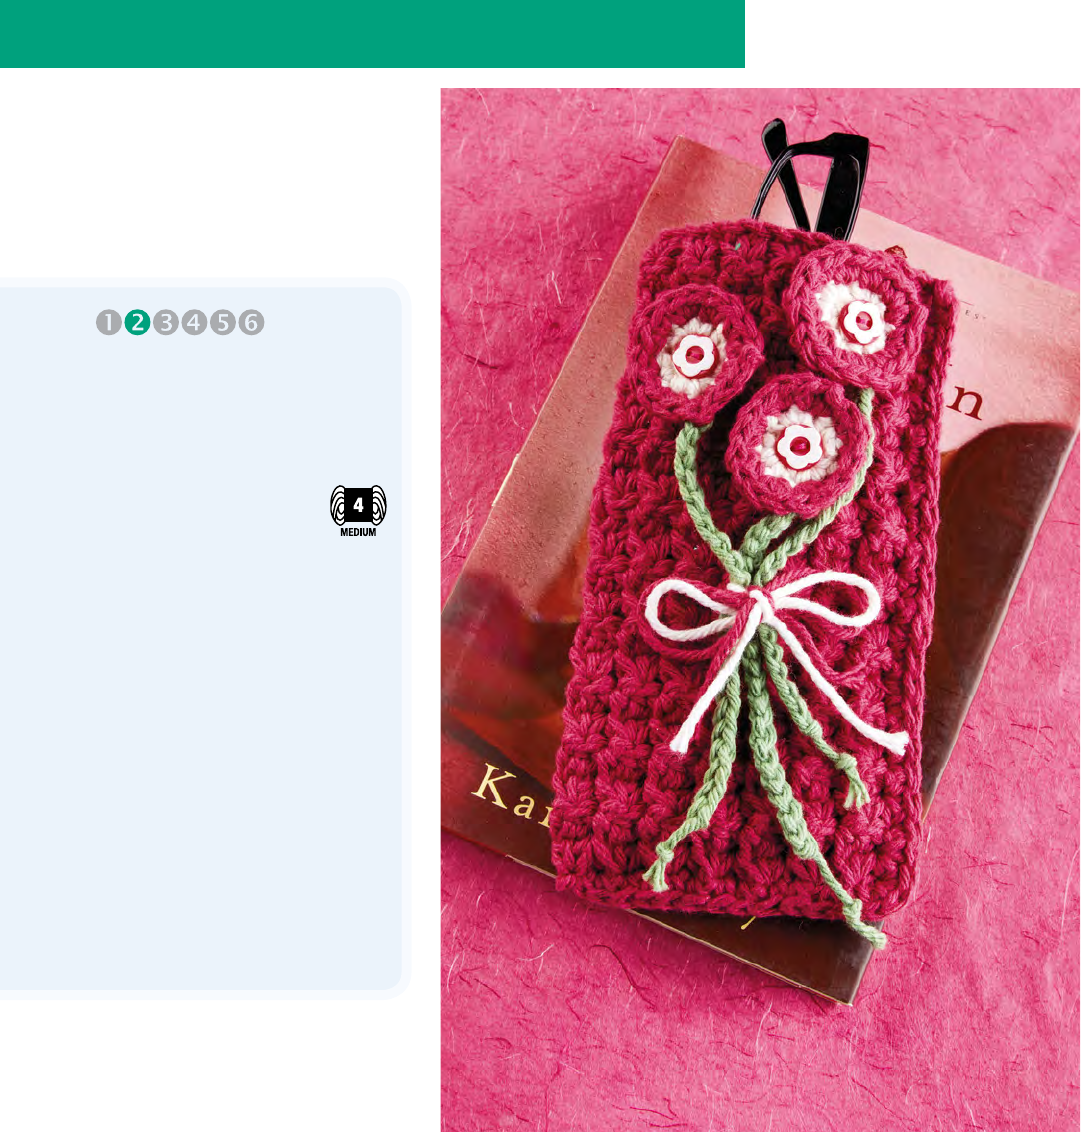
Pretty Blossoms
Eyewear Case
Design by Kenneth Cormier
CELEBRATE FRIENDS
PATTERN NOTES
Weave in loose ends as work
progresses.
All single crochet decrease
stitches are worked in the
same stitch as the last stitch
worked and in the next 2
stitches (which may be a
stitch or a chain).
Join with slip stitch as indi-
cated unless otherwise stated.
SPECIAL STITCH
Single crochet join (sc join):
Place a slip knot on hook,
insert hook in indicated st,
yo and draw up a lp, yo and
draw through both lps on hook.
CASE
Row 1 (RS): With size H hook
and red, ch 32, sc in 2nd ch from
hook, sc dec (see Stitch Guide)
in same ch as st just made
and in next 2 chs (see Pattern
Notes), *ch 1, sc dec in same ch
as st just made and next 2 chs,
rep from * across, sc in last ch
(same ch as st just made), turn.
(17 sc, 14 ch-1 sps)
Row 2: Ch 1, sc in first st, sc dec
in same sc as st just made, next
sc and next ch-1 sp, [ch 1, sc dec
in same ch-1 sp of st just made,
next sc and next ch-1 sp] 13
times, ch 1, sc dec in same ch-1
sp of st just made and last 2 sc,
sc in last sc again, turn.
This pretty case makes a great gift for a friend who
wears eyeglasses or for anyone who needs an
extra holder for a pair of sunglasses!
CONFIDENT
BEGINNER
31 AUGUST 2015 CROCHETWORLD.COM Crochet World
Rows 3–22: [Rep row 2] 20
times. Fasten off at end of
row 22.
FLOWER
Make 3.
Rnd 1 (RS): With size G hook
and ecru, ch 2, 4 sc in 2nd ch
from hook. (4 sc)
Rnd 2: 2 sc in each st around,
join (see Pattern Notes) in beg
sc. Fasten off. (8 sc)
Rnd 3: Join red in any sc of rnd
1, ch 1, sc in same st, 2 sc in
each rem st around, join in beg
sc. Fasten off. (16 sc)
STEM
Short Stem
Make 2.
With size G hook and WS of
Flower facing, join green to back
post of any sc, ch 20. Fasten off.
Long Stem
Make 1.
With size G hook and WS of
Flower facing, join green to back
post of any sc, ch 25. Fasten off.
FINISHING
Place a button in center of each
Flower and sew button through
both thicknesses of Flower and
Case. With RS of Case facing,
position Flowers with edges
touching as follows: Sew Flower
with Long Stem at top right of
Case, near top edge and ½ inch
from right side edge. Sew 1
Flower with Short Stem ¾ inch
from top and to left of first Flow-
er. Position last Flower below
and between first 2 Flowers.
Edging
With WS tog, fold Case in half.
With size G hook and working
through both thicknesses of
opposite side of foundation ch,
sc join (see Special Stitch) red
in first ch, sc in each ch across
to last ch, 3 sc in last ch, work-
ing in both thicknesses of ends
of rows, sc evenly up side.
Fasten off.
Bow
Cut 12-inch strand of red and
ecru. Gather stems tog and, with
both strands held tog, tie a bow
around all 3 stems. CW
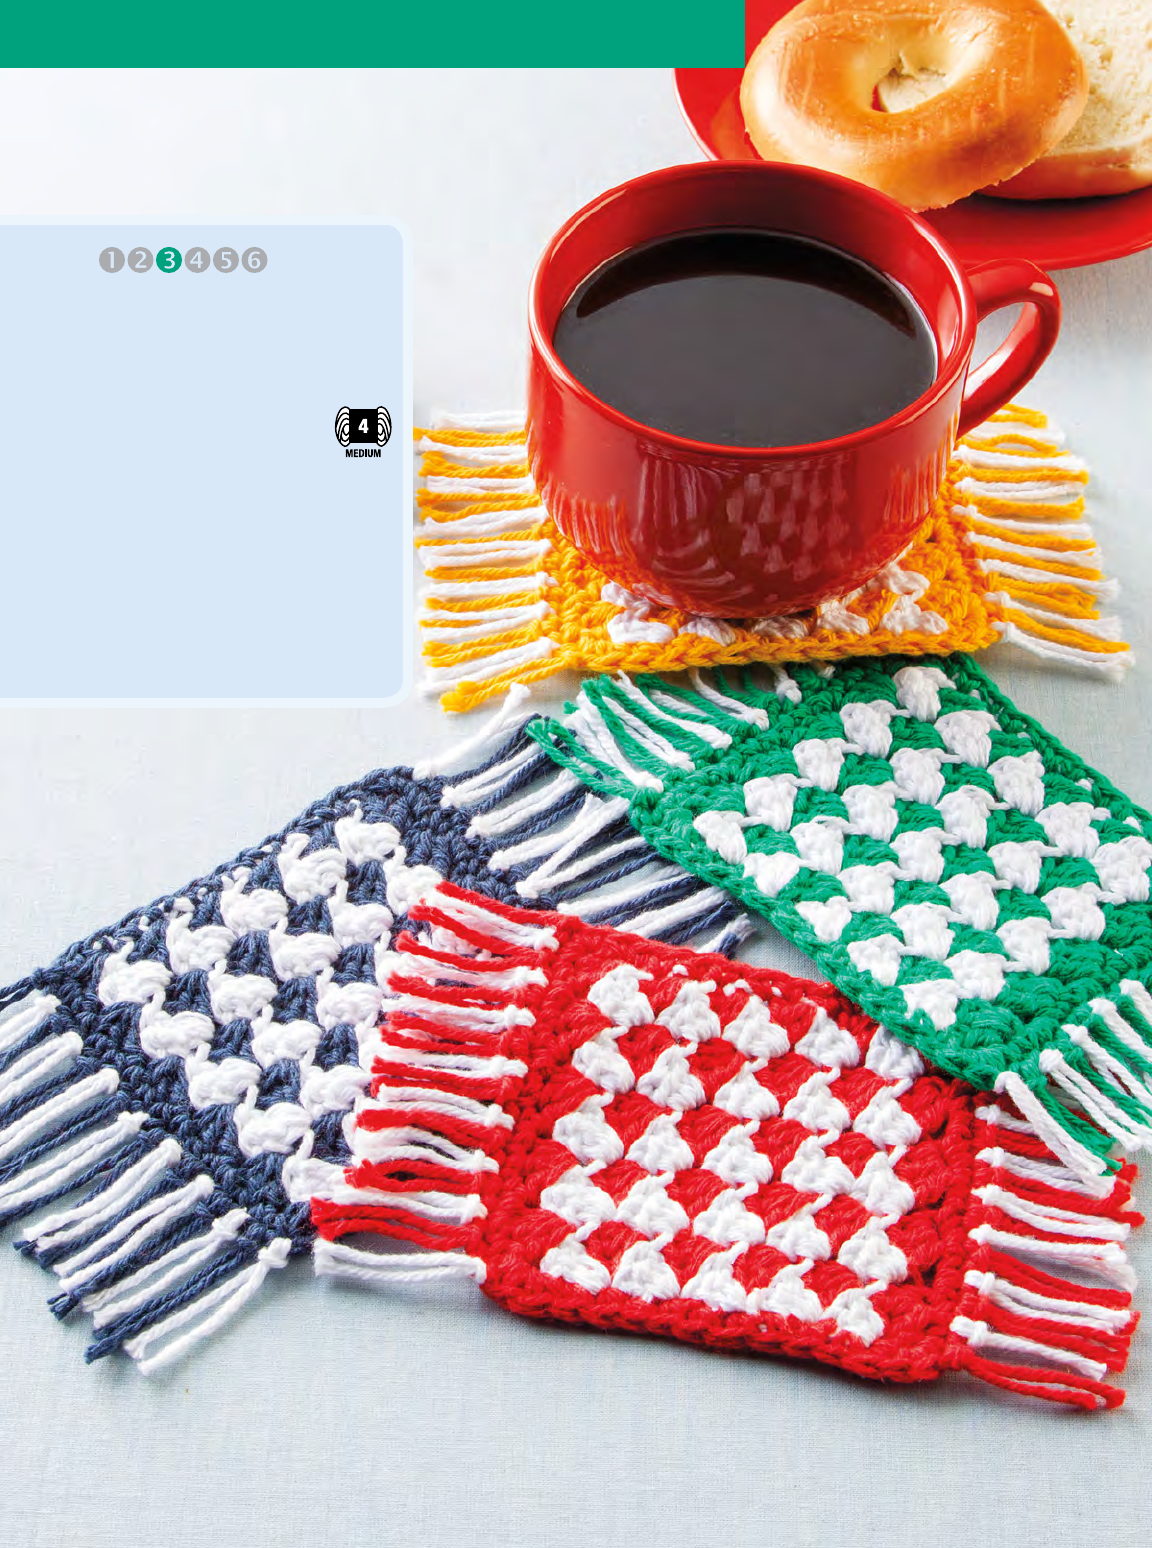
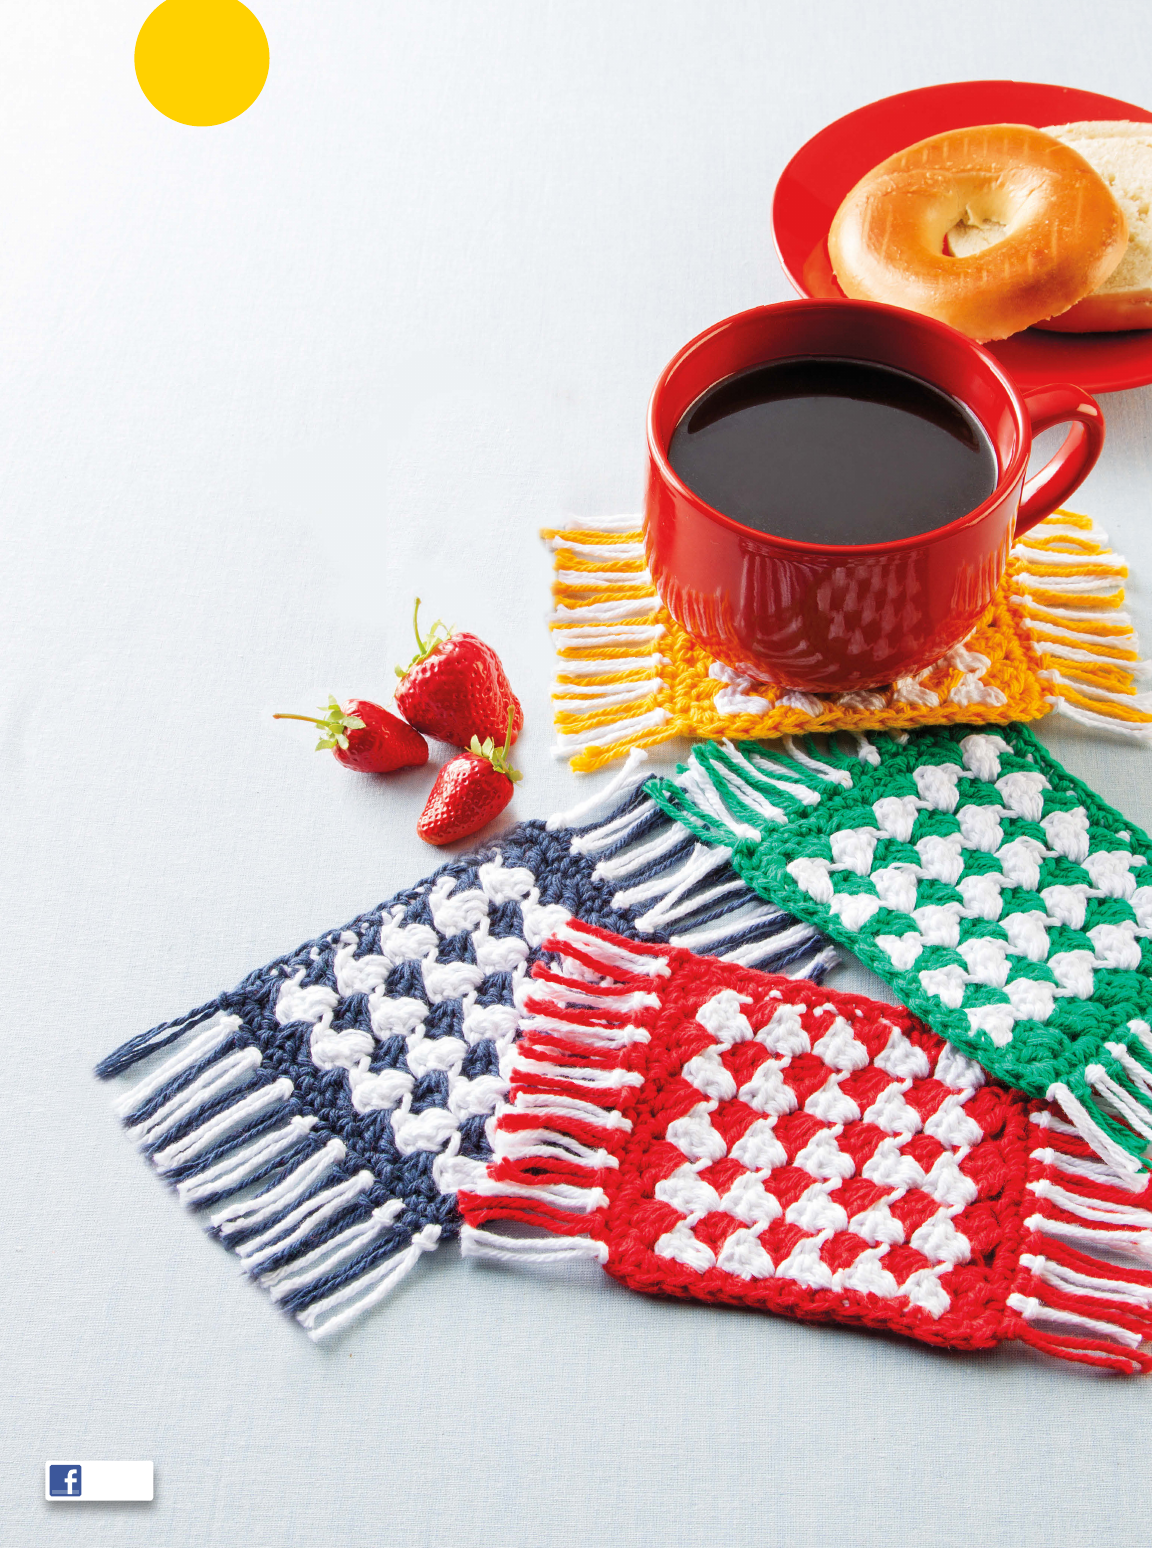
Little Bits Mug Rugs
Design by Kenneth Cormier
FINISHED MEASUREMENTS
5 inches wide x 4½ inches long,
excluding Fringe
MATERIALS
• Medium (worsted) weight
cotton yarn (2½ oz/
120 yds/71g per ball):
1 ball each white, red,
green, dark blue and
bright yellow
• Size G/6/4mm crochet hook
• Tapestry needle
GAUGE
Gauge is not important for
this project.
CELEBRATE FRIENDS
Use up your scraps of worsted-weight cotton yarn and
give a friend a set of these colorful coasters along
with a cute mug and their favorite tea or coffee.
EASY

33 AUGUST 2015 CROCHETWORLD.COM Crochet World
PATTERN NOTES
Weave in loose ends as work
progresses.
Join with slip stitch as indicated
unless otherwise stated.
MUG RUG
Make 1 each pine, red,
indigo & yellow.
Row 1 (RS): With MC, ch 17,
(sc, 2 dc) in 2nd ch from hook,
*sk next 2 chs, (sc, 2 dc) in next
ch, rep from * to last 3 chs, sk
next 2 chs, sc in last ch, change
color (see illustration) to white,
turn. (6 sc, 10 dc)
Row 2: Ch 1, (sc, 2 dc) in each
sc across to last sc, sc in last sc,
change color to MC, turn.
Row 3: Ch 1, (sc, 2 dc) in each
sc across to last sc, sc in last sc,
change color to white, turn.
Rows 4–11: [Rep rows 2 and
3 alternately] 4 times. Do not
change color or turn at end
of row 11.
EDGING
Rnd 1: Ch 1, working in ends
of rows down next side, work 13
sc evenly sp across, working in
opposite side of foundation ch,
3 sc in first ch, sc in each ch to
last ch, working in ends of rows
up 2nd side, work 13 sc evenly
sp across to last row, 3 sc in first
st, sc in each st across to last st,
3 sc in last st, join (see Pattern
Notes) in beg sc. Fasten off.
FINISHING
Fringe
For each Mug Rug, cut 16 4-inch
lengths each MC and white.
Fold 1 strand in half to form a
lp. Insert hook from RS through
center st of any 3-sc group.
Place fold on hook and draw fold
through, forming a lp. Thread
ends of strands through lp and
pull to tighten. Alternating col-
ors and working across short
edge, rep to attach Fringe in
each st, ending in first st of next
3-sc group. With RS of opposite
edge facing, rep to attach Fringe
across other short edge. Trim
ends evenly. CW
Single Crochet Color Change
Omega has the
best cotton
crochet threads
and yarns,
different sizes
and plenty of
colors to provide
satisfaction in
your crochet
and knitting
handcrafts.
Omega nylon
threads and
cords, different
sizes, excellent
for all kind of
crochet and
handcrafts.
Brightness,
durability,
different.
OMEGA DISTRIBUIDORA DE HILOS, S.A. DE C.V.
Callejón San Antonio Abad No.23, col. Tránsito,
México, D. F., 06820 Ph: 001 525555 228660
Fax: 5522 6347 Lada 01800 70 25100
e-mail: orden@hilosomega.com.mx
www.hilosomega.com.mx
Made in Mexico
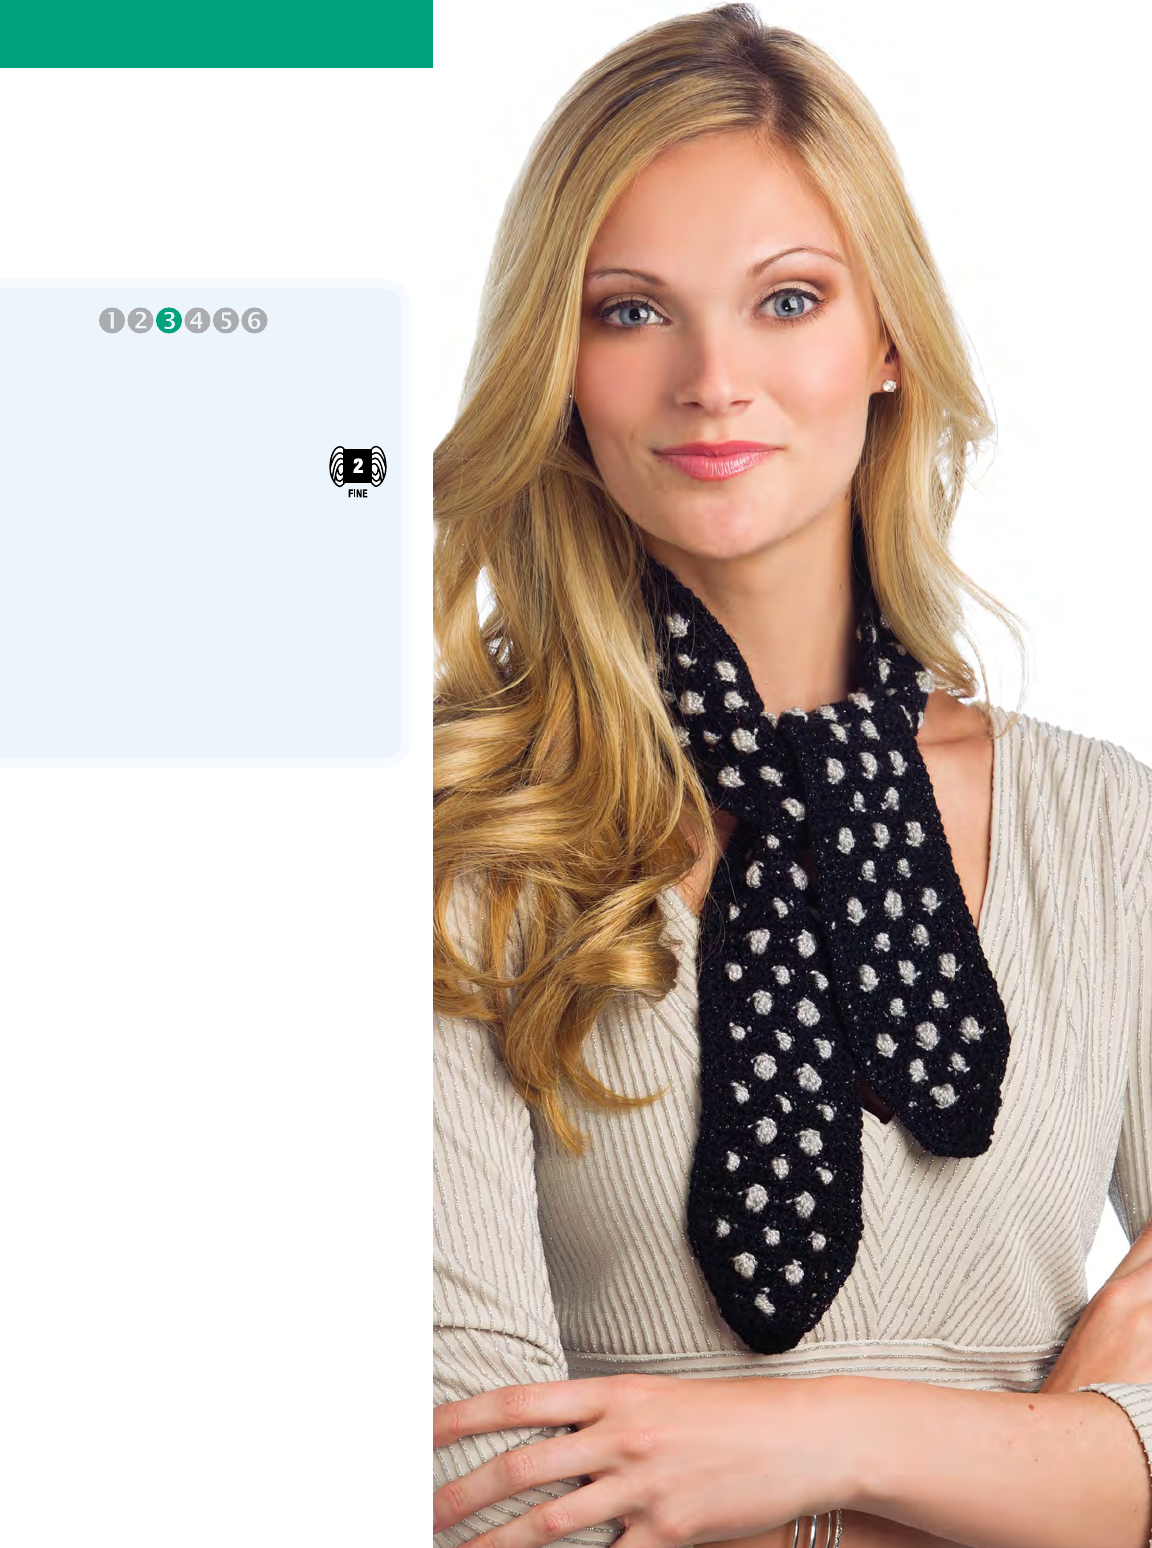
Glamour Girl
Scarf
Design by Leshia Tweddle
34 Crochet World CROCHETWORLD.COM
FINISHED MEASUREMENTS
2¾ inches wide x 38 inches long
MATERIALS
• Lion Brand Yarn Vanna’s
Glamour fine (sport)
weight acrylic/metallic
polyester yarn (1¾ oz/
202 yds/50g per ball):
1 ball each #153 onyx and
#150 platinum
• Size F/5/3.75mm crochet hook
• Tapestry needle
GAUGE
Gauge is not important for
this project.
CELEBRATE FRIENDS
PATTERN NOTES
Weave in loose ends as work
progresses.
Chain-3 at beginning of row
counts as first double crochet
unless otherwise stated.
When changing color, carry and
work over color not in use on
back side of piece until needed.
Chain-1 of puff does not count
as a stitch. Work into top of puff
and not chain-1 space.
Join with slip stitch as indicated
unless otherwise stated.
SPECIAL STITCH
Puff: Yo, insert hook in indi-
cated st, yo and draw up a lp,
[yo, insert hook in same st, yo
and draw up a lp] twice (7 lps on
hook), change color (see Stitch
Guide) to onyx, yo, pull through
all 7 lps on hook, ch 1 tightly
to close.
Put a little
sparkle in
someone’s life
with this elegant
scarf crocheted
in glitzy metallic
yarn. It can be
worn either
around the neck
or the head.
EASY
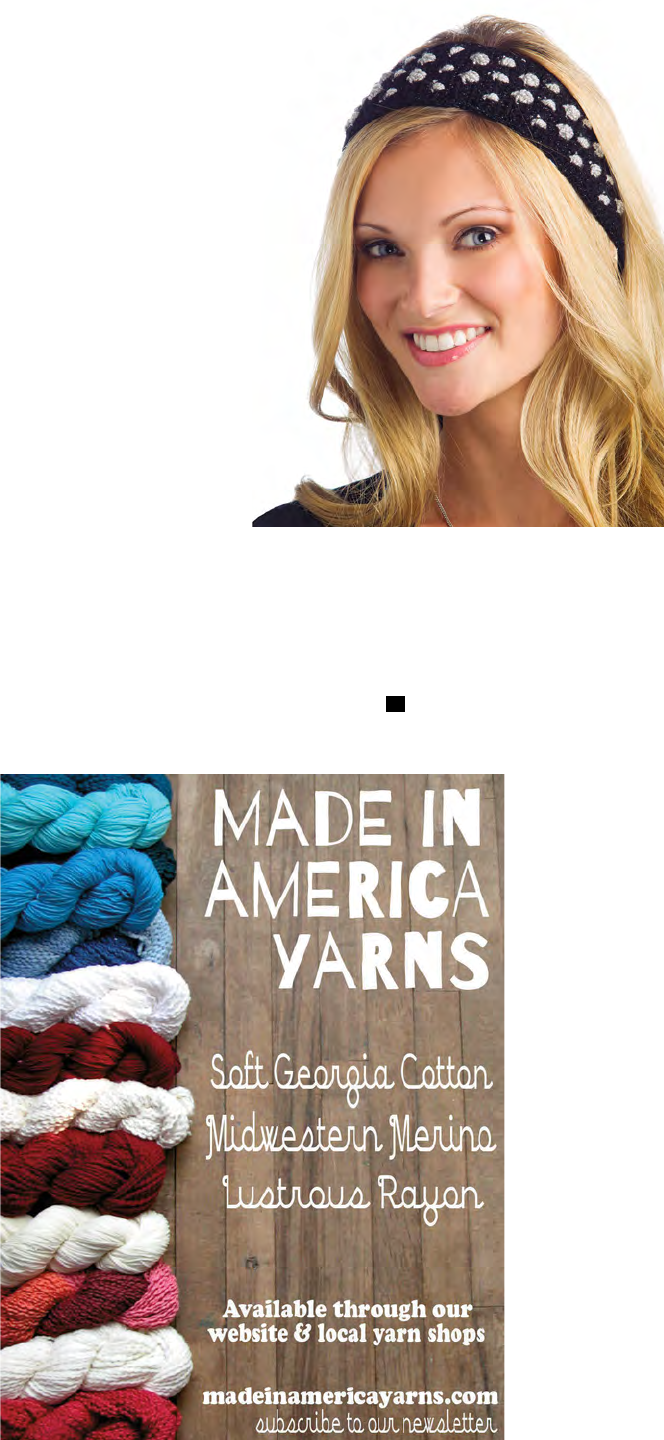
35 AUGUST 2015 CROCHETWORLD.COM Crochet World
SCARF
Row 1: With onyx, ch 2, sc in
2nd ch from hook, turn. (1 sc)
Row 2: Ch 3 (see Pattern Notes),
4 dc in sc, turn. (5 dc)
Row 3: Ch 3, dc in same st as
beg ch-3 and in each of next 3
sts, 2 dc in last st, turn. (7 dc)
Row 4: Ch 1, sc in each of first
3 sts, change color to platinum,
puff (see Special Stitch) in next
st, with onyx, sc in each of last
3 sts, turn. (6 sc, 1 puff)
Row 5: Ch 1, 2 sc in first st, sc
in each of next 5 sts, 2 sc in last
st, turn. (9 sc)
Row 6: Ch 1, 2 sc in first st, sc
in each of next 7 sts, 2 sc in last
st, turn. (11 sc)
Row 7: Ch 1, sc in each of next
3 sts, [change color to platinum,
puff in next st, with onyx, sc in
each of next 3 sts] twice, turn.
(9 sc, 2 puffs)
Row 8: Ch 1, 2 sc in first st, sc
in each of next 9 sts, 2 sc in last
st, turn. (13 sc)
Row 9: Ch 1, sc in each st
across, turn.
Row 10: Ch 1, sc in each of first
2 sts, [change color to platinum,
puff in next st, with onyx, sc
in each of next 3 sts] 2 times,
change color to platinum, puff in
next st, with onyx, sc in each of
next 2 sts, turn. (10 sc, 3 puffs)
Rows 11 & 12: Rep row 9.
(13 sc)
Row 13: Ch 1, sc in each of next
4 sts, change color to platinum,
puff in next st, with onyx, sc in
each of next 3 sts, change color
to platinum, puff in next st, with
onyx, sc in each of next 4 sts, drop
platinum, turn. (10 sc, 3 puffs)
Rows 14 & 15: Rep row 9.
(13 sc)
Rep rows 10–15 until Scarf
measures 35 inches.
Next row: Ch 1, sc in each
of first 2 sts, [change color to
platinum, puff in next st, with
onyx, sc in each of next 3 sts]
twice, change color to platinum,
puff in next st, with onyx, sc in
each of last 2 sts, drop platinum,
turn. (10 sc, 3 puffs)
Next row: Rep row 9. (13 sc)
Next row: Ch 1, sk first st,
sc in each of next 9 sts, sc dec
(see Stitch Guide) in last 2 sts,
turn. (11 sc)
Next row: Rep row 7. (9 sc,
2 puffs)
Next 2 rows: Ch 1, sk first st,
sc in each st to last 2 sts, sc dec
in last 2 sts, turn. (7 sc)
Next row: Rep row 4. (6 sc,
1 puff)
Next row: Ch 3, dc in each st
across, turn. (7 dc)
Next row: Ch 2, sk next st, dc
dec (see Stitch Guide) in next
4 sts, leaving last st unworked,
turn. (1 dc)
Last rnd: Now working in rnd,
ch 1, 3 sc in dc, working in ends
of rows and over platinum, sc
evenly around, working 3 sc in
opposite side of foundation ch,
join (see Pattern Notes) in beg
sc. Fasten off. CW
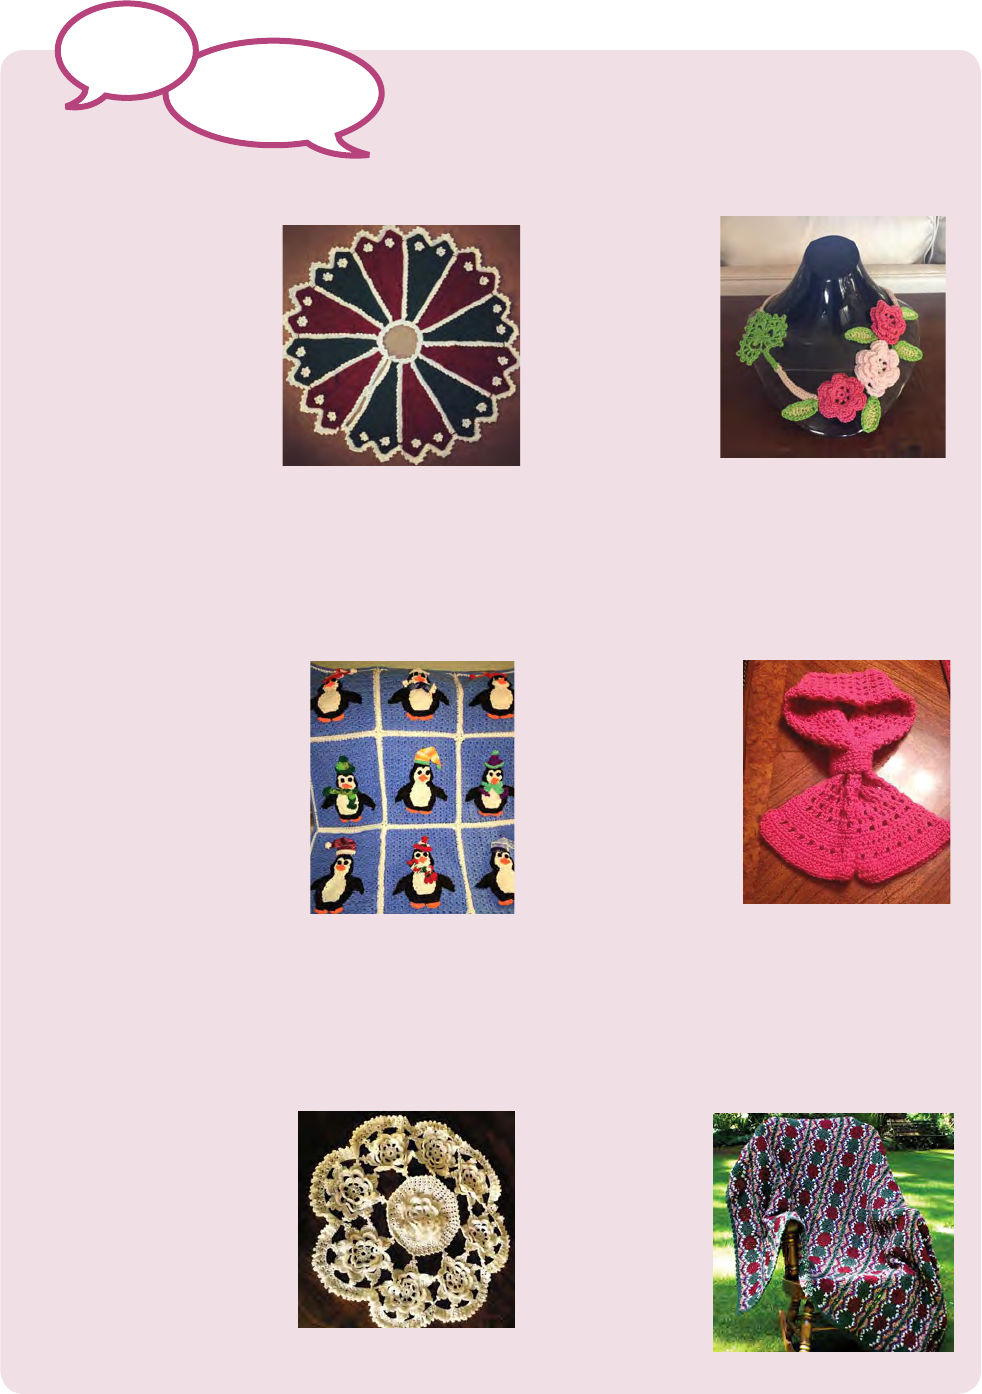
36 Crochet World CROCHETWORLD.COM AUGUST 2015
BACK
TALK! Raves from
our readers and
online followers.
From Our Readers
My mother-in-law made the
beautiful Playful Penguins
Blanket from the Decem-
ber 2014 issue! It came out
perfectly!
—Karie Newsome
I just found the December 2014 issue of Crochet
World at Michael’s today and picked it up because of
the Playful Penguins Blanket on the cover. I wanted
to say thank you for the code to download a digital
copy of the issue.
—Jamie Todhunter
Here is my Winter Rose
Doily from the December
2014 issue of Crochet World.
—Peg Billyard
From Our Facebook Fans
Hello! I absolutely love
this magazine and have
crocheted many of the
patterns (and hope to do
many more). I am quite
proud of the tree skirt
I just nished from the
December 2014 issue. I
have been looking for a
tree skirt pattern for a few
years and fell in love with this one right away! I
just wanted to share it with you ... and brag a bit!
—Annette Tomlinson
From Our Ravelry Followers
Karen (allnineskr)
on Ravelry posted
this photo of her
beautiful version
of our Vintage
Christmas Throw
by Katherine Eng
in the December
2012 issue.
I’m really enjoying
the Crochet World
February 2015
issue. Here is a
picture of my
Roses & Shamrock
Necklace. I loved
creating this piece.
Next up is the
Sweet Sentiments
Jar. Then it will
be the Trifolium Doily, or should I do the
Twists & Turns Ripple Throw? There are so
many beautiful patterns to choose from.
Thanks for a wonderful magazine!
—Susie Marro
Here’s Crochet World
fan Margot A-N’s
nished Fun on the
Run Scarf from the
February 2015 issue!
Great job, Margot!
Please don’t go out of business like all the
other crochet magazines have! I am hoping
to keep you around for a long time!
—Terri Craig
Watch our TV show---ON DEMAND
Join us today as an
ALL-ACCESS MEMBER
ü All 78 episodes
ü All 215 projects
ü 10% off at Annie’s
Craft Store
24/7 ACCESS ANYTIME, ANYWHERE
Every episode and every pattern at your ngertips.
Go to KnitandCrochetNow.com for info
An Annie’s Production
Find us on
From Our Ravelry Followers
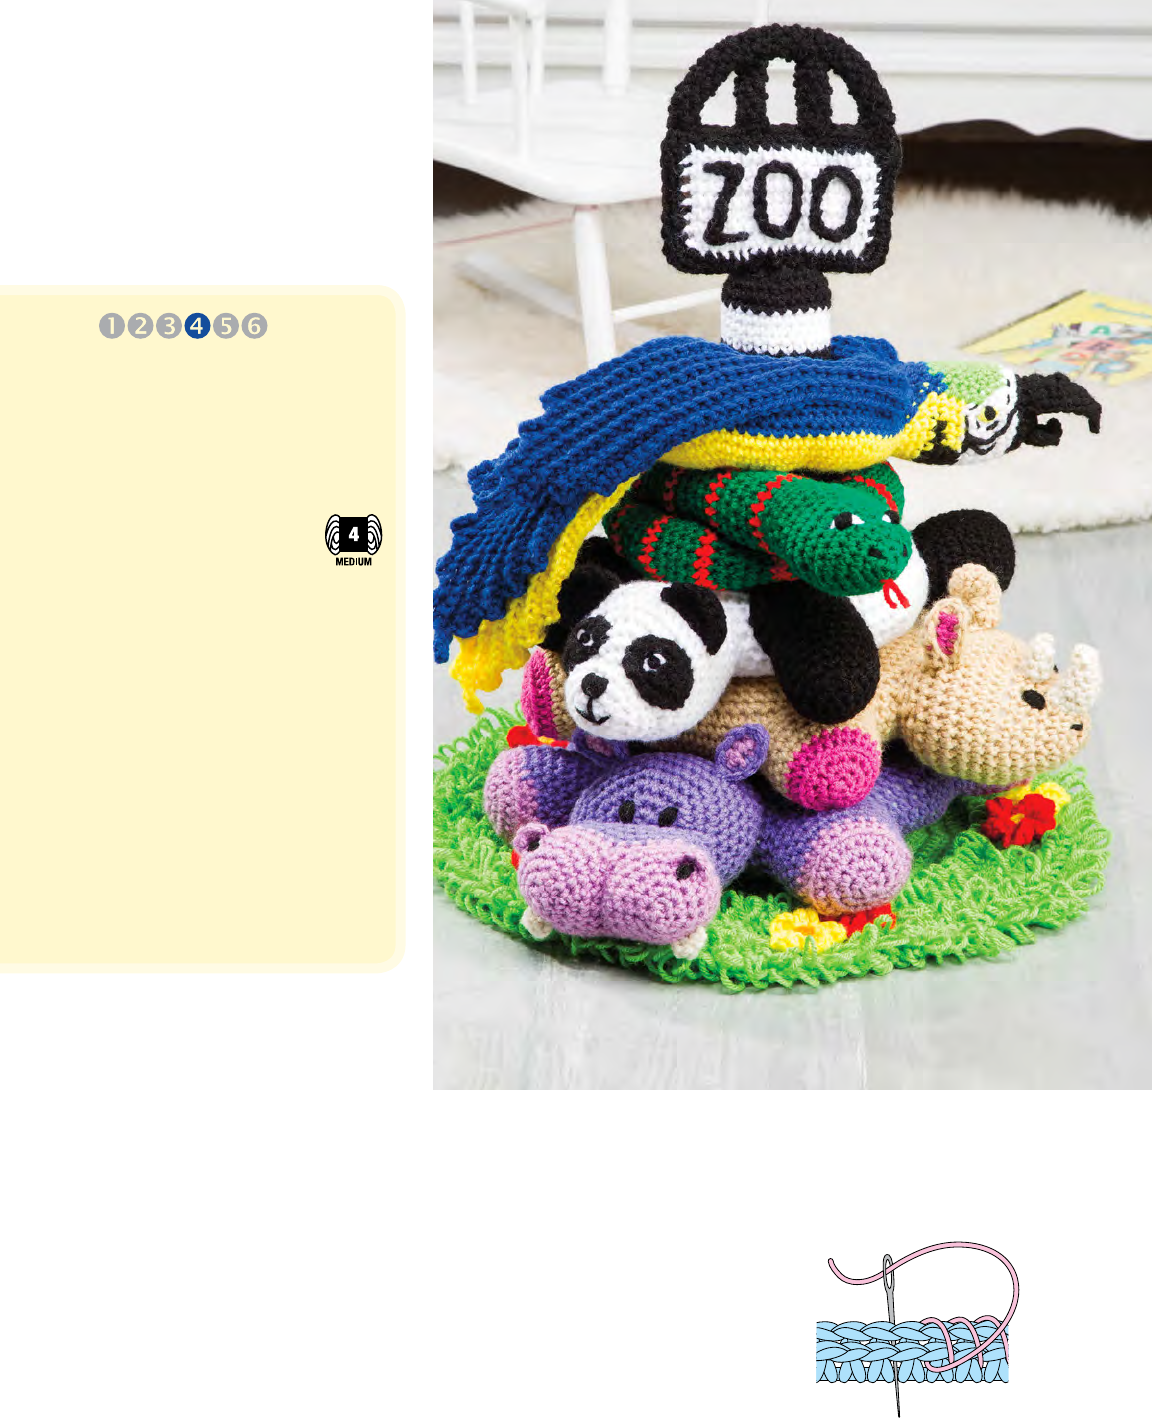
Crochet World CROCHETWORLD.COM AUGUST 201538
At the Zoo,
Part 2
Designs by Cindy Cseh
FINISHED MEASUREMENTS
Rhino Body: 8½ inches in diam-
eter, not including Head or Legs
Panda Body: 8 inches in diam-
eter, not including Head or Legs
MATERIALS
• Red Heart Super Saver
medium (worsted)
weight acrylic yarn
(7 oz/364 yds/198g per skein):
6 oz each #334 buff and
#311 white
3 oz each #312 black
1 oz each #706 perfect pink
and #313 Aran
• Sizes F/5/3.75mm, H/8/5mm
and I/9/5.5mm crochet hooks
or size needed to obtain gauge
• Tapestry needle
• Fiberfill
• Stitch marker
GAUGE
Size I hook: 3 sc = 1 inch;
3 sc rnds = 1 inch
INTERMEDIATE
PATTERN NOTES
Weave in loose ends as work
progresses.
Use size I hook unless other-
wise stated.
Join with slip stitch as indicated
unless otherwise stated.
Do not join rounds unless other-
wise stated. Use stitch marker
to mark rounds.
RHINO
BODY
Rnd 1: With buff, ch 48, join
(see Pattern Notes) to form a
ring, ch 1, sc in each ch around.
(48 sc)
Rnds 2–7: Sc around, inc (see
Stitch Guide) 6 sc evenly sp
around. (84 sc)
Rnds 8–11: Sc in each sc
around.
Rnds 12–18: Sc around, dec
(see Stitch Guide) 6 sc evenly
sp around. At the end of rnd 18,
sl st in next st, leaving 24-inch
length, fasten off. (42 sc)
Matching sts of rnd 18 to oppo-
site side of foundation ch, whip-
stitch (see illustration) edges
tog, stuffing with fiberfill as
work progresses to form ring.
Meet the next two adorable animals in our darling
zoo set—the rhino and the panda!
Whipstitch Edges
Whipstitch Edges
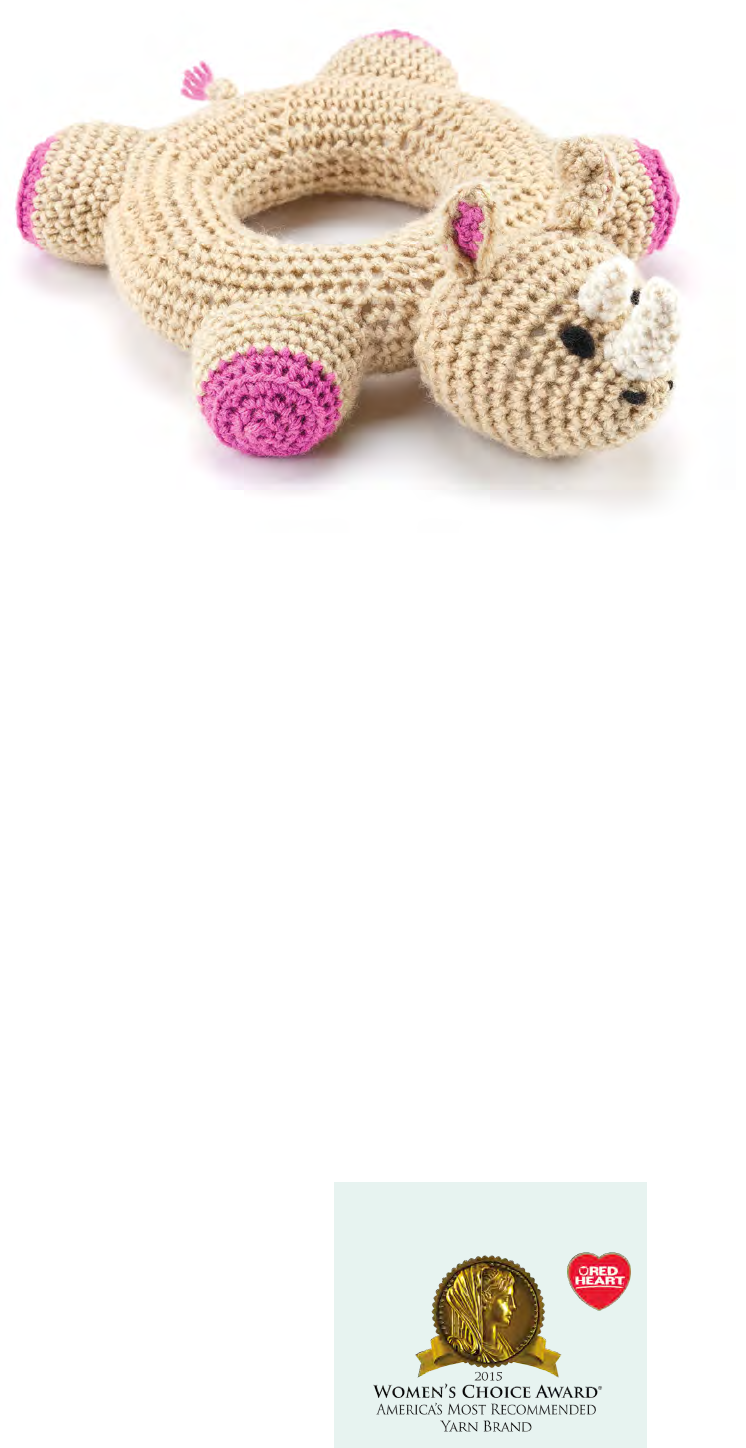
39 AUGUST 2015 CROCHETWORLD.COM Crochet World
HEAD
Rnd 1: With buff, ch 3, join
to form a ring, ch 1, 2 sc in ch
around. (6 sc)
Rnd 2: 2 sc in each sc around.
(12 sc)
Rnd 3: [Sc in next sc, 2 sc in
next sc] around. (18 sc)
Rnd 4: Sc in each st around.
Rnd 5: Rep rnd 4.
Rnd 6: [Sc in each of next 2 sc,
2 sc in next sc] around. (24 sc)
Rnd 7: Rep rnd 4.
Rnd 8: [Sc in each of next 3 sc,
2 sc in next sc] around. (30 sc)
Rnd 9: Sc in each of next 12 sc,
2 sc in each of next 6 sc, sc in
each of next 12 sc. (36 sc)
Rnds 10–13: Rep rnd 4.
Rnd 14: [Sc in each of next
4 sc, sc dec in next 2 sc] around.
(30 sc)
Rnd 15: [Sc in each of next
3 sc, sc dec in next 2 sc] around.
(24 sc)
Rnd 16: [Sc in each of next 2
sc, sc dec in next 2 sc] around,
leaving a 12-inch length of yarn,
fasten off. (18 sc)
Stuff Head with fiberfill and
with rnd 9 at top of Head (fore-
head), sew to Body as indicated
on Placement Diagram.
EAR
Make 2.
Inner Ear
Row 1: With pink, ch 2, sc in
2nd ch from hook, turn. (1 sc)
Row 2: Ch 1, 2 sc in next sc,
turn. (2 sc)
Rows 3 & 4: Ch 1, sc in each sc
across, turn.
Row 5: Ch 1, sc in each sc
across. Fasten off.
Ear Back
Rep rows 1–5 of Inner Ear with
buff. At the end of row 5, do not
fasten off.
Place Inner Ear and Ear Back
tog, with Inner Ear facing.
Working through both thick-
nesses, work 2 sc in each of next
2 sts, sc up side of Ear, 3 sc in
opposite side of foundation ch,
sc down other side of Ear, join in
first st, leaving a length of yarn,
fasten off.
Tack first and 4th sts tog to
gather bottom of Ear. Run nee-
dle up center of Ear Back to tip
of Ear, turn needle and reinsert
needle back into Ear (in another
sp next to the one needle exited
through) and run back down
through Ear. Pull strand slightly
to pull Ear Back into a slight
arch shape. Sew Ears to top of
Head with Inner Ear facing
outwards to the sides of Head.
LARGE HORN
Rnd 1: With Aran, ch 4, 4 sc in
2nd ch from hook.
Rnd 2: Sc in each sc around.
Rnd 3: [Sc in next sc, 2 sc in
next sc] twice. (6 sc)
Rnd 4: Rep rnd 2.
Rnd 5: [Sc in each of next 2 sc,
2 sc in next sc] twice. (8 sc)
Rnds 6 & 7: Rep rnd 2.
Rnd 8: [Sc in each of next 3 sc,
2 sc in next sc] twice, leaving a
12-inch length of yarn, fasten
off. (10 sc)
SMALL HORN
Rnds 1–4: Rep rnds 1–4 of
Large Horn.
Stuff Horns, sew to Head, sew-
ing Large Horn at the top end
of Muzzle, and the Small Horn
¼ inch above Large Horn. Bend
Large Horn slightly so it is
curved towards Small Horn.
LEG
Make 4.
Rnd 1: With pink, ch 3, join to
form a ring, ch 1, 2 sc in each ch
around. (6 sc)
Rnd 2: 2 sc in each sc around.
(12 sc)
Rnd 3: Rep rnd 2. (24 sc)
Rnd 4: Sc in each sc around,
draw up a lp of buff, fasten
off pink.
Rnd 5: Working in back lps
(see Stitch Guide) only, sc in
each st around.
Congratulations to Red Heart
from Crochet World!
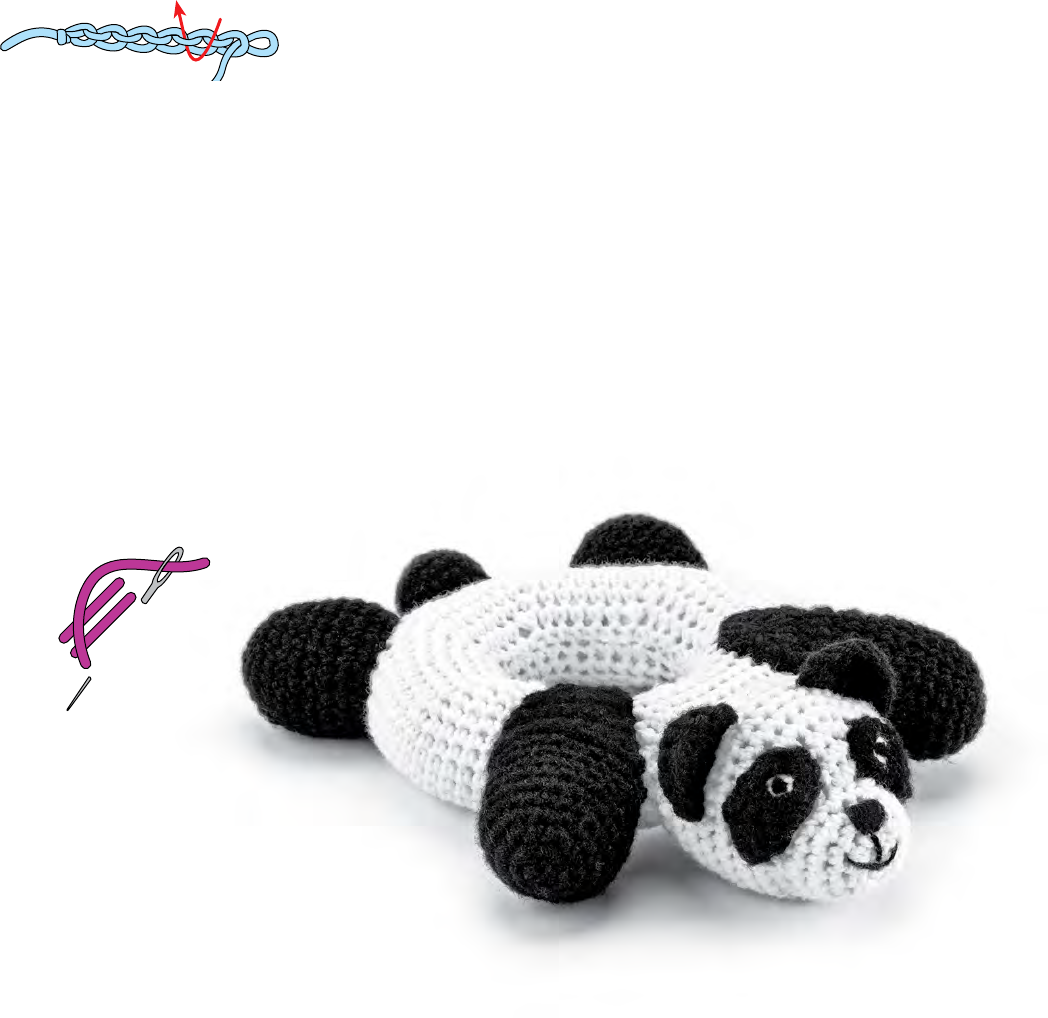
Crochet World CROCHETWORLD.COM AUGUST 201540
Rnds 6–9: Sc in each sc around.
At the end of rnd 9, leaving
a 12-inch length of yarn,
fasten off.
Stuff Legs with fiberfill and sew
to Body as indicated on Place-
ment Diagram.
TAIL
Leaving a 4-inch length of buff
at beg, ch 8, working in back
bar of ch (see illustration),
sl st in 2nd ch from hook, sl st in
back bar of each rem ch, leaving
a length of yarn, fasten off.
With beg rem length, attach Tail
to end of Body centering
between back Legs.
Cut 4 strands of pink each
3 inches long. Holding strands
tog, knot on end sp of Tail.
Trim ends.
EYE
Make 2.
With tapestry needle and
black, embroider 5 or 6 vertical
straight stitches (see illustra-
tion) for each eye, placing Eyes
just above muzzle.
NOSTRIL
Make 2.
With tapestry needle and black,
embroider 2 sts straight stitches
for each nostril, placing Nostrils
on front of muzzle of Head just
below Large Horn.
PANDA
BODY
Rnd 1: With white, ch 36,
join (see Pattern Notes) to
form a ring, ch 1, sc in each ch
around. (36 sc)
Rnds 2–8: Sc around, inc (see
Stitch Guide) 6 sc evenly sp
around. (78 sc)
Rnd 9: Sc around, inc 3 sc evenly
sp around. (81 sc)
Rnd 10: Sc in each sc around.
Rnd 11: Sc around, dec (see
Stitch Guide) 3 sc evenly sp
around. (78 sc)
Rnds 12–18: Sc around, dec 6 sc
evenly sp around. At the end of
rnd 18, sl st in next st, leaving
24-inch length, fasten off. (36 sc)
Matching sts of rnd 18 to op-
posite side of foundation ch,
whipstitch (see illustration on
page 38) edges tog, stuffing with
fiberfill as work progresses to
form ring.
HEAD
Rnd 1: With white, ch 3, join
to form a ring, ch 1, 2 sc in ch
around. (6 sc)
Rnd 2: 2 sc in each sc around.
(12 sc)
Rnd 3: Rep rnd 2. (24 sc)
Rnd 4: Sc around, inc 6 sc evenly
sp around. (30 sc)
Rnd 5: Rep rnd 4. (36 sc)
Rnds 6–11: Sc in each sc
around.
Rnds 12 & 13: Sc around, dec
6 sc evenly sp around. At the
end of rnd 13 leaving a 12-inch
length of yarn, fasten off. (24 sc)
Stuff Head with fiberfill and sew
to Body as indicated on Place-
ment Diagram.
MUZZLE
Rnd 1: With white, ch 3, join
to form a ring, ch 1, 2 sc in ch
around. (6 sc)
Rnd 2: [2 sc in next sc, 2 hdc in
each of next 2 sc] twice. (12 sts)
Rnd 3: Sc around, inc 6 sc
evenly sp around. (18 sc)
Rnd 4: Sc in each sc around,
leaving a 12-inch length,
fasten off.
Stuff with fiberfill, position
Muzzle on lower half of Head
with the hdc sts of rnd 2 at each
side of the Muzzle.
Back Bar of Chain
Straight Stitch
A
B
41 AUGUST 2015 CROCHETWORLD.COM Crochet World
EAR
Make 2.
Rnd 1: With size H hook and
black, ch 3, join in first ch, ch 1,
2 sc in each ch around. (6 sc)
Rnd 2: [Sc in next sc, 2 sc in
next sc] around. (12 sc)
Rnd 3: [Sc in each of next 2 sc,
2 sc in next sc] around. (18 sc)
Row 4: Now working in rows,
with WS tog, fold Ear in half,
working through both thick-
nesses, sc around curved edge
of 9 sc only, leaving a 6-inch
length, fasten off.
Sew straight edge of Ear to
Head with 1-inch sp between
Ears.
FRONT LEG
Make 2.
Rnd 1: With size H hook and
black, ch 3, join in first ch, ch 1,
2 sc in each ch around. (6 sc)
Rnd 2: [Sc in next sc, 2 sc in
next sc] around. (12 sc)
Rnd 3: [Sc in each of next 2 sc,
2 sc in next sc] around. (18 sc)
Rnd 4: [Sc in each of next 3 sc,
2 sc in next sc] around. (24 sc)
Rnds 5–9: Sc in each sc around.
Row 10: Now working in
rows, sc in each of next 10 sc,
turn. (10 sc)
Row 11: Ch 1, sc dec in next
2 sc, sc in each of next 6 sc, sc
dec in next 2 sc, turn. (8 sc)
Row 12: Ch 1, sc in each sc
across, turn.
Row 13: Rep row 12.
Row 14: Ch 1, sc dec in next
2 sc, sc in each of next 4 sc, sc
dec in next 2 sc, turn. (6 sc)
Row 15: Rep row 12.
Row 16: Ch 1, sc dec in next
2 sc, sc in each of next 2 sc, sc
dec in next 2 sc, turn. (4 sc)
Row 17: Rep row 12.
Rnd 18: Ch 1, sc in each sc
across row 17, sc evenly sp down
side edge of rows, sc in each
rem 14 sc of rnd 9, sc up oppo-
site edge of rows, join in beg sc,
leaving 12-inch length of yarn,
fasten off.
Stuff Front Legs with fiberfill
and using Diagram as a guide,
sew to Body with rows 10–17
positioned on top edge of Body.
BACK LEG
Make 2.
Rnds 1–4: Rep rnds 1–4 of
Front Leg. (24 sc)
Rnds 5–11: Sc in each sc
around. At the end of rnd
11, leaving 12-inch length,
fasten off.
Stuff Back Legs with fiberfill,
sew to Body as indicated on
Diagram.
TAIL
Rnd 1: With size H hook and
black, ch 3, join in first ch, ch 1,
2 sc in each ch around. (6 sc)
Rnd 2: 2 sc in each sc around.
(12 sc)
Rnd 3: [Sc in next sc, 2 sc in
next sc] around. (18 sc)
Rnd 4: Sc in each sc around.
Rnd 5: [Sc dec in next 2 sc, sc in
each of next 7 sc] twice. (16 sc)
Rnd 6: [Sc in each of next 2 sc,
sc dec in next 2 sc] 4 times.
(12 sc)
Rnd 7: [Sc dec in next 2 sc] 6
times, sl st in next st, leaving
12 inch length, fasten off. (6 sc)
Stuff Tail with fiberfill and sew
to back of Body.
EYE PATCH
Make 2.
Rnd 1: With size F hook and
black, ch 10, join to form a ring,
ch 1, sc in each of next 3 chs,
turn. (3 sc)
Row 2: Now working in rows,
ch 1, sc in each of next 3 sc, turn.
Row 3: Ch 1, sc dec in next 2 sc,
sc in next sc, turn. (2 sc)
Rnd 4: Now working in rnds,
ch 1, sc in each of next 2 sc, sc
around Eye Patch, working in
side edge of rows, sc in each of
rem 7 chs of foundation ch, sc in
side edge of rows, join in beg sc,
leaving 12-inch length of yarn,
fasten off. (15 sc)
Using photo as a guide, sew Eye
Patches to front of Head with
opening at top, sewing on a slant
to Head.
FACIAL FEATURES
Pupil
Make 2.
With black and tapestry needle,
embroider 3 small straight
stitches (see illustration) ¼ inch
in length in center opening of
Eye Patch.
Nose
With black and tapestry needle,
embroider several vertical
straight stitches ½ inch in
length on top of Muzzle in a tri-
angle shape. Do not fasten off.
Mouth
Embroider 1 vertical straight
stitch centered below Nose
½ inch in length and 2 straight
stitches to form smiling
mouth. CW
At the Zoo
Rhino & Panda Assembly Diagram
Tail
Leg Leg
Leg Leg
Body
Head
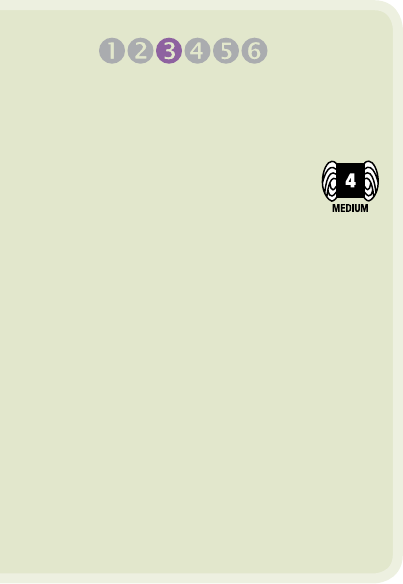
42 Crochet World CROCHETWORLD.COM AUGUST 2015
PATTERN NOTES
Weave in loose ends as work
progresses.
Do not work over color not
in use; drop to wrong side of
Blanket and add new ball as
needed for color change.
Join with slip stitch as indicated
unless otherwise stated.
Chain-3 at beginning of round
counts as first double crochet
unless otherwise stated.
When crocheting appliqués,
if desired, make 2 sets of
appliques to make Blanket
reversible.
SPECIAL STITCH
Picot: Ch 3, sl st in first ch
of ch-3.
BLANKET
CENTER
Row 1 (RS): With size I hook
and grey, ch 61, sc in 2nd ch
from hook, sc in each rem ch
across, turn. (60 sc)
Row 2: Ch 1, sc in each sc
across, turn.
Rows 3–8: Rep row 2.
Row 9: Using Chart (see page
45) as a guide, ch 1, sc in each
of next 36 sc, change color
(see Stitch Guide) to red in last
step of 36th sc, dropping grey
to WS of Blanket (see Pattern
Notes), with red, sc in each of
next 12 sc, changing color to a
new ball of grey in last step of
12th sc, drop red to WS, sc in
each rem 12 sc, turn. (60 sc)
Rows 10–120: Continue follow-
ing Charts as indicated, chang-
ing color as indicated.
Rows 121–128: With grey, ch 1,
sc in each sc across, turn. At
the end of row 128, do not
fasten off.
BORDER
Rnd 1: At the end of row 128,
work a total of 3 sc in last st,
rotate to work down side edge
of rows, work 102 sc evenly sp
across, 3 sc in bottom corner, sc
in each ch across opposite side of
foundation ch, 3 sc in corner, 102
sc evenly sp across, 3 sc in last
corner, sc in each sc across top
edge, join (see Pattern Notes) in
beg sc. Fasten off.
Rnd 2: Join lilac in any sc away
from corner, ch 3 (see Pattern
Notes), dc in each sc around,
working (2 dc, ch 2, 2 dc) in
center sc of each corner, join in
top of beg ch-3, turn.
Rnd 3: Ch 3, dc in each dc
around, working (2 dc, ch 2, 2
dc) in each corner ch-2 sp, join in
top of beg ch-3, turn. Fasten off.
Rnd 4: Join grey in any dc, ch 1,
sc in each dc around, working (2
sc, ch 2, 2 sc) in each corner ch-2
sp around, join in beg sc, turn.
Rnd 5: Ch 1, sc in each sc
around, working (sc, ch 2, sc) in
each corner ch-2 sp, join in beg
sc, turn. Fasten off.
Rnd 6: Join guacamole in any
sc, ch 3, dc in each sc around,
working (2 dc, ch 2, 2 dc) in each
corner ch-2 sp, join in beg ch-3.
Rnd 7: Rep rnd 3.
Rnds 8 & 9: Rep rnds 4 and 5.
Rnd 10: Join grey in any sc,
ch 3, dc in each sc around, work-
ing (2 dc, ch 2, 2 dc) in each
corner ch-2 sp, join in beg ch-3.
Rnd 11: Rep rnd 3.
Rnd 12: Rep rnd 4.
Rnd 13: Rep rnd 5, do not
turn.
Rnd 14: Join guacamole in any
sc, ch 1, [sc in each of next 4
sts, picot (see Special Stitch)]
around, use care to work in 2
sc in each corner, join in beg sc.
Fasten off.
APPLIQUÉ
Baby Spot
Make 16.
Rnd 1: With size H hook
and black, form a slip ring
(see illustration on page 44),
6 sc in slip ring, join in beg sc,
leaving 8-inch length, fasten off,
pull beg length tightly to close
slip ring. (6 sc)
Following Mommy
Ladybug Blanket
Design by Tara Cousins
FINISHED MEASUREMENTS
30 inches wide x 45 inches long
MATERIALS
• Red Heart Soft Yarn
medium (worsted)
weight acrylic yarn
(5 oz/256 yds/141g per ball):
3 balls #9440 light
grey heather
1 ball each #5142 cherry red,
#4420 guacamole, #4614
black and #9528 lilac
• Sizes H/8/5mm and I/9/5.5mm
crochet hook or size needed
to obtain gauge
• Yarn needle
GAUGE
Size I hook: 12 sc = 4 inches;
15 sc rows = 4 inches
EASY

This charming blanket shows that even
in the animal kingdom, little ones love
to tag along after their moms.
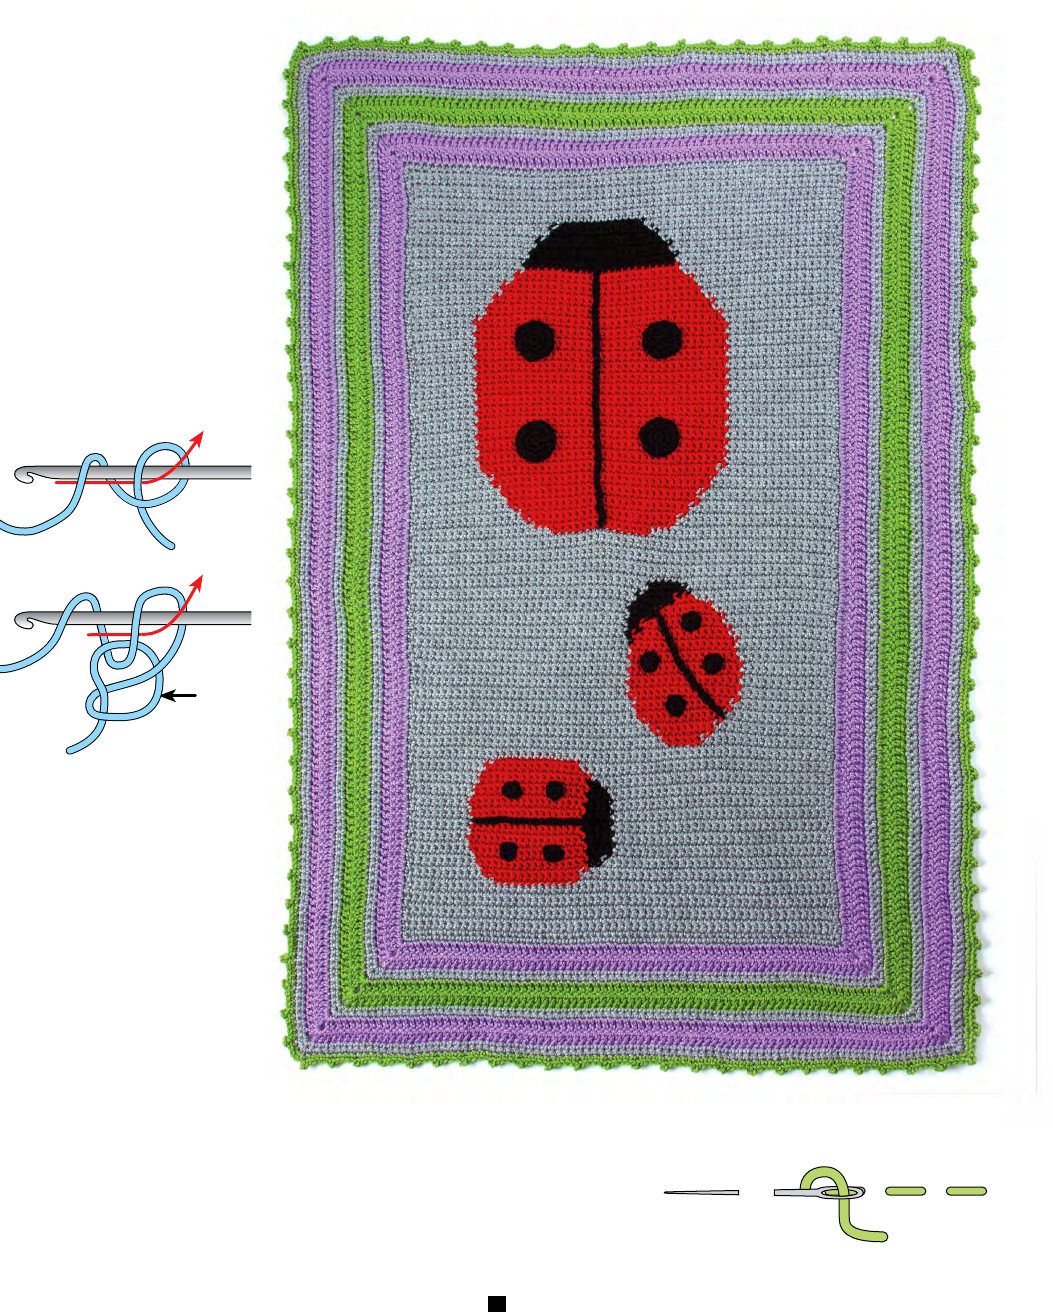
44 Crochet World CROCHETWORLD.COM AUGUST 2015
Baby Stripe
Make 4.
With size H hook and
black, ch 23, leaving
20-inch length, fasten off.
Mom Spot
Make 8.
Rnd 1: With size H hook
and black, form a slip
ring, 6 sc in slip ring,
join in beg sc, pull beg
length tightly to close
slip ring. (6 sc)
Rnd 2: Ch 1, 2 sc in each
sc around, join in beg
sc. (12 sc)
Rnd 3: Ch 1, [sc in
next sc, 2 sc in next sc]
around, join in beg sc,
leaving 12-inch length,
fasten off.
Mom Stripe
Make 2.
With size H hook and
black, ch 48, leaving 30-inch
length, fasten off.
FINISHING
With yarn needle and rem
length, and using running
stitch (see illustration), sew
Stripe centered on each side of
each Baby and a Stripe centered
on each side of Mom to make
reversible Blanket.
With yarn needle, stitch 2 Spots
to each side of Stripe on each
side of Blanket. CW
Slip Ring
Leave ring
loose until
stitches are
made.
4" end
Running Stitch
13 2

45 AUGUST 2015 CROCHETWORLD.COM Crochet World
64
63
60
58
56
54
52
50
48
46
44
42
40
38
36
34
32
30
28
26
24
22
20
18
16
14
12
10
8
6
4
2
63
61
59
57
55
53
51
49
47
45
43
41
39
37
35
33
31
29
27
25
23
21
19
17
15
13
11
9
7
5
3
1
Following Mommy Ladybug Blanket
Bottom Chart
128
126
124
122
120
118
116
114
112
110
108
106
104
102
100
98
96
94
92
90
88
86
84
82
80
78
76
74
72
70
68
66
127
125
123
121
119
117
115
113
111
109
107
105
103
101
99
97
95
93
91
89
87
85
83
81
79
77
75
73
71
69
67
65
Following Mommy Ladybug Blanket
Top Chart
128
126
124
122
120
118
116
114
112
110
108
106
104
102
100
98
96
94
92
90
88
86
84
82
80
78
76
74
72
70
68
66
127
125
123
121
119
117
115
113
111
109
107
105
103
101
99
97
95
93
91
89
87
85
83
81
79
77
75
73
71
69
67
65
Following Mommy Ladybug Blanket
Top Chart
64
63
60
58
56
54
52
50
48
46
44
42
40
38
36
34
32
30
28
26
24
22
20
18
16
14
12
10
8
6
4
2
63
61
59
57
55
53
51
49
47
45
43
41
39
37
35
33
31
29
27
25
23
21
19
17
15
13
11
9
7
5
3
1
Following Mommy Ladybug Blanket
Bottom Chart
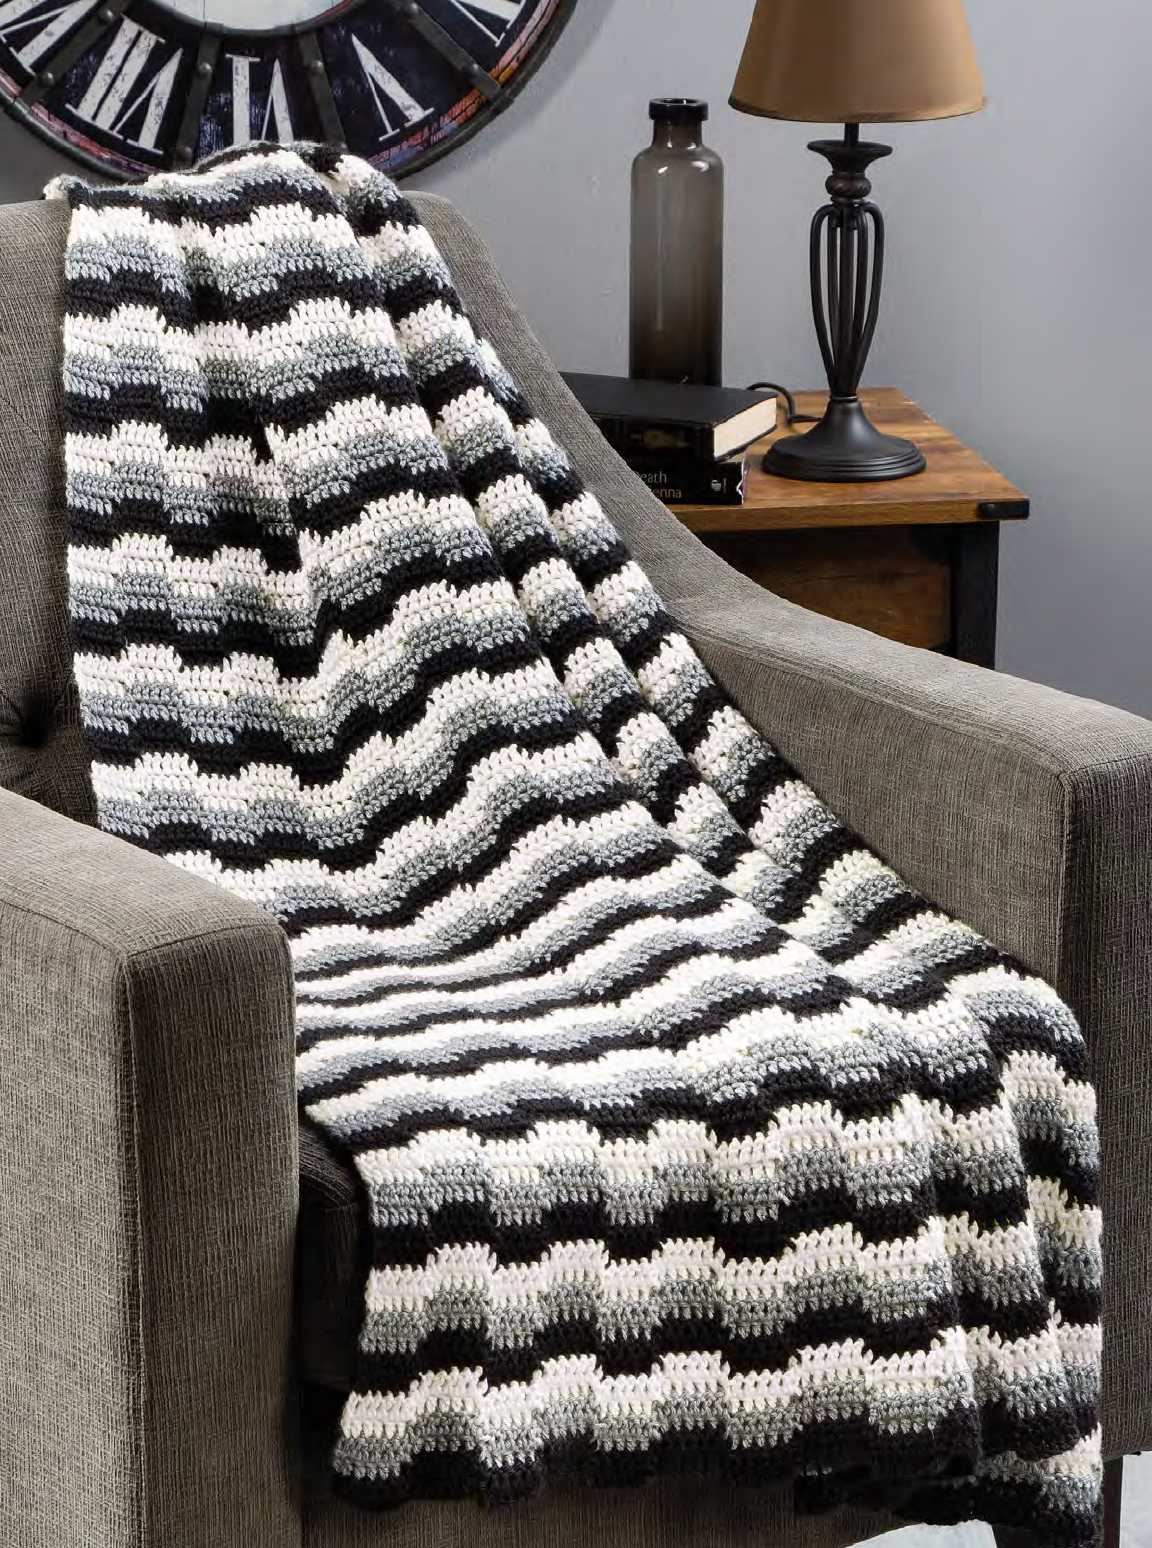
FINISHED MEASUREMENTS
49 inches wide x 62 inches long
MATERIALS
• Caron Simply Soft
medium (worsted)
weight acrylic yarn
(6 oz/315 yds/170g
per skein):
3 skeins each
#9727 black
and #9702
off-white
• Caron Simply Soft Heathers
medium (worsted) weight
acrylic yarn (5 oz/250 yds/142g
per skein):
4 skeins #9509 grey heather
• Size H/8/5mm crochet hook or
size needed to obtain gauge
• Tapestry needle
GAUGE
14 dc = 4 inches; 9 rows = 4 inches
A fun, zigzag stripe
pattern creates
interesting color steps
and edges in this striking
afghan that would look
great in many different
color combinations.
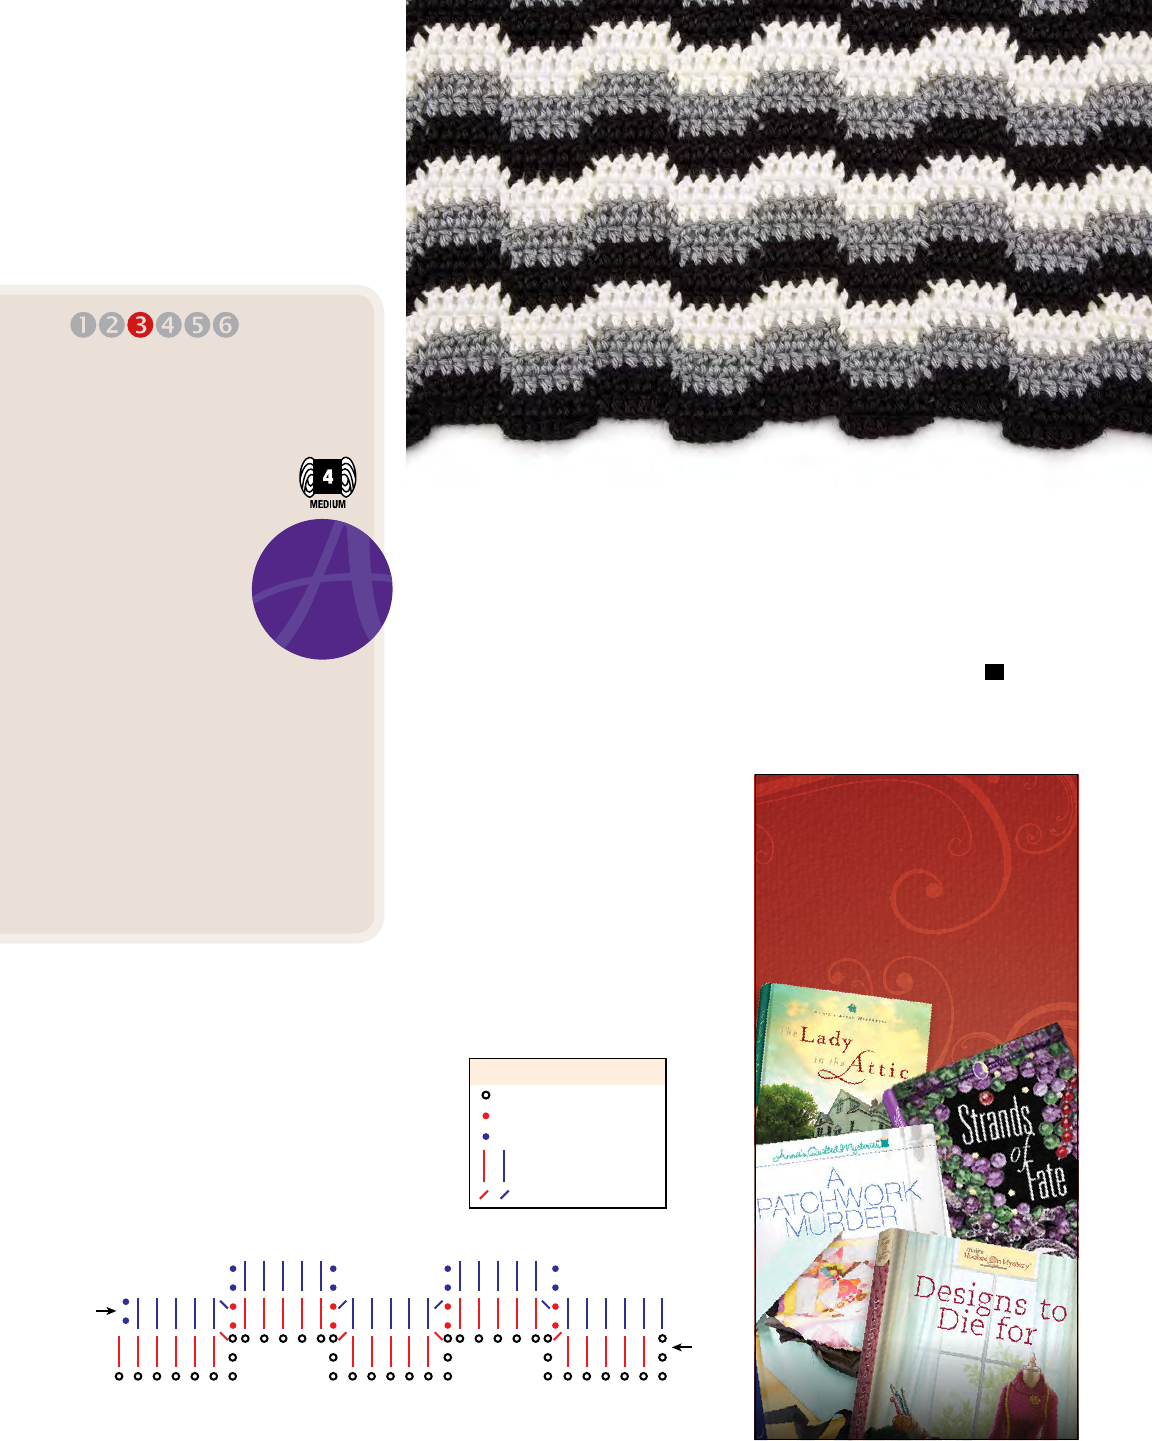
47 AUGUST 2015 CROCHETWORLD.COM Crochet World
PATTERN NOTES
Weave in loose ends as work
progresses.
Chain-2 at beginning of round
counts as first double crochet
unless otherwise stated.
Change color every 2 rows as
indicated in pattern.
AFGHAN
Row 1: With black, ch 233, dc
in 4th ch from hook, dc in each
of next 4 chs, *sk next 2 chs,
sl st in next ch, ch 2, dc in each
of next 5 chs, ch 2, sl st in next
ch, sk next 2 chs, dc in each of
next 5 chs, rep from * across,
ending with dc in last ch, turn.
(29 groups of dc steps)
Row 2: Ch 2 (see Pattern Notes),
dc in each of next 5 dc, *sl st in
next ch-2 sp, ch 2, dc in each of
next 5 dc, ch 2, sl st in next ch-2
sp, sk next sl st, dc in each of
next 5 dc, sk next sl st, rep from
* across, dc in turning ch, turn.
Rows 3 & 4: Join grey heather,
rep row 2.
Rows 5 & 6: Join off-white,
rep row 2.
Rows 7 & 8: Join black, rep
row 2.
Rows 9–140: [Rep rows 3–8
consecutively] 22 times. At the
end of last rep, fasten off. CW
FINISHED MEASUREMENTS
49 inches wide x 62 inches long
MATERIALS
• Caron Simply Soft
medium (worsted)
weight acrylic yarn
(6 oz/315 yds/170g
per skein):
3 skeins each
#9727 black
and #9702
off-white
• Caron Simply Soft Heathers
medium (worsted) weight
acrylic yarn (5 oz/250 yds/142g
per skein):
4 skeins #9509 grey heather
• Size H/8/5mm crochet hook or
size needed to obtain gauge
• Tapestry needle
GAUGE
14 dc = 4 inches; 9 rows = 4 inches
Step-by-Step
Afghan
Design by Margret Willson
EASY
Foundation chain
Row 1
Row 2
STITCH KEY
Dc
Sl st
Step-by-Step Afghan
Row Placement Diagram
Row 1
Row 2
Pantone uncoated (below)
Logo over stacked tagline
Logo next to stacked tagline
Logo alone
Minimum allowed sizes
Pantone uncoated (below)
Pantone uncoated (below) 4 color process (below)
Black (below) White (below)
Annie’s Logo Purple:
Pantone: 268C, GOE Medium Purple U
CMYK: C82, M100, K12
RGB: R82, G43, B133
Hexadecimal: 522b85
Annie’s Logo Gray:
Pantone: Cool Gray 9 U
CMYK: 60K
RGB: R130, G131, B134
Hexadecimal: 828386
Color specications:
Note: Symbols such as ®, ©, and ™ are never to appear as less than 5 pt. in size. If, in the event
of reducing art to t a space the symbol appears too small, that symbol must be reset to the
minimum 5 pt. type size.
A art, pantone uncoated (below)
Pantone uncoated (below)
Annie’s ocial logo, created 8/12, revised 7/13
(You must be familiar with the DRG corporate logo
standards before any usage attempt.)
4 color process (below)
Black (below)
White (below)
4 color process (below)
Black (below)
White (below)
4 color process (below)
Black (below)
White (below)
Buy this
YARN NOW!
AnniesYarnShop.com
Which would you
enjoy the most?
AnniesFictionSavings.com
Now there are 4 Annie’s
mystery book series!
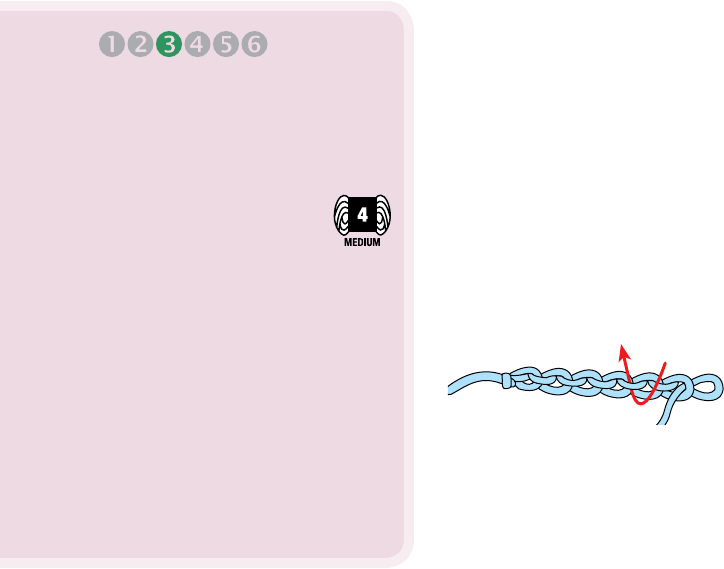
48 Crochet World CROCHETWORLD.COM AUGUST 2015
PATTERN NOTES
Throw is crocheted lengthwise
from center out to sides.
Chain-4 at beginning of row
counts as first double crochet
and chain-1 unless otherwise
stated.
Chain-3 at beginning of row
counts as first double crochet
unless otherwise stated.
SPECIAL STITCHES
Shell: 3 dc in indicated st or sp.
Double crochet join (dc join):
Place a slip knot on hook, yo,
insert hook in indicated st, yo
and draw up a lp, [yo and pull
through both lps on hook] twice.
Single crochet join (sc join):
Place a slip knot on hook,
insert hook in indicated st, yo
and draw up a lp, yo and draw
through both lps on hook.
THROW
FIRST SIDE
Row 1 (RS): With white, leav-
ing 7-inch length at beg, ch 182,
working in back bar of ch (see
illustration), sc in 2nd ch from
hook, *sk next ch, shell (see
Special Stitches) in next ch, sk
next ch, sc in next ch, rep from
* across. Leaving 7-inch length,
fasten off. (46 sc, 45 shells)
Row 2 (WS): With WS facing
and tan, leaving 7-inch length
at beg, dc join (see Special
Stitches) in first sc, *ch 1, sc in
center dc of next shell, ch 1, dc
in next sc, rep from * across,
turn. (46 dc, 45 sc)
Row 3: Ch 1, sc in first dc,
*shell in next sc, sc in next dc,
rep from * to * across, turn.
(46 sc, 45 shells)
Row 4: Ch 4 (see Pattern Notes),
sc in center dc of first shell,
ch 1, dc in next sc, *ch 1, sc in
center dc of next shell, ch 1, dc
in next sc, rep from * across.
Leaving 7-inch length, fasten
off. (46 dc, 45 sc)
Row 5: With RS facing and
bluebell, leaving 7-inch length at
beg, sc join (see Pattern Stitch-
es) in first dc, *shell in next sc,
sc in next dc, rep from * to *
across, turn. (46 sc, 45 shells)
Row 6: Ch 4, sc in center dc of
first shell, ch 1, dc in next sc,
*ch 1, sc in center dc of next
shell, ch 1, dc in next sc, rep
from * across, turn.
Row 7: Rep row 3. At end of row,
leaving 7-inch length, fasten off.
Rows 8 & 9: With lettuce,
rep rows 2 and 3.
Row 10: Rep row 6.
Rows 11 & 12: Rep rows 3
and 4.
Row 13: With boysenberry,
rep row 5.
Row 14: Rep row 4.
Row 15: With iced aqua, rep
row 5.
Row 16: Rep row 4.
Row 17: Rep row 3.
Row 18: Rep row 6.
Row 19: Rep row 3. At end
of row, leaving 7-inch length,
fasten off.
Rows 20 & 21: With white,
rep rows 2 and 3. At the end of
row 21, leaving 7-inch length,
fasten off.
Rows 22–41: Rep rows 2–21. Do
not fasten off at end of row 41.
BORDER
Row 1 (WS): With WS facing,
ch 3 (see Pattern Notes), dc in
first sc, *sc in center dc of next
shell, shell in next sc, rep from *
across to last sc, 2 dc in last sc.
Leaving 7-inch length, fasten off.
Row 2 (RS): With RS facing
and tan, leaving 7-inch length
at beg, sc join in first dc, shell
in next sc, *sc in center dc of
next shell, shell in next sc, rep
from * across to last dc, sc in
last dc, turn.
Row 3: Ch 1, sc in first sc, *ch
1, (sl st, ch 2, sl st) in center dc
of next shell**, ch 1, sl st in next
sc, rep from * across, ending
last rep at **, ch 1, sc in last sc.
Leaving 7-inch length, fasten off.
2ND SIDE
Row 1 (RS): With RS of
First Side facing and white,
FINISHED MEASUREMENTS
41 inches wide x 57 inches long,
excluding Fringe
MATERIALS
• Red Heart With Love
medium (worsted)
weight acrylic yarn (7 oz/
370 yds/198g per skein):
2 skeins each #1601 lettuce
and #1502 iced aqua
1 skein each #1001 white,
#1308 tan, #1805 bluebell
and #1907 boysenberry
• Size J/10/6mm crochet hook or
size needed to obtain gauge
• Tapestry needle
GAUGE
Rows 1–4 = 2 inches
Cabin Retreat Throw
Design by Katherine Eng
EASY
Back Bar of Chain
Continued on page 60
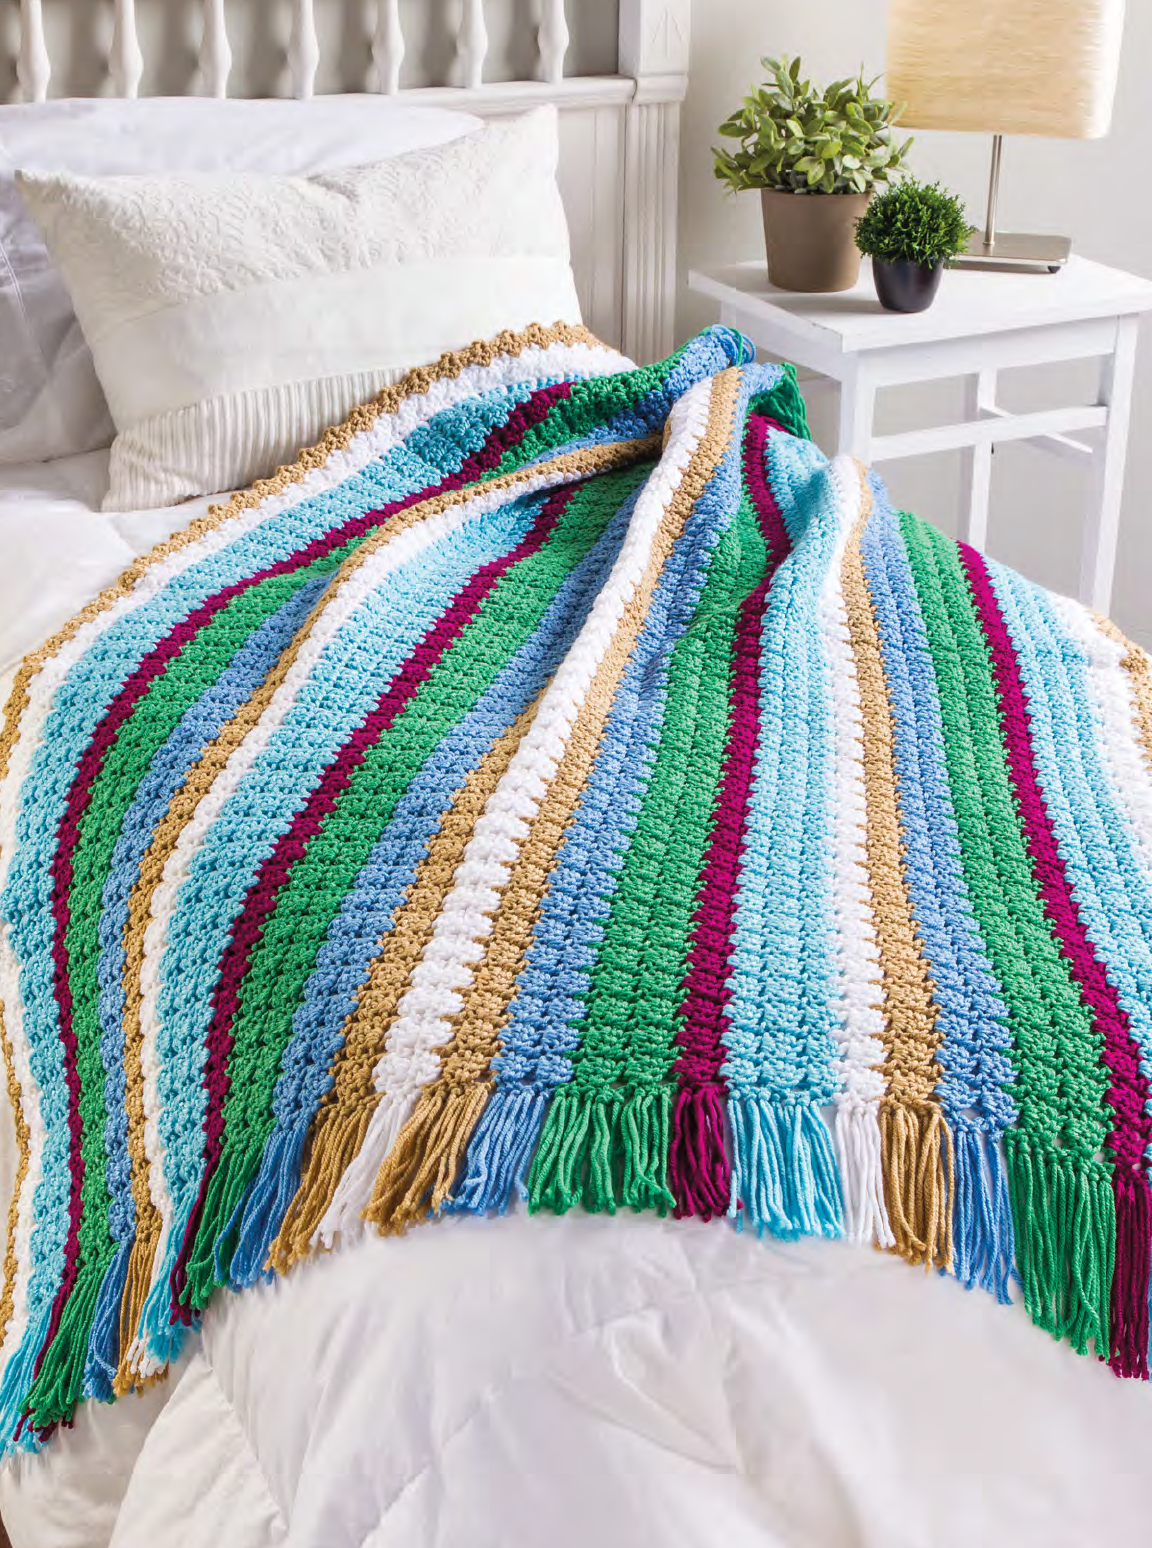
Continued on page 59
Textured stripes in a pretty pastoral palette
create this easy, one-piece throw that will
add colorful appeal to a couch or bed.

FINISHED MEASUREMENTS
9½ inches long x 12½ inches wide
MATERIALS
• Caron Simply Soft Paints
medium (worsted)
weight acrylic yarn
(4 oz/204 yds/113g
per skein):
2 skeins #0004
spring brook
• Size H/8/5mm
crochet hook or size
needed to obtain gauge
• Yarn needle
• Sewing needle
• Fabric lining
• Matching sewing thread
• 20mm buttons: 4
• 1 pair handles with rings
• Ornamental pin or decorative
charm
GAUGE
6 sc = 1½ inches; 2 dc mesh rnds =
1½ inches
Rippling
Waters
Handbag
Design by Dorothy Warrell
PATTERN NOTES
Weave in loose ends as work
progresses.
Join with slip stitch as indica-
ted unless otherwise stated.
Chain-3 at beginning of round
counts as first double crochet
unless otherwise stated.
Chain-2 at beginning of round
counts as first half double cro-
chet unless otherwise stated.
INTERMEDIATE
Continued on page 60
Pantone uncoated (below)
Logo over stacked tagline
Logo next to stacked tagline
Logo alone
Minimum allowed sizes
Pantone uncoated (below)
Pantone uncoated (below) 4 color process (below)
Black (below) White (below)
Annie’s Logo Purple:
Pantone: 268C, GOE Medium Purple U
CMYK: C82, M100, K12
RGB: R82, G43, B133
Hexadecimal: 522b85
Annie’s Logo Gray:
Pantone: Cool Gray 9 U
CMYK: 60K
RGB: R130, G131, B134
Hexadecimal: 828386
Color specications:
Note: Symbols such as ®, ©, and ™ are never to appear as less than 5 pt. in size. If, in the event
of reducing art to t a space the symbol appears too small, that symbol must be reset to the
minimum 5 pt. type size.
A art, pantone uncoated (below)
Pantone uncoated (below)
Annie’s ocial logo, created 8/12, revised 7/13
(You must be familiar with the DRG corporate logo
standards before any usage attempt.)
4 color process (below)
Black (below)
White (below)
4 color process (below)
Black (below)
White (below)
4 color process (below)
Black (below)
White (below)
Buy this
YARN NOW!
AnniesYarnShop.com
The crocodile stitch gives this fun bag
lots of texture and eye-catching detail.
Depending on your yarn choice,
it can be casual or dressy.
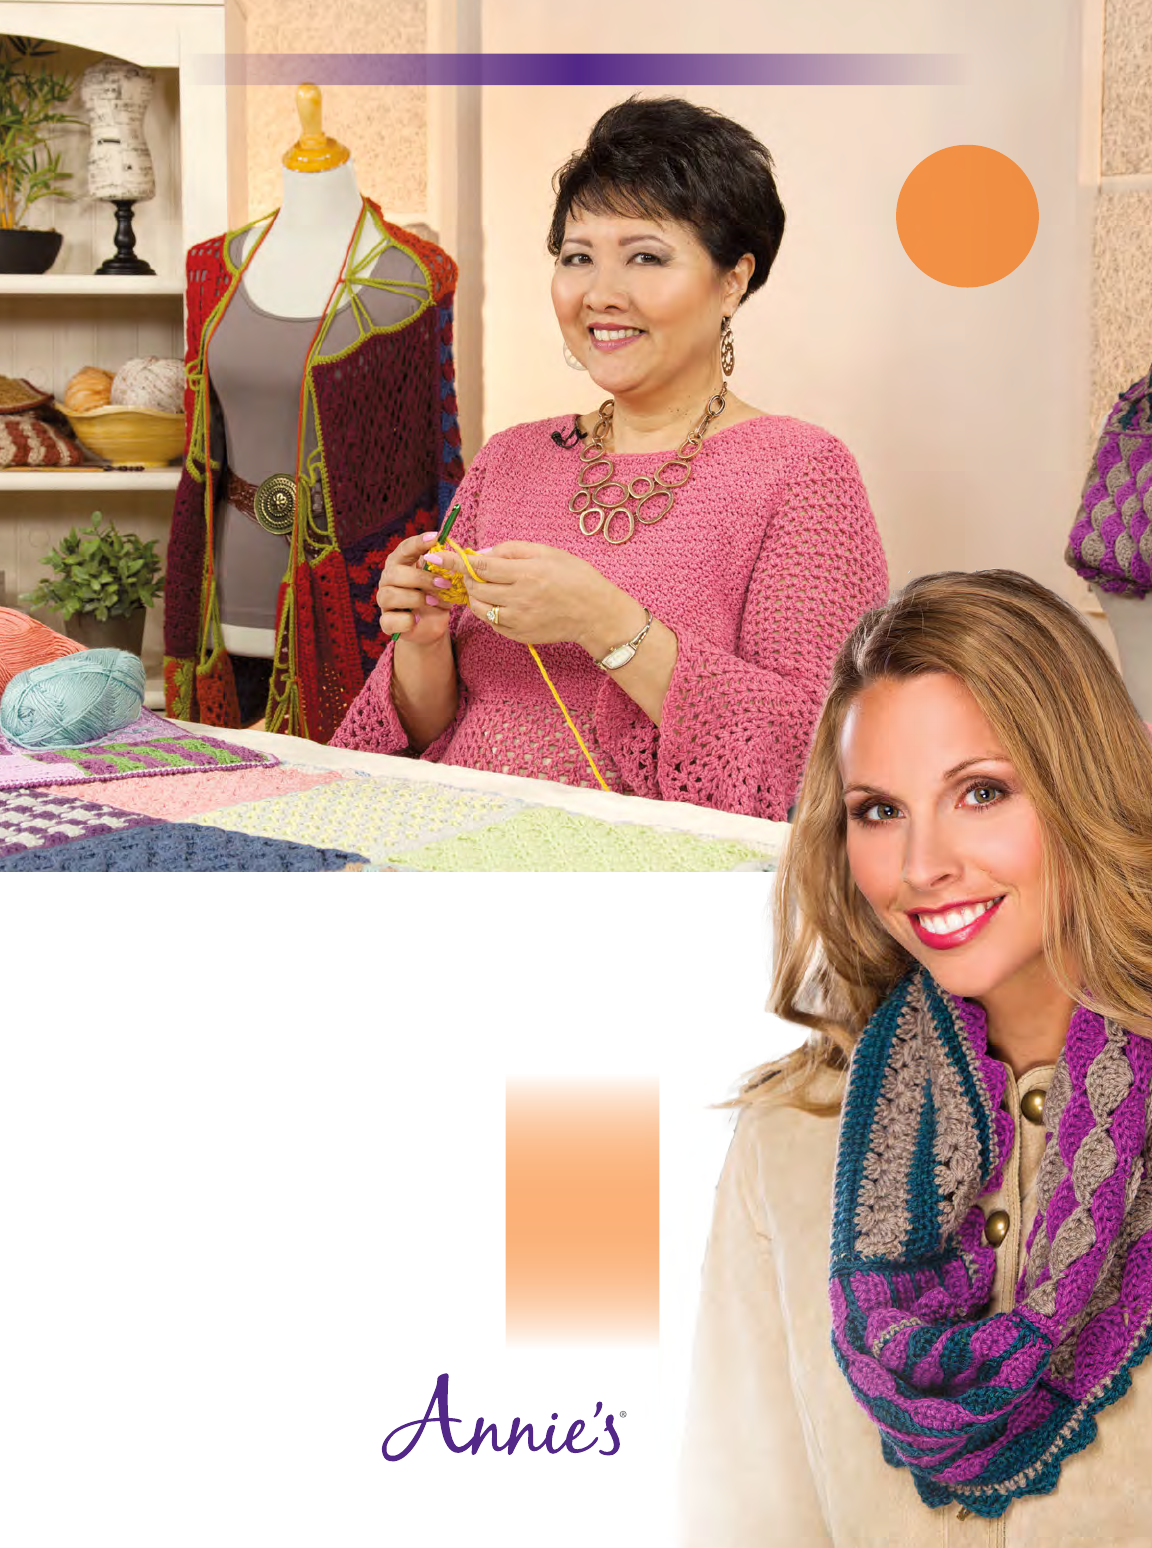
Rippling
Waters
Handbag
Design by Dorothy Warrell
ANNIE’S ONLINE VIDEO CLASSES
Pantone uncoated (below)
Logo over stacked tagline
Logo next to stacked tagline
Logo alone
Minimum allowed sizes
Pantone uncoated (below)
Pantone uncoated (below) 4 color process (below)
Black (below) White (below)
Annie’s Logo Purple:
Pantone: 268C, GOE Medium Purple U
CMYK: C82, M100, K12
RGB: R82, G43, B133
Hexadecimal: 522b85
Annie’s Logo Gray:
Pantone: Cool Gray 9 U
CMYK: 60K
RGB: R130, G131, B134
Hexadecimal: 828386
Color specications:
Note: Symbols such as ®, ©, and ™ are never to appear as less than 5 pt. in size. If, in the event
of reducing art to t a space the symbol appears too small, that symbol must be reset to the
minimum 5 pt. type size.
A art, pantone uncoated (below)
Pantone uncoated (below)
Annie’s ocial logo, created 8/12, revised 7/13
(You must be familiar with the DRG corporate logo
standards before any usage attempt.)
4 color process (below)
Black (below)
White (below)
4 color process (below)
Black (below)
White (below)
4 color process (below)
Black (below)
White (below)
AnniesOnlineClasses.com
Mix & Match Crochet Stitch Sampler
Instructor Lily Chin
In this online video class you’ll learn:
• Four beautiful, textured stitch patterns
• Four pretty lace patterns
• Four colorwork patterns
• Four versatile edging patterns
• How to keep all stitch sampler squares the
same size
• How to work in stitch multiples
• How to invisibly join squares and
seam projects
CHV22 Mix & Match Crochet
Stitch Sampler
Mix & Match Crochet
Stitch Sampler
Crafts
16
stitch patterns and
5 exclusive projects
included as part of
the class curriculum
Available
as an online
class or
DVD!
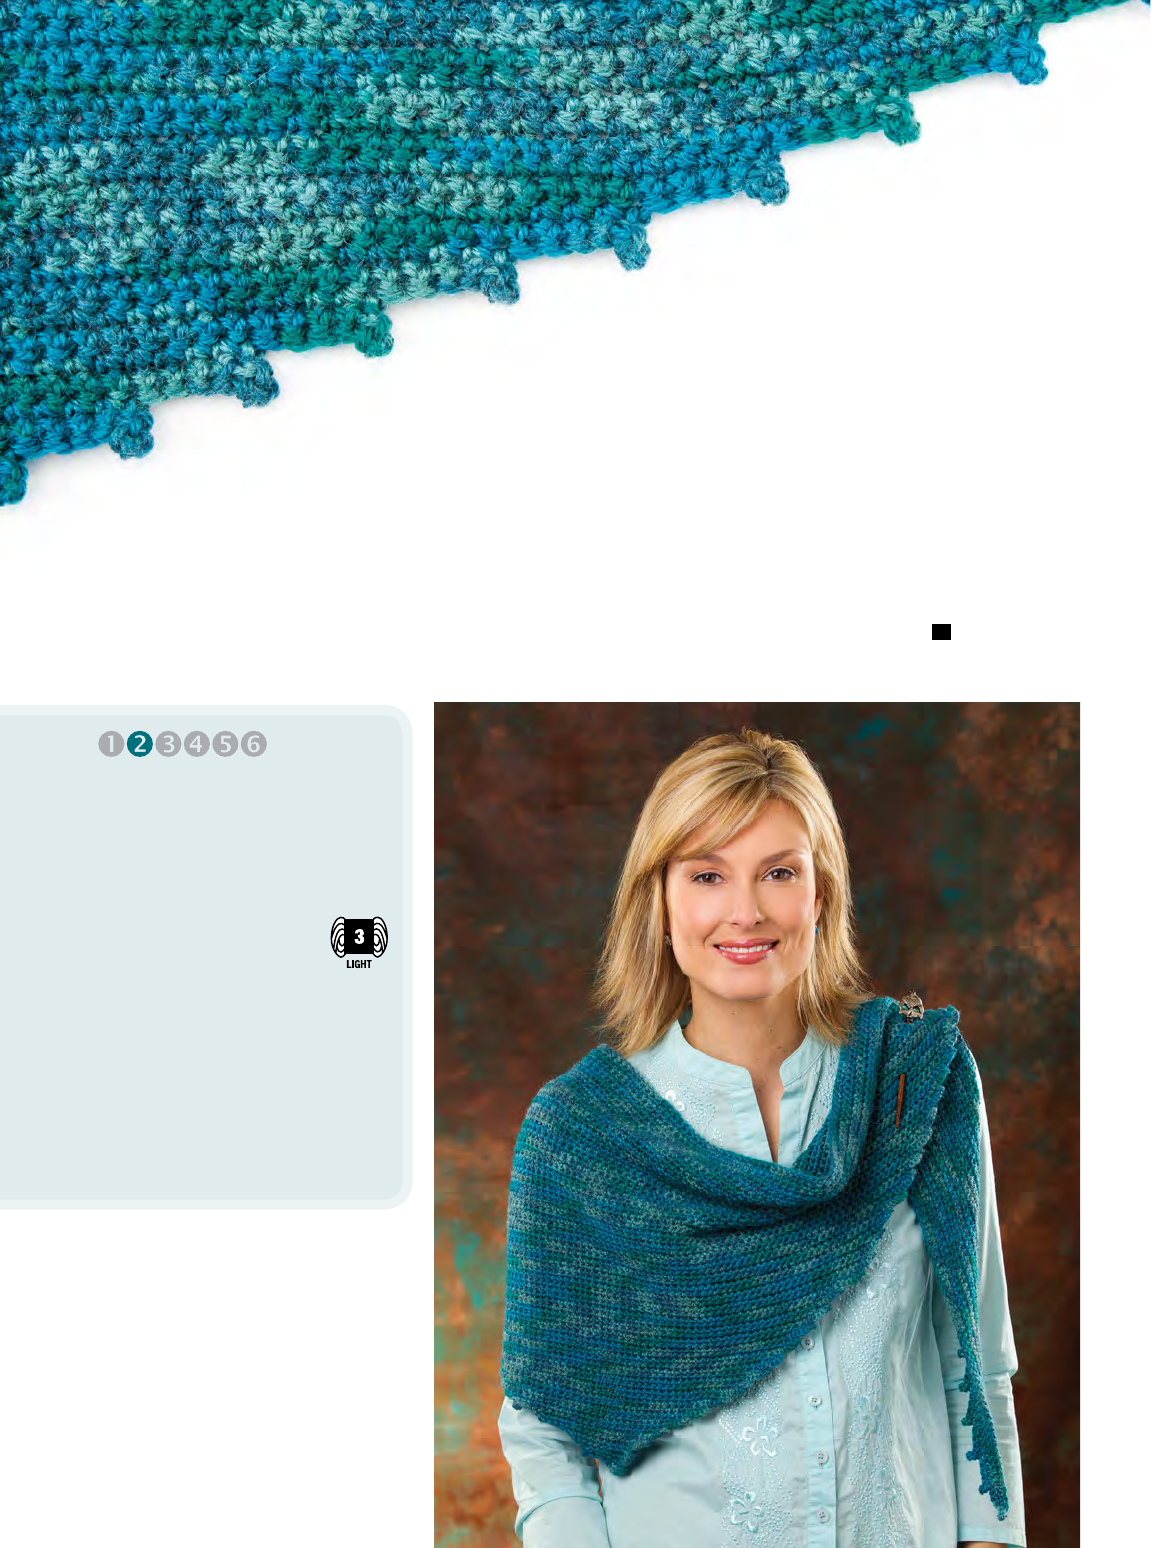
52 Crochet World CROCHETWORLD.COM
PATTERN NOTE
Weave in loose ends as work
progresses.
SPECIAL STITCH
Picot: Ch 3, sl st in last st of ch.
Picots & Leaves
Shawlette
Design by Abbey Swanson
of the Firefly Hook
FINISHED SIZE
One size fits most
FINISHED MEASUREMENTS
14 inches long x 66 inches wide
MATERIALS
• Universal Yarn Infusion
Handpaints light (DK)
weight wool/acrylic yarn
(3½ oz/291 yds/100g per hank):
2 hanks #112 hydro power
• Size 7/4.5mm crochet hook or
size needed to obtain gauge
• Tapestry needle
GAUGE
8 sc rows = 2 inches; 10 sc rows =
2 inches
CONFIDENT
BEGINNER
SHAWLETTE
Row 1: Ch 232, sc in 2nd ch
from hook, sc in each rem ch
across, picot (see Special Stitch),
turn. (231 sc)
Row 2: Sc in each st across to
last 2 sc, 2 sc in each of next
2 sc, turn. (233 sc)
Row 3: Ch 2, sc in next st,
2 sc in each of next 2 sts, sc in
each st across to last 4 sts, picot,
leaving last 4 sts unworked,
turn. (231 sc)
Row 4: Ch 1, sc in each st across
to last 8 sts, 2 sc in each of the
next 2 sts (leaving last
6 sts unworked), turn. (227 sc)
Rows 5–76: [Rep rows 3 and 4
alternately] until 8 sts rem.
Note: Each rep of rows 3 and 4
dec st count by 6.
Row 77: Ch 2, sc in next st,
2 sc in each of the next 2 sts,
sc in next st, sl st across row to
picot. Fasten off. CW
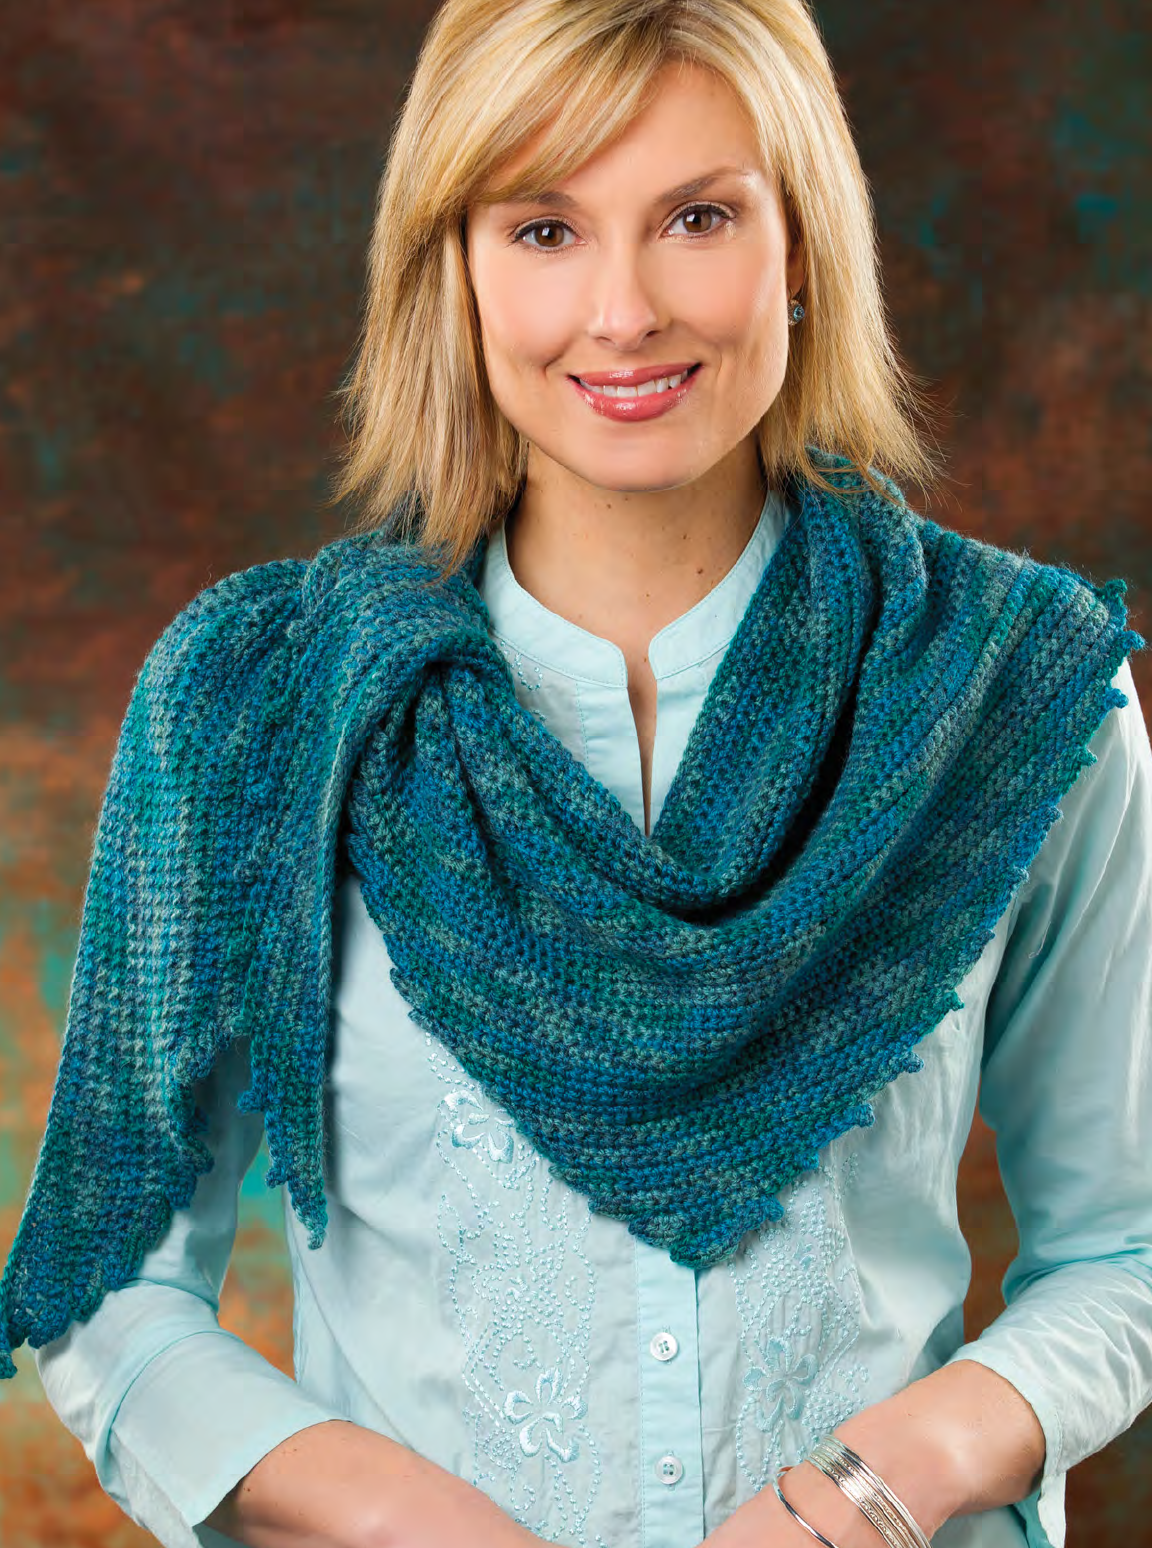
53 AUGUST 2015 CROCHETWORLD.COM Crochet World
You can drape this pretty piece
around your shoulders as a
shawlette or around your neck
as a cowboy-style scarf for
different fashion options.
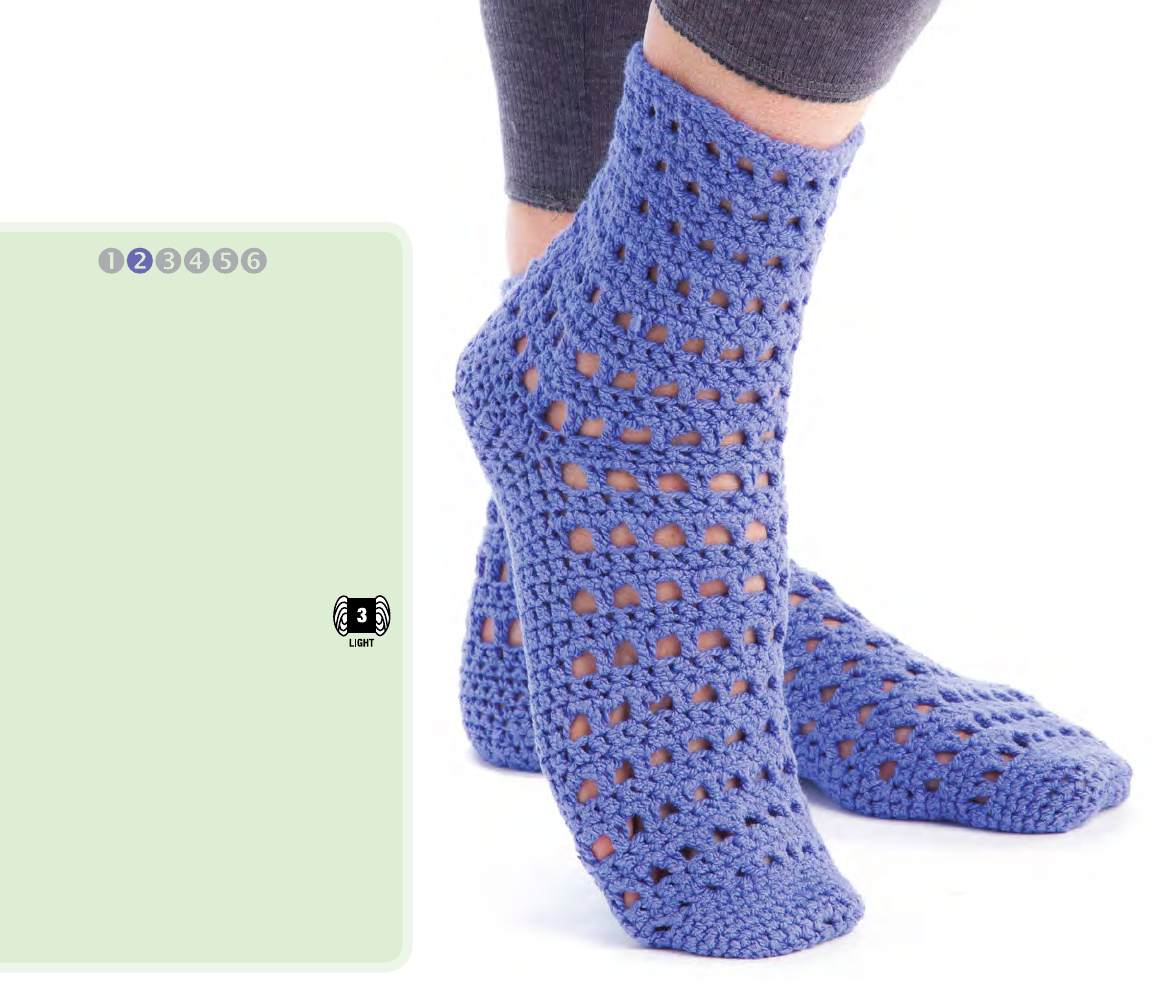
54 Crochet World CROCHETWORLD.COM AUGUST 2015
PATTERN NOTES
Weave in loose ends as work
progresses.
Do not join rounds unless other-
wise stated. Place stitch marker
at beginning of round and move
as work progresses.
Chain-2 at beginning of round
counts as first extended single
crochet unless otherwise stated.
Join with slip stitch as indicated
unless otherwise stated.
SPECIAL STITCH
Extended single crochet
(esc): Insert hook in indicated
st, yo, draw up a lp, yo, draw
through first lp on hook, yo,
draw through 2 lps on hook.
SOCK
Make 2.
TOE
Rnd 1: Beg at toe, ch 7 [9, 11], sc
in 2nd ch from hook, sc in each
ch across, place stitch marker
in last sc made to mark side of
Foot, working on opposite side
of foundation ch, sc in each of
next 6 [8, 10] chs, do not join,
place stitch marker to mark
beg (see Pattern Notes). (12 [16,
20] sc)
Rnd 2: [2 sc in next sc, sc in
each of next 3 sc] around.
(15 [20, 25] sc)
Rnd 3: Sc in each sc around.
Rnd 4: [2 sc in next sc, sc in
each of next 4 sc] around.
(18 [24, 30] sc)
Rnd 5: Rep rnd 3.
Rnd 6: [2 sc in next sc, sc in
each of next 5 sc] around.
(21 [28, 35] sc)
Rnd 7: Rep rnd 3.
Rnd 8: [2 sc in next sc, sc in
each of next 6 sc] around.
(24 [32, 40] sc)
Rnd 9: Rep rnd 3.
Trellis Lace Socks
Design by Rohn Strong
FINISHED SIZE
Instructions given fit size small;
changes for medium and large
are in [ ].
FINISHED MEASUREMENTS
Foot circumference: 7¼ [8, 10]
inches
Foot length: 8 [9, 10] inches or
desired length
Leg length: 5 inches or desired
length
MATERIALS
• Cascade Yarns Fixation
light (light worsted)
weight cotton/elastic
yarn (1¾ oz/100 yds/50g
per ball):
2 [3, 3] balls #2319
periwinkle
• Size F/5/3.75mm crochet hook
or size needed to obtain gauge
• Yarn needle
• Split ring stitch markers
GAUGE
18 esc = 4 inches; 16 rows esc =
4 inches
CONFIDENT
BEGINNER
Indulge your fetish
for comfortable
footwear with these
easy socks that are
worked in one piece
from the toe up for a
stretchy but snug fit.

55 AUGUST 2015 CROCHETWORLD.COM Crochet World
Sizes Medium & Large Only
Rnd [10]: [2 sc in next sc, sc
in each of next 7 sc] around.
([36, 45] sc)
FOOT
Rnd 1: Ch 2 (see Pattern Notes),
esc (see Special Stitch) in each
st around, join (see Pattern
Notes) in beg ch-2. (24 [36,
45] sc)
Note: Lace pattern will be
worked across top of Foot; sole
will be worked in esc.
Rnd 2: Ch 2, esc in first st,
[ch 4, sk next st, esc in next
st] 6 [9, 11] times, place stitch
marker, esc in each rem st, join
in beg ch-2.
Rnd 3: Ch 1, sc in same st as
beg ch-1, [sc in next ch sp, sc in
next esc] across to stitch marker,
esc in each rem st, join in beg sc.
Rnd 4: Ch 2, esc in each st
around, join in beg ch-2.
Rep rnds 2–4 until foot mea-
sures 6 [7, 8] inches from beg of
Toe or desired length from tip of
Toe to ankle bone, ending with
Rnd 4.
At the end of last rep, turn.
HEEL
Row 1 (RS): Now working in
rows, ch 1, sc in each of next
12 [18, 22] sts, leaving rem sts
unworked.
Row 2: Ch 1, sc in each sc
across, turn.
Rows 3–12: Ch 1, sc in each sc
across to last sc, leaving last sc
unworked, turn. (2 [8, 12] sc)
Row 13: Rep row 2.
Row 14: Ch 1, sc in each sc
across, sc in next unworked
sc on row below (row 12), sl st
in end of same row, turn. (3 [9,
13] sc)
Rows 15–22: Sk first sl st, sc in
next sc and in each sc across,
sc in next unworked sc on row
below, sl st in end of same row.
(11 [17, 21] sc)
Row 23: Sk first sl st, sc in next
sc, sc in each sc across, sc in next
unworked sc on row below, sl st
in end of same row, turn.
LEG
Rnd 1: Now working in rnds,
ch 2, esc in first st, ch 4, sk next
st, [esc in next st, ch 4, sk next
st] around, join in beg ch-2.
Rnd 2: Ch 1, sc in same st as
beg ch-1, [sc in next ch-4 sp, sc
in next sc] around, join in beg sc.
Rnd 3: Ch 2, esc in same st as
beg ch-1, esc in each sc around,
join in beg sc.
Rep rnds 1–3 until Leg mea-
sures 5 inches from top of Heel
or to desired length. Fasten off.
FINISHING
Sew closed any holes that may
occur near ankle on either side
of Foot. To block Socks, wash
and place on flat surface CW
CONNECTICUT
Pamela Roose
386 Main St., 1st Floor
Middletown, CT 06457
IDAHO
Alpaca Direct, LLC
1016 W. Hayden Ave.
Hayden, ID 83835
ILLINOIS
Lake St. Floral, Inc.
112 N. Chestnut St.
Kewanee, IL 61443
Lynda’s Crafts
Books & More
110 E. Pleasant St.
Taylorville, IL 62568
IOWA
BeeHive Crafts &
Framing
404 Grand Ave.
Spencer, IA 51301
Village
Needlework
1123 Seventh Ave.
Marion, IA 52302
MICHIGAN
Apple Knits & Purls
2009 Lakeshore Drive
Muskegon, MI 49441
MISSOURI
Treasure Chest Yarn
216 W. Monroe
Mexico, MO 65265
NEW YORK
Cook's Arts & Crafts
8009 Myrtle Ave.
Ridgewood, NY 11385
NORTH CAROLINA
Yarn and More, Inc.
4104 S. Virginia Dare Trail,
Unit 21
Nags Head, NC 27959
OHIO
Crochet Innovations
7660 Chippewa Road
Brecksville, OH 44141
Lion & Lamb Yarn
Boutique
6819 Cranford Drive
Dayton, OH 45459
OREGON
Jennie’s Yarn Shop
30 North Central Ave.
Medford, OR 97501
PENNSYLVANIA
Good’s Store Dist.
165 Earland Drive
New Holland, PA 17557
RHODE ISLAND
Perfectly Twisted Yarn
651 Rear Main Road
Tiverton, RI 02878
TENNESSEE
Yarn Asylum
2535-A Madison St.
Clarksville, TN 37043
TEXAS
Crafts & Quilting, Etc.
715 S. College Ave.
Tyler, TX 75701
VIRGINIA
Needles in the
Haymarket, LLC
15125 Washington St., #108
Haymarket, VA 20169
Old Town Yarnery
914 Marye St.
Fredericksburg, VA 22401
Yarn Cloud
204 Washington St.
Occoquan, VA 22125
PUERTO RICO
Tru-Tru Creations
Ave Las Americas
CC-12 Res Bairoa,
Caguas, PR 00725
This autoship listing is provided as a service to our readers and should
not be considered an endorsement from Crochet World magazine.
MAGAZINE is ne STORES
®
available at these
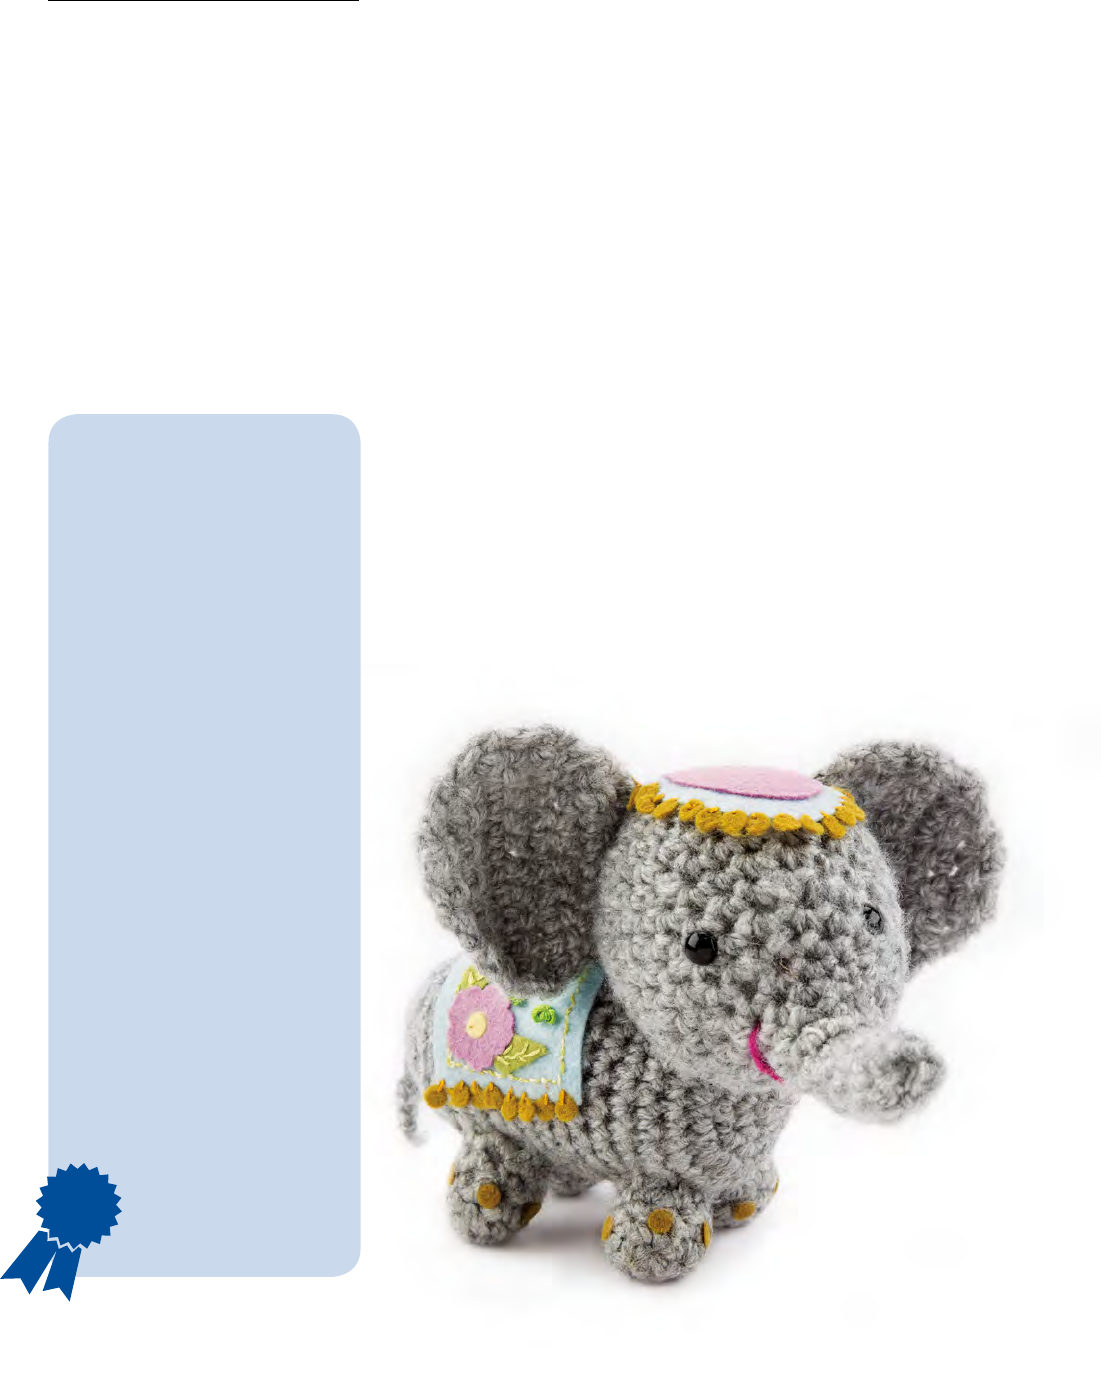
56 Crochet World CROCHETWORLD.COM AUGUST 2015
Row 3: Ch 1, 2 sc in first sc, sc
in each of next 3 sc, 2 sc in next
sc, turn. (7 sc)
Row 4: Ch 1, [2 sc in next sc, sc
in next sc] 3 times, 2 sc in last
sc, turn. (11 sc)
Row 5: Ch 1, sc in each sc
across, turn.
Rows 6 & 7: Rep row 5.
Row 8: Ch 1, sc dec in next 2 sc,
sc in each of next 7 sc, sc dec in
next 2 sc, turn. (9 sc)
Row 9: Ch 1, sc dec in next 2 sc,
sc in each of next 5 sc, sc dec in
next 2 sc, turn. (7 sc)
Row 10: Ch 1, sc dec in next
2 sc, sc in each of next 3 sc, sc
dec in next 2 sc, leaving a 10-
inch length, fasten off. (5 sc)
BODY
Rnds 1 & 2: Rep rnds 1 and 2 of
Head. (12 sc)
Rnd 3: Sc in each of next 3 sc,
2 sc in each of next 6 sc, sc in
each of next 3 sc. (18 sc)
Rnd 4: Sc in each of next 6 sc,
2 sc in each of next 6 sc, sc in
each of next 6 sc. (24 sc)
Rnd 5: Ch 1, sc in each sc
around.
Rnds 6–16: Rep rnd 5.
Rnd 17: [Sc in each of next
2 sc, sc dec in next 2 sc] around.
(18 sc)
Rnd 18: Rep rnd 5.
Rnd 19: [Sc in next sc, sc dec
in next 2 sc] around. (12 sc)
Rnd 20: Rep rnd 5.
Stuff Body with fiberfill.
Rnd 21: [Sc dec in next 2 sc]
around, do not fasten
off. (6 sc)
TAIL
Rnd 1: [Sc dec in next 2 sc] 3
times, weave hook through rem
sts, yo, draw through to close
opening, ch 12, fasten off.
LEG
Make 4.
Rnd 1: Ch 2, 4 sc in 2nd ch from
hook, place marker.
Rnd 2: 2 sc in each sc around.
(8 sc)
Rnds 3–5: Sc in each sc around.
At the end of rnd 5, join (see
Pattern Notes) in next sc, leaving
8-inch length of yarn, fasten off.
Stuff Legs with fiberfill and sew
to bottom of body.
ADORNMENT
Following manufacturer’s
directions for fusible web, trace
pattern pieces on felt and cut
out. Cut pieces from felt as fol-
lows: 1 small oval and 3 flowers
from wisteria, 1 large oval and
rectangle from blue snow and 6
WINNER’S CIRCLE
CONTEST
We know many talented readers
enjoy designing their own
patterns, from tablecloths to toys.
Why not let others enjoy your
pattern and earn a little cash in
the process? We’ll pay top dollar
for your original crochet patterns.
From those submitted, we’ll
choose a Winner’s Circle prize-
winning design.
Please send us the actual
crocheted item(s), which will be
photographed and returned to
you. (Make sure you include return
postage for the return of the item.)
Please email (Editor@Crochet-
World.com) or write for our
Designer’s Guidelines, which
provide necessary information
when submitting designs.
All patterns submitted must be
your own design and not a copy
of another designer’s pattern or
copyrighted figures (Disney or
Sesame Street characters, etc.).
Designs should be sent to:
BRIGHT
IDEA! HINT!
BOOK
REVIEW
BACK
TALK! Letters from
our readers
PRODUCT
REVIEW
Winner’s Circle
Crochet World
306 E. Parr Road
Berne, IN 46711
Nyla the Indian Elephant
Continued from page 7
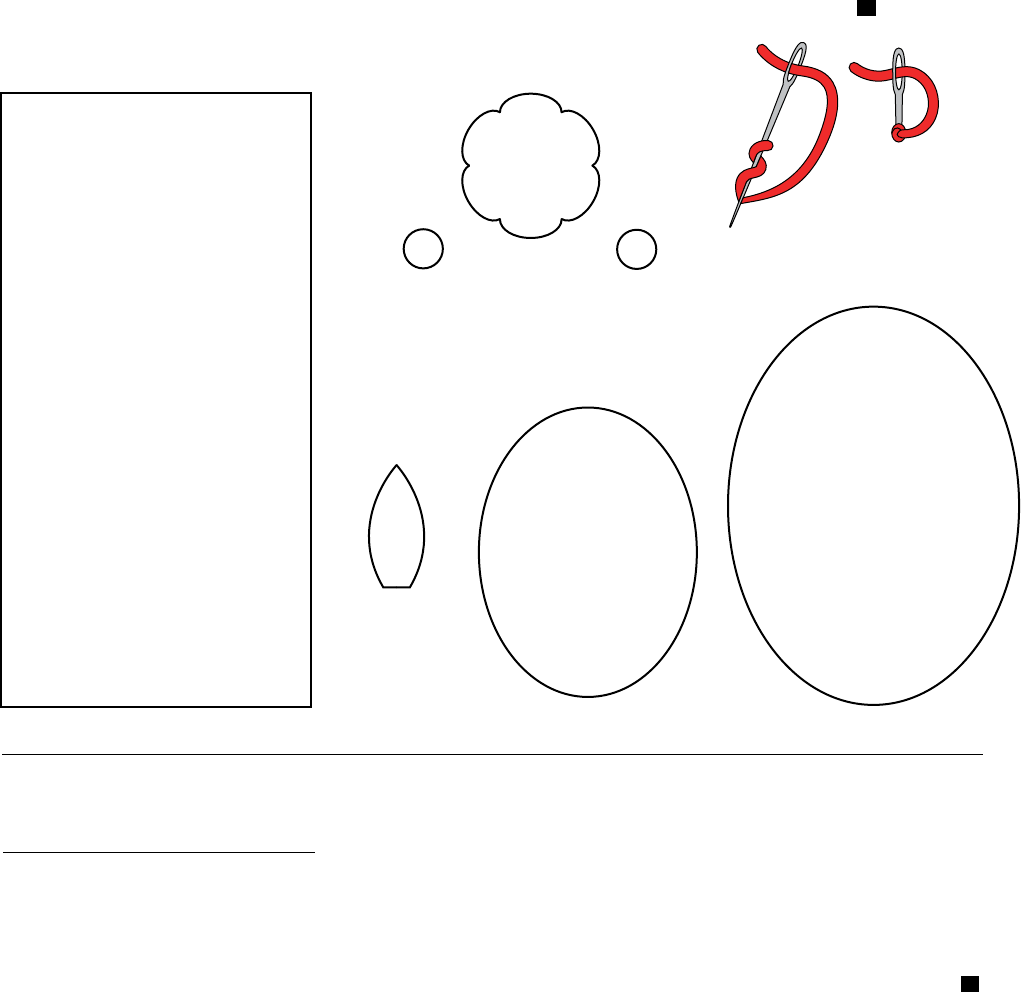
57 AUGUST 2015 CROCHETWORLD.COM Crochet World
SMALL BASKET
Rnds 1–3: Rep rnds 1–3 of
Large Basket. (24 sc)
Rnds 4 & 5: Rep rnds 4 and
5 of Medium Basket. (36 sc,
4 ch-2 sps)
Rnds 6 & 7: Rep rnds 7 and 8
of Medium Basket. (48 sc)
Rnd 8: Ch 1, sc in each sc
around, join in beg sc, turn.
Rnds 9–16: Rep rnd 8.
Rnd 17 (RS): Ch 1, sc in each
sc around, join in beg sc, do
not turn.
Rnd 18 (RS): Ch 1, sc in same
sc as beg ch-1, sk next sc, shell
in next sc, sk next sc, [sc in next
sc, sk next sc, shell in next sc, sk
next sc] around, join in beg sc.
Fasten off. (12 shells)
To form cuff, fold rnds 16–18
down on Basket or as desired. CW
leaves from pea soup. Use hole
punch or templates below to cut
3 flower centers from buttercup
and 59 circles from old gold.
For Legs, glue 4 old gold circles
evenly sp around to rnd 3 of
each Leg.
For the headpiece, sew 27 old
gold circles to the large oval
using very dark straw embroi-
dery floss.
Following manufacturer’s direc-
tions for fusible web, use iron to
heat bond the small oval to the
large oval. Glue headpiece to top
of Head.
For blanket sew 8 old gold
circles to each short side of
the rectangle using very dark
straw embroidery floss. Using 2
strands very light golden yellow
embroidery floss, embroider a
¼-inch backstitch border around
edge. Following manufacturer's
directions for fusible web,
use iron to heat bond 2 leaves
slightly under each flower and a
buttercup circle to center of
each Flower. With 2 strands of
ultra-light avocado green em-
broidery floss, embroider veins
on each leaf.
Following manufacturer's
directions for fusible web, use
iron to heat bond flower to
blanket. With 6 strands bright
chartreuse, embroider French
knots (see illustration) as de-
sired on blanket. Glue blanket
to Elephant’s back. CW
French Knot
AB
Nyla the Indian Elephant
Rectangle
Cut 1 blue snow
Nyla the Indian Elephant
Circle
Cut 3 buttercup
Nyla the Indian Elephant
Circle
Cut 59 old gold
Nyla the
Indian Elephant
Flower
Cut 3 wisteria
Nyla the
Indian Elephant
Leaf
Cut 6 pea soup
Nyla the Indian Elephant
Large Oval
Cut 1 blue snow
Nyla the Indian Elephant
Small Oval
Cut 1 wisteria
Colorful Catchalls
Continued from page 9

58 Crochet World CROCHETWORLD.COM AUGUST 2015
Rows 2–60: Ch 1, sc in each st
across, turn. Do not turn at
end of last row.
EDGING
Rnd 1 (RS): Now working in
rnds, ch 1, working down next
side, sc in end of each row to
first row, working in opposite
side of foundation ch, 3 sc in
first ch, sc in each ch across to
last ch, 3 sc in last ch, working
up other side, sc in end of each
row to last row, 3 sc in first st,
sc in each st across to last st, 3
sc in last st, join (see Pattern
Notes) in beg sc. Fasten off.
Rnd 2: Join faded denim
ombré in any sc, ch 1, sl st in
each sc around, join in beg sl st.
Fasten off.
FINISHING
Using photo as a guide, position
top of pocket 3½ inches from top
edge with left side of pocket par-
allel to side edge of Place Mat.
Using pocket stitches as a guide,
sew by hand or machine on 3
sides, leaving top edge of pocket
unsewn. CW
next 8 dc, ch 3, 5 dc in 3rd ch of
next ch-5 sp, ch 3**, dc in each
of next 8 dc, rep from * around,
ending last rep at **, join in 3rd
ch of beg ch-3. (256 dc, 16 groups
of 5 dc, 32 ch-3 sps)
Rnd 21: Ch 3, dc in each of next
6 dc, *sk next 2 dc, dc in each of
next 7 dc, ch 7, sk next ch-3 sp,
sl st in 3rd dc of next 5-dc group,
ch 7**, dc in each of next 7 dc,
rep from * around, ending last
rep at **, join in 3rd ch of beg
ch-3. (224 dc, 16 ch-7 sps)
Rnd 22: Ch 3, dc in each of next
5 dc, *sk next 2 dc, dc in each
of next 6 dc, ch 3, 5 dc in 4th
ch of next ch-7 sp, ch 5, 5 dc in
4th ch of next ch-7 sp, ch 3**,
dc in each of next 6 dc, rep from
* around, ending last rep at **,
join in 3rd ch of beg ch-3. (192
dc, 32 groups of 5 dc, 32 ch-3 sps,
16 ch-5 sps)
Rnd 23: Ch 3, dc in each of next
4 dc, *sk next 2 dc, dc in each of
next 5 dc, ch 7, sl st in 3rd dc of
next 5-dc group, ch 7, sl st in 3rd
ch of next ch-5 sp, ch 7, sl st in
3rd dc of next 5-dc group, ch 7**,
dc in each of next 5 dc, rep from
* around, ending last rep at **,
join in 3rd ch of beg ch-3. (160
dc, 64 ch-7 sps)
Rnd 24: Ch 3, dc in each of next
3 dc, *sk next 2 dc, dc in each of
next 4 dc, ch 3, 5 dc in 4th ch of
next ch-7 sp, [ch 5, 5 dc in 4th ch
of next ch-7 sp] 3 times, ch 3**,
dc in each of next 4 dc, rep from
* around, ending last rep at **,
join in 3rd ch of beg ch-3. (128
dc, 16 ch-3 sps, 48 ch-5 sps, 64
groups of 5 dc)
Rnd 25: Beg 6-dc split cl (see
Special Stitches), ch 3, *5-dc cl
(see Special Stitches), [ch 5, sl st
in next ch-5 sp, ch 5, 5-tr cl—see
Special Stitches] 3 times, ch
5, 5-dc cl, ch 3**, 6-dc split cl
(see Special Stitches), rep from
* around, ending last rep at **,
join in top of beg 6-dc split cl.
Fasten off.
PETAL OVERLAY
Rnd 1: With RS facing, join in
sp between 2 7-dc groups of rnd
5, [ch 5, sl st between next 2
groups of 7-dc] around, join in
beg sl st. (16 ch-5 sps)
Rnd 2: Sl st in ch-5 sp, ch 3, 8
dc in same sp, 9 dc in each rem
ch-5 sp around, join in 3rd ch of
beg ch-3. (144 dc)
Rnd 3: Ch 3, dc in each of next
7 dc, *sk next 2 dc**, dc in each
of next 16 dc, rep from * around,
ending last rep at **, dc in each
of next 8 dc, join in 3rd ch of beg
ch-3. (128 dc)
Petal
Row 4: Now working in rows,
ch 3, dc in each of next 6 dc, sk
next 2 dc, dc in each of next 7 dc,
turn. (14 dc)
Row 5: Ch 3, dc in each of next
5 dc, sk next 2 dc, dc in each of
next 6 dc, turn. (12 dc)
Row 6: Ch 3, dc in each of next
4 dc, sk next 2 dc, dc in each of
next 5 dc, turn. (10 dc)
Row 7: Ch 3, dc in each of next
3 dc, sk next 2 dc, dc in each of
next 4 dc, turn. (8 dc)
Row 8: Ch 3, dc in each of next
2 dc, sk next 2 dc, dc in each of
next 3 dc, turn. (6 dc)
Row 9: Ch 3, dc in next dc, sk
next 2 dc, dc in each of next 2 dc,
turn. (4 dc)
Row 10: Ch 3, sk next 2 dc, dc
in next dc. Fasten off. (2 dc)
Working counterclockwise with
RS facing, join in next unworked
dc of rnd 3, rep rows 4–10
around Doily until a total of 8
Petals are completed, at end of
row 10 of last Petal, do not
fasten off.
EDGING
*Ch 5, tr in same st, working
over ends of rows, sk next row,
sl st in next sp, [ch 5, tr in same
sp, sk next row, sl st in next sp]
twice, ch 5, tr in same sp, sl st
between 8-dc groups of rnd 3,
[ch 5, tr in same sp, sk next row,
sl st in next sp] 3 times, ch 5, tr
in same sp, sl st in 2nd dc of top
row, rep from * around, join at
base of beg ch-5.
Fasten off. CW
Teal Fantasy Doily
Continued from page 13
Denim Pocket Place Mat
Continued from page 24
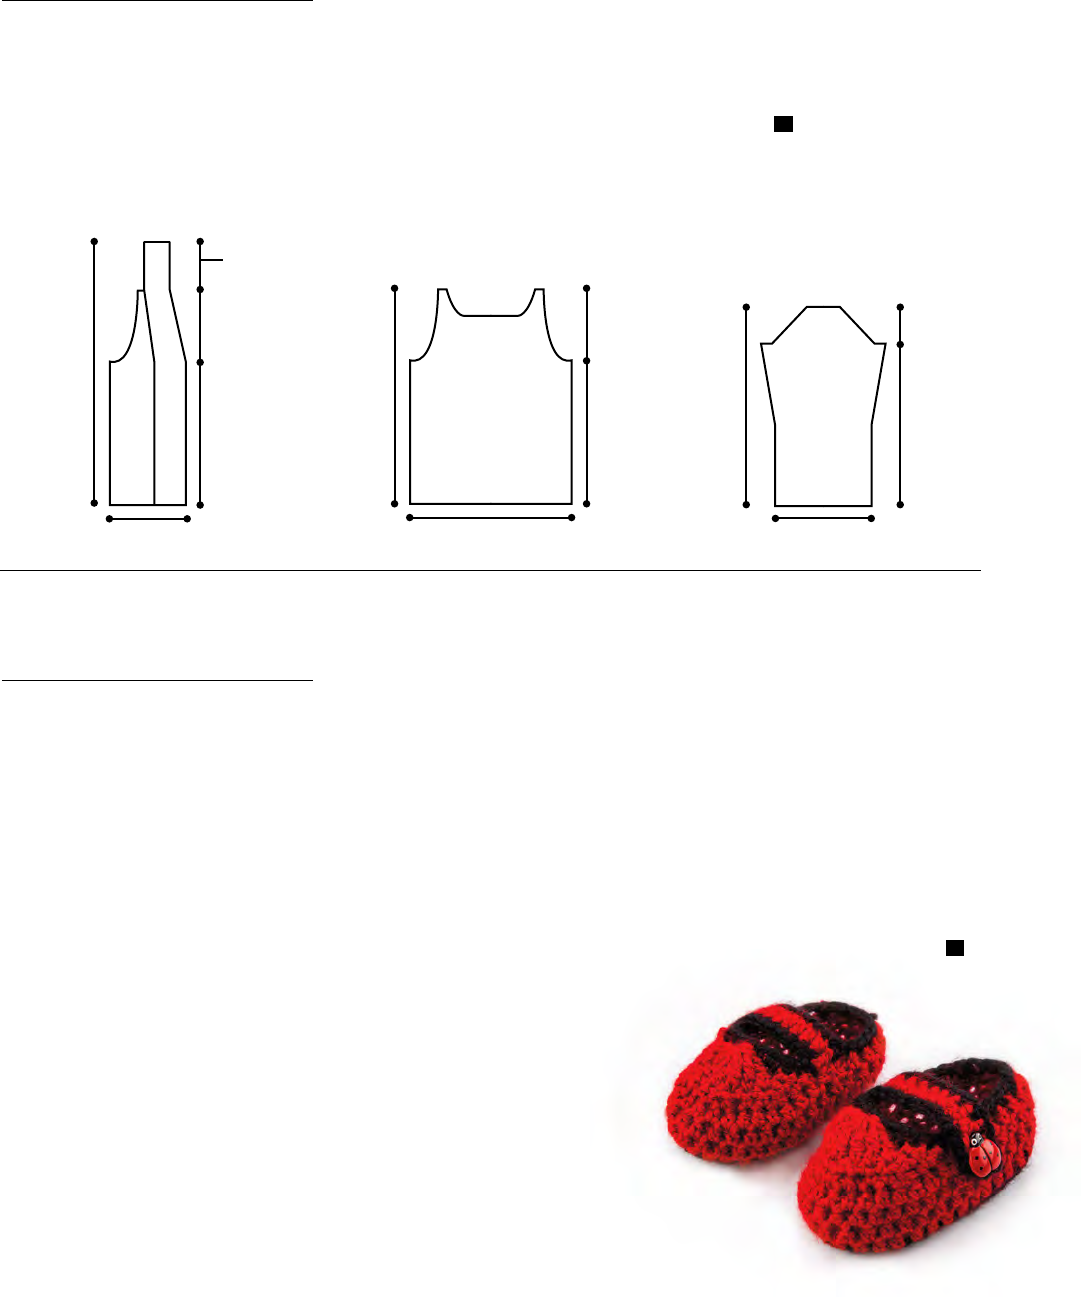
59 AUGUST 2015 CROCHETWORLD.COM Crochet World
stitch marker, 3 sc in marker,
place stitch marker in last sc, sc
in each end of each row across to
next stitch marker, 3 sc in mark-
er, place stitch marker in last sc,
sc in end of each row across to
bottom, turn.
Row 2: Ch 1, sc in each st
across to 2nd stitch marker, sc
in marked st and in each of
next 2 sts, [ch 4, sk next 4 sts, sc
in each of next 10 sts] 3 times
(buttonholes made), sc each rem
st across, turn.
Row 3: Ch 1, sc in each st and
in each ch across, turn.
Row 4: Ch 1, sc in each st
across, turn.
Row 5: Sl st in each st across.
Fasten off.
Sew buttons opposite button-
holes.
Fasten off. CW
22 [223/4, 23, 231/2, 24]"
4 [43/4, 5, 51/2, 6]"18"
103/4 [103/4, 11, 12, 121/2]"
SLEEVE
291/2 [301/2, 311/2, 321/4, 331/4]"
8 [81/2, 9, 91/2, 10]"
51/2 [6, 61/2, 63/4, 71/4]"
16"
83/4 [10, 11, 12, 13]"
FRONT
24 [241/2, 25, 251/2, 26]"
8 [81/2, 9, 91/2, 10]"16"
18 [20, 221
/2, 241/2, 261/2]"
BACK
Cabled Elegance Cardigan
Continued from page 18
Size 0–3 Months Only
Fasten off.
Size 6–9 Months Only
Rnd [4]: Rep rnd 3. Fasten off.
(38 hdc)
SIDES
Rnd 1: With RS facing, join red
in center st of any 3-hdc group,
ch 1, hdc in each st around, join
in beg hdc. (34 [38] hdc)
Rnds 2–4 [5]: Ch 1, hdc in each
st around, join in beg hdc. Fas-
ten off at end of last rnd. Place
marker (see Pattern Notes).
TOP
Row 1: Sk first 10 [11] sts from
marked st, sc join (see Special
Stitch) red in next st, sc in next
1 [2] st(s), sc dec (see Stitch
Guide) in next 2 sts, [sc in each
of next 2 sts, sc dec in next 2 sts]
3 [4] times, sc in each of next 2
sts, leaving rem sts unworked,
turn. (14 [18] sc)
Row 2: Ch 1, sc in each of first
2 sts, sc dec in next 2 sts, [sc in
each of next 2 sts, sc dec in next
2 sts] 2 [3] times, sc in each of
next 2 sts, turn. (11 [14] sc)
Row 3: Ch 3, sk first 2 sc, hold-
ing back last lp of each st on
hook, tr in each of next 7 [10]
sc (8 [11] lps on hook), yo, pull
through all lps on hook, ch 3, sk
next sc, sl st in last sc. Fasten
off. Do not remove marker.
STRAP
Note: For left Bootie, join red
in last st made in row 1; for
right Bootie, join red in 9th
[11th] sc from marked st.
Ch 13 [15], hdc in 3rd ch from
hook, ch 1, sk next ch, hdc in
each rem ch, sk next unworked
st on rnd 4 [5] of Sides, sl st in
next st. Fasten off.
EDGING
Sc join black in any st on top
row of Strap, sc evenly around
Bootie top, Strap and Sides, join
in beg sc. Fasten off.
FINISHING
Sew button on opposite edge of
top from Strap under ch-1 sp
buttonhole. Block as needed. CW
Little Ladybug Booties
Continued from page 15
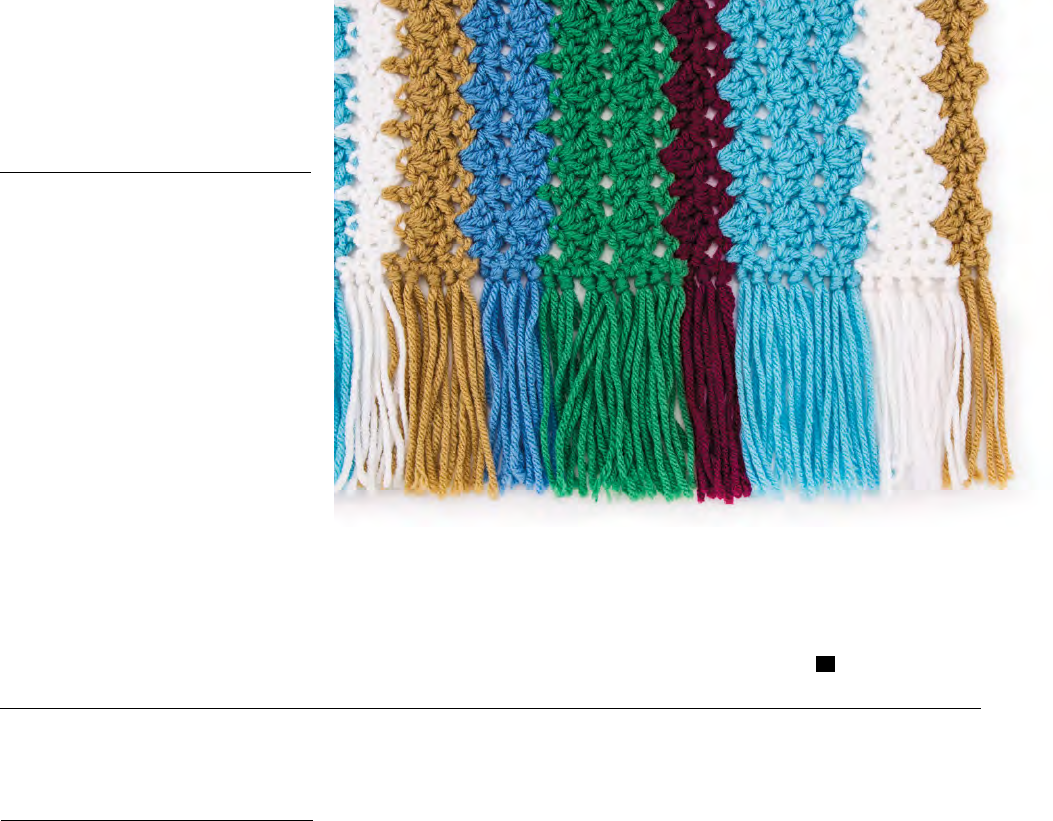
60 Crochet World CROCHETWORLD.COM AUGUST 2015
leaving 7-inch length at beg
and working in opposite side of
foundation ch, sc join in first ch
of row 1, *sk next ch, shell in
next ch, sk next ch, sc in next
ch, rep from * across. Leaving
7-inch length, fasten off. (46 sc,
45 shells)
Rows 2–41: Rep rows 2–41 of
First Side.
BORDER
Work same as Border of
First Side.
FRINGE
Cut 14-inch lengths of yarn in
colors to match ends of rows. For
rows with fringe, cut 1 length;
for rows without fringe, cut 2
lengths. Pull lengths through
ends of rows, fold in half, and tie
in an overhand knot. Arrange
beg and rem lengths of each row
and knot matching colors tog.
Finger-comb the knotted Fringe
and place evenly on a flat sur-
face. Trim Fringe to 4 inches or
desired length. CW
Cabin Retreat Throw
Continued from page 48
SPECIAL STITCH
Crocodile stitch (crocodile
st): 5 dc around vertical post
from top to bottom of next dc,
ch 1, turn work to work around
next dc worked in same st from
bottom to top, work 5 dc around
vertical post of dc.
HANDBAG
BODY
Rnd 1: Beg at bottom of Hand-
bag, ch 42, 3 sc in 2nd ch from
hook, sc in each of next 39 chs,
3 sc in last ch, working on op-
posite side of foundation ch, sc
in each of next 39 chs, join (see
Pattern Notes) in beg sc, sl st in
next sc. (84 sc)
Rnd 2: Ch 3 (see Pattern Notes),
dc in same st as beg ch-3, ch 2,
sk next 2 sc, [2 dc in next sc,
ch 2, sk next 2 sc] around, join
in 3rd ch of beg ch-3. (28 groups
of 2 dc)
Rnd 3: Working from top to bot-
tom of 2nd dc of previous rnd,
work 5 dc around vertical post,
ch 1, turn piece to work from
bottom to top of first dc worked
in same sc, work 5 dc around
vertical post, sk next 2 dc,
[work crocodile st (see Special
Stitch), sk next 2 dc] around,
join in first dc of first crocodile
st, sl st in sp between sk 2 dc of
previous rnd. (14 crocodile sts)
Rnd 4: Working over sp be-
tween crocodile sts and between
2 sk dc of previous rnd, ch 3, dc
in same sp, ch 2, [2 dc in center
of crocodile st, ch 2, working
over sp between crocodile sts
and between 2 sk dc of previ-
ous rnd, work 2 dc in sp, ch 2]
around, join in beg ch-3. (28
groups of 2 dc)
Rnd 5: Rep rnd 3, placing croco-
dile sts between crocodile sts of
previous round.
Rnds 6–23: [Rep rnds 3 and 4
alternately] 9 times.
Rnd 24: Ch 1, [working over
crocodile sts, sc in side edge of
dc post, sc in center of crocodile
st, sc in side edge of dc post (3 sc
over crocodile st), working over
sp between crocodile sts, sc in
sp between 2 dc] around, join in
beg sc. (56 sc)
Rnd 25: Ch 2 (see Pattern
Notes), hdc in each sc around,
join in beg ch-2.
Rnd 26: Sl st in sp between hdc
sts, ch 2, hdc in sp between each
hdc around, join in beg ch-2.
Rnds 27 & 28: Rep rnd 26.
Rnd 29: Ch 1, sc in each hdc
around, join in beg sc.
Rnd 30: Ch 1, reverse sc (see
Stitch Guide) in each sc around,
join in beg sc. Fasten off.
Rippling Waters Handbag
Continued from page 50

61 AUGUST 2015 CROCHETWORLD.COM Crochet World
TAB
Make 4.
Row 1: Ch 4, sc in 2nd ch
from hook, sc in each of next
2 chs, turn.
Rows 2–8: Ch 1, sc in each sc
across, turn.
Row 9: Ch 2, 2 dc in center sc
of row, dc in last sc, ch 1, do
not turn.
Rnd 10: Now working in rnds,
ch 1, sc evenly sp down side
edge of Tab, across opposite
side of foundation ch and up
opposite edge, work (5 dc, ch 1,
5 dc) between 2 center dc sts,
join in beg sc. Fasten off.
LINING
Turn Handbag WS out and use
as a pattern, allowing ¼-inch
seam allowance and 1 inch for
top hem. With fabric fold at
bottom, cut fabric out. Sew side
seams and turn top edge under
and sew around opening.
Sew lining around inner top
edge of Handbag.
FINISING
Use care to position handles
evenly sp from edge. Pass a
Tab through each end of handle
with shell positioned on
outer edge and straight
edge on the inside, place a
button over inside edge
of Tab and sew through
all layers to secure
Tab using care not to
crush shell. Rep in
same manner with
2nd Tab. Rep same
as first handle with
2nd handle.
Using photo as a
guide, secure or-
namental pin or
decorative charm on
front of Handbag. CW
PRODUCT
REVIEW
Designer Jill Hanratty creates
stunning garments that are
just as easy to wear as they
are to crochet! The six designs
featured in Summer Tops will
quickly become warm-weather
favorites when crocheted in cool
cotton and cotton-blend yarns
from Omega. Great season
spanners—just add
a jacket and your favorite jeans—each top
can be dressed up for ofce attire too. The
designs feature clearly written directions
and symbol crochet diagrams, and they
come in a range of sizes from small
to 4X-large. Summer Tops by Jill
Hanratty is published by Annie’s and is
available at AnniesCraftStore.com
Summer Tops
by Jill Hanratty
summersummer
TopsTops
J I L L
HANRATTY
6
stunning tops
made using ngering-
and sport-weight
cotton yarns!
TM
871505
CROCHET
Crochet
SUMMER TOPS
Crochet Annie’s
Need help?
Stitch
Guide.com
ILLUSTRATED GUIDES
HOW-TO VIDEOS
How would you like to crochet faster,
more easily and more accurately? In
this class, crochet expert Ellen Gormley
teaches you how to read crochet symbol
diagrams that can help you achieve all
that—and more.
CDV02 Learn to Read Symbol Crochet
Diagrams
Learn to Read Symbol
Crochet Diagrams
ANNIE’S VIDEO CLASSES
Pantone uncoated (below)
Logo over stacked tagline
Logo next to stacked tagline
Logo alone
Minimum allowed sizes
Pantone uncoated (below)
Pantone uncoated (below) 4 color process (below)
Black (below) White (below)
Annie’s Logo Purple:
Pantone: 268C, GOE Medium Purple U
CMYK: C82, M100, K12
RGB: R82, G43, B133
Hexadecimal: 522b85
Annie’s Logo Gray:
Pantone: Cool Gray 9 U
CMYK: 60K
RGB: R130, G131, B134
Hexadecimal: 828386
Color specications:
Note: Symbols such as ®, ©, and ™ are never to appear as less than 5 pt. in size. If, in the event
of reducing art to t a space the symbol appears too small, that symbol must be reset to the
minimum 5 pt. type size.
A art, pantone uncoated (below)
Pantone uncoated (below)
Annie’s ocial logo, created 8/12, revised 7/13
(You must be familiar with the DRG corporate logo
standards before any usage attempt.)
4 color process (below)
Black (below)
White (below)
4 color process (below)
Black (below)
White (below)
4 color process (below)
Black (below)
White (below)
®
AnniesOnlineClasses.com
Craft Store
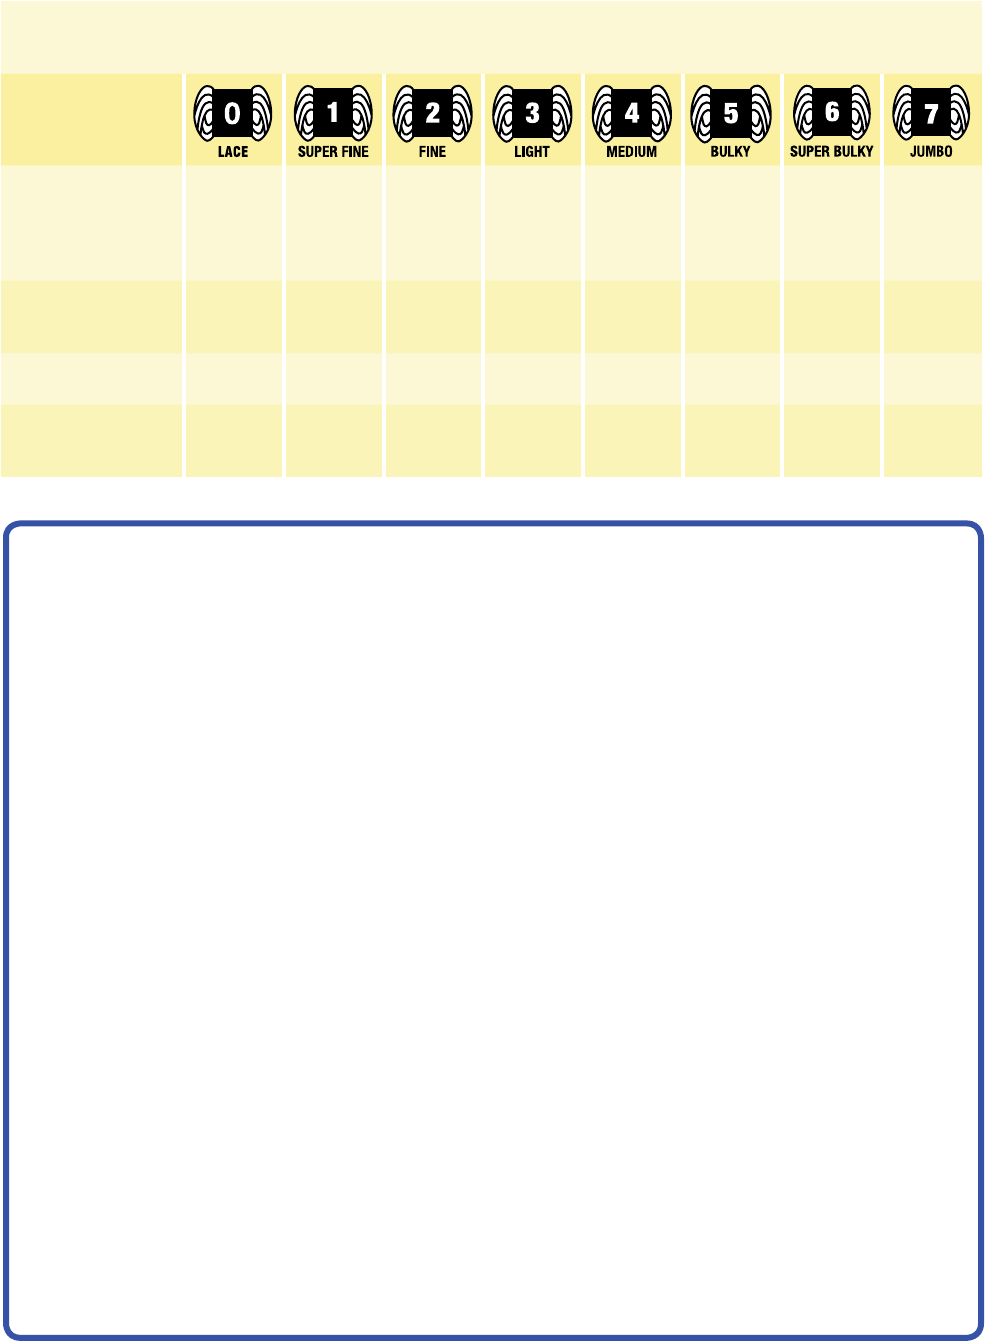
Order this pattern and much more at...
www.CrochetVillage.com
Crochet
Village
America’s #1 Pain Relieving Topical Gel
Shop all our products at Savannahgold.com
or call (941) 723-1813 to place your order.
Made in the USA
Arthritis
Neck Pain
Gout
Fibromyalgia
Planter Fasciitis
Back Pain
Headaches
Shingles
Sciatica
Carpal Tunnel
Knee Pain
Restless Leg
Neuropathy
Bone Spurs
Muscle Aches
Pain
GONE in 60
seconds!
Shop.Crochet.Create.
Crochet Edge
blades for making
perfect crochet
holes in fleece,
flannel and other
materials.
Kay’s
CROCHET PATTERNS
Order at www.kayscrochetpatterns.com
See what everyone is talking about...
watch the video at
www.YarnPullEase.com
Life Just Got Easier!
Skip-Stitch
®
Perforating Rotary Blade
THE CUTTING EDGE You Need
Say goodbye to measuring and poking
holes in fabric. The Skip-Stitch
®
blade
perfectly places perforations in fleece,
flannel and a variety of other fabrics in
preparation for the application of over-
edge finishing, lacing or crocheting
edging to blankets, towels, pillowcases,
clothing and more! Available in three
sizes and fits all 45mm rotary cutters.
www.skipstitch.com
Reach out to our dedicated crocheters!
Place your ad here!
Call Joan:
(877) 282-4724, ext. 4504
62 Crochet World CROCHETWORLD.COM AUGUST 2015
Buyer’s Guide
Annie’s
AnniesYarnShop.com
Cascade Yarns
Fixation
www.cascadeyarns.com
Caron
Simply Soft, Simply Soft
Heathers, Simply Soft Light,
Simply Soft Paints
Distributed by Yarnspirations.
com
320 Livingstone Ave. S., Box 40
Listowel, ON
N4W 3H3 Canada
(888) 368-8401
www.yarnspirations.com
Crochet Lites
(469) 682-1695
www.cornerstoneproducts
online.com
Crochet Village
www.crochetvillage.com
Darice
13000 Darice Parkway
Strongsville, OH 44149
(866) 4-DARICE (432-7423)
www.darice.com
Denise Interchangeable
Knitting & Crochet
1618 Miller School Road
Charlottesville, VA 22903
(888) 831-8042
www.knitdenise.com
DMC
Embroidery Floss, Pearl Cotton
10 Basin Drive, Suite 130
Kearny, NJ 07032
(800) 275-4117
www.dmc-usa.com
Handy Hands
578 N. 1800 E.
Paxton, IL 60957
(217) 379-3802
www.hhtatting.com
Hobby Lobby Stores Inc.
Sew-Ology
7707 S.W. 44th St.
Oklahoma City, OK 73179
www.hobbylobby.com
JHB
Blumenthal Lansing Co.
1929 Main Street
Lansing, Iowa 52151
(800) 810-2622
www.buttons.com
Kay’s Crochet Patterns
http://kayscrochetpatterns.com
Lily
Sugar ‘n Cream
Distributed by Yarnspirations.
com
320 Livingstone Ave. S., Box 40
Listowel, ON
N4W 3H3 Canada
(888) 368-8401
www.yarnspirations.com
Lion Brand Yarn
Jiffy, Pound of Love,
Vanna’s Glamour
135 Kero Road
Carlstadt, NJ 07072
(800) 258-YARN (9276)
www.lionbrand.com
Made in America Yarns
3114 E. Thompson St.
Philadelphia, PA 19134
(215) 425-5656
www.madeinamericayarns.com
National Nonwovens
WoolFelt
P.O. Box 150
Easthampton, MA 01027
(800) 333-3469
www.nationalnonwovens.com
Omega
Distributed by Creative
Yarn Source
29980 Technology Suite 8
Murrieta, CA 92563
(614) 205-3210
www.creativeyarnsource.com
Plymouth Yarn Company, Inc
Encore DK
500 Lafayette St.
Bristol, PA 19007
(215) 788-0459
www.plymouthyarn.com
Red Heart Yarns
Aunt Lydia’s Classic Crochet,
Aunt Lydia’s Fashion Crochet,
Soft Yarn, Super Saver,
With Love
Coats & Clark Consumer
Services
P.O. Box 12229
Greenville, SC 29612-0229
(800) 648-1479
www.redheart.com
Savannah Gold
(941) 723-1813
www.savannahgold.com
Skip-Stitch
www.skipstitch.com
The Warm Company
Steam-A-Seam 2
5529 186th Place S.W.
Lynnwood, WA 98037
(800) 234-WARM (9276)
www.warmcompany.com
Universal Yarn
Infusion Handprints, Nazli
Gelin Garden 3, Nazli Gelin
Garden 10
5991 Caldwell Business Park
Drive
Harrisburg, NC 28075
(877) UNIYARN (864-9276)
www.universalyarn.com
Yarn PullEase
www.yarnpullease.com
Standard Yarn Weight System
Catagories of yarn, gauge ranges and recommended hook sizes.
Yarn Weight Symbol &
Category Names
Type of Yarns in Category
Lace,
Fingering
Size 10
Crochet
Thread
Sock,
Fingering,
Baby
Sport,
Baby
DK, Light
Worsted
Worsted,
Afghan, Aran
Chunky,
Craft, Rug
Super
Chunky,
Roving
Roving
Crochet Gauge* Ranges in
Single Crochet to
4 inches
32–42 sts 21–32 sts 16–20 sts 12–17 sts 11–14 sts 8–11 sts 6–9 sts 5 sts and
fewer
Recommended Hook in
Metric Size Range
1.5–
2.25mm
2.25–
3.5mm
3.5–
4.5mm
4.5–
5.5mm
5.5–
6.5mm
6.5–
9mm
9–
16mm
16mm and
larger
Recommended Hook–
U.S. Size Range
Steel 8–1
Regular
Hook B1
B1 to E4 E4 to 7 7 to I9 I9 to K10½ K10½ to
M/N13 M/N13 to Q Q and larger
*Guidelines only: The above reect the most commonly used gauges and hook sizes for specic yarn categories.
Order this pattern and much more at...
www.CrochetVillage.com
Crochet
Village
America’s #1 Pain Relieving Topical Gel
Shop all our products at Savannahgold.com
or call (941) 723-1813 to place your order.
Made in the USA
Arthritis
Neck Pain
Gout
Fibromyalgia
Planter Fasciitis
Back Pain
Headaches
Shingles
Sciatica
Carpal Tunnel
Knee Pain
Restless Leg
Neuropathy
Bone Spurs
Muscle Aches
Pain
GONE in 60
seconds!
Shop.Crochet.Create.
Crochet Edge
blades for making
perfect crochet
holes in fleece,
flannel and other
materials.
Kay’s
CROCHET PATTERNS
Order at www.kayscrochetpatterns.com
See what everyone is talking about...
watch the video at
www.YarnPullEase.com
Life Just Got Easier!
Skip-Stitch
®
Perforating Rotary Blade
THE CUTTING EDGE You Need
Say goodbye to measuring and poking
holes in fabric. The Skip-Stitch
®
blade
perfectly places perforations in fleece,
flannel and a variety of other fabrics in
preparation for the application of over-
edge finishing, lacing or crocheting
edging to blankets, towels, pillowcases,
clothing and more! Available in three
sizes and fits all 45mm rotary cutters.
www.skipstitch.com
Reach out to our dedicated crocheters!
Place your ad here!
Call Joan:
(877) 282-4724, ext. 4504
63 AUGUST 2015 CROCHETWORLD.COM Crochet World
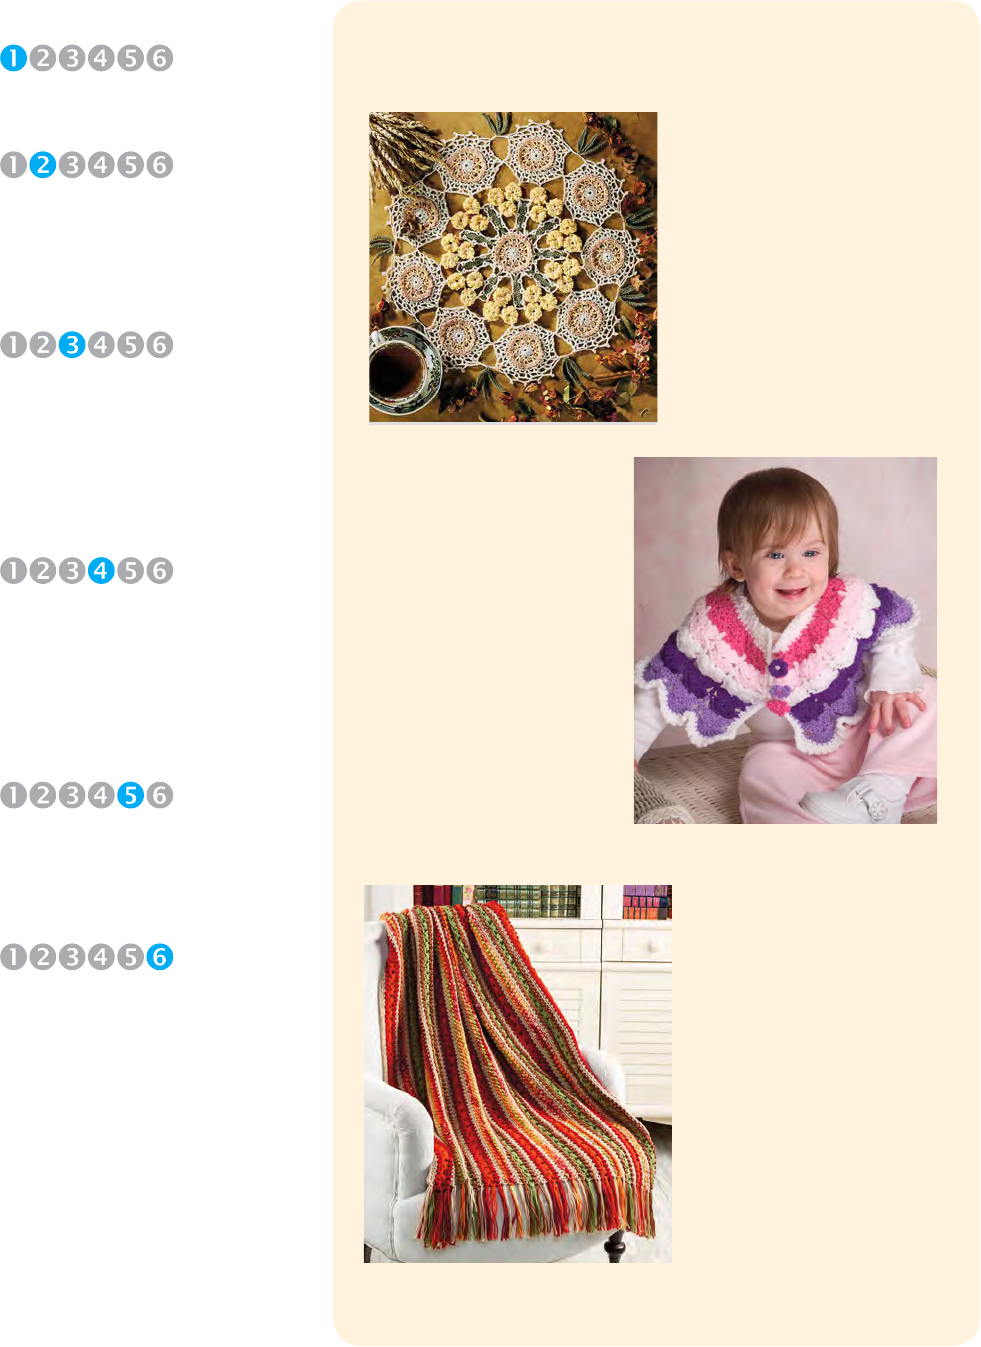
Crochet World CROCHETWORLD.COM AUGUST 2015
64
Fall Landscapes
Afghan
Autumn Bouquet
Doily
Subdued autumn
hues combine to make
this beautiful doily a
striking fall accent for
your home.
On Sale Sept. 1, 2015
Coming in October!
Stitched in rich fall
shades, this colorful
throw features sections
of shells, seed stitch
and bead stitch that
create visual interest.
Projects for first-time crocheters using
basic stitches, with little or no shaping.
Projects that utilize a wide variety of
stitches and techniques such as those
noted above, as well as more detailed
colorwork, shaping, construction
and finishing.
Projects that require a more intuitive
understanding of a pattern or chart and
that also include advanced stitches and
techniques, as well as more intricate
methods such as intarsia, cables, lace,
stranded colorwork with numerous
color changes and advanced shaping
and construction techniques.
Projects for new crocheters who are
comfortable with the beginner basic
stitches and are ready to combine them
into short pattern sequences. Skills
include simple increasing, decreasing
and minimal color changes.
Projects using basic stitches, repetitive
stitch patterns, simple color changes
and easy shaping and finishing. Simple
in-the-round projects, such as coasters,
hot mats, flowers, hats, neck warmers and
cowls fall within this skill category, as well
as the ability to read simple stitch charts
and keys.
Projects that incorporate a wide variety
of stitch techniques beyond the basics,
such as shells, fans, popcorns, clusters,
post stitches, basic cables, lace, simple
intarsia, shaping and finishing. The
crocheter has the ability to read more
advanced stitch pattern charts, such as
lace and cable charts.
Skill Levels
BEGINNER
CONFIDENT
BEGINNER
EASY
INTERMEDIATE
MODERATELY
CHALLENGING
CHALLENGING
Charming Baby
Capelet
Baby girls love to
get their style on too,
and this adorable
capelet hits the
mark for on-trend
accessories for our
littlest fashionistas!
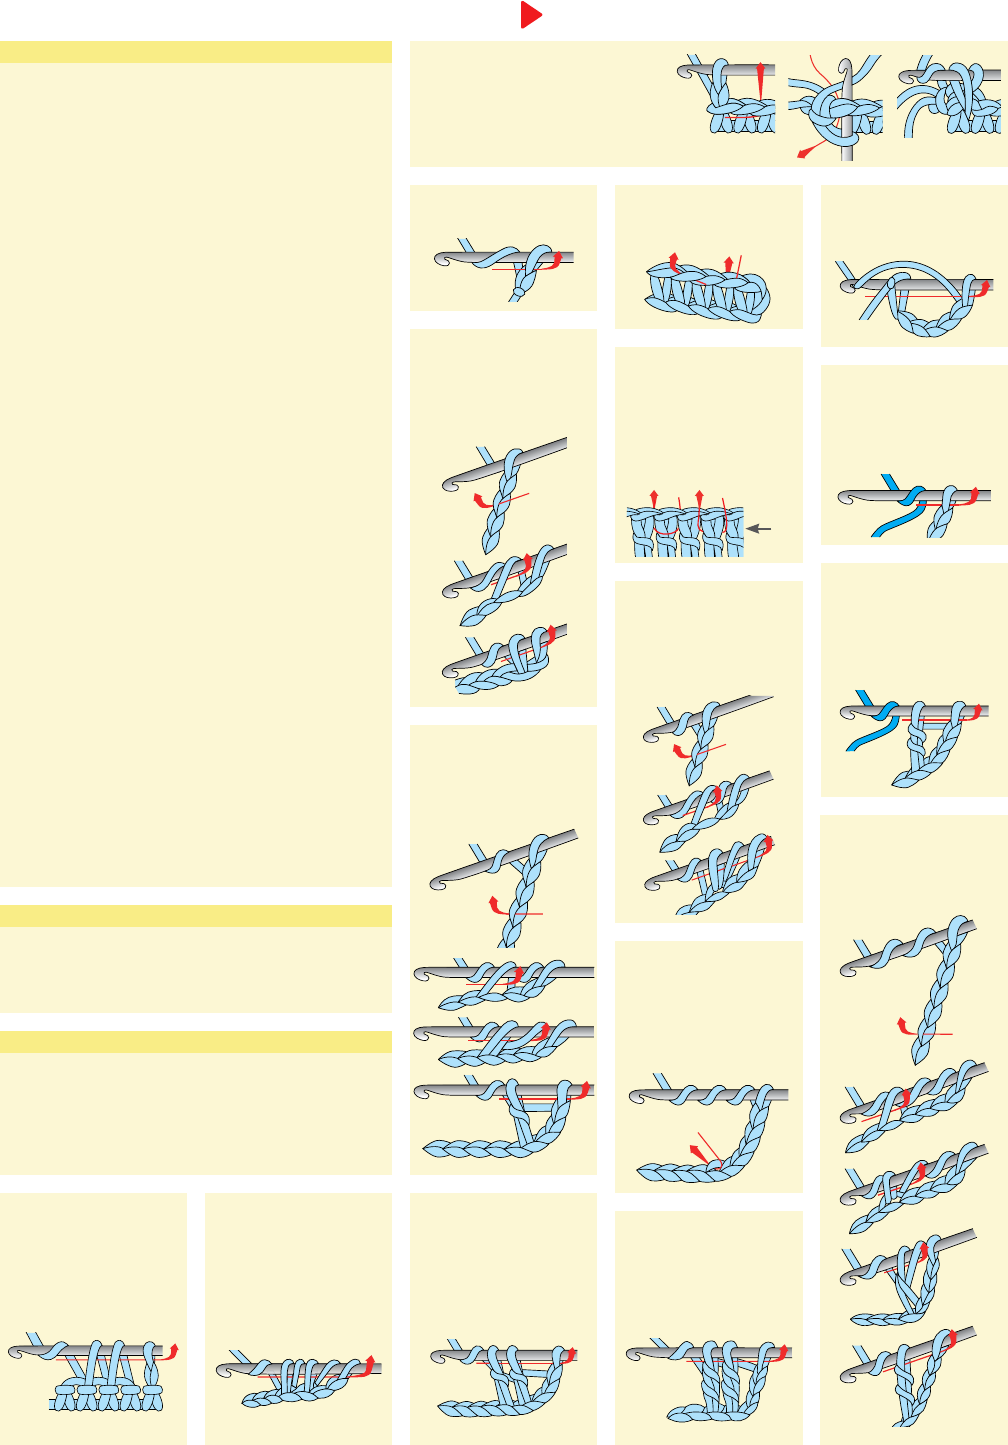
beg ............................begin/begins/beginning
bpdc .......................... back post double crochet
bpsc ............................back post single crochet
bptr .............................back post treble crochet
CC ......................................contrasting color
ch(s) .............................................chain(s)
ch- ...............................refers to chain or space
previously made (i.e., ch-1 space)
ch sp(s) ................................... chain space(s)
cl(s) ............................................ cluster(s)
cm .........................................centimeter(s)
dc .......................double crochet (singular/plural)
dc dec. . . . . . . . . . . . . . . . . . . . . . . . . double crochet 2 or more
stitches together, as indicated
dec ......................decrease/decreases/decreasing
dtr ................................double treble crochet
ext .............................................extended
fpdc ...........................front post double crochet
fpsc ............................ front post single crochet
fptr ............................ front post treble crochet
g .................................................gram(s)
hdc ................................. half double crochet
hdc dec ...................half double crochet 2 or more
stitches together, as indicated
inc ........................increase/increases/increasing
lp(s) ...............................................loop(s)
MC ............................................main color
mm .........................................millimeter(s)
oz ............................................... ounce(s)
pc ............................................ popcorn(s)
rem ..........................remain/remains/remaining
rep(s) ...........................................repeat(s)
rnd(s) ...........................................round(s)
RS ..............................................right side
sc ........................single crochet (singular/plural)
sc dec ...........................single crochet 2 or more
stitches together, as indicated
sk .................................skip/skipped/skipping
sl st(s) ...................................... slip stitch(es)
sp(s) .................................... space(s)/spaced
st(s) ............................................ stitch(es)
tog ..............................................together
tr ..........................................treble crochet
trtr ...........................................triple treble
WS ...........................................wrong side
yd(s) ..............................................yard(s)
yo ..............................................yarn over
STITCH GUIDE
Chain (ch): Yo, pull
through lp on hook.
Slip stitch (sl st): Insert
hook in st, pull through
both lps on hook.
Single crochet (sc):
Insert hook in st, yo,
pull through st, yo,
pull through both
lps on hook.
Front loop (front lp)
Back loop (back lp)
Front Loop Back Loop
Treble crochet (tr):
Yo twice, insert hook
in st, yo, pull through
st, [yo, pull through 2
lps] 3 times.
Double treble
crochet (dtr):
Yo 3
times, insert hook in
st, yo, pull through st,
[yo, pull through 2 lps]
4 times.
Half double crochet
(
hdc): Yo, insert hook
in st, yo, pull through
st, yo, pull through all 3
lps on hook.
Treble crochet
decrease (tr dec): Hold-
ing back last lp of each
st, tr in each of the sts in-
dicated, yo, pull through
all lps on hook.
Example of 2-tr dec
STITCH ABBREVIATIONS
YARN CONVERSION
Chain color change
(ch color change)
Yo with new color,
draw through last lp
on hook.
Double crochet
color change
(dc color change)
Drop first color, yo
with new color, draw
through last 2 lps of st.
Front post stitch (fp):
Back post stitch (bp):
When working post st,
insert hook from right
to left around post of st
on previous row.
Back Front
Post
of
Stitch
Single crochet
decrease (sc dec):
(Insert hook, yo, draw lp
through) in each of the
sts indicated, yo, draw
through all lps on hook.
Example of 2-sc dec Example of 2-dc dec
Double crochet
decrease (dc dec): (Yo,
insert hook, yo, draw lp
through, yo, draw through
2 lps on hook) in each of
the sts indicated, yo, draw
through all lps on hook.
Example of 2-hdc dec
Half double crochet
decrease (hdc dec):
(Yo, insert hook, yo,
draw lp through)
in each of the sts
indicated, yo, draw
through all lps on hook.
Reverse single crochet (reverse
sc): Ch 1, sk first st, working from
left to right, insert hook in next st
from front to back, draw up lp on
hook, yo and draw through both
lps on hook.
OUNCES TO GRAMS
1 ...............28.4
2 ...............56.7
3 ...............85.0
4 ............ 113.4
GRAMS TO OUNCES
25 .................⁄
40 .............. 1⁄
50 .............. 1¾
100 ............ 3½
=
=
=
=
=
=
=
sc (single crochet)
dc (double crochet)
htr (half treble crochet)
tr (treble crochet)
dtr (double treble crochet)
ttr (triple treble crochet)
miss
sl st (slip stitch)
sc (single crochet)
hdc (half double crochet)
dc (double crochet)
tr (treble crochet)
dtr (double treble crochet)
skip
UNITED KINGDOMUNITED STATES
Double crochet (dc):
Yo, insert hook in st,
yo, pull through st,
[yo, pull through 2 lps]
twice.
Need help?
Stitch
Guide.com •
ILLUSTRATED GUIDES
•
HOWTO VIDEOS
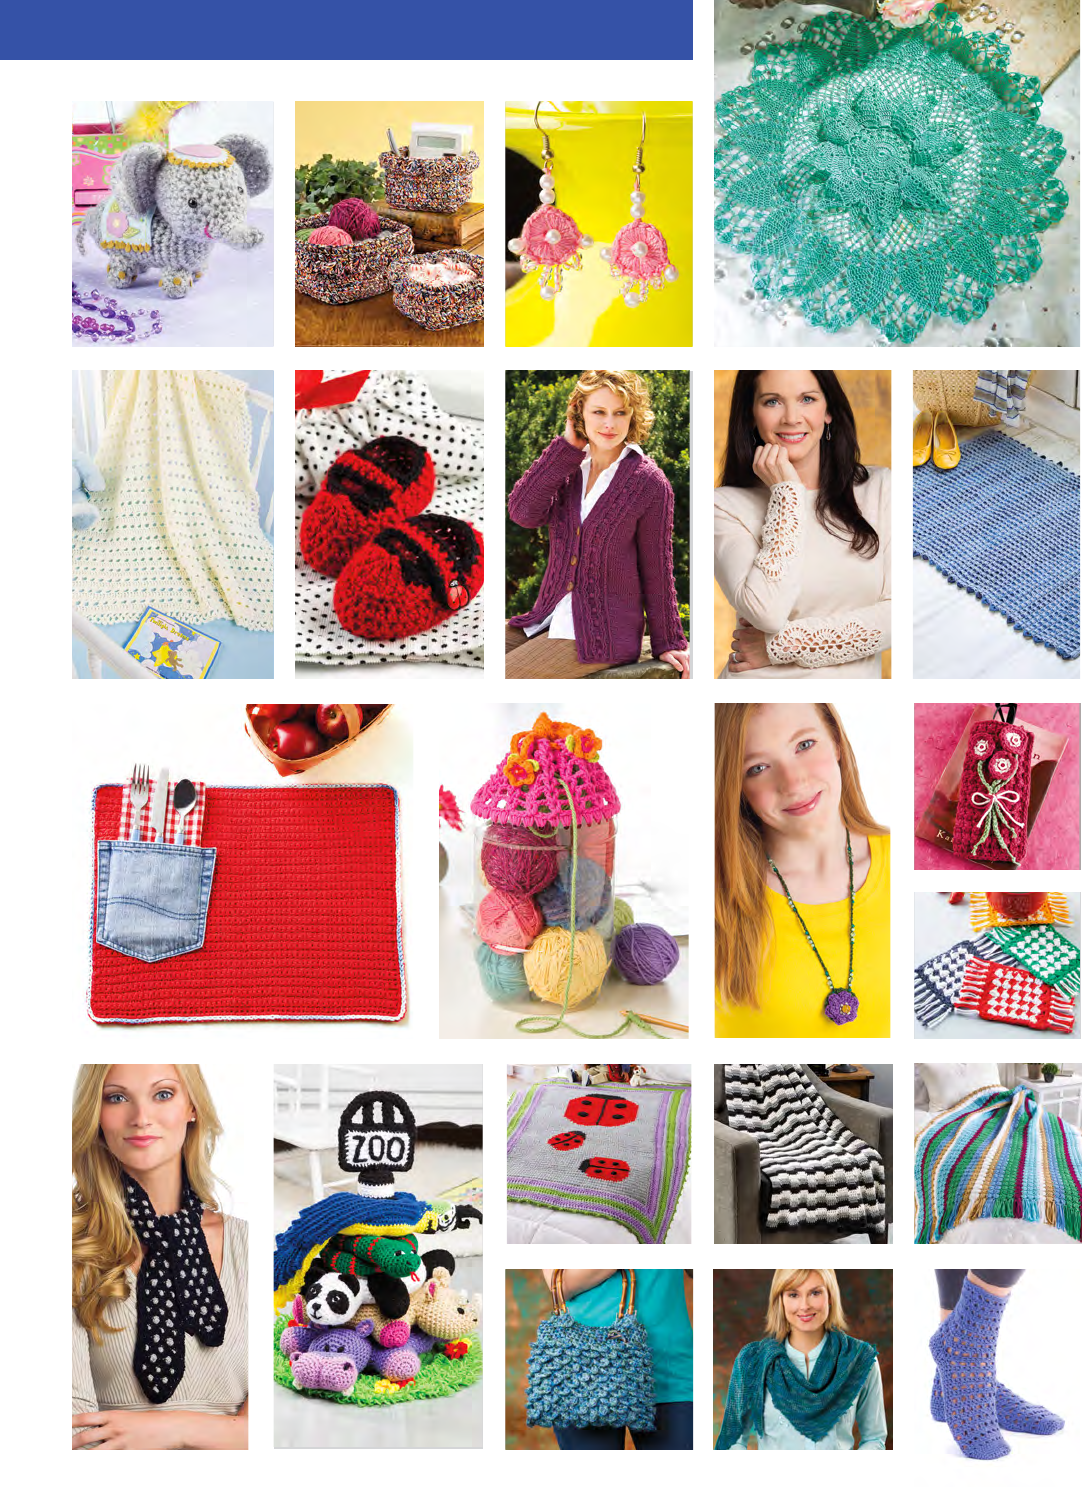
Crochet World CROCHETWORLD.COM AUGUST 201566
DESIGN DIRECTORY
10
6
8
20
24
14
15 16
34 38
22
26
12
28
44 44
42 47
48
50
52
30
54
32
Discover a Kit-of-the-Month Club for
CROCHETERS and KNITTERS!
It’s Your Choice!
• All the quality yarn and TWO easy sets of instructions
(one in crochet and one in knitting) for every project
are delivered right to your mailbox!
• Now, there are TWO fast, fun and easy ways to
indulge your passion for stitching!
• Get a handy Crochet & Knitting Stitch Guide
as a FREE GIFT with your first shipment!
Get more than HALF-OFF introductory
savings, plus get a FREE GIFT!
SYARU-A
Knit It!
Crochet It!
FREE
GIFT!
To find out more, visit: KitClubSavings.com