093 Instructions For Customized Google Form
User Manual:
Open the PDF directly: View PDF ![]() .
.
Page Count: 32
INSTRUCTIONS TO CREATE A CUSTOMIZED GOOGLE FORM
By Dan Menashi E-mail: d_menashi@yahoo.com
What is the purpose of this document? Provide step by step instructions to create a
simple customized form as shown below. Once the data is entered in this form and submitted, it
would feed into your Google sheet.
NOTE : You will need a general Google account to follow this document. If you don’t have one ,
you can create it for FREE at https://account.google.com/
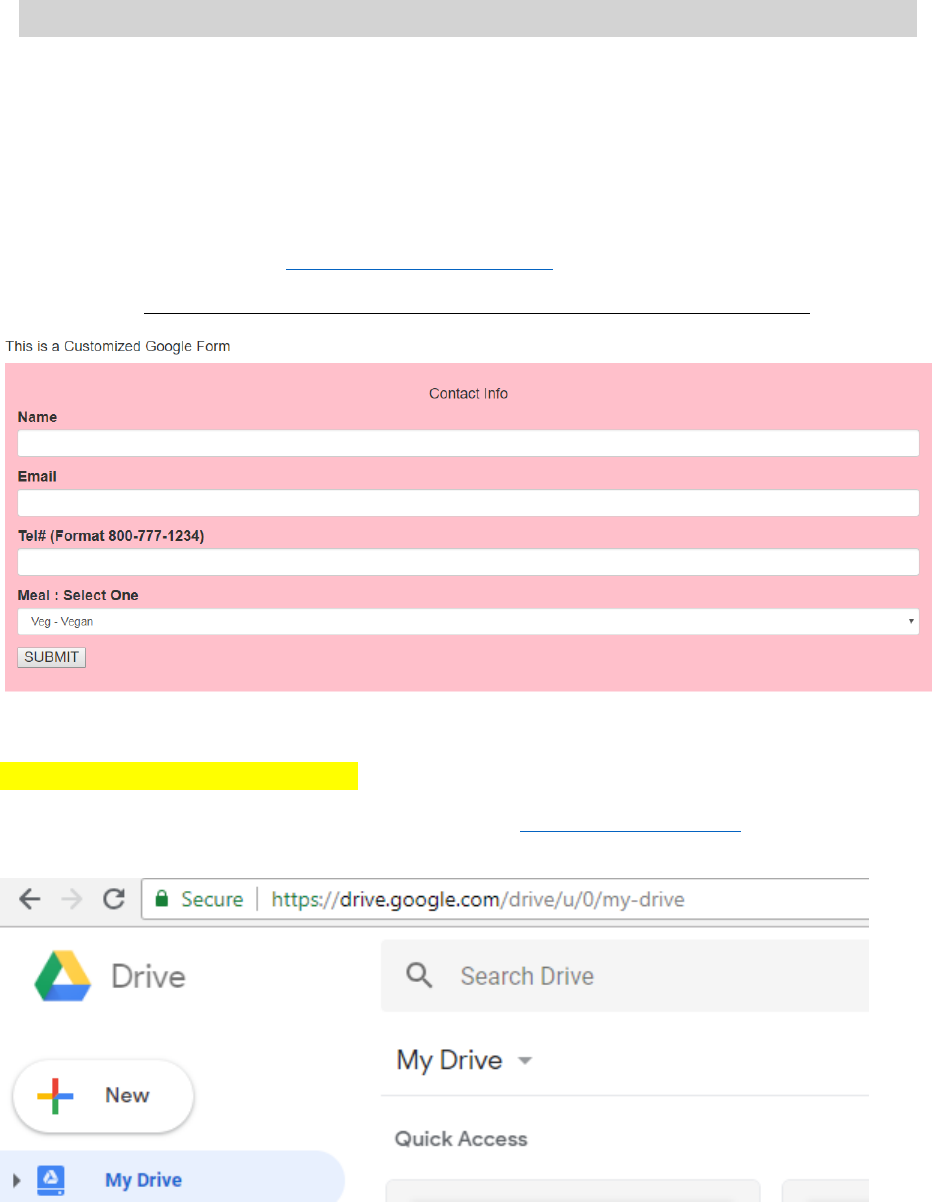
SNAPSHOT OF THE CUSTOMIZED FORM THAT WE WILL CREATE
STEP-1 : Create a new Google sheet.
Sign in to your Google account and Login to Google drive https://drive.google.com/ . You should see a
screen as follows.
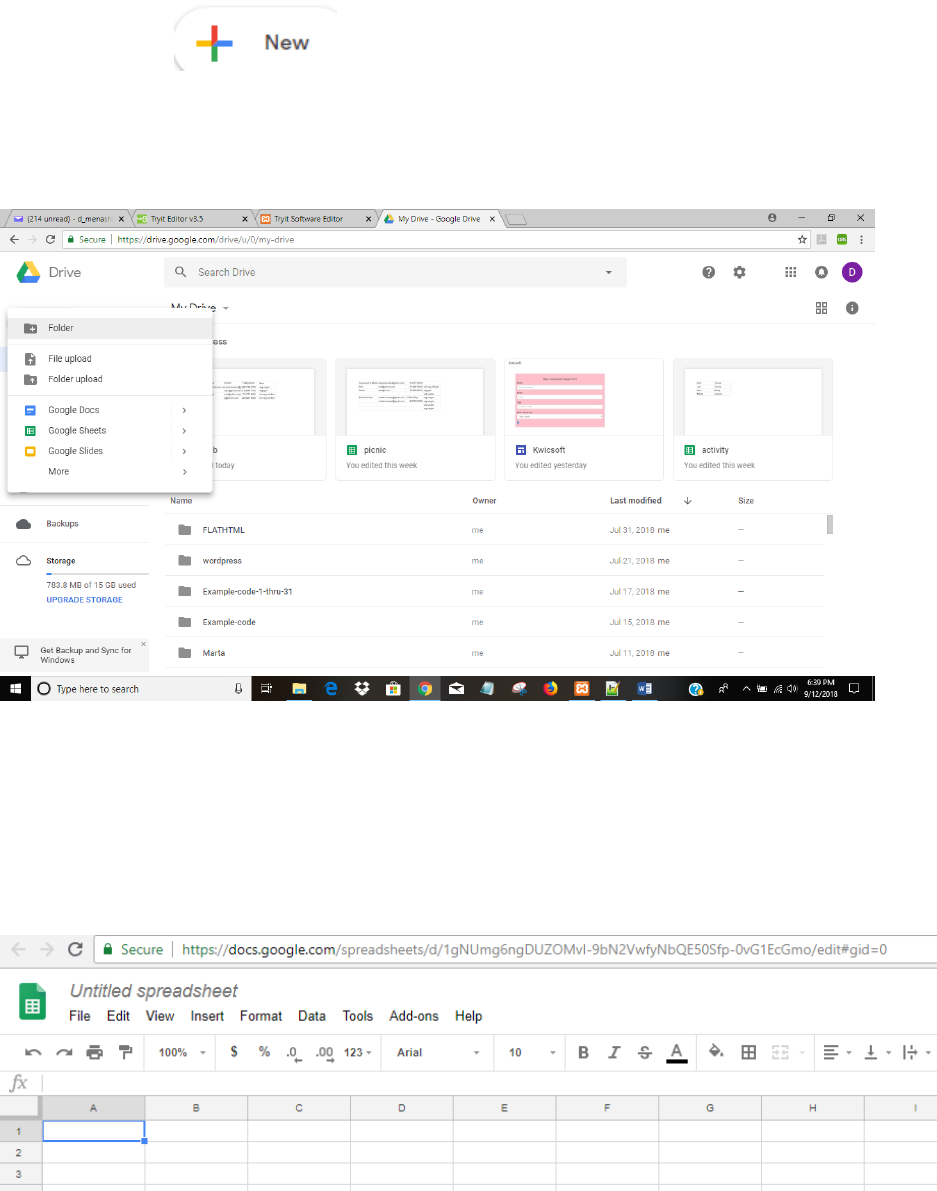
Click on the button
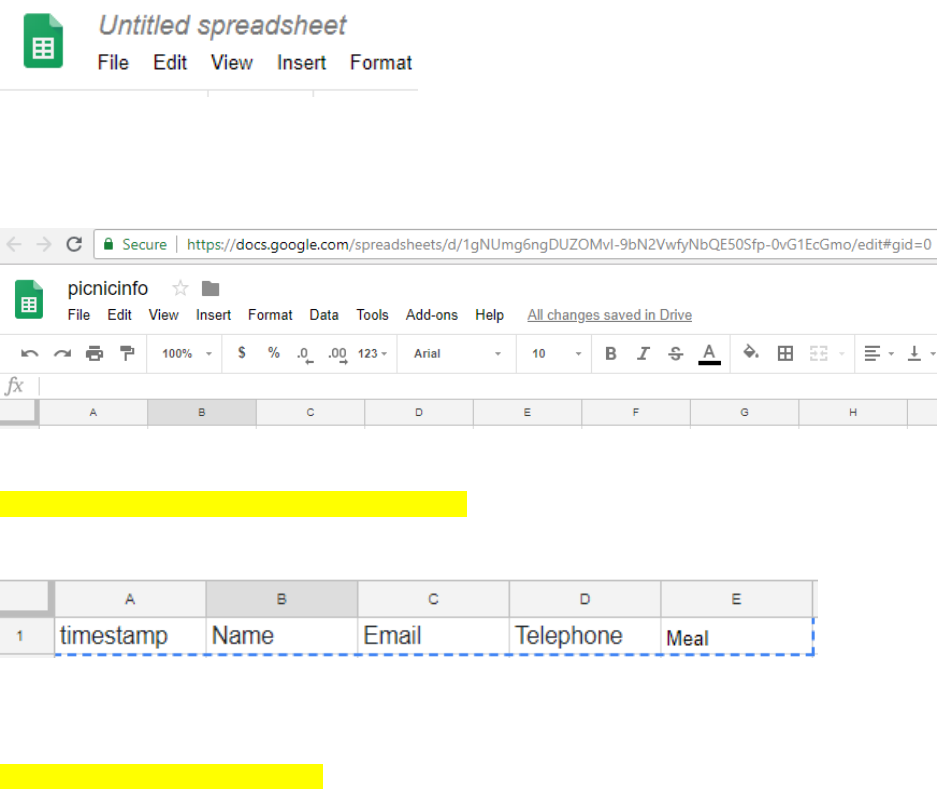
After clicking on new button, a pull-down menu on left would be displayed as shown below. Click on the
link Google Sheets.
A new blank Google sheet would open as shown below.
Please rename the sheet to any name of your choice. You can do that by clicking on Untitled spreadsheet
as shown below.
For the purpose of this tutorial we would rename the document as picnicinfo. The document would like
this.
STEP-2 : Create a header record in the Google sheet.
Type in a header record . It should exactly look as shown below.
STEP-3 : Update the Google Script :
Click on Tools tab and from the pull down menu click on <>Script editor.
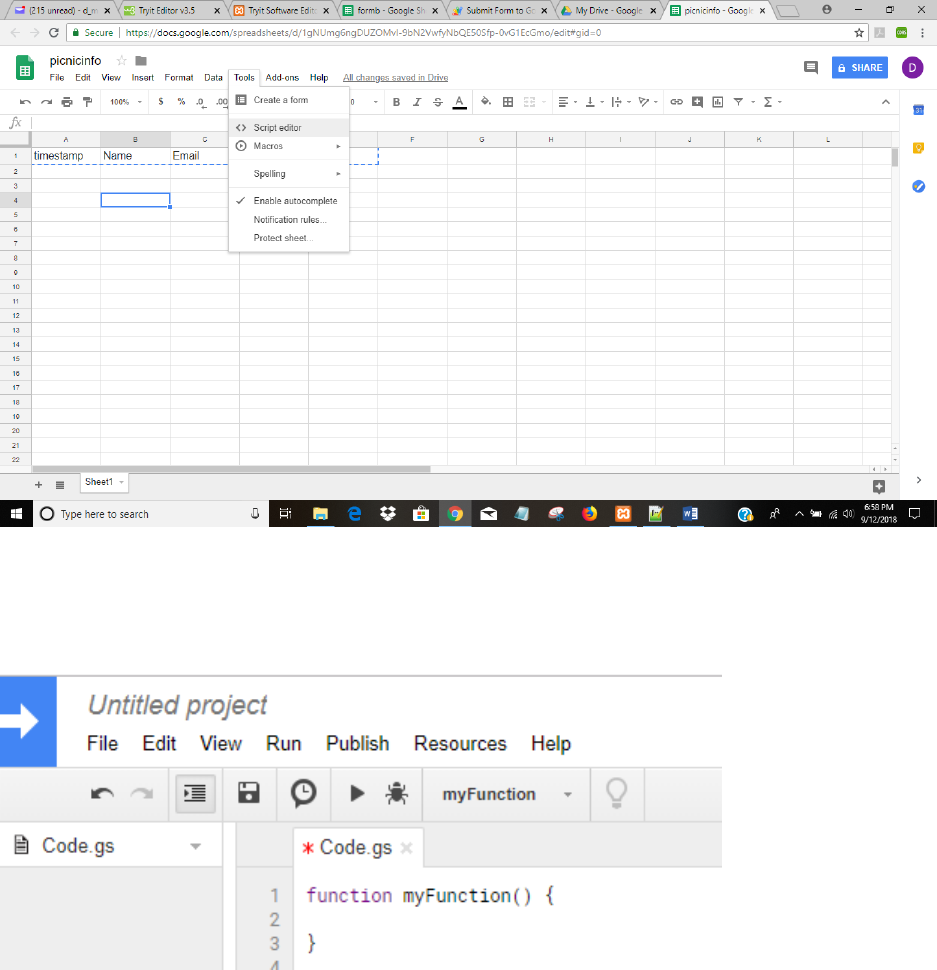
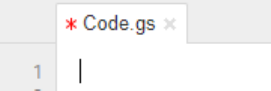
You will see the following screen that has two lines of code. Remove those lines of code.
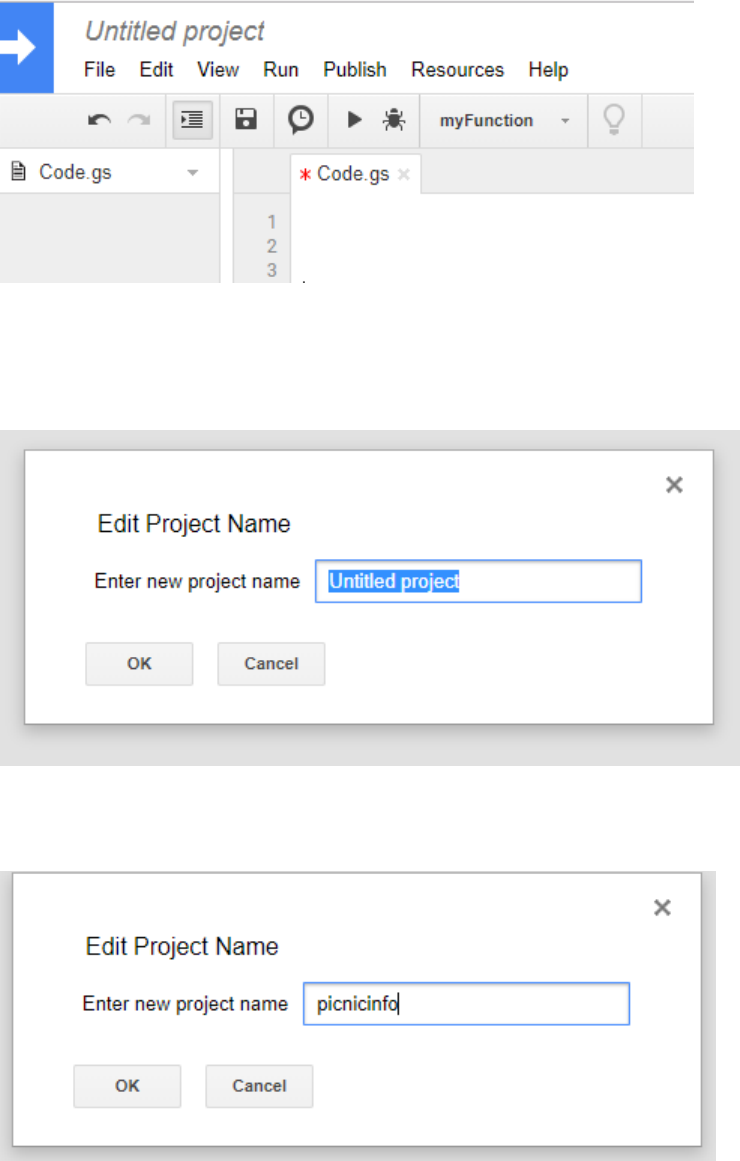
After removing the code your screen should look like this
Now Click on the top left next to blue arrow where it says Untitled project . Following screen will popup
Enter picnicinfo in the box and click OK. As shown belo.
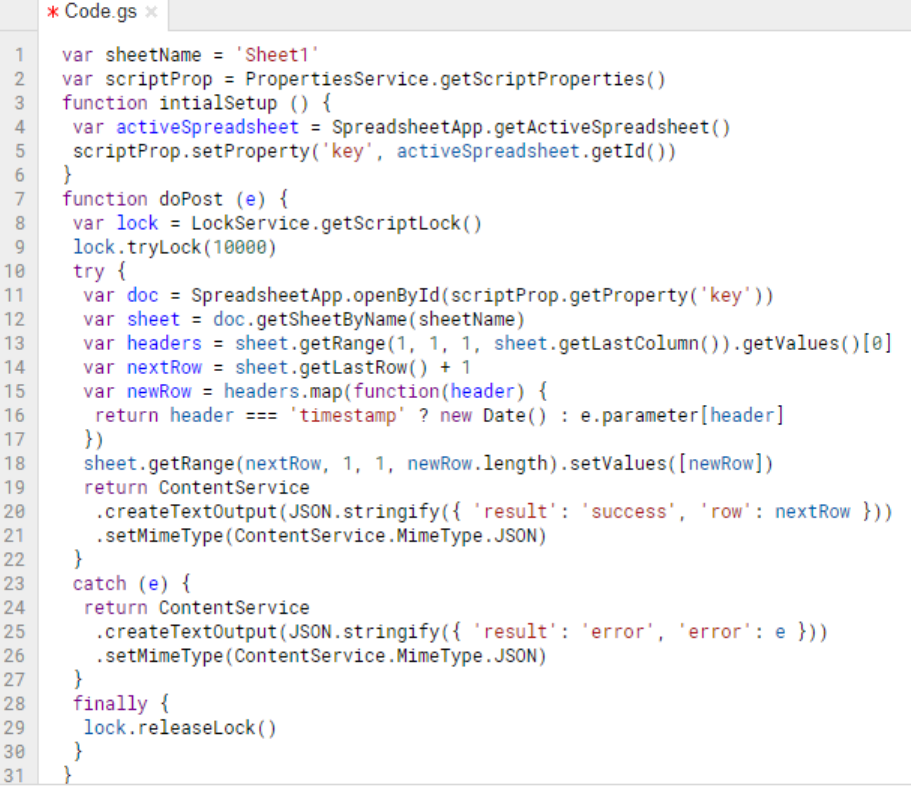
Now put your cursor on the line one as shown below. Copy paste all the code in red as shown below.
var sheetName = 'Sheet1'
var scriptProp = PropertiesService.getScriptProperties()
function intialSetup () {
var activeSpreadsheet = SpreadsheetApp.getActiveSpreadsheet()
scriptProp.setProperty('key', activeSpreadsheet.getId())
}
function doPost (e) {
var lock = LockService.getScriptLock()
lock.tryLock(10000)
try {
var doc = SpreadsheetApp.openById(scriptProp.getProperty('key'))
var sheet = doc.getSheetByName(sheetName)
var headers = sheet.getRange(1, 1, 1, sheet.getLastColumn()).getValues()[0]
var nextRow = sheet.getLastRow() + 1
var newRow = headers.map(function(header) {
return header === 'timestamp' ? new Date() : e.parameter[header]
})
sheet.getRange(nextRow, 1, 1, newRow.length).setValues([newRow])
return ContentService
.createTextOutput(JSON.stringify({ 'result': 'success', 'row': nextRow }))
.setMimeType(ContentService.MimeType.JSON)
}
catch (e) {
return ContentService
.createTextOutput(JSON.stringify({ 'result': 'error', 'error': e }))
.setMimeType(ContentService.MimeType.JSON)
}
finally {
lock.releaseLock()
}
}
After copy pasting , your screen should look as follows. The last line of code should end in line 31.

STEP-4 : Save the Google script.
Click on the File tab , next to blue arrow and below picnic as shown below and highlighted in yellow. A
pull down menu will appear and click on save.
STEP-5 : Intial Setup
Click on the Run tab as highlighted in yellow. From the pulldown menu click on Run function and then
from sub menu click on initialSetup
Following box will comeup.
Click on Review Permissions
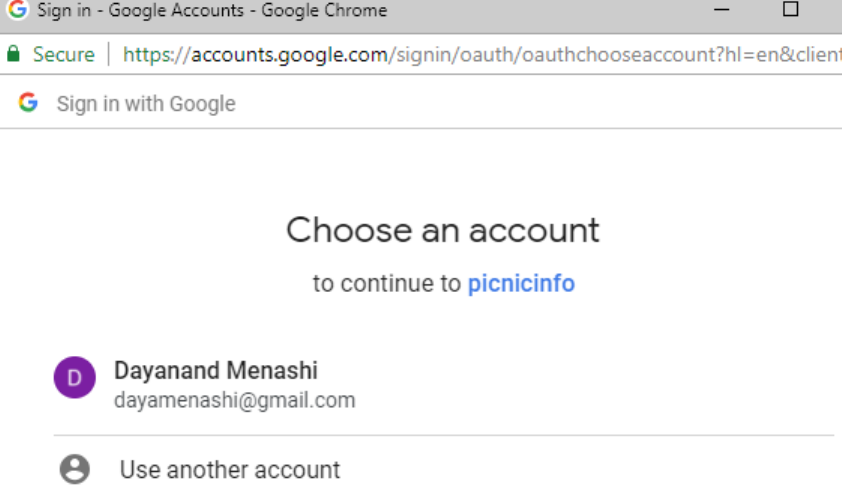
Following box will pop up. Click on your account.
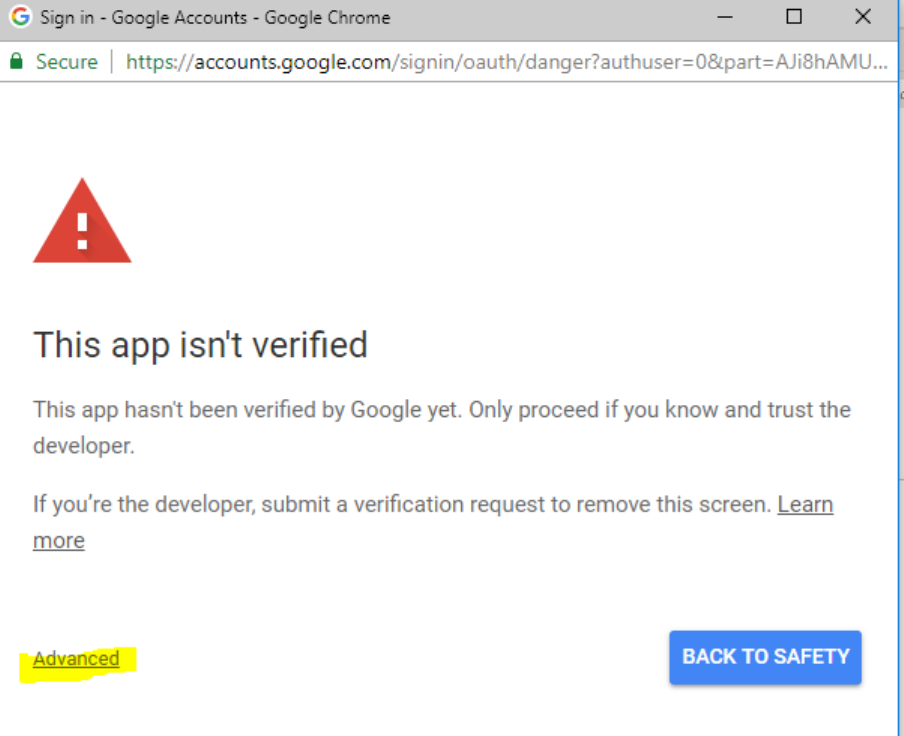
Following box will pop up. Now click where it says Advanced as highlighted in yellow below.
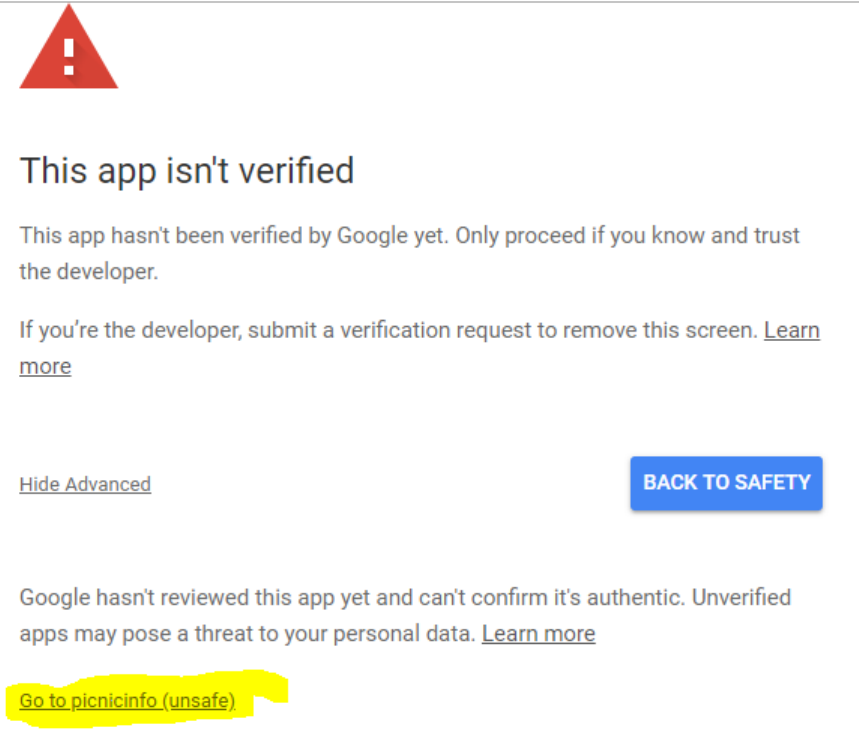
Following box will now popup. Click on the bottom left link Go to picnicinfo (unsafe) as highlighted in
yellow below
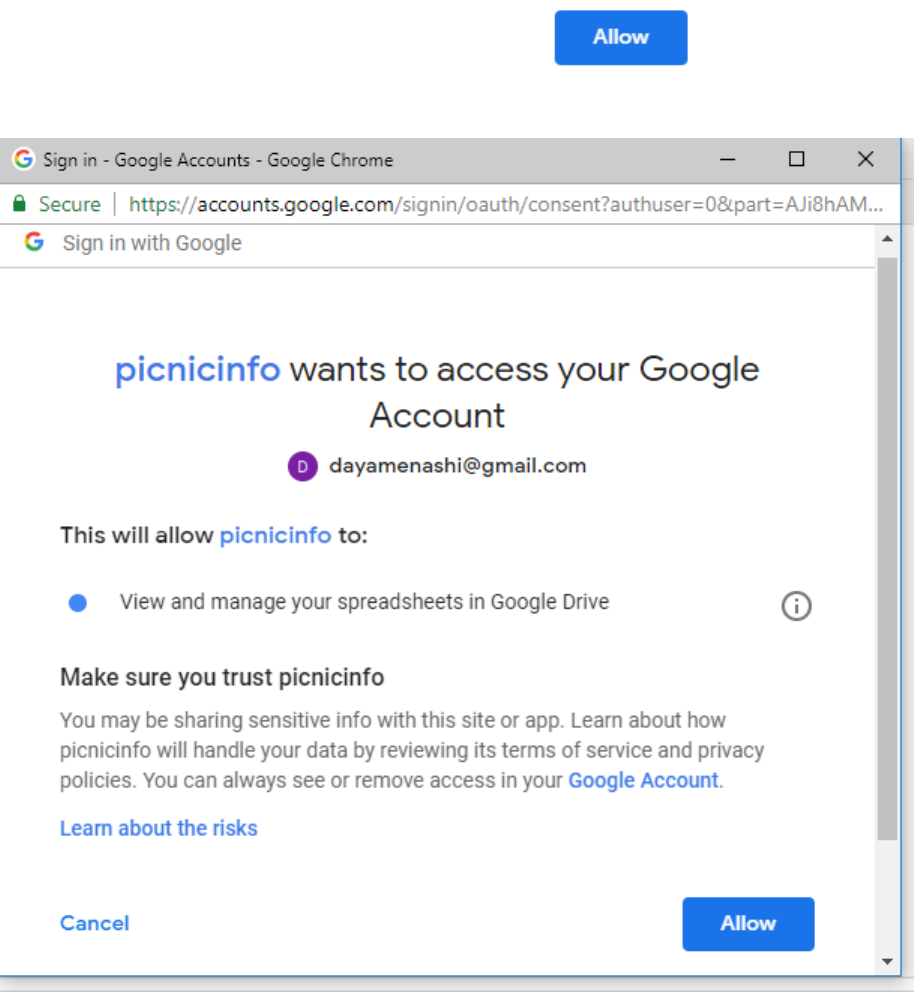
Following Box will popup. Now click on the button that says
After clicking on the Allow button that box will be closed and you will be back to the script screen.
STEP-6 : Create Trigger
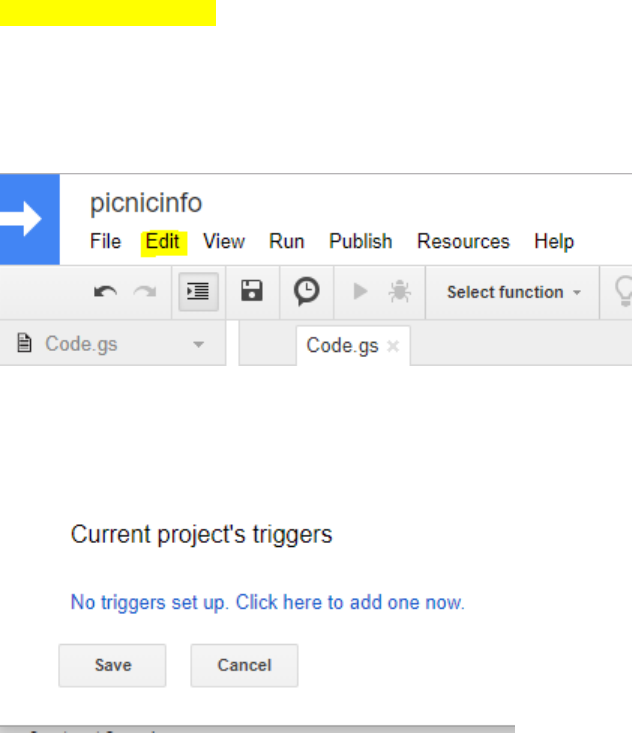
Click on Edit tab as shown below, a pull down menu will appear.
Click where it says Current project’s triggers
The following box will appear.
As we can see that there are no triggers, hence we will add one. Click on where it says Click here
Once we click, then following box will appear.
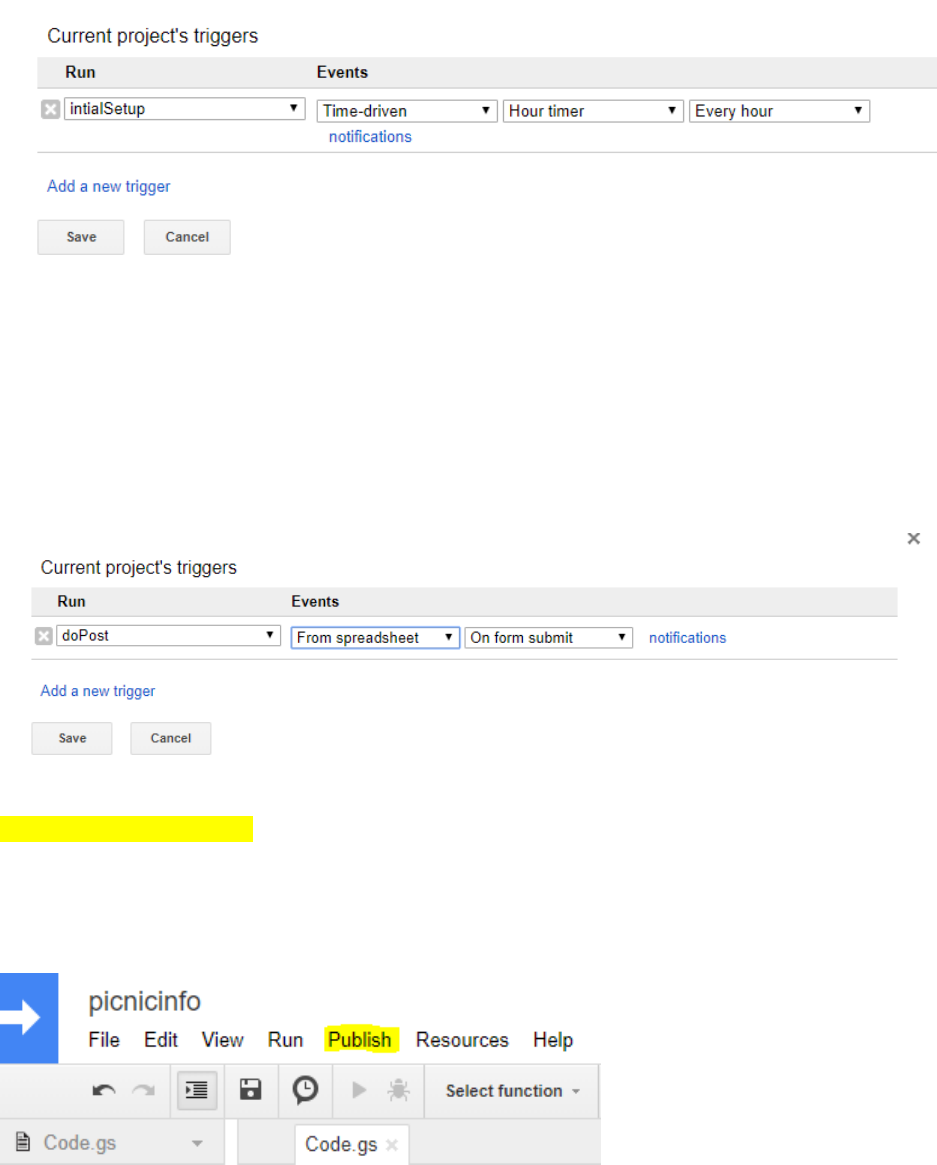
Change the dropdown values to the following
Run : doPost
Events : From spreadsheet Onform submit.
After changing the values your box should look as follows. Now click Save.
STEP-7 : Publish your script
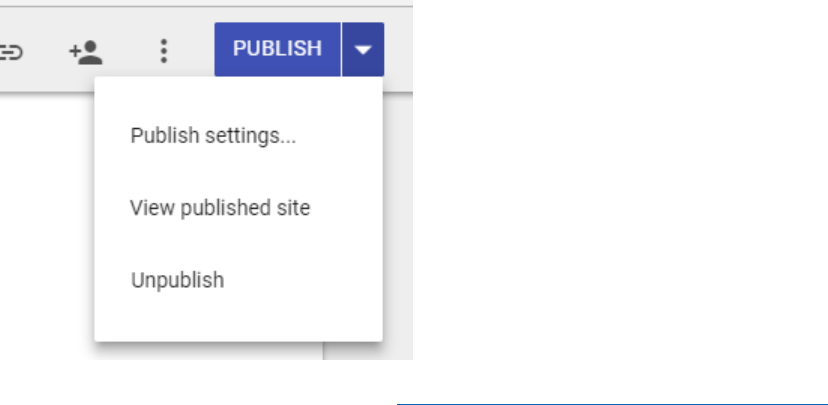
Click on the Publish tab as highlighted in yellow below. In the pulldown menu click on the first item that
says Deploy as web app
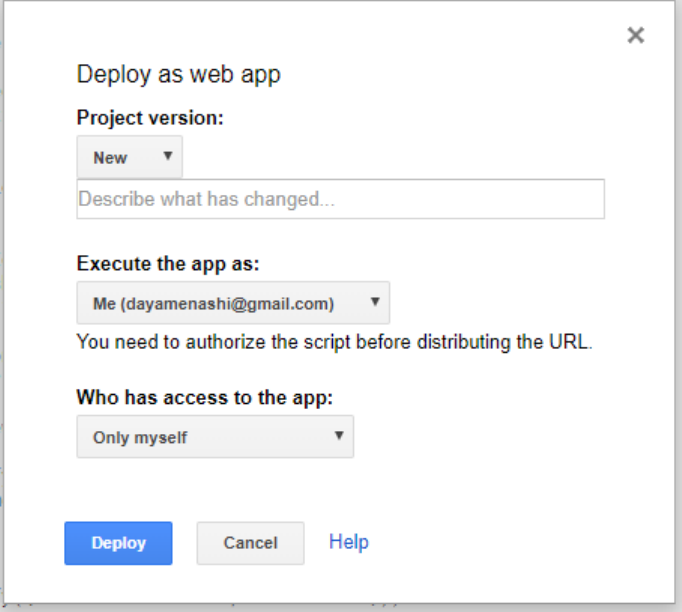
Following box should pop up. Change the following :
1. In the box under New, type Initial version
2. In the bottom where it say Who has access to the app select Anyone, even anonymous
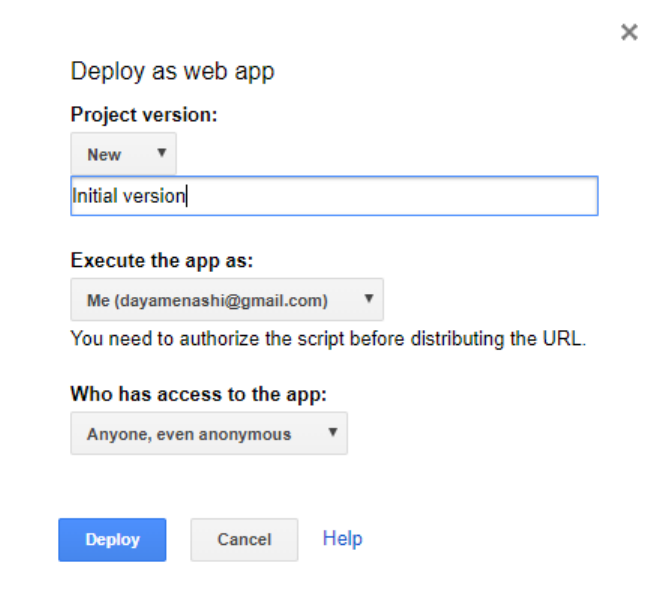
Your box should look as follows
Now click on the blue button that says Deploy. Following box should pop up.
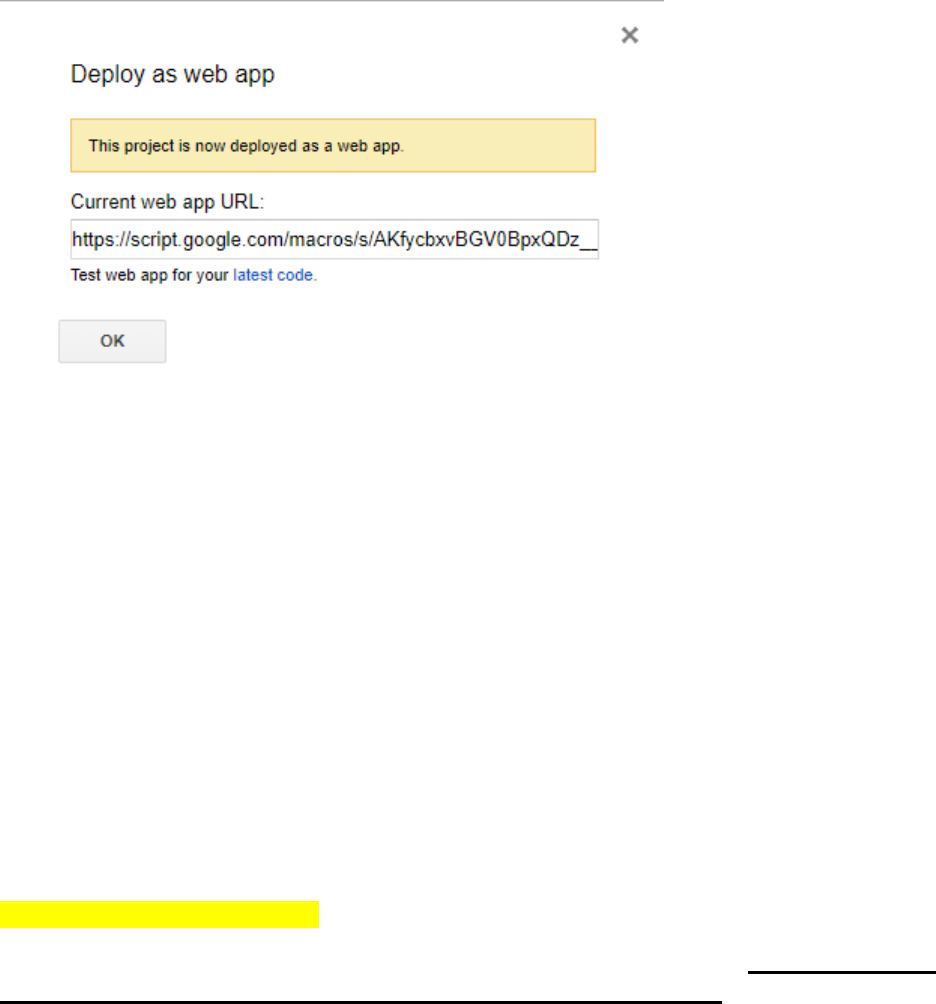
CAUTION : Don’t Click OK now.
First copy paste the Current web app URL in a notepad.
It should look something like this, ending with exec.
https://script.google.com/macros/s/AKfycbxvBGV0BpxQDz__UXl2dd0VRIwCzqF8PVEzoe13
xv34itxVWHv8/exec
This is a very important piece of information as we will use URL in the Form web page that will
be shown in next step.
Now click OK box.
The popup should disappear.
STEP-8 : Create Form web page.
Open a New Notepad file in your PC. Copy paste the code shown in red below. Replace the yellow
highlighted part with your web app URL that we created in STEP-7. Make sure that after
replacing the URL in your code . the URL is still enclosed within single quotes.
<!DOCTYPE html>
<html lang="en">
<head>
<title>Basic Customized Google Form</title>
<meta charset="utf-8">
<meta name="viewport" content="width=device-width, initial-scale=1">
<link rel="stylesheet"
href="https://maxcdn.bootstrapcdn.com/bootstrap/3.3.7/css/bootstrap.min.css">
<script src="https://ajax.googleapis.com/ajax/libs/jquery/3.3.1/jquery.min.js"></script>
<script src="https://maxcdn.bootstrapcdn.com/bootstrap/3.3.7/js/bootstrap.min.js"></script>
</head>
<body>
<div class="container">
<h4>This is a Customized Google Form
<p>
<div class="col-md-12 shadow p-4 mb-4 border border-primary" style="background-
color:pink">
<p> </p>
<h4 align="center">Contact Info</h4>
<form name="contact">
<div class="form-group">
<label for="Name">Name</label>
<input type="text" name="Name" class="form-control" id="Name" required>
</div>
<div class="form-group">
<label for="Email">Email</label>

<input type="email" name="Email" class="form-control" id="Email"
pattern="[^@\s]+@[^@\s]+\.[^@\s]+" required>
</div>
<div class="form-group">
<label for="Telephone">Tel# (Format 800-777-1234)</label>
<input type="text" name="Telephone" class="form-control" id="Telephone"
pattern="^\d{3}-\d{3}-\d{4}$" required>
</div>
<div class="form-group">
<label for="Meal">Meal : Select One</label>
<select class="form-control" name="Meal" id="Meal">
<option value="veg-vegan">Veg - Vegan</option>
<option value="veg-gen">Veg - eggsok</option>
<option value="nonveg-chicken">Non Veg-Only Chicken</option>
<option value="nonveg-red-meat">Non Veg-Red Meat</option>
</select>
</div>
<button type="submit">SUBMIT</button>
<p> </p>
</form>
<script>
const scriptURL =
'https://script.google.com/macros/s/AKfycbxvBGV0BpxQDz__UXl2dd0VRIwCzqF8PVEzoe13
xv34itxVWHv8/exec'
const form = document.forms['contact']
form.addEventListener('submit', e => {
e.preventDefault()
fetch(scriptURL, { method: 'POST', body: new FormData(form)})
// .then(response => console.log('Successmmm!', response))
// .catch(error => console.error('Error!', error.message))
.then(response => success())
.catch(error => console.error('Error!', error.message))
})
function success() {
document.getElementById("status").innerHTML = "Form Submitted to Google sheet.";
clear();
}
function clear () {
document.contact.Name.value='';
document.contact.Email.value='';
document.contact.Telephone.value='';
}
$(document).ready(function(){
$("input").focus(function(){
$(this).css("background-color", "#cccccc");
});
$("input").blur(function(){
$(this).css("background-color", "#ffffff");
});
});
</script>
</div>
<p> </p>
<p id="status"></p>
</div>
</body>
</html>
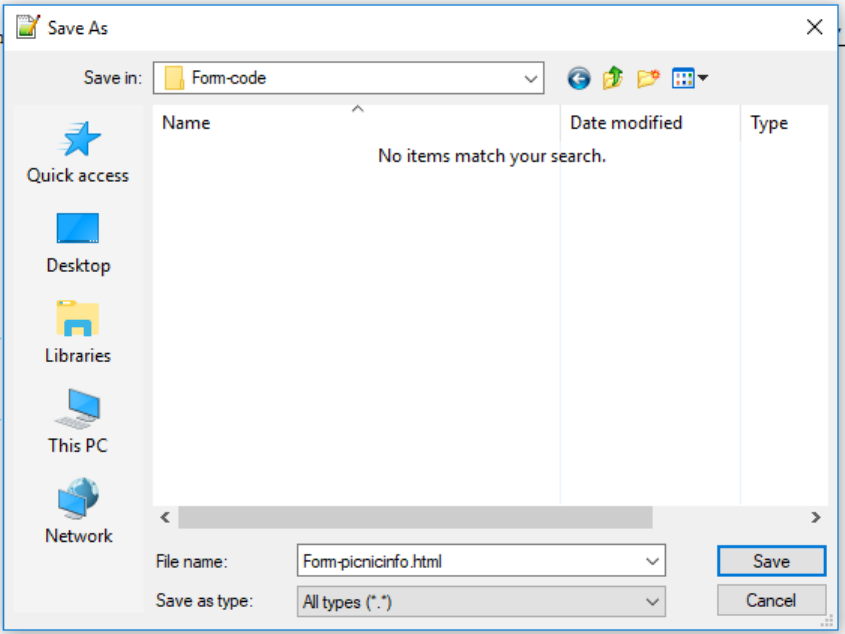
Create a new folder called Form-code in the C:\ drive of your machine (assuming you are using
Windows) Save this file as Form-picnicinfo.html in your machine as shown below.
NOTE : While saving the file Save as type dropdown field should have All types(*.*)
STEP-9 : Test the Form
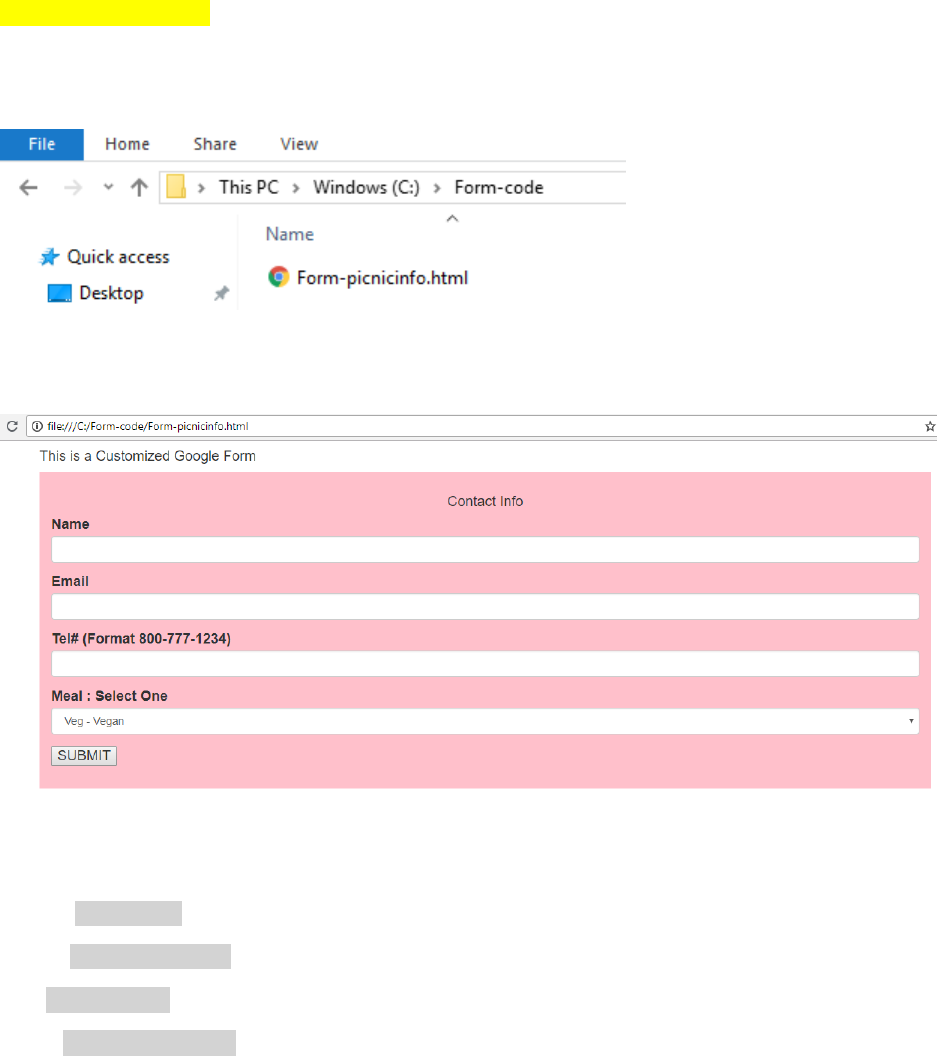
Go to the Form-code folder that we created in STEP-8. It should look as below.
Double click and open the file Form-picnicinfo.html. The form should appear as shown below.
Let us input the following test data and click on the SUBMIT button
Name : James Bond
Email : bond@yahoo.com
Tel# 888-007-1234
Meal : Non Veg-Red Meat
After you hit SUBMIT button, in about 5 seconds you will see the message Form Submitted to Google
sheet as shown below
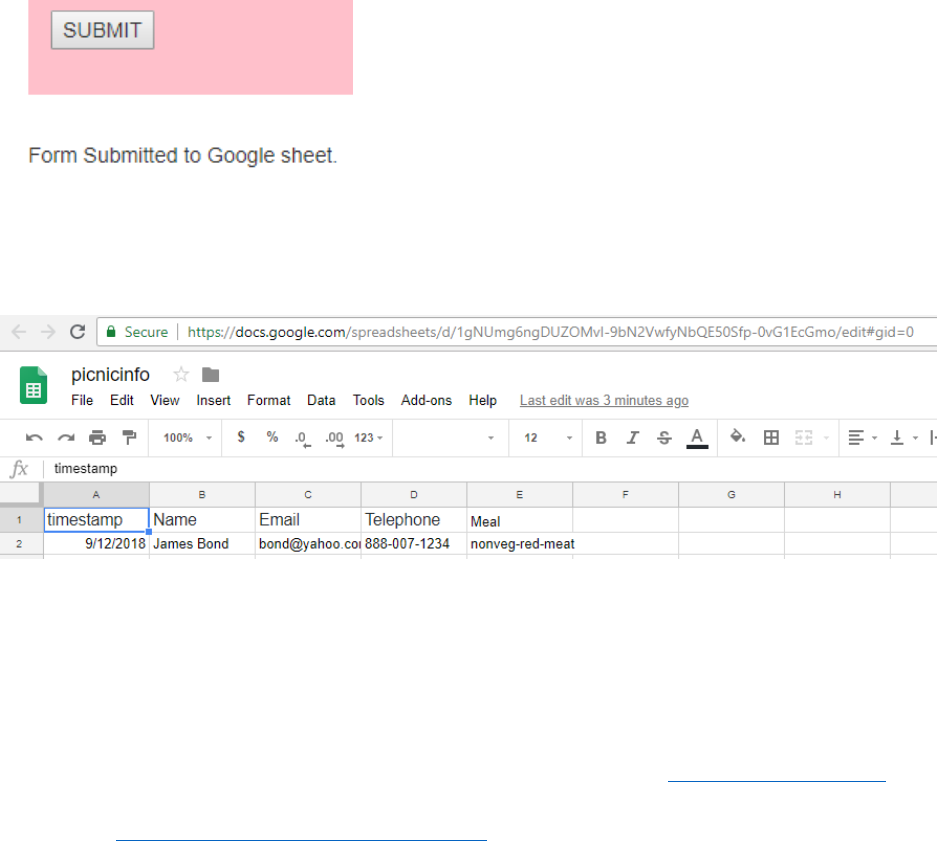
The data entered in the form should have fed the Google Sheet Picnicinfo that we created in STEP-1
So let us open the Google Sheet. Following is the snapshot of the Google Sheet, we can see that the info
entered in the Form has fed to the Google Sheet. As shown below.
CONGRATULATIONS !!! you have successfully created a Customized
Google Form that you can deploy in your web site and share it with others
to get your required data.
If you don’t have a website, you can create a simple one for FREE at http://sites.google.com
Within 5 minutes you should have a basic website like the following that I created for demo of
this tutorial https://sites.google.com/view/kwicsoft
Once the basic website is ready then we will insert the Form code as shown below.
STEP-1 : In the right bar you will see the < > Embed button as shown below. Click on that.
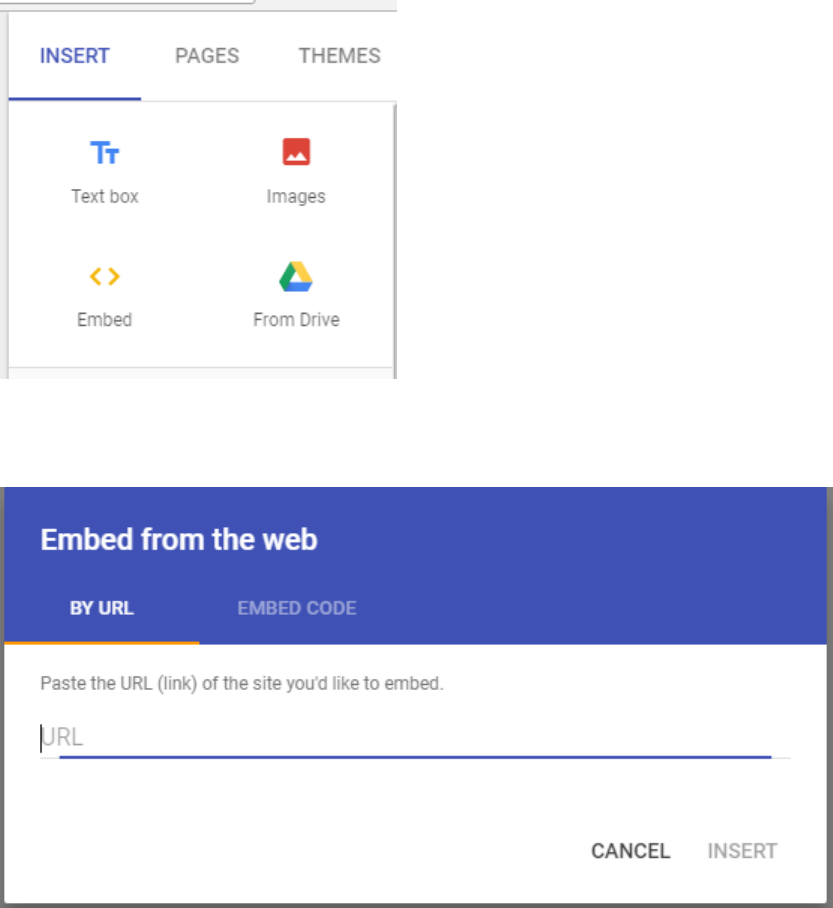
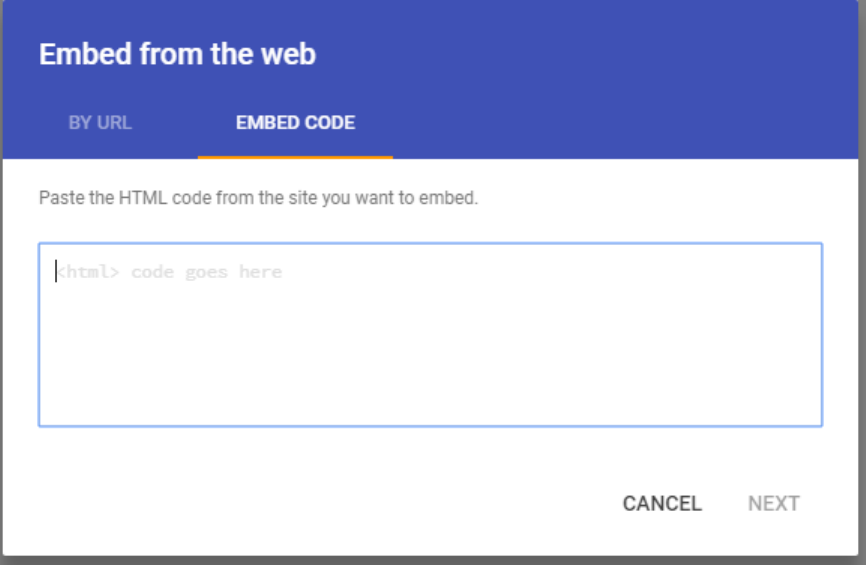
It will pop up the following box. Click on thesecond tab that says EMBED CODE
You should now see the following box
Now copy paste all code for Form-picnicinfo.html (Red code from STEP-8). Once you have
copy pasted all the code then the NEXT button should become active and look as shown below.
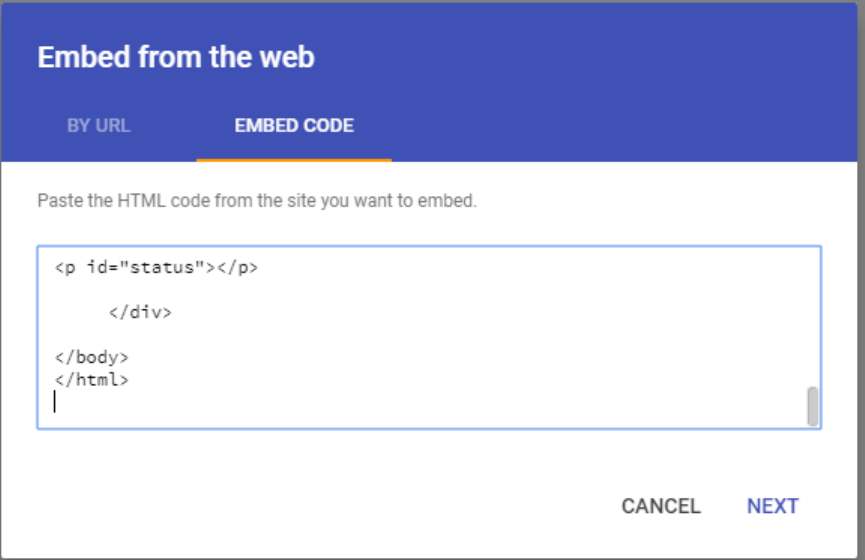
Click on the NEXT button now. You should see the following box popup.
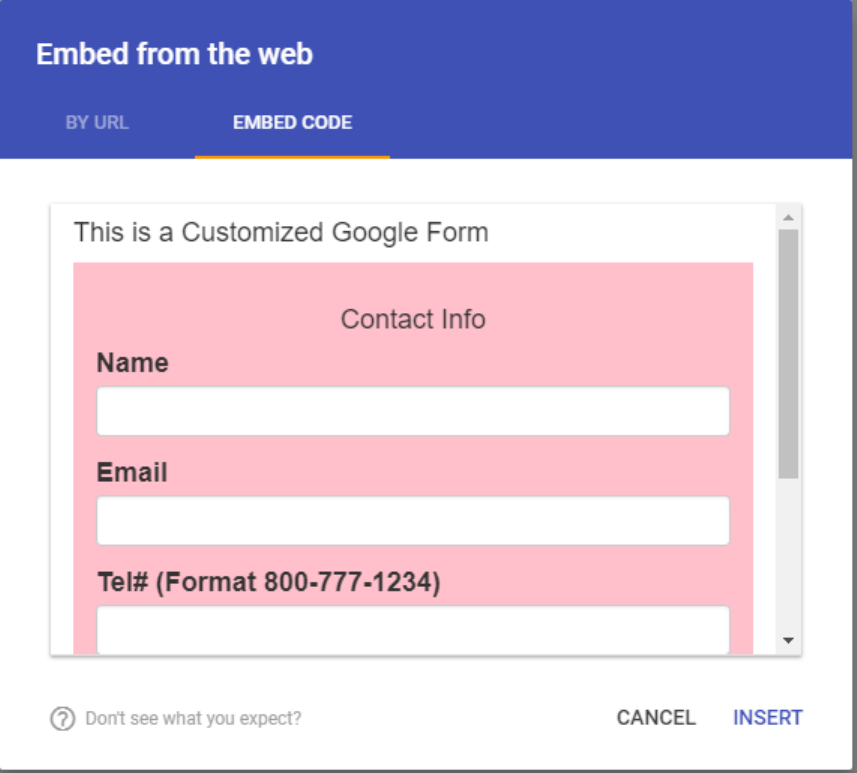
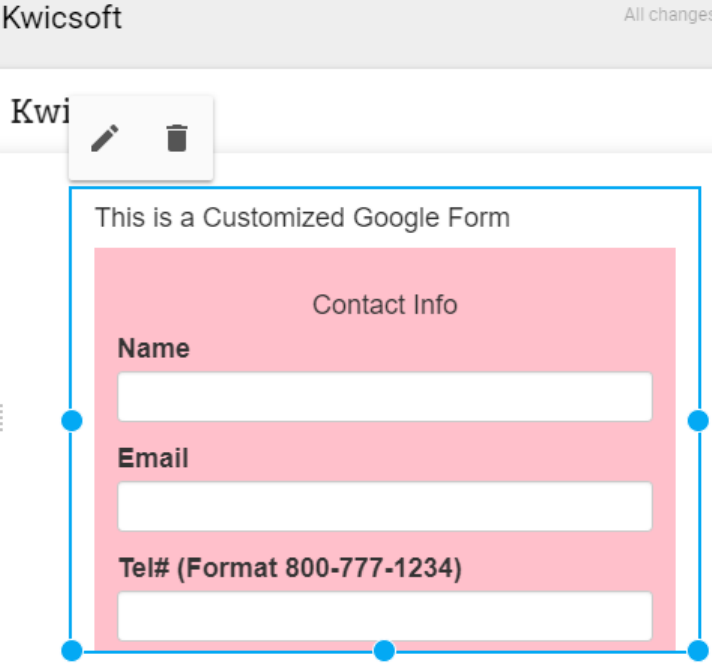
Click on INSERT button. You would see the following kind of box appear. This shows that the
code was inserted properly.
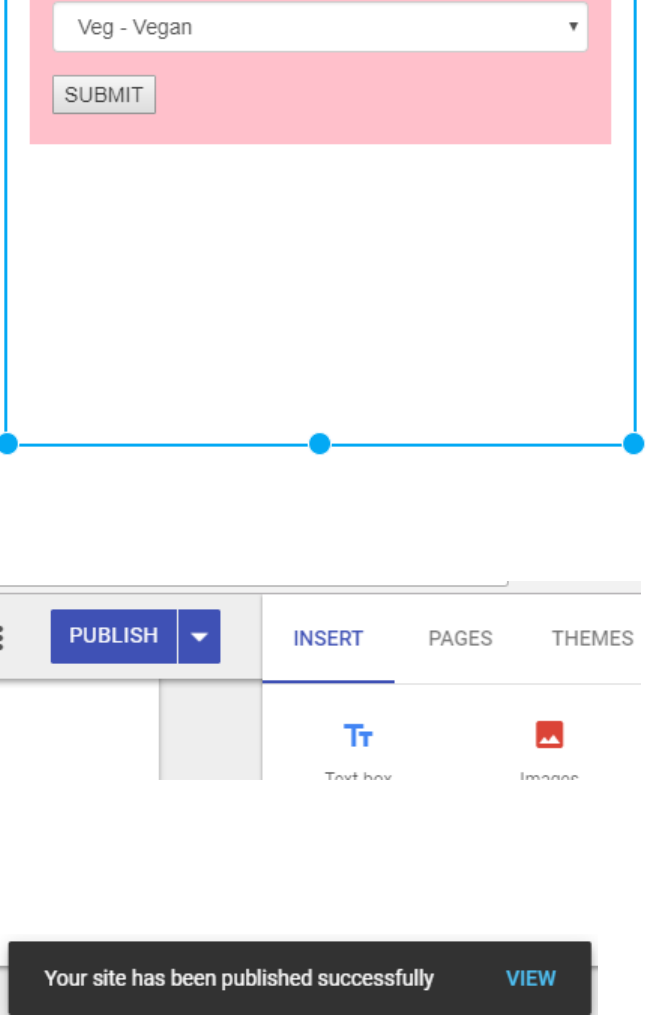
Now we need to drag the blew dotted box from the bottom to enlarge it so that all the form is
visible. This we are doing because Google site has inserted the code in a Frame and we are
increasing the size of the Frame so that the users don’t have to scroll down to view the entire
form.
Drag the blue box enough so that there is enough space at the bottom for the Form output
message to appear. You might have to drag in two steps as the initial dragging might stop after
the end of form. You can release the cursor and then continue dragging. The Blue box should
look as follows
Once dragging is complete Click on the blue PUBLISH button as shown below
In few seconds a message at the bottom should pop as shown below
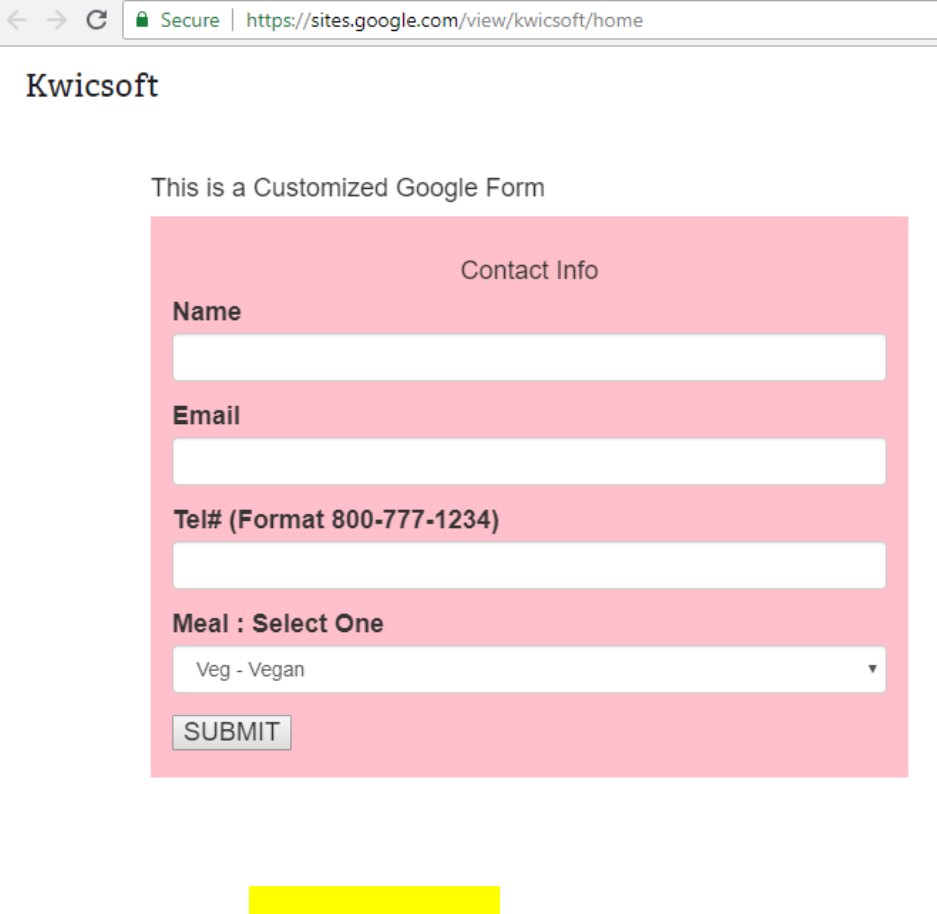
Your Google website should now have your customized Google Form ready to use and should
look as follows.
NOTE : If you are accessing your Google site on the phone and submitting the form, then you
might not see the Form message right away. You will need to scroll down to see the message.
Hope this tutorial was helpful in achieving your goal. If you have any questions then please E-
mail me with the subject :Question on Google Form .
My name is Dan and my E-mail is d_menashi@yahoo.com
*****
