10279 Inst
2016-10-12
: 10279-Inst 10279-inst images 714 p4dbimg
Open the PDF directly: View PDF ![]() .
.
Page Count: 4
1 pc.
Made in Viet Nam
email: info@riverside-furniture.com
FURNITURE
Riverside Page 1 of 4
8 pcs.
R-B 1 pc.
8 pcs.
Hexagonal Nut
12 mm Open
Wrench
Long All-thread Bolt
2 pcs.
F-A
R-A
R-D
8 pcs.
R-C
Spring washer
R-E
R-F
8 pcs.
Half moon washer
4 pcs.
4 pcs.
F-B F-C F-D
F-K
2 pcs. F-E
4 pcs.
F-F
Allen Head Bolt
8 pcs.
Spring Washer
8 pcs.
Flat Washer
8 pcs.
4mm
Allen Wrench
1 pc.
4 pcs.
F-G F-H F-I F-J
Huntleigh
Queen Sleigh Uph.Bed
Assembly Instructions
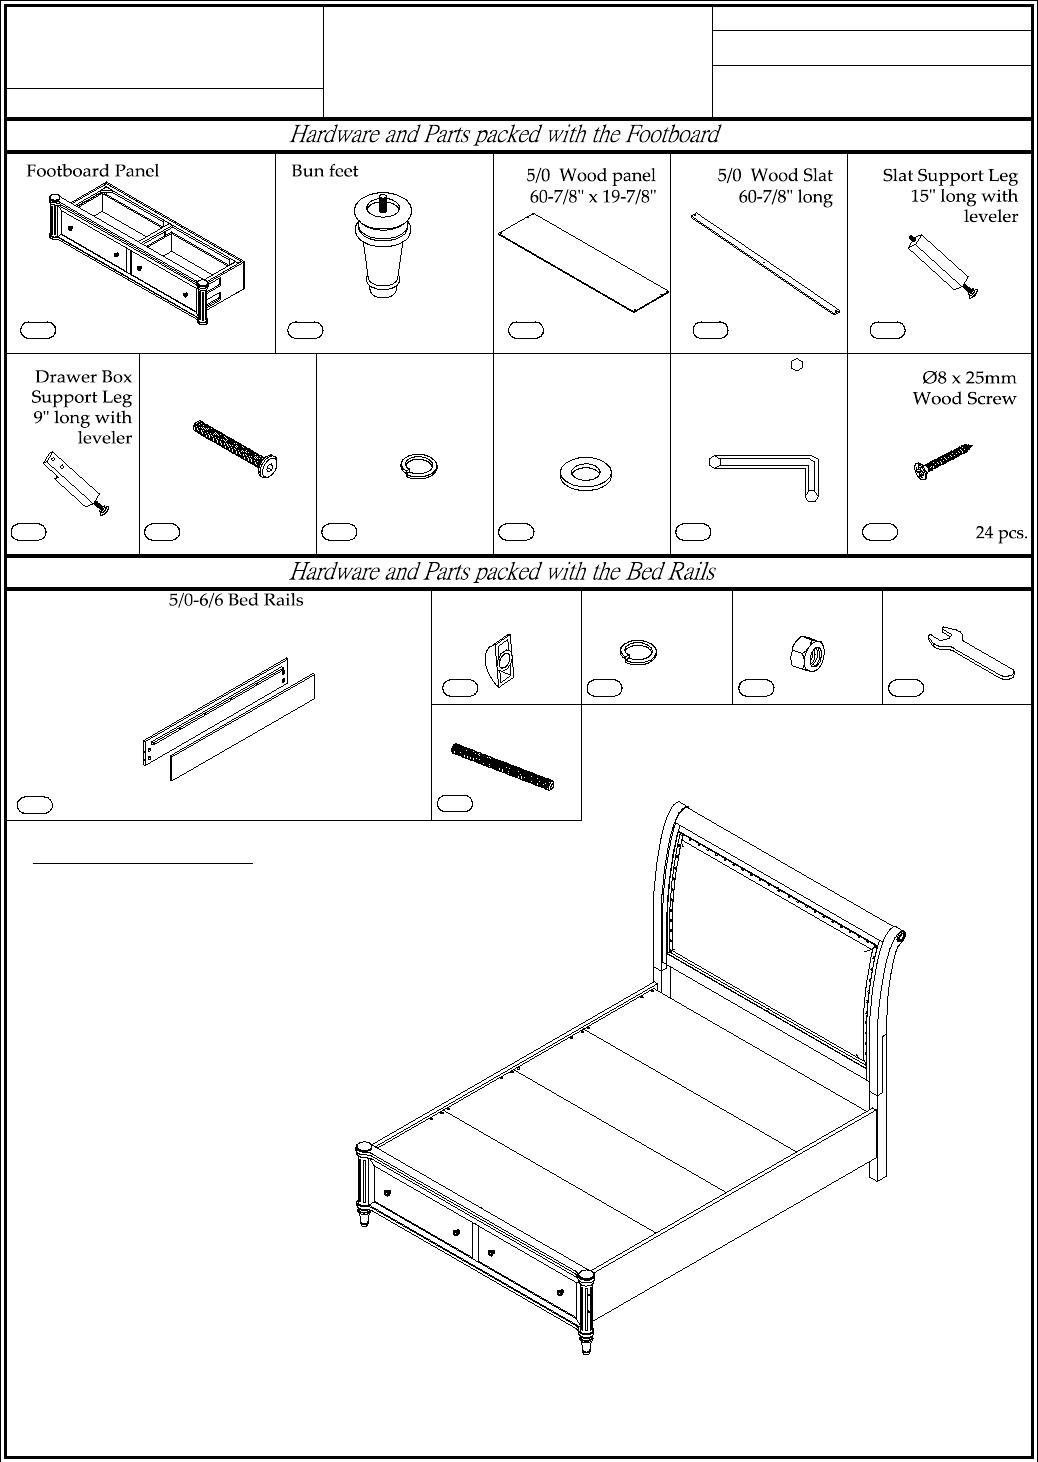
5/0 Queen Standard Bed
10277 -- 4/6-5/0 Sleigh Headboard
10279 -- 4/6-5/0 Sleigh Footboard w/Slats
10274 -- 5/0-6/6 Sleigh Bed Rails

Page 2 of 4
Made in Viet Nam
email: info@riverside-furniture.com
FURNITURE
Riverside
ASSEMBLY STEPS :
1. Place the Storage Footboard (F-A) face down on a clean and soft surface.
2.
(see Detail C)
3. Attach the Drawer Box Support Legs (F-F) using the Flat Washers (F-I), Spring Washers (F-H) and Bolts
(F-G). Tighten with the Allen Wrench (F-J). (See Detail D).
4.
Footboard (see Detail E) .
R-F
R-F
F-I
F-H
F-G
F-J
F-F
F-B
Huntleigh
Queen Sleigh Uph. Bed
Assembly Instructions
Page 3 of 4
Made in Viet Nam
email: info@riverside-furniture.com
FURNITURE
Riverside
ASSEMBLY STEPS :
To prevent possible damage to furniture and personal injury, it is recommended that two people are used
to perform the following steps.
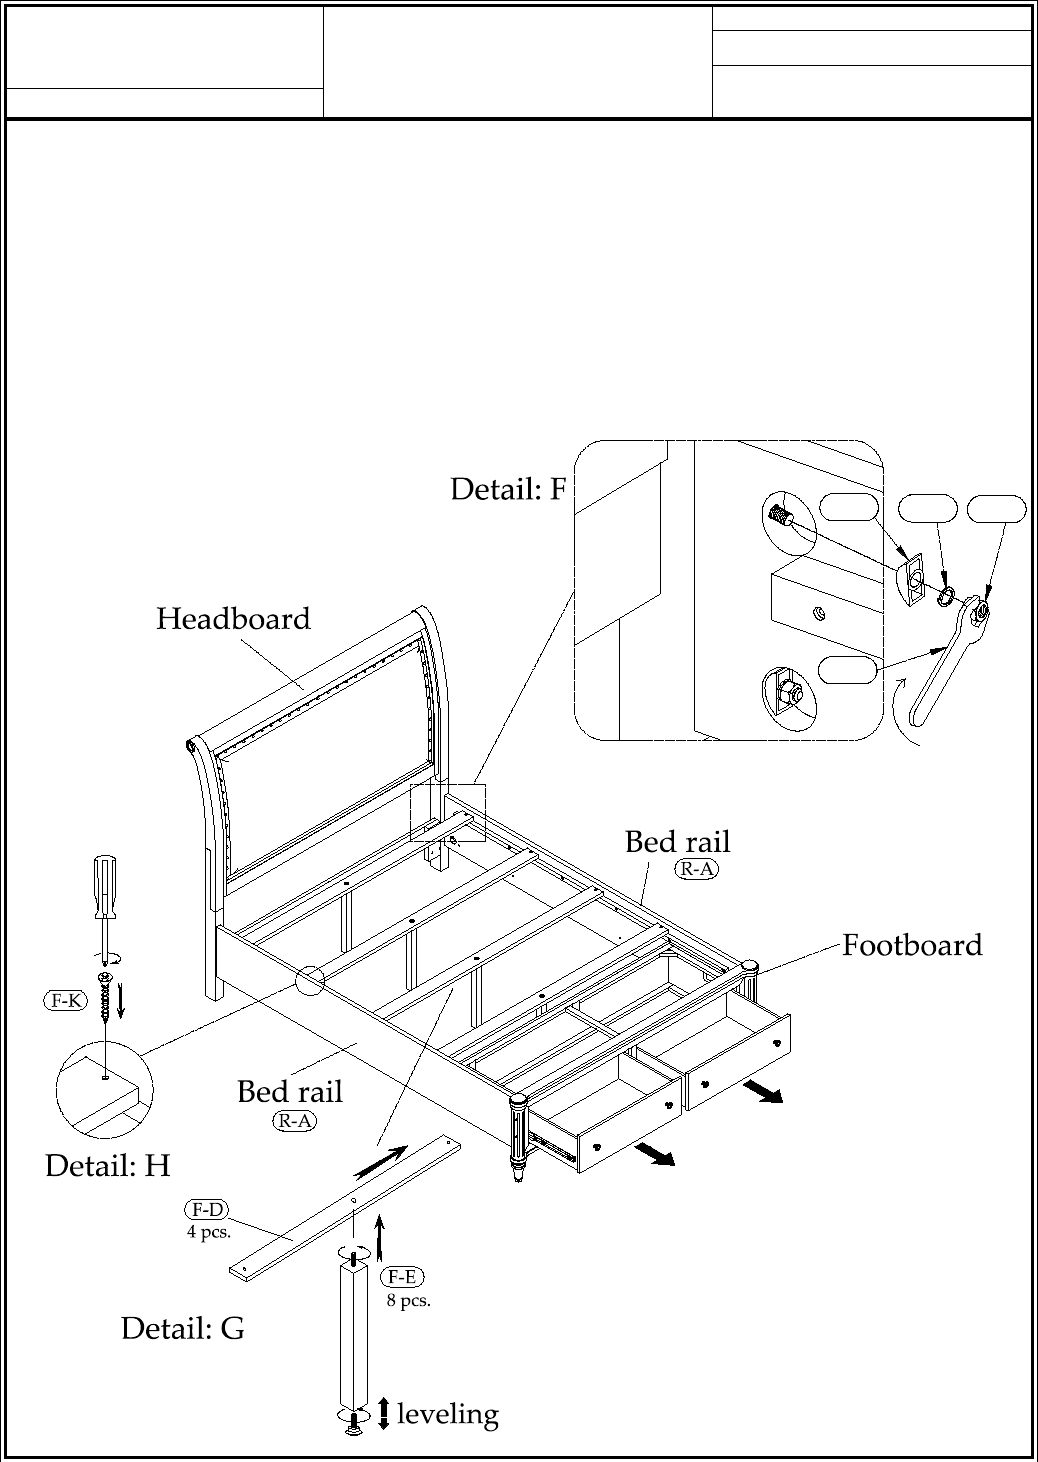
5. Carefully position one end of one Bed Rail (R-A) onto the All-thread Bolts installed on the Headboard
and connect using the Half moon washers (R-B), Spring washer (R-C) & Hexagonal Nuts (R-D). Only
partially tighten the Nuts until the Footboard has been connected. Repeat for other Bed Rail.
6. Open both drawers of the Footboard. Position and connect the Footboard to the other end of the Bed
Rails, attaching as in the previous Steps.
7. Carefully align the Footboard to be 'square' with the Headboard. Using the Open Wrench (R-E) tighten
all Hex Nuts attaching the Side Rails to the Headboard and Footboard. (See Detail F).
8. Attach the eight Support Legs (F-E) to the bottom side of four Wood Slats (F-D). (See Detail G).
9. Position and attach the Slats to the Bed Rails using the Wood Screws (F-K) and your Phillips
Screwdriver. (See Detail H).
R-B R-C
R-E
R-D
Huntleigh
Queen Sleigh Uph. Bed
Assembly Instructions
Page 4 of 4
Made in Viet Nam
email: info@riverside-furniture.com
FURNITURE
Riverside
ASSEMBLY STEPS :
To prevent possible damage to furniture and personal injury, it is recommended that two people are used
to perform the following steps.
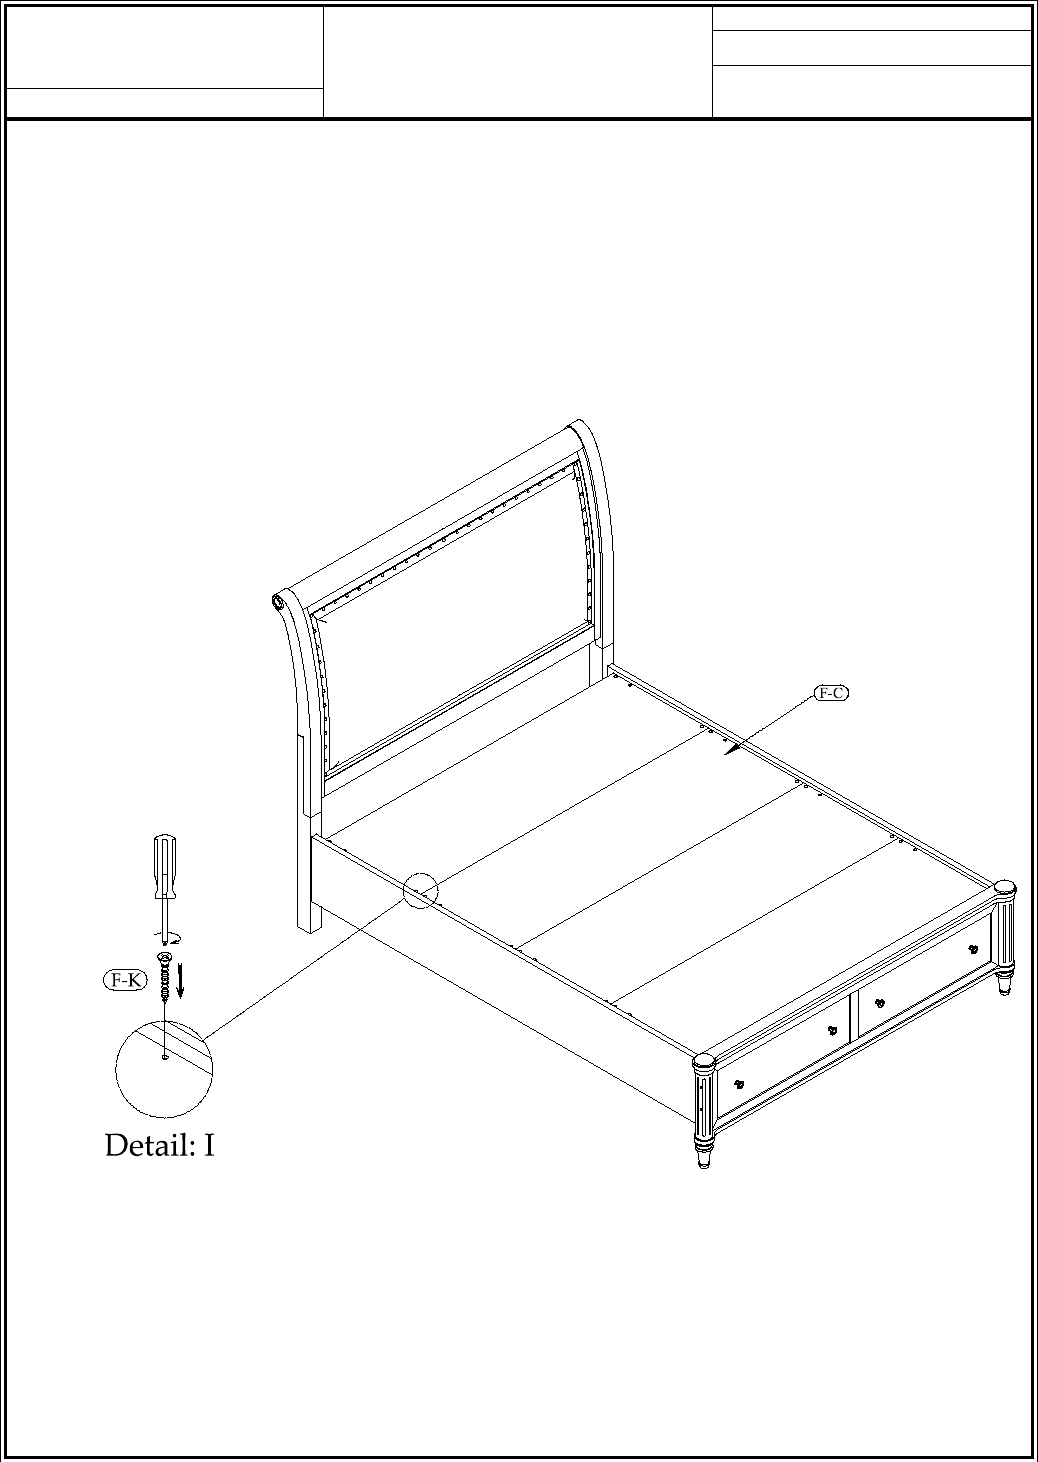
10. The levelers located at the bottom of the Support Legs can be adjusted if necessary to help support the
Slats. Position and attach the Wood Panels (F-C) to the Slats using the Wood Screws (F-K) and your
Phillips Screwdriver. (See Detail I).
Huntleigh
Queen Sleigh Uph. Bed
Assembly Instructions
