Removing Your AIS System On A V Star 1100 Yamaha Removal
User Manual: 1100
Open the PDF directly: View PDF ![]() .
.
Page Count: 2
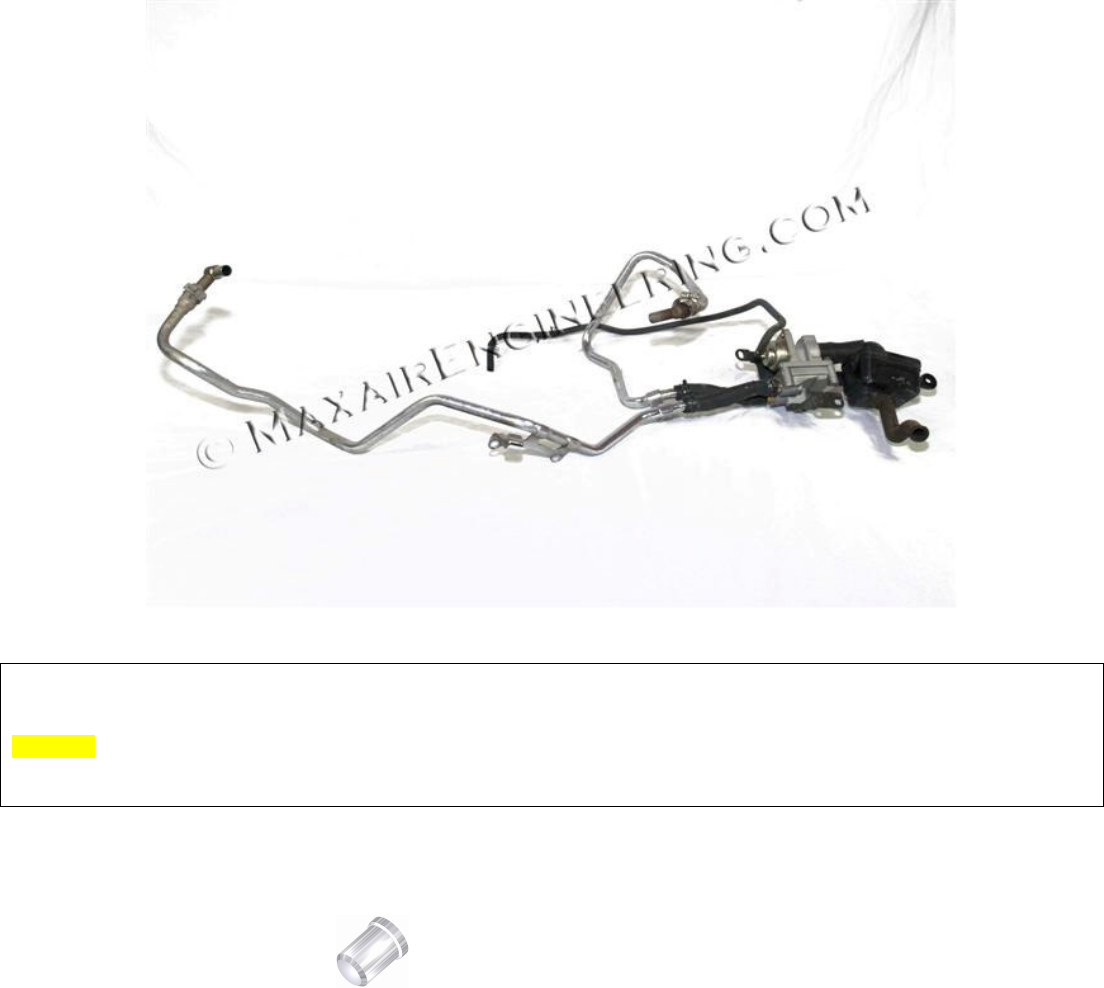
Removing your AIS system on a V Star 1100 Yamaha
Picture of the parts to be removed
This does not conform to EPA regulations and is intended for show/track use only. Under no circumstances is this procedure
intended for illegal use. Check local and federal laws.
Warning: Do this procedure at YOUR own risk. Maxair Engineering llc accepts no responsibly for the use, installation,
misused or the illegal use of these instructions. The consumer assumes all risks and responsibility in the use of these
instructions and product. Safety is your primary concern. Wear proper safety equiptment . Not DOT or EPA approved.
Removing your AIS system is a simple job that is very straightforward if you have the right tools and some
patience.
Tools Needed:
• Maxair® AIS removal kit
• Ball Peen hammer
• ¾ to1 inch diameter 8 -10 inch long hardwood dowel , aluminum or other suitable punch
• Misc. wrench, sockets and screw drivers
• Service manual for torque specs
• WD-40® or other suitable penetrating lubricant
• Suitable stand or lift
• Large set of vice grips
• Optional: Large Philips heard screw driver or round pry bar
1. Place your Maxair AIS plugs in the freezer and leave them there until you are ready to install them.
Overnight is best.
2. Get the bike on a suitable jack or stand. Use some tie straps if possible. It is important to get the bike
good and stabile so you do not knock it over during this process.
3. Find the elbows at the on the heads next to the exhaust ports and spray them with WD-40 just at the
point where they go into the engine. Keep the wd-40 off the rest of the elbow.
4. Remove the right floorboard or foot peg and set aside
5. Remove the right frame rail and set aside
6. Remove the left side cover
7. Start the process by loseing the clamp bolts and pulling the chrome AIS tubes off the elbows
8. Next remove the 2 bolts that hold the clutch cable bracket. Reinstall the two bolts without the bracket
and torque. Set aside- The clutch cable does not need this bracket and since it is part of the AIS
system it will be removed for good.
9. Follow the chrome AIS tube to where they are clamped together. Remove the rubber hoses and pull the
AIS tubes off the bike. The rear will take a bit of meandering to clear the exhaust. The tube can be bent
to aid in this process if needed.
10. Remove the vacuum line running to the rear carburetor manifold and install replacement vacuum cap.
This is a good time to check the cap on the other manifold and replace if necessary.
11. Next remove the bolts and screws holding the AIS pump system under the right side cover. Pull pump
system and plastic tank as one unit and set aside.
12. Now you can prepare to remove the elbows from the engine heads. The elbows are press fit into the
heads and this process with take some strength, patience and finesse. It really is much easier than it
looks and sounds. Just go slow and stop often to inspect your process. In the end the will slip right out so
be care to know that point so as to not cause damage to yourself or the bike.
13. Cover surrounding areas with duct tape for protection. Stick tape on clothing a couple of times
and fold one end for easy removal. Use padding on any area that may get hit during this process.
Be very careful of your engine fins as well.
14. Start at the rear cylinder. Get a good bite on the elbow with your vise grips. Make sure you have it tight.
Now with a rhythmic motion lift and push down while pulling. Do this for several minutes. Squirt more
WD-40 at the joint. Continue this until you can rotate the elbow. Rotate the elbow vigorously many
times and pull elbow from engine as it loosens. Set elbow aside.
15. Repeat the procedure on the front cylinder elbow. If you have a large Philips head screwdriver you can
also stick the end into the elbow and beginning rotating to loosen. Apply more wd-40 and push away
from the engine while working loose.
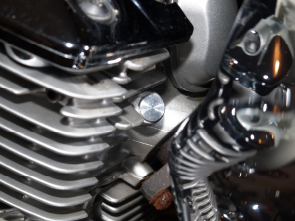
16. Now that you have both elbows removed, it is time to install the new plugs where the elbows were.
17. Get your suitable drift or punch ready. Plan the angle that you will be driving each one in at and be
careful of fins and other parts. Use a drift that will not mar the aluminum
plugs. Make sure you have your safety glasses on.
18. One at a time remove the plugs from the freezer and apply a small
amount of oil to the end.
19. Hold the drift at the correct angle drive the plug into the holes until
seated. A 1 mm gap between the plug cap and the engine is acceptable.
20. Do the same with the front plug hole.
21. Do not start right away. Allow the plugs to come to room temperature
first.
22. Meanwhile reassemble the bike and torque all bolts to factory specs.
23. You are finished. Congratulations on a fine job!
