2D Camera Regions Instructions
2D%20Camera%20Regions%20Instructions
User Manual:
Open the PDF directly: View PDF ![]() .
.
Page Count: 6
2D Camera Regions
How-to setup the 2D camera regions asset in your own project.
Showcasing video (YouTube): https://youtu.be/Sie88pQxGk0
Instructional video (YouTube): https://youtu.be/bAlAf603Io0
What is it?
The 2D Camera Regions asset enables the developers to easily mark boxed areas in which the camera is
confined. With the marked regions the camera follows either a given gameobject or moves to a fixed
position all the while staying between the boundaries of the area.
Importing the asset
The complete asset includes a folder named Camera Regions which contains an Editor and a Scripts
folder. When importing the asset into your own project make sure that both of these folders are
imported.
The scripts folder contains two C#-scripts named Player and Example. These exist to make the example
scene work but are not necessary for your own project and can thus be removed.
Setting up
When you have imported the asset and created a level which you’d like to divide in different regions for
the camera to move in create an empty game object and name it RegionHandler. Make sure the
transform is reset to all zero.
Note: the RegionHandler should always stay at the scene origin to avoid any conflict with creating
regions later on.
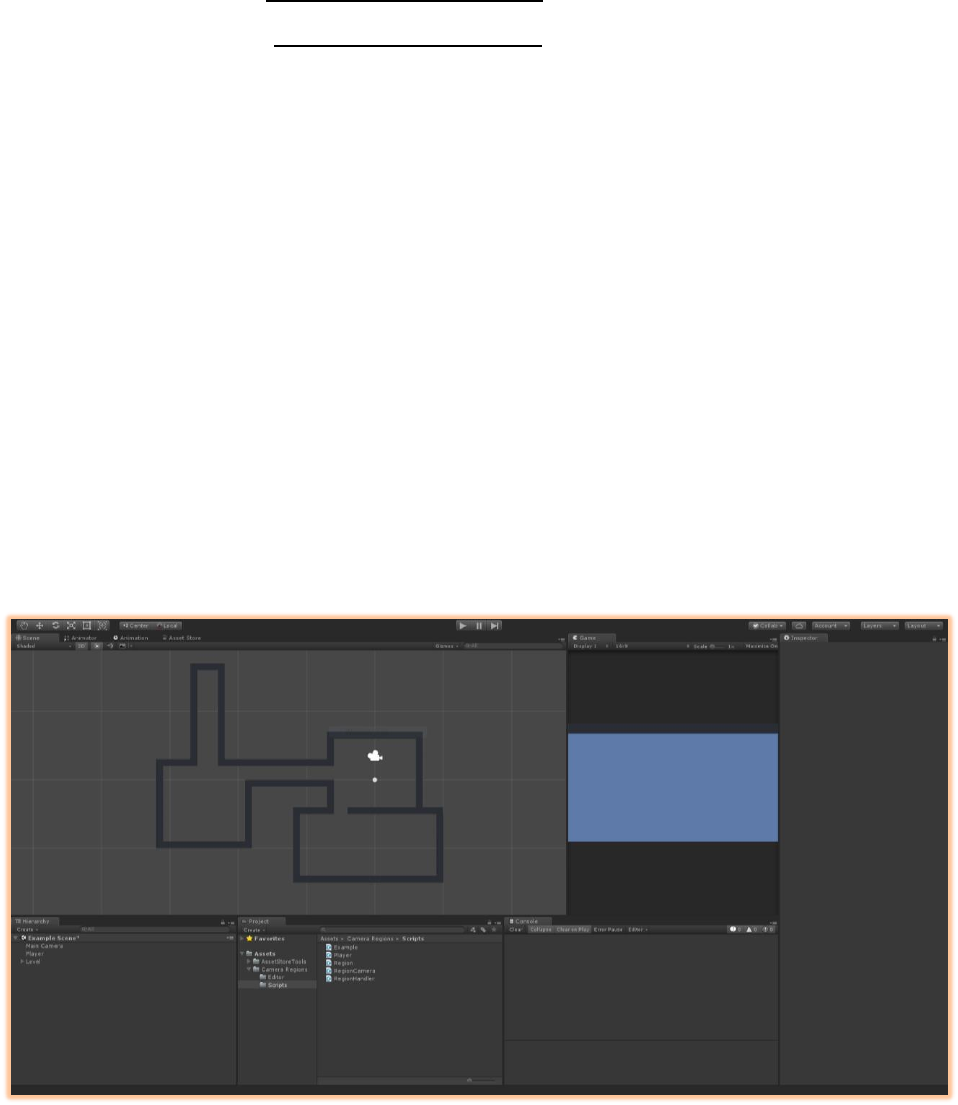
Figure 1 Starting project with the imported asset and a simple level with a player
Add the Region Handler script to the object. This component makes use of the Editor library and enables
you to quickly and easily define regions. The Region Handler component will be explained more in depth
later on.
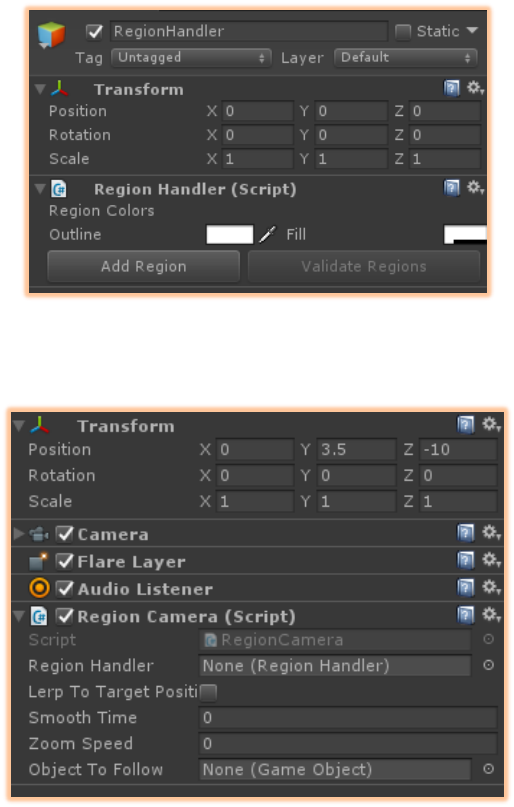
Figure 2 Region Handler component
Select the camera you want to constrain to the defined regions and add the Region Camera script to the
camera.
Figure 3 Main Camera with the Region Camera component attached
You’ll notice the Region Camera component has a field for a Region Handler type. The previously
created RegionHandler object can be assigned to this field.
Lerp To Target Position is a Boolean. When set to true the camera will lerp towards the target
object/position at the Smooth Speed assigned in the next float field.
Zoom Speed defines the speed at which the camera zooms in and out to the target object/position.
Finally, Object To Follow, is a GameObject field. The GameObject assigned to this field is the object the
camera will follow from the start of the game. This can be left empty but for the camera to follow an
object you’ll have to make a call to the Region Camera script later in.
That’s it for setting up the asset! Now all that is left is creating the regions.
Defining regions
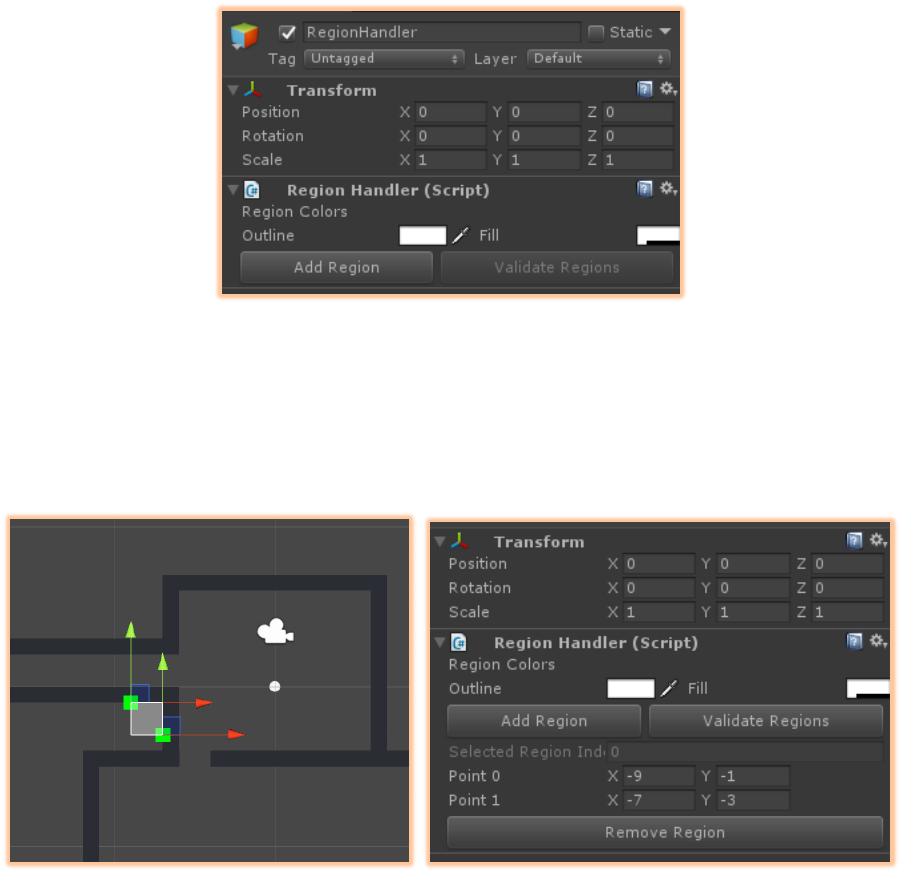
To create regions in which the camera will move select the Region Handler object and press the Add
Region button in the inspector.
Figure 4 Region Handler component and Add Region button
A box will appear in the middle of your active scene view with two handles that can be moved around.
Information about the currently selected region is visible in the inspector below the Add Region button.
The rectangle in between the two points defines a region in which the camera moves. You can drag the
handles in the scene view (like any other game object they can snap to the grid) to make the area larger
or alternatively change the position from the handles in the inspector for more precise placement.
Figure 5 A created region with the positions shown in the inspector
Selected regions have the rectangle filled with a transparent color. When you don’t have a region
selected, only the outlines are displayed so that it does not overlap the level any more than needed. You
also have the option to change the colors of the outline and the filling color of all regions.
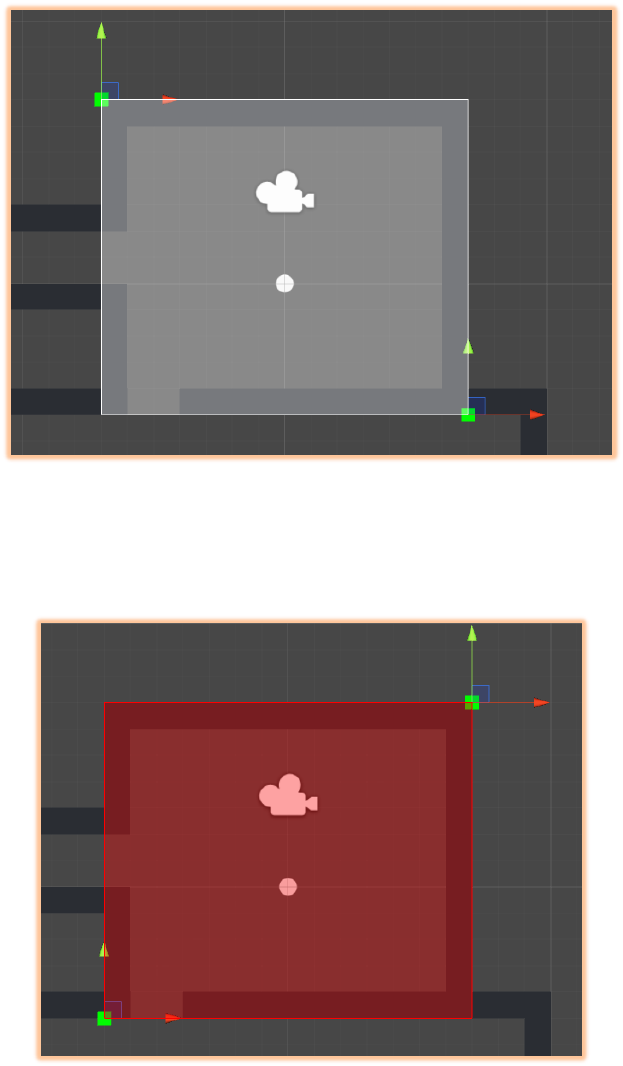
It is important to note that the camera will only properly stay within the boundaries if the two points are
placed diagonally across each other as pictured below.
Figure 6 Properly created region
Luckily when a region is not valid it will color red to let you know. Either fix the region yourself by
moving the handles or press the Validate Regions button in the Region Handler inspector. This will go
over all created regions and validate those that were not properly placed. Easy!
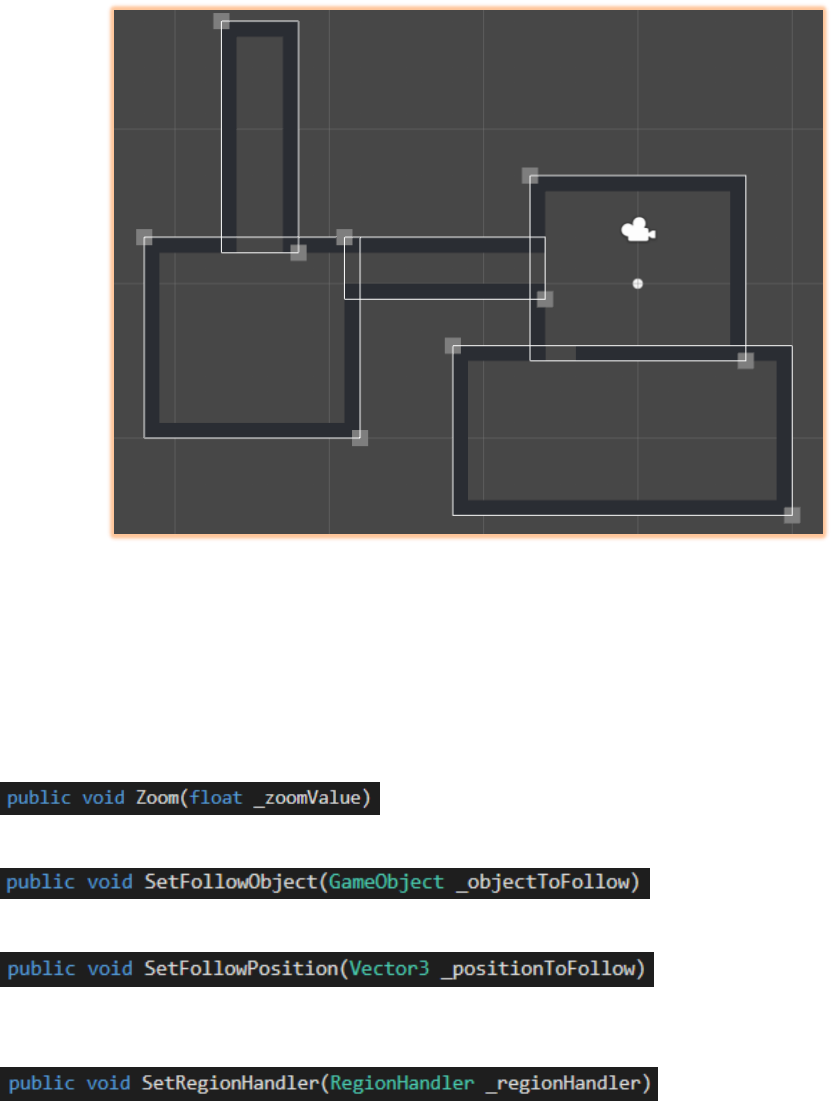
This is all there is to it. Place regions across your level and rooms and watch the camera follow the
selected object within the defined regions.
Figure 7 A level completely defined in regions
Scripts and functions
The asset comes with a few additional functions that could make your project more elaborate and
interesting. One of these features is the option to zoom in and out on the object the camera is following.
When zooming in and out the camera still retains the borders of the region and stay within these limits.
These functions are a part of the Region Camera script and you thus need a reference to the active
camera.
Takes a float that represents the orthographic size of the camera you want to either zoom in or out to.
Takes a type of GameObject. This is the game object that the camera will follow by either translating or
lerping.
FollowPosition is unlike FollowObject and takes a type of vector3, a position. Whereas FollowObject
makes the camera continuously follow an object, FollowPosition tells the camera to move to a position
and stay fixed on that position.
It is possible for the camera to switch between different Region Handlers by calling this function. A
useful function for switching to a different floor in a building for instance.

Final word
A few things to note are that regions can overlap each other. However, the camera will stay within a
region until the object it follows leaves that boundary. It does not work the other way around where a
region transition happens when the object enters another region.
Contact
For other questions or suggestions you can contact me through the following platforms:
E-mail: stephanzuidam@gmail.com
Portfolio: szuidam.weebly.com
LinkedIn: https://www.linkedin.com/in/stephan-zuidam/
